# Azure IoT Samples
## Table of Contents
- [Azure IoT Samples](#azure-iot-samples)
- [Table of Contents](#table-of-contents)
- [Introduction](#introduction)
- [Github Codespaces](#github-codespaces)
- [Prerequisites](#prerequisites)
- [Getting Started](#getting-started)
- [Create an Authenticated Device](#create-an-authenticated-device)
- [Create a Device Using X.509 Self-Signed Certificate Authentication](#create-a-device-using-x509-self-signed-certificate-authentication)
- [Linux Certificate Creation](#linux-certificate-creation)
- [Windows Certificate Creation](#windows-certificate-creation)
- [Create a device](#create-a-device)
- [Create a Device Using Symmetric Key (SAS) Authentication](#create-a-device-using-symmetric-key-sas-authentication)
- [Set Environment Variables](#set-environment-variables)
- [All-Samples](#all-samples)
- [IoT Hub X.509 Certificate Samples](#iot-hub-x509-certificate-samples)
- [IoT Provisioning X.509 Certificate Sample](#iot-provisioning-x509-certificate-sample)
- [IoT Hub Symetric Key (SAS) Sample](#iot-hub-symetric-key-sas-sample)
- [IoT Provisioning Symmetric Key (SAS) Sample](#iot-provisioning-symmetric-key-sas-sample)
- [Build and Run the Sample](#build-and-run-the-sample)
- [Sample Descriptions](#sample-descriptions)
- [IoT Hub C2D Sample](#iot-hub-c2d-sample)
- [IoT Hub Methods Sample](#iot-hub-methods-sample)
- [IoT Hub Telemetry Sample](#iot-hub-telemetry-sample)
- [IoT Hub SAS Telemetry Sample](#iot-hub-sas-telemetry-sample)
- [IoT Hub Twin Sample](#iot-hub-twin-sample)
- [IoT Plug and Play Sample](#iot-plug-and-play-sample)
- [IoT Plug and Play with Provisioning Sample](#iot-plug-and-play-with-provisioning-sample)
- [IoT Plug and Play Multiple Component Sample](#iot-plug-and-play-multiple-component-sample)
- [IoT Provisioning Certificate Sample](#iot-provisioning-certificate-sample)
- [IoT Provisioning SAS Sample](#iot-provisioning-sas-sample)
- [Using IoT Hub with an ECC Server Certificate Chain](#using-iot-hub-with-an-ecc-server-certificate-chain)
- [Next Steps and Additional Documentation](#next-steps-and-additional-documentation)
- [Troubleshooting](#troubleshooting)
- [Contributing](#contributing)
- [License](#license)
## Introduction
This document explains samples for the Azure Embedded C SDK IoT Hub Client and Device Provisioning Client.
Samples are designed to highlight the function calls required to connect with the Azure IoT Hub or the Azure IoT Hub Device Provisioning Service (DPS). These calls illustrate the happy path of the [mqtt state machine](https://github.com/Azure/azure-sdk-for-c/blob/main/sdk/docs/iot/mqtt_state_machine.md). As a result, **these samples are NOT designed to be used as production-level code**. Production code needs to incorporate other elements, such as connection retries and more extensive error-handling, which these samples do not include. These samples also utilize OpenSSL, which is **NOT recommended to use in production-level code on Windows or macOS**.
The samples' instructions include specifics for both Windows and Linux based systems. For Windows, the command line examples are based on PowerShell. The Linux examples are tailored to Debian/Ubuntu environments. Samples are also designed to work on macOS systems, but the instructions do not yet include specific command line examples for this environment. While Windows and Linux devices are not likely to be considered constrained, these samples enable developers to test the Azure SDK for Embedded C libraries, debug, and step through the code, even without a real device. We understand not everyone will have a real device to test and that sometimes these devices won't have debugging capabilities.
**WARNING: Samples are generic and should not be used in any production-level code.**
More detailed step-by-step guides on how to run an IoT Hub Client sample from scratch can be found below:
- **Linux**: [How to Setup and Run Azure SDK for Embedded C IoT Hub Certificate Samples on Linux](https://github.com/Azure/azure-sdk-for-c/blob/main/sdk/samples/iot/docs/how_to_iot_hub_samples_linux.md)
- **Windows**: [How to Setup and Run Azure SDK for Embedded C IoT Hub Certificate Samples on Microsoft Windows](https://github.com/Azure/azure-sdk-for-c/blob/main/sdk/samples/iot/docs/how_to_iot_hub_samples_windows.md)
- **Realtek Ameba D**: [How to Setup and Run Azure SDK for Embedded C IoT Hub Client on Realtek AmebaD](https://github.com/Azure/azure-sdk-for-c/blob/main/sdk/samples/iot/aziot_realtek_amebaD/readme.md)
- **Espressif ESP8266**: [How to Setup and Run Azure SDK for Embedded C IoT Hub Client on Esp8266 NodeMCU](https://github.com/Azure/azure-sdk-for-c/blob/main/sdk/samples/iot/aziot_esp8266/readme.md)
- **Espressif ESP32**: [How to Setup and Run Azure SDK for Embedded C IoT Hub Client on ESP32](https://github.com/Azure/azure-sdk-for-c/blob/main/sdk/samples/iot/aziot_esp32/readme.md)
- **Espressif ESP32 Over the Air Update**: [How to Setup and Run Azure SDK for Embedded C Azure Device Update on ESP32](https://github.com/Azure/azure-sdk-for-c-arduino/tree/main/examples/Azure_IoT_Adu_ESP32)
- **Community Samples**: there are additional samples created and maintained by the community. Click [here](https://github.com/Azure/azure-sdk-for-c/tree/main/sdk/docs/iot#community-samples) for the full list. If you want to contribute, [here](https://github.com/Azure/azure-sdk-for-c/tree/main/sdk/docs/iot#contributing) are the guidelines.
To view scenario-focused examples using the API calls, please view the Azure IoT Client [introductory examples](https://github.com/Azure/azure-sdk-for-c/blob/main/sdk/docs/iot/README.md#examples). General [coding patterns](https://github.com/Azure/azure-sdk-for-c/blob/main/sdk/docs/iot/coding_patterns.md) that are MQTT stack agnostic are also available to view.
## Github Codespaces
You can use Github Codespaces to be up and running quickly! Here are the steps to follow (assuming you already have an IoT Hub set up).
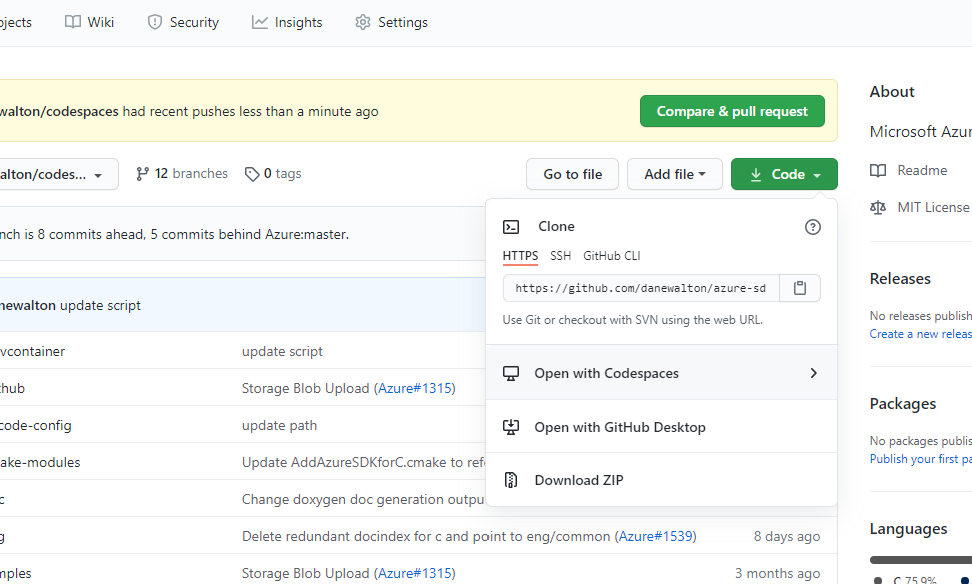
1. Select the "Open with Codespaces" prompt on Github and then "New codespace".
 1. Once the Codespace is open, all required build tools, extensions, and debugging tools will be setup for you.
1. Hit Control-Shift-B on your keyboard to build the SDK and samples.
1. Navigate to the `cert/` directory and find the fingerprint for the certificate that was generated for you.
1. In the Azure IoT Hub portal, add a device using Self-Signed Cert authentication. Paste the fingerprint in for Primary and Secondary. Add the device.
1. Back in the Codespace, navigate to the "Run" tab on the left side (arrow with a bug).
1. Select any of the samples and hit the green run button.
1. Paste you Device ID and IoT Hub Hostname in the prompts that pop up. Hit enter and the sample should be running!
1. Note you can use the device explorer to monitor/interact with the samples.
## Prerequisites
To run the samples, ensure you have the following programs and tools installed on your system:
- Have an [Azure account](https://azure.microsoft.com/) created.
- Have an [Azure IoT Hub](https://docs.microsoft.com/azure/iot-hub/iot-hub-create-through-portal) created.
- Have the following build environment setup:
1. Once the Codespace is open, all required build tools, extensions, and debugging tools will be setup for you.
1. Hit Control-Shift-B on your keyboard to build the SDK and samples.
1. Navigate to the `cert/` directory and find the fingerprint for the certificate that was generated for you.
1. In the Azure IoT Hub portal, add a device using Self-Signed Cert authentication. Paste the fingerprint in for Primary and Secondary. Add the device.
1. Back in the Codespace, navigate to the "Run" tab on the left side (arrow with a bug).
1. Select any of the samples and hit the green run button.
1. Paste you Device ID and IoT Hub Hostname in the prompts that pop up. Hit enter and the sample should be running!
1. Note you can use the device explorer to monitor/interact with the samples.
## Prerequisites
To run the samples, ensure you have the following programs and tools installed on your system:
- Have an [Azure account](https://azure.microsoft.com/) created.
- Have an [Azure IoT Hub](https://docs.microsoft.com/azure/iot-hub/iot-hub-create-through-portal) created.
- Have the following build environment setup:
Instructions:
Linux:
```bash
sudo apt-get update
sudo apt-get install build-essential curl zip unzip tar pkg-config
```
Windows (PowerShell):
- Have [Microsoft Visual Studio 2019](https://visualstudio.microsoft.com/downloads/) installed with [C and C++ support](https://docs.microsoft.com/cpp/build/vscpp-step-0-installation?view=vs-2019).
Instructions:
NOTE: For the correct vcpkg commit, see the `builtin-baseline` value in [vcpkg.json](https://github.com/Azure/azure-sdk-for-c/blob/main/vcpkg.json).
Linux:
```bash
git clone https://github.com/Microsoft/vcpkg.git
cd vcpkg
git checkout # Checkout the vcpkg commit from vcpkg.json's builtin-baseline value above.
./bootstrap-vcpkg.sh
./vcpkg install --triplet x64-linux curl cmocka paho-mqtt
```
Windows (PowerShell):
```powershell
git clone https://github.com/Microsoft/vcpkg.git
cd vcpkg
git checkout # Checkout the vcpkg commit from vcpkg.json's builtin-baseline value above.
.\bootstrap-vcpkg.bat
.\vcpkg.exe install --triplet x64-windows-static curl[winssl] cmocka paho-mqtt # Update triplet per your system.
```
Instructions:
Linux:
```bash
sudo apt-get install openssl libssl-dev
```
Windows (PowerShell):
- OpenSSL will be installed by vcpkg as a dependency for Eclipse Paho.
**WARNING: It is NOT recommended to use OpenSSL in production-level code on Windows or macOS.**
```powershell
# NOT RECOMMENDED to use for production-level code.
$env:PATH=$env:PATH + ';\installed\x64-windows-static\tools\openssl' # Update complete path as needed.
```
Instructions:
Linux:
- Ubuntu 18.04 or 20.04:
```bash
sudo apt-get install cmake
```
- Ubuntu 16.04: Download the latest version of [CMake](https://cmake.org/files).
```bash
wget https://cmake.org/files/v3.18/cmake-3.18.3-Linux-x86_64.sh # Use latest version.
sudo ./cmake-3.18.3-Linux-x86_64.sh --prefix=/usr
```
- When prompted to include the default subdirectory, enter `n` so to install in `/usr/local`.
Windows (PowerShell): Download the latest version of [CMake](https://cmake.org/download).
- Use the Windows installer.
Instructions to set environment variables for IoT Hub X.509 Certificate samples:
1. Retrieve variable information:
Access your Azure IoT Hub from either your Azure Portal or Azure IoT Explorer.
- `AZ_IOT_HUB_DEVICE_ID`: From the IoT devices tab, select your device. Copy its Device Id.
- `AZ_IOT_HUB_HOSTNAME`: From the Overview tab, copy your Azure IoT hub Hostname.
2. Set the variables:
Linux:
```bash
export AZ_IOT_HUB_DEVICE_ID=
export AZ_IOT_HUB_HOSTNAME=
```
Windows (PowerShell):
```powershell
$env:AZ_IOT_HUB_DEVICE_ID=''
$env:AZ_IOT_HUB_HOSTNAME=''
```
Instructions to set environment variables for DPS X.509 Certificate sample:
1. Retrieve variable information:
Access your Azure IoT Hub Device Provisioning Service from your Azure Portal.
- `AZ_IOT_PROVISIONING_REGISTRATION_ID`: Set this to `paho-sample-device1`.
- `AZ_IOT_PROVISIONING_ID_SCOPE`: From the Overview tab, copy the Id Scope.
2. Set the variables:
Linux:
```bash
export AZ_IOT_PROVISIONING_REGISTRATION_ID=
export AZ_IOT_PROVISIONING_ID_SCOPE=
```
Windows (PowerShell):
```powershell
$env:AZ_IOT_PROVISIONING_REGISTRATION_ID=''
$env:AZ_IOT_PROVISIONING_ID_SCOPE=''
```
Instructions to set environment variables for IoT Hub Symmetric Key sample:
1. Retrieve variable information:
Access your Azure IoT Hub from either your Azure Portal or Azure IoT Explorer.
- `AZ_IOT_HUB_SAS_DEVICE_ID`: From the IoT devices tab, select your device. Copy its Device Id.
- `AZ_IOT_HUB_SAS_KEY`: From the same page, copy its Primary Key.
- `AZ_IOT_HUB_HOSTNAME`: From the Overview tab, copy your Azure IoT hub Hostname.
2. Set the variables:
Linux:
```bash
export AZ_IOT_HUB_SAS_DEVICE_ID=
export AZ_IOT_HUB_SAS_KEY=
export AZ_IOT_HUB_HOSTNAME=
```
Windows (PowerShell):
```powershell
$env:AZ_IOT_HUB_SAS_DEVICE_ID=''
$env:AZ_IOT_HUB_SAS_KEY=''
$env:AZ_IOT_HUB_HOSTNAME=''
```
Instructions to set environment variables for DPS Symmetric Key sample:
1. Retrieve variable information:
Access your Azure IoT Hub Device Provisioning Service from your Azure Portal.
- `AZ_IOT_PROVISIONING_SAS_REGISTRATION_ID`: From the Manage enrollments tab, under Individual Enrollments, copy the Registration Id of your SAS device.
- `AZ_IOT_PROVISIONING_SAS_KEY`: Under Individual Enrollments, select your SAS device. Copy its Primary Key.
- `AZ_IOT_PROVISIONING_ID_SCOPE`: From the Overview tab, copy the Id Scope.
2. Set the variables:
Linux:
```bash
export AZ_IOT_PROVISIONING_SAS_REGISTRATION_ID=
export AZ_IOT_PROVISIONING_SAS_KEY=
export AZ_IOT_PROVISIONING_ID_SCOPE=
```
Windows (PowerShell):
```powershell
$env:AZ_IOT_PROVISIONING_SAS_REGISTRATION_ID=''
$env:AZ_IOT_PROVISIONING_SAS_KEY=''
$env:AZ_IOT_PROVISIONING_ID_SCOPE=''
```
How to interact with the C2D sample:
To send a C2D message: Select your device's "Message to Device" tab in the Azure Portal for your IoT Hub. Enter a message in the "Message Body" and select "Send Message".
How to interact with the Methods sample:
A method named `ping` is supported for this sample.
To invoke a method: Select your device's "Direct Method" tab in the Azure Portal for your IoT Hub. Enter a method name and select "Invoke Method". If successful, the sample will return a JSON payload of the following:
```json
{"response": "pong"}
```
No other method commands are supported. If any other methods are attempted to be invoked, the log will report the method is not found.
How to interact with the Twin sample:
A desired property named `device_count` is supported for this sample.
To send a device twin desired property message: Select your device's "Device Twin" tab in the Azure Portal of your IoT Hub. Add the property `device_count` along with a corresponding value to the `desired` section of the JSON. Select "Save" to update the twin document and send the twin message to the device.
```json
"properties": {
"desired": {
"device_count": 42,
}
}
```
No other property names sent in a desired property message are supported. If any are sent, the log will report there is nothing to update.
How to interact with the IoT Plug and Play sample:
The easiest way to interact with this sample from the service side is to use Azure IoT Explorer. To use the sample:
- Follow the initial setup instructions described above.
- Install [Azure IoT Explorer](https://github.com/Azure/azure-iot-explorer/#plug-and-play).
- Download [the Thermostat model](https://github.com/Azure/opendigitaltwins-dtdl/blob/master/DTDL/v2/samples/Thermostat.json) to a local directory.
- Build and run `paho_iot_pnp_sample`.
- Start Azure IoT Explorer and then:
- [Configure your hub](https://github.com/Azure/azure-iot-explorer/#configure-an-iot-hub-connection). Once you've created your thermostat device, you should see it listed in the UX.
- Go to `IoT Plug and Play Settings` on the home screen, select `Local Folder` for the location of the model definitions, and point to the folder you downloaded the thermostat model.
- Go to the devices list and select your thermostat device. Now select `IoT Plug and Play components` and then `Default Component`.
- You will now be able to interact with the IoT Plug and Play device.
Additional instructions for Azure IoT Explorer, including screenshots, are available [here](https://github.com/Azure/azure-iot-explorer/#plug-and-play).
How to interact with the IoT Plug and Play Multiple Component sample:
The easiest way to interact with this sample from the service side is to use Azure IoT Explorer. To use the sample:
- Follow the initial setup instructions described above.
- Install [Azure IoT Explorer](https://github.com/Azure/azure-iot-explorer/#plug-and-play).
- Download [the Temperature Controller model](https://github.com/Azure/opendigitaltwins-dtdl/blob/master/DTDL/v2/samples/TemperatureController.json) to a local directory.
- Build and run `paho_iot_pnp_component_sample`.
- Start Azure IoT Explorer and then:
- [Configure your hub](https://github.com/Azure/azure-iot-explorer/#configure-an-iot-hub-connection). Once you've created your thermostat device, you should see it listed in the UX.
- Go to `IoT Plug and Play Settings` on the home screen, select `Local Folder` for the location of the model definitions, and point to the folder you downloaded the thermostat model.
- Go to the devices list and select your thermostat device. Now select `IoT Plug and Play components` and then `Default Component`.
- You will now be able to interact with the IoT Plug and Play device.
Additional instructions for Azure IoT Explorer, including screenshots, are available [here](https://github.com/Azure/azure-iot-explorer/#plug-and-play).