# dsh-image-compare
[简体中文](README.md)
A DeepSeek Harness plugin for **comparing several images side by side in the sidebar**.
Comparing a "before vs after" pair in DSH — or five screenshots of five design options — used to mean opening them one at a time and flipping back and forth. With this plugin the right column gains an **Image viewer** panel:
```
Sidebar → Image viewer → tick a few images → press Open → compare side by side
```
1/2/3/4/6 images per page, zoom and pan each one freely, drag the filmstrip to reorder — and **synchronise the whole set**: apply the current image's zoom *and* the place it is looking at to every other image, so each one ends up on *the same region*. That is what actually aligns a detail-by-detail comparison.
The images are for you to look at. **They never enter the model's context** — twenty 2 MB screenshots add not a single word to the conversation.
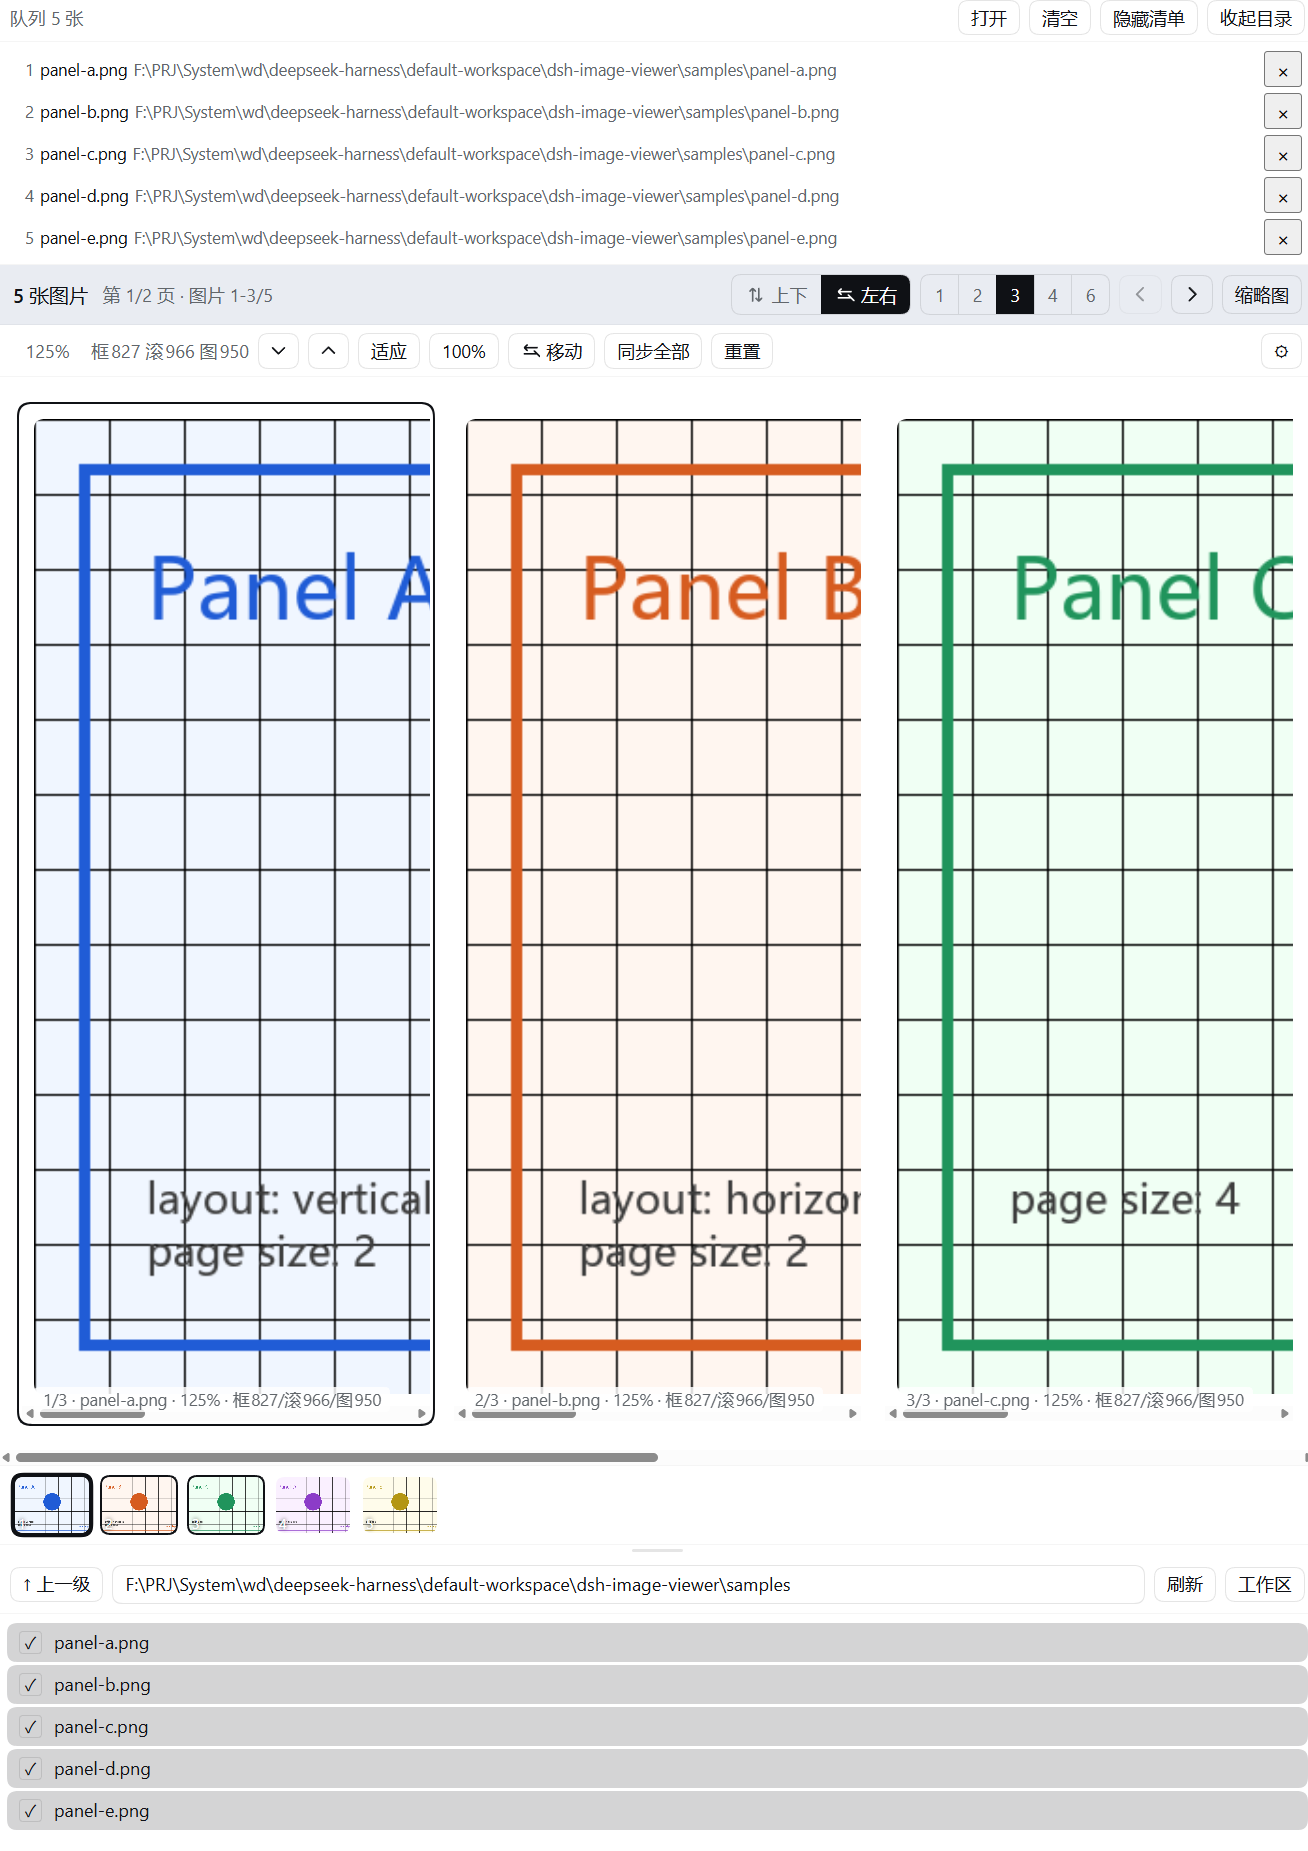
Left/right · three per page
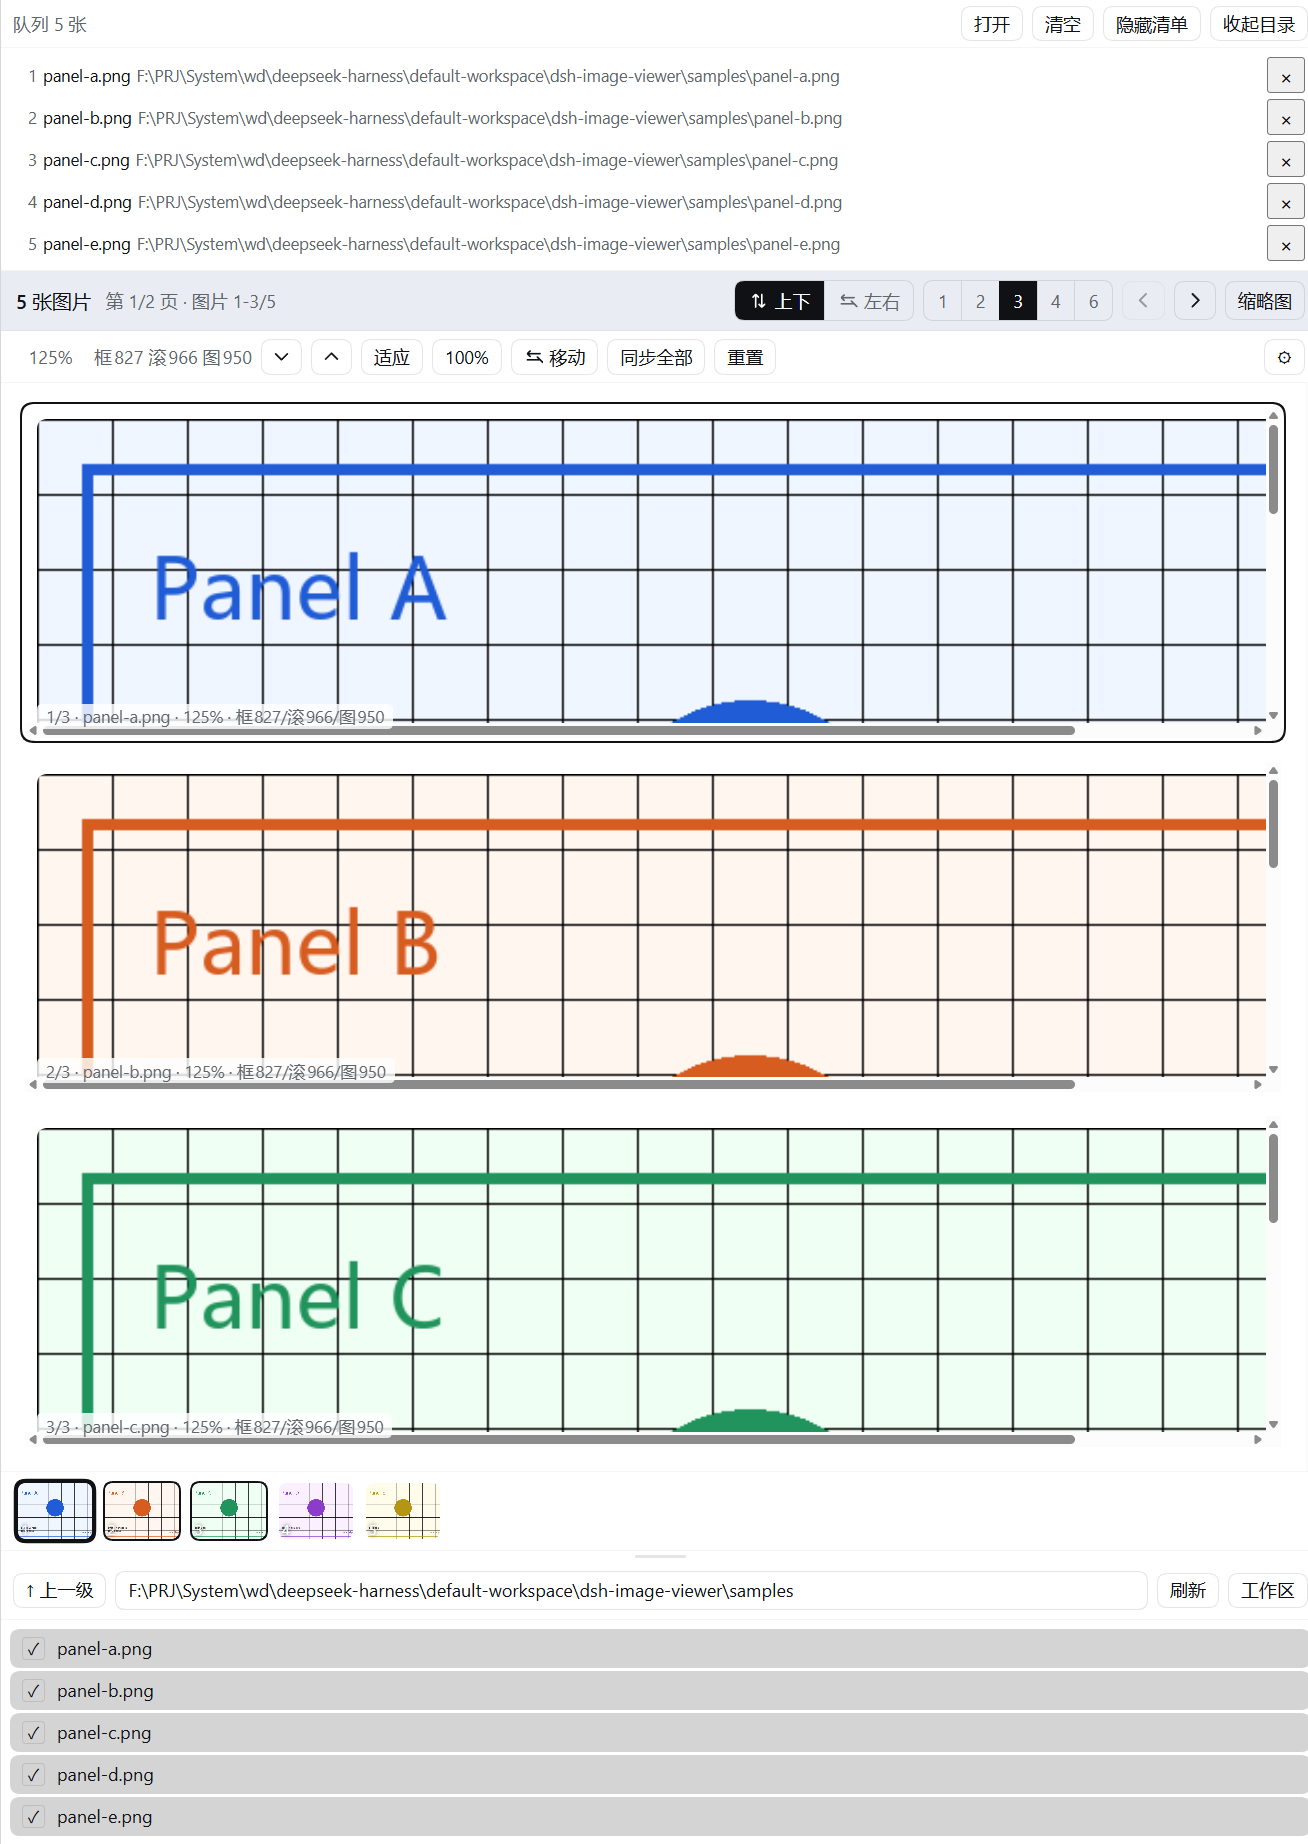
Up/down · three per page
The same five images, only the arrangement changed; both at 125%, and the filmstrip at the bottom is drag-reorderable.
## What it does
**Comparing several images** (the point of the plugin)
- **1/2/3/4/6 images side by side per page** (2 by default) — a real side-by-side comparison instead of scrolling back and forth.
- **Synchronise the whole set**: apply the current image's **zoom and viewed position** to every other image, so each shows *the same region*. That is what aligns a detail comparison.
- **Any order**: drag the filmstrip to reorder, so the two images you want to compare sit next to each other.
**Looking at them**
- **Per-image zoom**: click an image to select it; the zoom row then acts on that one only, 0.1x–8x. Double-click toggles magnified / fit.
- **Middle-button drag to pan**: one-to-one with the pointer, stops the moment you stop; hold `Shift` to pan the whole set together.
- **Page up/down or left/right**: wheel, arrow keys and prev/next buttons all page; one wheel gesture advances exactly one page.
- **Filmstrip**: click any thumbnail to jump to the page it is on.
**Getting images in**
- **Browse the workspace inside the panel**: parent directory, path box, refresh, tick several files and open them together. A local session lists local files, an SSH session lists remote ones.
- **A path that cannot be read says why**: outside the workspace, not an image, or not found — reported instead of showing a broken image.
## Install
The plugin is a standard DSH profile bundle and carries every declaration it needs, so **no configuration file has to be written by hand**.
### Plugins page (recommended)
1. Open the Web UI and click **插件** (Plugins) in the left sidebar;
2. Click **添加插件** (Add plugin) and paste either:
- `github:ChordXD/dsh-image-compare`
- the **absolute path** of this directory
- the npm package name (once published)
3. Make sure it is **enabled**;
4. **Restart DeepSeek Harness**.
### Command line
```sh
dsh plugin --profile web add github:ChordXD/dsh-image-compare
```
The package has no build step at all (plain JS, no `scripts` in `package.json`), so it normally installs and runs as-is. If dsh still prints an `allowBuilds` notice, add the key it names to that profile's `pnpm-workspace.yaml` and re-run. To pin a revision, append a commit: `github:ChordXD/dsh-image-compare#`.
### Uninstall
Remove it on the plugins page, or `dsh plugin --profile web remove dsh-image-compare`, then restart.
> Requirements: DeepSeek Harness 0.2.0-rc.2 or later (Web UI or desktop app). **No dependencies to install** — the host half uses services the profile already provides, and the client half only needs the `react` every shell preloads.
## Usage
### Open the panel
Every tab type may contribute a **start-page entry**. Open the right column's start page (guide page) and pick **Image viewer** (图片查看器) from the list; the panel then appears as a tab. It stays resident, so afterwards a single click on the tab brings the comparison view back.
### Pick images and open them
The panel has three segments, top to bottom:
```
┌────────────────────────────────────────────┐
│ Queue N [Open] [Clear] [Hide list] [Collapse]│
│ ⠿ 1 before.png /data/…/before.png × │ ← tick to queue, × to remove
├────────────────────────────────────────────┤
│ Image area (all remaining height)│ ← the comparison happens here
│ …… filmstrip at the bottom: drag to reorder ……│
├────────────────────────────────────────────┤
│ ↑Up /data/…/eval [Refresh] [Workspace]│ ← browser, height is draggable
│ ✓ results.png ☐ baseline.png │
└────────────────────────────────────────────┘
```
1. Tick the images you want in the **directory browser** at the bottom (ticking only queues them — nothing on screen changes yet);
2. If you need more room, drag the **divider** above the browser. The path box is editable: type a directory and press Enter;
3. Press **Open** — the first image appears;
4. To change the comparison order, **drag a thumbnail** in the filmstrip.
### Comparing
- Click an image to **select** it (blue outline); the zoom row then acts on that one;
- `Ctrl`/`Cmd` + wheel to zoom it, then **middle-button drag** to pan;
- Once it is positioned, press **Sync all** (同步全部) — every other image jumps to the same region;
- To move the whole set, `Shift` + middle-button drag; to zoom the whole set, `Ctrl`/`Cmd` + `Shift` + wheel.
## Controls
Mouse (inside the image area):
| Gesture | Effect |
| --- | --- |
| Left click | Select that image |
| `Ctrl` / `Cmd` + wheel | Zoom the image under the pointer (anchored there) |
| `Ctrl` / `Cmd` + `Shift` + wheel | Apply that image's zoom **and position to the whole set** |
| Middle-button drag | Pan the magnified region of that image |
| `Shift` + middle-button drag | Pan the whole set together |
| Wheel (no modifier) | Page, one page per gesture |
| Double-click an image | Magnify ↔ fit |
| Drag a thumbnail | Reorder the images |
Zoom row (above the image area): percentage readout, `−`, `+`, `适应` (fit), `100%`, `移动` (move), `同步全部` (sync all), `重置` (reset), `⚙` (settings).
Keyboard:
| Key | Effect |
| --- | --- |
| `↑` `↓` | Previous / next page (when paging up/down) |
| `←` `→` / `PageUp` `PageDown` | Previous / next page (either paging axis) |
| `Home` / `End` | First / last page |
| `+` / `-` | Zoom in / out the selected image (the whole set in 移动 mode) |
| `0` | Reset every image to the default zoom |
| `V` | Switch between up/down and left/right paging |
| `2`–`6` | 1 / 2 / 3 / 4 / 6 images per page |
| `F` | Show / hide the filmstrip |
| `Esc` | Close the full-screen view (the panel has none, so `Esc` does nothing there) |
The gear panel holds: default zoom, images per page, whether the filmstrip starts open, the viewer's own font size, the minimum height of one image, and whether to show the diagnostics (off by default; it adds each image's measured size to the zoom row and the full measurement dump to this panel, which is only worth it when chasing a layout problem). Images on a page share the available height, so that floor yields to a crowded page instead of pushing an image out of view.
## How it differs from other image plugins
| | Who looks at the image | How many at once | Bytes in the model context |
| --- | --- | --- | --- |
| Built-in `read_image` | the model | 1 | yes |
| Plugins that enhance the built-in viewer | images already on screen | mostly 1 | no |
| Vision-bridge plugins | **the model** | several | **yes** (spends vision quota) |
| **This plugin** | **you** | **a whole set, side by side, pageable** | **no** |
In one line: it is a tool for **a person comparing several images**, not a channel for feeding images to a model. Every image is fetched by the browser straight from this plugin's read-only routes, so the model neither reads the bytes nor handles them.
## Roadmap
- **Let the model open a set directly.** Today you pick the images in the panel's browser. The plan is to restore a tool (shaped like `view_images(images, layout, page_size, title)`) that publishes a set straight to the right-column panel, so no manual picking is needed. An earlier release had it, but the entry button on the conversation card could not reliably open the panel, so it was pulled back to make this release's panel solid first.
## License
MIT