/Desktop/projects/git` folder and create a `syllabus.md` file there.
We'll be typing our markdown into this file in the Visual Studio Code window. At any time, you can save your file by hitting control + s on Windows or ⌘ + s on macOS. Alternatively, you can click the `File` menu on the top right, then select `Save` from the dropdown menu.
Saving frequently is advised. When we get to the version contol functionality of Git, only changes that are saved will be preserved when a version is created.
# Creating Syllabus Content Using Markdown
We'll be using **Markdown** to write a syllabus, and then using **Git** to track any changes we make to it. Markdown allows us to format textual features like headings, emphasis, links, and lists in a plain text file using a streamlined set of notations that humans can interpret without much training. Markdown files usually have a `.md` extension.
**Markdown** is a markup language for formatting text. Like HTML, you add markers to plain text to style and organize the text of a document.
Whereas you use HTML and CSS with WordPress, you use Markdown to render legible documents on GitHub. Markdown has fewer options for marking text than HTML. It was designed to be easier to write and edit.
For comparison, you learned to create headers in HTML like this:
```html
My Syllabus Heading
```
In Markdown, we insert headings with a single hash mark like this:
```markdown
# My Syllabus Heading
```
A sub-heading (H2) heading uses two hash marks like this:
```markdown
## Readings
```
The lessons of this workshop were originally written in markdown. You can see [here](https://raw.githubusercontent.com/DHRI-Curriculum/git/v2.0/lessons.md) what they look like in their raw, unrendered form.
Compare that with this—the source code for this lesson's web page, written in HTML [here](view-source:http://curriculum.dhinstitutes.org/workshops/git/lessons/).
Markdown is also arguably more sustainable and accessible than formats like `.docx` because of its simplicity and related ability to be read across multiple platforms. Use of Markdown is also supported by document-conversion tools like [Pandoc](https://pandoc.org/) that can change a markdown file to an `.epub` with one command entered into your terminal.
Here are a few more key elements to get you ready to make your own syllabus in Markdown.
To provide emphasis, place asterisks around some text:
```markdown
*This text will appear italicized.*
**This text will appear bold.**
```
For emphasis, you need to mark where it should start and where it should end, so you need astrisks at the beginning and end of whatever text is being emphasized.
To create a bulleted list, put a hyphen at the beginning of each list item:
```markdown
- Reading one
- Reading two
- Reading three
```
To create a link, put the anchor text (the text you will see) in square brackets and the URL in parentheses, directly following the anchor text in brackets. Don't put a space between them:
```markdown
I teach at [The Graduate Center, CUNY](https://www.gc.cuny.edu).
```
Paragraphs of text are denoted by putting a blank line between them:
```markdown
This is a paragraph in markdown. It's separated from the paragraph below with a blank line. If you know HTML, it's kind of like the tag. That means that there is a little space before and after the paragraph when it is rendered.
This is a second paragraph in markdown, which I'll use to tell you what I like about markdown. I like markdown because it looks pretty good, if minimal, whether you're looking at the rendered or unrendered version. It's like tidy HTML.
```
## Challenge
Use these five elements—headings, emphasis, lists, links, and paragraphs—to create a syllabus. Have a main heading that gives the course title (one `#`), then subheadings for, at least, course info and readings. Use emphasis (`*`) for book titles and try to get a list in there somewhere.
If you want an a more advanced challenge, you can review some additional markdown elements on [this page](https://github.com/adam-p/markdown-here/wiki/Markdown-Cheatsheet) and add some extra features like images, blockquotes, or horizontal rules.
## Example
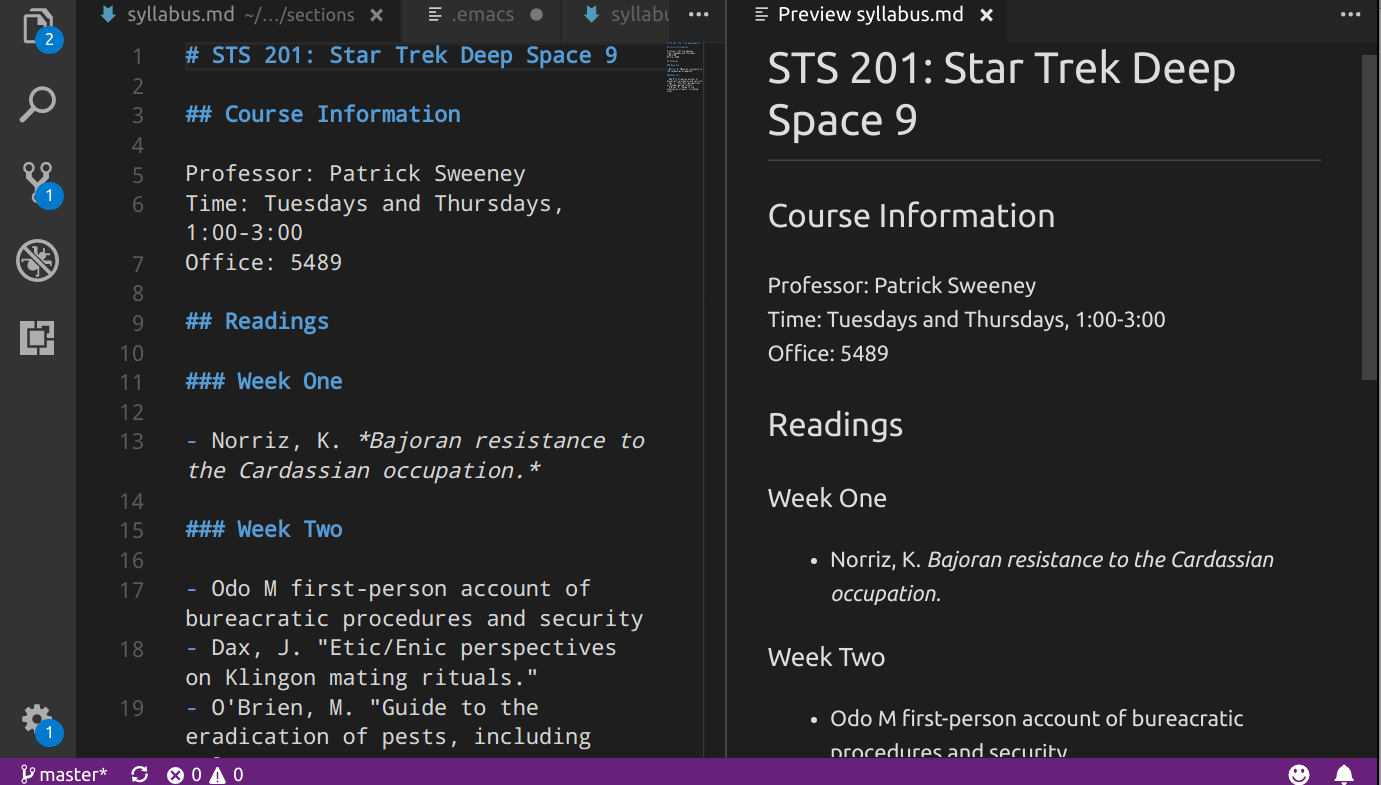
You can look at an example syllabus in raw text form [here](https://raw.githubusercontent.com/DHRI-Curriculum/git/main/sections/syllabus.md). You can see what it looks like when it's rendered by GitHub [on GitHub](https://github.com/DHRI-Curriculum/git/blob/main/sections/syllabus.md). When editing the markdown file in Visual Studio Code, it might look like this:

## Tips
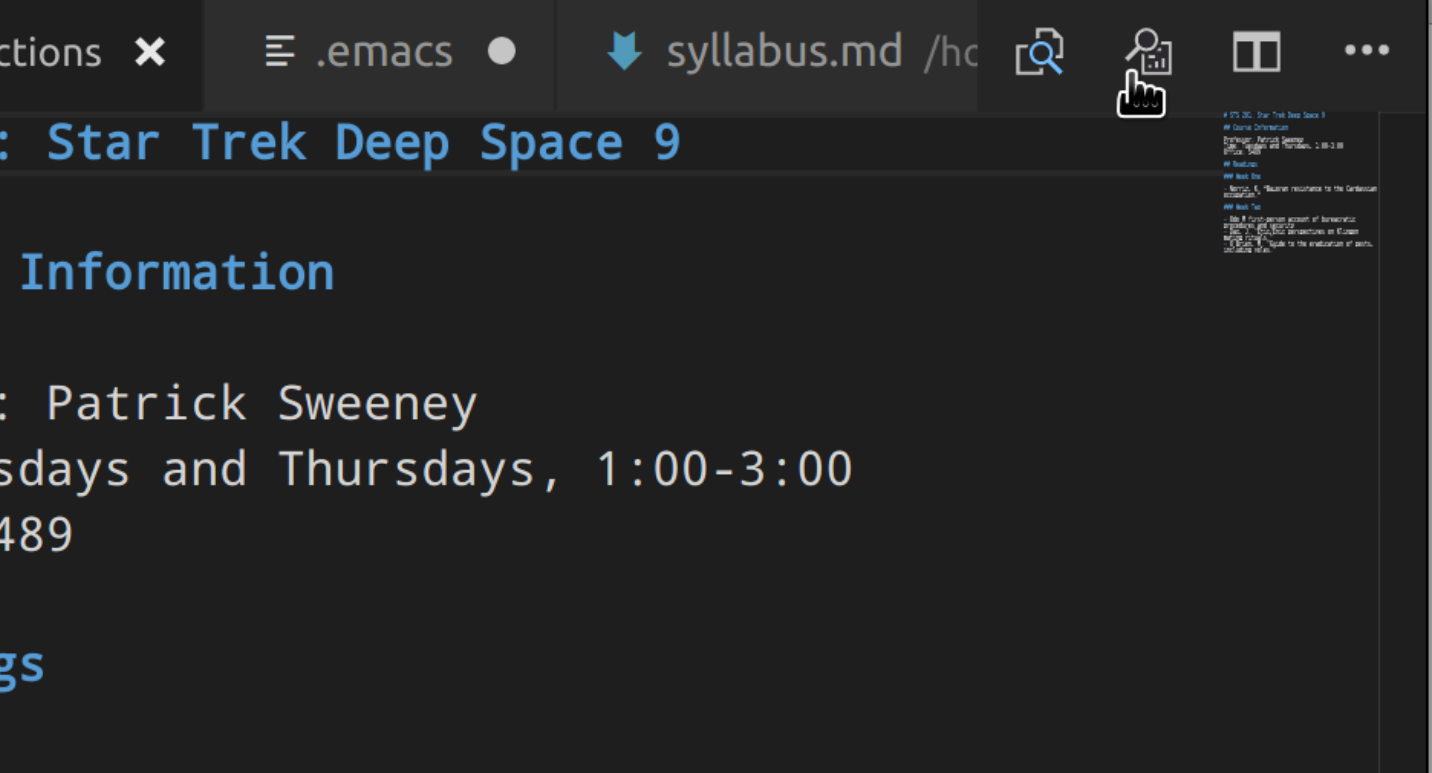
1. Visual Studio Code also has a preview feature for your markdown. Hit the preview button on the top right while editing your markdown file:
You'll get two side-by-side panels. Your markdown file will be on the left, and your rendered preview will be on the right:
2. Remember to save your work—regularly!—with control + s on Windows or ⌘ + s on macOS.
## Evaluation
Which best describes what you're doing when you initialize your project folder:
- You created a new version of your project folder
- You told Git to pay attention to your project folder*
- You told Git to set up its file structure within your project folder so it can track changes to your files.*
- You use the command `mkdir` in your terminal
- You use the command `git init` in your terminal*
Which best describes Markdown:
- a software installed on my local machine
- a language for formatting plain text files*
- a language that can be read and rendered by some web-based platforms*
- a version control software
- a cloud-based software
- refers to project folders as "repositories"
## Keywords
Do you remember the glossary terms from this section?
- [Markdown](https://github.com/DHRI-Curriculum/glossary/blob/v2.0/terms/markdown.md)
# Staging and Committing Changes
Git's primary function is version control, or to track a project as it exists at particular points in time. Now that we have a file to track—our `syllabus.md`—let's use Git to save the current state of the repository as it exists now.
## A Metaphor for Adding and Committing
In Git, a _commit_ is a snapshot of a repository that is entered into its permanent history. To commit a change to a repository, we take two steps:
1. Adding files to a "staging area," meaning that we intend to commit them.
2. Finalizing the commit.
Staging a file or files is you telling Git, "Hey! Pay attention these files and the changes in them".
Making a commit is a lot like taking a photo. First, you have to decide who will be in the photo and arrange your friends or family in front of the camera (the staging process). Once everyone is present and ready, you take the picture, entering that moment into the permanent record (the commit process).
Why do you need both steps? Sometimes when you're working on a project you don't want to pay attention to all the files you changed. Perhaps you fixed a bug in some code, but also did some work on your manuscript document. You may want to only commit the changes you made to the code because you still haven't finished your thoughts on the manuscript. You can stage, or `add`, the code file so Git knows to only commit the changes made to that file. Later, you can stage and then commit the manuscript changes on their own once you've finished your thought.
## Staging Changes with the `add` Command
First, let's see what state Git is currently in. We do that with the `git status` command. It's a good idea to use this command before and after doing anything in a Git repository so you can always be on the same page as the computer.
Make sure you're in your `/home//Desktop/projects/git-practice` directory using the `pwd` command in the terminal. Once you're there, enter `git status` and you should see the following output:
```console
$ git status
On branch main
No commits yet
Untracked files:
(use "git add ..." to include in what will be committed)
syllabus.md
nothing added to commit but untracked files present (use "git add" to track)
```
"Nothing added to commit" means that we have initialized our repository, but haven't made any commits yet. _If you're instead getting a message that begins with the word `fatal` when you use `git status`, you may be in the wrong directory or perhaps you haven't run the `git init` command on your directory yet._
Let's follow the recommendation in the status message above and use the `add` command to stage files, making them ready to be committed.
We will go ahead and add `syllabus.md` by writing the following in the terminal:
```console
$ git add syllabus.md
```
You should see no output from the command line, which should be interpreted as a the above command succeeded. It is what we call "succeeding silently." Let's run `git status` again to have a "sanity check"—to make sure that things have changed. You should see output like this:
```
$ git status
On branch main
No commits yet
Changes to be committed:
(use "git rm --cached ..." to unstage)
new file: syllabus.md
```
The `new file: syllabus.md` should be highlighted in green to show that it's ready for commit.
This is Git telling you, "Ok, I see the file(s) you're talking about."
## Committing Changes
Now that our files have been staged, let's commit them, making them part of the permanent record of the repository. In the terminal, type:
```console
$ git commit -m "Initial commit of syllabus file"
```
The `-m` flag provides that the message following the flag (in quotation marks) along with the commit. The message will tell others—or remind a future version of yourself—what the commit was all about. Try not to type `git commit` without the `-m` flag—there's a note about this below.
After running the command, you should see output like this:
```
[main (root-commit) 8bb8306] Initial commit of syllabus file
1 file changed, 0 insertions(+), 0 deletions(-)
create mode 100644 syllabus.md
```
This means you have successfully made your first commit in the repository—congratulations! There are a few things going on in this message. The relevant information for you for now is the second line, which tells you that one file was changed, and there were no insertions or deletions. You have a fresh new file!
Let's check the state of our repository after the commit by running `git status`:
```
$ git status
On branch main
nothing to commit, working tree clean
```
This means that everything in the repository is successfully committed and up-to-date. If you edit your syllabus file or create a new file in the repository, the message you get with `git status` will instead list files that have uncommitted changes.
Let's run one other command to see the effect our commit has had. Enter this command:
```console
$ git log
```
You should see output similar to this:
```
commit 8bb8306c1392eed52d4407eb16867a49b49a46ac (HEAD -> main)
Author: Your Name
Date: Sun May 20 16:03:39 2018 -0400
Initial commit of syllabus file
```
This is the log of commits, comprising a history of your repository. There's only one commit here now, though. If you don't see a prompt (the `$`) after running `git log`, you may need to press the q key (just the q key by itself) to return to the command line.
## Why Do We Need to Use the `-m` Flag?
The `-m` flag is useful for human purposes and technical purposes. For human purposes, the `-m` flag helps you keep track of the changes you're making. Version control is most useful when you can confidently return to a specific version. It can also help you be more structured in your approach to making changes—your notes to self are limited, so to make them clear, you might make commits after specific tasks are completed. If you update readings for the first week of classes or if you add another reading, you will want to make a commit. This can also make it easier to reverse a specific change in the future.
Also, if you type `git commit` by itself, git will open the command line's default text editor to allow you to enter the commit message in a file-like environment. It looks something like this:
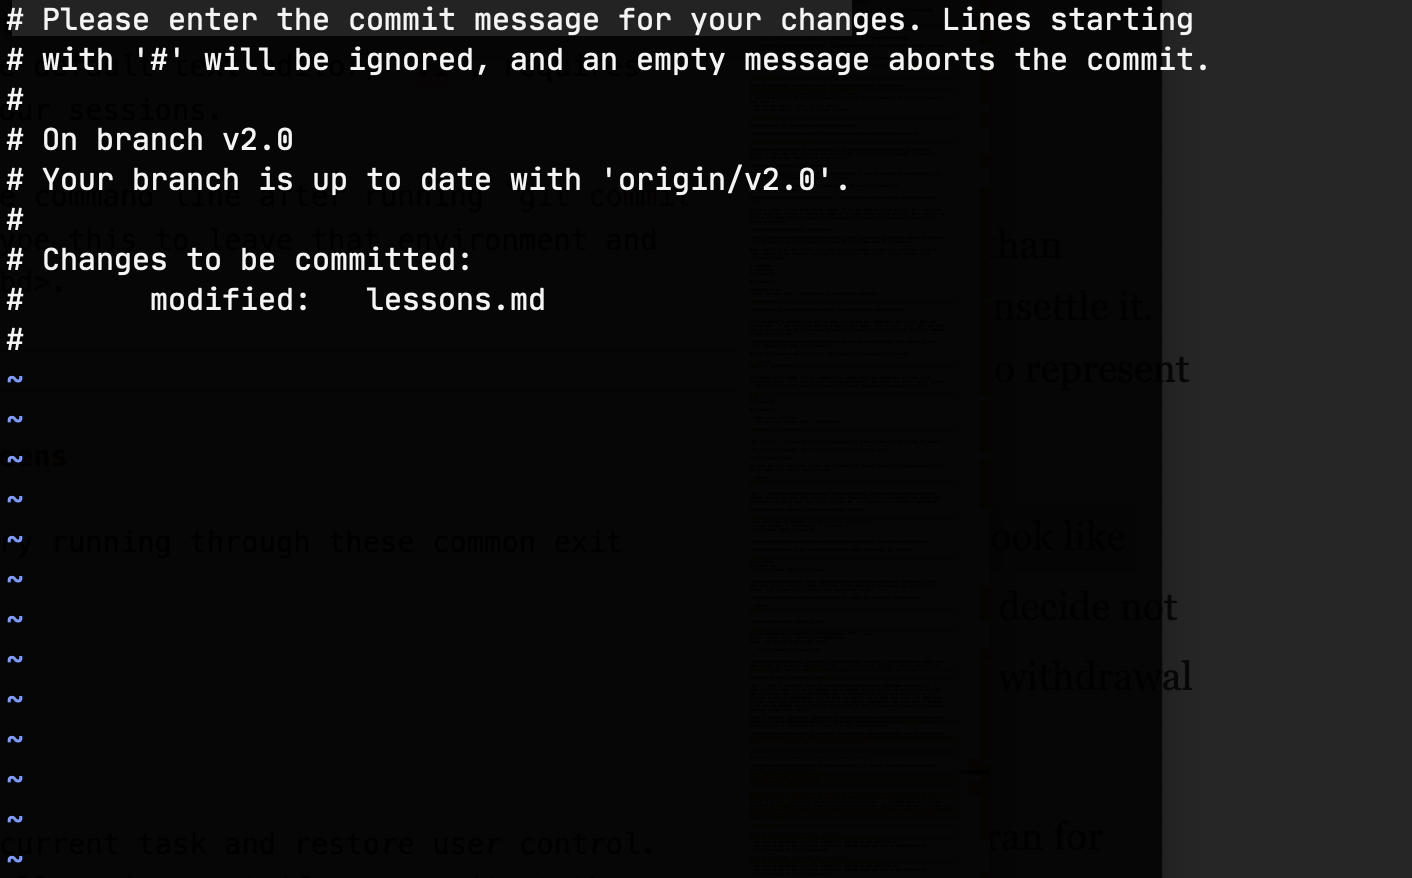
This unfamiliar screen is the default text editor, `vi`, and it requires some knowledge to use. We don't teach it as part of our sessions, but if you find yourself stuck in this screen, you can try this trick to leave that environment and return to your usual command prompt. Type `:q` and then press enter. You should be back to the command line with a message saying:
```console
Aborting commit due to empty commit message.
```
If you make a mistake where you include an opening quotation mark but forget a closing one, you might accidentally end up inside a "quote prompt." You will know you're there when your command prompt changes to `quote>`. If this happens, you can just keep writing as much of your commit message as you want, and then end it with the same quotation mark that you opened the commit message with.
Another option is to press control + c on your keyboard, which will exit the quote prompt and cancel any commits you were trying to perform.
## Pro-tip for the Command Line: How to exit unknown screens
If you're ever stuck or "trapped" on the command line, try running through these common exit commands to return to the prompt:
- control + c
- control + d
- `q` followed by enter
- `:q` followed by enter
control + c attempts to abort the current task and restore user control. control + d escapes the current shell environment—if you use it at the normal `$` prompt, it will end the current command line session. `q` is often used as a command (followed by enter) to escape from specific programs like `less`. `:q` is the command used in `vi` that changes the mode of interaction (`:`), allowing you to enter the `q`, a one-letter command to quit, which must be followed by enter. Thus, it's a command specific to `vi`.
## Evaluation
Which best describe the process of _staging_:
- you telling Git to take a snapshot of changes made to a file.
- you telling Git which files with changes you want it to pay attention to.*
- you telling git to pay attention to a folder storing files you want to make changes to.
- the second part of a two-step process.
Which best describes the process of _committing_:
- you telling Git to take a snapshot of changes made to a file.*
- you telling Git which files with changes you want it to pay attention to.
- you telling git to pay attention to a folder storing files you want to make changes to.
- the second part of a two-step process.*
What happens if you _stage_ the files, but don't _commit_ them?
- Git won't know what files you want to take a snapshot of
- Git won't take a snapshot of the files.*
- Git will take the snapshot of the files
- You will have told Git what files you would like it to take a snapshot of.*
What happens if you _commit_ the files, but don't _stage_ them?
- Git won't know what files you want to take a snapshot of*
- Git won't take a snapshot of the files.*
- You will have told Git what files you would like it to take a snapshot of.
- Git will take the snapshot of the files
Which best describes the `-m` flag used when committing changes to a file?
- a brief description of changes you made to your file*
- Its just something Git needs so it doesn't break
- future aids when you are trying to make sense of or recover changes you previously made to a file*
- It's nonsense—who needs it?!
## Keywords
Do you remember the glossary terms from this section?
- [Commit](https://github.com/DHRI-Curriculum/glossary/blob/v2.0/terms/commit.md)
# Pushing to GitHub
Now, let's connect the directory you made to GitHub. GitHub is a service that allows us to host files, collaborate, and find the work of others. Once our syllabus is on GitHub, it will be publicly visible.
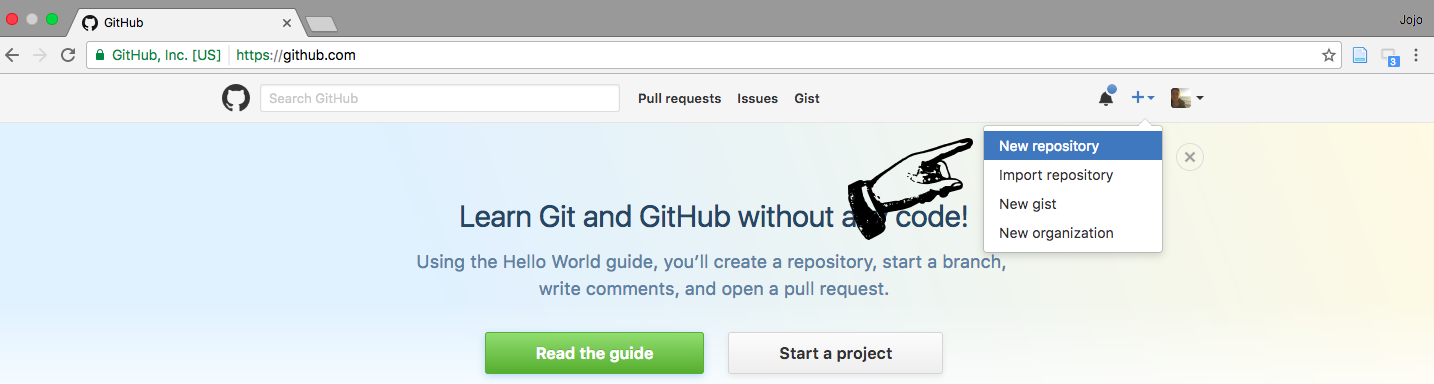
Go to GitHub in your browser and click the plus sign in the upper right hand corner.

After clicking the plus button, select `New repository` from the dropdown menu.
After clicking `New repository`, you'll have to enter some information, including a name and description for your repository.

- Choose a name, such as `git-practice`.
- Enter a description, such as `Test syllabus for learning Git and GitHub`.
- Keep the `Public — Anyone can see this repository` selector checked.
- Do *not* select `Initialize this repository with a README` since you will be importing an existing repository from your computer.
- Click `Create repository`.
You should end up inside your newly created git-practice repo. It will look like a set of instructions that you might want to use to connect your GitHub repository to a local repository.
The instructions we want consist of three lines underneath the heading `...or push an existing repository from the command line`. The arrow in this screenshot points to where these directions are on the page:
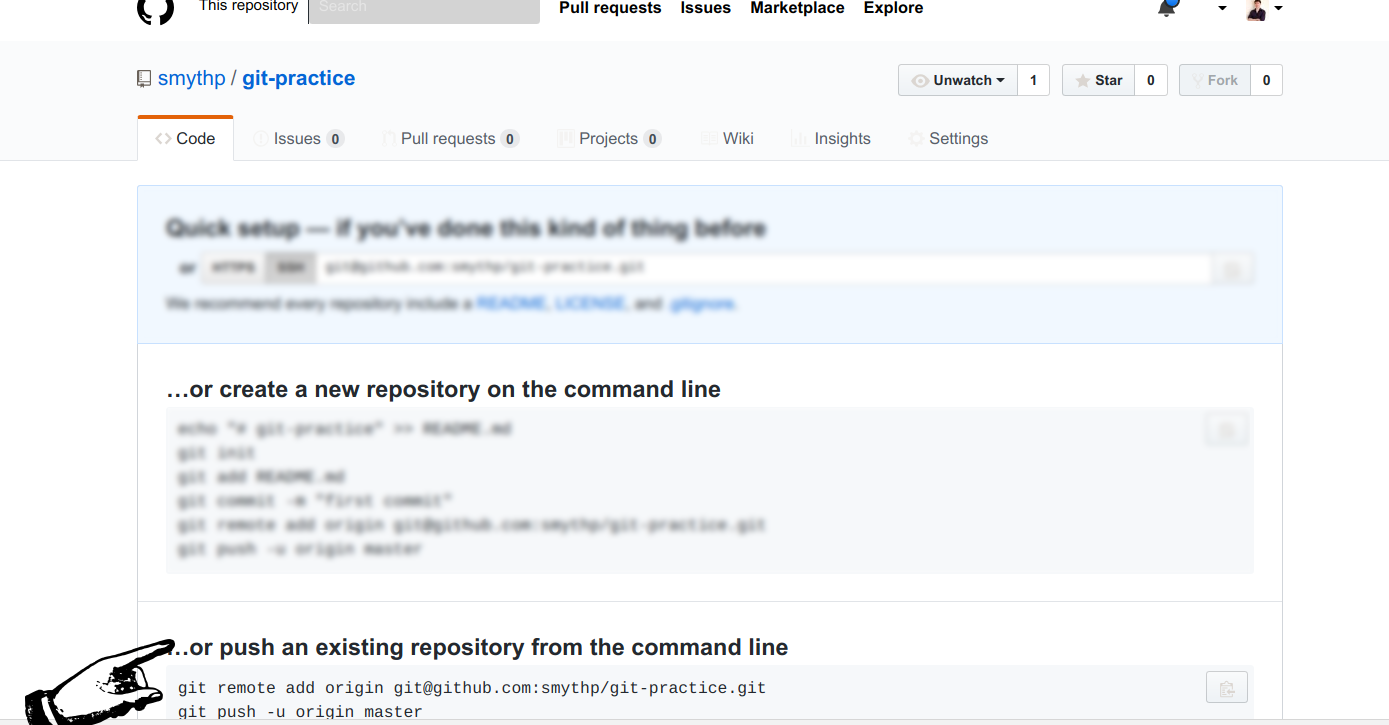
Copy out the first command and paste it in your terminal. It should look something like this:
```console
git remote add origin https://github.com//.git
```
You'll need the command copied from your new repo, since it will contain the correct URL.
Next, paste the second command. It will look exactly like this:
```console
git branch -M main
```
Finally, paste the third command. It will look exactly like this:
```console
git push -u origin main
```
If you have not used git before, you will need to authenticate with GitHub, and a window will pop up asking you to sign in. Click `Sign in with your browser`.
Your browser should open a window asking you to "Authorize Git Credential Manager." Click the green `Authorize GitCredentialManager` button.
You should see a message that authentication succeeded. If so, you may now close the browser window and return to the command line, where you should see output like this:
```
Total 4 (delta 3), reused 0 (delta 0)
remote: Resolving deltas: 100% (3/3), completed with 3 local objects.
To github.com:/git.git
916998f..9779fa7 master -> master
```
If you see output like this, go back to your new repository page in the browser and click the `Refresh` button. You should see your `syllabus.md` file on GitHub! Your git credentials are also now stored locally, so you should not need to authorize the credential manager again from that computer.
## Challenges
1. Go through the process a few more times by adding additional readings and weeks of course material. Remember to commit changes intentionally so your commit messages make sense. Use `git log` to review your changes.
2. Also try creating a new file and adding an assignment. Rewrite the assignment using Markdown, or edit and add in the markers. Go through the process of staging and commiting that file, and pushing it to your repository on GitHub.
3. Test your understanding by thinking through the following questions:
- Do you need to push the file to GitHub each time you commit changes to the file, or can you make several commits to a file and push them all to GitHub at once?
- Do you need to use `git init` after after adding a new assignment file to your folder?
- What about the `-u` flag in the `git push origin main` command? Does this flag need to be used to add the assignment to your repository on GitHub?
## Solution
In response to _Challenge 3_:
- No, you don't need to push to GitHub every time, or at all even, if you didn't want to share your changes publicly. Git is the software that tracks the changes, and you review them on your local machine using Git as well.
- No, you don't need to initialize the folder after adding a new file for an assignment or otherwise. In this case, we've already initialized the process; Git is tracking the folder. After the file is added, we just need to notify Git to take a snapshot of the additions and changes using the `git add`, `git commit` sequence. We can also use `git push` to share those changes on GitHub.
- No, the `-u` flag does not need to be used again. This flag is only necessary when setting up the original connection between the folder on your local machine and the folder on GitHub.
## Evaluation
Which best describes what you're doing when you use the command `git push`?
- you telling Git to take a snapshot of changes made to a file.
- you telling Git which files with changes you want it to pay attention to.
- you telling git to pay attention to a folder storing files you want to make changes to.
- you are copying the updated files with the changes to the repository on GitHub*
How does the process of _pushing_ differ from the processes of _staging_ and _committing_ discussed in the previous lesson?
- There is no fundamental difference between these processes.
- Staging and Committing set up the files whereas pushing is the act of taking the snapshot.
- Staging and committing the files is to communicate with GitHub on the Internet, pushing the changes happens on your local machine.
- Staging and committing the files happens on your local machine, pushing the changes is to communicate with GitHub on the Internet.*
What happens if you use `git push` without staging and committing files?
- Git won't know what files you want to take a snapshot of.*
- Git won't take a snapshot of the files.*
- Your computer won't know what changes to share with GitHub.*
- Git will take the snapshot of the files
- You will have successfully created a new version of the file.
- You will have communicated with GitHub and shared a copy of the updated files.
What happens if you _stage_ and _commit_ files, but not _push_ the changes?
- Git won't know what files you want to take a snapshot of.
- Git won't take a snapshot of the files.
- Your computer won't know what changes to share with GitHub.
- Git will take the snapshot of the files*
- You will have successfully created a new version of the file.*
- You will have communicated with GitHub and shared a copy of the updated files.
## Keywords
Do you remember the glossary terms from this section?
- [Push](https://github.com/DHRI-Curriculum/glossary/blob/v2.0/terms/push.md)
- [Repository](https://github.com/DHRI-Curriculum/glossary/blob/v2.0/terms/repository.md)
# Cloning and Forking
GitHub was built for sharing and collaborating on projects. A key advantage of the platform is that you can find lots of bits of software that do many different things—such as code for plugins for WordPress or Leaflet. Increasingly, you might find syllabi or open writing projects. If a project is public, you can save a copy of it to your local machine, work on it, save your admendations and share it on your own GitHub account. Like we've already mentioned, GitHub usefully helps track attribution along the way.
Cloning and forking are the basic functions of this capability. Each are first explained below, and followed by an example and activity to further explain.
## Cloning
**Cloning** a repository means making a copy of a repository on GitHub, to download and work on locally—on your local machine. By entering the following code into your terminal, you can clone any public directory on GitHub:
```console
$ git clone
```
When you clone a repository from GitHub, the folder that shows up on your local machine comes built-in with a few things. First, Git is already present, so you don't need to initialize the folder. Also, the connection between your local copy and the online repository is already made, so `git push origin main` will work (no `-u` flag needed).
For practice, let's clone the repository for this workshop about Git and GitHub, which [lives on GitHub](https://github.com/DHRI-Curriculum/git).
First, let's navigate back to your Desktop folder.
```console
$ cd ~/Desktop
```
Remember that the `~` refers to your home directory. Now let's find the URL we need to clone the lesson.
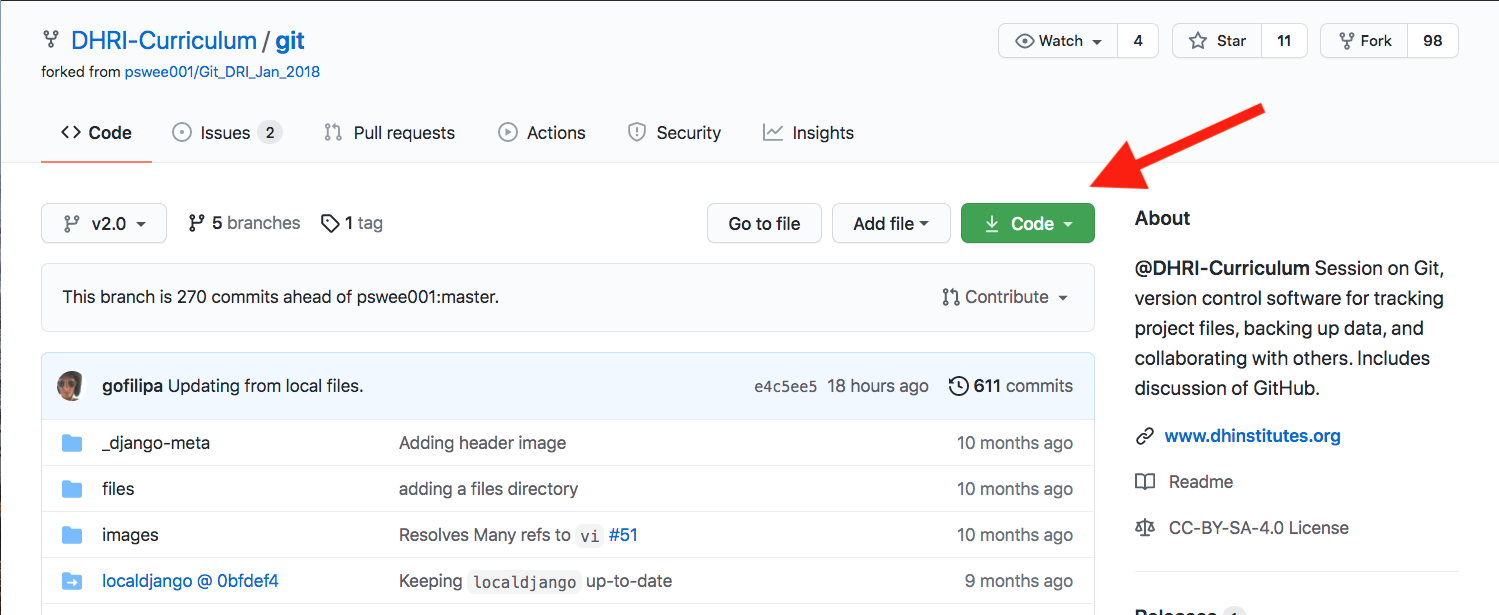
First, visit [this workshop's page on GitHub](https://github.com/DHRI-Curriculum/git).
On the main page, there should be a green `Code` button on the right side:
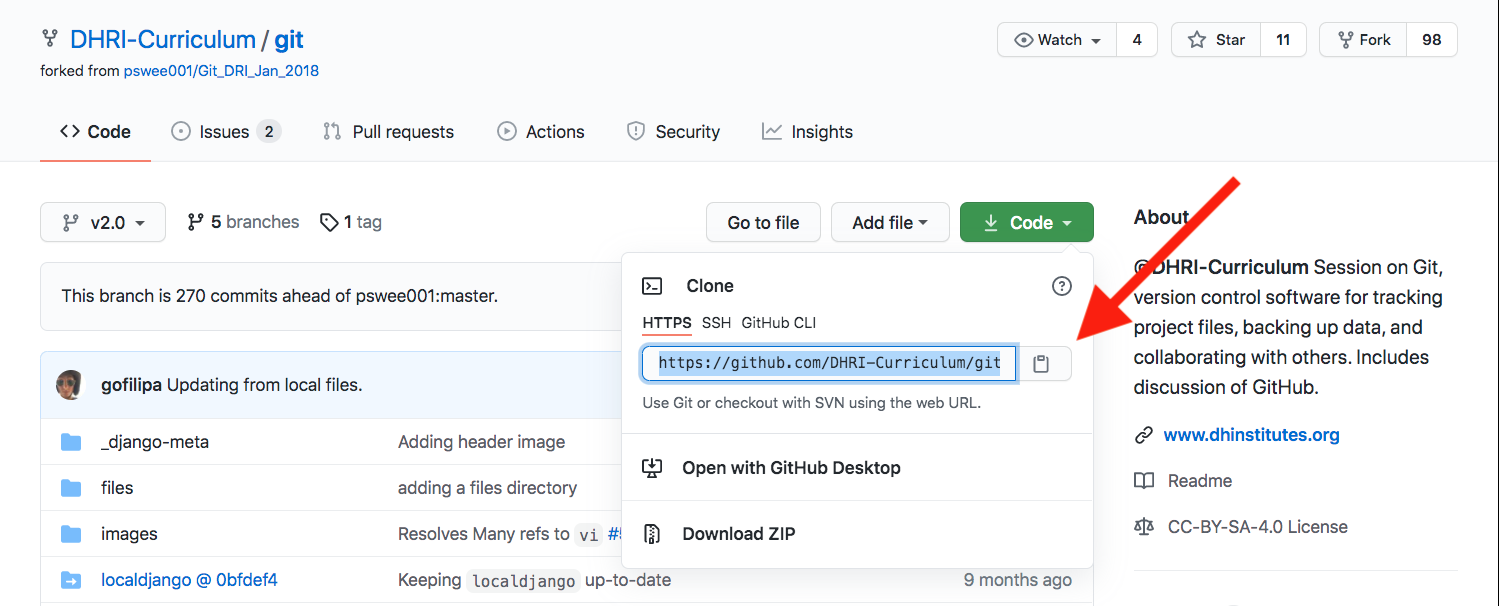
Click the green button and you will see a box with highlighted text under a heading that says `Clone with HTTPS`. If you instead see `Cloning with SSH`, click the small link that says `Use HTTPS`.
Now copy out the text in the box:
Now that you have the text copied, go back to your terminal. Remember, you should be on the `Desktop`. (Hint: Use `pwd` to find out what your current working directory is.)
Once you are in the `Desktop`, type:
```console
$ git clone
```
If the command is successful, the full Git and GitHub workshop's text will be replicated on your local machine. To navigate into the folder, its name is `git` and you can use the `cd` command to access it:
```console
$ cd git
```
Use the `ls` command to take a look at the various files in the lesson folder.
Cloning can be especially useful when you're joining a group project that is hosted on GitHub, and you want your changes to eventually be pushed and shared with that same repository.
But maybe that is not possible or ideal. Maybe you don't want to contribute your changes to someone else's repository. Maybe you want to make a derivative of their folder for yourself, on your GitHub account, and make changes there.
Forking is the step you could take to do this.
## Forking
_Forking_ a repository means making a copy of someone else's repository on GitHub, and saving it to your account on GitHub. This function happens within GitHub, and has nothing to do with what is happening on your local machine. Note that _forking_ will not automatically make the repository appear as a folder on your computer; that's the role of _cloning_.
In order to "fork" the `git` repository into your own GitHub account, follow these steps.
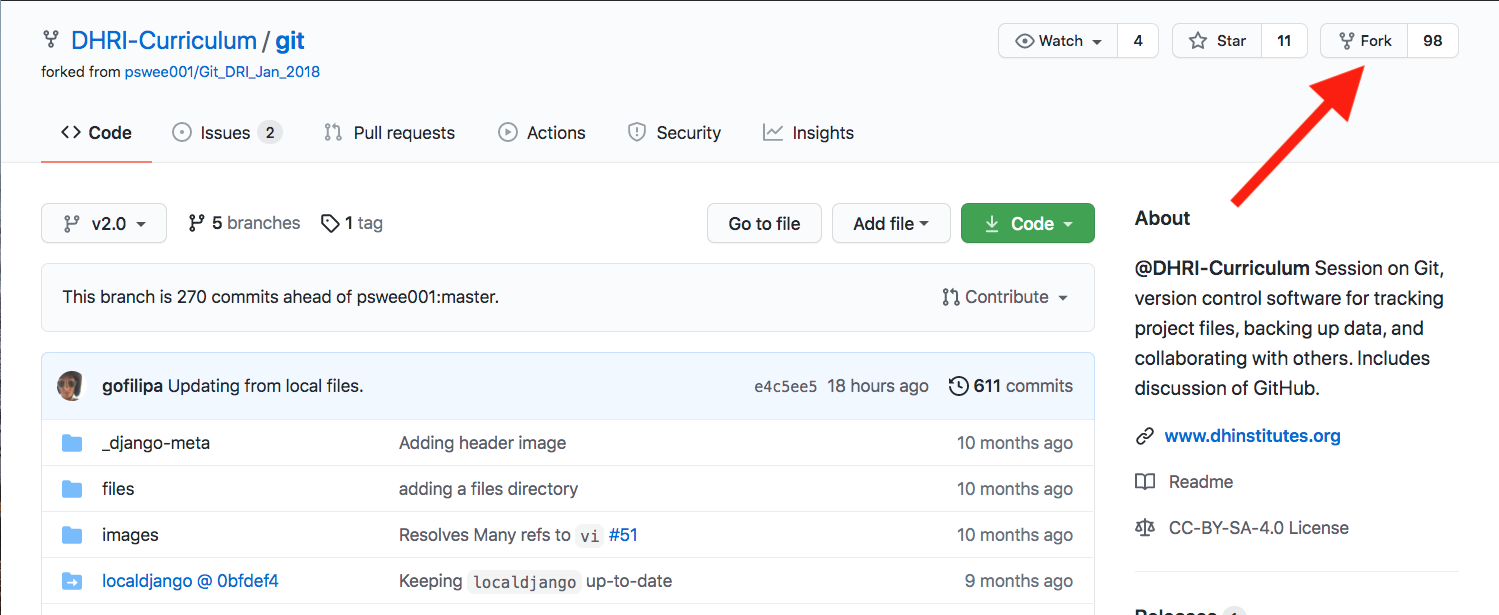
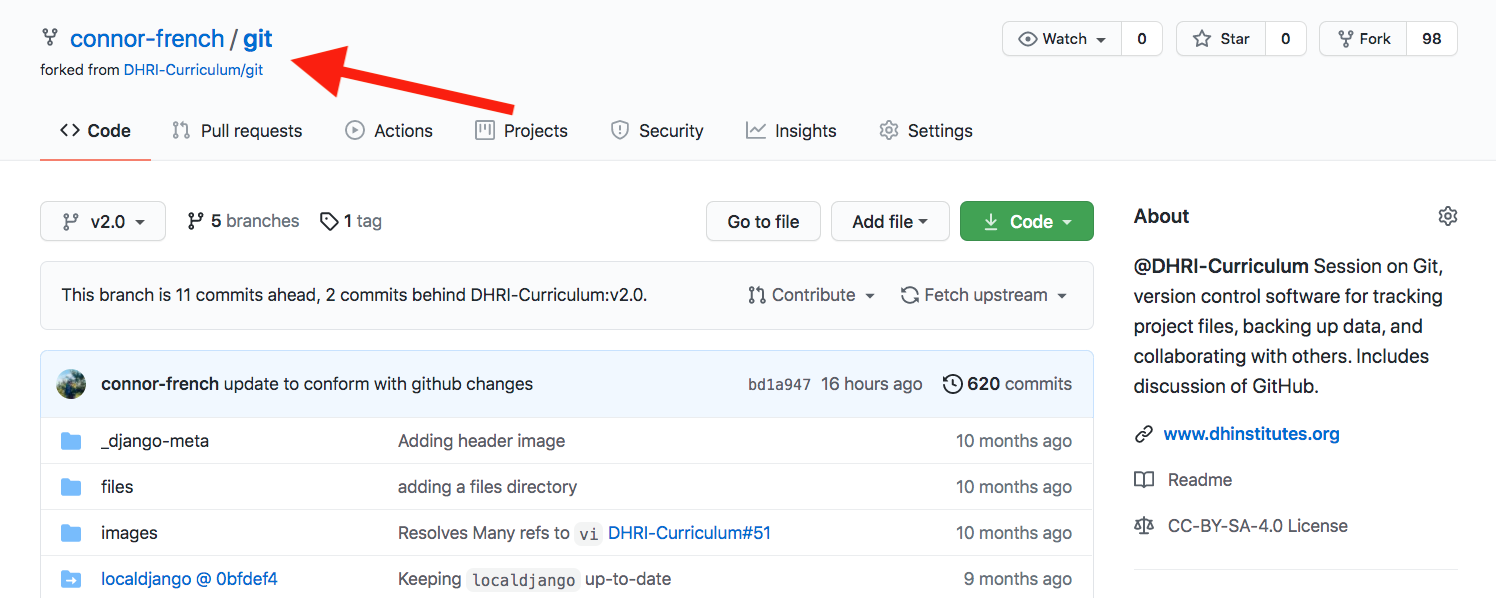
First, go to [the repository for this workshop on GitHub](https://github.com/DHRI-Curriculum/git). Note the `Fork` button in the upper right hand corner. By clicking that button, you can copy, or fork, this repository to your account.
Doing so would also adjust the attribution information in the upper left hand corner. Your username would replace `DHRI-Curriculum`, showing that you are looking at a copy of the repository on your account now. Additionally, it will reference the origin account, in this case, `DHRI-Curriculum` below after `forked from`, since this was the origin point of _your_ fork.
Your local machine would come into play when you want to _clone_ that repository so you can work on it locally. This also means that when you push those changes to GitHub, you would be pushing them to a forked repository associated with your own account.
You might use this method if you were going to teach your own Git & GitHub workshop. You could use our repository as a base for getting started, and add more examples or change some language, clarify something further, or create a connection to another workshop you are giving, etc. This allows us to continue to use the workshop as we have it as well. Also, maybe at a later time, we want to merge some of your changes with ours. We can do that too by revisiting your version history.
## Challenge
1. Fork and clone [the repository for this workshop on GitHub](https://github.com/DHRI-Curriculum/git). Note not only _what_ you are doing, but also _where_ you are working when completing these two different tasks.
2. Make changes to the files on your local machine. Remember to save them!
3. Use the 3-step process of stage, commit and push to return the amended files to the repository on GitHub.
## Solution
Rather than write out the solution here, I want to encourage you to go back through the lessons as needed.
You'll know you've completed step one when the project folder (called `git`) shows up on your local machine.
After you've made and saved the changes, you'll know you've completed step three when your changes appear in the project folder on _your_ GitHub account.
## Evaluation
Which best describes _cloning_?
- Copying a repository from GitHub to your local machine.*
- Copying a repository from your local machince to GitHub.
- Copying a repository from someone else's GitHub account to your own.
- Copying a repository from your account to someone else's account.
Which best describes _forking_?
- Copying a repository from GitHub to your local machine.
- Copying a repository from your local machince to GitHub.
- Copying a repository from someone else's GitHub account to your own.*
- Copying a repository from your account to someone else's account.
## Keywords
Do you remember the glossary terms from this section?
- [Cloning](https://github.com/DHRI-Curriculum/glossary/blob/v2.0/terms/cloning.md)
- [Forking](https://github.com/DHRI-Curriculum/glossary/blob/v2.0/terms/forking.md)
- [Repository](https://github.com/DHRI-Curriculum/glossary/blob/v2.0/terms/repository.md)