# Lightning-LM
[](https://discord.gg/gdM9mQutC8)
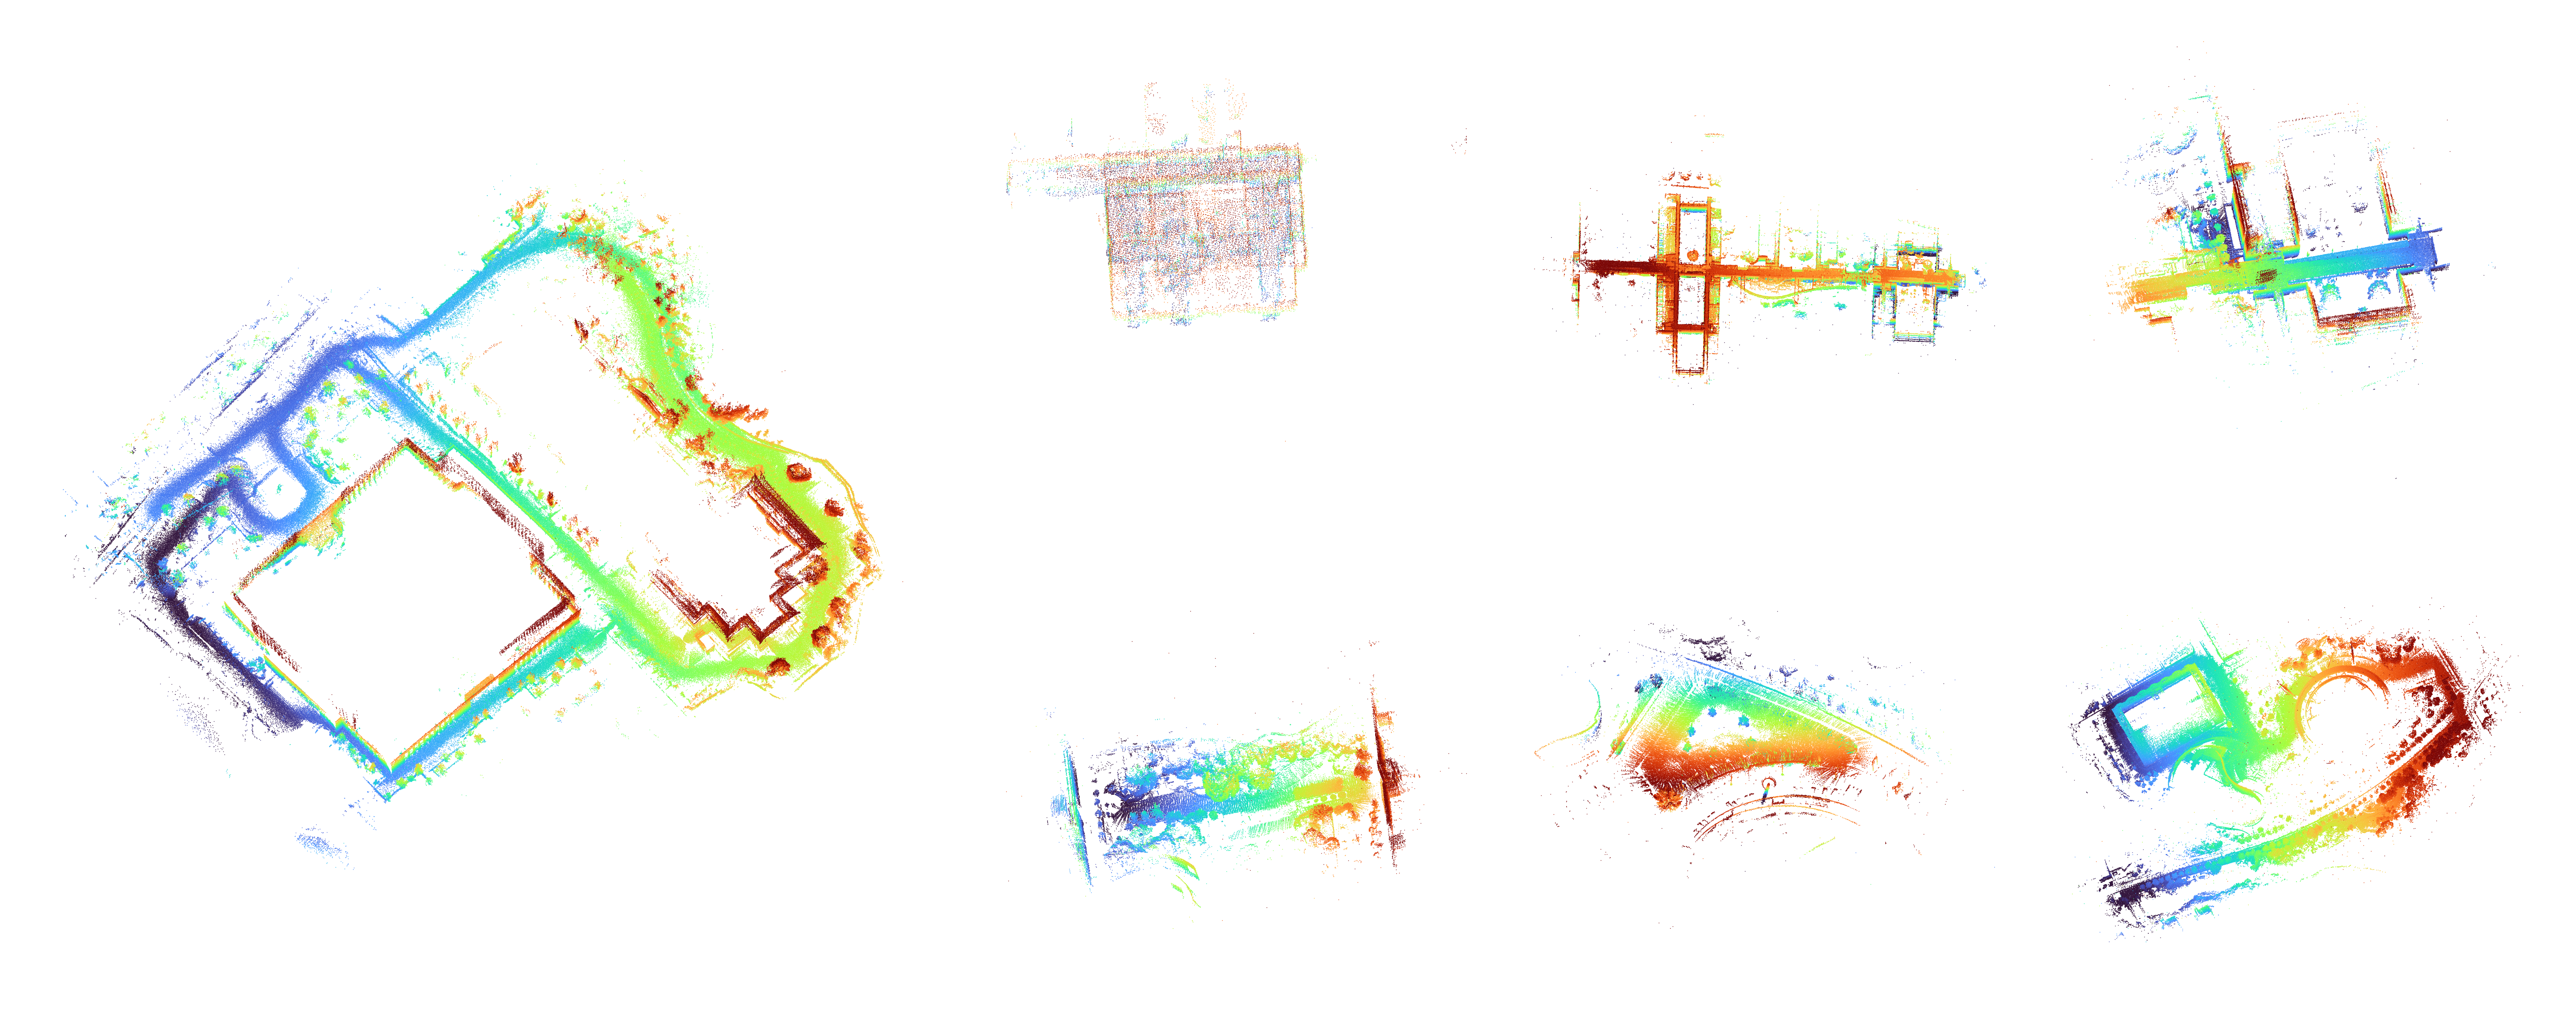
Watch the tutorial on [YouTube](https://youtu.be/1S8X03tm3-8?si=2YWOS35JFoj5kiHp)
or [Bilibili](https://b23.tv/jfz4q8u).
3D LiDAR mapping and localization for **Deep Robotics M20 Pro** and
**Lite3 EDU with Jetson AGX and Livox Mid360**. Supports **Ubuntu 20.04 / ROS 2 Foxy**
and **Ubuntu 22.04 / ROS 2 Humble** on x86-64 and ARM.
- **Recorded datasets:** follow sections [1](#1-install-and-build)–[4](#4-localize-a-recording).
- **Onboard robots:** deploy with [section 5](#5-deploy-from-a-laptop-to-the-robot),
configure with [section 6](#6-connect-to-robots-and-sensor-drivers), then
[map](#7-onboard-mapping) or [localize](#8-onboard-localization).
- **Diagnostics:** see [section 9](#9-diagnostics-and-reference).
- **AI assistants:** read [AGENTS.md](AGENTS.md) before working on the repository.
Expand only the sections you need. Examples use `~/lightning-lm` as the checkout
or deployment directory; adjust each `cd` if yours is elsewhere. Run shell commands
in Bash. Labels identify whether a command runs on the laptop, AOS, NOS, or AGX.
1. Install and build on a workstation
Download and extract this repository, or clone it into `~/lightning-lm`.
In a fresh workstation terminal:
```bash
cd ~/lightning-lm
source /opt/ros/humble/setup.bash
bash scripts/install_dep.sh
bash scripts/build.sh
source scripts/setup.bash
ros2 pkg executables lightning
```
For Ubuntu 20.04, replace the ROS setup line with
`source /opt/ros/foxy/setup.bash`. Use a separate build directory/checkout for each
ROS distribution. The installer provides the build dependencies and viewers.
Use [section 5](#5-deploy-from-a-laptop-to-the-robot) for a robot without internet.
1.1 Rebuilds and compiler resources
Keep `build`, `build-pangolin`, `.deps`, and `install`. After editing sources,
source the matching ROS installation and rerun `bash scripts/build.sh` from the
repository root. Unchanged files are skipped; `ccache`, when available, reuses
matching previous compilations. Check its statistics with `ccache -s`.
The workstation build uses the available CPUs. To limit memory demand:
```bash
cd ~/lightning-lm
source /opt/ros/humble/setup.bash
CMAKE_BUILD_PARALLEL_LEVEL=2 bash scripts/build.sh
```
Release is the default. For debug symbols, prefix the build command with
`CMAKE_BUILD_TYPE=RelWithDebInfo`. On robots, use `scripts/build_robot.sh`, which
selects a CPU/RAM budget automatically.
2. Select a sensor and recording
| Robot / sensor | Preset | LiDAR topic | IMU topic |
|---|---|---|---|
| M20 Pro | `config/m20_pro.yaml` | `/LIDAR/POINTS` (`PointCloud2`) | `/IMU` |
| Lite3 EDU / Mid360 | `config/mid360.yaml` | `/livox/lidar` (`CustomMsg`) | `/livox/imu` |
In **each workstation mapping or localization terminal**, load the environment
and set the paths below. `BAG` accepts a SQLite bag directory or `.db3` file.
Choose a new map directory for mapping; select an existing one for localization.
```bash
cd ~/lightning-lm
source scripts/setup.bash
export CONFIG="$PWD/config/mid360.yaml"
export BAG="/absolute/path/to/recording"
export MAP="$PWD/data/my_map"
```
For M20 Pro, use `config/m20_pro.yaml`. Use the same sensor calibration for mapping
and localization. Live Lite3 with the internal IMU uses a runtime copy created by
[AGX setup](#62-lite3-edu-with-agx-mid360).
Both presets use `loop_closing.ndt_score_th: 0.6` for offline and online mapping.
A loop candidate must score above this value before graph checks. Localization
has [separate confidence thresholds](#terminal-status).
2.1 Calibration, timestamps, and headless operation
Extrinsics follow `p_imu = R * p_lidar + T`. The recording presets use translations
`[0, 0, 0]` for M20 and `[0, 0, 0.28]` for the tested Mid360 mounting. The latter
is mounting-specific, not the Livox internal-IMU translation.
LiDAR headers, per-point times, and IMU headers must share a consistent time base.
M20 point timestamps are absolute seconds; Livox point offsets are nanoseconds
from the scan header. IMU units are rad/s and m/s². Playback rate changes processing
speed, not acquisition timestamps. The estimator does not calibrate clock offsets;
publishing `/clock` cannot repair incorrect sensor timestamps.
Both presets estimate full 3D motion without fixed-height or planar constraints.
M20 uses inertial translation; Mid360 uses constant-velocity translation with gyro
rotation. See [implementation notes](doc/implementation.md) for the models.
Dataset applications open a Pangolin viewer when `system.with_ui: true`.
Use an OpenGL desktop with `DISPLAY` set. For headless processing, copy the preset,
set `system.with_ui: false` in that copy, and point `CONFIG` to it.
3. Map a recording
Prepare the application terminal using [section 2](#2-select-a-sensor-and-recording).
Choose either offline processing or online playback.
3.1 Offline mapping
```bash
cd ~/lightning-lm
ros2 run lightning run_slam_offline \
--config "$CONFIG" --input_bag "$BAG" --map_path "$MAP"
```
At completion, the application saves the map, prints `map saved`, and closes
the viewer. Nonempty map output directories are protected from overwriting.
3.2 Online mapping
Start the application in the prepared terminal:
```bash
cd ~/lightning-lm
ros2 run lightning run_slam_online --config "$CONFIG"
```
In a second workstation terminal, source the environment and play the recording:
```bash
cd ~/lightning-lm
source scripts/setup.bash
export BAG="/absolute/path/to/recording"
ros2 bag play "$BAG" --rate 1.0
```
After playback finishes, save from that second terminal:
```bash
cd ~/lightning-lm
ros2 service call /lightning/save_map lightning/srv/SaveMap "{map_id: online_map}"
```
Wait for `response: 0`, then press **Ctrl+C** in the mapping terminal. The map is
saved under `data/online_map/` in the mapping application's working directory.
Use a new `map_id` for each run. Online mapping requires this explicit save.
3.3 Map files
Keep the **complete map directory**:
| File | Purpose |
|---|---|
| `global.pcd` | Full saved point cloud. |
| `index.txt` and numbered `.pcd` tiles | Required for localization. |
| `places.bin` | Mapping views used by automatic global initialization. |
| `map_view.json`, when present | Onboard saved-map display leveling. |
`places.bin` is generated automatically when mapping saves a map. Older maps
without it can use default/manual initialization; remap to create the index.
Optional `*_dyn.pcd` layers are not loaded by the supplied presets.
3.4 View a saved map on the workstation
```bash
cd ~/lightning-lm
export MAP="$PWD/data/my_map"
pcl_viewer "$MAP/global.pcd" -ps 2
```
Select `data/online_map` instead for the online example. `-ps 2` sets point size;
press **h** in the window for controls. The dependency installer includes
`pcl-tools`. To render on the robot and forward the window, use
[section 7.5](#75-view-a-saved-map-separately).
4. Localize a recording
Stop mapping. Prepare the terminal using [section 2](#2-select-a-sensor-and-recording),
with `MAP` pointing to the complete saved map directory. Localization preserves
the map and writes accepted poses as `timestamp x y z qx qy qz qw` rows.
An existing trajectory file at the selected path is replaced.
4.1 Offline localization
```bash
cd ~/lightning-lm
ros2 run lightning run_loc_offline \
--config "$CONFIG" --input_bag "$BAG" --map_path "$MAP" \
--trajectory "$PWD/localization.tum"
```
4.2 Online localization
```bash
cd ~/lightning-lm
ros2 run lightning run_loc_online \
--config "$CONFIG" --map_path "$MAP" \
--trajectory "$PWD/localization_online.tum"
```
In a second workstation terminal:
```bash
cd ~/lightning-lm
source scripts/setup.bash
export BAG="/absolute/path/to/recording"
ros2 bag play "$BAG" --rate 1.0
```
The viewer shows the reference map, scan, and trajectory. After playback, press
**Ctrl+C** in the localization terminal to close the viewer and flush the trajectory.
4.3 Starting location and automatic initialization
Default initialization starts near the map's saved starting pose. It searches
heading around that position, so replaying the mapping recording normally works
without an initial estimate. It does not search all positions in the map.
To start elsewhere, add `--global_init` to either localization command. This
requires the map's `places.bin`. It recognizes mapped views, rejects competing
locations, and confirms agreement across three observations before publishing a
pose. Repeated structures, poor overlap, or map drift can prevent correct
recognition; a high score alone does not establish the correct location.
Keep the robot stationary during IMU initialization. A recording cut during a
turn can corrupt the initial gyro bias even if place recognition succeeds. An
offline run fails if input ends before localization initializes.
For a manual starting estimate, publish
`geometry_msgs/msg/PoseWithCovarianceStamped` on `/initialpose`, with
`header.frame_id: map`. RViz's **2D Pose Estimate** supplies a starting guess;
estimation remains 3D. Online pose output is `/lightning/pose`, with
`map` → `base_link` on `/tf`. Onboard commands use separate TF/initial-pose topics
as described in [section 8.4](#84-onboard-initialization).
5. Deploy from a laptop to the robot
Transfer sources, then build on the robot. Standard robot environments already
have the required dependencies and need no external internet for this build.
Choose the M20 or Lite3 subsection after creating the archive.
5.1 Laptop: prepare the source archive
From your downloaded ZIP or Git checkout:
```bash
cd ~/lightning-lm
tar -czf /tmp/lightning-source.tar.gz --exclude='__pycache__' --exclude='*.pyc' \
CMakeLists.txt package.xml cmake config scripts src msg srv \
thirdparty/Pangolin-0.9.3.zip thirdparty/Sophus thirdparty/livox_ros_driver \
README.md AGENTS.md LICENSE.txt doc
```
This includes local source edits and bundled source dependencies. It excludes
workstation binaries, maps, logs, and saved robot configuration.
5.2 M20 Pro: transfer and build on AOS
On the laptop:
```bash
export AOS=10.21.33.103
scp /tmp/lightning-source.tar.gz "user@$AOS:~/"
ssh "user@$AOS"
```
For the additional adapter address, set `AOS=10.21.41.1` instead.
In the **AOS terminal**:
```bash
mkdir -p ~/lightning-lm
tar -xzf ~/lightning-source.tar.gz --touch -C ~/lightning-lm
cd ~/lightning-lm
source /opt/ros/foxy/setup.bash
bash scripts/build_robot.sh
source scripts/setup.bash
ros2 pkg executables lightning
ros2 interface show lightning/srv/SaveMap
ros2 interface show lightning/msg/SlamInput
ros2 interface show livox_ros_driver2/msg/CustomMsg
```
Continue with [M20 setup](#61-m20-pro).
5.3 Lite3 EDU: transfer and build on AGX
On the laptop:
```bash
export JUMP=ysc@192.168.2.1
export AGX=ysc@192.168.1.45
scp -o HostKeyAlias=lightning-agx -J "$JUMP" \
/tmp/lightning-source.tar.gz "$AGX:~/"
ssh -Y -C -o HostKeyAlias=lightning-agx -J "$JUMP" "$AGX"
```
In the **AGX terminal**:
```bash
mkdir -p ~/lightning-lm
tar -xzf ~/lightning-source.tar.gz --touch -C ~/lightning-lm
cd ~/lightning-lm
source /opt/ros/humble/setup.bash
bash scripts/build_robot.sh
source scripts/setup.bash
ros2 pkg executables lightning
ros2 interface show lightning/srv/SaveMap
ros2 interface show lightning/msg/SlamInput
ros2 interface show livox_ros_driver2/msg/CustomMsg
```
Continue with [AGX/Mid360 setup](#62-lite3-edu-with-agx-mid360).
5.4 Build settings and subsequent updates
`build_robot.sh` checks dependencies, builds Pangolin and Lightning-LM, and
installs into this checkout. It selects at most four jobs according to available
RAM. On RK3588 it uses the four A76 cores at reduced scheduling priority; AGX
retains its available CPU affinity. Runtime CPU placement is separate.
To inspect requirements and selected resources without building:
```bash
cd ~/lightning-lm
source /opt/ros/humble/setup.bash
bash scripts/build_robot.sh --check
```
Use Foxy on AOS. Missing dependencies are reported rather than downloaded
implicitly; transfer any required packages matching the robot's Ubuntu/ARM
installation before using `--offline /path/to/packages`.
For code updates, repeat the archive/transfer/extract/build commands for your
robot. Keep the existing build directories to reuse compiled objects and cache
entries. To reduce compiler jobs, prefix the build with
`CMAKE_BUILD_PARALLEL_LEVEL=2`. Preserve the robot's sensor clock synchronization.
Existing `data/onboard.yaml` settings survive source updates; see
[configuration changes](#64-saved-configuration).
6. Connect to robots and prepare sensors
Complete deployment first. Use your robot's connection command for each new
terminal. Ubuntu can display forwarded RViz windows through standard SSH; on
Windows, use an X server such as MobaXterm with X11 forwarding enabled.
6.1 M20 Pro
**Relay:** from a laptop terminal, connect to NOS and start point-cloud access:
```bash
ssh user@10.21.31.106
```
On **NOS**:
```bash
sudo systemctl start multicast-relay.service
sudo systemctl status multicast-relay.service
exit
```
Optionally run `sudo systemctl enable multicast-relay.service` on NOS to start it
after reboot. Leave firmware sensor and control services running.
**Each AOS terminal:** connect from your laptop's graphical desktop:
```bash
ssh -Y -C user@10.21.33.103
```
Use `ssh -Y -C user@10.21.41.1` for the additional adapter address.
On **AOS**, enter the deployment directory and a root application shell:
```bash
cd ~/lightning-lm
sudo env DISPLAY="$DISPLAY" XAUTHORITY="${XAUTHORITY:-$HOME/.Xauthority}" bash
export LIGHTNING_DIR=/home/user/lightning-lm
cd "$LIGHTNING_DIR"
```
This preserves the new connection's X11 authorization. The explicit root-shell
path assumes the standard `user` deployment; adjust it if installed elsewhere.
`LIGHTNING_DIR` carries this path into the shared commands and tmux sessions.
**Configure once**, in that root shell:
```bash
cd "$LIGHTNING_DIR"
source /opt/robot/scripts/setup_ros2.sh
python3 scripts/onboard.py configure m20
python3 scripts/onboard.py status
```
Proceed when `status` prints **SUCCESS**. Later onboard commands load their own
ROS/DDS environment and saved settings; no repeated exports are needed. For a
manual sensor check with direct `ros2` commands, source the firmware environment:
```bash
cd "$LIGHTNING_DIR"
source /opt/robot/scripts/setup_ros2.sh
ros2 topic hz /LIDAR/POINTS
```
6.2 Lite3 EDU with AGX and Mid360
**Each AGX terminal:** connect directly through the robot from a new laptop
terminal, including for RViz:
```bash
ssh -Y -C -o HostKeyAlias=lightning-agx -J ysc@192.168.2.1 ysc@192.168.1.45
```
Verify the host identity when first connecting or if its key changes. The jump
host needs no X server. On **AGX**, prepare each new terminal:
```bash
cd ~/lightning-lm
export LIGHTNING_DIR="$PWD"
```
Then configure the deployment **once**:
```bash
cd "$LIGHTNING_DIR"
python3 scripts/onboard.py configure agx
```
The full Livox driver must already be built in its own workspace. Configuration
finds a unique installed workspace; if ambiguous, specify it explicitly:
```bash
cd "$LIGHTNING_DIR"
python3 scripts/onboard.py configure agx --driver-workspace /path/to/livox_driver_workspace
```
The default launch file is `msg_MID360s_launch.py`. For an original Mid360, add
`--driver-model mid360` to `configure agx`. This repository includes Livox message
definitions, not the hardware driver.
**Start the driver** in a separate AGX terminal, preferably inside
[tmux](#63-keep-running-through-ssh-disconnects-with-tmux):
```bash
cd "$LIGHTNING_DIR"
python3 scripts/onboard.py lidar
```
The driver supplies both `/livox/lidar` and `/livox/imu`. Keep one driver running
across mapping/localization sessions; restart it only after it stops or AGX
reboots. An existing working driver is reused, not moved into tmux.
**Check readiness** in the application terminal:
```bash
cd "$LIGHTNING_DIR"
python3 scripts/onboard.py status
```
Proceed when it prints **SUCCESS**. Later commands load the saved environment
automatically. Driver, algorithm, and viewer use ROS domain 42 and localhost DDS;
the driver still receives LiDAR packets through Ethernet.
6.2.1 Internal-IMU calibration
The [Mid360 manual](https://terra-1-g.djicdn.com/851d20f7b9f64838a34cd02351370894/Livox/Livox_Mid-360_User_Manual_EN.pdf)
and [Mid360s manual, page 22](https://terra-1-g.djicdn.com/65c028cd298f4669a7f0e40e50ba1131/Mid-360S/UM/20260601/Livox_Mid-360s_User_Manual_en.pdf#page=22)
place the internal IMU at `[0.011, 0.02329, -0.04412]` metres in LiDAR coordinates,
with parallel axes. For this project's `p_imu = R * p_lidar + T` convention,
`configure agx` uses identity rotation and `T = [-0.011, -0.02329, 0.04412]`.
Keep the driver's point-cloud transform at identity when using these values.
This is separate from a robot URDF's LiDAR-to-body transform. The recording preset
is preserved; the internal-IMU values live in the generated runtime YAML.
6.3 Tmux: create, detach, reconnect, and stop
Tmux keeps the driver's or algorithm's terminal alive on the robot when SSH
or Wi-Fi disconnects. Complete configuration first. Use **root on M20 AOS** and
**ysc on AGX**; sessions belong to the host and account that created them.
Check installation with `tmux -V` (Ubuntu package `tmux`).
**Create an algorithm session** in the prepared robot shell:
```bash
cd "$LIGHTNING_DIR"
tmux new-session -s lightning -c "$LIGHTNING_DIR"
```
Inside it, set the path for the shared commands, then run
[mapping](#71-start-mapping) or [localization](#81-load-the-map-and-start-localization):
```bash
export LIGHTNING_DIR="$PWD"
```
Run one algorithm at a time.
**Create a separate AGX driver session**, then run the driver command from 6.2:
```bash
cd "$LIGHTNING_DIR"
tmux new-session -s lightning-lidar -c "$LIGHTNING_DIR"
```
Inside the driver session, also run `export LIGHTNING_DIR="$PWD"` before the
driver command. Skip this session on M20. Tmux cannot adopt a driver already running in
another terminal; that original terminal must remain open until you stop it.
**Detach:** press **Ctrl+B**, release, then press **D**. The application keeps
running; you can now close SSH.
**Find and reconnect:** reconnect to the same robot/account using 6.1 or 6.2:
```bash
tmux list-sessions
tmux attach-session -d -t lightning
```
Use `-t lightning-lidar` for the driver. `-d` detaches an old SSH client while
preserving the process. Attach to an existing session instead of creating a
duplicate. **Ctrl+B, then S** also lists sessions inside tmux.
**Stop:** save the map first using [7.3](#73-save-the-map), then attach to the
algorithm session and press **Ctrl+C**. Wait for the shell prompt and type `exit`.
Do the same for the driver session when it is no longer needed. To remove an
already-stopped session:
```bash
tmux kill-session -t lightning
tmux list-sessions
```
“No server running” is normal after the last session ends. Tmux survives SSH
loss, not a robot reboot or an application crash. Viewers run outside tmux;
[7.2](#72-view-the-location-lidar-and-trajectory) explains reopening their windows.
6.4 Saved configuration and parameter changes
`configure` saves deployment settings in `data/onboard.json` and sensor parameters
in `data/onboard.yaml`. Every `onboard.py` command loads them automatically.
SSH display credentials always come from the current connection.
| Default | M20 Pro | Lite3 EDU / AGX |
|---|---|---|
| Sensor preset | `m20_pro.yaml` | `mid360.yaml` with internal-IMU extrinsics |
| Pangolin | Disabled | Disabled |
| `fasterlio.skip_lidar_num` | `2` | `2` |
| `loop_closing.ndt_score_th` | `0.6` | `0.6` |
| Runtime CPU placement | Estimation: 7; RViz: 6 | Inherited available CPUs |
Scan skipping applies LiDAR corrections every second scan, approximately 5 Hz for
10 Hz input. IMU prediction and deskewing still process every scan. Dataset presets
keep scan skipping at `0`.
**Existing configurations are preserved.** Transferring updated sources and
rerunning `configure` does not replace `data/onboard.yaml`. To change a parameter,
edit its existing entry in that file and restart the algorithm; a YAML-only change
needs no rebuild. Preserve the sensor calibration when updating defaults.
To deliberately replace the runtime configuration, add
`--config /path/to/calibrated_sensor.yaml` to your robot's `configure` command.
The supplied calibration and scan-skipping settings are retained; Pangolin is
disabled. See [implementation notes](doc/implementation.md) for parameter details.
7. Onboard mapping
Complete [section 6](#6-connect-to-robots-and-sensor-drivers). Use the prepared
root shell on M20 or `ysc` shell on AGX; both set `LIGHTNING_DIR` to the deployment
directory. Leave the sensors running and keep the robot stationary during
initialization.
7.1 Start mapping
Inside the prepared application terminal or tmux session:
```bash
cd "$LIGHTNING_DIR"
python3 scripts/onboard.py status
python3 scripts/onboard.py slam
```
Start only after `status` reports **SUCCESS**. To record the inputs for later
debugging, use `python3 scripts/onboard.py slam --record-bag` instead of `slam`.
Recording is off by default; see [7.4](#74-record-and-replay) for the saved files
and replay command. Terminal fields are explained in [section 9.1](#terminal-status).
7.2 Open or reopen the live RViz window
From a **new laptop terminal**, use the complete X11 connection command for
[M20](#61-m20-pro) or [AGX](#62-lite3-edu-with-agx-mid360). Enter the M20 root shell
as documented there. Stay **outside tmux**. On the robot:
```bash
cd "$LIGHTNING_DIR"
echo "$DISPLAY"
python3 scripts/onboard.py rviz
```
`DISPLAY` must be nonempty. The window shows the current LiDAR scan, a red
location arrow, and a yellow trajectory. It does not show the full map.
After an SSH disconnect, reconnect and run these commands again. The new window
recovers the retained trajectory if the algorithm is still running in tmux.
An old X11 window cannot migrate to a new connection. Restarting the algorithm
starts a new trajectory.
Scans/poses update at up to 5 Hz; the retained path refreshes at 1 Hz. RViz is
limited to 5 FPS, with actual rendering dependent on the connection. To see the
whole route, change **Target Frame** from `lightning_lidar` to `map` and zoom out.
Historical trail points retain their estimates from when they were recorded.
7.3 Save the map and stop mapping
In another prepared terminal on the **same robot computer/account**:
```bash
cd "$LIGHTNING_DIR"
python3 scripts/onboard.py save onboard_map
```
Wait for `response: 0`. The map is saved to `data/onboard_map/` under the mapping
application's working directory. Use a new map ID for each run and keep the
[complete directory](#3-map-a-recording).
Then press **Ctrl+C** in the mapping terminal. If recording was enabled, wait
for **SLAM recording complete** and the shell prompt before ending the session.
Close the live RViz window separately. The sensor driver can remain running for
localization or another mapping run.
7.4 Record and replay SLAM inputs
`slam --record-bag` saves a session under `log/lightning-.../`; its path is printed
at startup. Keep the whole directory: `slam_input/` is the ROS 2 bag,
`slam_config.yaml` is the runtime configuration, and `recording.yaml` reports
completion and input counts alongside the detailed log.
The bag contains synchronized inputs actually used by SLAM: selected LiDAR
points before deskewing and their paired IMU samples. Initialization and
correction-skipped scans are included, so 10 Hz input normally remains about
10 recorded groups per second with `skip_lidar_num: 2`. Raw discarded points,
unpaired samples, maps, and visualization topics are excluded.
The writer runs separately with a bounded buffer. If storage cannot keep up,
it reports **INCOMPLETE** while SLAM continues. `complete: true` and zero
`unrecorded_scans` in `recording.yaml` confirm recorder coverage; they do not rule
out earlier DDS/input-queue losses. Check the detailed log too.
**Replay on the workstation** after copying the session directory:
```bash
cd ~/lightning-lm
source scripts/setup.bash
export SESSION="/absolute/path/to/copied/lightning-session"
ros2 bag info "$SESSION/slam_input"
ros2 run lightning run_slam_offline \
--config "$SESSION/slam_config.yaml" \
--input_bag "$SESSION/slam_input" --replay_recording \
--map_path "$PWD/data/replayed_map"
```
Choose a new output directory. `--replay_recording` is required because these
bags contain `lightning/msg/SlamInput`, not raw driver topics. Replay preserves
synchronized sensor values and grouping, not onboard thread scheduling.
For a live replay viewer, copy `slam_config.yaml`, set `system.with_ui: true`
in that copy, and pass it as `--config` from an OpenGL desktop. Onboard session
configs disable this viewer by default. Direct mapping executables also accept
`--record_bag` to create this recording format.
7.5 View a saved map on the robot
In a fresh X11-forwarded robot terminal, outside tmux:
```bash
cd "$LIGHTNING_DIR"
python3 scripts/onboard.py rviz --map data/onboard_map
```
The map renders on the robot and SSH forwards the window. No driver or estimator
is required. Close the window or press **Ctrl+C** in this terminal to stop the
viewer and its map publisher. If prompted to save RViz settings, choose **Discard**;
this concerns the temporary display configuration, not the map.
7.5.1 Display orientation and point budget
The viewer accepts a map directory or `.pcd` file and fits the camera to the
cloud. It uniformly samples at most 500,000 points for display; `--max-points 100000`
reduces rendering load. Files remain unchanged. X11 drawing still uses Wi-Fi
bandwidth even though the point cloud stays onboard.
For maps saved through the onboard launcher, `map_view.json` records startup
gravity for a level display. The PCDs, map tiles, estimated poses, and calibration
retain their original coordinates. Keep the sidecar with its map.
Use `--original-frame` to disable display leveling. Older maps without the sidecar
retain their original frame; `--up X Y Z` accepts an upward vector measured in
that map's initial IMU frame. Do not use current gravity from an unrelated pose
or substitute the robot's body mounting for LiDAR-to-IMU calibration.
8. Onboard localization
Stop mapping first. Use the same prepared robot account, saved configuration,
and running sensor driver as in [section 6](#6-connect-to-robots-and-sensor-drivers).
8.1 Start localization
Inside the prepared application terminal or tmux session:
```bash
cd "$LIGHTNING_DIR"
python3 scripts/onboard.py status
python3 scripts/onboard.py localize data/onboard_map --global-init
```
Proceed only when `status` reports **SUCCESS**. `--global-init` searches the
mapping views in `places.bin`, allowing a start away from the mapping origin.
Keep the robot stationary during IMU initialization and wait for a confirmed
location. For an older map without `places.bin`, use default/manual initialization
as described in 8.4.
8.2 View localization
Close any viewer from the previous mapping run and use the
[RViz connection and command in 7.2](#72-view-the-location-lidar-and-trajectory).
It shows the current scan, accepted location, and retained localization trajectory.
The reference map is used onboard without being displayed.
Before initialization succeeds the display remains empty. Rejected matches leave
the last valid scan/pose visible; check the terminal if the display stops updating.
8.3 Stop localization
Press **Ctrl+C** in the localization terminal and wait for the shell prompt.
Accepted map poses are written to `data/localization_onboard.tum`; an existing
trajectory at that path is replaced. The reference map is preserved.
Close RViz separately. When finished with all runs, stop the AGX driver you
started. Leave the robot's firmware sensor and control services running.
8.4 Initialization and ROS topics
Automatic recognition requires distinctive overlap and matching calibration;
see [initialization behavior](#43-initialization). Without `--global-init`, start
near the mapping origin or supply a manual estimate. RViz's **2D Pose Estimate**
tool publishes to `/lightning/initialpose` with frame `map`. A manual estimate
overrides a pending automatic search. Use a full 3D pose for a different floor
or a map whose Z axis is tilted.
The launcher remaps TF to avoid M20 firmware conflicts:
| Output/input | Topic |
|---|---|
| Estimator pose | `/lightning/pose` |
| Live scan / matching pose | `/lightning/current_scan` / `/lightning/current_pose` |
| Retained trajectory | `/lightning/trajectory` |
| Lightning transforms | `/lightning/tf`, `/lightning/tf_static` |
| Manual initial pose | `/lightning/initialpose` |
The RViz child frame is `lightning_lidar`; its pose/scan timestamps correspond to
the same accepted scan. The map format is shared with dataset workflows; transfer
the complete directory and use the appropriate calibration.
9. Diagnostics and reference
9.1 Terminal status, confidence, velocity, and logs
Mapping/localization refresh a compact display once per second on a terminal.
Warnings, errors, and map-save events stay in scrollback; repeated warnings are
counted. Full diagnostics are saved under the `log/` session path printed at
startup. Redirected output uses plain periodic summaries.
| Field | Meaning |
|---|---|
| LiDAR / IMU / LIO Hz | Wall-time receive/correction rates; offline processing can exceed recorded sensor frequency. |
| `matches accepted/total` | Accepted scan-to-map matches out of attempted matches. |
| `score` / `confidence` | NDT matching score: higher means stronger geometric agreement, not a probability or percentage. It can exceed 1. |
| `accepted` / `rejected` | Latest match decision; rejected matches do not update the displayed map position. |
| `LIO xyz` / `Map xyz` | Mapping odometry / last accepted map position, in metres. |
| `vel_norm` / `v_norm` | Estimated 3D odometry speed in m/s, available in detailed motion-prediction diagnostics. |
Localization initialization requires confidence `1.8`; tracking defaults to `1.0`.
Matches must also converge and be finite; global initialization adds ambiguity
and confirmation checks. These are separate from the mapping loop threshold.
Velocity is estimated from sensor timestamps, not commanded robot speed or
workstation processing rate. The compact display omits velocity; conditional
`vel_norm`/`v_norm` log entries are not emitted for every scan, so absence does
not mean zero speed.
To change terminal output, append `--console=plain` or `--console=verbose` to a
mapping/localization command. These flags also work with `onboard.py slam` and
`onboard.py localize`. Default `auto` selects refreshing output when supported.
9.2 Sensor delivery, DDS, and blank windows
`onboard.py status` checks both sensor streams and reports **SUCCESS** or
**NOT READY**, with missing topics/publishers and a next step. It also reports an
existing estimator. `status --json` returns the raw report; exit status is 0 for
successful delivery and 1 for a missing stream or failed check. Topic discovery
alone does not prove delivery. This short check does not establish clock alignment,
calibration, or sustained performance.
For direct ROS commands, source `scripts/setup.bash` in every application/player
terminal; on M20 source the firmware environment in the root shell as shown in
6.1. `onboard.py` configures its child processes, not the parent shell.
The supplied Fast DDS profile uses a 64 MiB shared-memory segment per participant
and an 8 MiB message limit. Both presets subscribe best effort and can receive
reliable publishers too. Apply the same profile/domain in the physical driver's
own workspace before restarting it; do not source Lightning-LM's message-only
Livox overlay into the full driver workspace. Shared memory applies on one host;
cross-host UDP and Wi-Fi capacity need separate checks. Reduce playback `--rate`
if processing falls behind.
For Qt `could not connect to display` or an `xcb` error, check `echo "$DISPLAY"`
in a fresh `ssh -Y -C` session from the laptop desktop. ROS exports cannot add X11
forwarding to an existing plain SSH connection. Keep the SSH-assigned display and
authorization; do not replace them with `:0` or a laptop address. The launcher
selects software OpenGL for forwarded RViz.
If a window opens but is empty, check sensor delivery and localization
initialization first, then adjust the camera. For Pangolin, use the mouse to
rotate/pan/zoom and enable **Follow** to track the robot. For RViz, inspect display
status and use the target-frame controls in 7.2.
9.3 Validation and resource limits
The seven-recording reference qualification covered offline/online mapping and
localization on Humble/x86 with visualization and 1× online playback. Its original
sources/settings and limitations are preserved in [doc/validation.md](doc/validation.md);
it is a historical reference, not a fresh qualification of every later change.
Library F retains visible revisit misalignment, and there is no surveyed ground
truth. Operational success does not guarantee perfect reconstruction.
Onboard localization matches at up to 5 Hz; sensor queues are bounded and distant
map tiles are unloaded. Mapping memory grows with route length because loop
closure retains keyframes. Stationary robot checks and workstation memory figures
do not establish moving-route CPU/RAM limits. See
[implementation and resource notes](doc/implementation.md) for details.
10. Maintenance and license
[AGENTS.md](AGENTS.md) guides AI agents on repository boundaries, platform support,
algorithm invariants, deployment, and verification. Technical explanations are in
[doc/implementation.md](doc/implementation.md); historical qualification evidence
is in [doc/validation.md](doc/validation.md).
Based on [Lightning-LM](https://github.com/gaoxiang12/lightning-lm).
See [LICENSE.txt](LICENSE.txt) for the BSD 3-Clause license. Bundled dependencies
retain their own licenses.