# 🚀 Getting Started
## 📋 API Configuration
VideoLingo requires an LLM and TTS(optional). For the best quality, use claude-3-5-sonnet-20240620 with Azure TTS. Alternatively, for a fully local setup with no API key needed, use Ollama for the LLM and Edge TTS for dubbing. In this case, set `max_workers` to 1 and `summary_length` to a low value like 2000 in `config.yaml`.
### 1. **Get API_KEY for LLM**:
| Recommended Model | Recommended Provider | base_url | Price | Effect |
|:-----|:---------|:---------|:-----|:---------|
| claude-3-5-sonnet-20240620 | [yunwu.ai](https://yunwu.ai/register?aff=TXMB) | https://yunwu.ai | $1 / 1M tokens | 🤩 |
| gpt-4.1 | [yunwu.ai](https://yunwu.ai/register?aff=TXMB) | https://yunwu.ai | $0.5 / 1M tokens | 🤩 |
| gemini-2.0-flash | [302AI](https://gpt302.saaslink.net/C2oHR9) | https://api.302.ai | $0.3 / 1M tokens | 😃 |
| deepseek-v3 | [302AI](https://gpt302.saaslink.net/C2oHR9) | https://api.302.ai | $1 / 1M tokens | 🥳 |
| qwen2.5-coder:32b | [Ollama](https://ollama.ai) | http://localhost:11434 | 0 | 😃 |
Note: Supports OpenAI format, you can try different models at your risk. However, the process involves multi-step reasoning chains and complex JSON formats, **not recommended to use models smaller than 30B**.
### 2. **TTS API**
VideoLingo provides multiple TTS integration methods. Here's a comparison (skip if only using translation without dubbing)
| TTS Solution | Provider | Pros | Cons | Chinese Effect | Non-Chinese Effect |
|:---------|:---------|:-----|:-----|:---------|:-----------|
| 🔊 Azure TTS ⭐ | [302AI](https://gpt302.saaslink.net/C2oHR9) | Natural effect | Limited emotions | 🤩 | 😃 |
| 🎙️ OpenAI TTS | [302AI](https://gpt302.saaslink.net/C2oHR9) | Realistic emotions | Chinese sounds foreign | 😕 | 🤩 |
| 🎤 Fish TTS | [302AI](https://gpt302.saaslink.net/C2oHR9) | Authentic native | Limited official models | 🤩 | 😂 |
| 🎙️ SiliconFlow FishTTS | [SiliconFlow](https://cloud.siliconflow.cn/i/ttKDEsxE) | Voice Clone | Unstable cloning effect | 😃 | 😃 |
| 🗣 Edge TTS | Local | Completely free | Average effect | 😐 | 😐 |
| 🗣️ GPT-SoVITS | Local | Best voice cloning | Only supports Chinese/English, requires local inference, complex setup | 🏆 | 🚫 |
- For SiliconFlow FishTTS, get key from [SiliconFlow](https://cloud.siliconflow.cn/i/ttKDEsxE), note that cloning feature requires paid credits;
- For OpenAI TTS, Azure TTS, and Fish TTS, use [302AI](https://gpt302.saaslink.net/C2oHR9) - one API key provides access to all three services
> Wanna use your own TTS? Modify in `core/all_tts_functions/custom_tts.py`!
SiliconFlow FishTTS Tutorial
Currently supports 3 modes:
1. `preset`: Uses fixed voice, can preview on [Official Playground](https://cloud.siliconflow.cn/playground/text-to-speech/17885302608), default is `anna`.
2. `clone(stable)`: Corresponds to fishtts api's `custom`, uses voice from uploaded audio, automatically samples first 10 seconds of video for voice, better voice consistency.
3. `clone(dynamic)`: Corresponds to fishtts api's `dynamic`, uses each sentence as reference audio during TTS, may have inconsistent voice but better effect.
How to choose OpenAI voices?
Voice list can be found on the [official website](https://platform.openai.com/docs/guides/text-to-speech/voice-options), such as `alloy`, `echo`, `nova`, etc. Modify `openai_tts.voice` in `config.yaml`.
How to choose Azure voices?
Recommended to try voices in the [online demo](https://speech.microsoft.com/portal/voicegallery). You can find the voice code in the code on the right, e.g. `zh-CN-XiaoxiaoMultilingualNeural`
How to choose Fish TTS voices?
Go to the [official website](https://fish.audio/en/) to listen and choose voices. Find the voice code in the URL, e.g. Dingzhen is `54a5170264694bfc8e9ad98df7bd89c3`. Popular voices are already added in `config.yaml`. To use other voices, modify the `fish_tts.character_id_dict` dictionary in `config.yaml`.
GPT-SoVITS-v2 Tutorial
1. Check requirements and download the package from [official Yuque docs](https://www.yuque.com/baicaigongchang1145haoyuangong/ib3g1e/dkxgpiy9zb96hob4#KTvnO).
2. Place `GPT-SoVITS-v2-xxx` and `VideoLingo` in the same directory. **Note they should be parallel folders.**
3. Choose one of the following ways to configure the model:
a. Self-trained model:
- After training, `tts_infer.yaml` under `GPT-SoVITS-v2-xxx\GPT_SoVITS\configs` will have your model path auto-filled. Copy and rename it to `your_preferred_english_character_name.yaml`
- In the same directory as the `yaml` file, place reference audio named `your_preferred_english_character_name_reference_audio_text.wav` or `.mp3`, e.g. `Huanyuv2_Hello, this is a test audio.wav`
- In VideoLingo's sidebar, set `GPT-SoVITS Character` to `your_preferred_english_character_name`.
b. Use pre-trained model:
- Download my model from [here](https://vip.123pan.cn/1817874751/8137723), extract and overwrite to `GPT-SoVITS-v2-xxx`.
- Set `GPT-SoVITS Character` to `Huanyuv2`.
c. Use other trained models:
- Place `xxx.ckpt` in `GPT_weights_v2` folder and `xxx.pth` in `SoVITS_weights_v2` folder.
- Following method a, rename `tts_infer.yaml` and modify `t2s_weights_path` and `vits_weights_path` under `custom` to point to your models, e.g.:
```yaml
# Example config for method b:
t2s_weights_path: GPT_weights_v2/Huanyu_v2-e10.ckpt
version: v2
vits_weights_path: SoVITS_weights_v2/Huanyu_v2_e10_s150.pth
```
- Following method a, place reference audio in the same directory as the `yaml` file, named `your_preferred_english_character_name_reference_audio_text.wav` or `.mp3`, e.g. `Huanyuv2_Hello, this is a test audio.wav`. The program will auto-detect and use it.
- ⚠️ Warning: **Please use English for `character_name`** to avoid errors. `reference_audio_text` can be in Chinese. Currently in beta, may produce errors.
```
# Expected directory structure:
.
├── VideoLingo
│ └── ...
└── GPT-SoVITS-v2-xxx
├── GPT_SoVITS
│ └── configs
│ ├── tts_infer.yaml
│ ├── your_preferred_english_character_name.yaml
│ └── your_preferred_english_character_name_reference_audio_text.wav
├── GPT_weights_v2
│ └── [your GPT model file]
└── SoVITS_weights_v2
└── [your SoVITS model file]
```
After configuration, select `Reference Audio Mode` in the sidebar (see Yuque docs for details). During dubbing, VideoLingo will automatically open GPT-SoVITS inference API port in the command line, which can be closed manually after completion. Note that stability depends on the base model chosen.
## 🛠️ Quick Start
VideoLingo supports Windows, macOS and Linux systems, and can run on CPU or GPU.
> **Note:** To use NVIDIA GPU acceleration on Windows, please complete the following steps first:
> 1. Install [CUDA Toolkit 12.6](https://developer.download.nvidia.com/compute/cuda/12.6.0/local_installers/cuda_12.6.0_560.76_windows.exe)
> 2. Install [CUDNN 9.3.0](https://developer.download.nvidia.com/compute/cudnn/9.3.0/local_installers/cudnn_9.3.0_windows.exe)
> 3. Add `C:\Program Files\NVIDIA\CUDNN\v9.3\bin\12.6` to your system PATH
> 4. Restart your computer
> **Note:** FFmpeg is required. Please install it via package managers:
> - Windows: ```choco install ffmpeg``` (via [Chocolatey](https://chocolatey.org/))
> - macOS: ```brew install ffmpeg``` (via [Homebrew](https://brew.sh/))
> - Linux: ```sudo apt install ffmpeg``` (Debian/Ubuntu) or ```sudo dnf install ffmpeg``` (Fedora)
Before installing VideoLingo, ensure you have installed Git and Anaconda.
1. Clone the project:
```bash
git clone https://github.com/Huanshere/VideoLingo.git
cd VideoLingo
```
2. Create and activate virtual environment (**must be python=3.10.0**):
```bash
conda create -n videolingo python=3.10.0 -y
conda activate videolingo
```
3. Run installation script:
```bash
python install.py
```
4. 🎉 Launch Streamlit app:
```bash
streamlit run st.py
```
5. Set key in sidebar of popup webpage and start using~
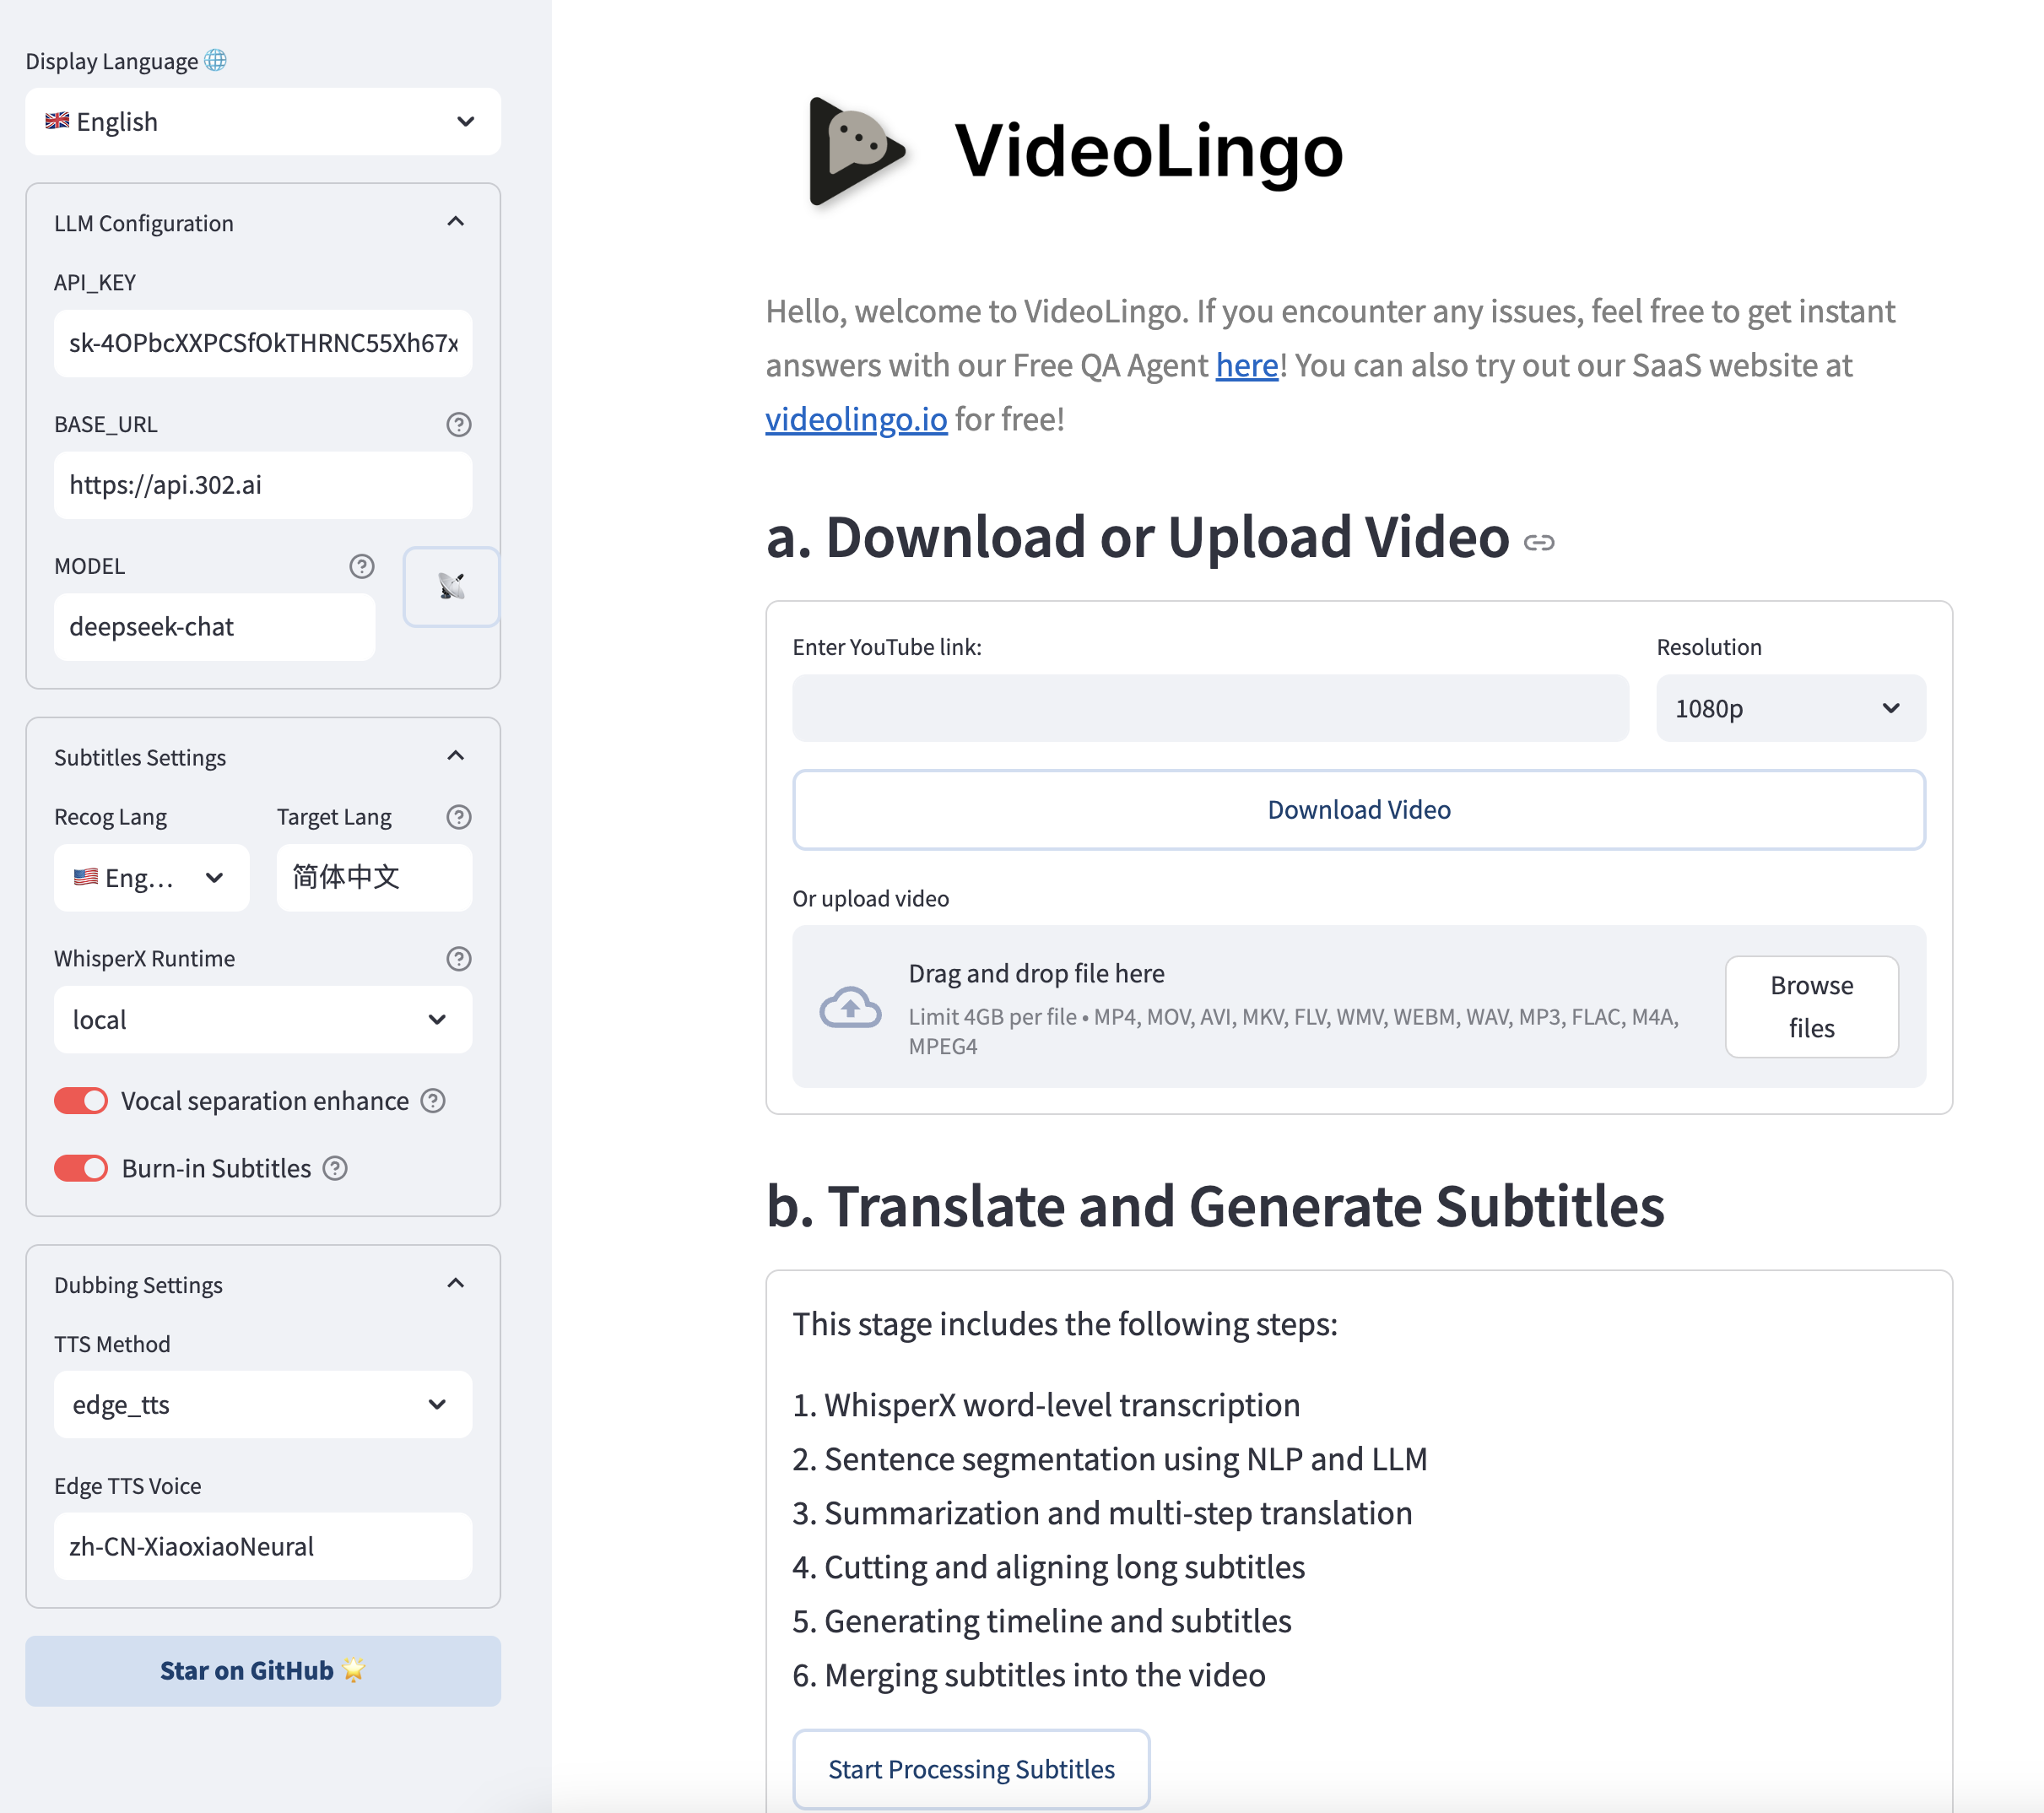
6. (Optional) More settings can be manually modified in `config.yaml`, watch command line output during operation. To use custom terms, add them to `custom_terms.xlsx` before processing, e.g. `Baguette | French bread | Not just any bread!`.
> Need help? Our [AI Assistant](https://share.fastgpt.in/chat/share?shareId=066w11n3r9aq6879r4z0v9rh) is here to guide you through any issues!
## 🏭 Batch Mode (beta)
Document: [English](/batch/README.md) | [Chinese](/batch/README.zh.md)
Note: This section is still in early development and may have limited functionality
## 🚨 Common Errors
1. **'All array must be of the same length' or 'Key Error' during translation**:
- Reason 1: Weaker models have poor JSON format compliance causing response parsing errors.
- Reason 2: LLM may refuse to translate sensitive content.
Solution: Check `response` and `msg` fields in `output/gpt_log/error.json`, delete the `output/gpt_log` folder and retry.
2. **'Retry Failed', 'SSL', 'Connection', 'Timeout'**: Usually network issues. Solution: Users in mainland China please switch network nodes and retry.
3. **local_files_only=True**: Model download failure due to network issues, need to verify network can ping `huggingface.co`.