5.2.4. Trainer sub system
Trainer Registration
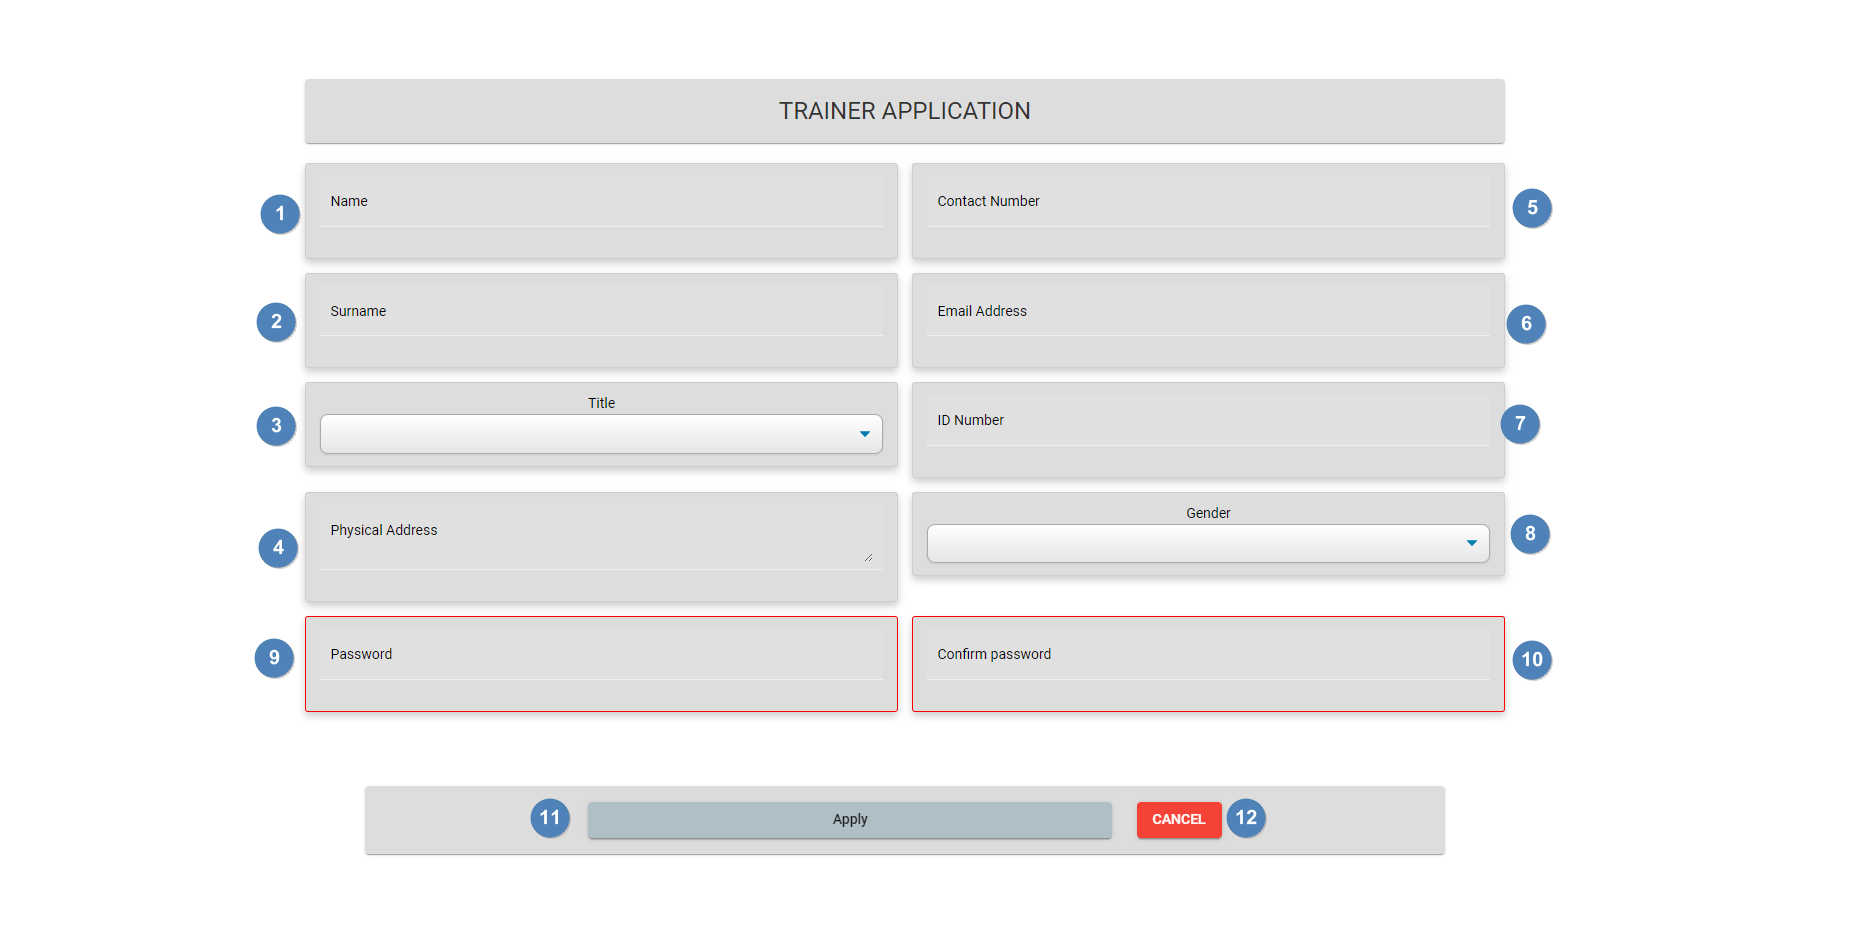
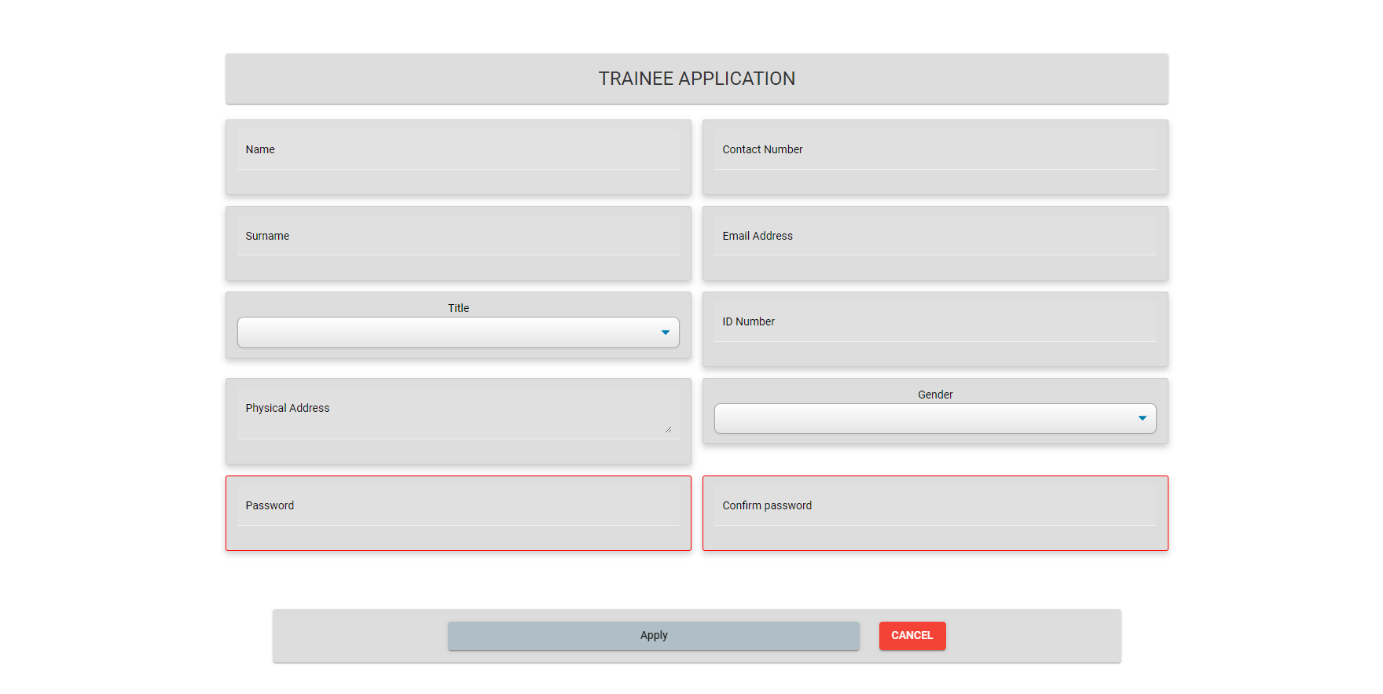
- Description: This page describes the instance when a user requests to be a trainee by entering details into a registration form and submitting their request. The user will be added to the database pending approval. If they are accepted, they will get access to the system.
- Navigation Process: The user will have to click on the “Trainer” sign-up button. Once they have clicked this button, they will be shown the registration form.
- Screen Layout:
- Detailed description of controls:
|
Reference |
Control |
Functionality Description |
|
1 |
Name Textbox |
This textbox allows the user to enter their first name into the registration form.
|
|
2 |
Surname Textbox |
This textbox allows the user to enter their surname into the registration form.
|
|
3 |
Title Dropdown |
This dropdown allows the user to select a title that will be used to refer to the user.
|
|
4 |
Physical Address Textbox |
This textbox allows the user to enter their physical address into the registration form.
|
|
5 |
Contact Number Textbox |
This textbox allows the user to enter a contact number into the registration form.
|
|
6 |
Email Address Textbox |
This textbox allows the user to enter an email address into the registration form, this will be used as the username.
|
|
7 |
ID Number Text Box |
This textbox allows the user to enter their ID number into the registration form.
|
|
8 |
Gender Dropdown |
This dropdown allows the user to select a gender they are comfortable with.
|
|
9 |
Password Textbox |
This allows the user to select a password which will be used to log into the system from registering.
|
|
10 |
Confirm Password Textbox |
This textbox will prompt the user to confirm the password they have selected.
|
|
11 |
Apply Button |
This button will allow the user to register. The fields will validate and will save to the database, and the user will become registered.
|
|
12 |
Cancel Button |
This button will cancel the registration and will return the user to the home page.
|


- Possible Error Messages:
- Invalid email address, please enter a valid email address.
- A character was added in the phone number text box, please enter numbers only.
- A JPG file was not selected, please select a JPG file only.
- Not all required fields were filled out, please fill out all required fields.
Maintain Profile Details
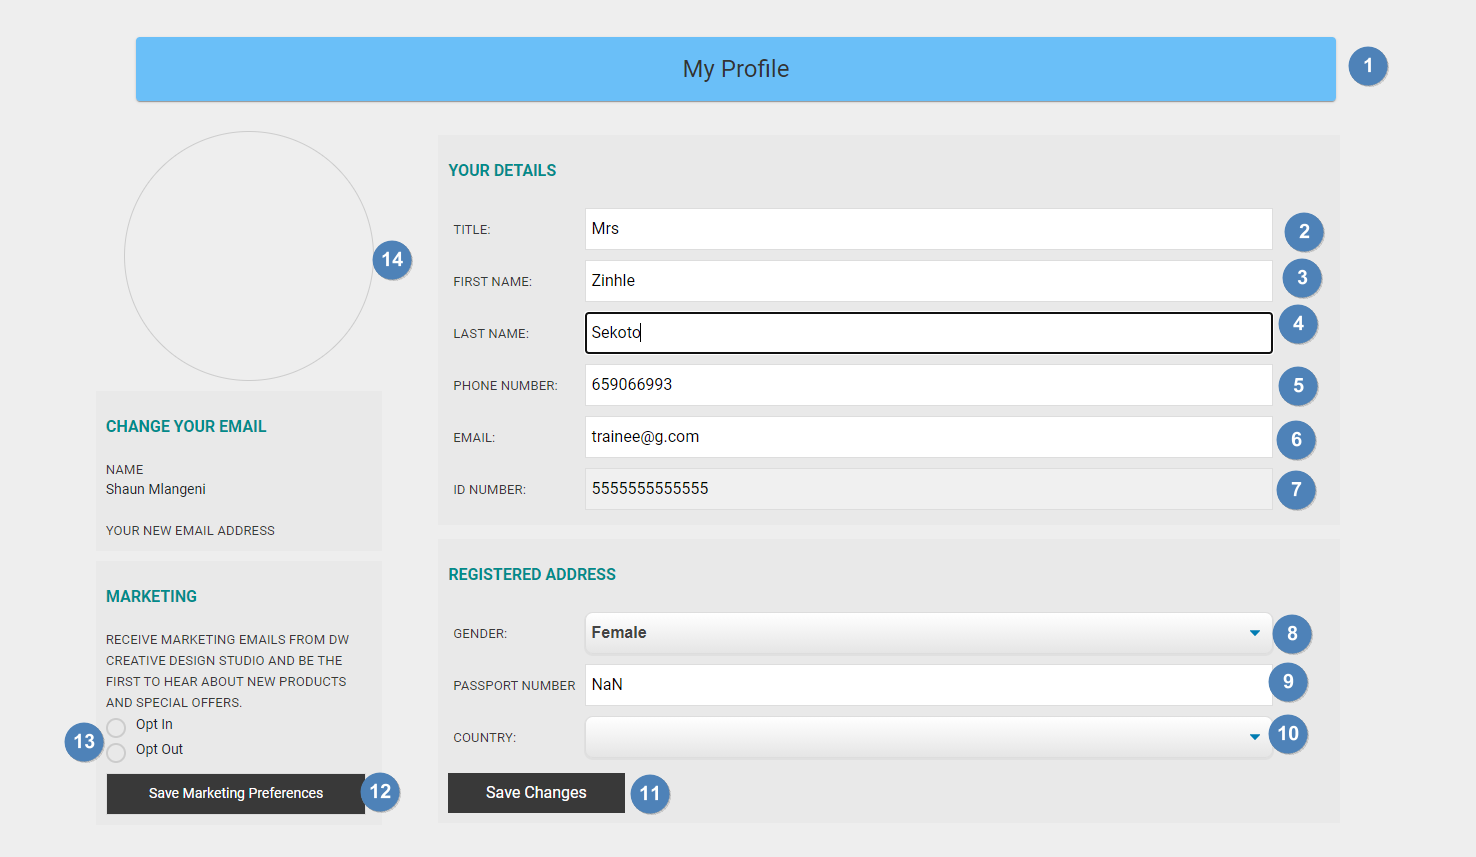
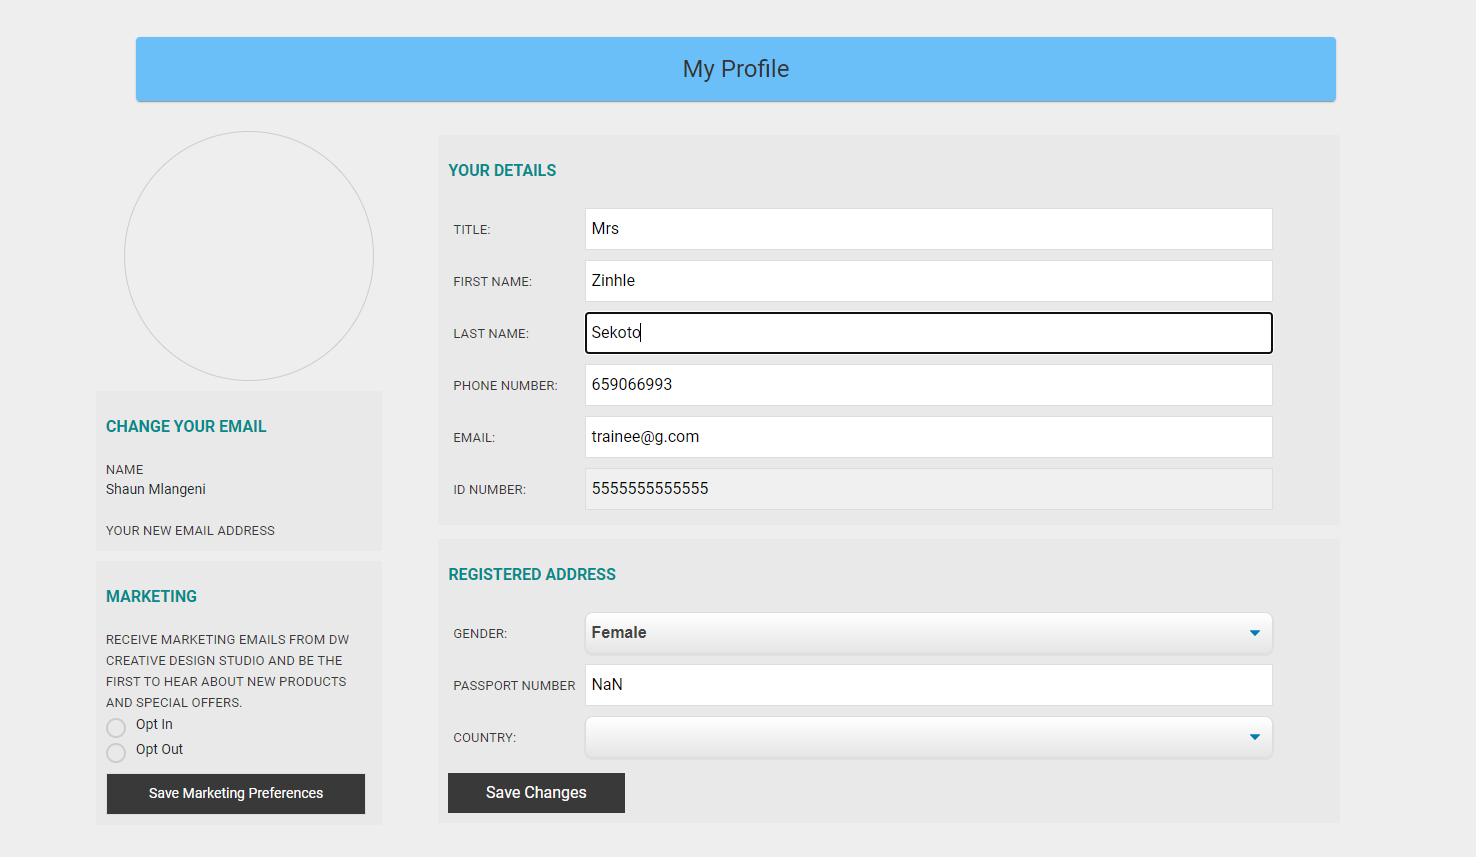
- Description: This page describes the instance where an accepted trainer desires to maintain their profile details. This entails entering details into the original registration form, by changing the desired detail in the desired field. They will then submit the changes and they will be added to the database.
- Navigation Process: This will open when the “Profile” Card is selected in the “Trainer Dashboard”. This can also be done using the “Maintain Profile” button on the navigation panel on the left-hand side of the “Trainer Dashboard”.
- Screen Layout:
- Detailed description of controls:
|
Reference |
Control |
Functionality Description |
|
1 |
Header |
This is used as an identifier for the user to be able to know what screen they are on.
|
|
2 |
Title Text Box |
This text box allows the user to input a title which they are comfortable to use.
|
|
3 |
First Name Text Box |
This text box allows the user to enter their first name to change their details on the database.
|
|
4 |
Last Name Text Box |
This text box allows the user to enter their last name to change their details on the database.
|
|
5 |
Phone Number Text Box |
This text box allows the user to enter their phone number to update their details on the database.
|
|
6 |
Email Text Box |
This text box allows the user to enter their email address to update their details on the database.
|
|
7 |
ID Number Text Box |
This cannot be changed; this text box is blacked out as it is not standard for users to be able to change their ID number.
|
|
8 |
Gender Dropdown |
This dropdown contains a list of genders that the user can use to change their gender on the database.
|
|
9 |
Passport Number Text Box |
This text box allows the user to change their passport number on the database.
|
|
10 |
Country Dropdown |
This allows the user to select a country where they are currently located.
|
|
11 |
Save Changes Button |
This means the database is updated with all the current details found in the text boxes and dropdowns.
|
|
12 |
Save Marketing Preferences Button |
This will save the status of marketing preferences making use of the POPI act.
|
|
13 |
Marketing Radio Button |
This will allow the user to change their marketing preferences and will update in the database.
|
|
14 |
Profile Picture |
This will allow the user to upload a new profile picture. Clicking on this will open the File Dialog and the user will be prompted to select a JPG file. This is then added to the database.
|


- Possible Error Messages:
- Invalid email address, please enter a valid email address.
- A character was added in the phone number text box, please enter numbers only.
- A JPG file was not selected, please select a JPG file only.
- Not all required fields were filled out, please fill out all required fields.
Set Availability
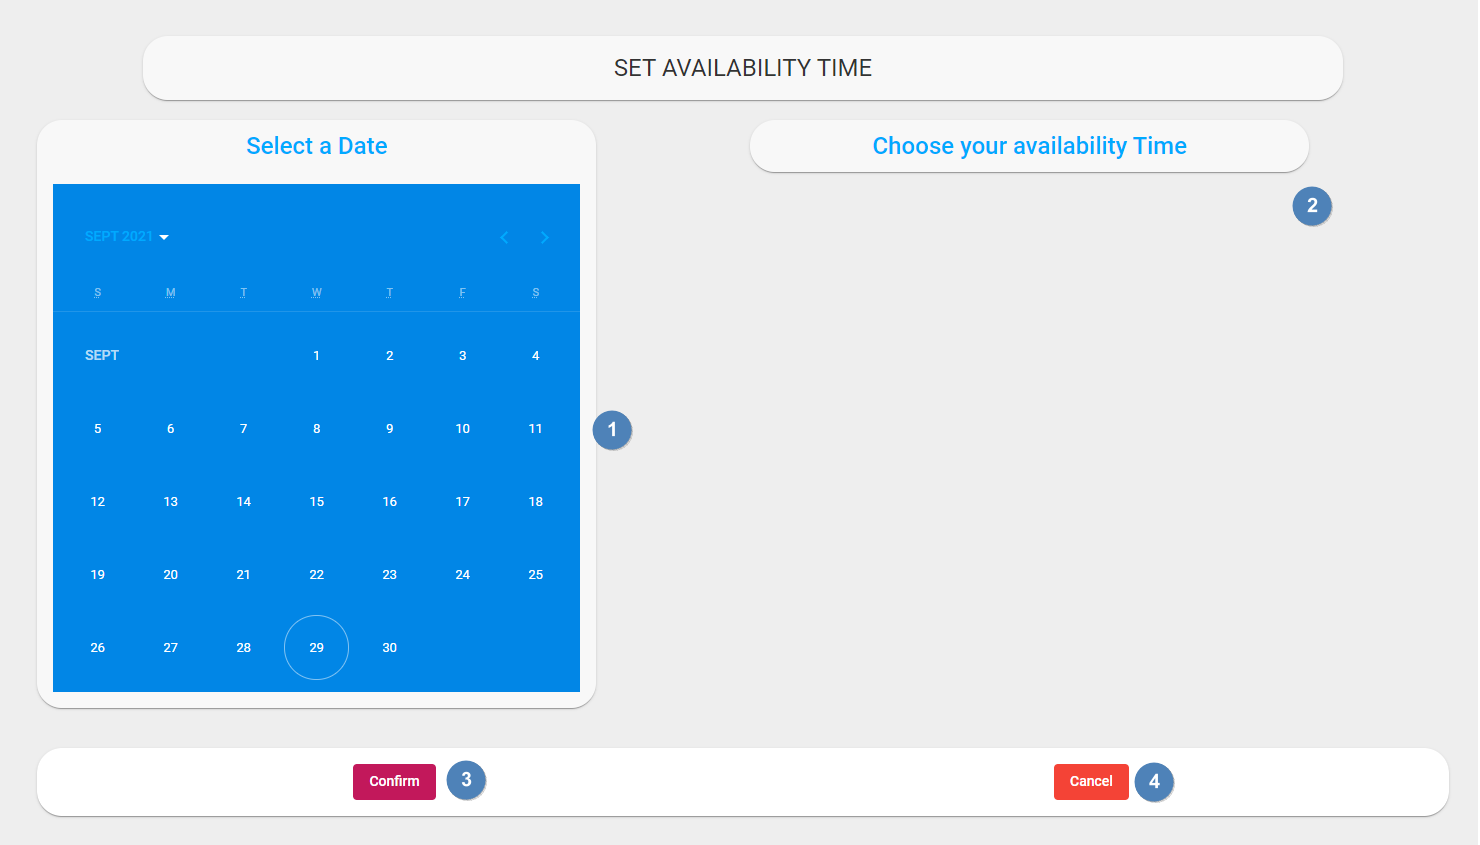
- Description: This page describes the instance where a trainer will be able to select slots in which they would like to make themselves available for sessions. The Trainer will select a specific date, they will then be prompted to select times on the day at which they would like to be available. They will then be prompted to confirm they would like to set their availability for the specified sessions.
- Navigation Process: The user will view this screen by clicking on the “Set Availability” Card on the “Trainer Dashboard”.
- Screen Layout:
- Detailed description of controls:
|
Reference |
Control |
Functionality Description |
|
1 |
Calendar View |
This calendar view shows all the dates that the Trainer can select to set their availability. The circled date is the current date.
|
|
2 |
Choose Slot Button |
The desired slots are to be selected using these buttons. Multiple can be chosen.
|
|
3 |
Confirm Button |
The selected date and time slot will be validated. The selected slots will then be added to the database and will display to the trainee that the trainer is associated to.
|
|
4 |
Cancel Button. |
This button will cancel the entire operation and will return the user to the main dashboard.
|


- Possible Error Messages:
- This slot has already been selected, please select a different slot.
- No slot has been selected, please select a slot before confirming.
Send Tasks
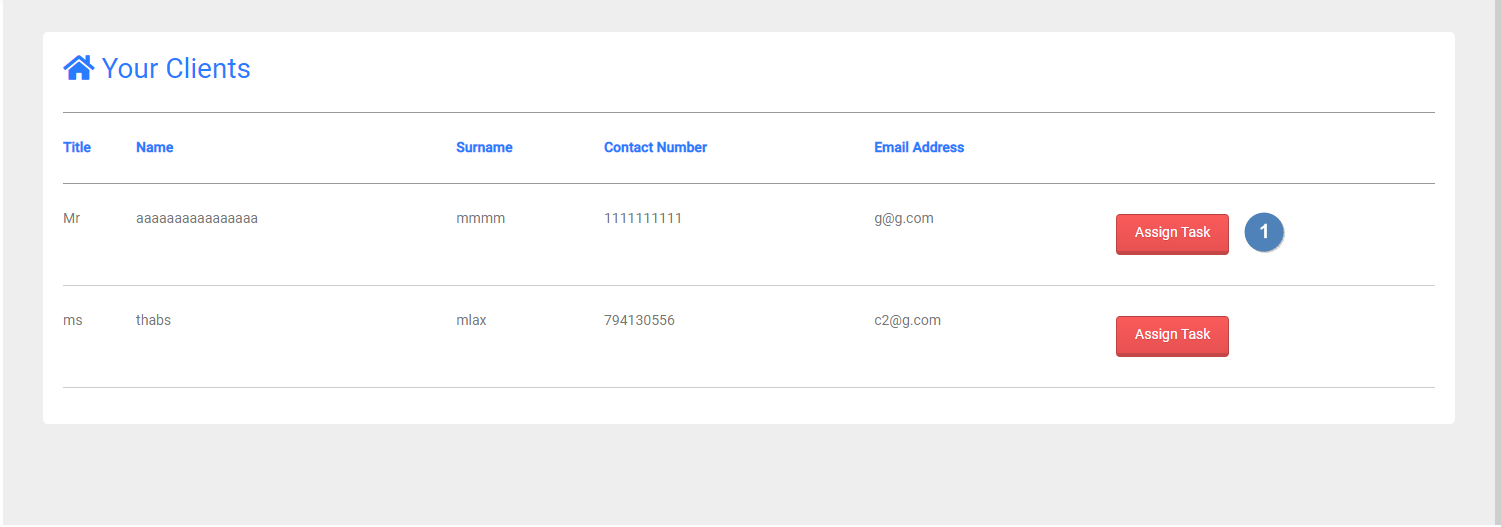
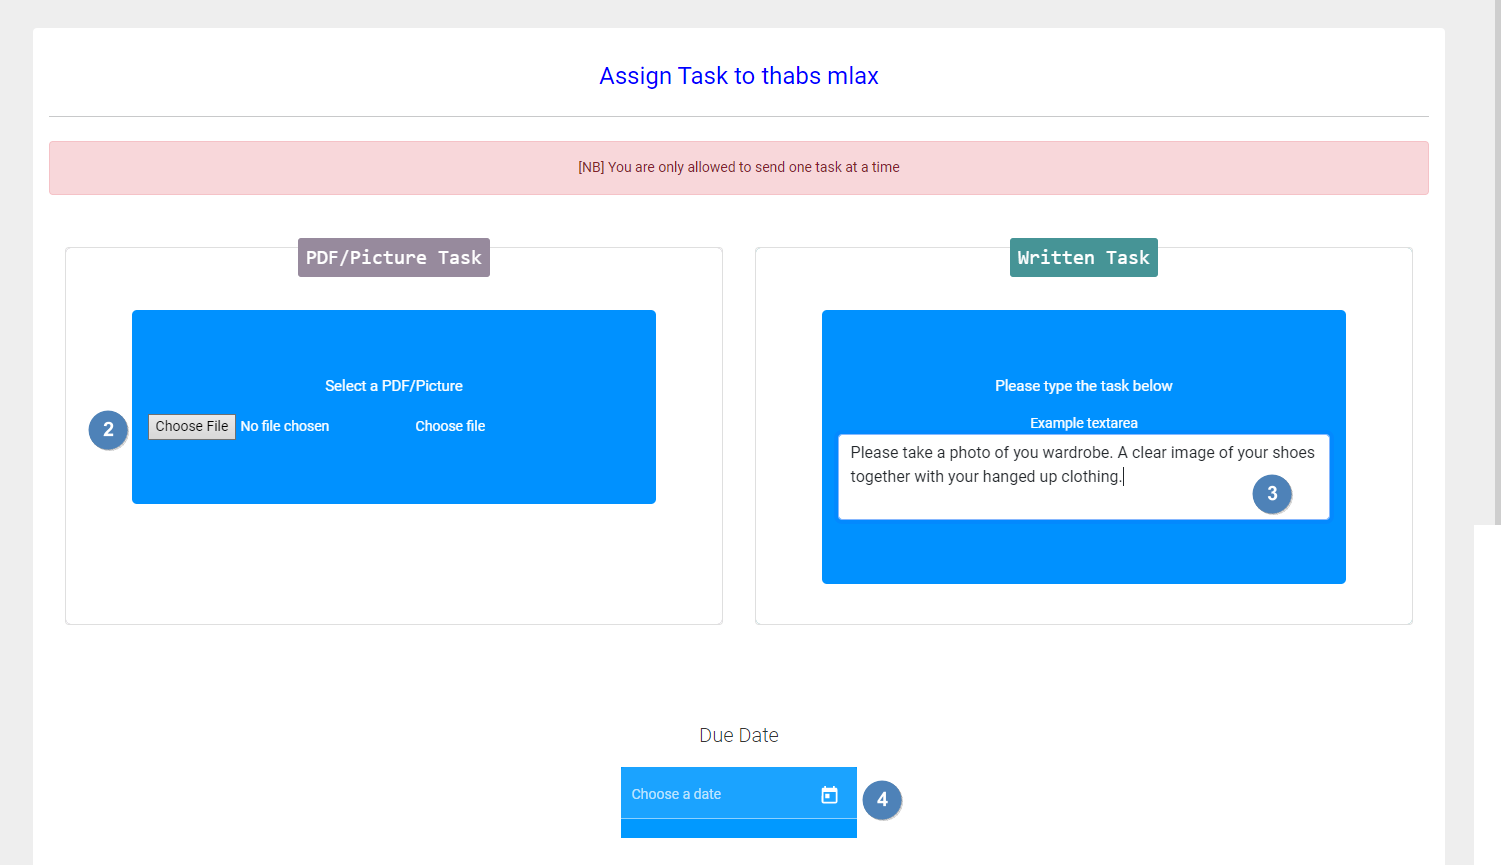
- Description: This describes how a Trainer will send a task to the Trainee. The trainer will view a list of trainees assigned to them and then they will click on the “Assign Task” Button. It will display a popup in which the Trainer must enter task details as well as a due date using the “Calendar”. They will then send the task to the trainee by clicking the “Send Task” Button.
- Navigation Process: The user will view this screen by clicking on the “Send Task” Card on the Trainer Dashboard.
- Screen Layout:


- Detailed description of controls:
|
Reference |
Control |
Functionality Description |
|
1 |
Assign Task Button |
This button will take the user to the second screen, where a task can be assigned to the trainee.
|
|
2 |
Choose File Button |
This button will open the file dialog, in which the user can select a file to upload to be given to the trainee.
|
|
3 |
Task Textbox |
This textbox can be used to give task details to a trainee if the user chooses to not upload a file. This will be displayed to the trainee in a table.
|
|
4 |
Date Picker |
This date picker will allow the user to select a due date for the task. It will open the calendar and will prompt the user to select a date that it must be completed by.
|


- Possible Error Messages:
- No task has been assigned, please enter valid task details before you can send a task.
Send Feedback
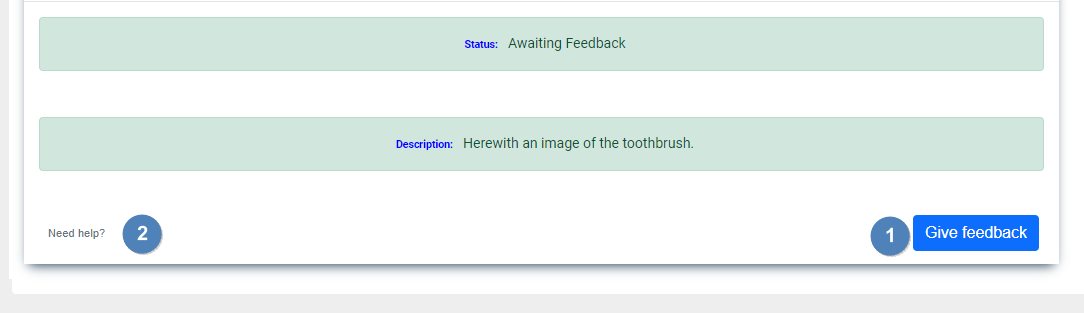
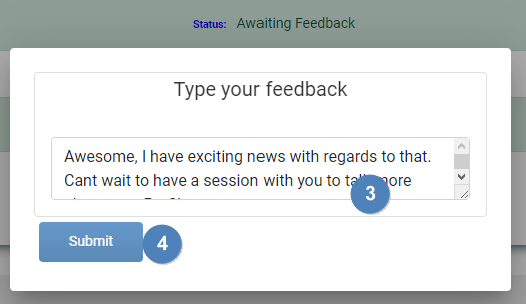
- Description: This screen describes the process in which a Trainer will send feedback to the Trainee. A list of tasks needing feedback will be presented to the user, they will select the task by clicking the “Give Feedback” Button. A popup will be displayed with a textbox. To submit the feedback the user will enter the feedback and click on the “Submit” Button.
- Navigation Process: The user will view this screen by clicking on the “Send Task” Card on the Trainer Dashboard.
- Screen Layout:


- Detailed description of controls:
|
Reference |
Control |
Functionality Description |
|
1 |
Give Feedback Button |
This button will allow the user to give feedback to the trainee with regards to a specific task. This button will open the popup which will prompt the user to send feedback.
|
|
2 |
Need Help Button |
This button will display a help screen.
|
|
3 |
Feedback Textbox |
This textbox will allow the user to send feedback with regards to a selected task.
|
|
4 |
Submit Button |
This button will save the feedback in the database, and it will be sent to the trainee.
|


- Possible Error Messages:
- No feedback provided, please enter feedback before submitting.
- No tasks have been completed, please wait for the Trainee to complete a task.
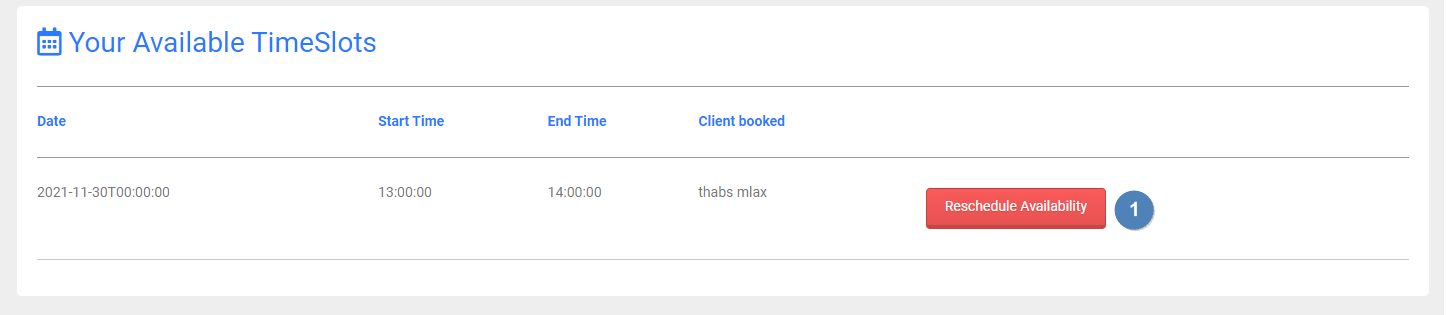
View Trainer Schedule
- Description: This allows the Trainer to view their schedule, based on what bookings have been booked by their trainees.
- Navigation Process: The Trainer will click on the “My Schedule” Card on the “Trainer Dashboard” to view this screen.
- Screen Layout:

- Detailed description of controls:
|
Reference |
Control |
Functionality Description |
|
1 |
Reschedule Availability Button |
This button will allow the user to reschedule their availability. This button will take the user to the “Set Availability” screen for the availability to be rescheduled.
|
- Possible Error Messages:
- No sessions have been booked.
View Trainee Questionnaire Results
- Description: The user will be able to view the questionnaire results of the trainees they train. A list of names will be displayed, and the results will be able to be viewed by clicking the “View” Button.
- Navigation Process: The Trainer will click on the “View Trainee Questionnaire” Card to view this screen.
- Screen Layout: No screen
- Detailed description of controls:
|
Reference |
Control |
Functionality Description |
|
1 |
|
|
|
|
|
|
- Possible Error Messages:
- No questionnaire has been completed, please wait for the Trainee to complete their questionnaire.
Created with the Personal Edition of HelpNDoc: Create help files for the Qt Help Framework