# AutoGLM For Android

**Native Android Phone AI Assistant Based on Open-AutoGLM**
[](LICENSE)
[](https://developer.android.com)
[](https://kotlinlang.org)
English | [中文](README.md)
## 📸 Screenshots
---
## 📖 Introduction
AutoGLM For Android is a native Android application developed based on the [Open-AutoGLM](https://github.com/zai-org/Open-AutoGLM) open-source project. It transforms the original phone automation solution that required a computer + ADB connection into a standalone app running directly on the phone, allowing users to control their phone using natural language to complete various tasks.
**Key Features:**
- 🚀 **No Computer Required**: Runs directly on the phone without ADB connection
- 🎯 **Natural Language Control**: Describe tasks in natural language, AI executes automatically
- 🔒 **Shizuku Permissions**: Obtains necessary system permissions through Shizuku
- 🪟 **Floating Window Interaction**: Floating window displays task execution progress in real-time
- 📱 **Native Experience**: Material Design, smooth native Android experience
- 🔌 **Multi-Model Support**: Compatible with any model API supporting OpenAI format and image understanding
## 🏗️ Architecture Comparison
| Feature | Open-AutoGLM (Original) | AutoGLM For Android (This Project) |
| -------------- | ----------------------- | ---------------------------------- |
| Runtime | Computer (Python) | Phone (Android App) |
| Connection | Requires ADB/USB | No connection needed, standalone |
| Permissions | ADB shell commands | Shizuku service |
| Text Input | ADB Keyboard | Built-in AutoGLM Keyboard |
| User Interface | Command line | Native Android UI + Floating Window|
| Screenshot | ADB screencap | Shizuku shell commands |
## 📋 Features
### Core Features
- ✅ **Task Execution**: Input natural language task descriptions, AI automatically plans and executes
- ✅ **Screen Understanding**: Screenshot → Vision model analysis → Output action commands
- ✅ **Multiple Actions**: Click, swipe, long press, double tap, text input, launch apps, etc.
- ✅ **Task Control**: Pause, resume, cancel task execution
- ✅ **History**: Save task execution history, view details and screenshots
### User Interface
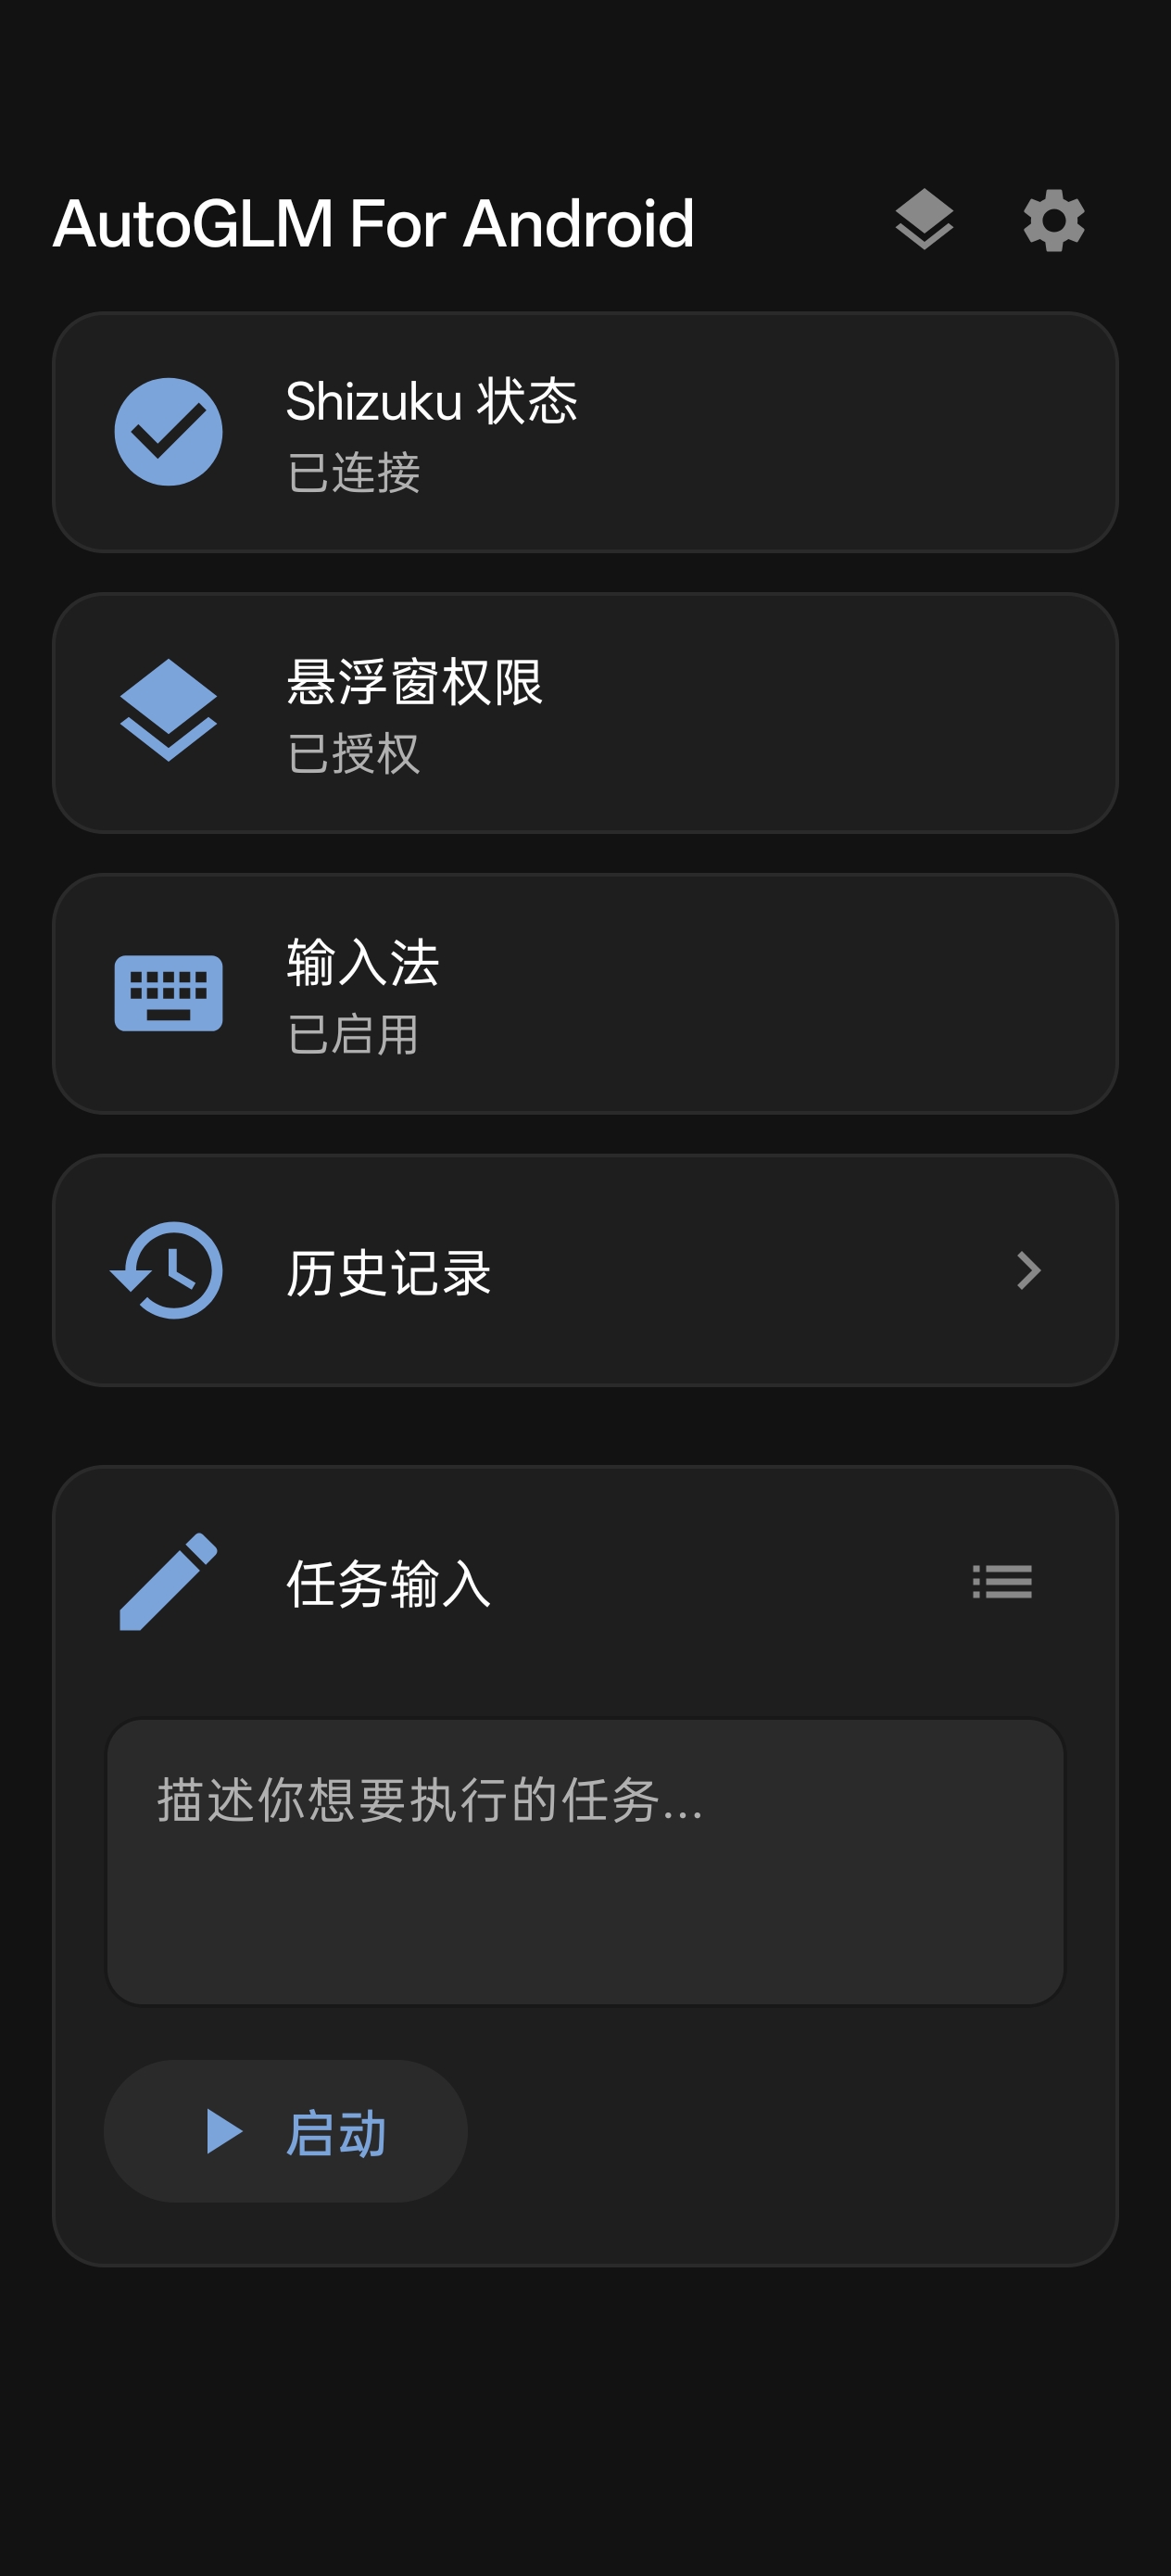
- ✅ **Main Screen**: Task input, status display, quick actions
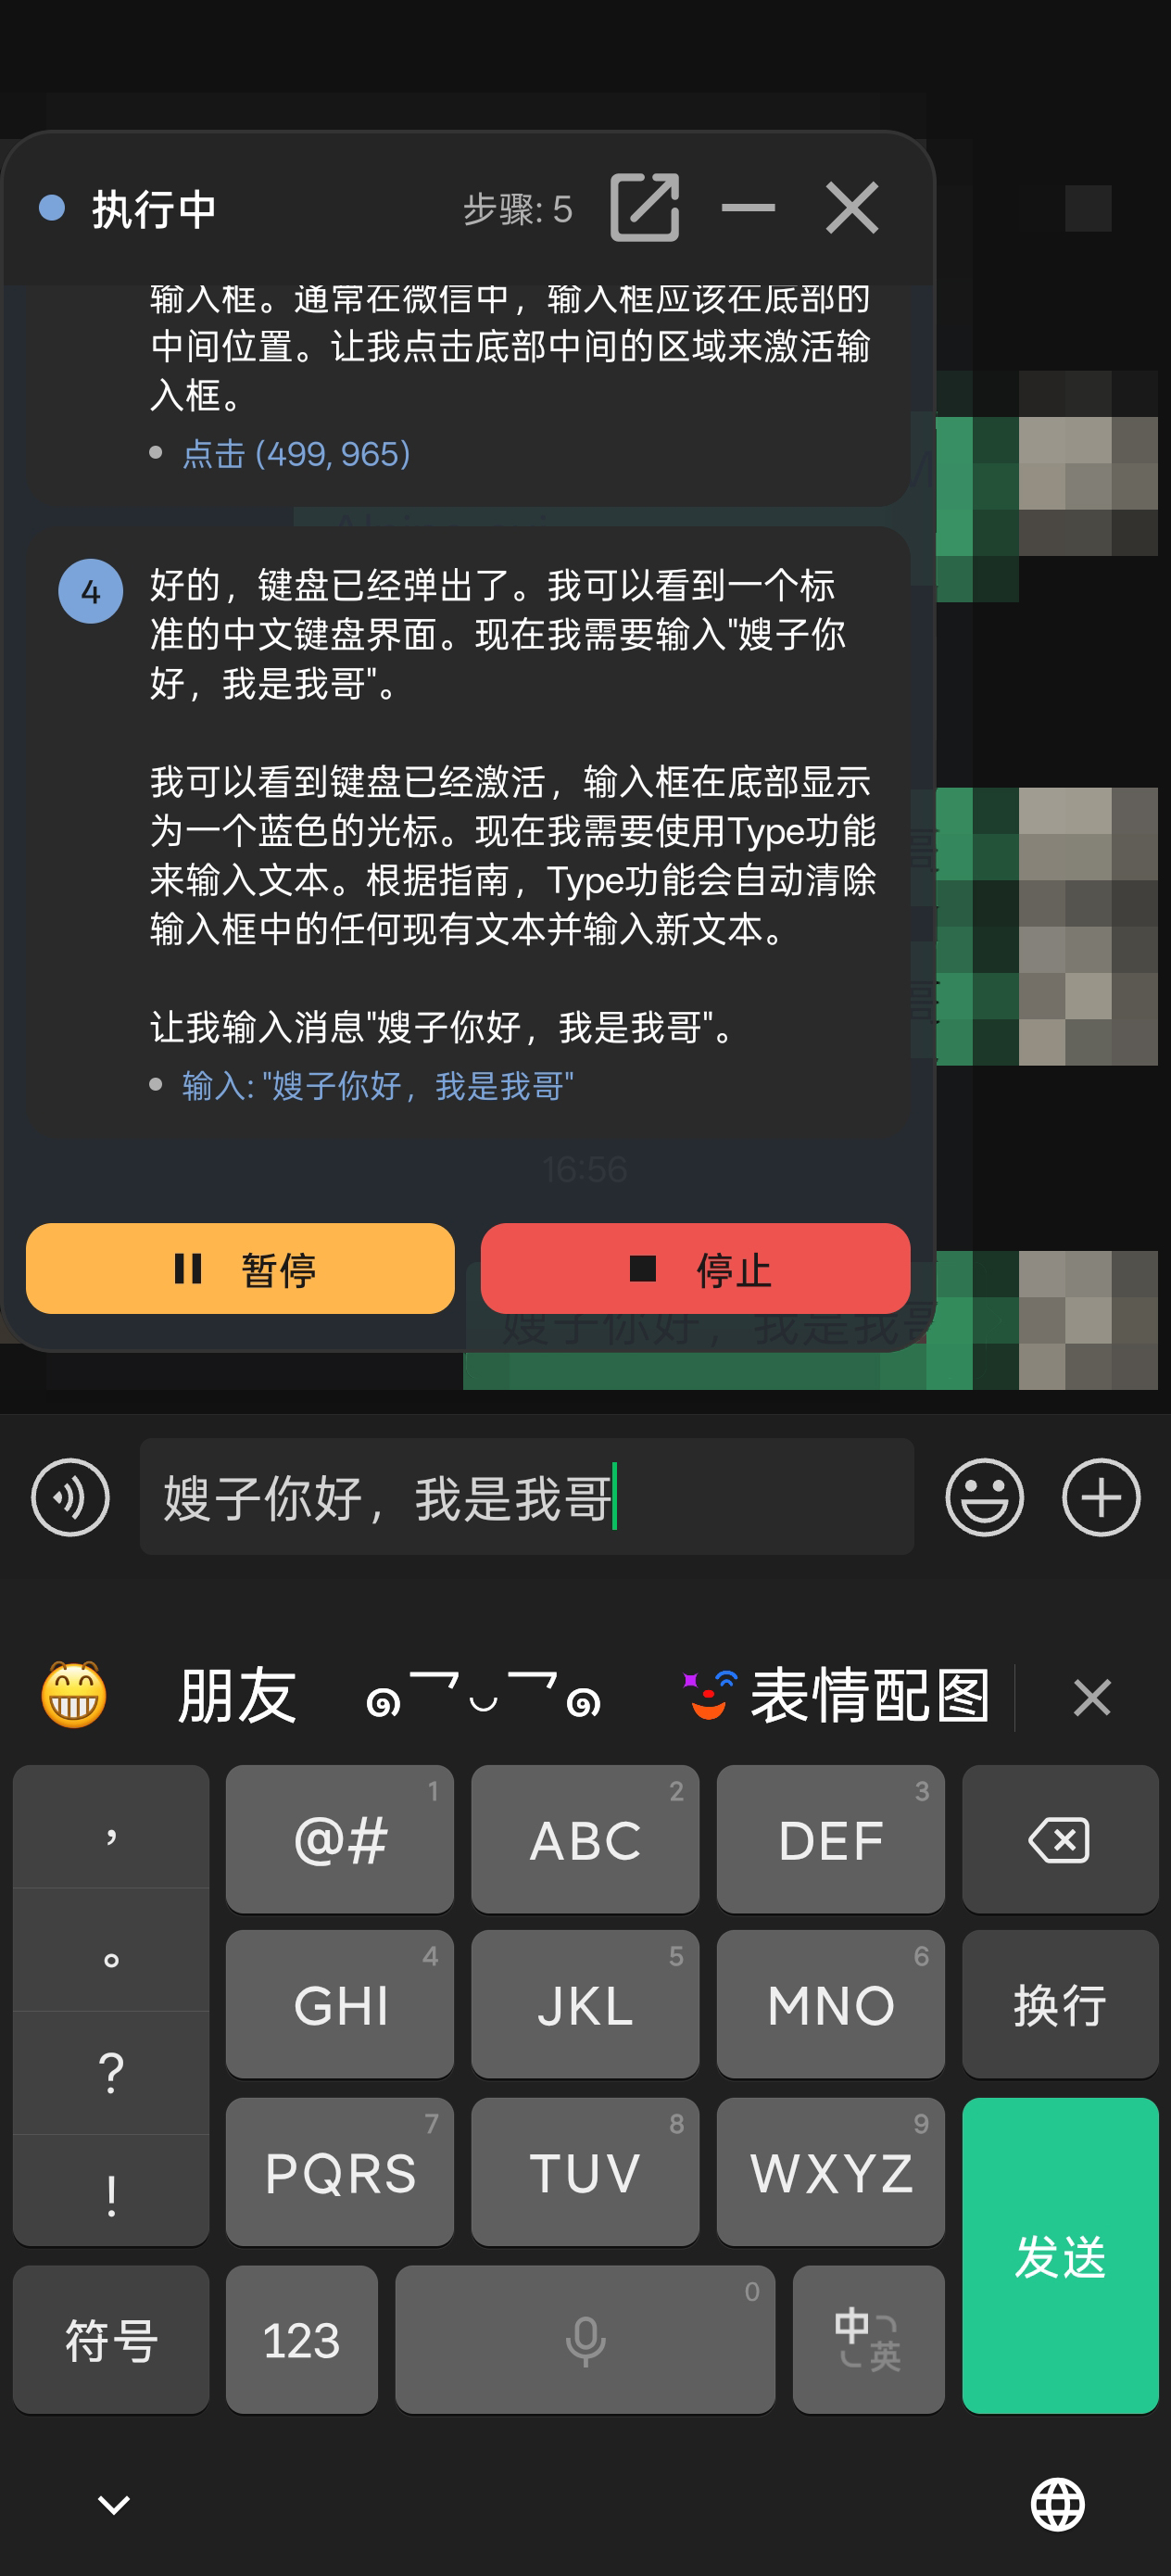
- ✅ **Floating Window**: Real-time display of execution steps, thinking process, action results
- ✅ **Settings Page**: Model configuration, Agent parameters, multi-profile management
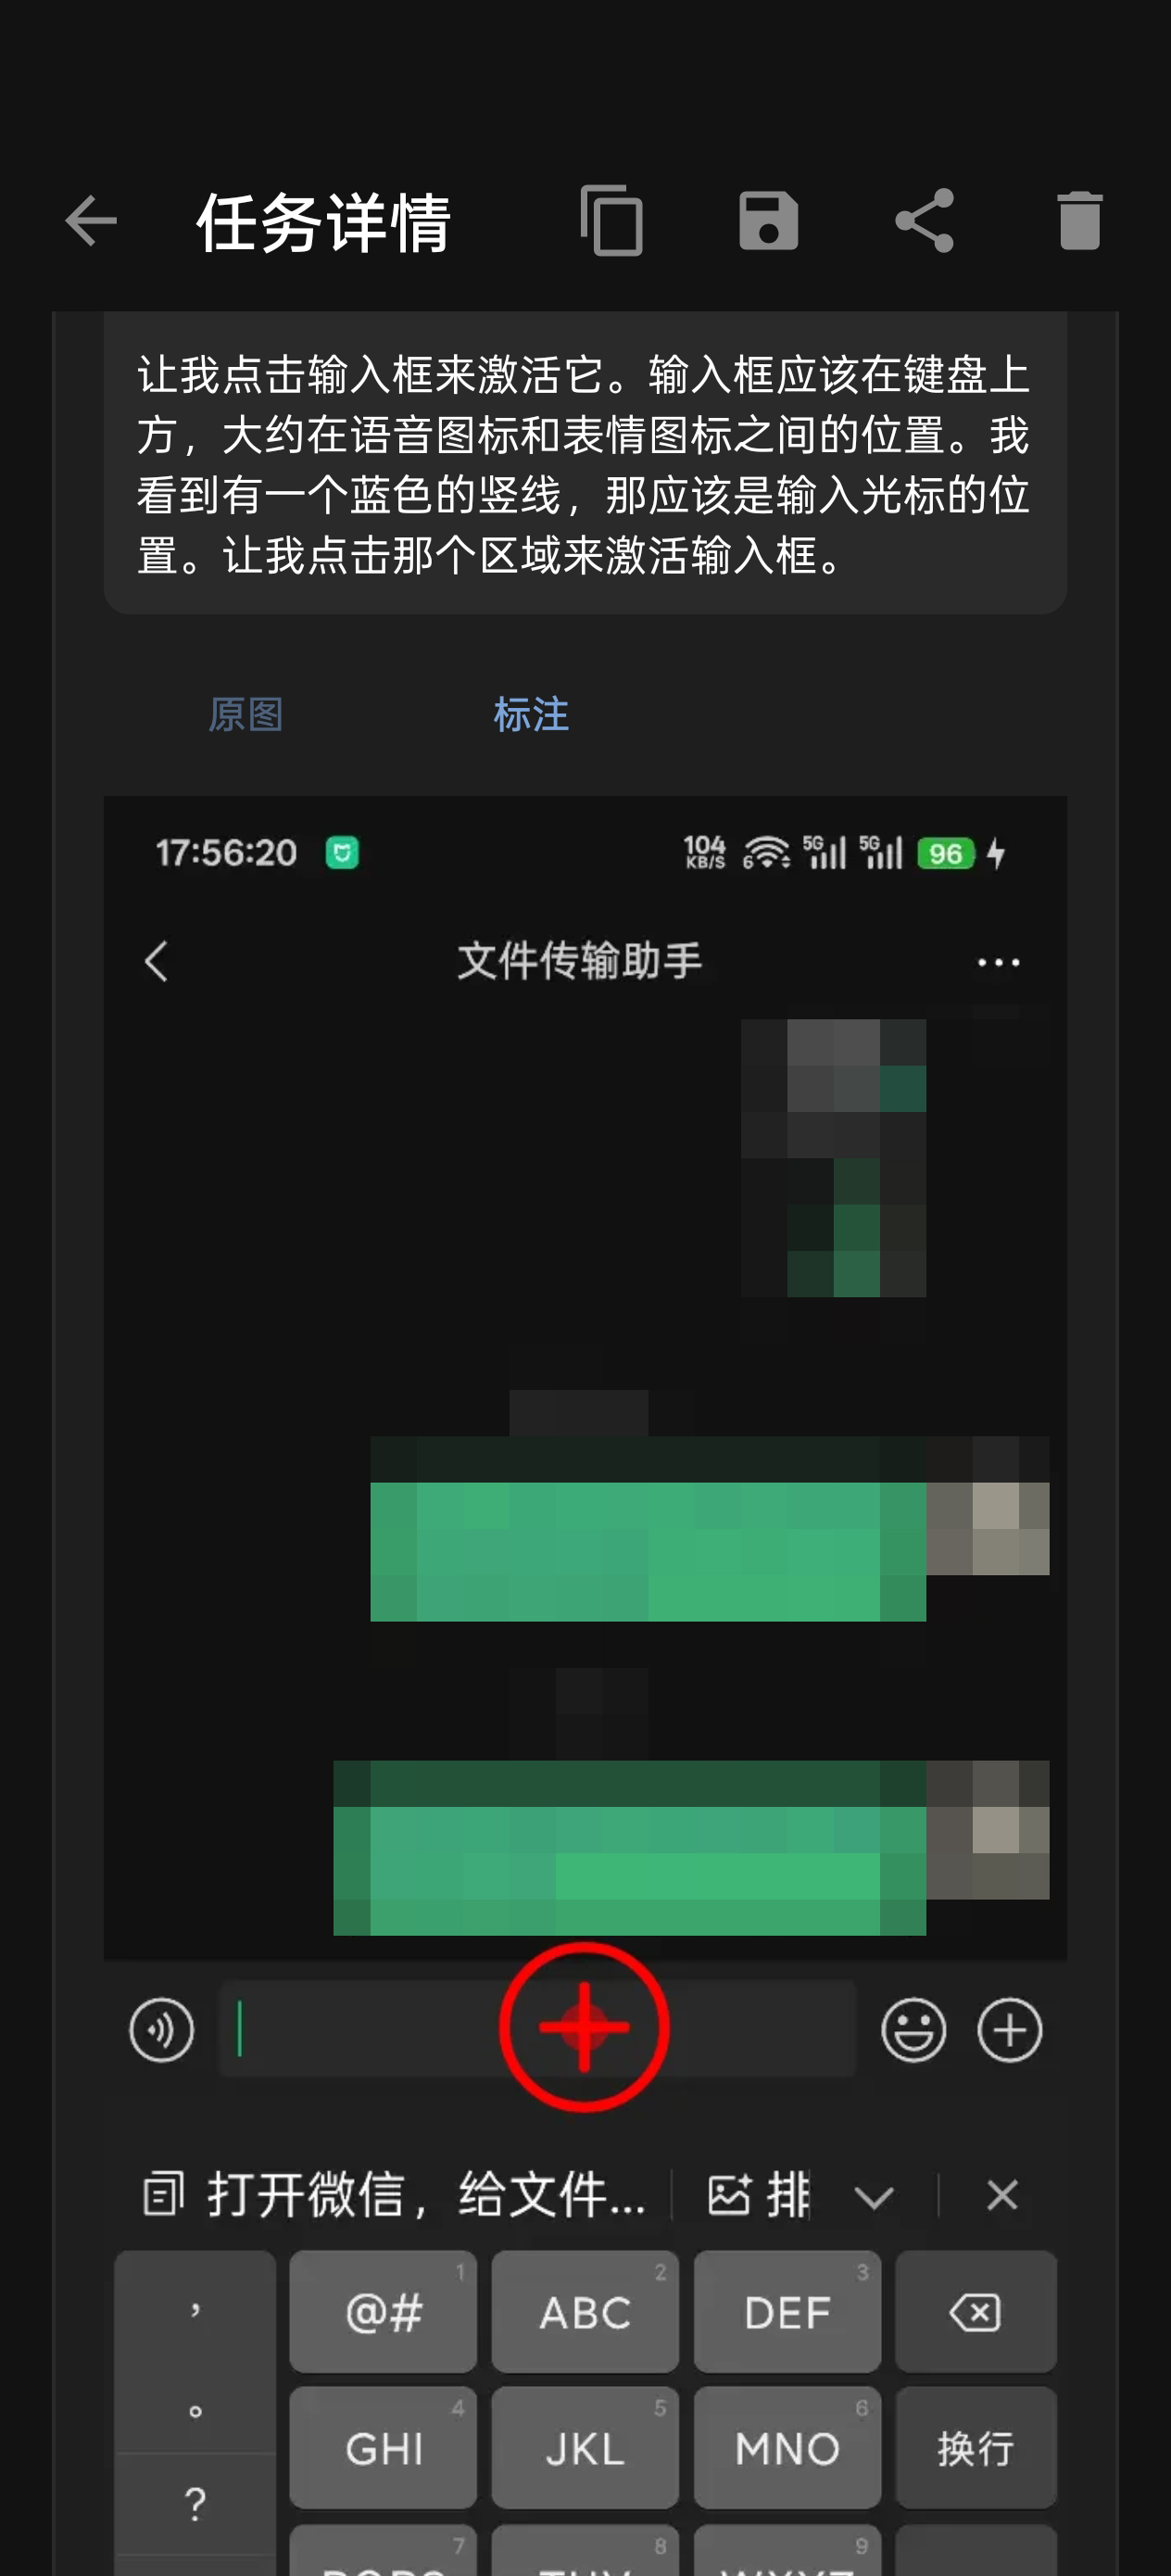
- ✅ **History Page**: Task history list, detail view, screenshot annotations
### Advanced Features
- ✅ **Multi-Model Profiles**: Save multiple model configurations, quick switching
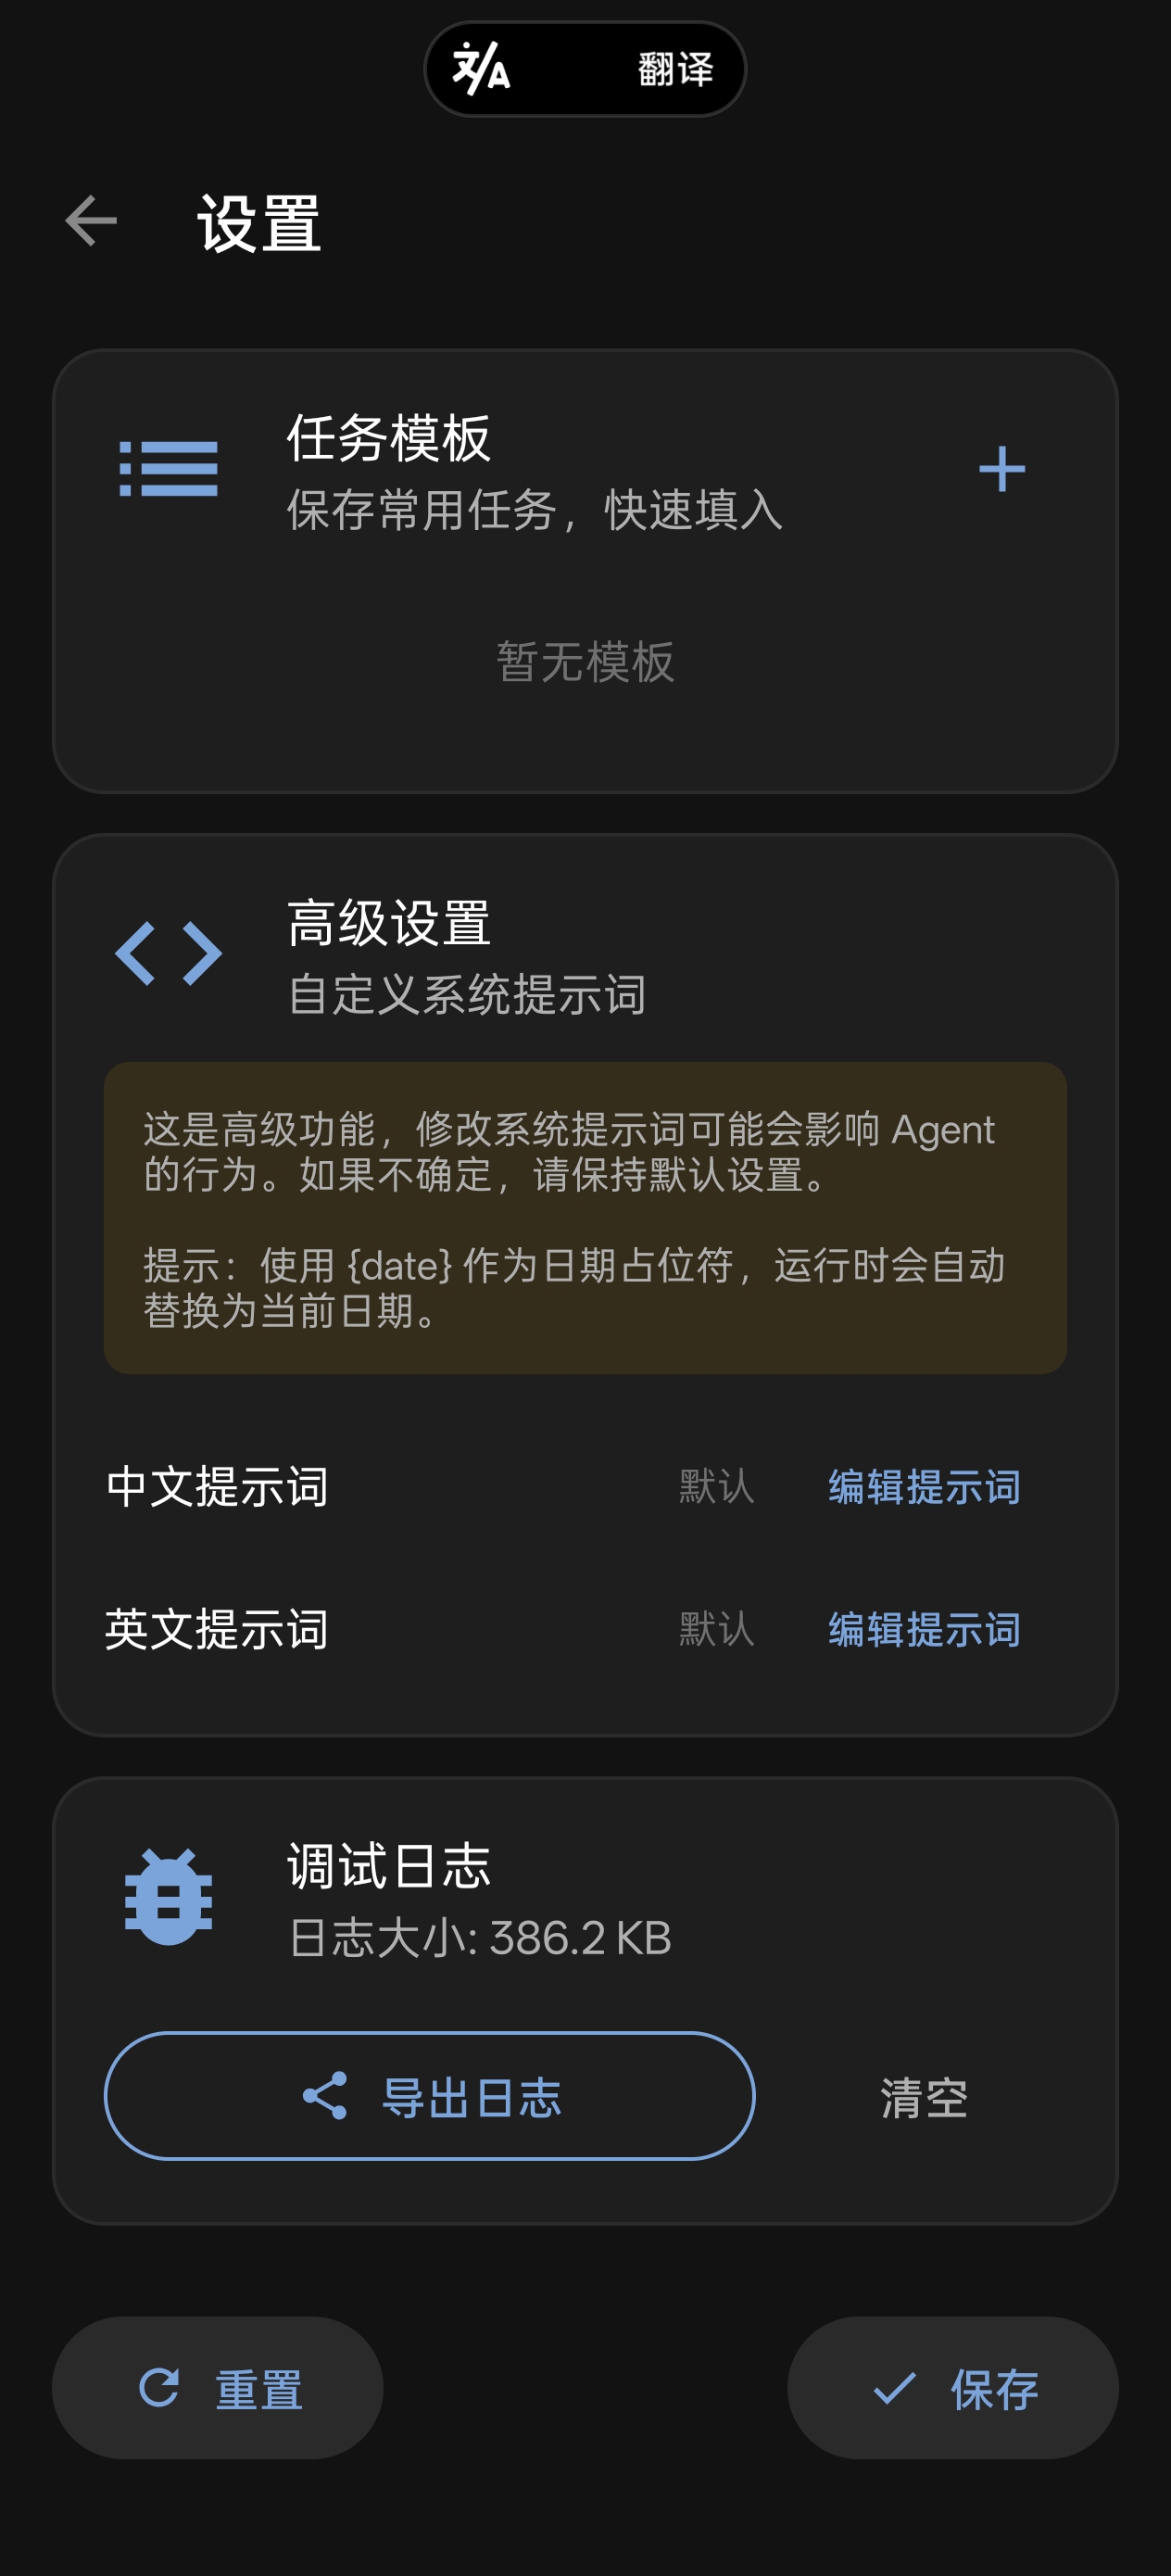
- ✅ **Task Templates**: Save frequently used tasks, one-click execution
- ✅ **Custom Prompts**: Support custom system prompts
- ✅ **Quick Tile**: Notification bar quick tile, fast access to floating window
- ✅ **Log Export**: Export debug logs with automatic sensitive data sanitization
## 📱 Requirements
- **Android Version**: Android 7.0 (API 24) or higher
- **Required App**: [Shizuku](https://shizuku.rikka.app/) (for system permissions)
- **Network**: Connection to model API service (supports any OpenAI-compatible vision model)
- **Permissions**:
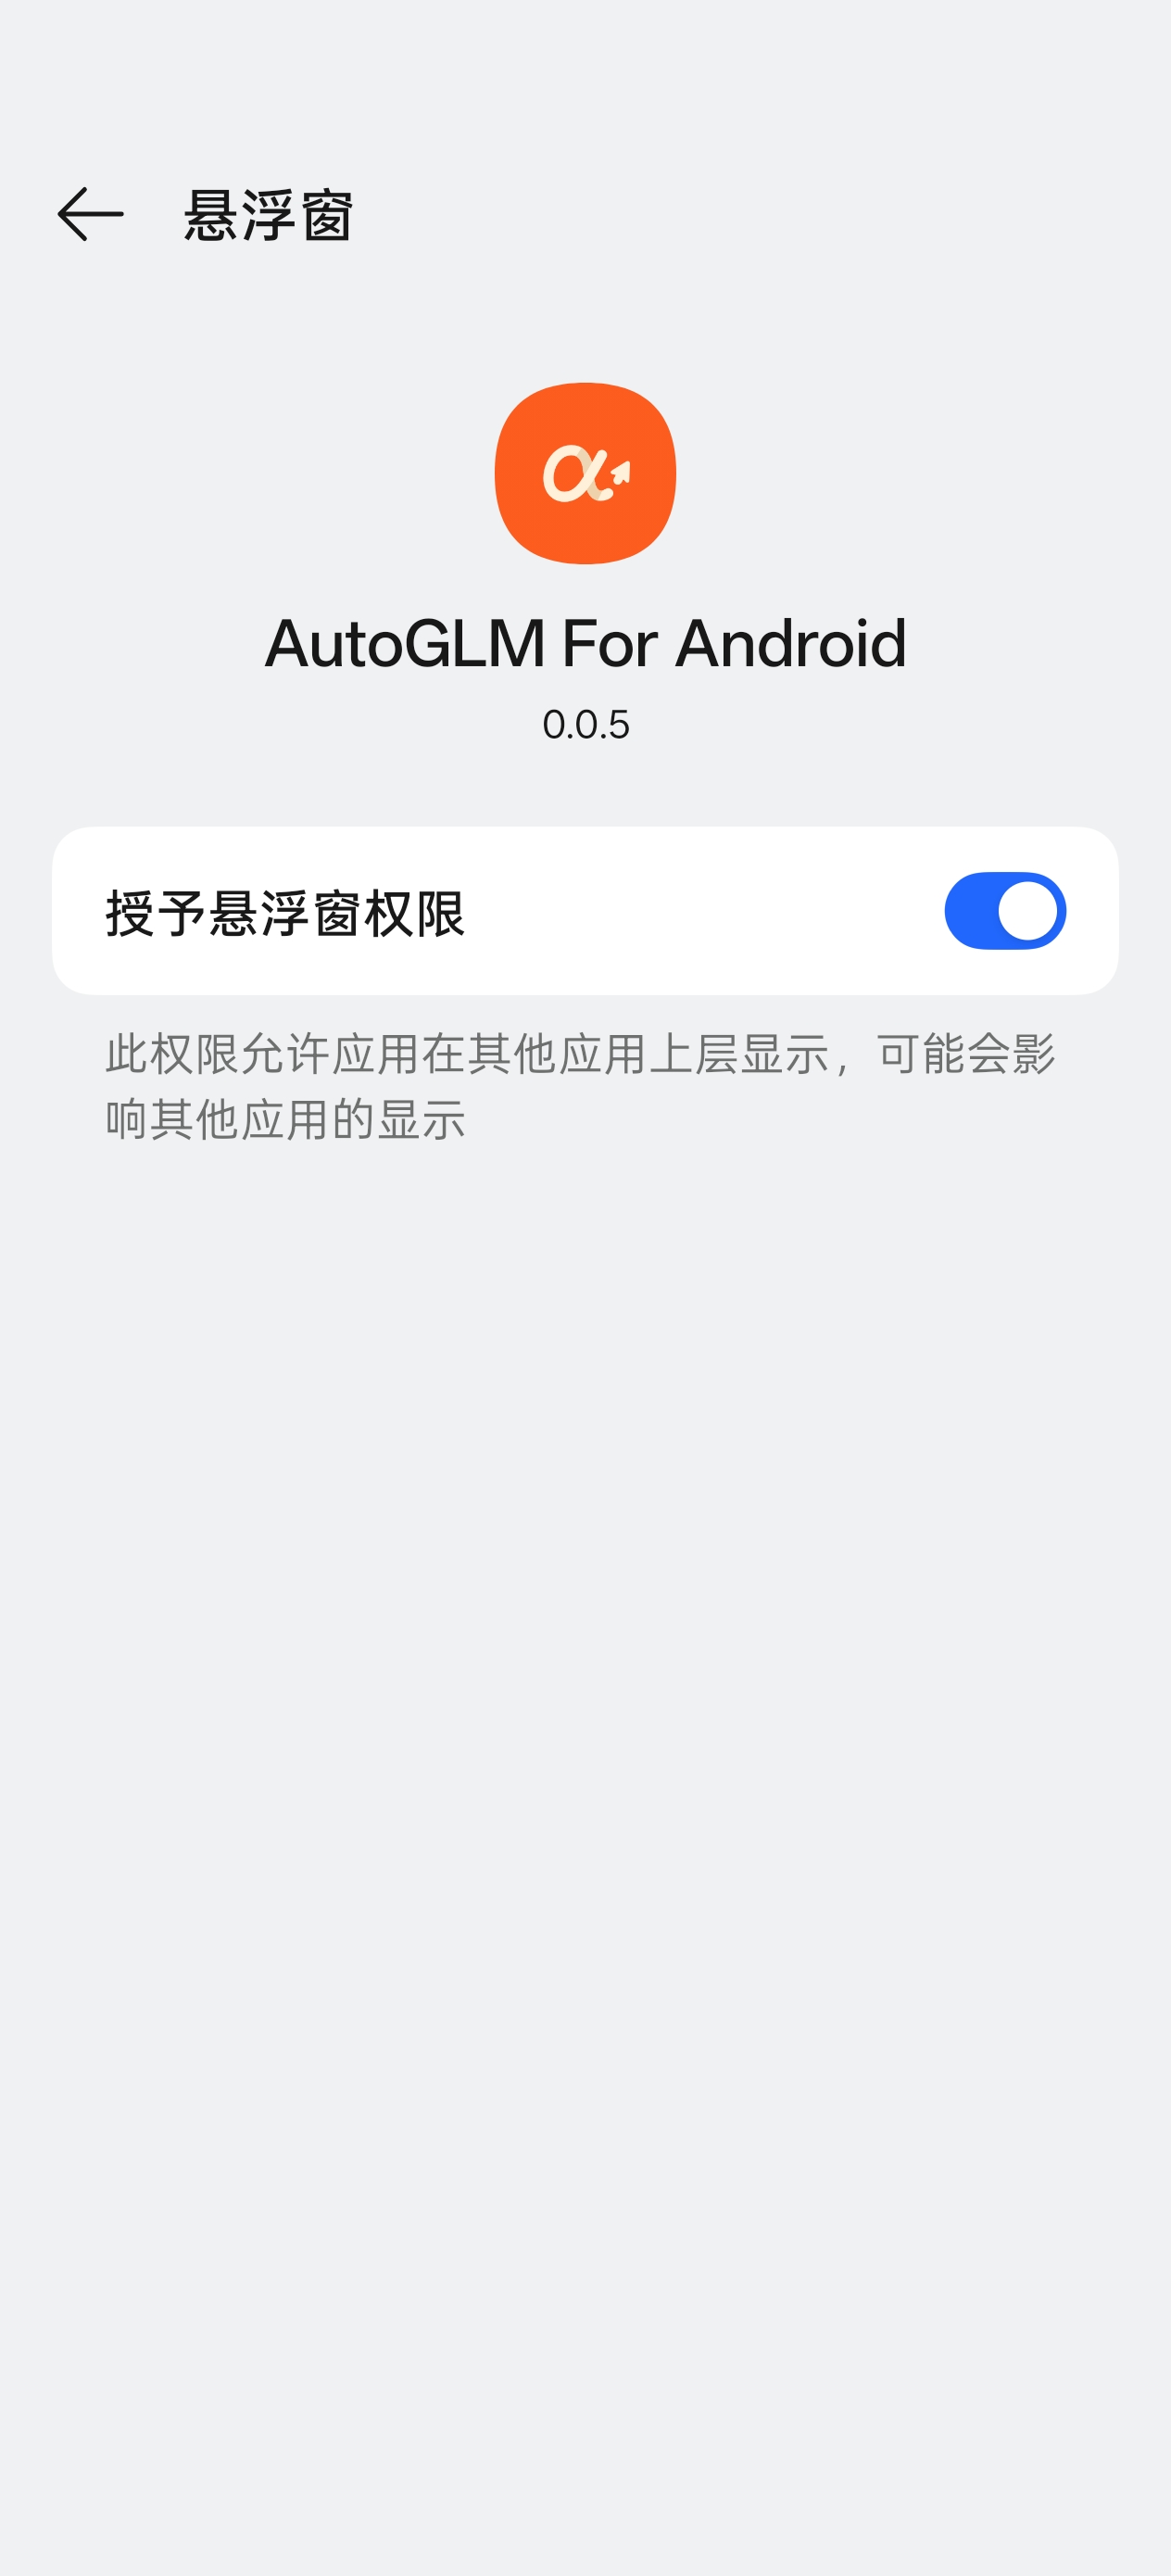
- Overlay permission (for floating window)
- Network permission (for API communication)
- Shizuku permission (for system operations)
## 🚀 Quick Start
### Step 1: Install and Activate Shizuku
Shizuku is the core dependency of this app, used to perform screen clicks, swipes, and other operations.
**Download and Install**
- [Google Play Download](https://play.google.com/store/apps/details?id=moe.shizuku.privileged.api)
- [GitHub Download](https://github.com/RikkaApps/Shizuku/releases)
**Activation Methods (Choose One)**
| Method | Use Case | Persistence |
| ---------------- | ------------------------- | ------------------------ |
| Wireless Debug | Recommended, no PC needed | Re-pair after reboot |
| ADB Connection | When PC is available | Re-execute after reboot |
| Root Permission | Rooted devices | Permanent |
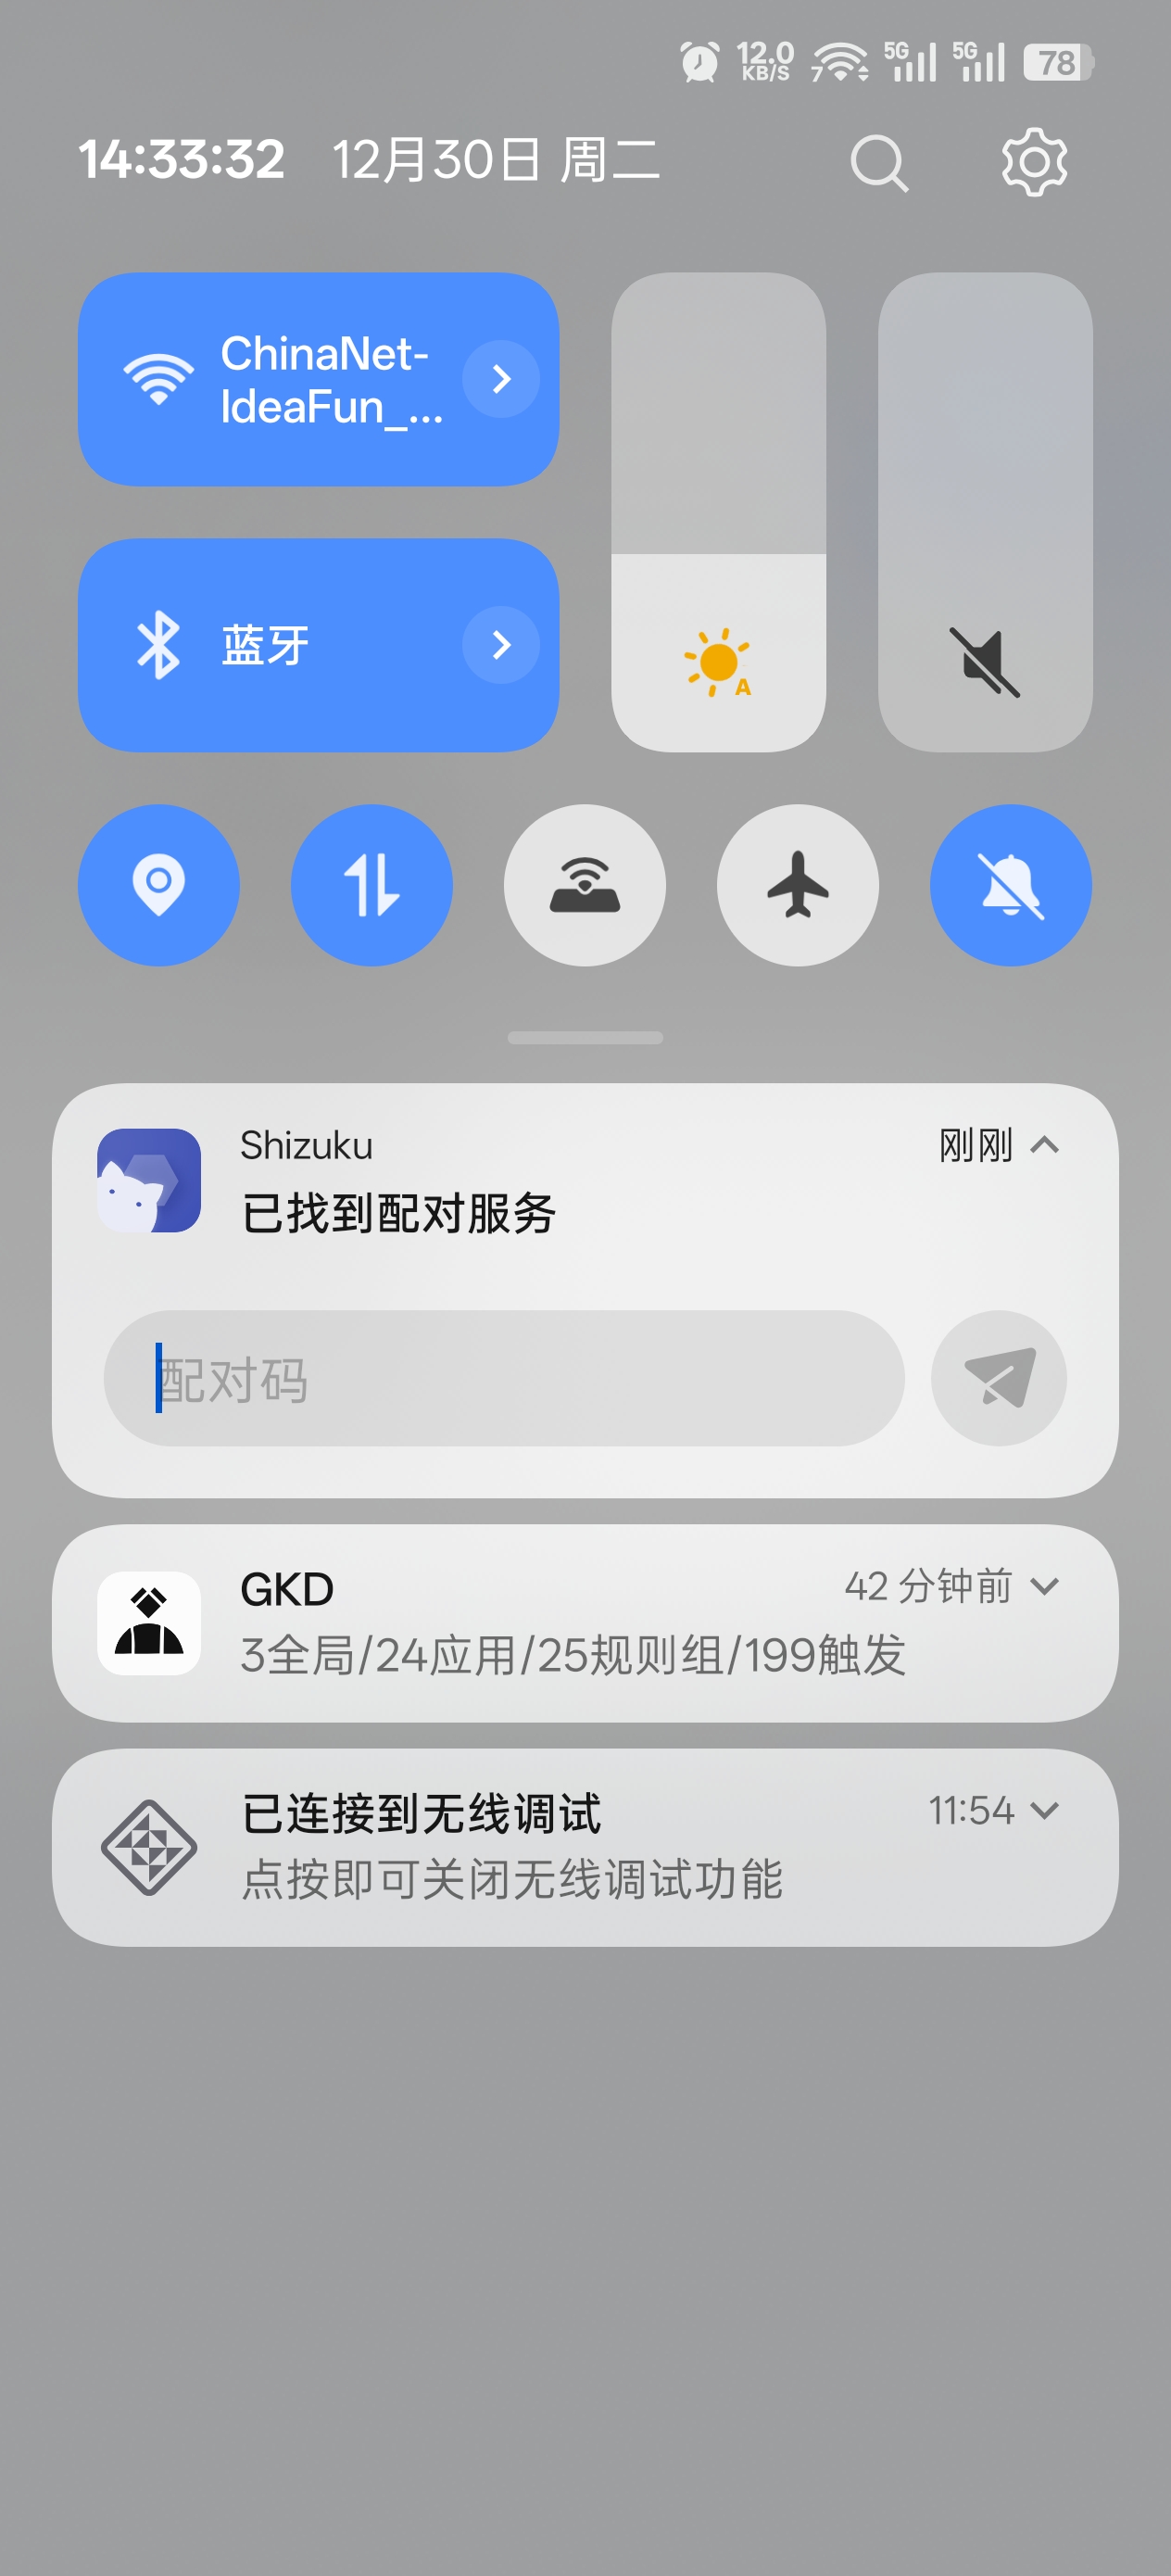
**Wireless Debugging Activation Steps (Recommended)**
1. Connect to any WiFi network
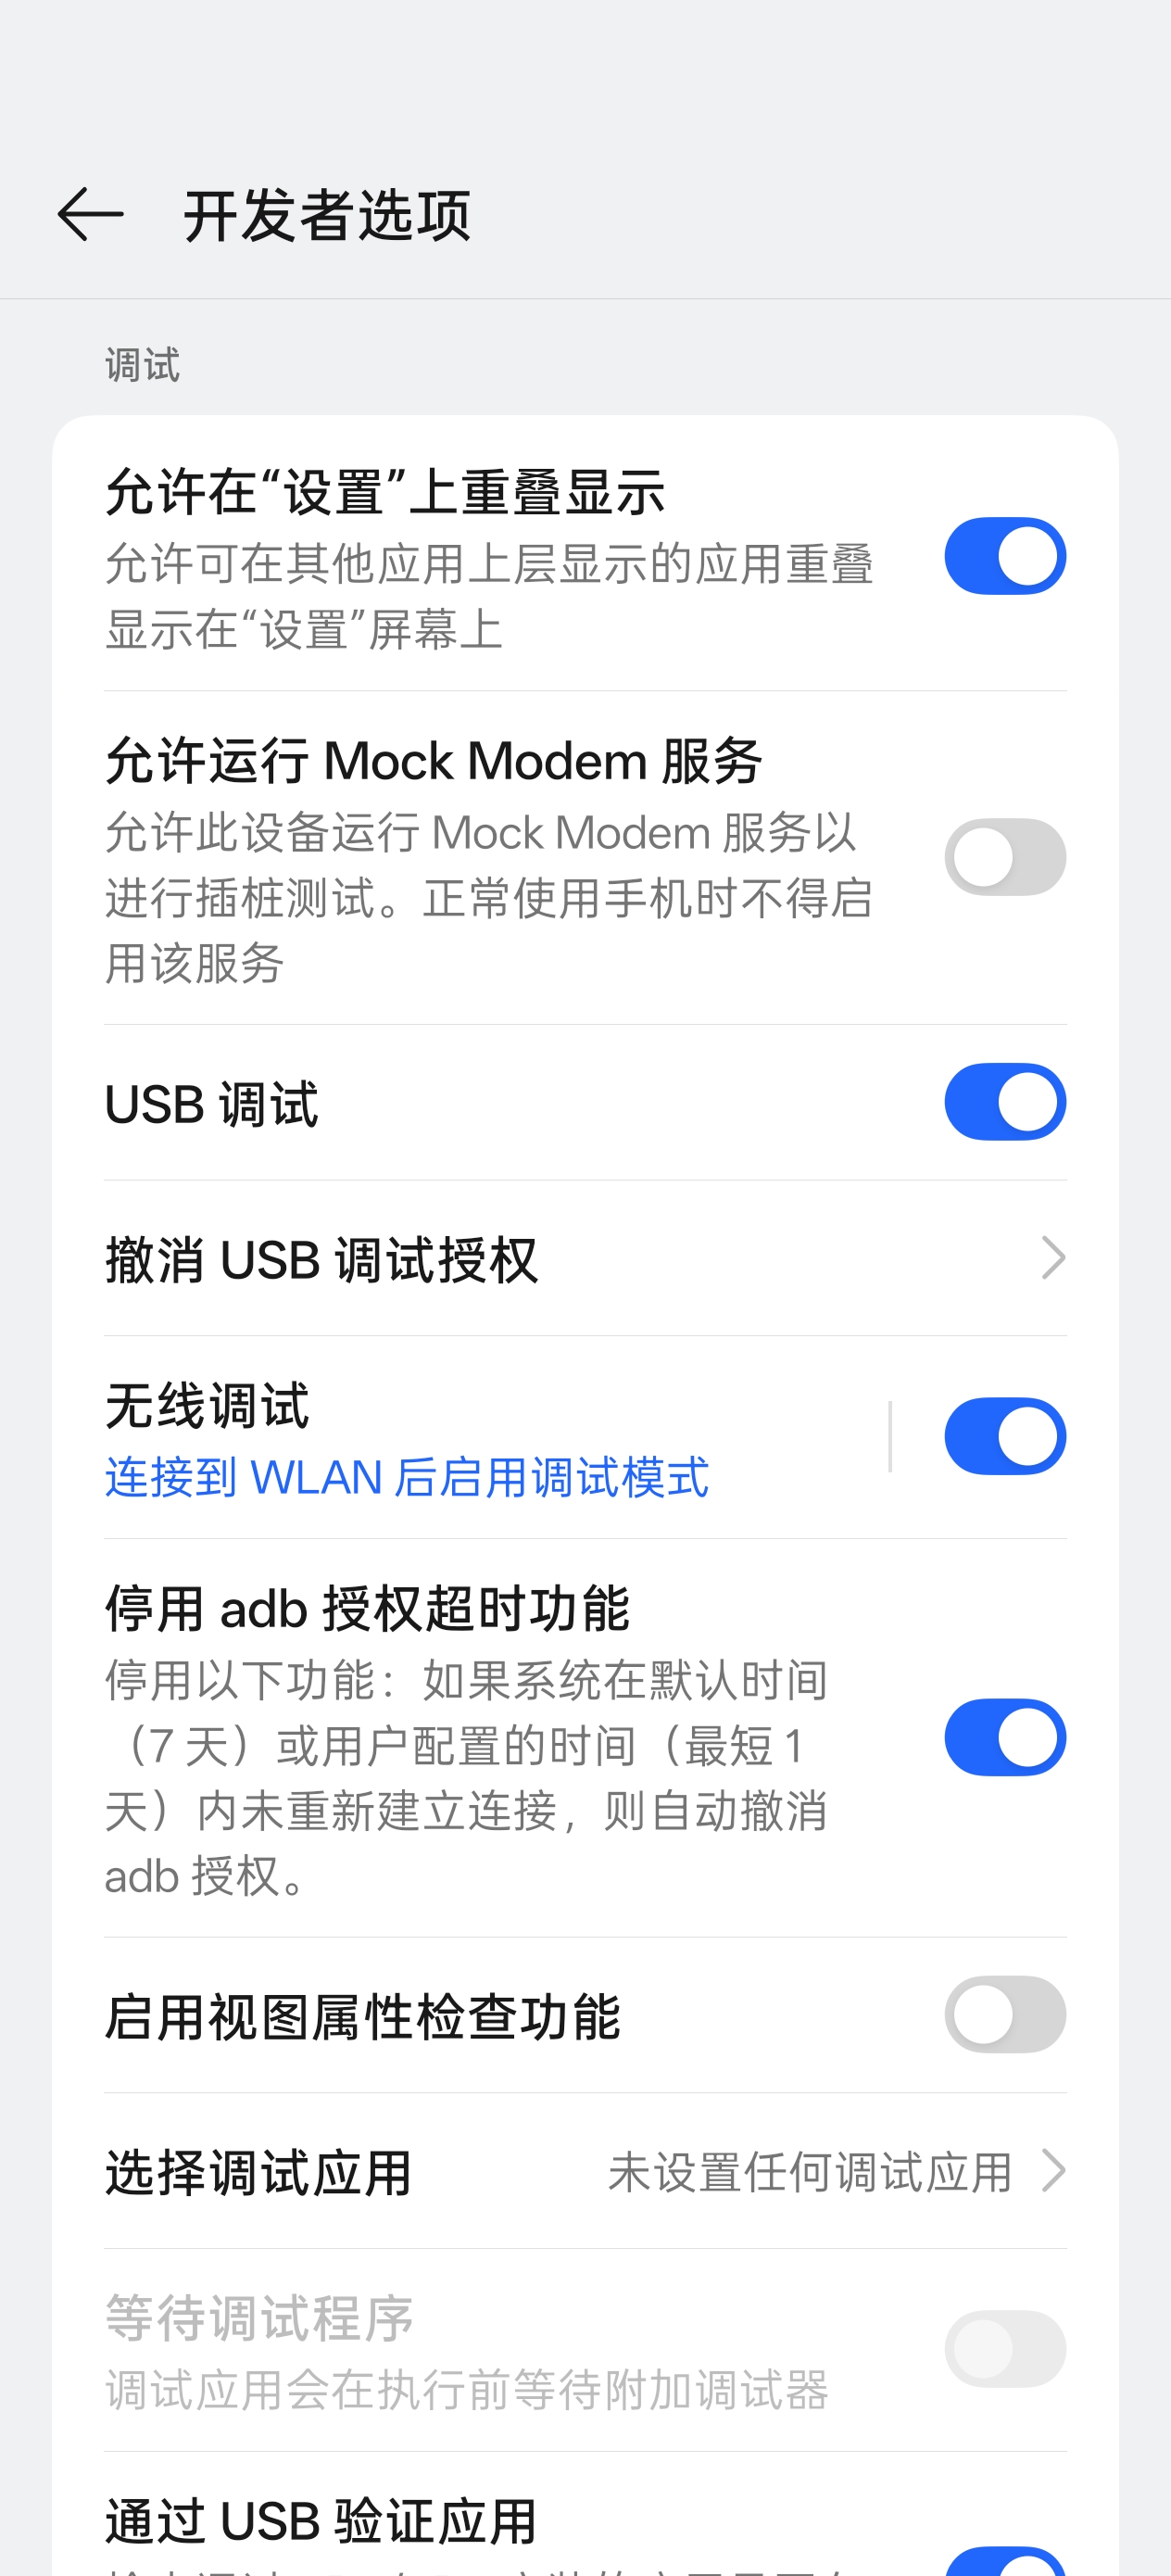
2. Go to phone "Settings" → "Developer Options"
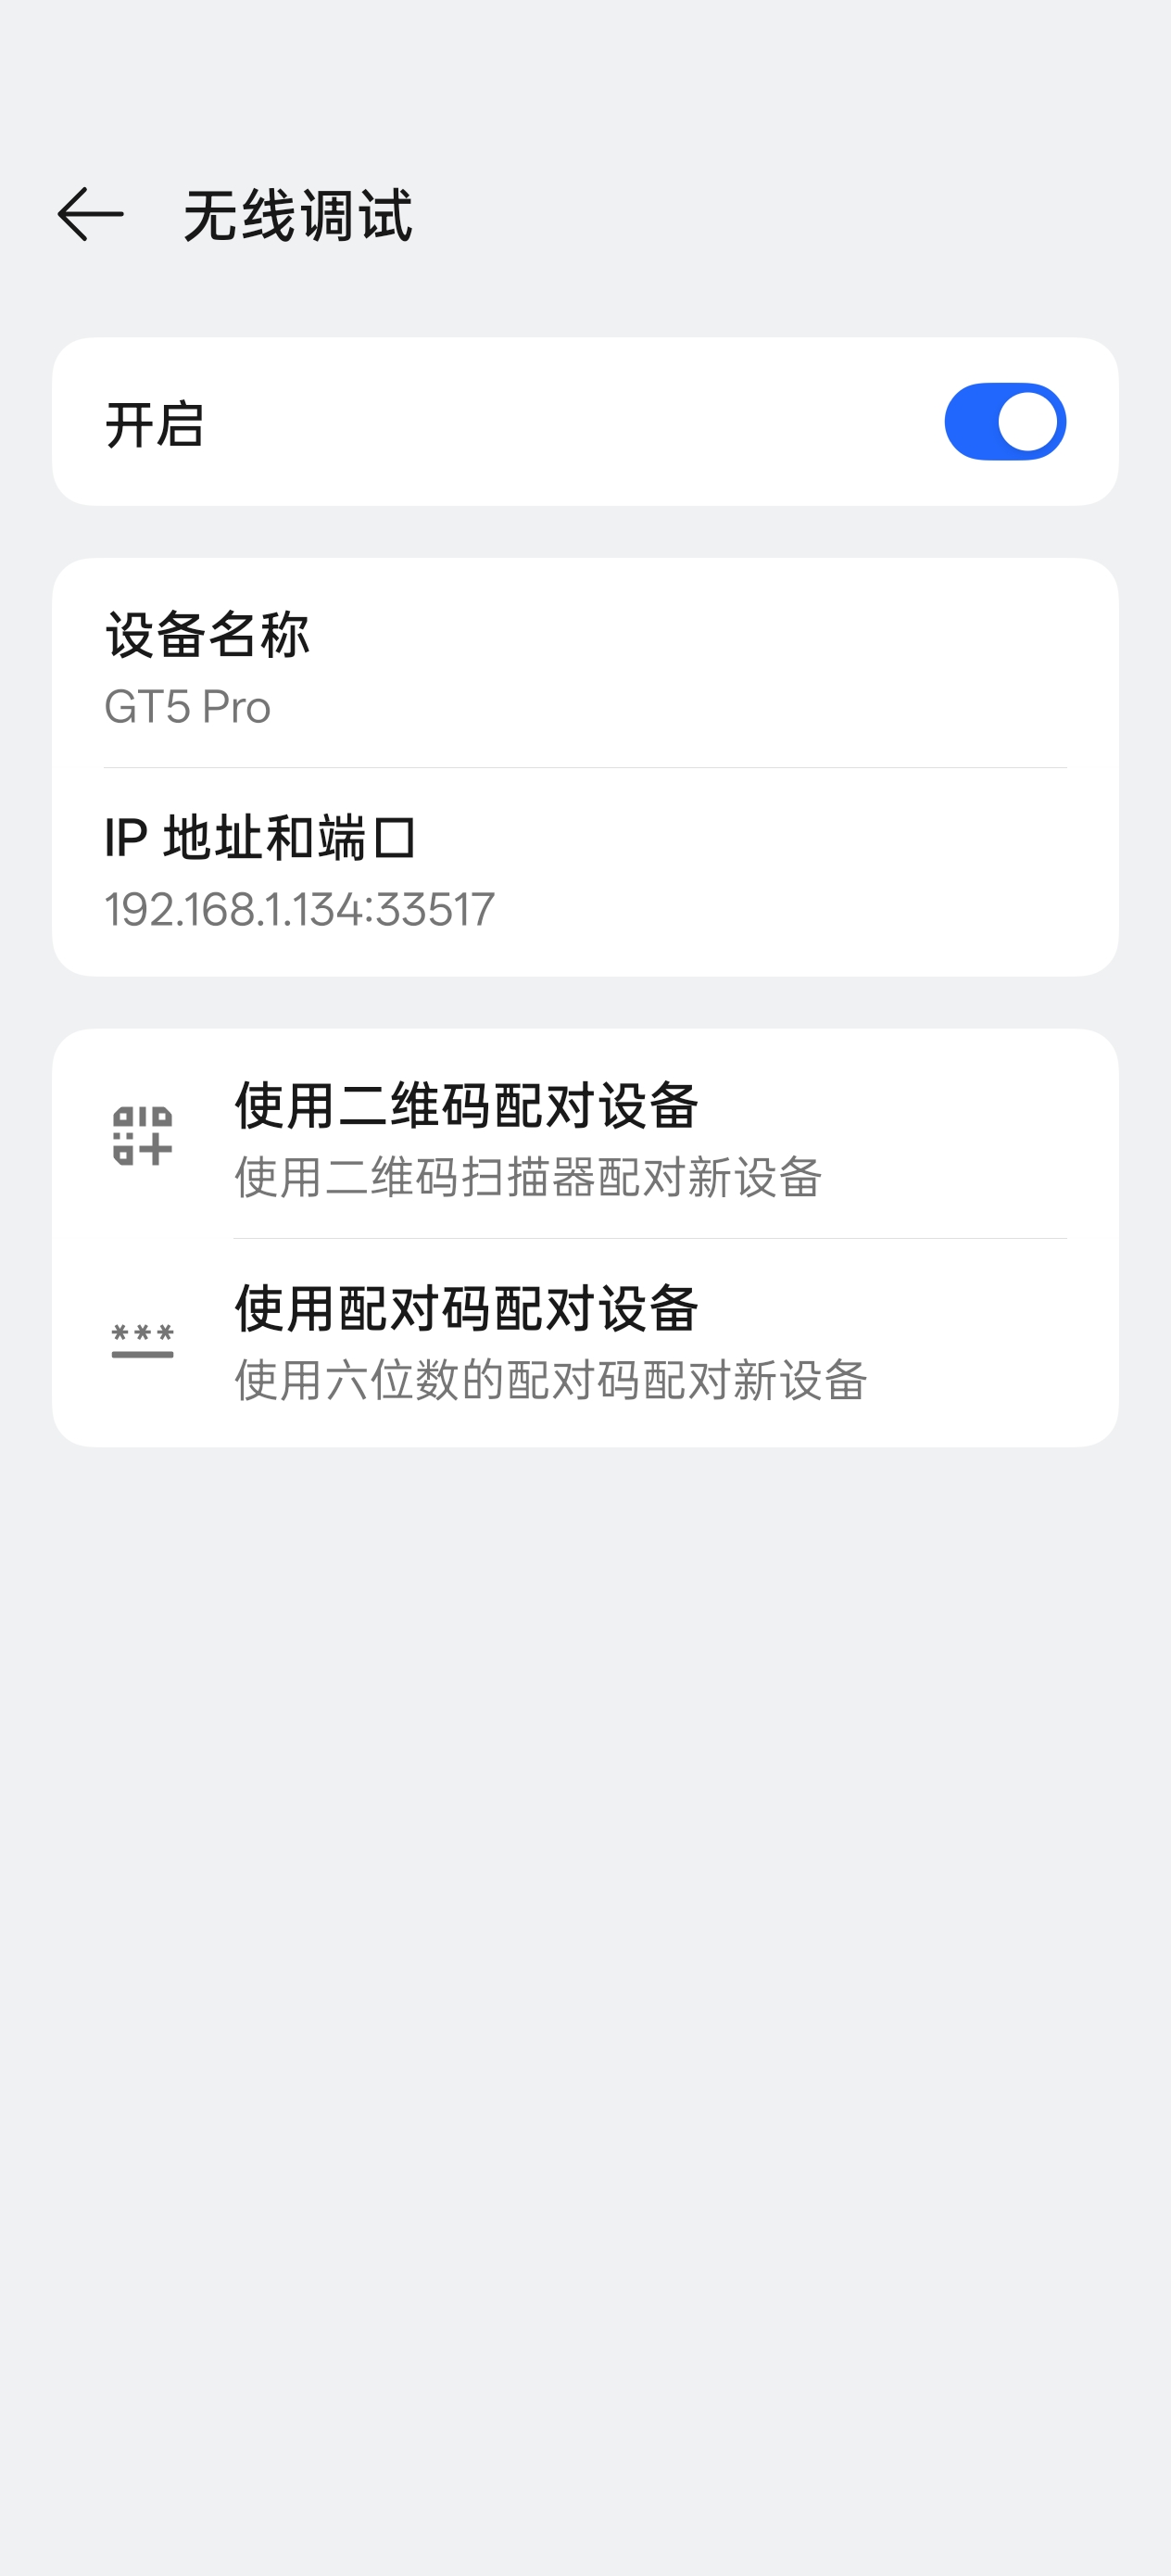
3. Enable "Wireless Debugging"
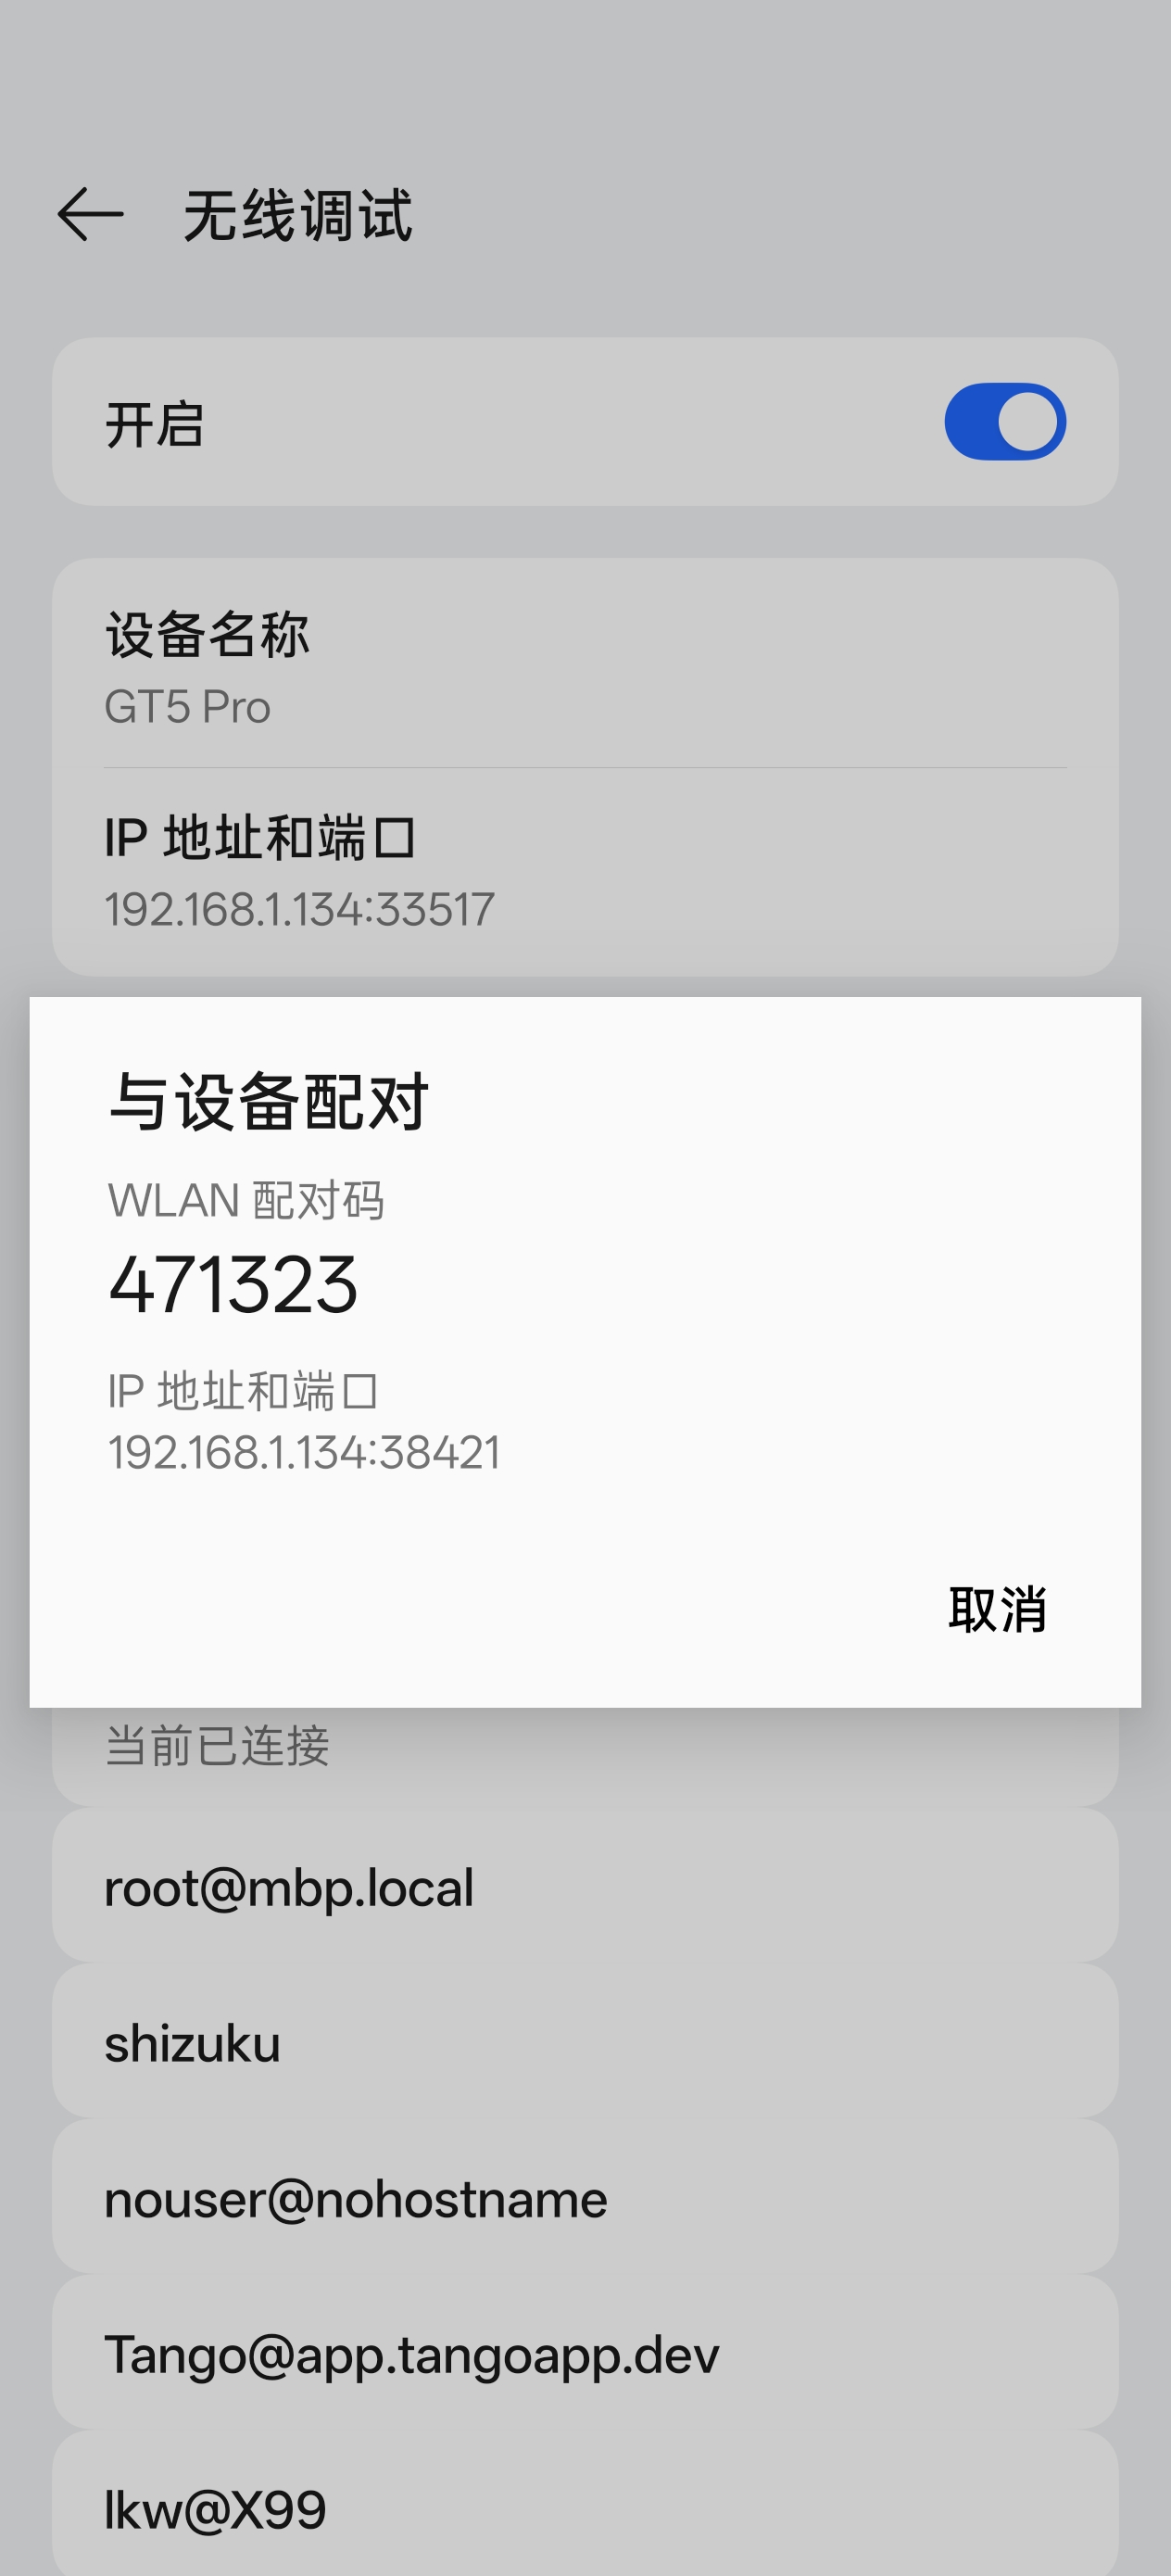
4. Tap "Pair device with pairing code"
5. Wait for Shizuku notification to appear, enter the pairing code in the notification
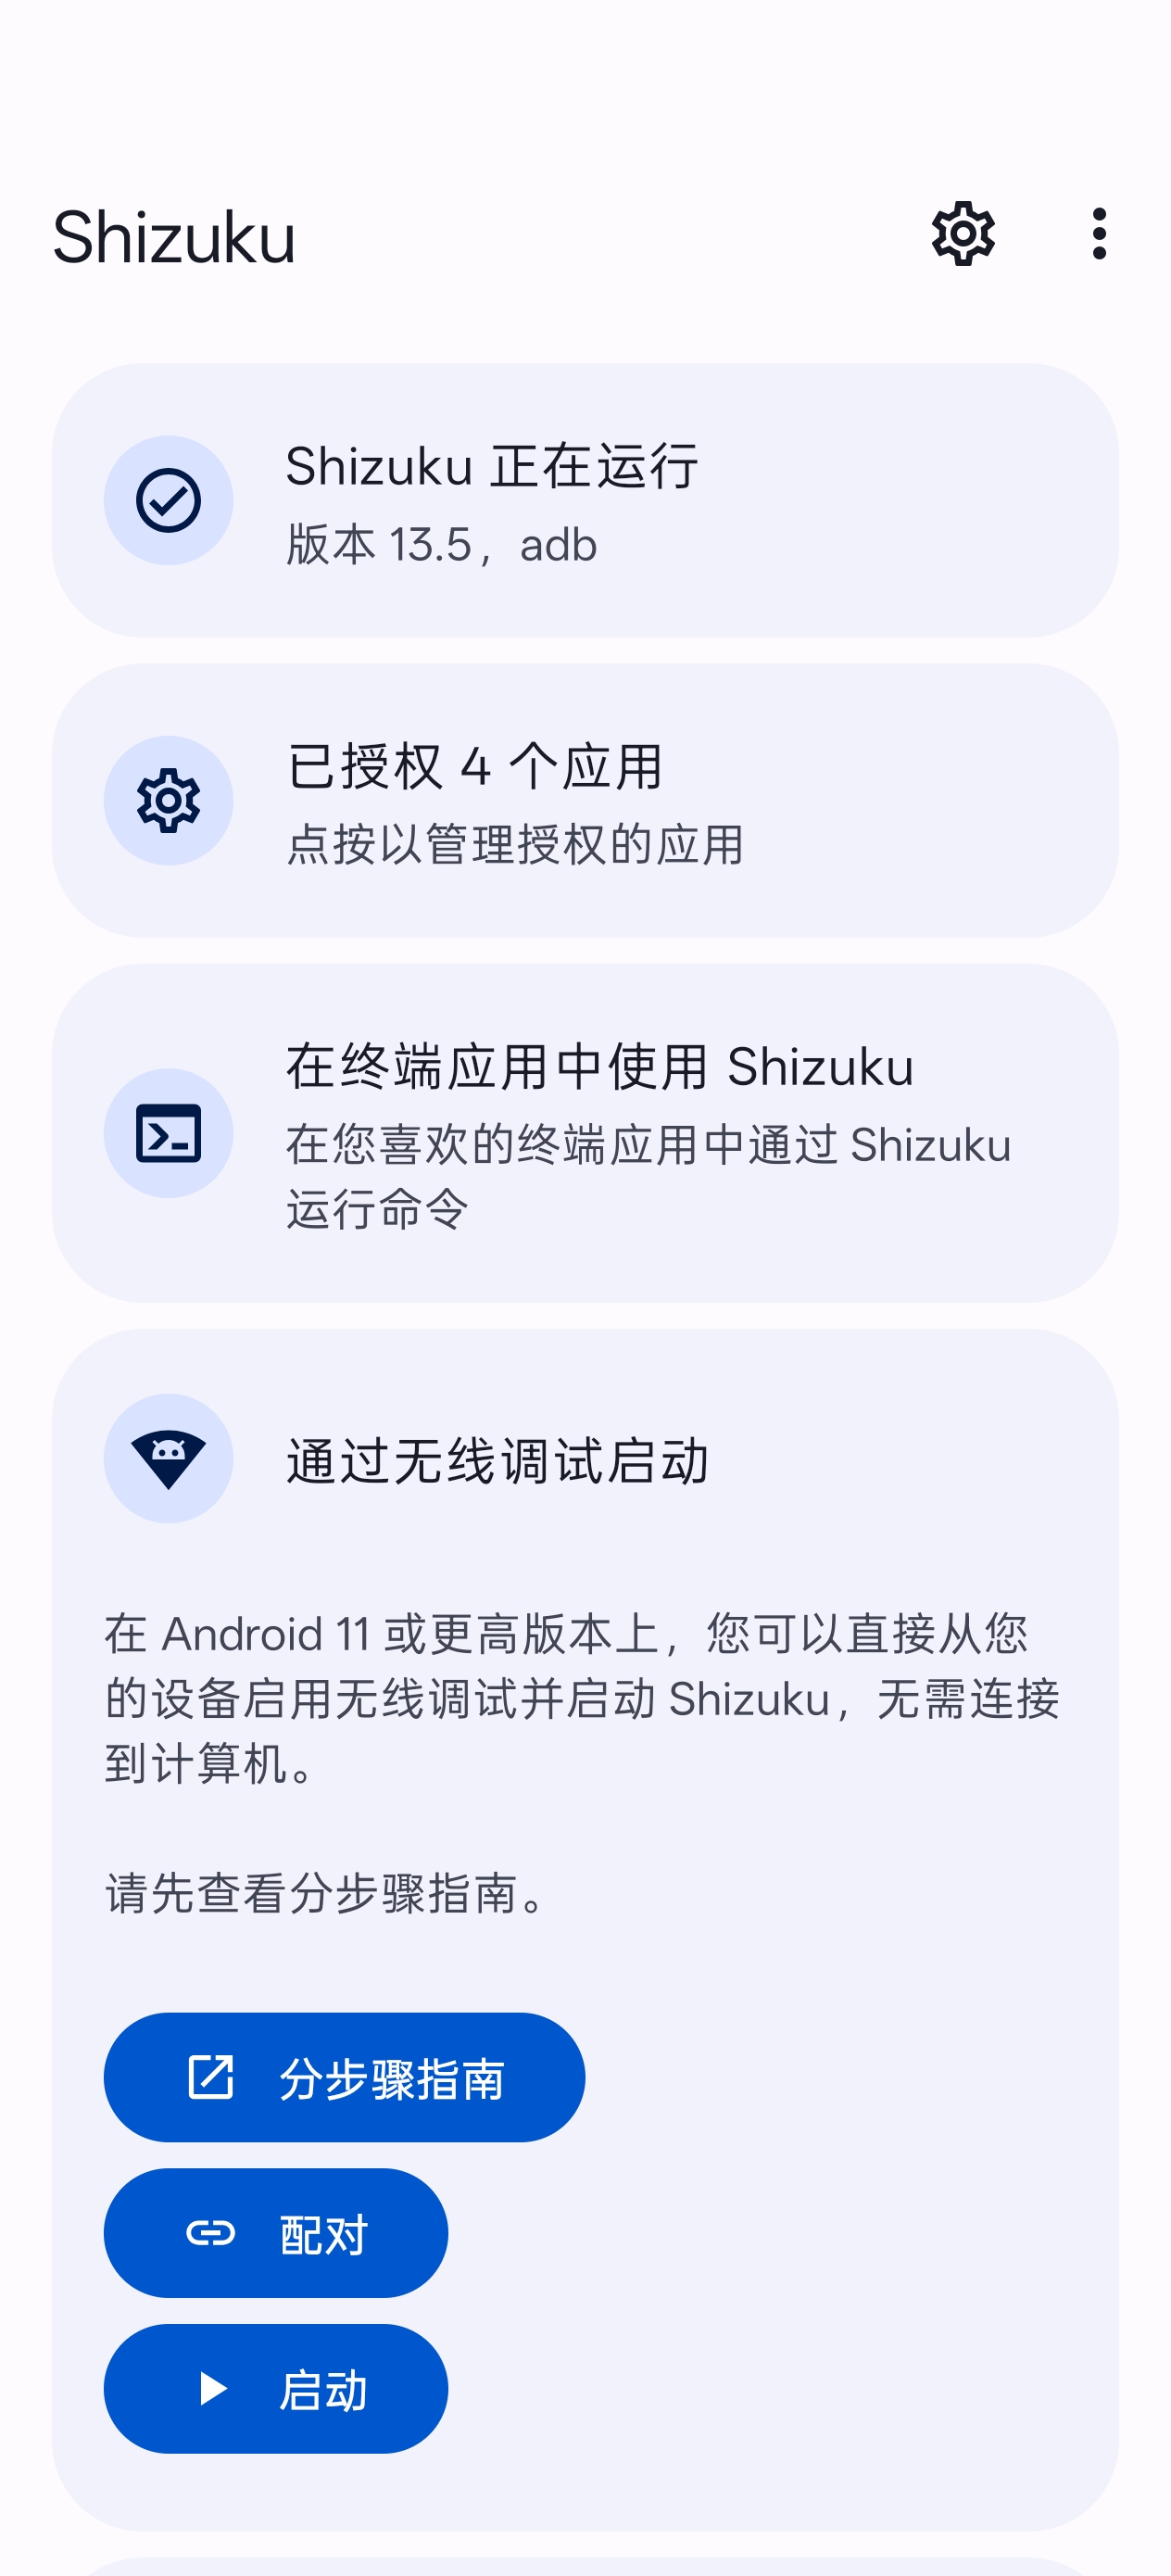
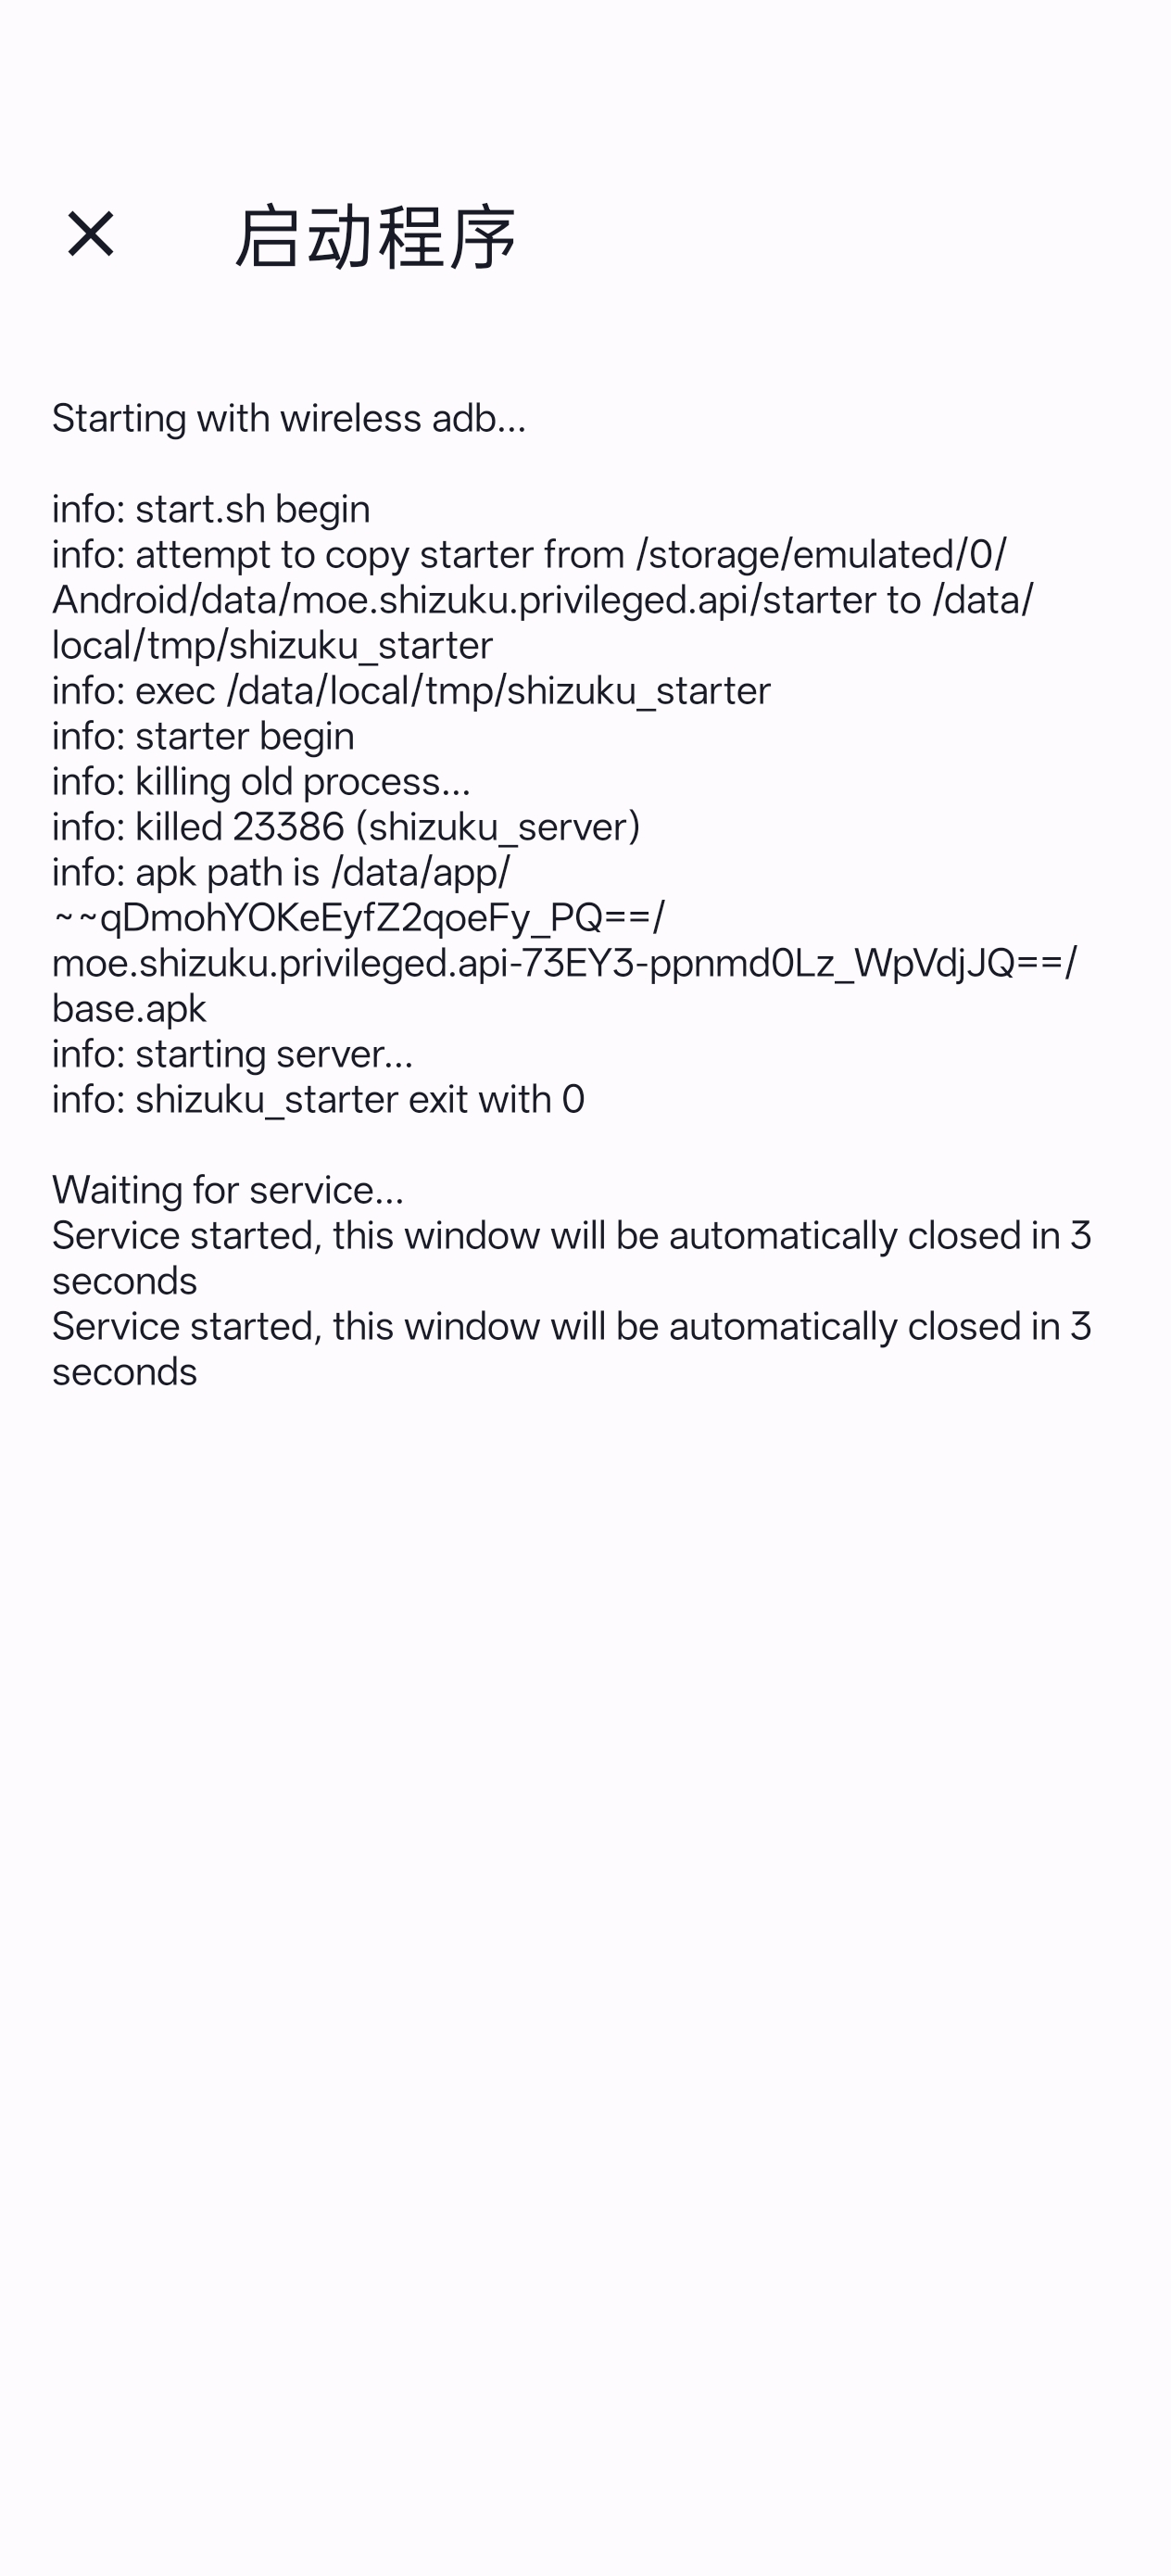
6. Open Shizuku and tap "Start", wait for it to complete
7. When Shizuku shows "Running", activation is successful
> 💡 **Tip**: If you can't find Developer Options, go to "About Phone" and tap "Build Number" multiple times to enable it.
### Step 2: Install AutoGLM For Android
1. Download the latest APK from [Releases Page](https://github.com/Luokavin/AutoGLM-For-Android/releases)
2. Install the APK and open the app
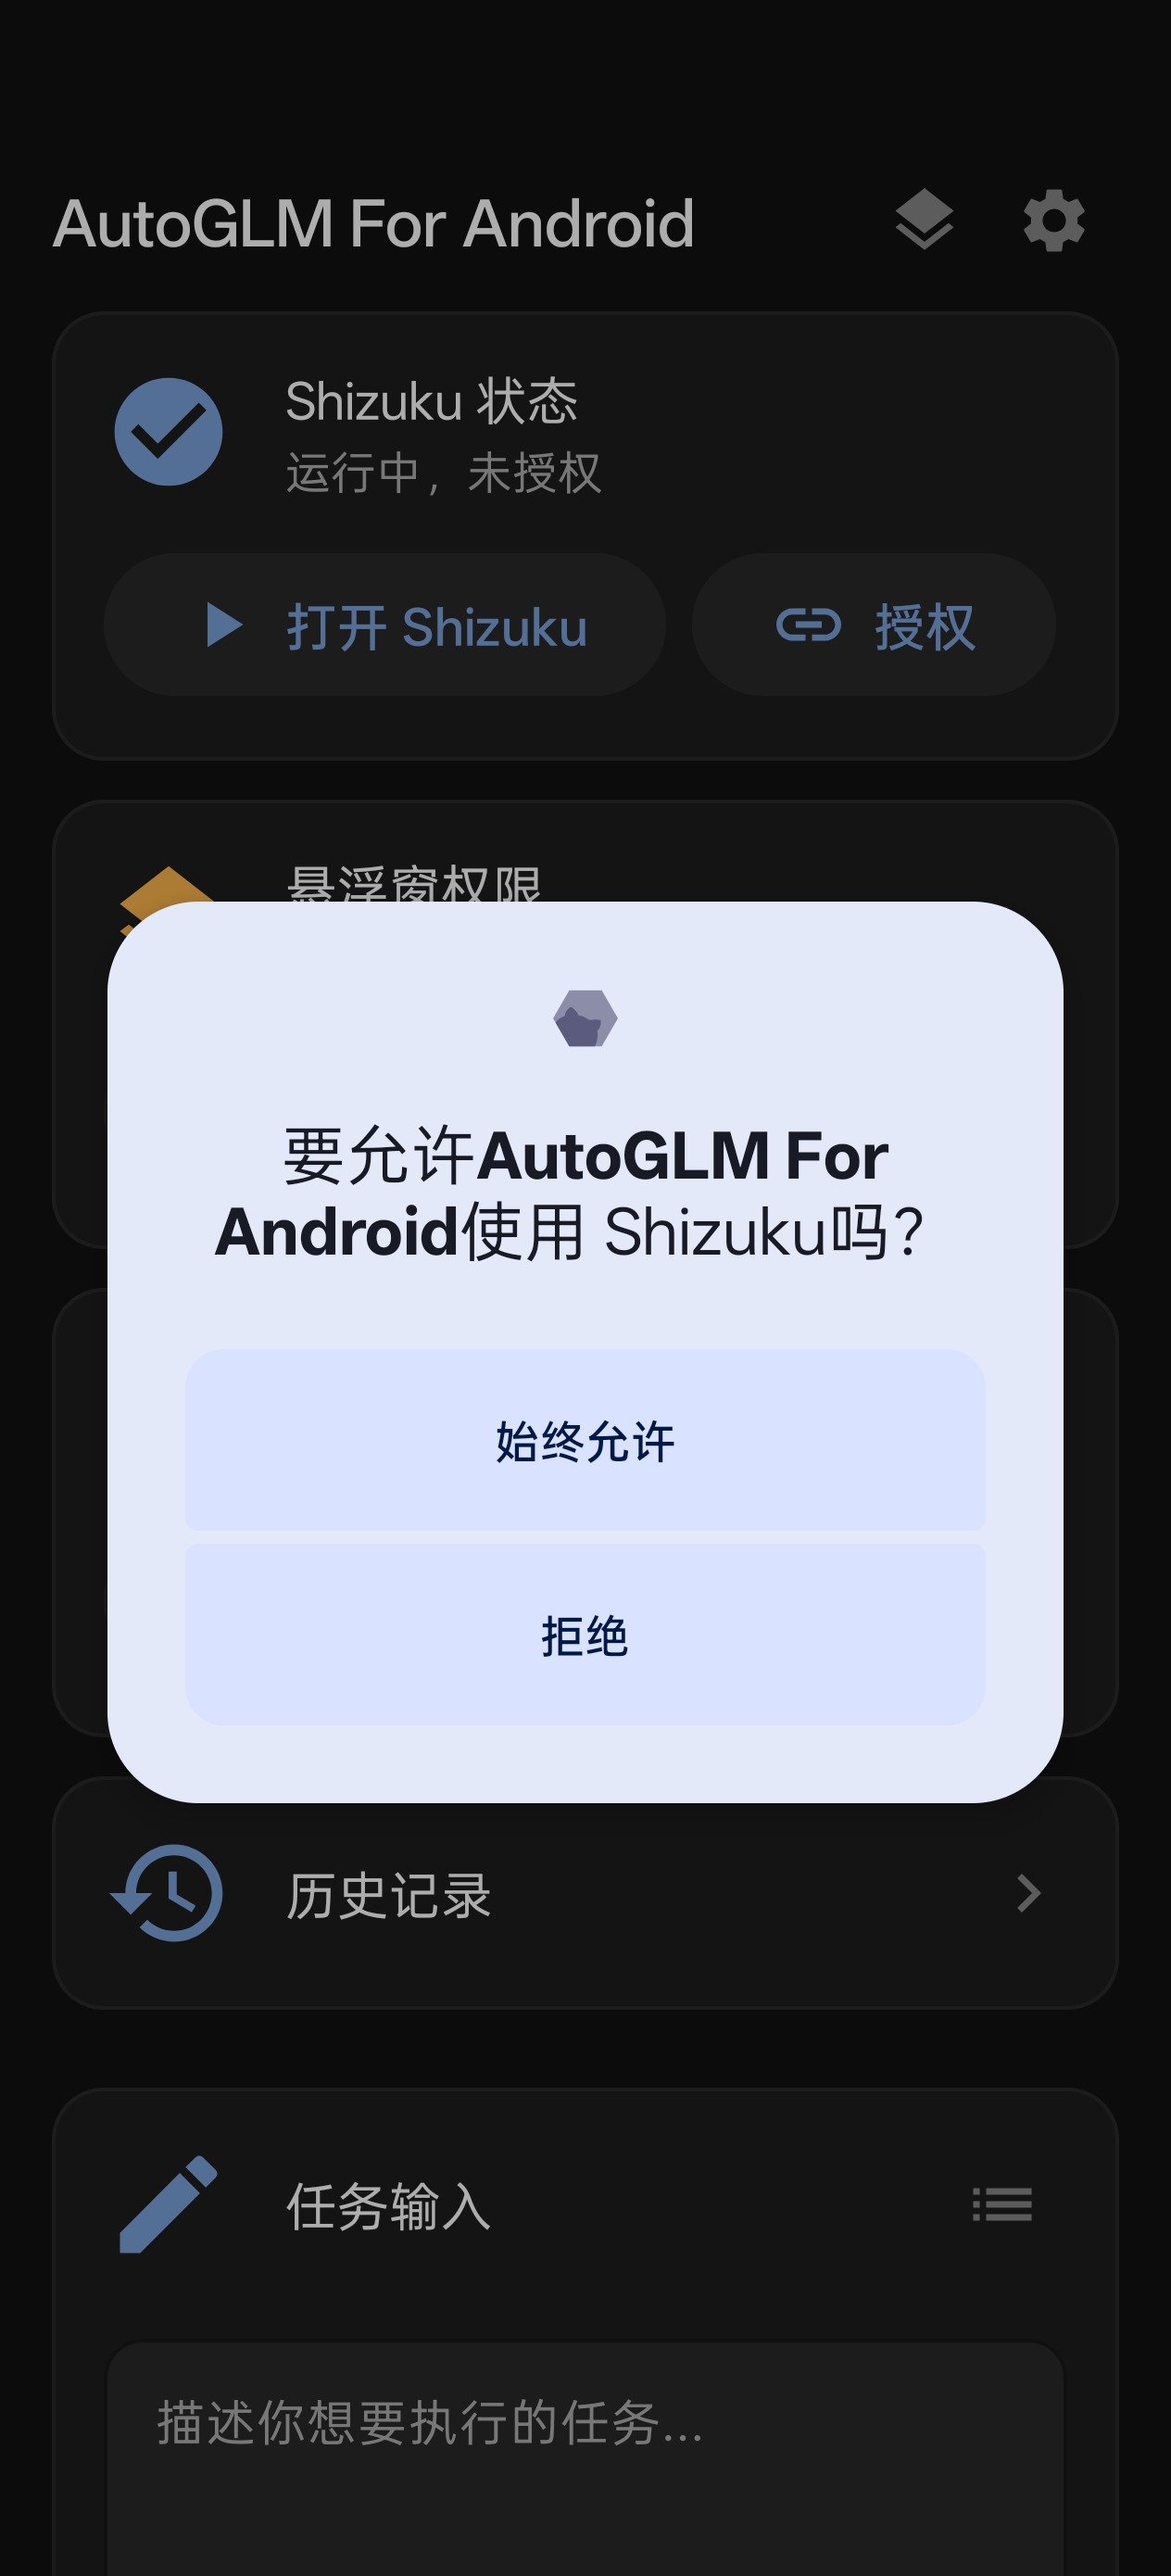
### Step 3: Grant Required Permissions
After opening the app, grant the following permissions in order:
| Permission | Purpose | Action |
| ------------------- | -------------------------- | ------------------------------------------------ |
| Shizuku Permission | Execute screen operations | Tap "Authorize" → Always Allow |
| Overlay Permission | Display task execution window | Tap "Authorize" → Enable toggle |
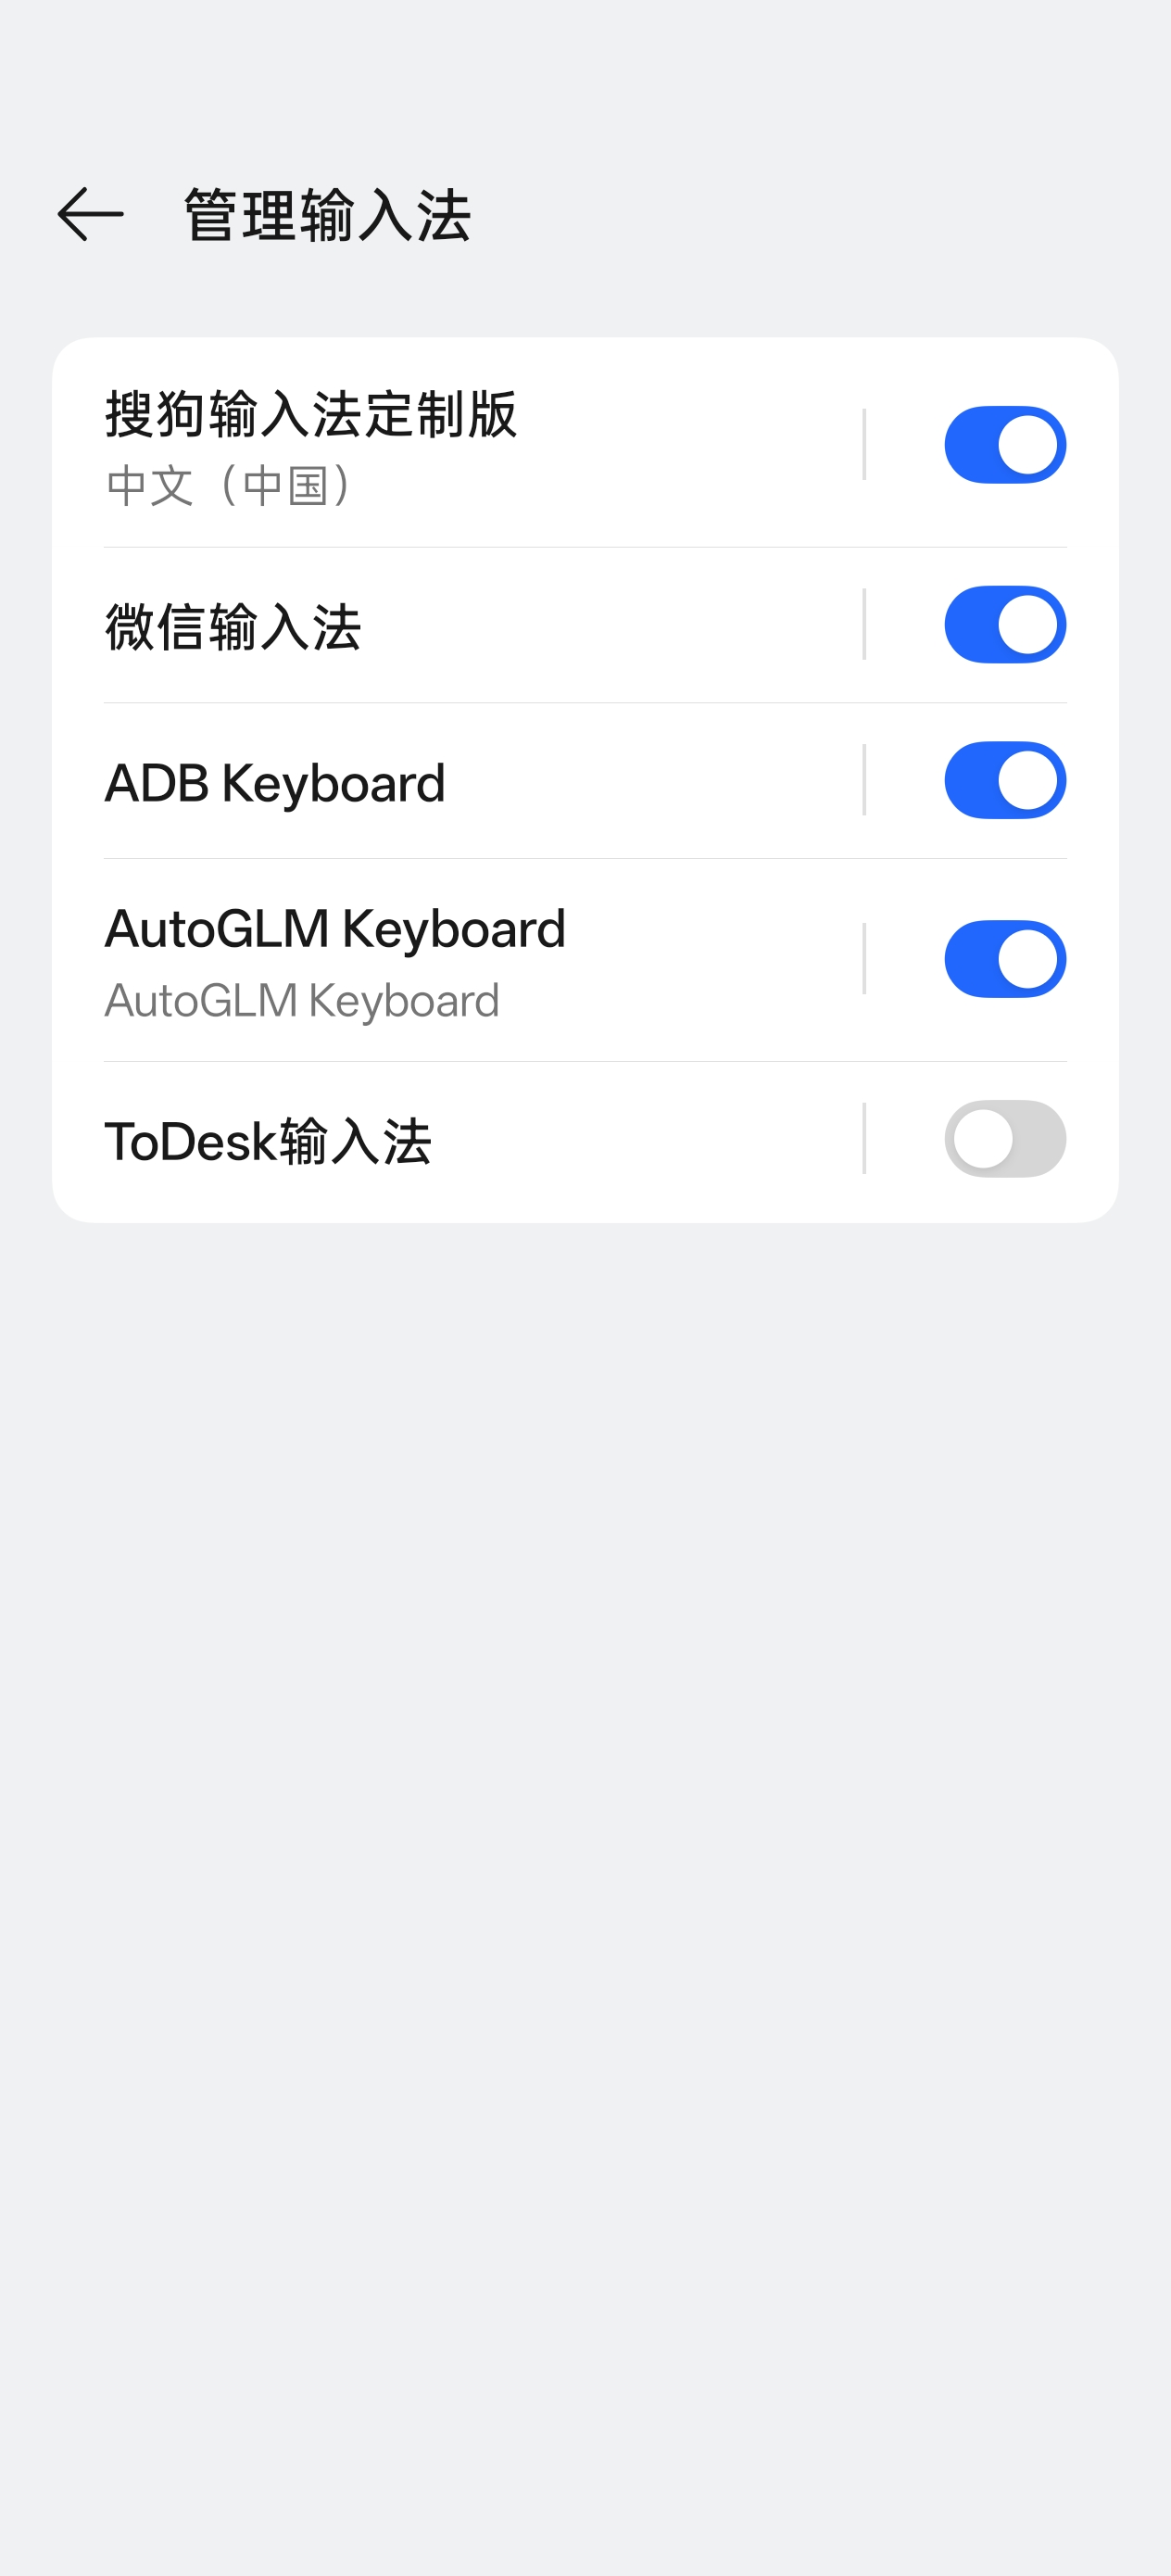
| Keyboard Permission | Input text content | Tap "Enable Keyboard" → Enable AutoGLM Keyboard |
> 💡 **Tip**: If overlay permission cannot be granted, go to app details page, tap "Menu (top right)" → Allow restricted settings, then try granting overlay permission again.
### Step 4: Configure Model Service
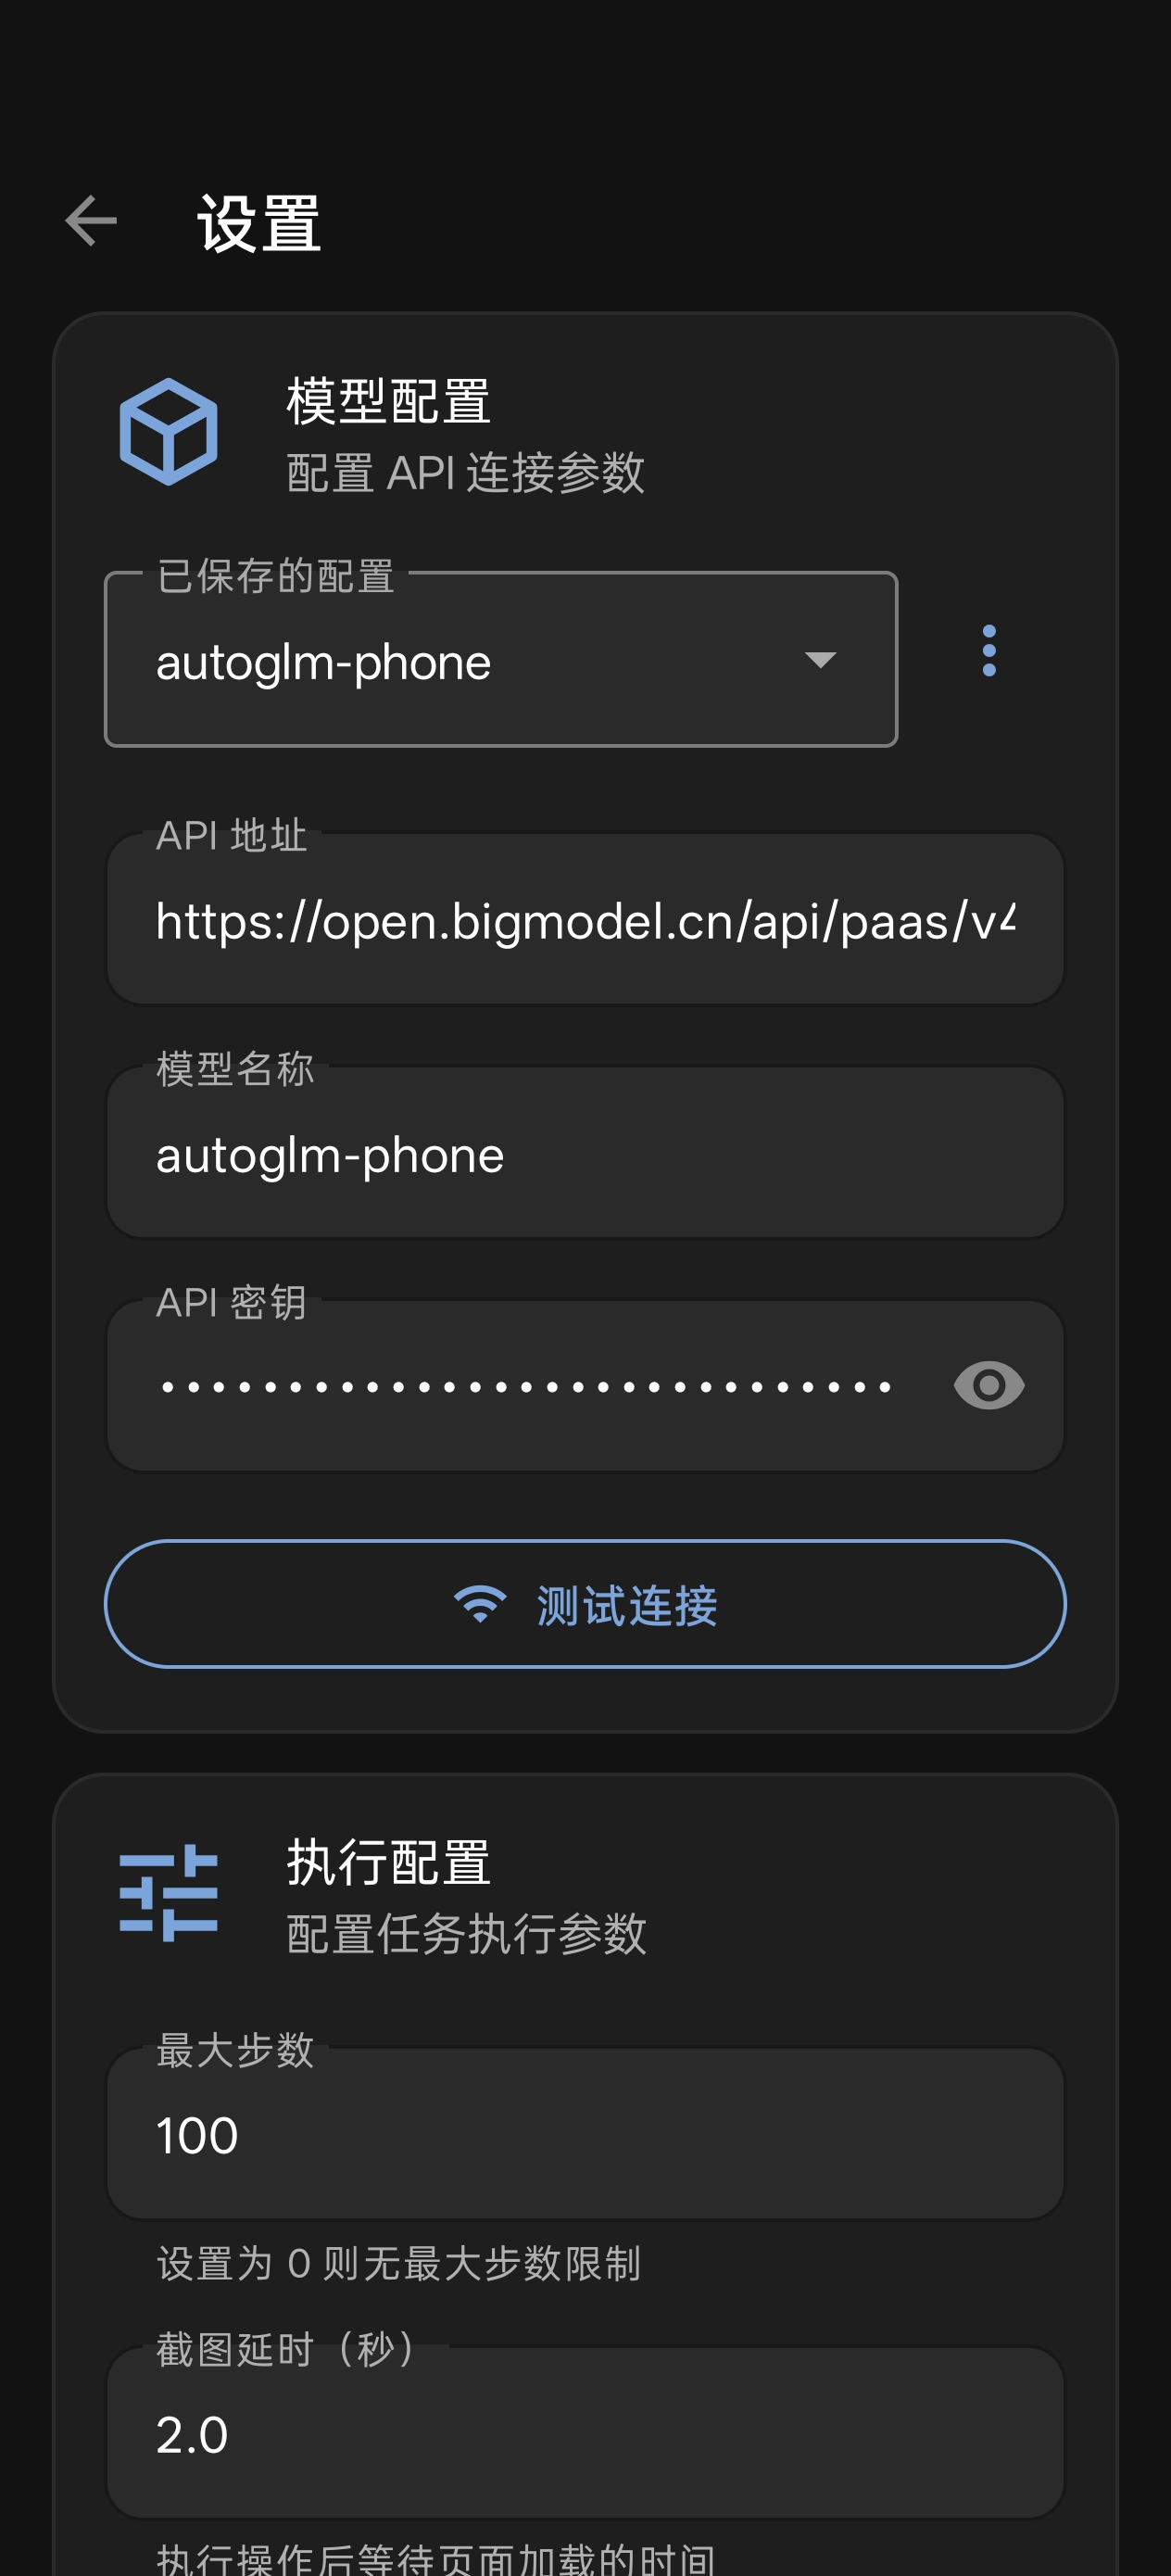
Go to "Settings" page and configure the AI model API:
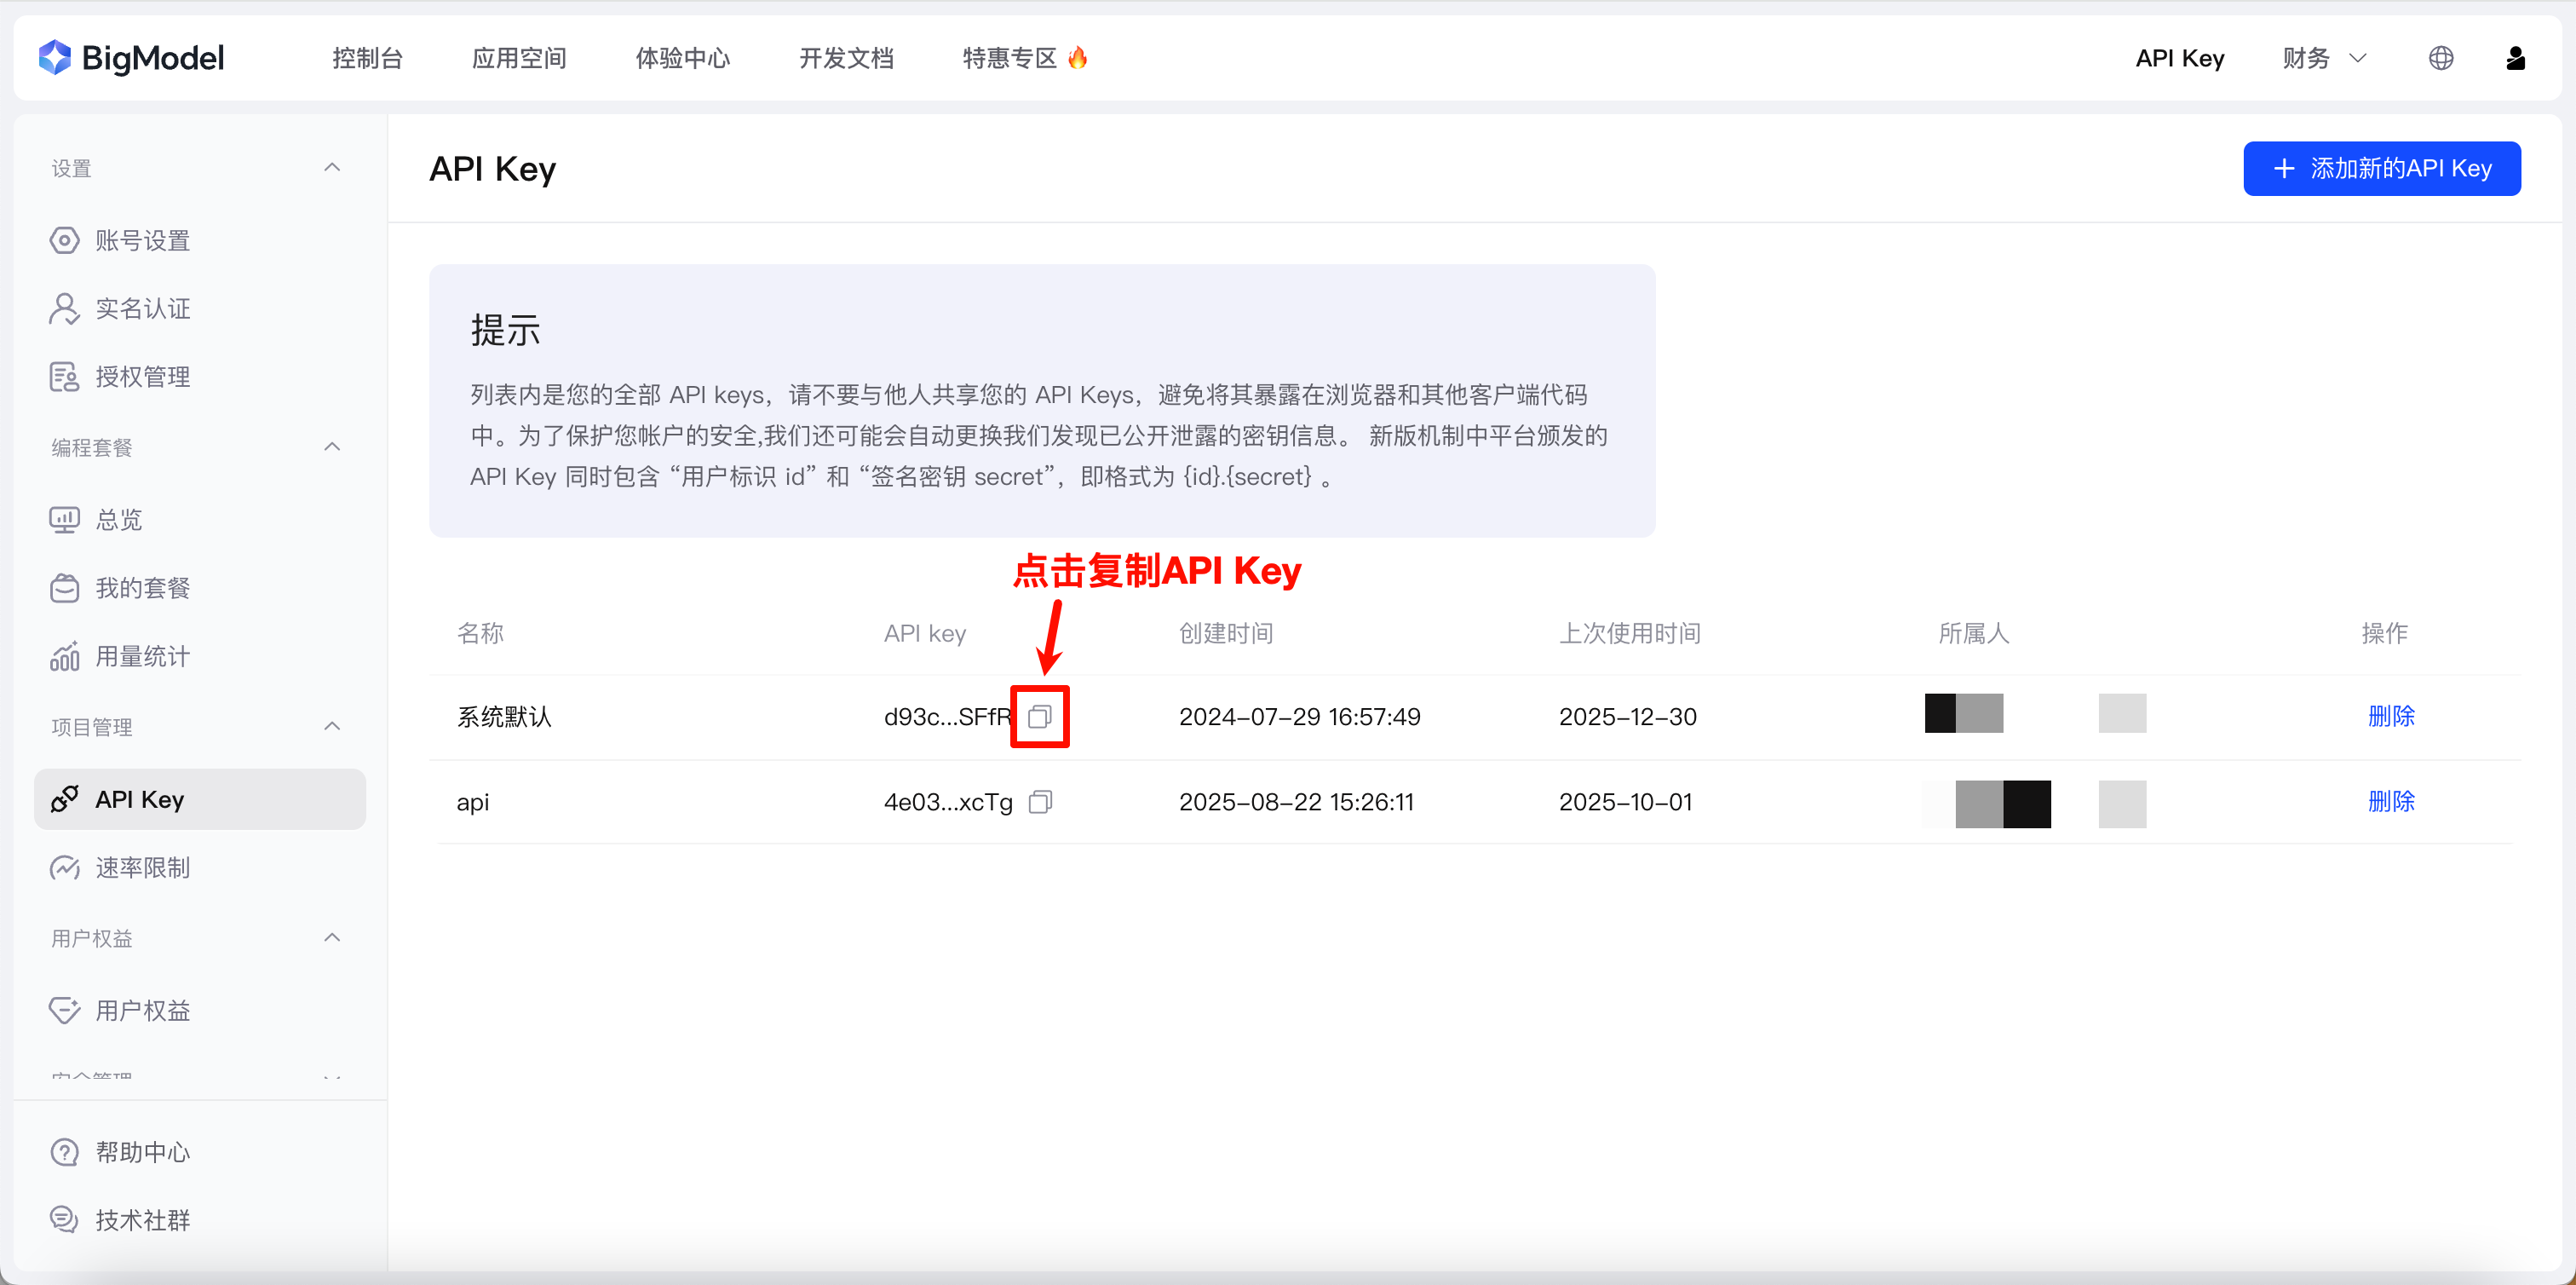
**Recommended Configuration (Zhipu BigModel)** 🎉 `autoglm-phone` model is currently FREE!
| Setting | Value |
| -------- | --------------------------------------------------------------------------------------- |
| Base URL | `https://open.bigmodel.cn/api/paas/v4` |
| Model | `autoglm-phone` |
| API Key | Get from [Zhipu AI Open Platform](https://open.bigmodel.cn/usercenter/proj-mgmt/apikeys)|
**Alternative Configuration (ModelScope)**
| Setting | Value |
| -------- | -------------------------------------------- |
| Base URL | `https://api-inference.modelscope.cn/v1` |
| Model | `ZhipuAI/AutoGLM-Phone-9B` |
| API Key | Get from [ModelScope](https://modelscope.cn/)|
After configuration, tap "Test Connection" to verify the settings.
**Using Other Third-Party Models**:
Any model service can be used as long as it meets the following requirements:
1. **API Format Compatible**: Provides OpenAI-compatible `/chat/completions` endpoint
2. **Multi-modal Support**: Supports `image_url` format for image input
3. **Image Understanding**: Can analyze screenshots and understand UI elements
> ⚠️ **Note**: Non-AutoGLM models may require custom system prompts to output the correct action command format. You can customize system prompts in Settings → Advanced Settings.
### Step 5: Start Using
1. Enter a task description on the main screen, e.g., "Open WeChat and send a message to File Transfer: test"
2. Tap "Start Task" button
3. The floating window will automatically appear, showing execution progress
4. Watch the AI's thinking process and execution actions
---
## 📖 User Guide
### Basic Operations
**Start a Task**:
1. Enter task description on the main screen or floating window
2. Tap "Start" button
3. The app will automatically screenshot, analyze, and execute actions
**Control Tasks**:
| Button | Function |
| --------- | ------------------------------- |
| ⏸️ Pause | Pause after current step |
| ▶️ Resume | Resume paused task |
| ⏹️ Stop | Cancel current task |
**View History**:
1. Tap the "History" icon in the top right of main screen
2. View all executed tasks
3. Tap a task to view detailed steps and screenshots
### Task Examples
**Social Communication**
```
Open WeChat, search for John and send message: Are you free tomorrow?
Open WeChat, check the latest Moments updates
```
**Shopping Search**
```
Open Taobao, search for wireless earphones, sort by sales
Open JD, search for phone cases, filter price under 50 yuan
```
**Food Delivery**
```
Open Meituan, search for nearby hotpot restaurants
Open Eleme, order a braised chicken rice
```
**Navigation**
```
Open Amap, navigate to the nearest subway station
Open Baidu Maps, search for nearby gas stations
```
**Video Entertainment**
```
Open TikTok, browse 5 videos
Open Bilibili, search for programming tutorials
```
### Advanced Features
**Save Model Configuration**:
If you have multiple model APIs, save them as different profiles:
1. Go to "Settings" → "Model Configuration"
2. After configuring parameters, tap "Save Configuration"
3. Enter a profile name (e.g., Zhipu, OpenAI)
4. Switch between profiles quickly from the list
**Create Task Templates**:
Save frequently used tasks as templates for one-click execution:
1. Go to "Settings" → "Task Templates"
2. Tap "Add Template"
3. Enter template name and task description
4. Tap template button on main screen for quick selection
**Custom System Prompts**:
Optimize AI performance for specific scenarios:
1. Go to "Settings" → "Advanced Settings"
2. Edit system prompts
3. Add domain-specific instructions for enhancement
**Quick Tile**:
Add a quick tile to notification bar for fast floating window access:
1. Pull down notification bar, tap edit icon
2. Find "AutoGLM" tile
3. Drag it to the quick tile area
**Export Debug Logs**:
Export logs for troubleshooting when issues occur:
1. Go to "Settings" → "About"
2. Tap "Export Logs"
3. Logs will automatically sanitize sensitive information
### Usage Tips
1. **Be Clear in Task Descriptions**: Describe the operations you want to complete as specifically as possible
2. **Break Down Complex Tasks**: Split complex tasks into multiple simple ones
3. **Use Pause Wisely**: Pause before critical steps, confirm before continuing
4. **Save Common Templates**: Save repetitive tasks as templates for efficiency
5. **Check Shizuku Regularly**: Ensure Shizuku service keeps running
## 🛠️ Development Guide
### Environment Setup
**Development Tools**:
- Android Studio Hedgehog (2023.1.1) or higher
- JDK 11 or higher
- Kotlin 1.9.x
**Clone Project**:
```bash
git clone https://github.com/your-repo/AutoGLM-For-Android.git
cd AutoGLM-For-Android
```
**Open Project**:
1. Launch Android Studio
2. Select "Open an existing project"
3. Select project root directory
4. Wait for Gradle sync to complete
### Project Structure
```
app/src/main/java/com/kevinluo/autoglm/
├── action/ # Action handling module
│ ├── ActionHandler.kt # Action executor
│ ├── ActionParser.kt # Action parser
│ └── AgentAction.kt # Action data classes
├── agent/ # Agent core module
│ ├── PhoneAgent.kt # Phone Agent main class
│ └── AgentContext.kt # Conversation context management
├── app/ # App base module
│ ├── AppInfo.kt # App info data class
│ ├── AppResolver.kt # App name resolver
│ └── AutoGLMApplication.kt
├── config/ # Configuration module
│ ├── I18n.kt # Internationalization
│ └── SystemPrompts.kt # System prompts
├── device/ # Device operation module
│ └── DeviceExecutor.kt # Device command executor
├── history/ # History module
│ ├── HistoryManager.kt # History manager
│ ├── HistoryActivity.kt # History UI
│ ├── HistoryDetailActivity.kt # History detail UI
│ ├── HistoryDetailAdapter.kt # History detail adapter
│ ├── HistoryModels.kt # History data models
│ └── ScreenshotAnnotator.kt # Screenshot annotator
├── input/ # Input module
│ ├── TextInputManager.kt # Text input manager
│ ├── KeyboardHelper.kt # Keyboard helper utility
│ └── AutoGLMKeyboardService.kt # Built-in keyboard
├── model/ # Model communication module
│ └── ModelClient.kt # API client
├── screenshot/ # Screenshot module
│ └── ScreenshotService.kt # Screenshot service
├── settings/ # Settings module
│ ├── SettingsManager.kt # Settings manager
│ └── SettingsActivity.kt # Settings UI
├── ui/ # UI module
│ ├── FloatingWindowService.kt # Floating window service
│ ├── FloatingWindowTileService.kt # Quick tile service
│ ├── FloatingWindowToggleActivity.kt # Floating window toggle
│ └── MainViewModel.kt # Main screen ViewModel
├── util/ # Utility module
│ ├── CoordinateConverter.kt # Coordinate converter
│ ├── ErrorHandler.kt # Error handler
│ ├── HumanizedSwipeGenerator.kt # Humanized swipe generator
│ ├── LogFileManager.kt # Log file manager & export
│ └── Logger.kt # Logger utility
├── ComponentManager.kt # Component manager
├── MainActivity.kt # Main activity
└── UserService.kt # Shizuku user service
```
### Core Module Description
**PhoneAgent (agent/PhoneAgent.kt)**
- Core Agent class, responsible for task execution flow
- Manages screenshot → model request → action execution loop
- Supports pause, resume, cancel operations
**ModelClient (model/ModelClient.kt)**
- Communicates with model API
- Supports SSE streaming responses
- Parses thinking process and action commands
**ActionHandler (action/ActionHandler.kt)**
- Executes various device operations
- Coordinates DeviceExecutor, TextInputManager and other components
- Manages floating window show/hide
**DeviceExecutor (device/DeviceExecutor.kt)**
- Executes shell commands via Shizuku
- Implements click, swipe, key press and other operations
- Supports humanized swipe trajectories
**ScreenshotService (screenshot/ScreenshotService.kt)**
- Captures screen and compresses to WebP
- Automatically hides floating window to avoid interference
- Supports sensitive page detection
### Build and Debug
**Debug Build**:
```bash
./gradlew assembleDebug
```
**Release Build**:
```bash
./gradlew assembleRelease
```
**Run Tests**:
```bash
./gradlew test
```
**Install to Device**:
```bash
./gradlew installDebug
```
## 🔧 FAQ
### Shizuku Related
**Q: Shizuku shows not running?**
A: Make sure Shizuku is installed and opened, follow the guide to activate. Wireless debugging is recommended.
**Q: Shizuku invalid after every restart?**
A: Wireless debugging requires re-pairing. Consider:
- Root method for permanent activation
- ADB method for activation
### Permission Related
**Q: Cannot grant overlay permission?**
A: Manual operation: System Settings → Apps → AutoGLM → Permissions → Enable "Display over other apps"
**Q: Cannot enable keyboard?**
A: Manual operation: System Settings → Language & Input → Manage Keyboards → Enable AutoGLM Keyboard
### Operation Related
**Q: Click action not working?**
A:
1. Check if Shizuku is running
2. Some systems require "USB debugging (Security settings)" enabled
3. Try restarting Shizuku
**Q: Text input failed?**
A:
1. Make sure AutoGLM Keyboard is enabled
2. Try manually switching input method once before executing task
**Q: Screenshot shows black screen?**
A: This is normal protection for sensitive pages (payment, password, etc.). The app will auto-detect and mark them.
### Model Related
**Q: API connection failed?**
A:
1. Check network connection
2. Verify API Key is correct
3. Verify Base URL format is correct (no trailing `/`)
**Q: Model response is slow?**
A:
1. Check network quality
2. Try switching to another model service
3. Adjust timeout in settings
## 📄 License
This project is licensed under [MIT License](LICENSE).
## ⭐ Star History
[](https://star-history.com/#Luokavin/AutoGLM-For-Android&Date)
## 🙏 Acknowledgments
- [Open-AutoGLM](https://github.com/zai-org/Open-AutoGLM) - Original open-source project
- [Shizuku](https://github.com/RikkaApps/Shizuku) - System permission framework
- [Zhipu AI](https://www.zhipuai.cn/) - AutoGLM model provider
## 📞 Contact
- Issues: [GitHub Issues](https://github.com/your-repo/issues)
- Email: luokavin@foxmail.com
---
**If this project helps you, please give it a ⭐ Star!**