---
title: Content for API token tutorial
output: html_fragment
dateCreated: '2024-12-30'
---
```{r setup, include=FALSE}
library(arrow)
library(reticulate)
reticulate::py_config()
knitr::opts_chunk$set(echo = TRUE)
```
This tutorial explains the background of NEON API tokens, provides a few
options for how to store and use your API token, and demonstrates how to use a
token with the neonUtilities code packages. If you aren't interested in these
details and are looking for a quick and easy guide to getting a token and
storing it in the recommended way,
see the Set Up an API Token tutorial.
NEON data can be downloaded from either the NEON Data Portal or the NEON API.
To download from the Data Portal, you need to create a user account. Read
about the benefits of an account on the User Account page. You can also use your account to create a token for using the
API. Your token is unique to your account, so don't share it.
Requiring tokens for data downloads helps NEON track data download patterns
and better understand data use, and helps to deter bots that scrape data
autonomously. The frequency of bot downloads has increased in recent years, and
putting obstacles in their way improves speed and performance for human users.
Tokens should be used whenever you use the NEON API. In this tutorial, we'll
focus on using tokens with the neonUtilities R package and the neonutilities
Python package. You can follow the tutorial using your preferred programming
language.
## Objectives
After completing this activity, you will be able to:
* Create a NEON API token
* Use your token when downloading data with neonUtilities
## Things You’ll Need To Complete This Tutorial
A recent version of R (version 4+) or Python (3.10+) installed on
your computer.
## Install and Load Packages {.tabset}
### R
Install the neonUtilities package. You can skip this step if it's
already installed, but remember to update regularly.
```{r installs, eval=FALSE}
install.packages("neonUtilities")
```
Load the package.
```{r loadStuff, results="hide"}
library(neonUtilities)
```
### Python
Install the neonutilities package. You can skip this step if it's
already installed, but remember to update regularly.
```{python p-install, eval=FALSE}
# do this in the command line
pip install neonutilities
```
Load the package.
```{python p-loadStuff}
import neonutilities as nu
import os
```
## {-}
## Additional Resources
* NEON Data Portal
* NEONScience GitHub Organization
* neonUtilities tutorial

## Get a NEON API Token
The first step is create a NEON user account, if you don't have one.
Follow the instructions on the Data Portal User Accounts page. If you do already
have an account, go to the NEON Data Portal,
sign in, and go to your My Account profile page.
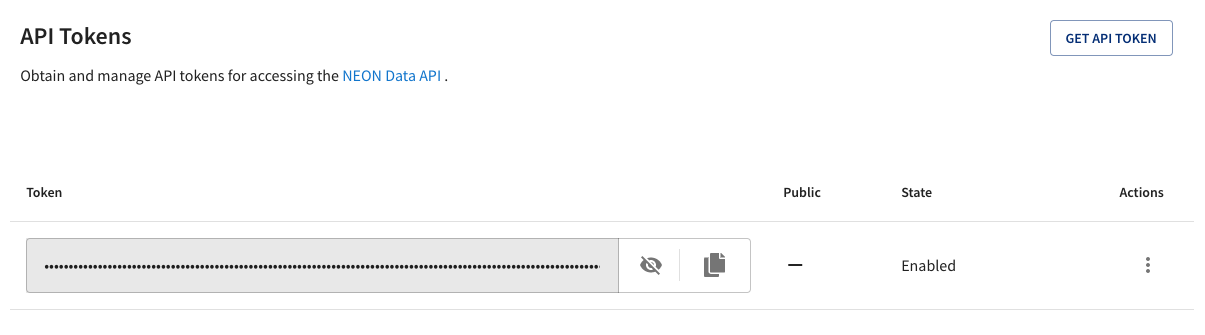
Once you have an account, you can create an API token for yourself. At
the bottom of the My Account page, you should see this bar:
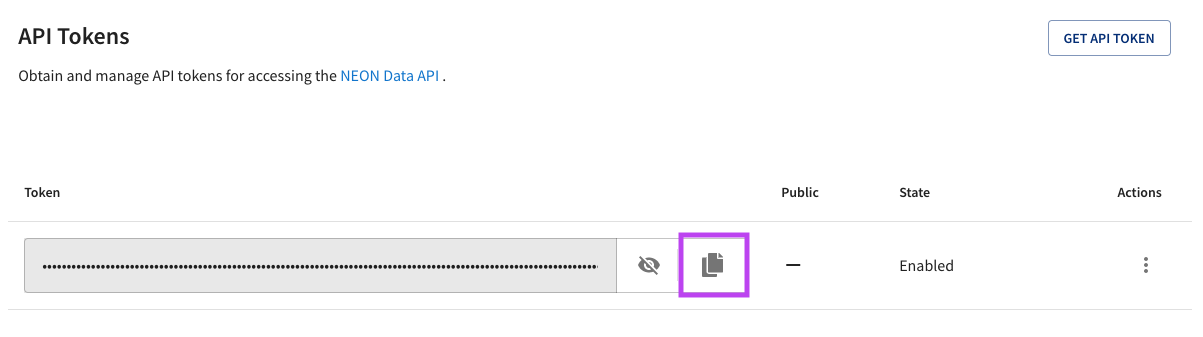
Click the 'GET API TOKEN' button. After a moment, you should see this:
Click on the Copy button to copy your API token to the clipboard:
## Use API token in neonUtilities {.tabset}
In the next section, we'll walk through saving your token somewhere secure but
accessible to your code. But first let's try out using the token the easy way,
as a simple text string.
NEON API tokens are very long, so it would be annoying to keep pasting the
entire string into functions. Assign your token an object name:
### R
```{r nameToken}
NEON_TOKEN <- "PASTE YOUR TOKEN HERE"
```
Now we'll use the `loadByProduct()` function to download data. Your
API token is entered as the `token` input parameter. For
this example, we'll download Plant foliar traits (DP1.10026.001) at Wind River
(WREF).
```{r getCFC, results="hide", message=FALSE}
foliar <- loadByProduct(dpID="DP1.10026.001", site="WREF",
package="expanded", check.size=F,
token=NEON_TOKEN)
```
### Python
```{python p-nameToken}
NEON_TOKEN = "PASTE YOUR TOKEN HERE"
```
Now we'll use the `load_by_product()` function to download data. Your
API token is entered as the `token` input parameter. For
this example, we'll download Plant foliar traits (DP1.10026.001) at Wind River
(WREF).
```{python p-getCFC, results="hide"}
foliar = nu.load_by_product(dpid="DP1.10026.001", site="WREF",
package="expanded", check_size=False,
token=NEON_TOKEN)
```
## {-}
You should now have data saved in the `foliar` object; the API
silently used your token.
This format applies to all `neonUtilities` functions that involve
downloading data or otherwise accessing the API; you can use the
`token` input with all of them. For example, when downloading
remote sensing data:
### Use token to download AOP data {.tabset}
#### R
```{r getAOP, eval=FALSE, comment=NA}
chm <- byTileAOP(dpID="DP3.30015.001", site="WREF",
year=2017, check.size=F,
easting=c(571000,578000),
northing=c(5079000,5080000),
savepath=getwd(),
token=NEON_TOKEN)
```
#### Python
```{python p-getAOP, eval=FALSE, comment=NA}
chm = nu.by_tile_aop(dpid="DP3.30015.001", site="WREF",
year=2017, check_size=False,
easting=[571000,578000],
northing=[5079000,5080000],
savepath=os.getcwd(),
token=NEON_TOKEN)
```
### {-}
## Token management for open code
Your API token is unique to your account, so don't share it!
If you're writing code that will be shared with colleagues or available
publicly, such as in a GitHub repository or supplemental materials of a
published paper, you can't include the line of code above where we assigned
your token to `NEON_TOKEN`, since your token is fully visible in the code
there. Instead, you'll need to save your token locally on your computer,
and pull it into your code without displaying it. There are a few ways to
do this, we'll show two options here.
* Option 1: Save the token in a local file, and `source()` (R) or `import`
(Python) that file at the start of every script. This is fairly simple but
requires a line of code in every script.
* Option 2: Set the token as an environment variable and you can access it
from any script. This is a little more work to set up initially, but once it's
done, it's done globally, and it will work in every script you run in that
environment.
## Option 1: Save token in a local file {.tabset}
### R
Open a new, empty R script (.R). Put a single line of code in the script:
```{r scriptToSource}
NEON_TOKEN <- "PASTE YOUR TOKEN HERE"
```
Save this file in a logical place on your machine, somewhere that won't be
visible publicly. Here, let's call the file `neon_token_source.R`, and
save it to the working directory. Then, at the start of
every script where you're going to use the NEON API, you would run this line
of code:
```{r source, eval=FALSE, comment=NA}
source(paste0(wd, "/neon_token_source.R"))
```
Now you can use `token=NEON_TOKEN` when you run `neonUtilities`
functions, and you can share your code without accidentally sharing your
token.
### Python
Open a new, empty Python script (.py). Put a single line of code in the script:
```{python p-scriptToSource}
NEON_TOKEN = "PASTE YOUR TOKEN HERE"
```
Save this file in a logical place on your machine, somewhere that won't be
visible publicly. Here, let's call the file `neon_token_source.py`, and
save it to the working directory. Then, at the start of
every script where you're going to use the NEON API, you would run this line
of code:
```{python p-source, eval=FALSE, comment=NA}
import neon_token_source
```
Now you can use `token=neon_token_source.NEON_TOKEN` when you run `neonutilities`
functions, and you can share your code without accidentally sharing your
token.
## {-}
## Option 2: Set token as environment variable {.tabset}
### R
To create a persistent environment variable in R, we use a
`.Renviron` file. Before creating a file, check which directory
R is using as your home directory:
```{r getdir, results="hide"}
# For Windows:
Sys.getenv("R_USER")
```
```{r getdir-2, results="hide"}
# For Mac/Linux:
Sys.getenv("HOME")
```
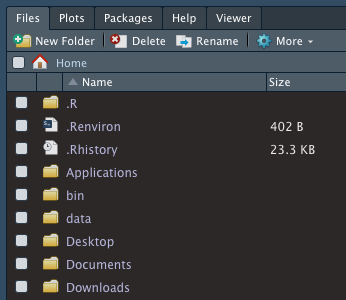
Check the home directory to see if you already have a `.Renviron` file, **using
the file browse pane in RStudio**, or using another file browse method with
hidden files shown. Files that begin with `.` are hidden by default, but
RStudio recognizes files that begin with `.R` and displays them.
Screenshot of file browse pane with .Renviron file.
If you already have a `.Renviron` file, open it and follow the instructions
below to add to it. If you don't have one, create one using File -> New File
-> Text File in the RStudio menus.
Add one line to the text file. In this case, there are no quotes around the
token value.
```{r Renviron, eval=FALSE, comment=NA}
NEON_TOKEN=PASTE YOUR TOKEN HERE
```
Save the file as `.Renviron` in the RStudio home directory identified above.
Re-start R to load the environment.
Once your token is assigned to an environment variable, use the function
`Sys.getenv()` to access it. For example, in `loadByProduct()`:
```{r useEnvtToken, results="hide", message=FALSE}
foliar <- loadByProduct(dpID="DP1.10026.001", site="WREF",
package="expanded", check.size=F,
token=Sys.getenv("NEON_TOKEN"))
```
### Python
To create a persistent environment variable in Python, the simplest
option is to use the `dotenv` module. You will still need to load the
variables in each script, but it provides a more flexible way to
manage enrionment variables.
```{python p-install-env, eval=FALSE}
pip install python-dotenv
```
Create a file named `.env` in the project folder. If you're using
GitHub, make sure `.env` is in your `.gitignore` to avoid syncing
tokens to GitHub.
To add variables to the `.env` file:
```{python p-var-add, eval=FALSE}
import dotenv
dotenv.set_key(dotenv_path=".env",
key_to_set="NEON_TOKEN",
value_to_set="YOUR TOKEN HERE")
```
Use the command `dotenv.load_dotenv()` to load environment
variables to the session, then use `os.environ.get()` to
access particular variables. For example, in
`load_by_product()`:
```{python p-loadTokens, eval=FALSE}
dotenv.load_dotenv()
```
```{python p-useEnvtToken, results="hide"}
foliar = nu.load_by_product(dpid="DP1.10026.001", site="WREF",
package="expanded", check_size=False,
token=os.environ.get("NEON_TOKEN"))
```
If `dotenv.load_dotenv()` returns `False`, the variables did not
load. Try `dotenv.load_dotenv(dotenv.find_dotenv(usecwd=True))`.
## {-}