---
title: Isaac Sim
description: "Simulation and Control with OM1"
icon: robot
---
## System Requirements
| Component| Minimum | Good | Ideal |
|----------|-------------------------------------------|----------------------------------------|------------------------------------------|
| OS | Ubuntu 20.04 / 22.04 | Ubuntu 20.04 / 22.04 | Ubuntu 20.04 / 22.04 |
| CPU | Intel Core i7 (7th Gen)
AMD Ryzen 5 | Intel Core i7 (9th Gen)
AMD Ryzen 7 | Intel Core i9, X-series or higher
AMD Ryzen 9, Threadripper or higher |
| Cores | 4 | 8 | 16 |
| RAM | 32 GB | 64 GB | 64 GB |
| Storage | 50 GB SSD | 500 GB SSD | 1 TB NVMe SSD |
| GPU | GeForce RTX 3070 | GeForce RTX 4080 | RTX Ada 6000 |
| VRAM | 8 GB | 16 GB | 48 GB |
## Features
- Isaac Sim: Realistic physics simulation of the Unitree Go2.
- Navigation Stack (Nav2): Fully configured navigation stack for autonomous movement.
- SLAM: Mapping capabilities using slam_toolbox.
- LiDAR Support: Simulation of Velodyne VLP-16 and Unitree 4D LiDAR.
## Simulation Instructions
To get started with **Isaac Sim** and **Unitree SDK**, please install cyclonedds and **ROS2 Humble** first. You can find the installation steps [here](../developing/middleware.md).
To install compilers and other tools to build ROS packages, run
```bash
sudo apt install ros-dev-tools
```
Install the following additional dependencies
```bash
sudo apt install ros-humble-rmw-cyclonedds-cpp
sudo apt install ros-humble-rosidl-generator-dds-idl
```
Set up your environment by sourcing the following file.
```bash
source /opt/ros/humble/setup.bash
```
If you don't have uv installed, use the following command to install it on your system.
```bash
curl -LsSf https://astral.sh/uv/install.sh | sh
```
Check if you have rosdep installed by running `rosdep` or `rosdep --version`. If it is not installed, run the following:
```bash
sudo apt-get update
sudo apt-get install python3-rosdep
```
Once you've successfully completed above steps, follow the following steps to start the Isaac Sim simulation with OM1.
Step 1: Clone the [OM1-ros2-sdk](https://github.com/OpenMind/OM1-ros2-sdk) repository:
```bash
git clone https://github.com/OpenMind/OM1-ros2-sdk.git
```
Step 2: Initialize rosdep by setting up the source list (this is only needed once per machine)
> **Note:** Run 'sudo rosdep init' only if rosdep has not been initialized on this machine before. If it has, skip this line and start from 'rosdep update'.
```bash
cd OM1-ros2-sdk
sudo rosdep init
rosdep update
rosdep install --from-paths . --ignore-src -r -y
```
It automatically installs all system dependencies needed by the ROS packages in your current directory.
Step 3: Build all the packages:
```bash
colcon build
```
Once the build is successful, create a virtual environment and install the dependencies
```bash
uv venv --python 3.10
source .venv/bin/activate
uv pip install .
```
Step 4: Install Isaac Sim
Open a new terminal window and switch to `unitree/isaac_sim` directory within `OM1-ros2-sdk`
```bash
cd OM1-ros2-sdk/unitree/isaac_sim
uv venv --python 3.11 --seed env_isaacsim
source env_isaacsim/bin/activate
# note that here we are installing IsaacSim 5.1
pip install "isaacsim[all,extscache]==5.1.0" --extra-index-url https://pypi.nvidia.com
# install the following or another CUDA-enabled PyTorch build that matches your system architecture
pip install -U torch==2.7.0 torchvision==0.22.0 --index-url https://download.pytorch.org/whl/cu128
# after installation, run the following to test successful installation
isaacsim
```
If the previous command ran with no issues, Isaac Sim was installed successfully.
Step 5: Now, let's get our system ready to run OM1 with Isaac Sim. Open a terminal and run the following commands.
To run the script, export the following
> **Note**: a trained policy is required, which should contain the policy.pt, env.yaml, and deploy.yaml files
```bash
export ROS_DISTRO=humble
export LD_LIBRARY_PATH=$LD_LIBRARY_PATH:PATH_TO_VENV/env_isaaclab/lib/python3.11/site-packages/isaacsim/exts/isaacsim.ros2.bridge/humble/lib
```
> **Note:** Make sure to replace PATH_TO_VENV with the actual path to your virtual environment. We use `env_isaacsim` (Python 3.11) for Isaac Sim and `.venv` (Python 3.10) for other services like orchestrator due to compatibility requirements.
We support Isaac Sim for Unitree Go2 and G1. To run the simulation for Go2, run
```bash
source env_isaacsim/bin/activate
python3 run.py # using default policy
python3 run.py --policy_dir YOUR_POLICY_DIR # using your own policy
```
To run the simulation for G1, run
```bash
source env_isaacsim/bin/activate
python3 run.py --robot_type g1 # using default policy
python3 run.py --robot_type g1 --policy_dir YOUR_POLICY_DIR # using your own policy
```
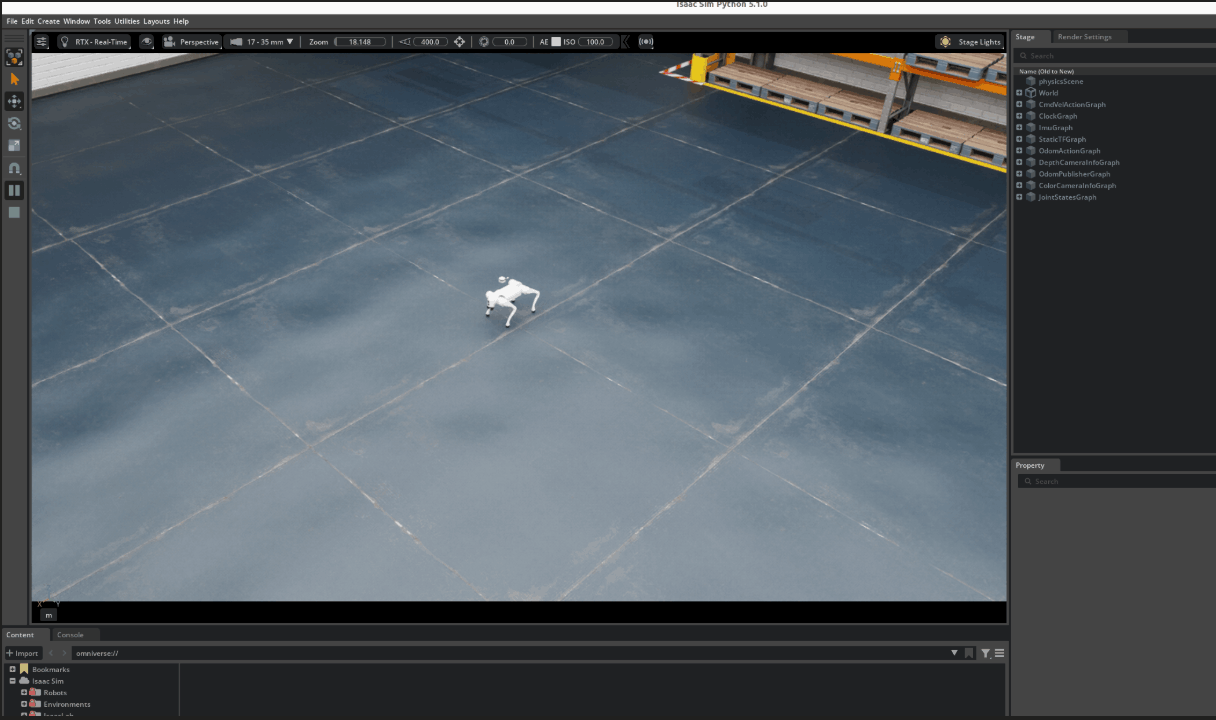
You'll now be able to see Isaac Sim running on your system.
> **Note**: You can skio Step 6 to Step 8 if you don't have Enterprise Plan Subscription. SLAM and Navigation are only supported as Premium features.
Step 6: Open a new terminal , switch to base directory `OM1-ros2-sdk` and run:
```bash
source install/setup.bash
ros2 launch go2_sdk sensor_launch.py use_sim:=true
```
This will bring up the `om/path` topic, enabling OM1 to understand the surrounding environment.
Step 7: Open a new terminal and run:
```bash
export PYTHONPATH=$PYTHONPATH:$(pwd)/.venv/lib/python3.10/site-packages
source install/setup.bash
ros2 launch orchestrator orchestrator_launch.py use_sim:=true
```
This will bring up the `orchestrator`, to consume data collected by `om1_sensor` for SLAM and Navigation.
Step 8: Run Zenoh Ros2 Bridge
To run the Zenoh bridge for the Unitree Go2, you need to have the Zenoh ROS 2 bridge installed. You can find the installation instructions [here](../developing/zenoh-bridge.md).
After installing the Zenoh ROS 2 bridge, you can run it with the following command:
```bash
zenoh-bridge-ros2dds -c ./zenoh/zenoh_bridge_config.json5
```
Step 9: Start OM1
Refer to the [Installation Guide](../developing/1_get-started.md) for detailed instructions.
Setup your API key in `.bashrc` file and run your simulation agent:
Get your API key from the [portal](https://portal.openmind.com), and add it to `bashrc`
```bash
vi ~/.bashrc
```
```bash
export OM_API_KEY=""
```
Now, run the simulation agent
```bash
CONFIG=unitree_go2_autonomy USE_SIM=true make dev
```
> **Note**: Update your agent name depending on robot type.
Congratulations! You have launched Isaac Sim with OM1 successfully.
### Control Methods
When keyboard control is enabled (default), use the following keys:
| Key | Action |
|-----|--------|
| `↑` or `Numpad 8` | Move forward |
| `↓` or `Numpad 2` | Move backward |
| `←` or `Numpad 4` | Strafe left |
| `→` or `Numpad 6` | Strafe right |
| `N` or `Numpad 7` | Rotate left |
| `M` or `Numpad 9` | Rotate right |
> **Note**: We don't have auto charging feature supported with Isaac Sim but it will be launched soon. Stay tuned!