---
name: Set up Your First Lightning Node
goal: Understand, install, configure, and use a Lightning node
objectives:
- Understand the role and usefulness of a Lightning node.
- Identify the different software solutions available.
- Install and configure a Lightning node (LND).
- Connect a spending wallet.
- Understand the risks associated with using a Lightning node.
---
# Your first step towards autonomy on Lightning
You've already acquired your first sats, secured your self-custody funds and deployed a Bitcoin node to be sovereign in your on-chain usage. The next step is to gain the same autonomy on Lightning: that's precisely the aim of this course.
LNP202 is aimed at intermediate users, and guides you step-by-step through the deployment of your first Lightning node, without advanced technical skills.
You'll learn how to install LND on Umbrel, open and manage your channels, supervise your node and connect a mobile wallet, so you can enjoy an experience comparable to that of a custodial wallet, while retaining total control over your funds.
+++
# Introduction
5e77c17a-0853-4f36-a988-1b4a956f49e4
## Course overview
e0871abf-af6d-4221-9389-1a996aea9b79
LNP202 is a hands-on course designed to make you autonomous on Lightning by operating your own node. The objective is simple: start with a Bitcoin node already in place, deploy LND on Umbrel, secure it properly, open and manage your first channels, then use your node on a daily basis from a mobile wallet. This course assumes that you've already taken BTC 202, as I'm assuming that your Bitcoin node on Umbrel is in place and synchronized. We won't go back over how to set up a Bitcoin node here.
https://planb.academy/courses/3cd9cb94-82e8-417a-9c5a-02afc2589426
For a better understanding of Lightning's internal mechanics, the LNP 201 course is also highly recommended, although it is not a prerequisite for this course:
https://planb.academy/courses/34bd43ef-6683-4a5c-b239-7cb1e40a4aeb
In the first part of this LNP202 course, we'll take a look at what a Lightning node really is, how it differs from a simple wallet, and why operating a personal node is the only way to use Lightning without delegating your sats to a trusted third party. This section concludes with a strategic choice: which solution is right for you, from the simplest approaches to the classic Lightning node, the one we'll be implementing in this course.
In Part 2 of the course, you'll install LND on Umbrel, then put in place the elements that prevent the most costly mistakes: a realistic backup strategy and protection against cheating via a watchtower. Once these basics are in place, you'll open your first channel, so you can start paying on Lightning with your own infrastructure.
So you see: in this LNP202 course, we'll be setting up a Lightning node in plug-and-play mode via Umbrel, rather than the classic command-line approach, to make it suitable for intermediate users. If you prefer a command-line installation, I recommend you follow the tutorial below. Other, more advanced, command-line oriented Lightning courses are also in preparation.
https://planb.academy/tutorials/node/lightning-network/lightning-network-daemon-linux-59d777e9-72c8-4b32-8c50-e86cdae8f2f9
Part 3 will then take you from a node that works to one that you know how to control. You'll start by determining your Lightning node operator profile (consumer, merchant or router), then get to grips with a complete management software package, in order to track your channels and act cleanly on your topology. Finally, you'll tackle a very important Lightning point: how to obtain inbound liquidity, whether via paid or cooperative solutions.
Part 4 will focus on everyday use. You'll be setting up a connection between your node and a mobile customer, so you can pay and collect simply from your smartphone, without giving up self-custody. We'll look first at a network approach via *Tailscale*, then at a protocol approach via *Nostr Wallet Connect*, with their respective advantages and trade-offs. The course will conclude with a final chapter that will give you the right habits to sustain your self-custody, both operationally and pedagogically.
If you follow this LNP202 course in the right order, by the end of it you'll have a complete configuration for your Lightning node, functional for everyday use and, above all, under control.
## Understanding what a Lightning node is
8275dfd8-7a72-48cc-bf7f-bc2a46063003
Before launching your own node, this chapter briefly reviews the basic theory behind [Lightning Network](https://planb.academy/resources/glossary/lightning-network). It is indeed important to understand the mechanisms involved, as this will enable you to identify risks and adopt good practices to limit them. I won't go into detail here, however, as this is not the main objective of this course. If you'd like to delve deeper into the subject, I highly recommend that you consult Fanis Michalakis's LNP 201 course, which is a reference in the field:
https://planb.academy/courses/34bd43ef-6683-4a5c-b239-7cb1e40a4aeb
### What's a Lightning node?
Let's go back to basics: before defining what a node is, we need to understand what Lightning Network is. It's a top-layer protocol, built on top of Bitcoin, designed to enable [offchain](https://planb.academy/resources/glossary/offchain) BTC transactions that are fast (with near-instant finality) and generally inexpensive. "Offchain" means that transactions carried out on Lightning are not intended to appear on the main Bitcoin [blockchain](https://planb.academy/resources/glossary/blockchain). Lightning is also a partial response to the increasing use of Bitcoin and to [onchain](https://planb.academy/resources/glossary/onchain) congestion, which is raising concerns about the system's [scalability](https://planb.academy/resources/glossary/scalability).
To operate, Lightning relies on the opening of [payment channels](https://planb.academy/resources/glossary/payment-channel) between participants, within which transactions can be carried out almost instantaneously, often with minimal fees, without the need to register them one by one on the Bitcoin blockchain. These channels can remain open for a very long time, requiring onchain transactions only when they are opened and closed.
A [Lightning node](https://planb.academy/resources/glossary/lightning-node) is a participant in the Lightning network, opening channels and making payments with other nodes. In concrete terms, a Lightning node is a piece of software running on a computer and implementing the Lightning Network protocol. Examples include LND, Core Lightning or Eclair. The main role of this software is to:
- connect to a [Bitcoin node](https://planb.academy/resources/glossary/full-node) to obtain information from the main blockchain;
- create and manage bidirectional payment channels with other nodes;
- exchange messages with the entire Lightning network.
### Node vs. Lightning Wallet: an important distinction
On Bitcoin (onchain), "*[wallet](https://planb.academy/resources/glossary/wallet)*" refers to software that manages your [private keys](https://planb.academy/resources/glossary/private-key), calculates your balance from your [UTXOs](https://planb.academy/resources/glossary/utxo) and builds your transactions. This wallet may be based on your own Bitcoin node or on someone else's, but today, the role of the node and that of the onchain wallet are clearly distinct.
On Lightning, it's more difficult to reuse this kind of vocabulary without creating confusion. The term "*Lightning wallet*" is rather vague, because in reality there is no such thing as a truly self-custodial Lightning wallet, unless it is based on a node. Only two situations are therefore possible:
- To have a real Lightning node (i.e. non-custodial): the software you're using (e.g. a mobile app like Phoenix or a LND instance on Umbrel) is actually running a node, and you actually hold the keys to retrieve your bitcoins. In this case, your "*Lightning wallet*" is really just a user interface on top of a Lightning node, whether embedded or remote.
- To use a custodial service: you use an application that shows you a balance in [sats](https://planb.academy/resources/glossary/satoshi-sat) on Lightning, but in the background, the funds are on a provider's node (e.g. Wallet of Satoshi). You have neither the keys nor control of the channels. Your balance is merely an accounting entry in the company's database. It's comparable to leaving your bitcoins on an exchange platform, with all the associated risks. In this case, your "*Lightning wallet*" is merely an access to an account managed by an operator who, in turn, runs a real Lightning node.
So there's no in-between on Lightning: either you have a node (even an embedded one) so you're in self-custody, or you don't, so a company owns your sats. But as we'll see in the following chapters, these two uses can sometimes be hard to distinguish. For example, Phoenix is a mobile application that embeds a real Lightning node, but the user isn't necessarily aware of it, as the full complexity of its operation is almost entirely hidden.
### A reminder of how the Lightning Network works
In this section, I'll give you a quick reminder of how Lightning works. Once again, if you'd like a more in-depth presentation of the theoretical concepts, I invite you to take a look at the dedicated LNP 201 course.
#### Payment channels: open, update and close
The heart of the Lightning network is based on bidirectional payment channels. A channel can be opened (i.e. created), updated as Lightning transactions take place, and then finally closed. From the onchain point of view, a channel is nothing more than a 2/2 [multisignature](https://planb.academy/resources/glossary/multisig) [output](https://planb.academy/resources/glossary/output).
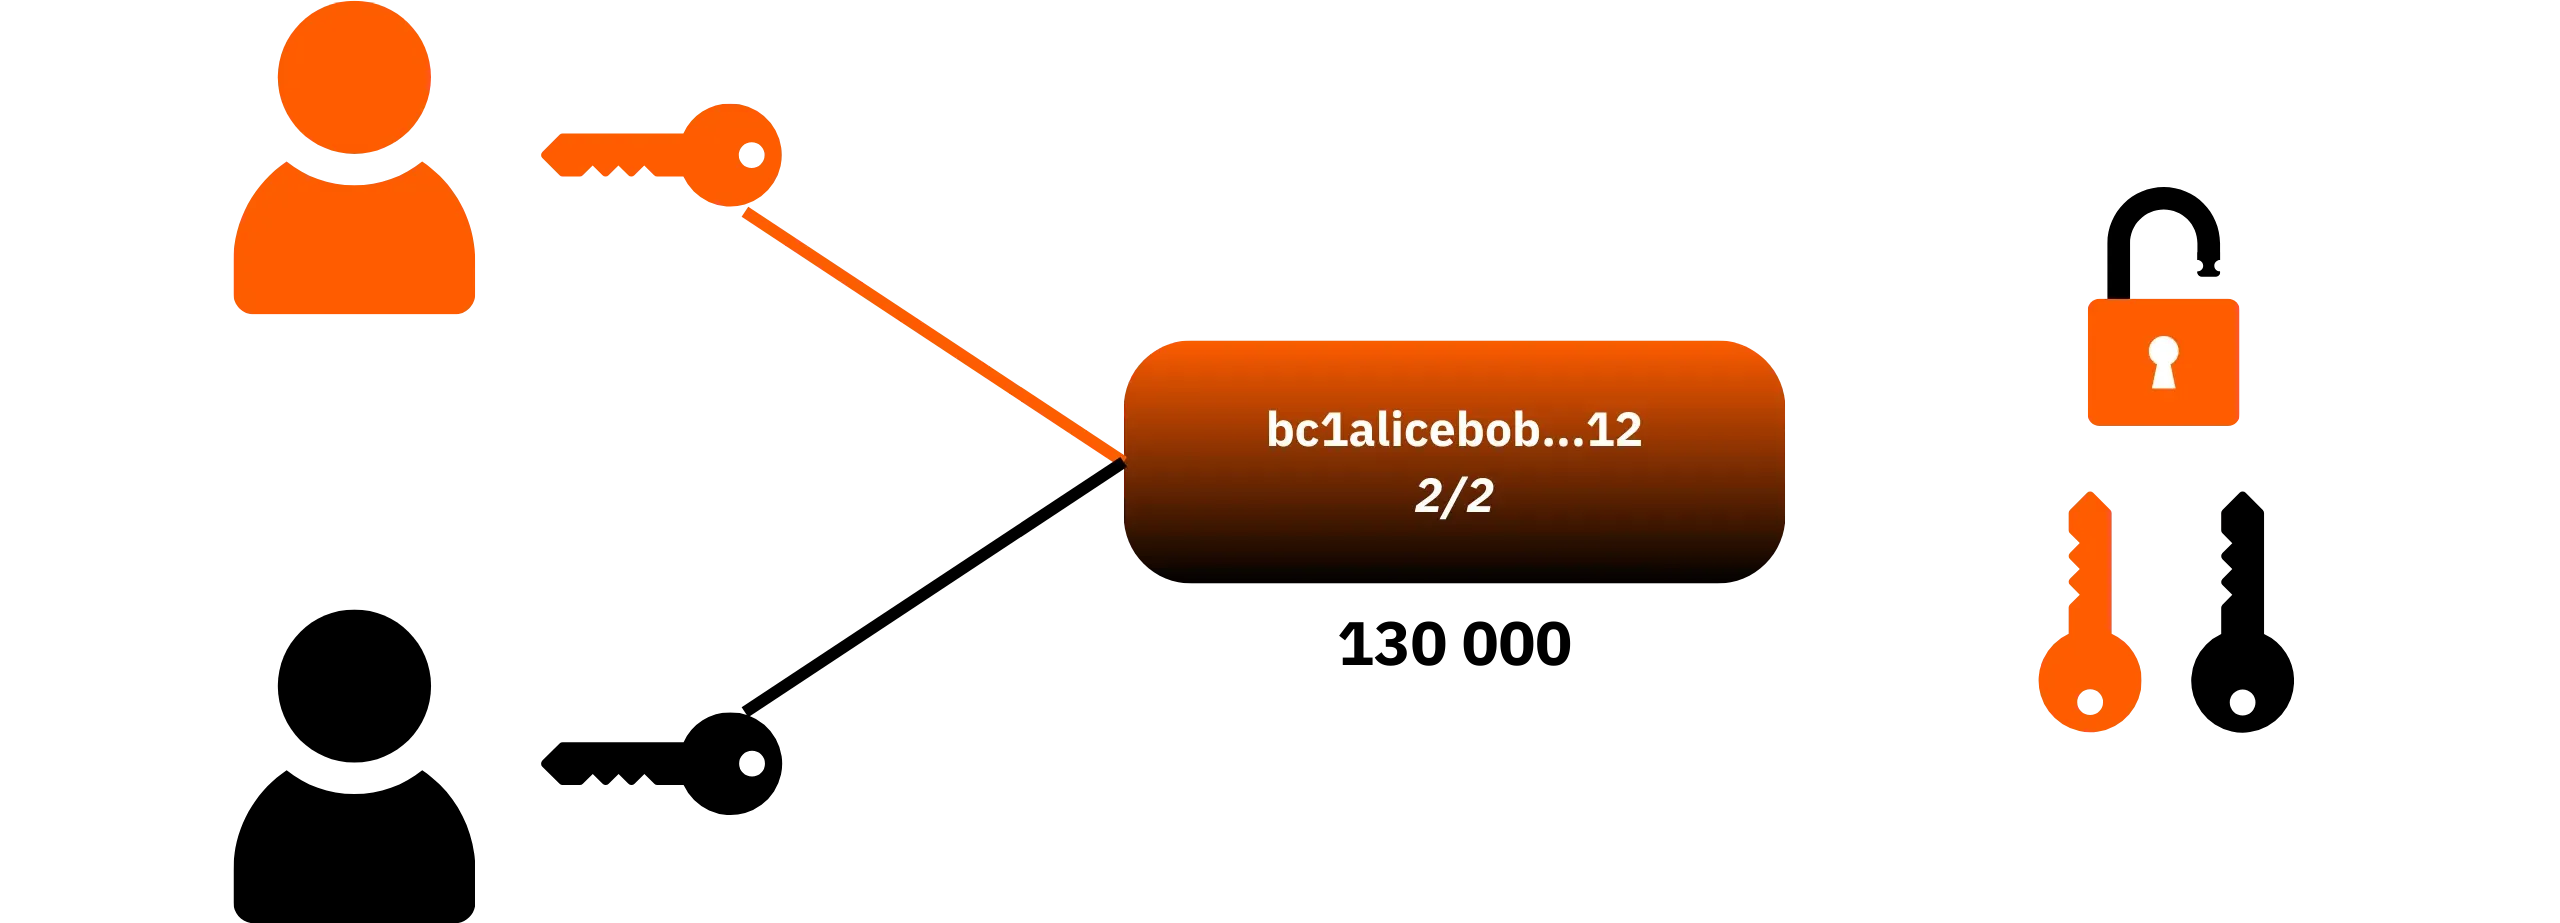
From Lightning's point of view, it is a payment channel with [liquidity](https://planb.academy/resources/glossary/liquidity-lightning) divided between the two participants.

- Opening a channel:**
Two nodes decide to open a channel. One of them commits bitcoins in an onchain transaction called *funding transaction*. This transaction creates an output based on a 2-of-2 multisignature [script](https://planb.academy/resources/glossary/script), which means that spending these funds on Bitcoin requires the [signature](https://planb.academy/resources/glossary/digital-signature) of both nodes in the channel. Before issuing this transaction, the party providing the funds asks the other to sign a *withdrawal transaction*, which is not issued onchain, but which enables it to recover its funds in the event of a problem.

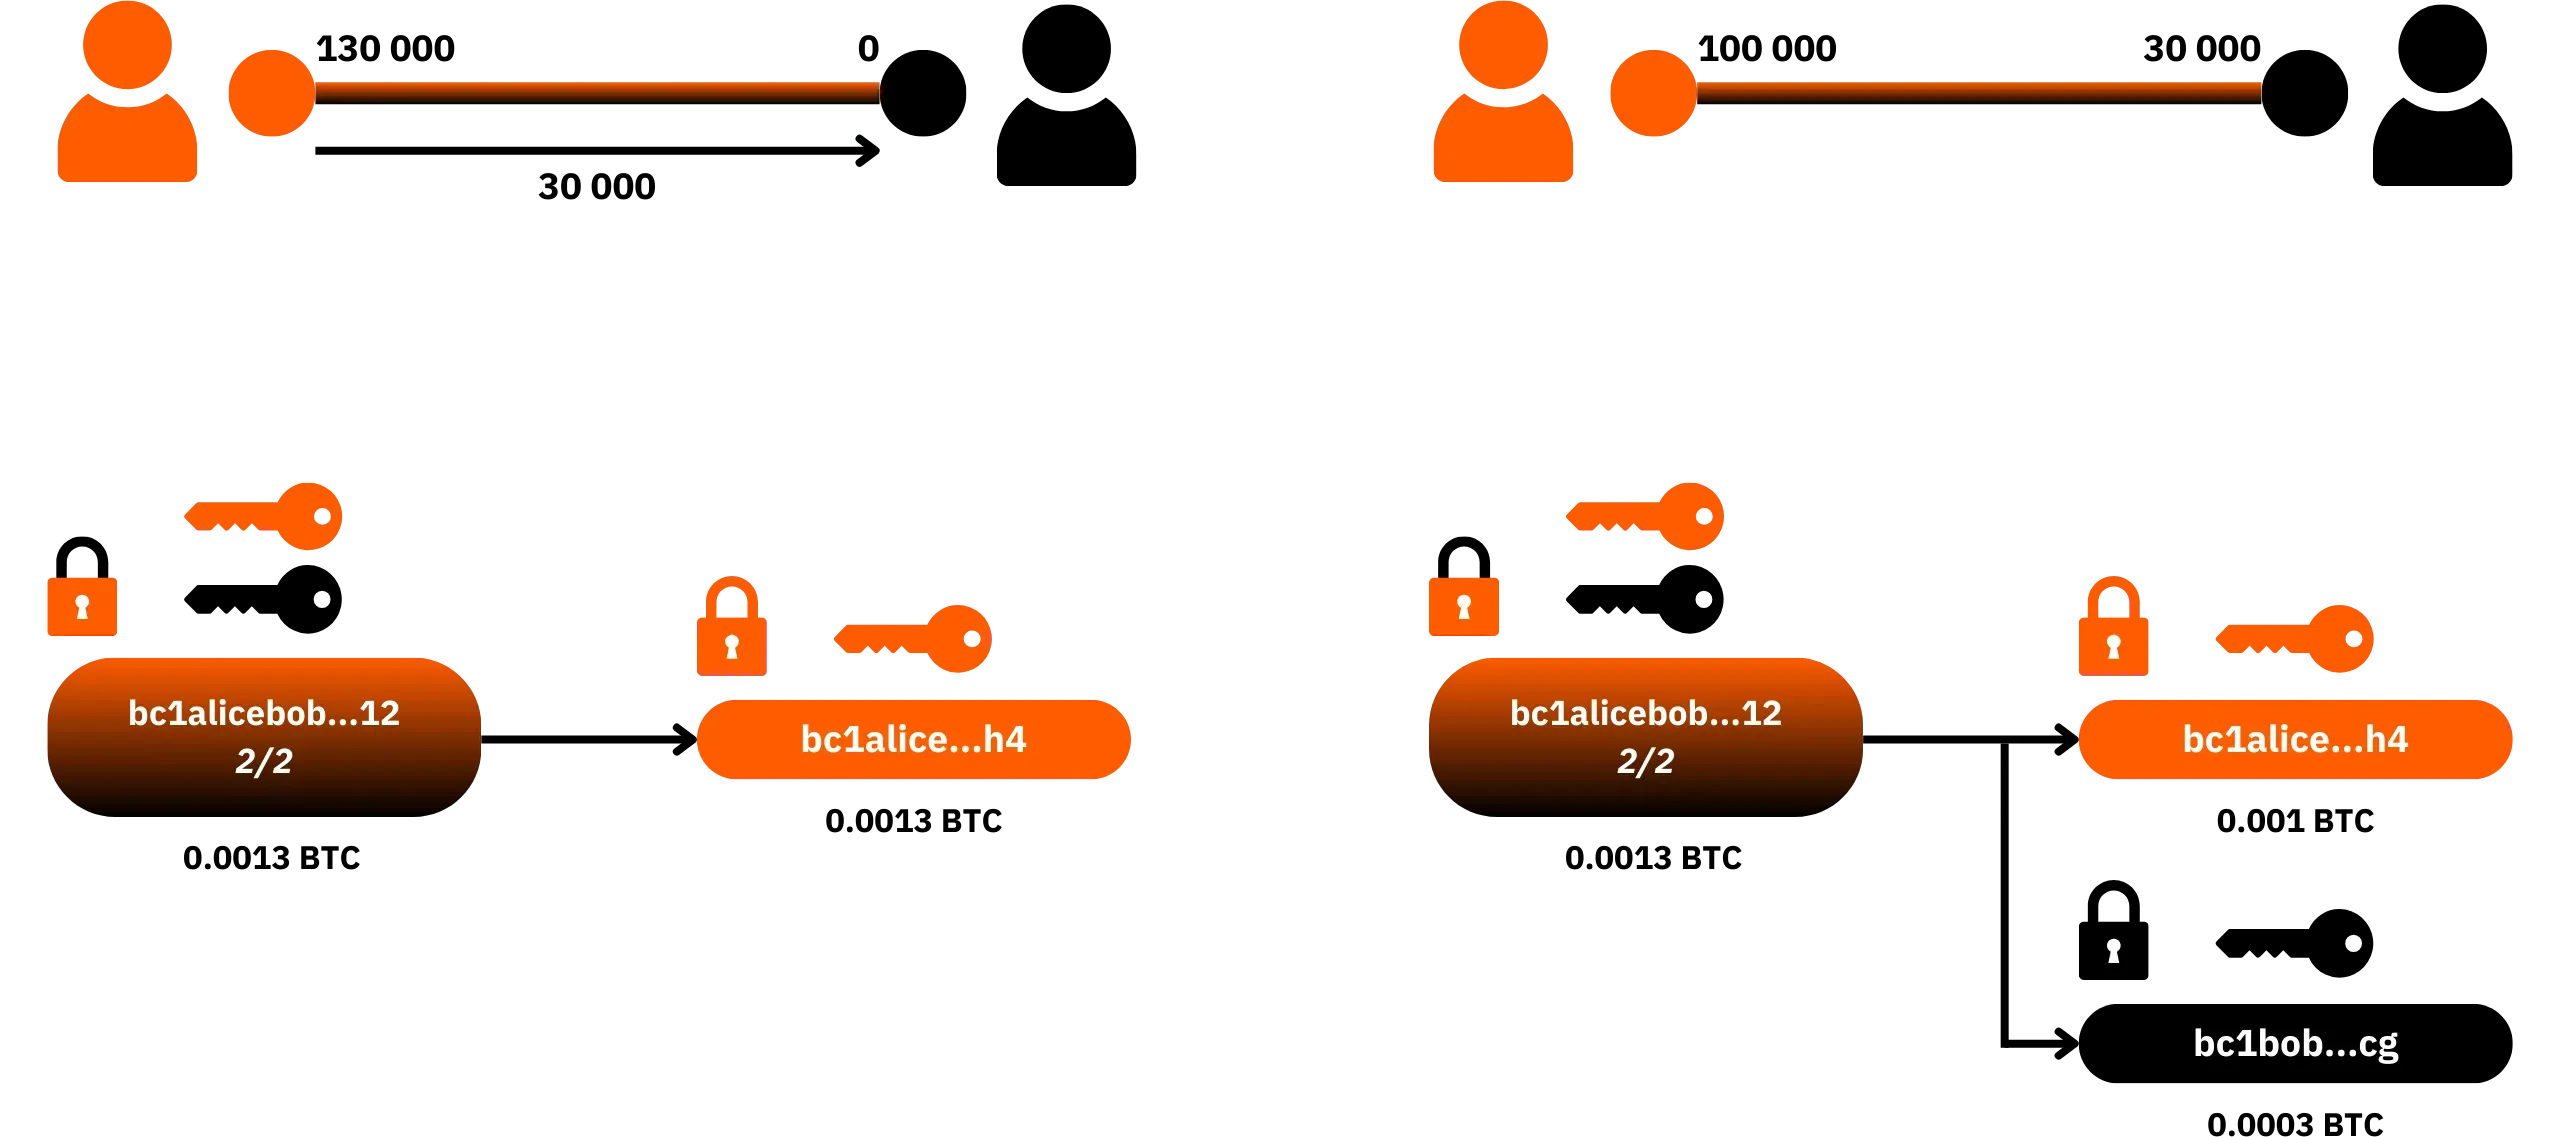
- [Commitment transactions](https://planb.academy/resources/glossary/commitment-transaction):**
The state of the channel (i.e. the distribution of sats between A and B) is represented by a *commitment transaction*, known to both nodes but not immediately broadcast on the blockchain. This transaction describes how to redistribute the channel funds onchain according to the payments made on Lightning.
With each Lightning payment, the two nodes sign a new state that replaces the previous one. The old state is revoked thanks to a revocation key mechanism: if one of the participants tries to broadcast an old state, the other can recover the full amount of the funds as a penalty.
The important idea here is that there is always a signed Bitcoin transaction, not broadcast onchain, kept by the nodes, and which enables the redistribution of each other's sats according to the payments made on Lightning Network.
- Channel closure:**
A channel can be closed cleanly via a cooperative closure, when both parties agree on the final state of the channel, or unilaterally (a forced closure) if one of the participants ceases to cooperate or becomes unreachable. In all cases, closure takes the form of an onchain transaction that spends the 2/2 output and distributes the funds between the participants according to the last valid state of the channel.
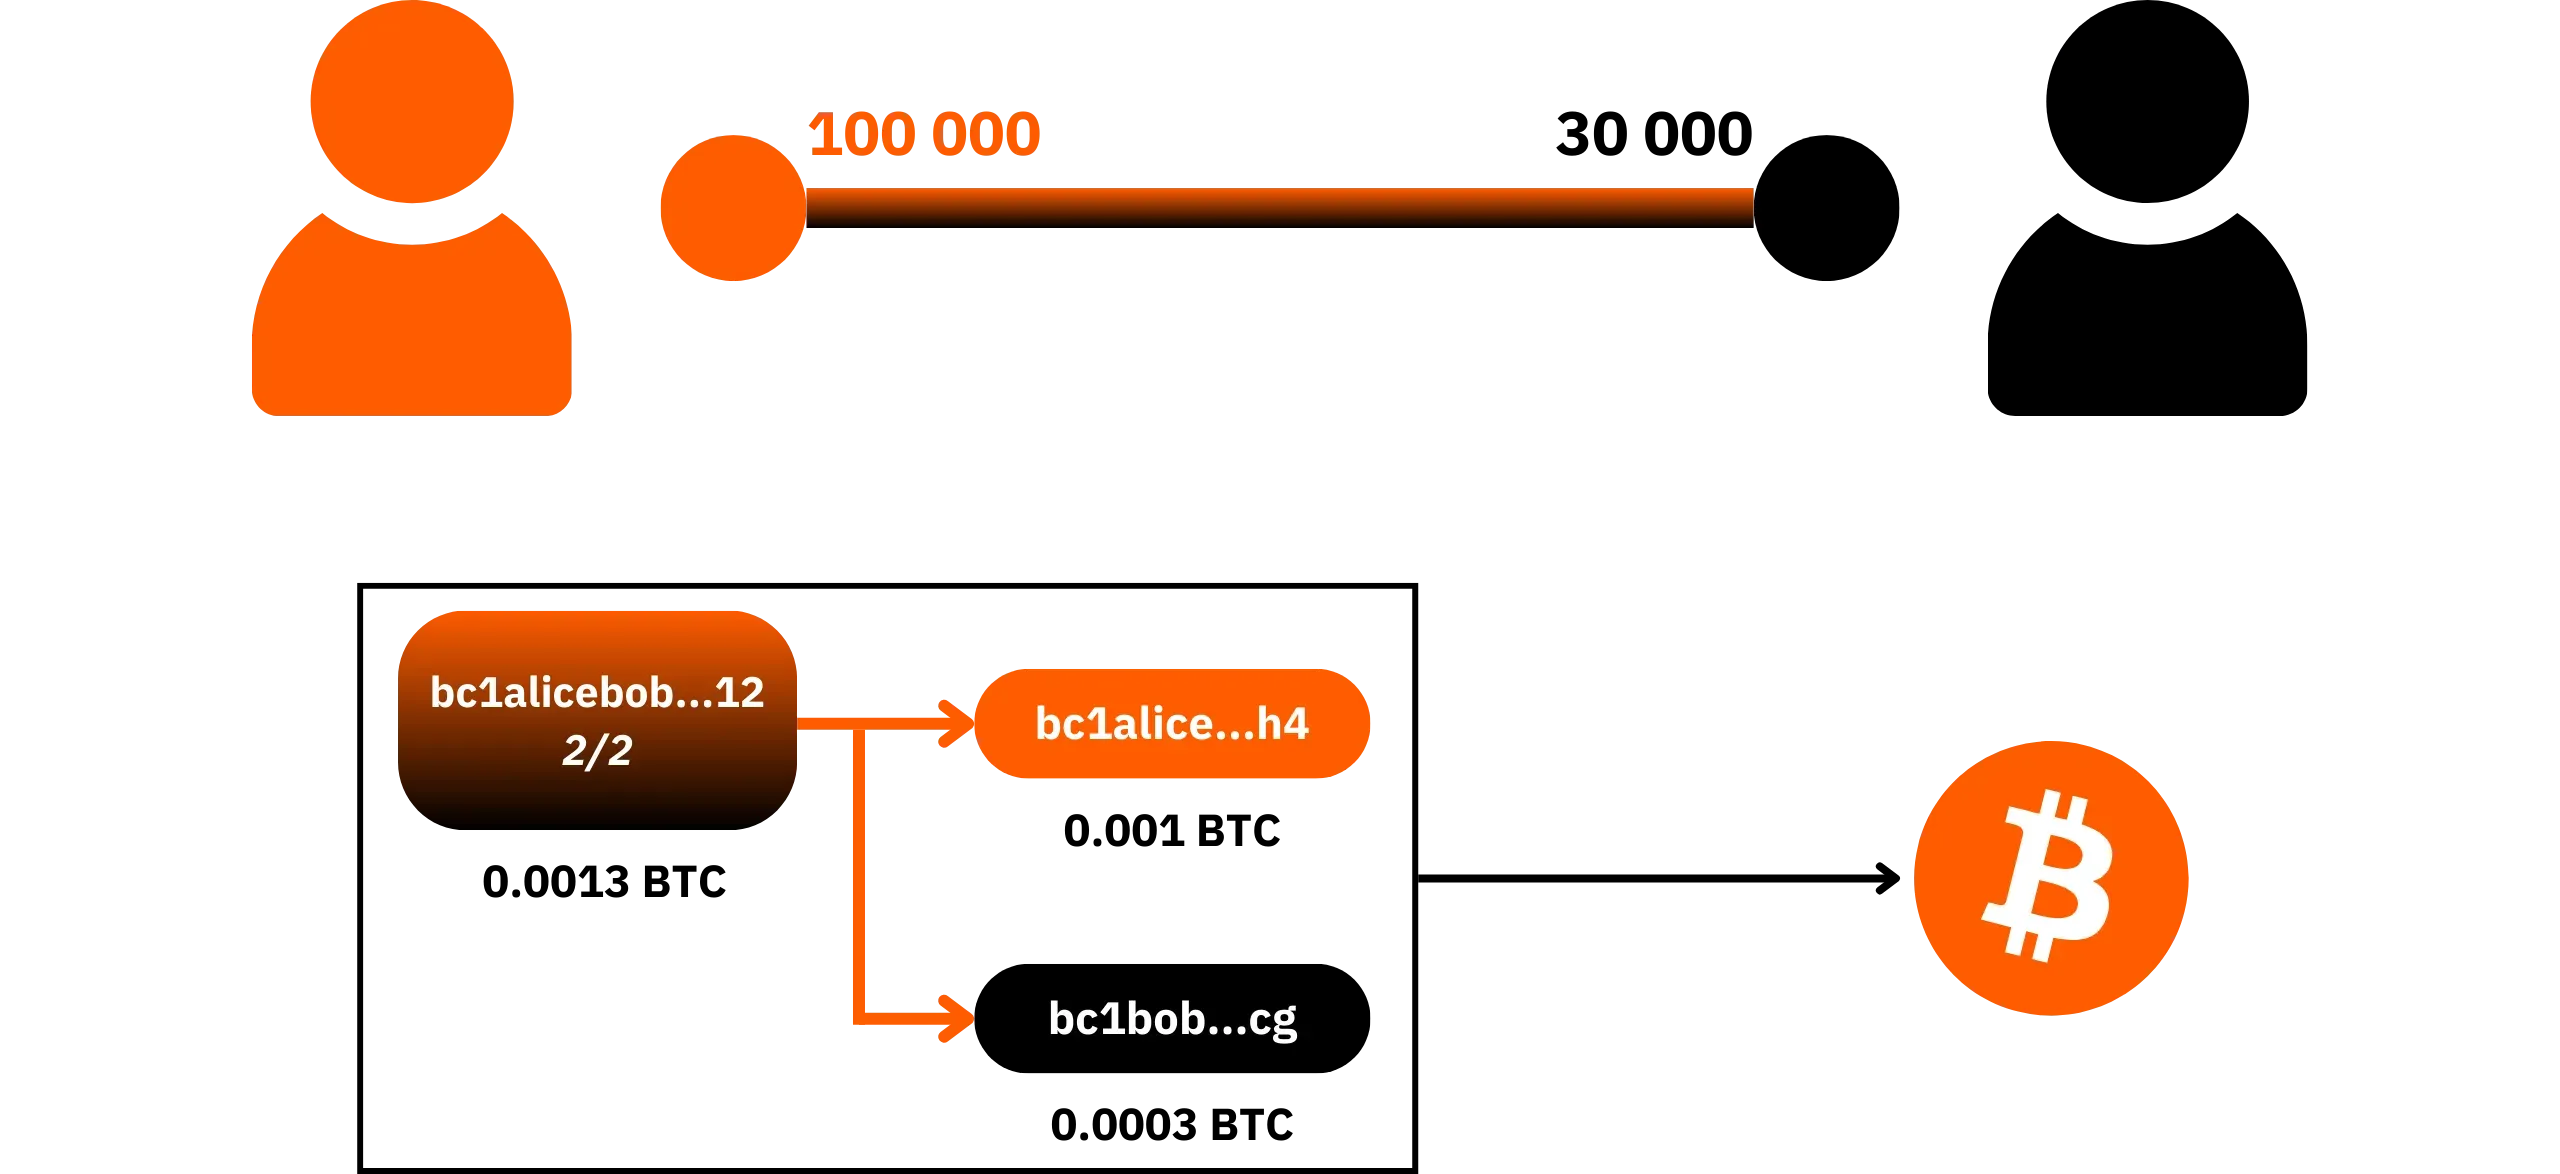
Lightning thus functions as a secondary layer anchored on Bitcoin: only certain events (the opening and closing of channels) appear on the main blockchain. Intermediate payments remain offchain.
Before going any further, here are two essential concepts for understanding how to manage a Lightning channel:
- Liquidity*: the quantity of sats available on one side of the channel;
- The *[capacity](https://planb.academy/resources/glossary/lightning-channel-capacity)*: it is the total amount locked in the 2/2 multisig output, i.e. the sum of liquidity on both sides of the channel.
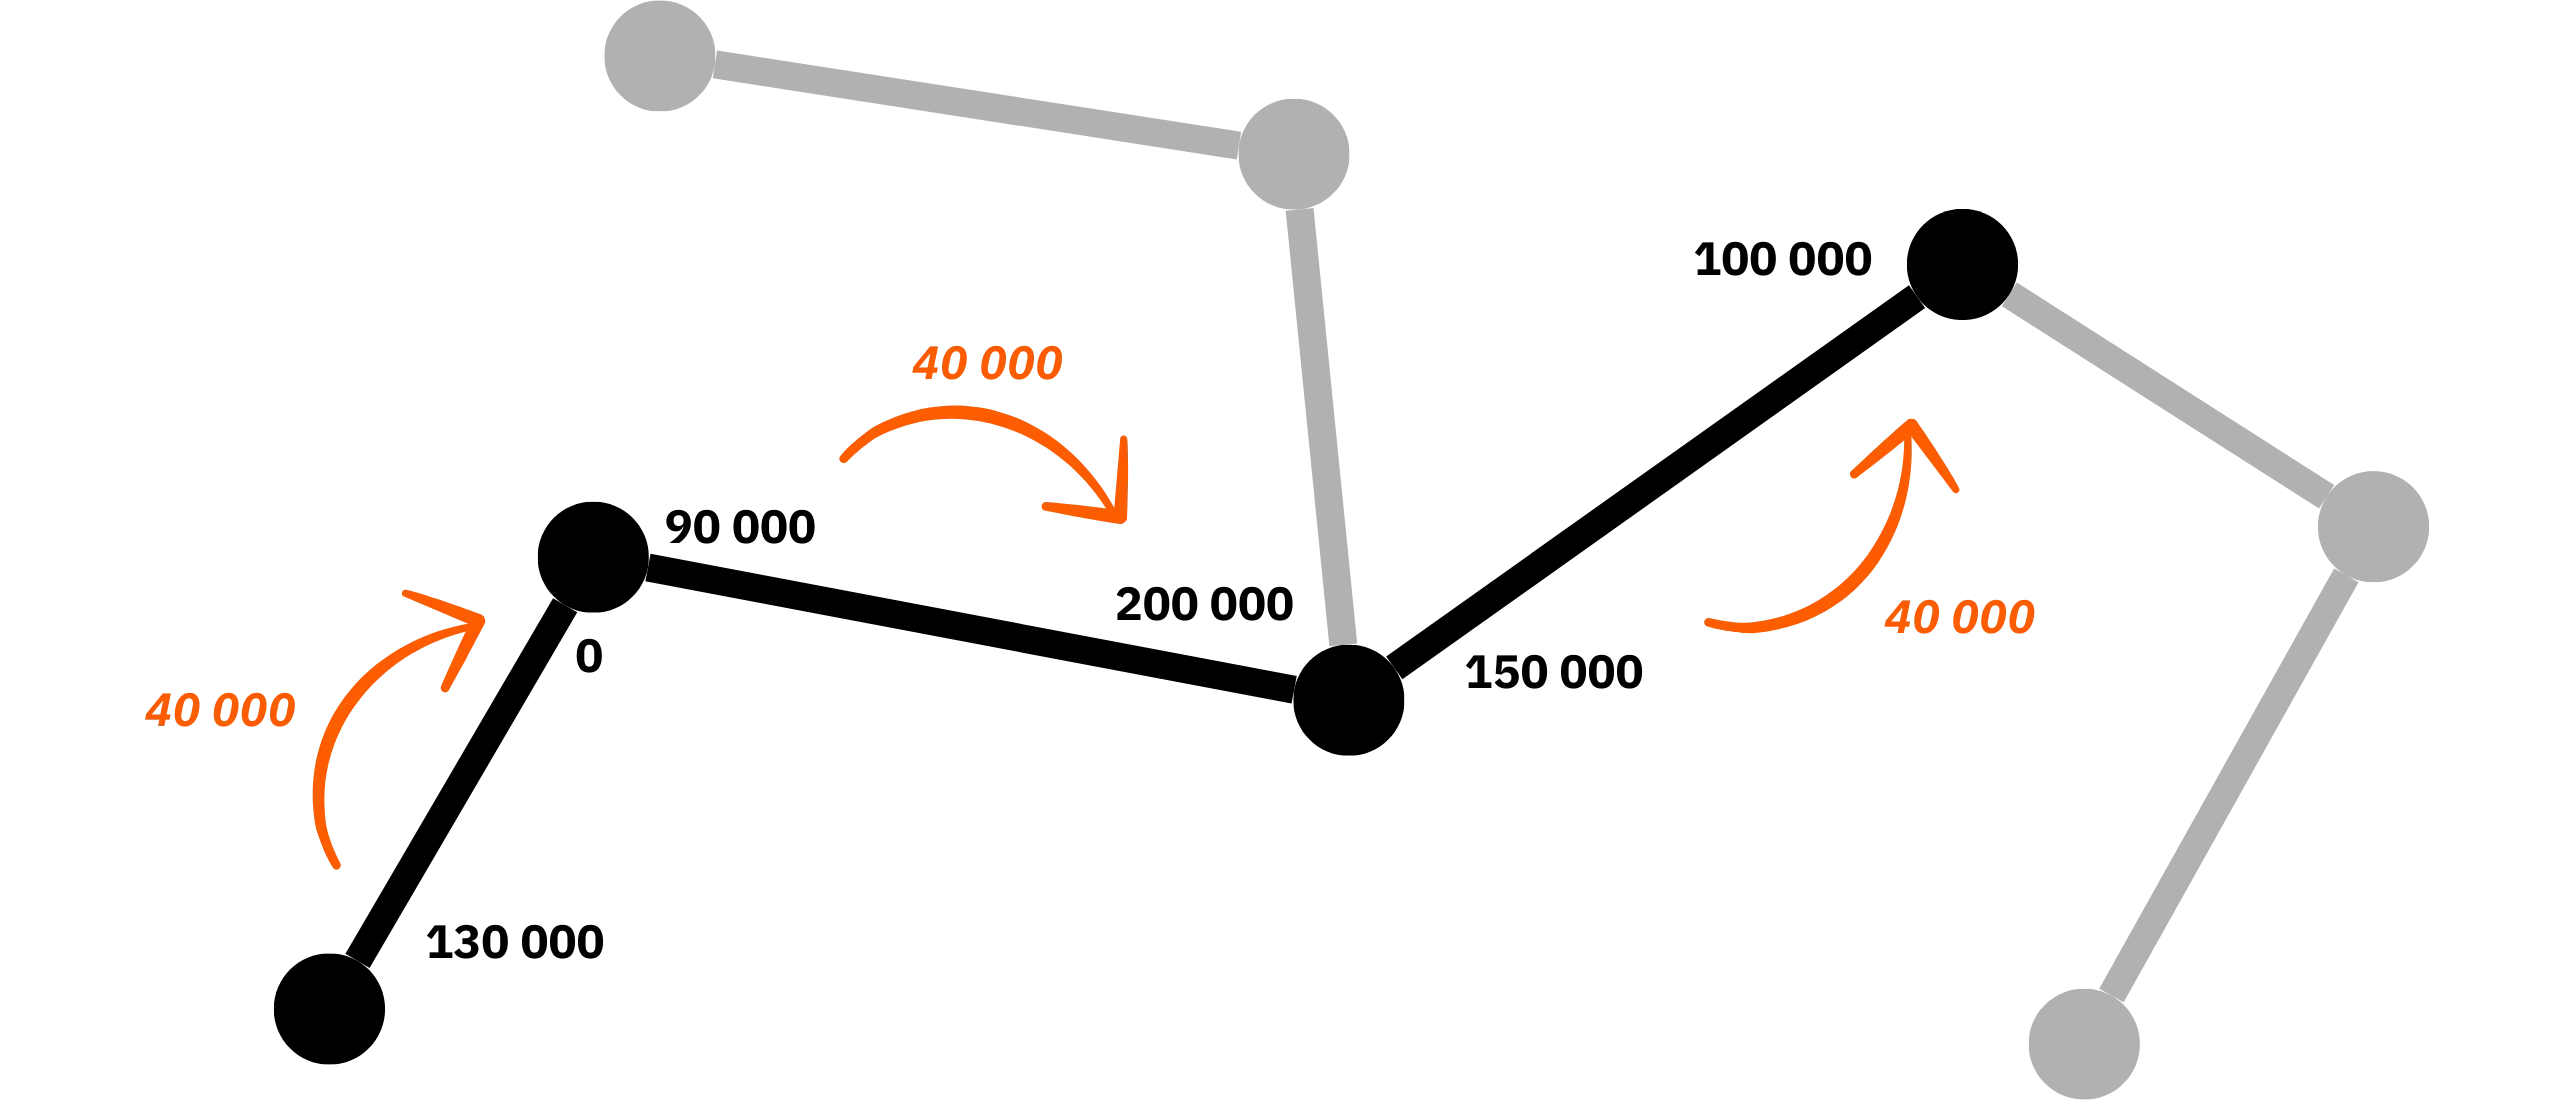
#### A network of channels and liquidity
A channel isn't just for payments between two nodes: it's part of a global network of interconnected channels. Your node can route payments for other users through its own channels, and you can send sats to a Lightning node with which you have no direct channel, as long as a valid path can be found between your two nodes.
Each node knows, via the [gossip protocol](https://planb.academy/resources/glossary/gossip), a map of this network: which channels exist, which nodes are connected by a bidirectional channel, and which capacities are published. To send a payment to a recipient without a direct channel, your node calculates a route consisting of several hops: your node → node X → node Y → recipient node. At each hop, the payment transits a channel that must have sufficient liquidity in the direction of payment.
The liquidity of a channel is therefore not symmetrical: one side may be heavily loaded, while the other is almost empty. Managing this liquidity, i.e. knowing where the sats are and in which direction they can flow, is one of the most important aspects of operating a Lightning node. We'll look at it in more detail in the practical chapters to come.
#### HTLC: transporting payment without being robbed
To enable payments to pass through intermediate nodes without the need for trust, Lightning uses [smart contracts](https://planb.academy/resources/glossary/smart-contract) called *[HTLC](https://planb.academy/resources/glossary/htlc)* (*Hashed Time-Locked Contracts*). In simple terms, a HTLC makes the transfer of funds conditional on the revelation of a secret, and incorporates a time constraint to protect the sender in the event of transaction failure. Each payment is therefore subject to the presentation of a pre-image (a secret whose [hash](https://planb.academy/resources/glossary/hash-function) corresponds to an agreed value). If the final recipient provides this pre-image, he or she can claim the funds, which in turn enables each intermediary node to recover its own funds.

I'll spare you the technical details of how HTLCs work, as they're not essential for the purposes of this course. You'll find an in-depth explanation in the LNP 201 theory course. Just remember that HTLCs enable atomic exchanges: either the transfer is completed and no one is harmed in the routing, or it fails and each participant recovers his or her initial funds. There is no in-between.
### The main Lightning node implementations
As with Bitcoin, there are several implementations of the Lightning protocol. A number of independent teams are developing their own versions, all of which are interoperable since they adhere to the same specifications (the [BOLTs](https://planb.academy/resources/glossary/bolt)). Here are the main implementations in use today.
#### LND (*Lightning Network Daemon*)
LND is a complete implementation of the Lightning protocol, written in Go and developed by Lightning Labs.

#### Core Lightning (*CLN*)
Core Lightning (formerly *C-Lightning*) is the implementation developed by Blockstream. It is written in C, with some components in Rust.
#### Eclair
Eclair is an implementation written in Scala and developed by the French company ACINQ. ACINQ operates one of the most important routing nodes in the Lightning network with Eclair, and uses this implementation as the software basis for its own products, such as the Phoenix application.

#### LDK (*Lightning Development Kit*)
LDK (*Lightning Development Kit*) is a Rust development kit, maintained by Spiral (Block, ex-Square). It's not a ready-to-use daemon like LND or CLN, but a library for developers wishing to integrate Lightning directly into their applications.

In this LNP202 course, we'll be concentrating mainly on LND: the implementation that is most commonly used in turnkey solutions for private customers, such as Umbrel.
So much for this brief reminder of how Lightning works. Once again, if there are any concepts you don't understand, or if you'd like to delve a little deeper before putting them into practice, Fanis Michalakis' course is the essential reference on the subject:
https://planb.academy/courses/34bd43ef-6683-4a5c-b239-7cb1e40a4aeb
## Why run your own Lightning node?
421db24e-511c-41ed-ad68-69b0662042ea
Answering this question is quite simple, since it's rhetorical: without your own node, you're no longer really using Lightning, but only the illusion of Lightning across a company's infrastructure.
Using a Lightning custodial wallet means that the bitcoins technically belong to the company operating the node. You don't hold the private keys, and you don't control the channels. Your wallet balance is just a line in a service provider's database. This situation is certainly very convenient for beginners, and the user experience is often fluid, but the fundamental question is: what's the advantage of using Bitcoin and Lightning if you end up relinquishing the very aspects that set them apart from traditional currencies and banks?
Bitcoin's two main value propositions are monetary sovereignty (no longer depending on a central authority for issuing and holding) and censorship resistance (impossibility for a third party to prevent or filter payments). A custodial system on Lightning goes head-on against both these objectives: you can't check the platform's internal money supply, and by definition, an operator who holds all the funds and all the channels can censor, delay, prioritize or block your payments. Under these conditions, we can legitimately ask ourselves, **what's the point of using bitcoin via Lightning if it's going to reproduce the same patterns of trust and dependency as with traditional state currency systems**.
> What is needed is an electronic payment system based on cryptographic proof instead of trust, allowing any two willing parties to transact directly with each other without the need for a trusted third party.
*Satoshi Nakamoto, Bitcoin White Paper
Philosophy aside, the more concrete disadvantages for you are as follows. Firstly, you have no way of verifying that the company actually holds the bitcoins corresponding to the balances displayed. It may operate on fractional reserve, be hacked, go bankrupt or simply disappear. In this case, you're just another creditor, with no real guarantee that you'll get your money back.
Secondly, the company is subject to regulatory risks: injunctions, freezing of funds, requests to block users or transactions, reinforced surveillance, or even outright prohibition of activity in certain jurisdictions. Every constraint that weighs on the service provider mechanically reflects on you.
In terms of confidentiality, the situation is no better. A custodial operator sees all your flows: amounts, frequencies, recipients, balances, spending habits. Combined with information provided by the application and possibly the underlying chain analysis on Bitcoin, this information can provide a very precise profile of your financial activity. Once again, it is a far cry from Bitcoin's aim of reducing financial monitoring.
The good news is that today, operating your own Lightning node is no longer the preserve of technical experts, as it may have been in the late 2010s. Relatively simple solutions are available for home users, which we'll explain in detail in the next chapter.
## Choosing the solution that fits your use case
615870e3-741d-4ec1-875d-a483e70f39d4
Today, it's possible to have a user experience very close to that of a Lightning custodial wallet, while remaining in self-custody. The aim of this chapter is to help you choose the path best suited to your profile.
### Option 1: Do not use Lightning directly
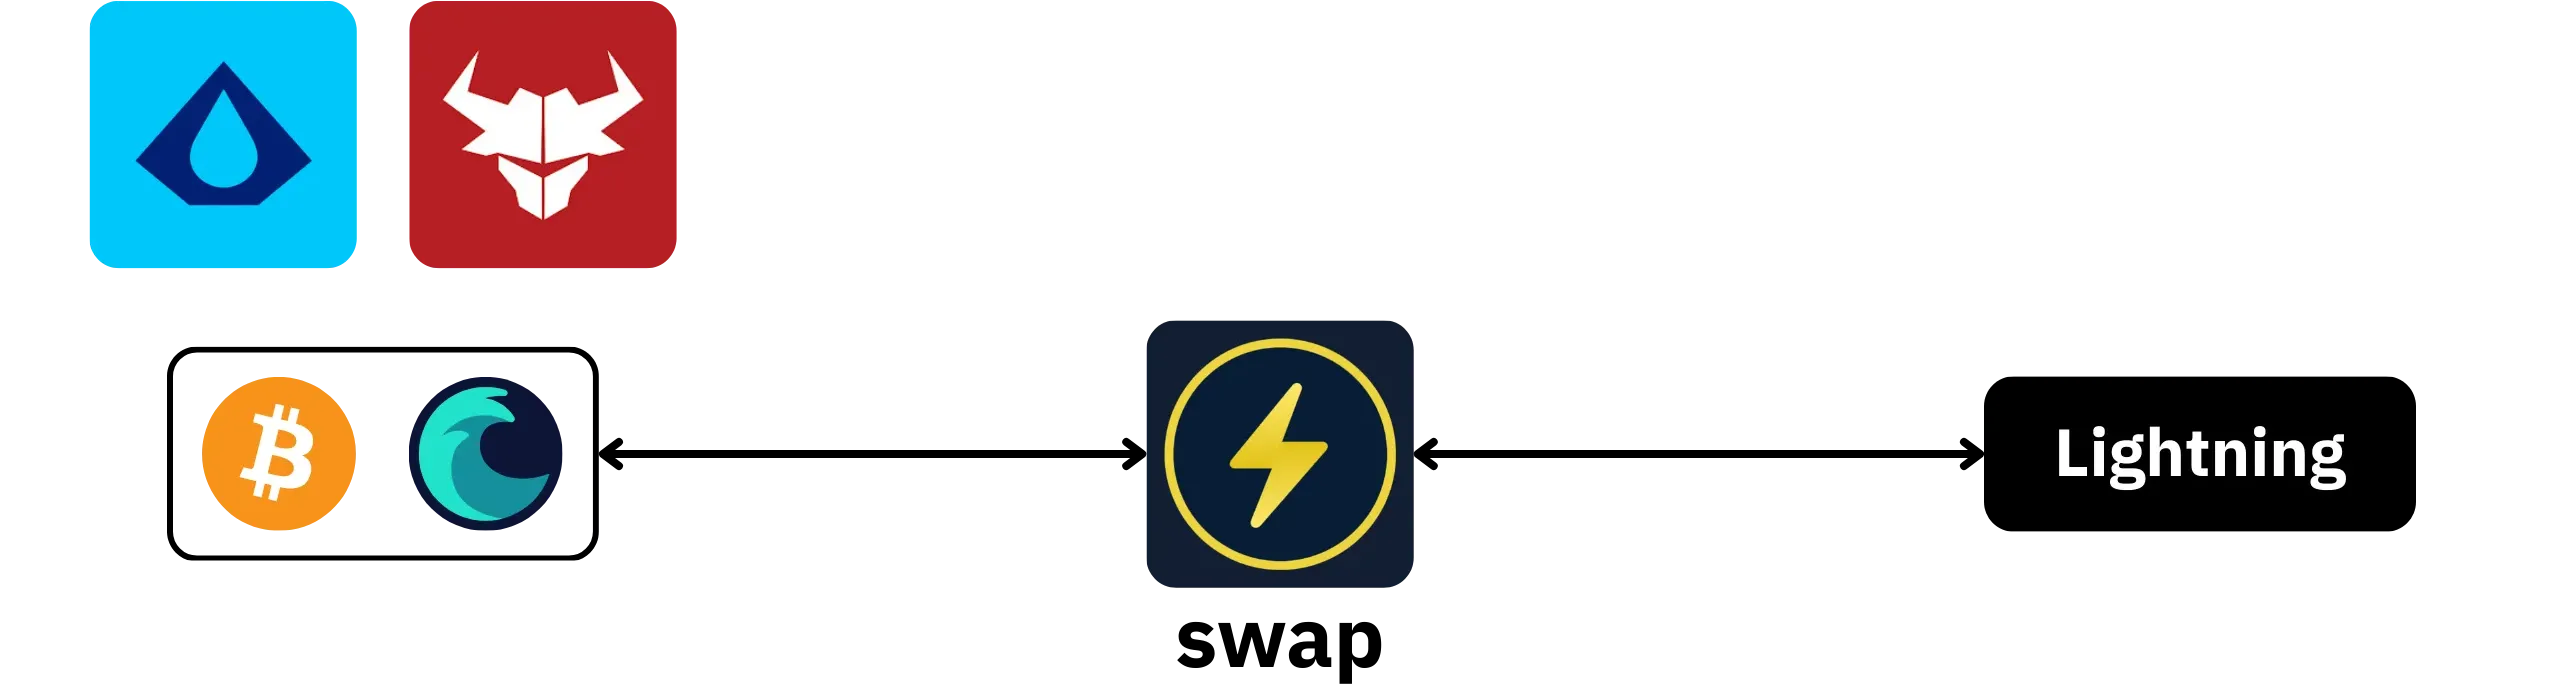
The first solution is simply not to use Lightning natively, but to use a Bitcoin or [Liquid](https://planb.academy/resources/glossary/liquid-network) wallet that embeds [atomic swaps](https://planb.academy/resources/glossary/atomic-swap). For example, Aqua or BULL Wallet applications use this method, by enabling you to pay [Lightning invoices](https://planb.academy/resources/glossary/invoice-lightning) without operating a Lightning node yourself, while remaining in self-custody.
The principle is straightforward: your funds stay in Bitcoin, either on-chain or on Liquid, and you access them through a wallet where you hold the keys in the traditional manner. When you scan a Lightning invoice, your wallet initiates a transaction (on-chain or Liquid) to an atomic swap service. This service then manages the Lightning payment through its own node, using the bitcoins you provided on-chain or via Liquid. As a result, you don't have to handle any Lightning channels yourself, yet you can still settle Lightning invoices seamlessly.
The major advantage of this approach, compared with a conventional Lightning custodial wallet, is that you remain in 100% possession of your funds at all times. The bitcoins are in your onchain or Liquid wallet, with your own [mnemonic phrase](https://planb.academy/resources/glossary/seed). Even during the swap, you remain in possession of your funds, because the swap is atomic. It relies on a cryptographic mechanism that ensures there are only two possible outcomes: either the swap succeeds entirely, or it fails and the service cannot appropriate your funds.
Most wallets offering this type of functionality rely on [Boltz](https://boltz.exchange/) for the technical part of the swap.
This solution also offers interesting advantages in terms of confidentiality, especially when coupled with Liquid. For a beginner, it's also very easy to set up and save: a classic mnemonic phrase, no channels, no liquidity to balance...
On the other hand, this approach has its limitations. Firstly, it's not incensurable: you depend on the availability and goodwill of the swap service. If it no longer wishes to process your account, or ceases to operate, you can no longer pay Lightning invoices through it. Then there are the not inconsiderable fees: you pay both the onchain or Liquid [transaction fees](https://planb.academy/resources/glossary/transaction-fees), and the swap service commission. Also, if onchain fees rise sharply, it can become very expensive to use Lightning.
So for occasional use, it's still acceptable, but for a very active Lightning user, it's better to do things right with a real Lightning node.
### Option 2: On-board Lightning nodes
The second category of solutions is based on Lightning nodes embedded directly in a mobile application. Phoenix Wallet pioneered this model and remains a benchmark. Today, other projects offer comparable approaches, such as Zeus (in embedded mode) or BitKit.
The idea is simple: the application actually runs a Lightning node, but all the complex operations are handled automatically in the background. You have a "*Lightning wallet*" interface with a mnemonic phrase for backup, you see a balance and pay invoices, but you don't manage channels, liquidity or most parameters.
These solutions are always self-custodial. The keys that control the funds are generated and stored on your phone, and backup is via a seed or equivalent mechanism. You don't simply hold an account with a service provider, you actually own bitcoins locked in channels that belong to you and can't be stolen.
The advantages of LN on-board nodes are numerous:
- extremely easy to install and use;
- user experience close to that of a custodial Lightning wallet, but with self-custody;
- no manual management of channels or liquidity;
- relatively simple backup.
But these embedded wallets also have significant limitations. Firstly, in terms of confidentiality, the service operator (e.g. ACINQ in the case of Phoenix) has a fairly detailed view of the flows passing through your node: amounts, frequencies, recipients, even if this is bound to improve, particularly with the gradual adoption of *Trampoline Nodes*. Secondly, you are heavily dependent on this operator as your main Lightning peer. If the ACINQ node becomes unavailable (in the case of Phoenix), if the company comes under regulatory pressure or changes its business model, your user experience may be severely degraded, or even compromised.
Finally, this simplicity comes at a price. Embedded LN node services generally charge specific fees on deposits, withdrawals or certain channel management operations. In my opinion, this model makes sense in terms of the service offered, but for intensive use, it can be much more expensive than a well-managed conventional Lightning node.
### Option 3: the classic Lightning node
The third solution, the one we'll be looking at in greater depth in this LNP202 course, is to operate a conventional Lightning node on a dedicated server or device.
By "classic" I mean that you install and configure a Lightning implementation (e.g. LND) yourself on top of your own Bitcoin node. You choose your peers, open your channels, manage your [inbound and outbound liquidity](https://planb.academy/resources/glossary/inbound-capacity), and set your routing fee policies.
In terms of sovereignty, it's the best solution. You are no longer dependent on a specific company for your channels or payments: if a peer censors you or closes a channel, you can open another with a different node. If a service disappears, your sats remain in the channels you control, and you can repatriate them onchain. You can also optimize your long-term costs: once your channels are correctly sized and managed, the overall cost of payments can become very low.
In terms of confidentiality, you're obviously subject to the limitations of Lightning's own model, but you're not handing over your entire business to a single operator.
By contrast, setting up a classic Lightning node is obviously more complex: you have to install, configure, maintain, monitor updates, understand the logic of channels and charge policies, manage channels and cash flow, and so on. Misconfiguration, sloppy backup or careless management can more easily lead to the loss of sats. The node must also run continuously.
This is precisely the path I propose you follow in this course, accompanying you every step of the way to limit risks and structure your approach.
### Which solution for which user profile?
To choose the right solution for your Lightning user profile, you need to consider two factors: how often you use Lightning, and your appetite for technical management.
If you don't make many Lightning payments on an occasional basis, but still want to be able to settle LN invoices from your phone from time to time, without giving up self-custody: a Bitcoin or Liquid wallet with swap functionality is probably the best option. You retain ownership of your funds, manage no nodes, and accept slightly higher fees in exchange for simplicity.
https://planb.academy/tutorials/wallet/mobile/bull-bitcoin-2c72127c-a228-4f50-b833-c6183d56aaf6
https://planb.academy/tutorials/wallet/mobile/aqua-8e6d7dd3-8c03-45cc-90dd-fe3899a7d125
If you use Lightning on a fairly regular basis and want the benefits of a real node, but don't want to spend time managing channels, fees or infrastructure, a mobile embedded Lightning node is a good solution. You retain custody of your funds, the UX remains very accessible, and all the complexity is hidden, at the price of a marked dependence on an operator.
https://planb.academy/tutorials/wallet/mobile/phoenix-0f681345-abff-4bdc-819c-4ae800129cdf
https://planb.academy/tutorials/wallet/mobile/bitkit-a7224674-85c4-4045-9baf-37018d89550c
https://planb.academy/tutorials/wallet/mobile/zeus-embedded-c67fa8bb-9ff5-430d-beee-80919cac96b9
If you're an intermediate or advanced user, willing to invest time in understanding and managing your infrastructure, and want maximum control over your channels, liquidity and costs: a classic server-based Lightning node is the way to go. It's the most demanding solution, but also the most consistent with Bitcoin's idea of sovereignty.
# Creating your first Lightning node
b6db225e-61ab-437a-bccb-33d07503da15
## Installing LND with Umbrel
a0014bf3-1bd3-4311-b15b-5ef2354ec744
Now that we've reviewed the basics of Lightning and the solutions available, it's time to get down to business. To take this course, you'll need a Bitcoin node synchronized to Umbrel. This LNP202 training course is a continuation of BTC 202; if you don't yet have a Bitcoin node, I invite you to take this other training course before coming back here once your node has been synchronized. I strongly recommend that you consult it, as I won't go into detail about its operation, configuration and security measures.
https://planb.academy/courses/3cd9cb94-82e8-417a-9c5a-02afc2589426
In this first chapter, we'll look at how to install LND on your Umbrel. The way Umbrel works makes this step very simple, since all you have to do is install an application.
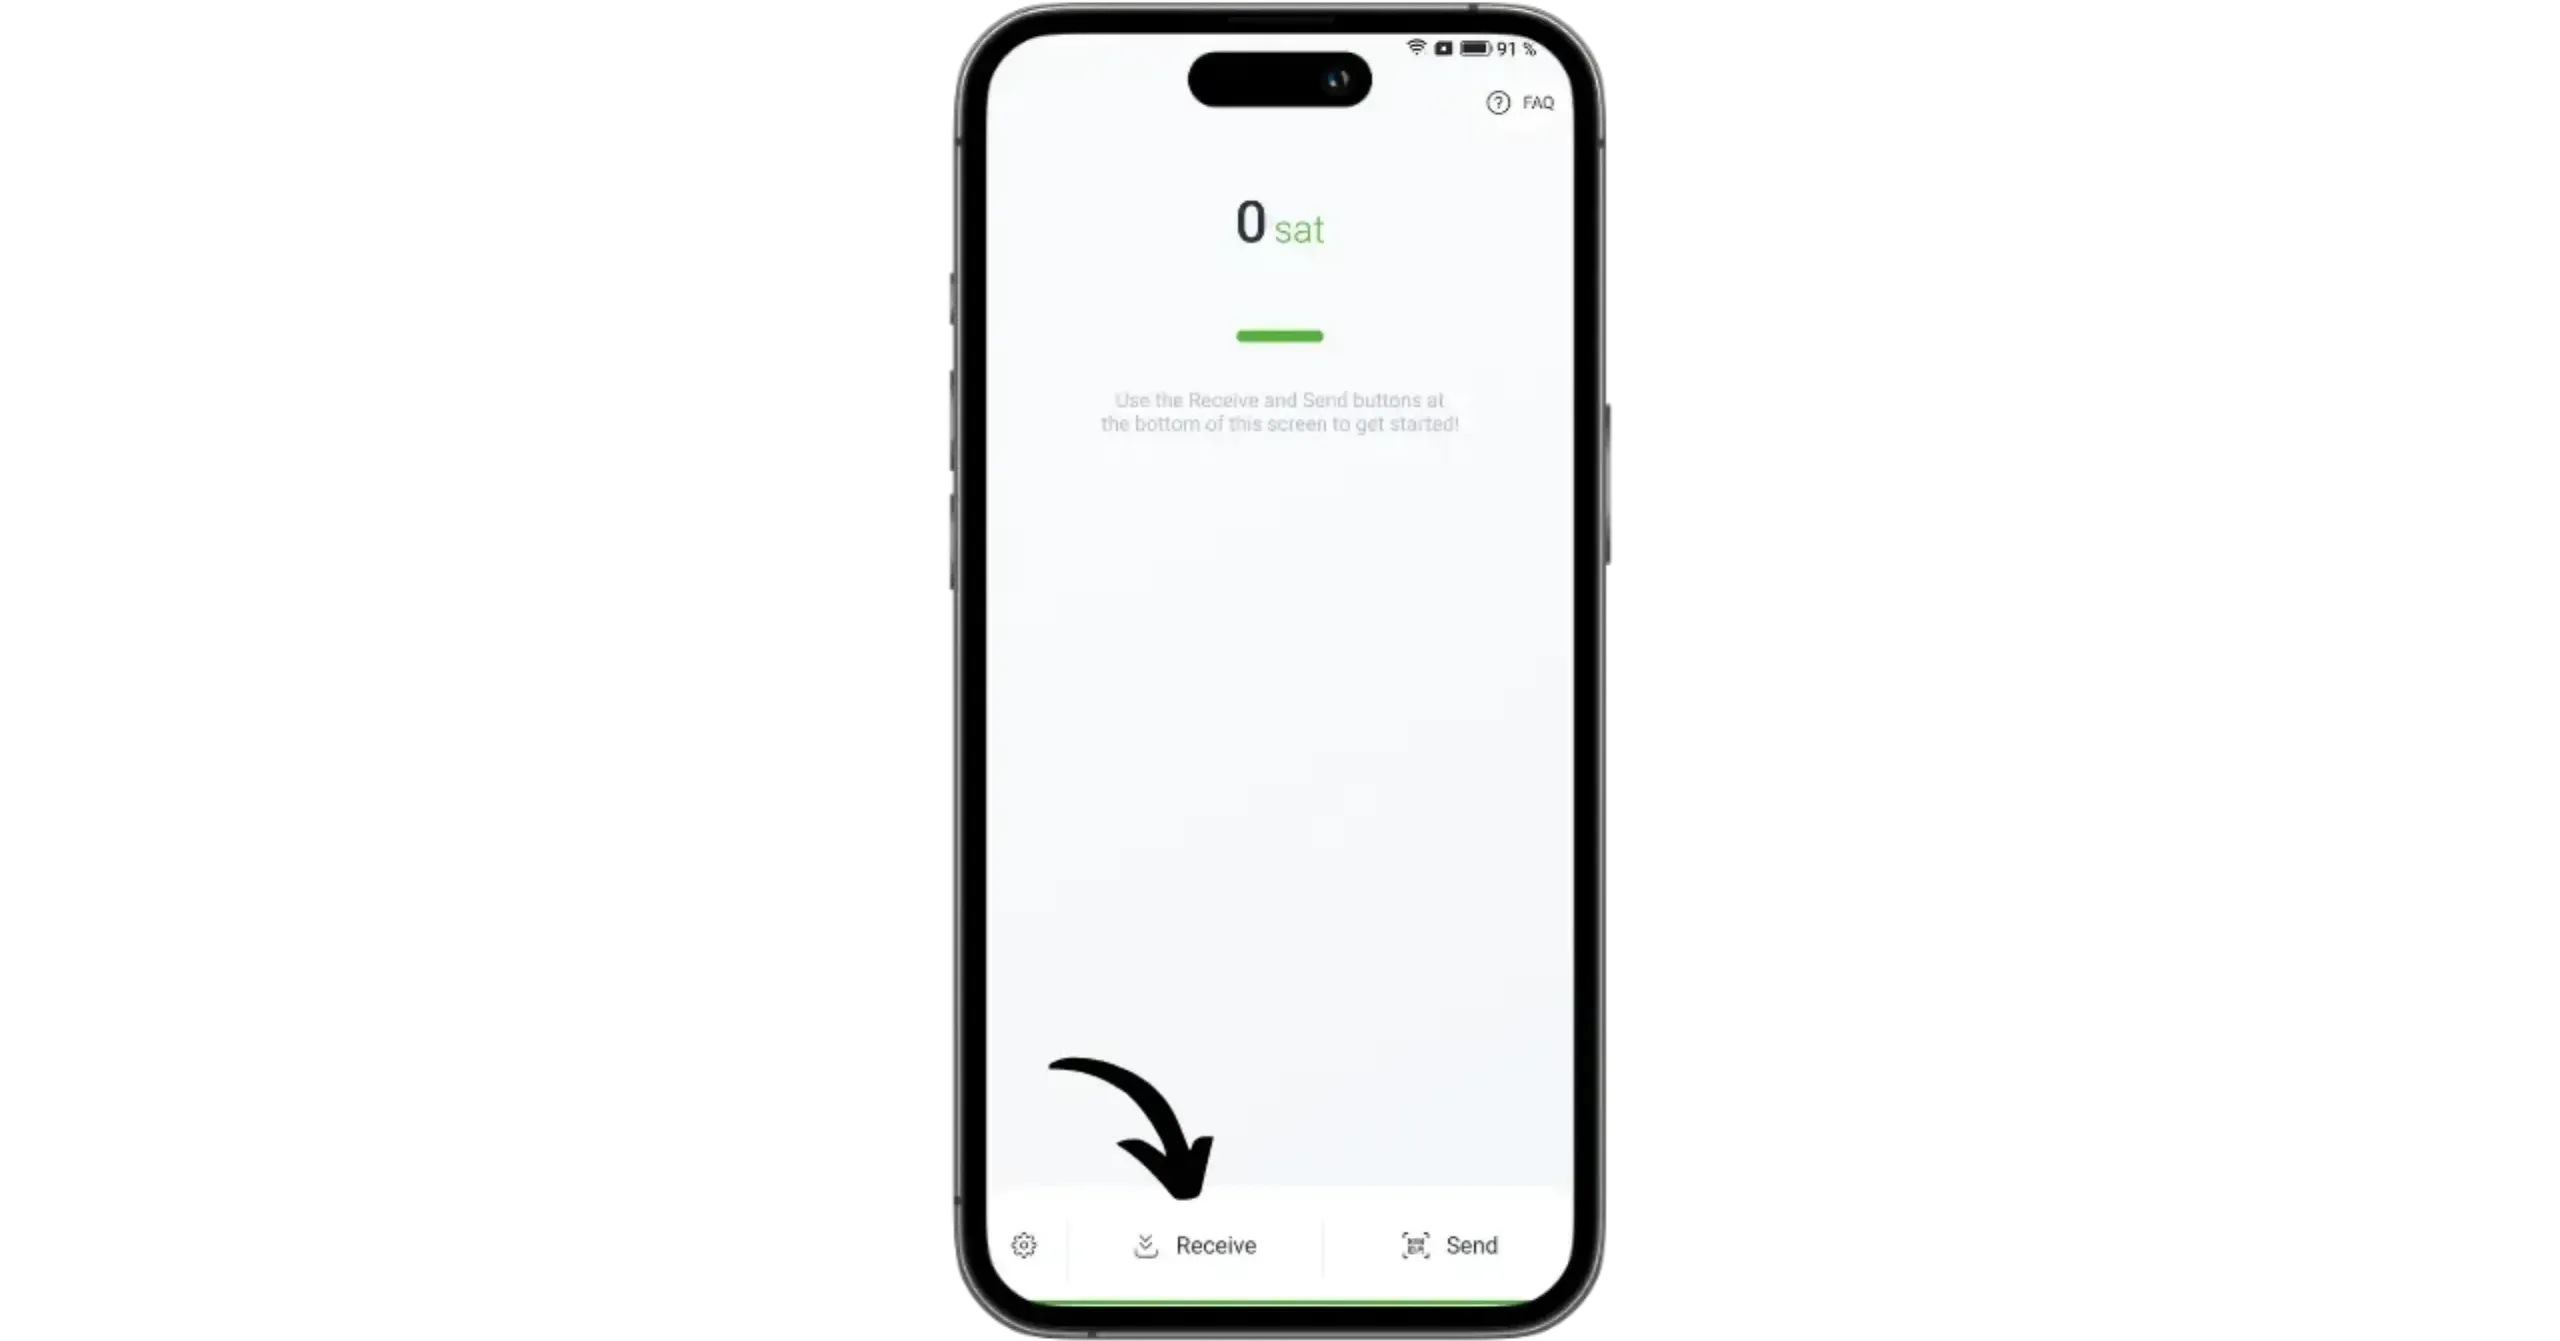
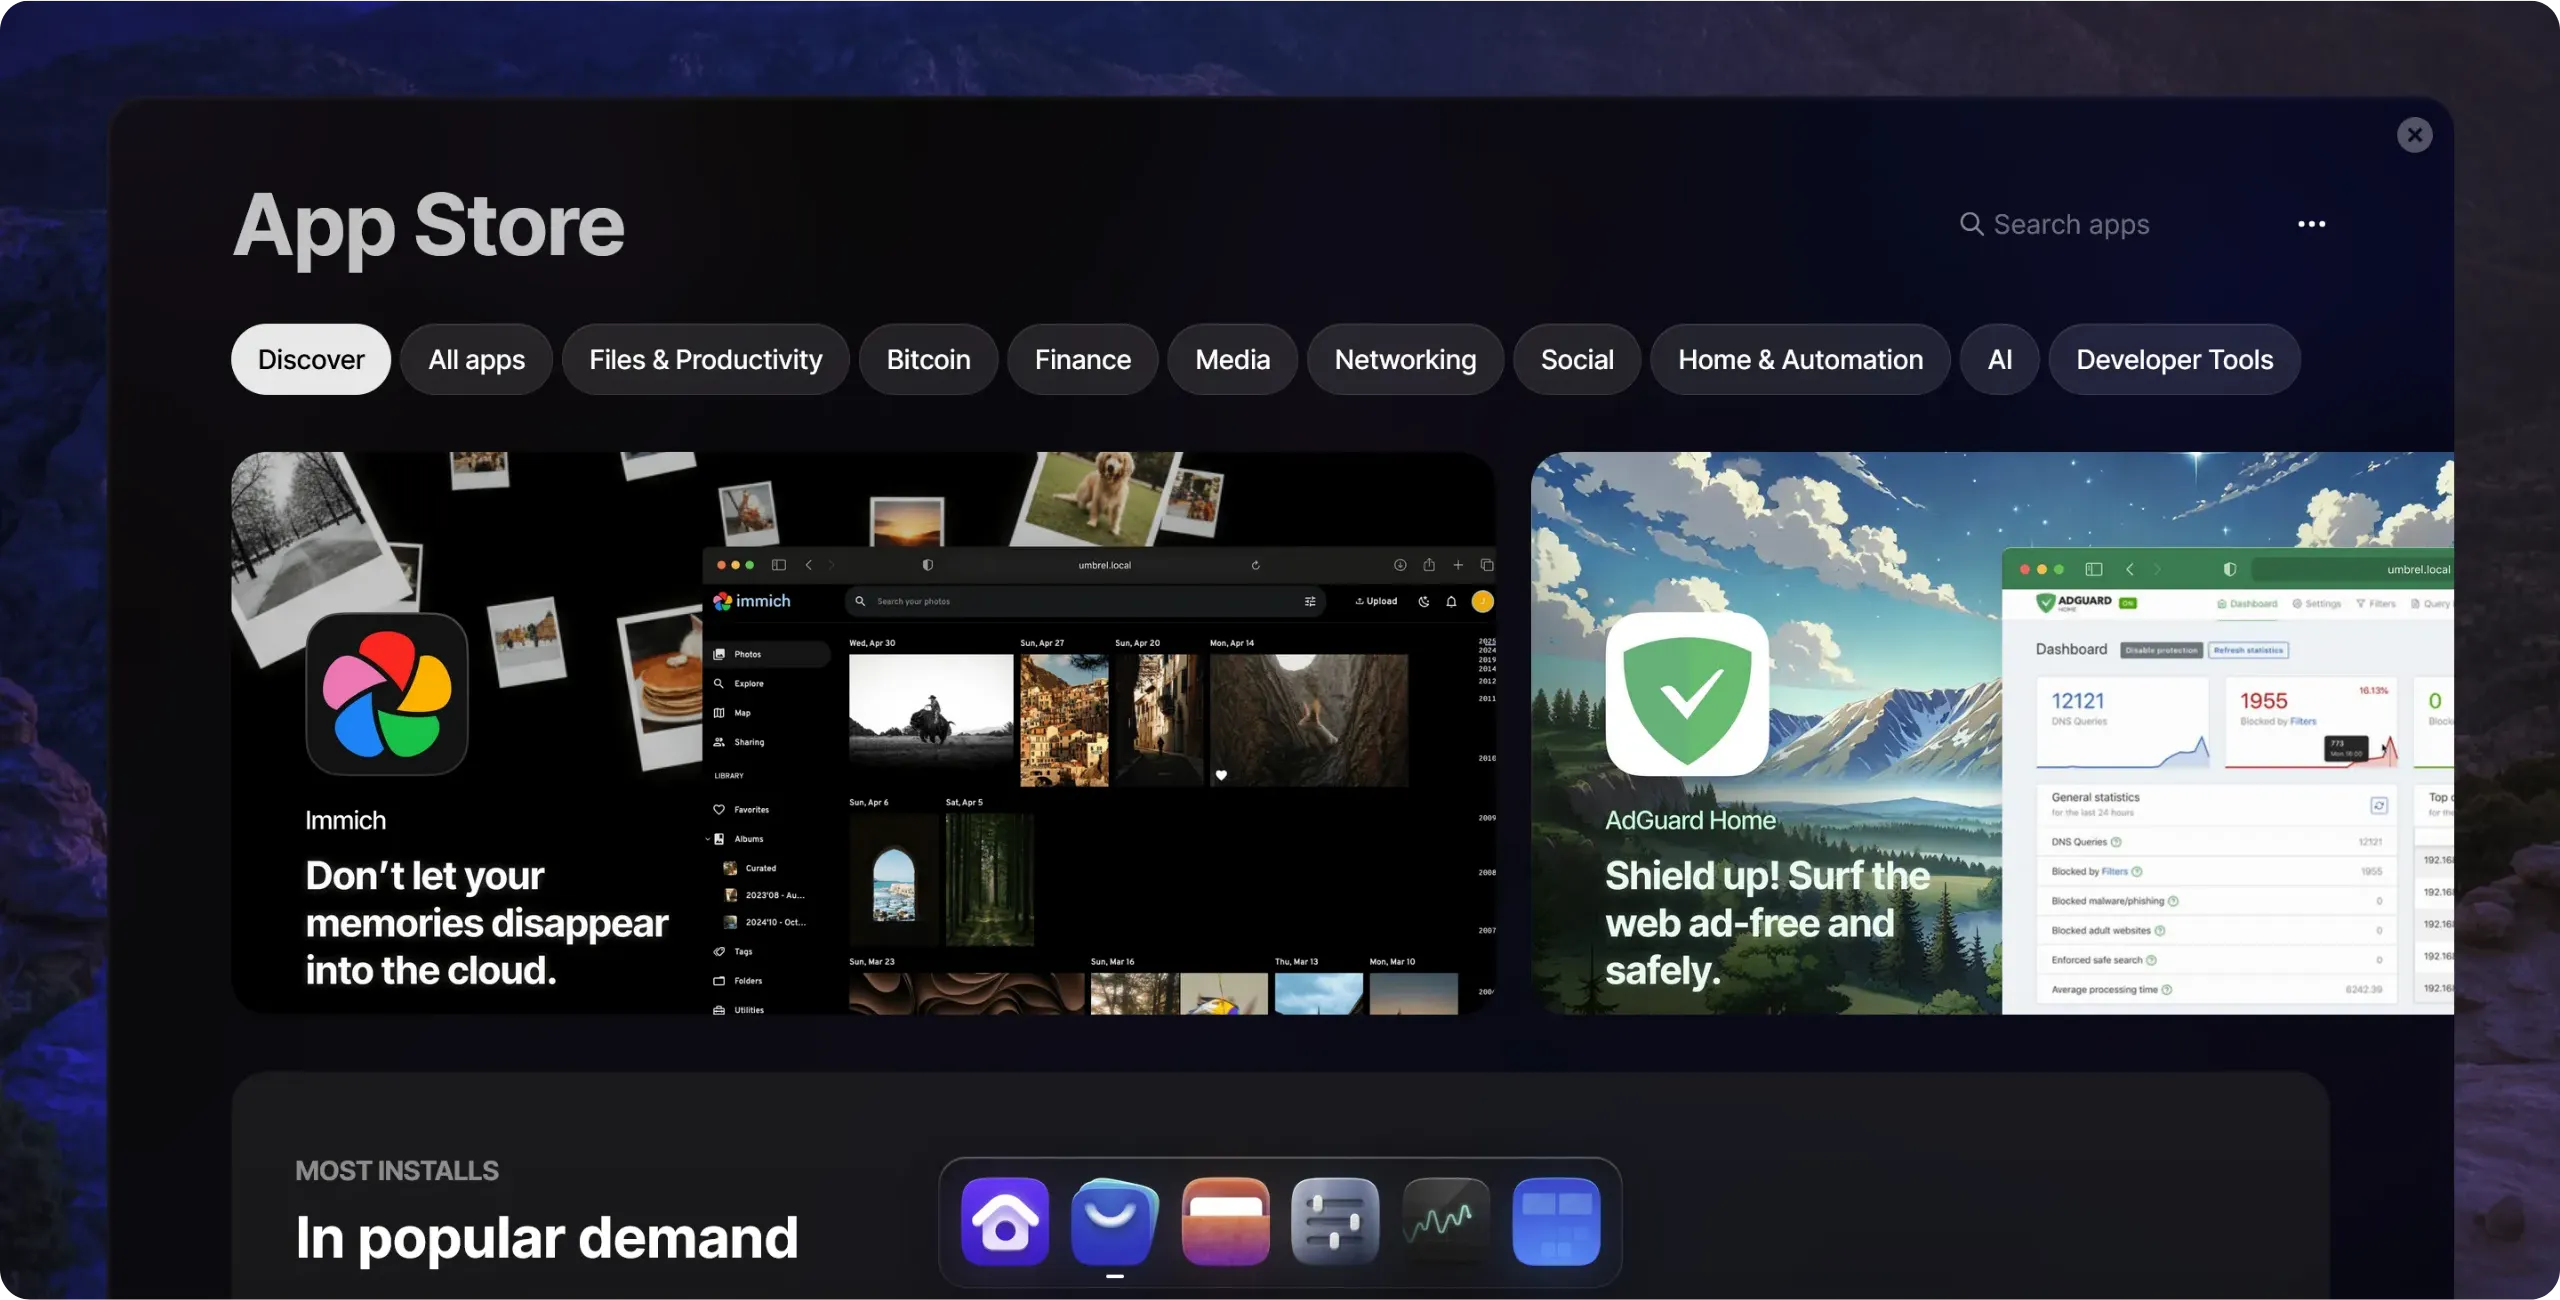
From the home page, open the `App Store` at the bottom of the interface.
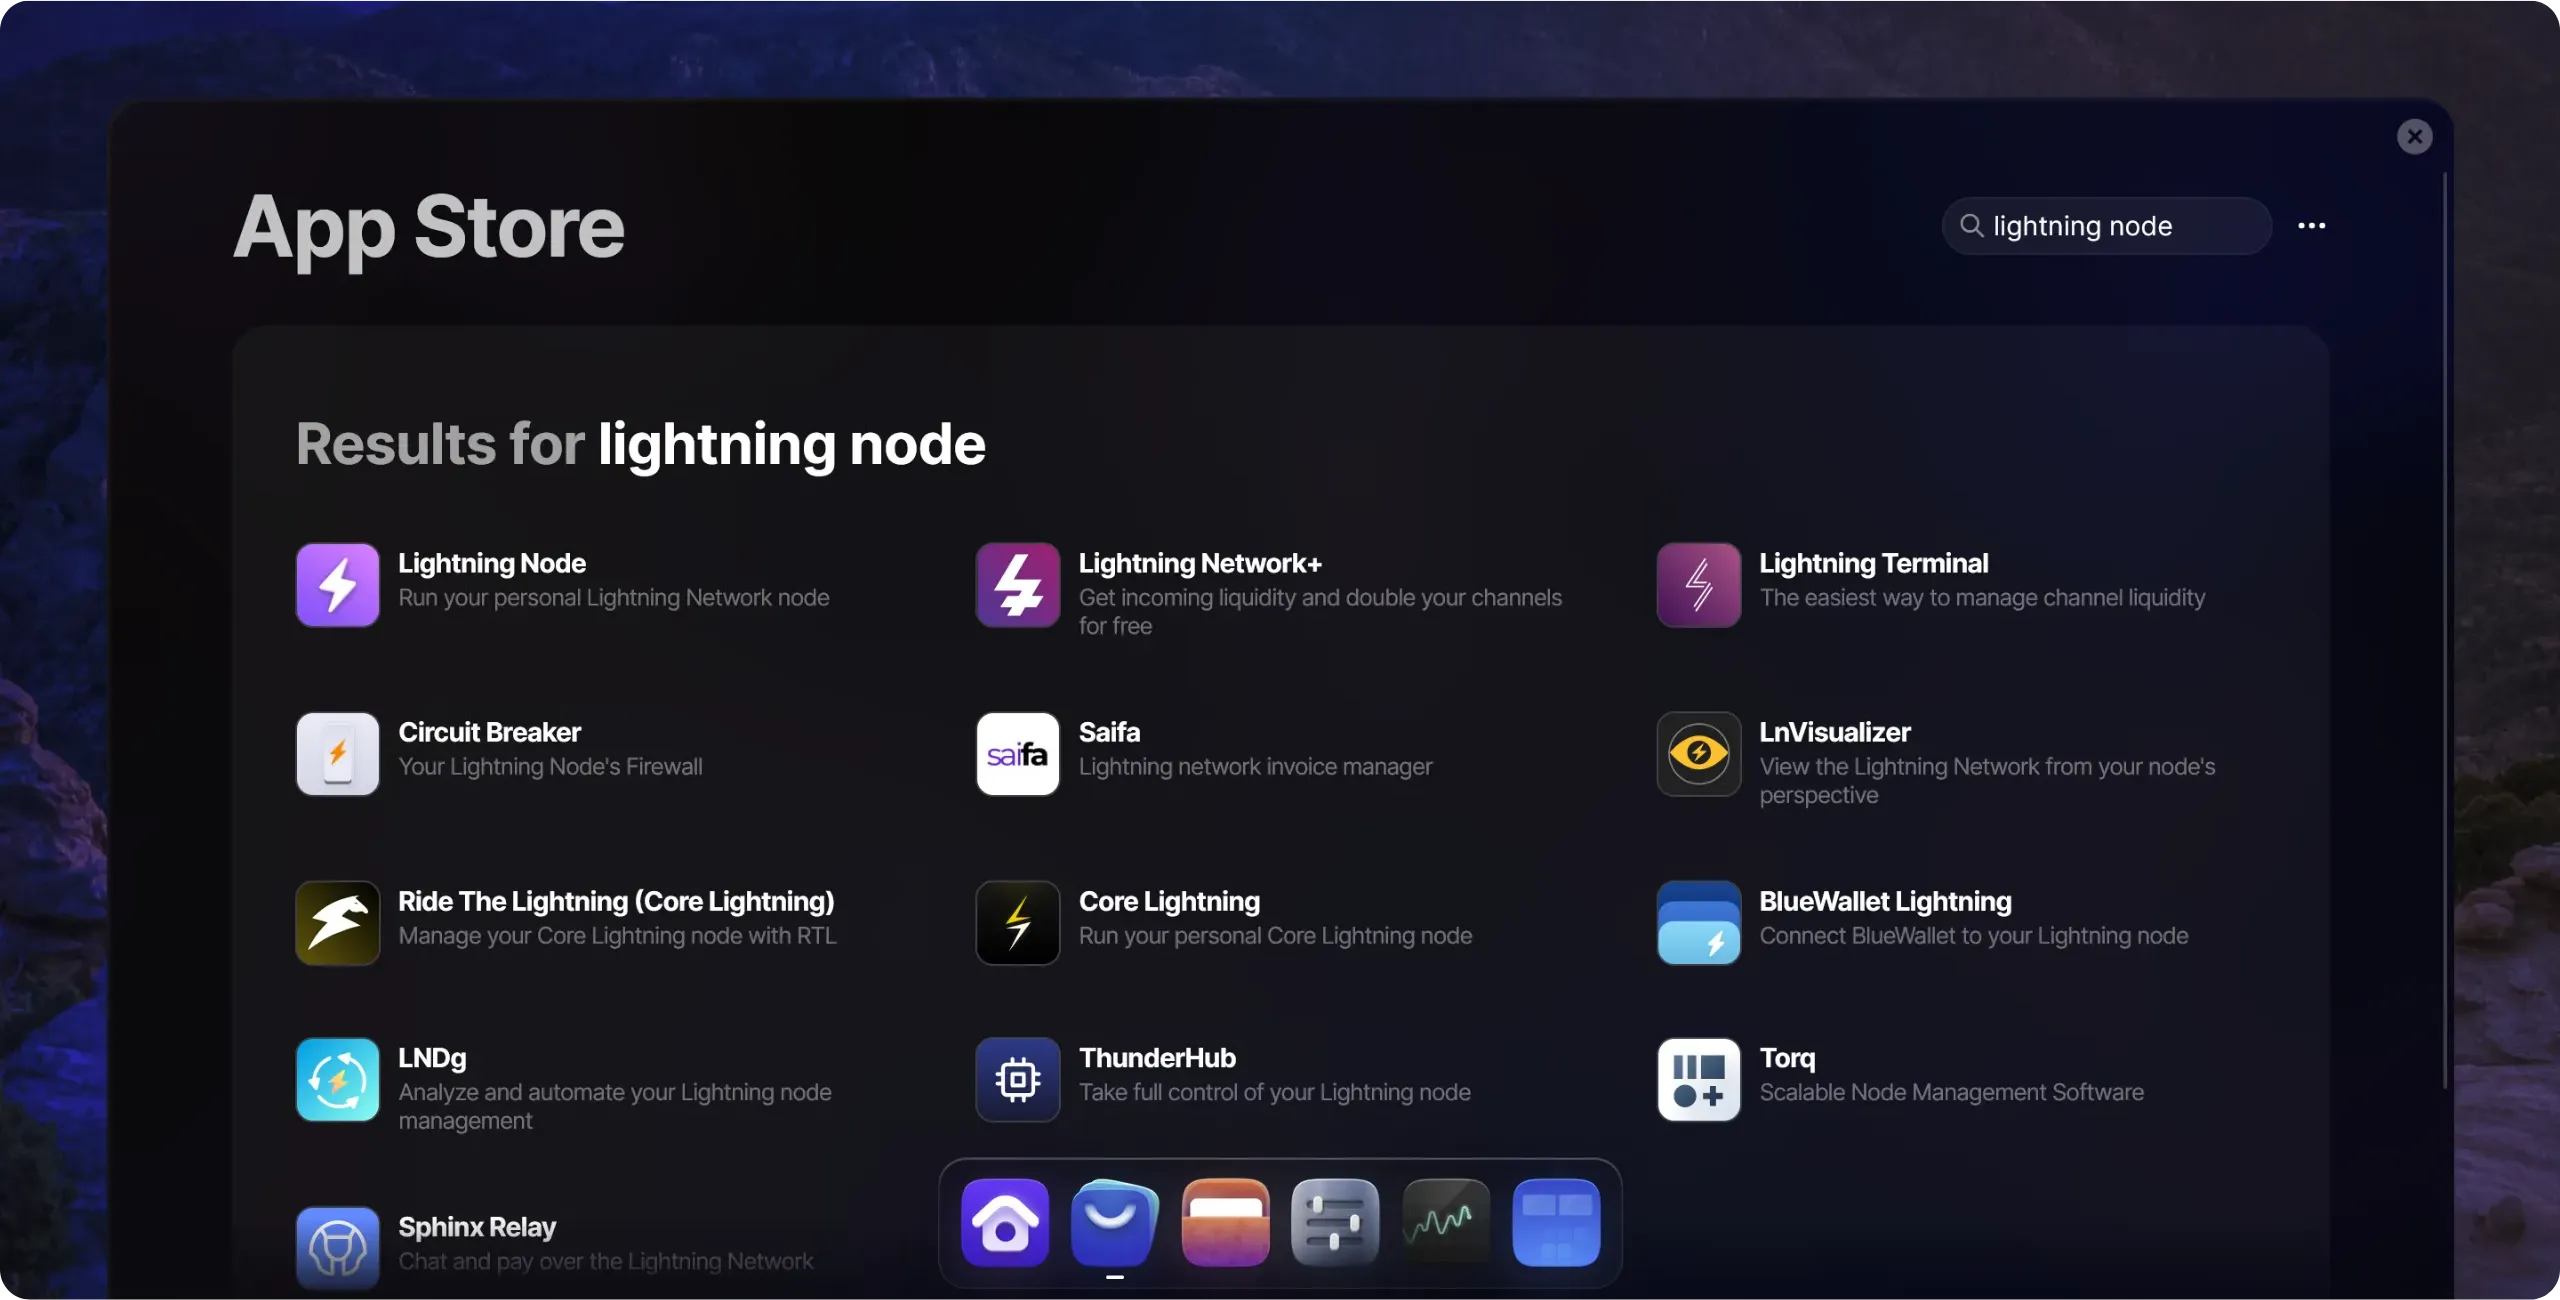
In the search bar, enter `Lightning Node`, then click on the application.
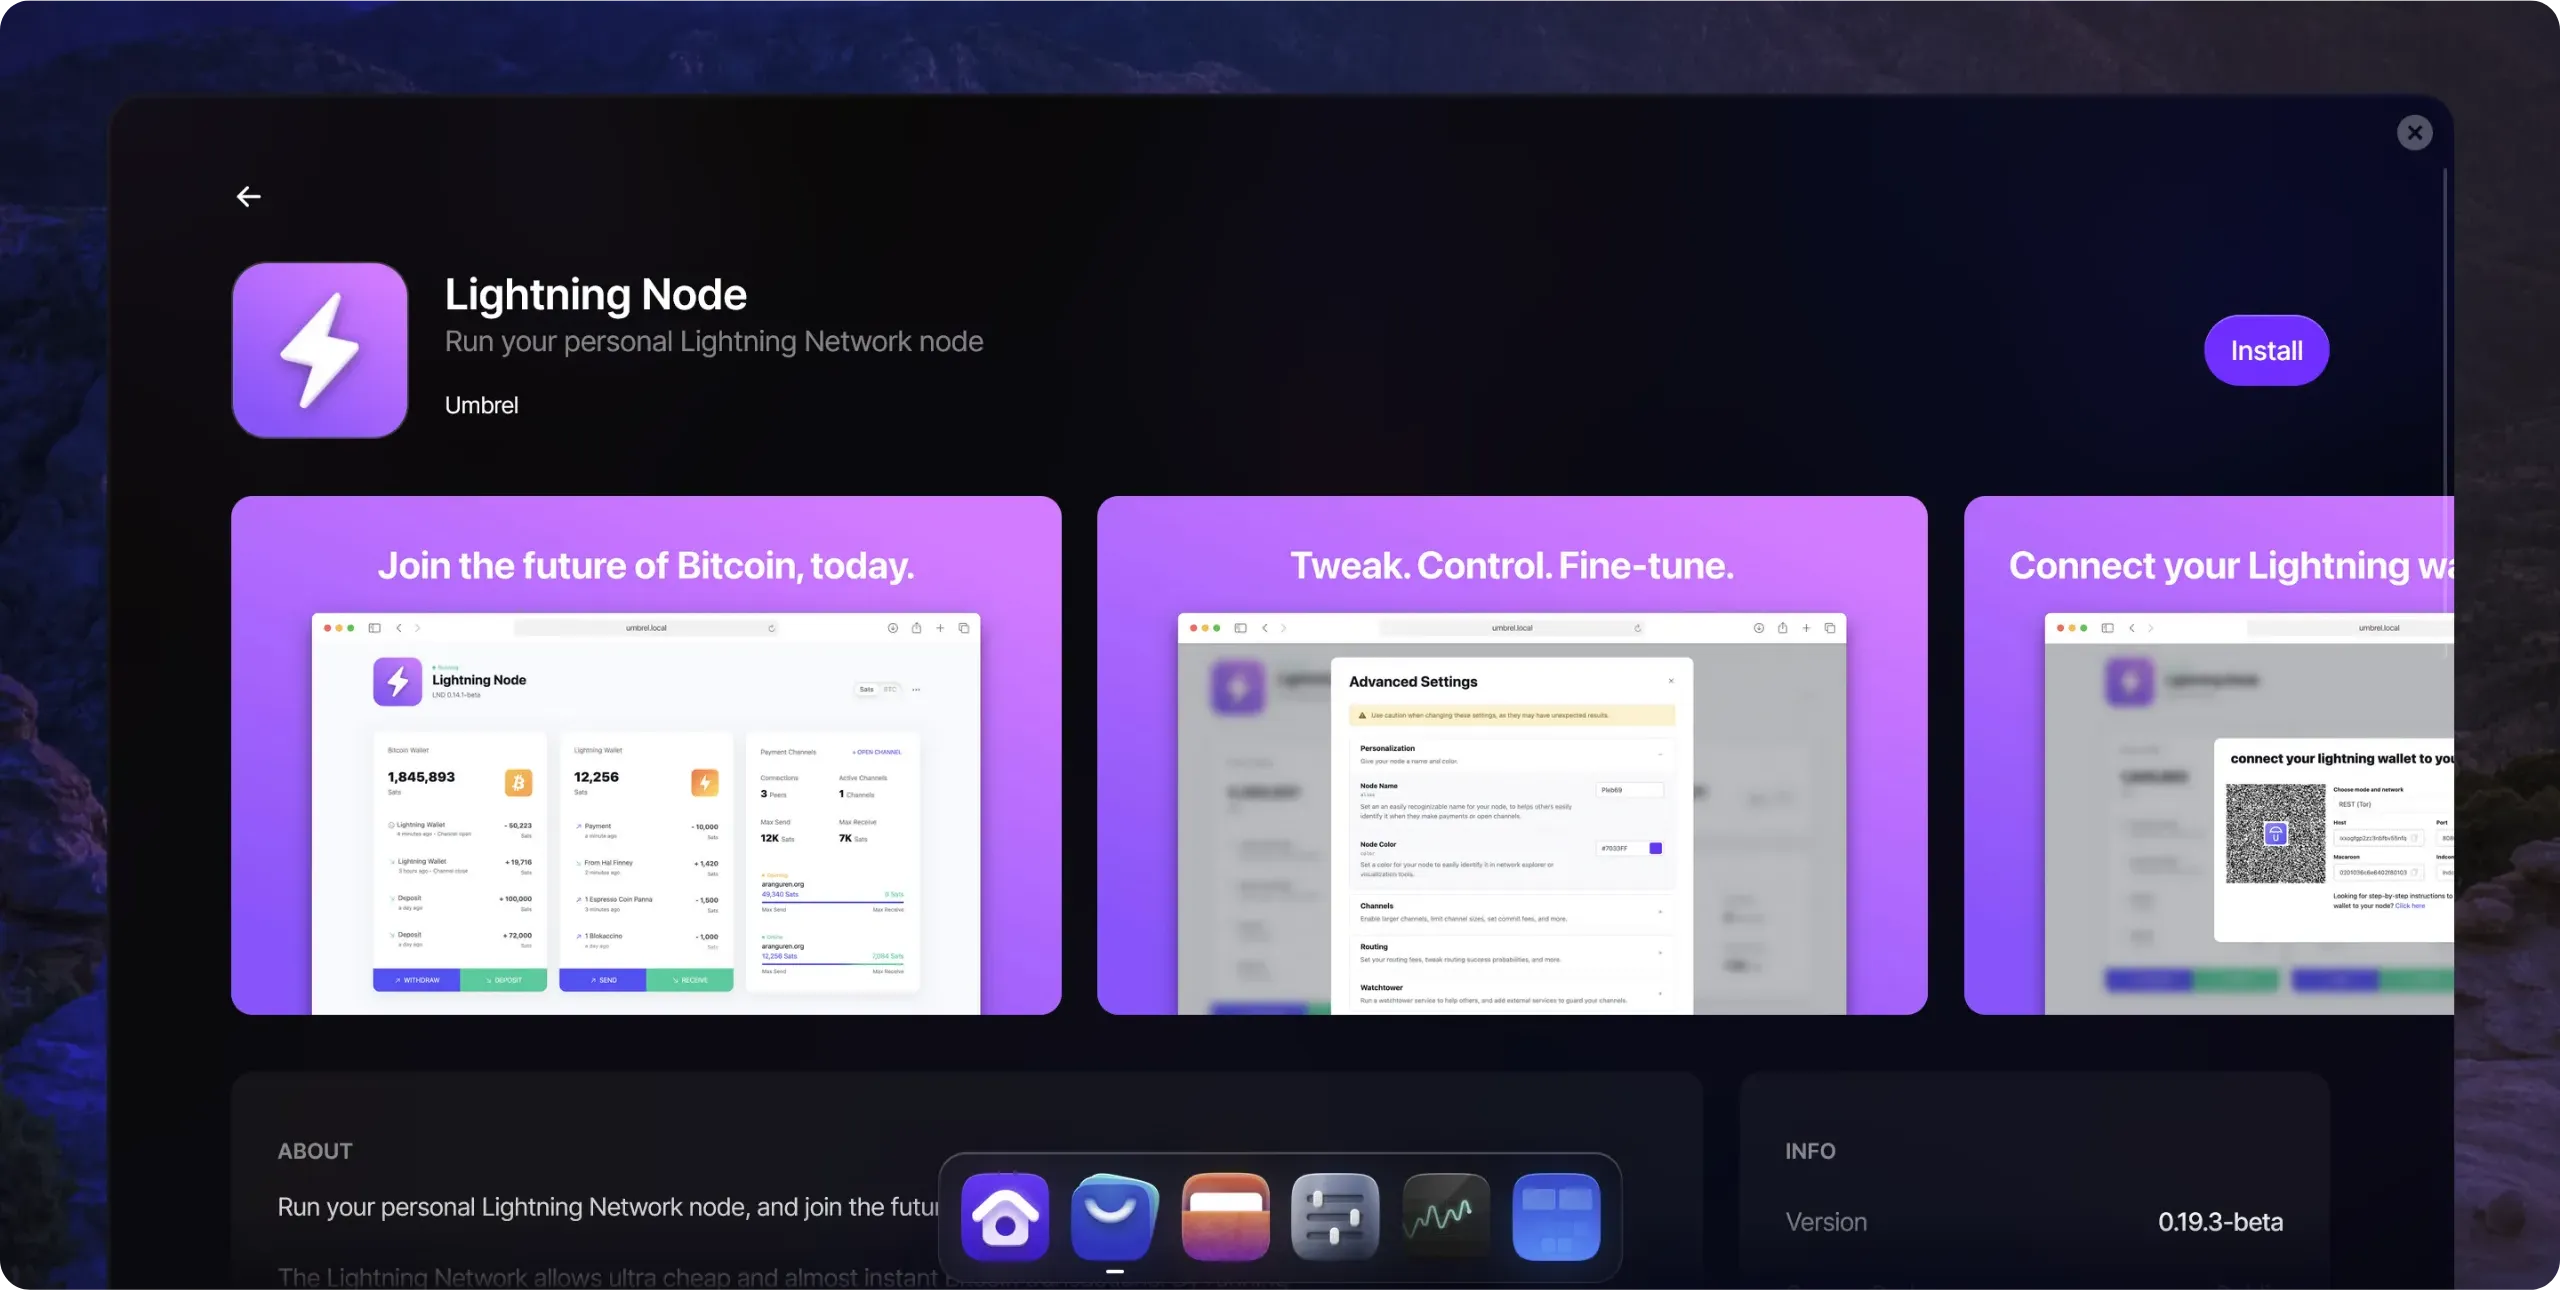
Then click on the `Install` button to launch the installation.
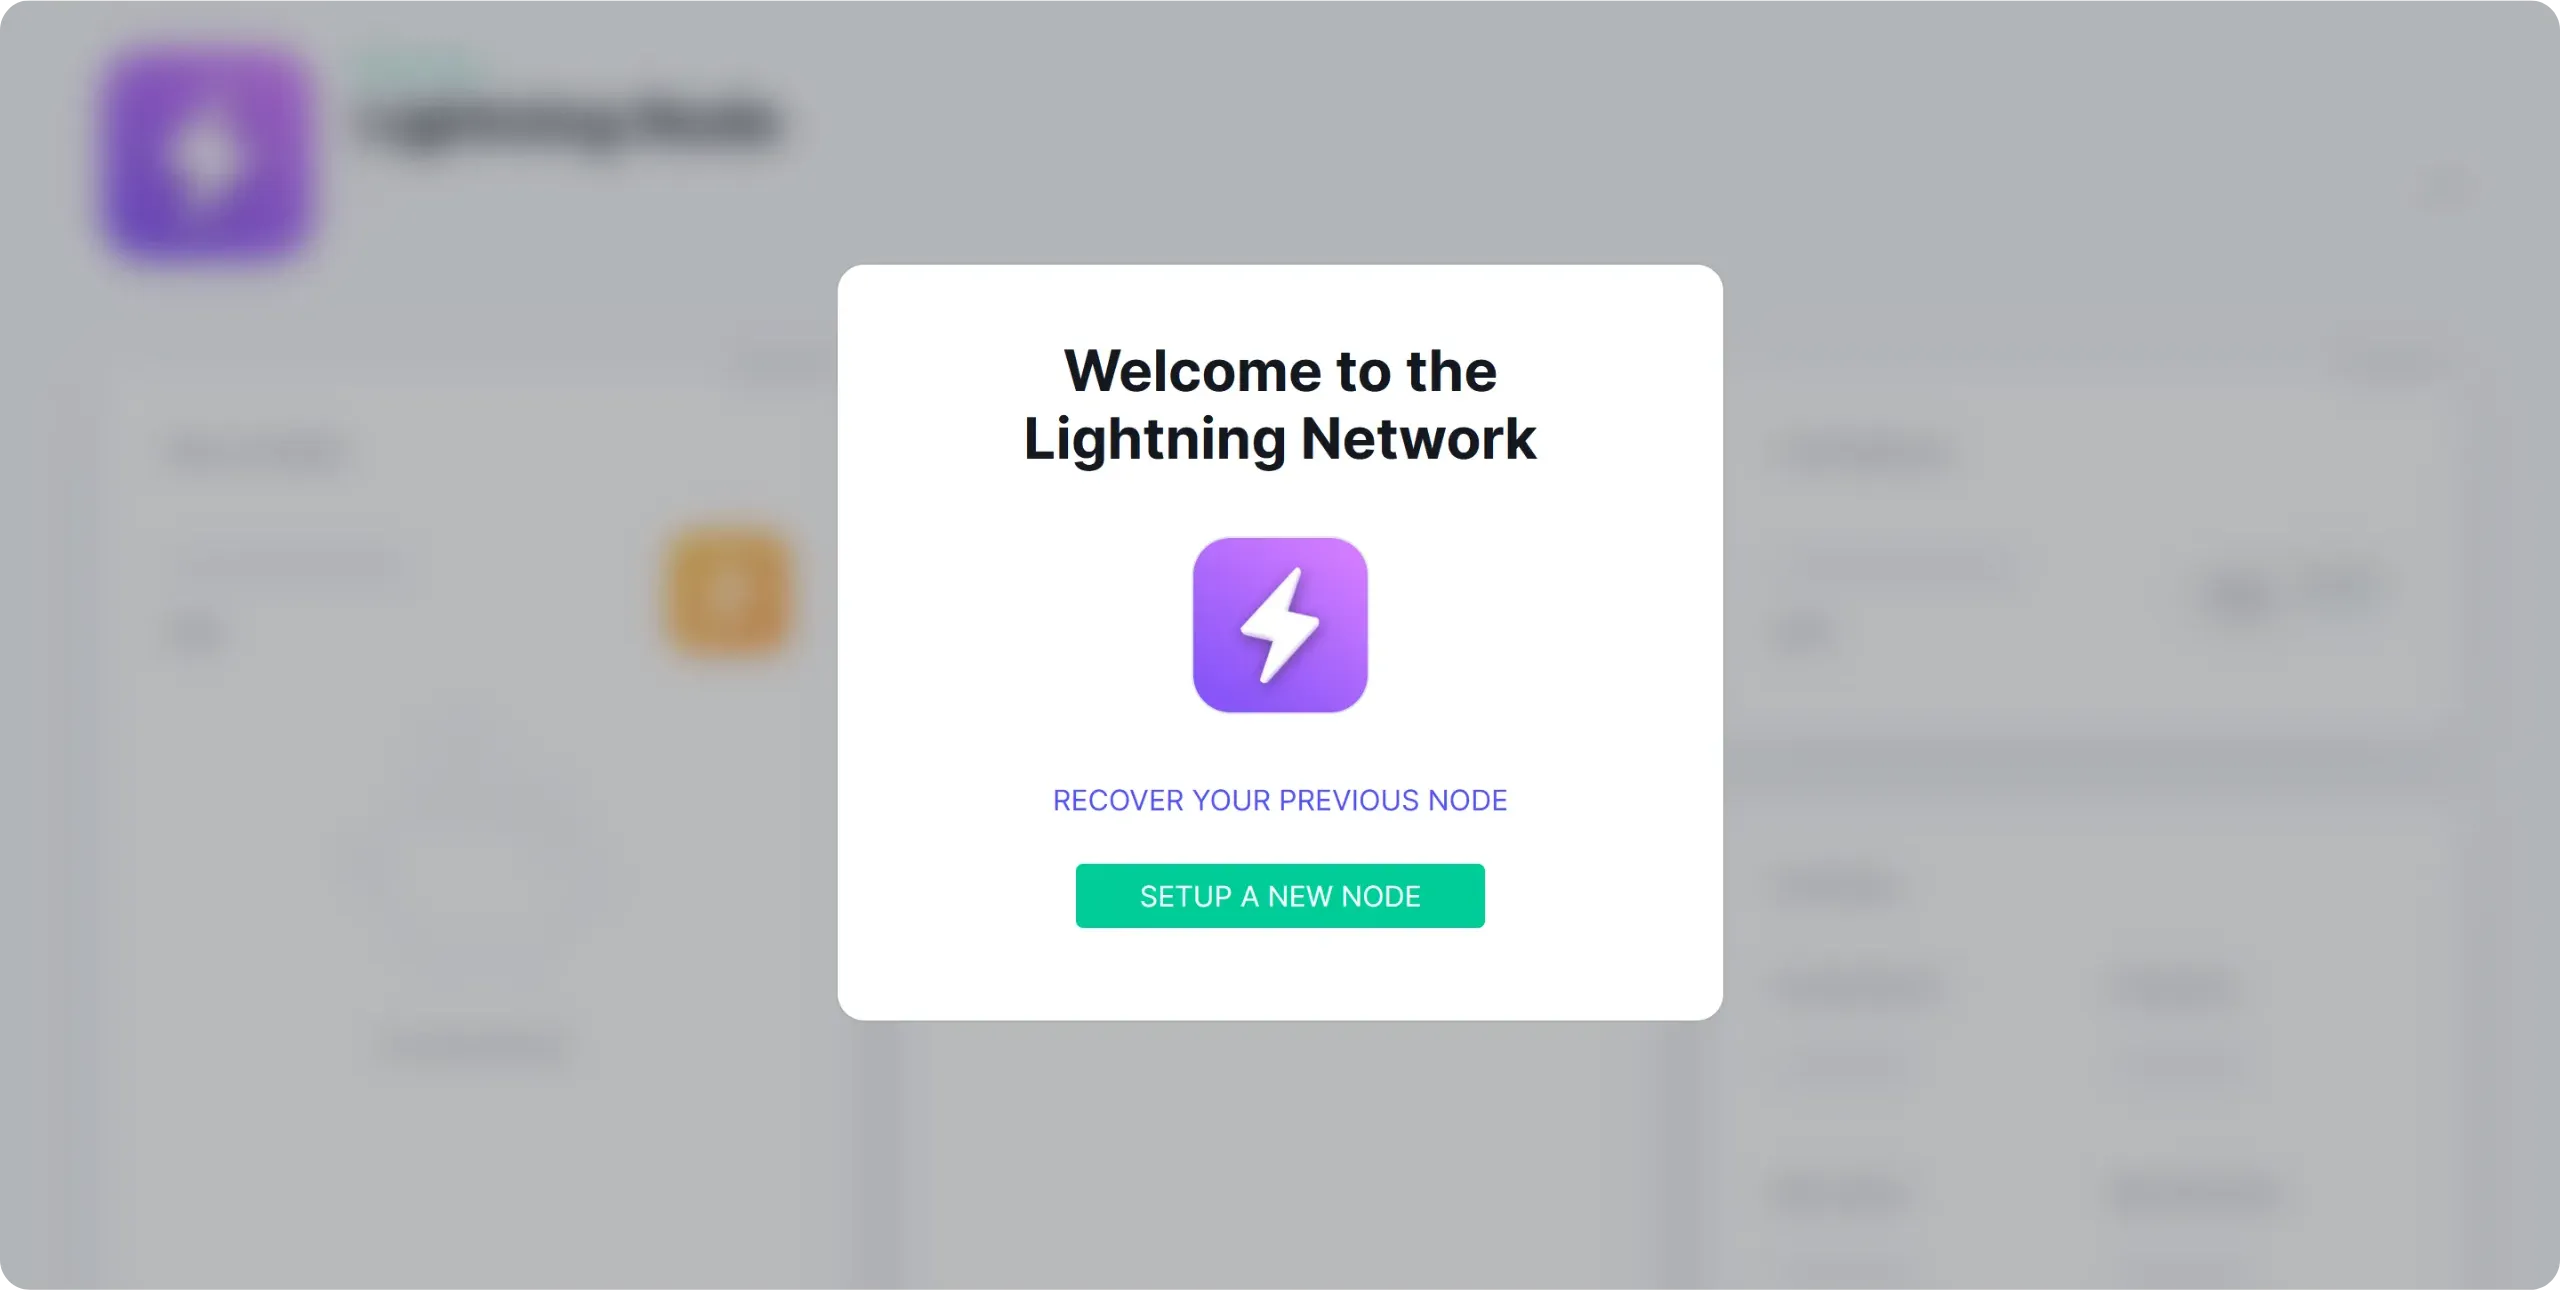
From the home page, click on the application to open it, then select `Setup a new node`.
You are given a 24-word mnemonic phrase. Keep it in a safe place. We'll look in more detail in the next chapter at how to regain access to your Lightning node (this is a much more complex process than for a simple Bitcoin wallet), but remember for now that this phrase plays a crucial role and must be saved with the utmost care.
https://planb.academy/tutorials/wallet/backup/backup-mnemonic-22c0ddfa-fb9f-4e3a-96f9-46e2a7954270
Save this phrase in the same way as a conventional mnemonic phrase: on a physical medium (paper or metal) stored in a secure location, then click on the `NEXT` button.

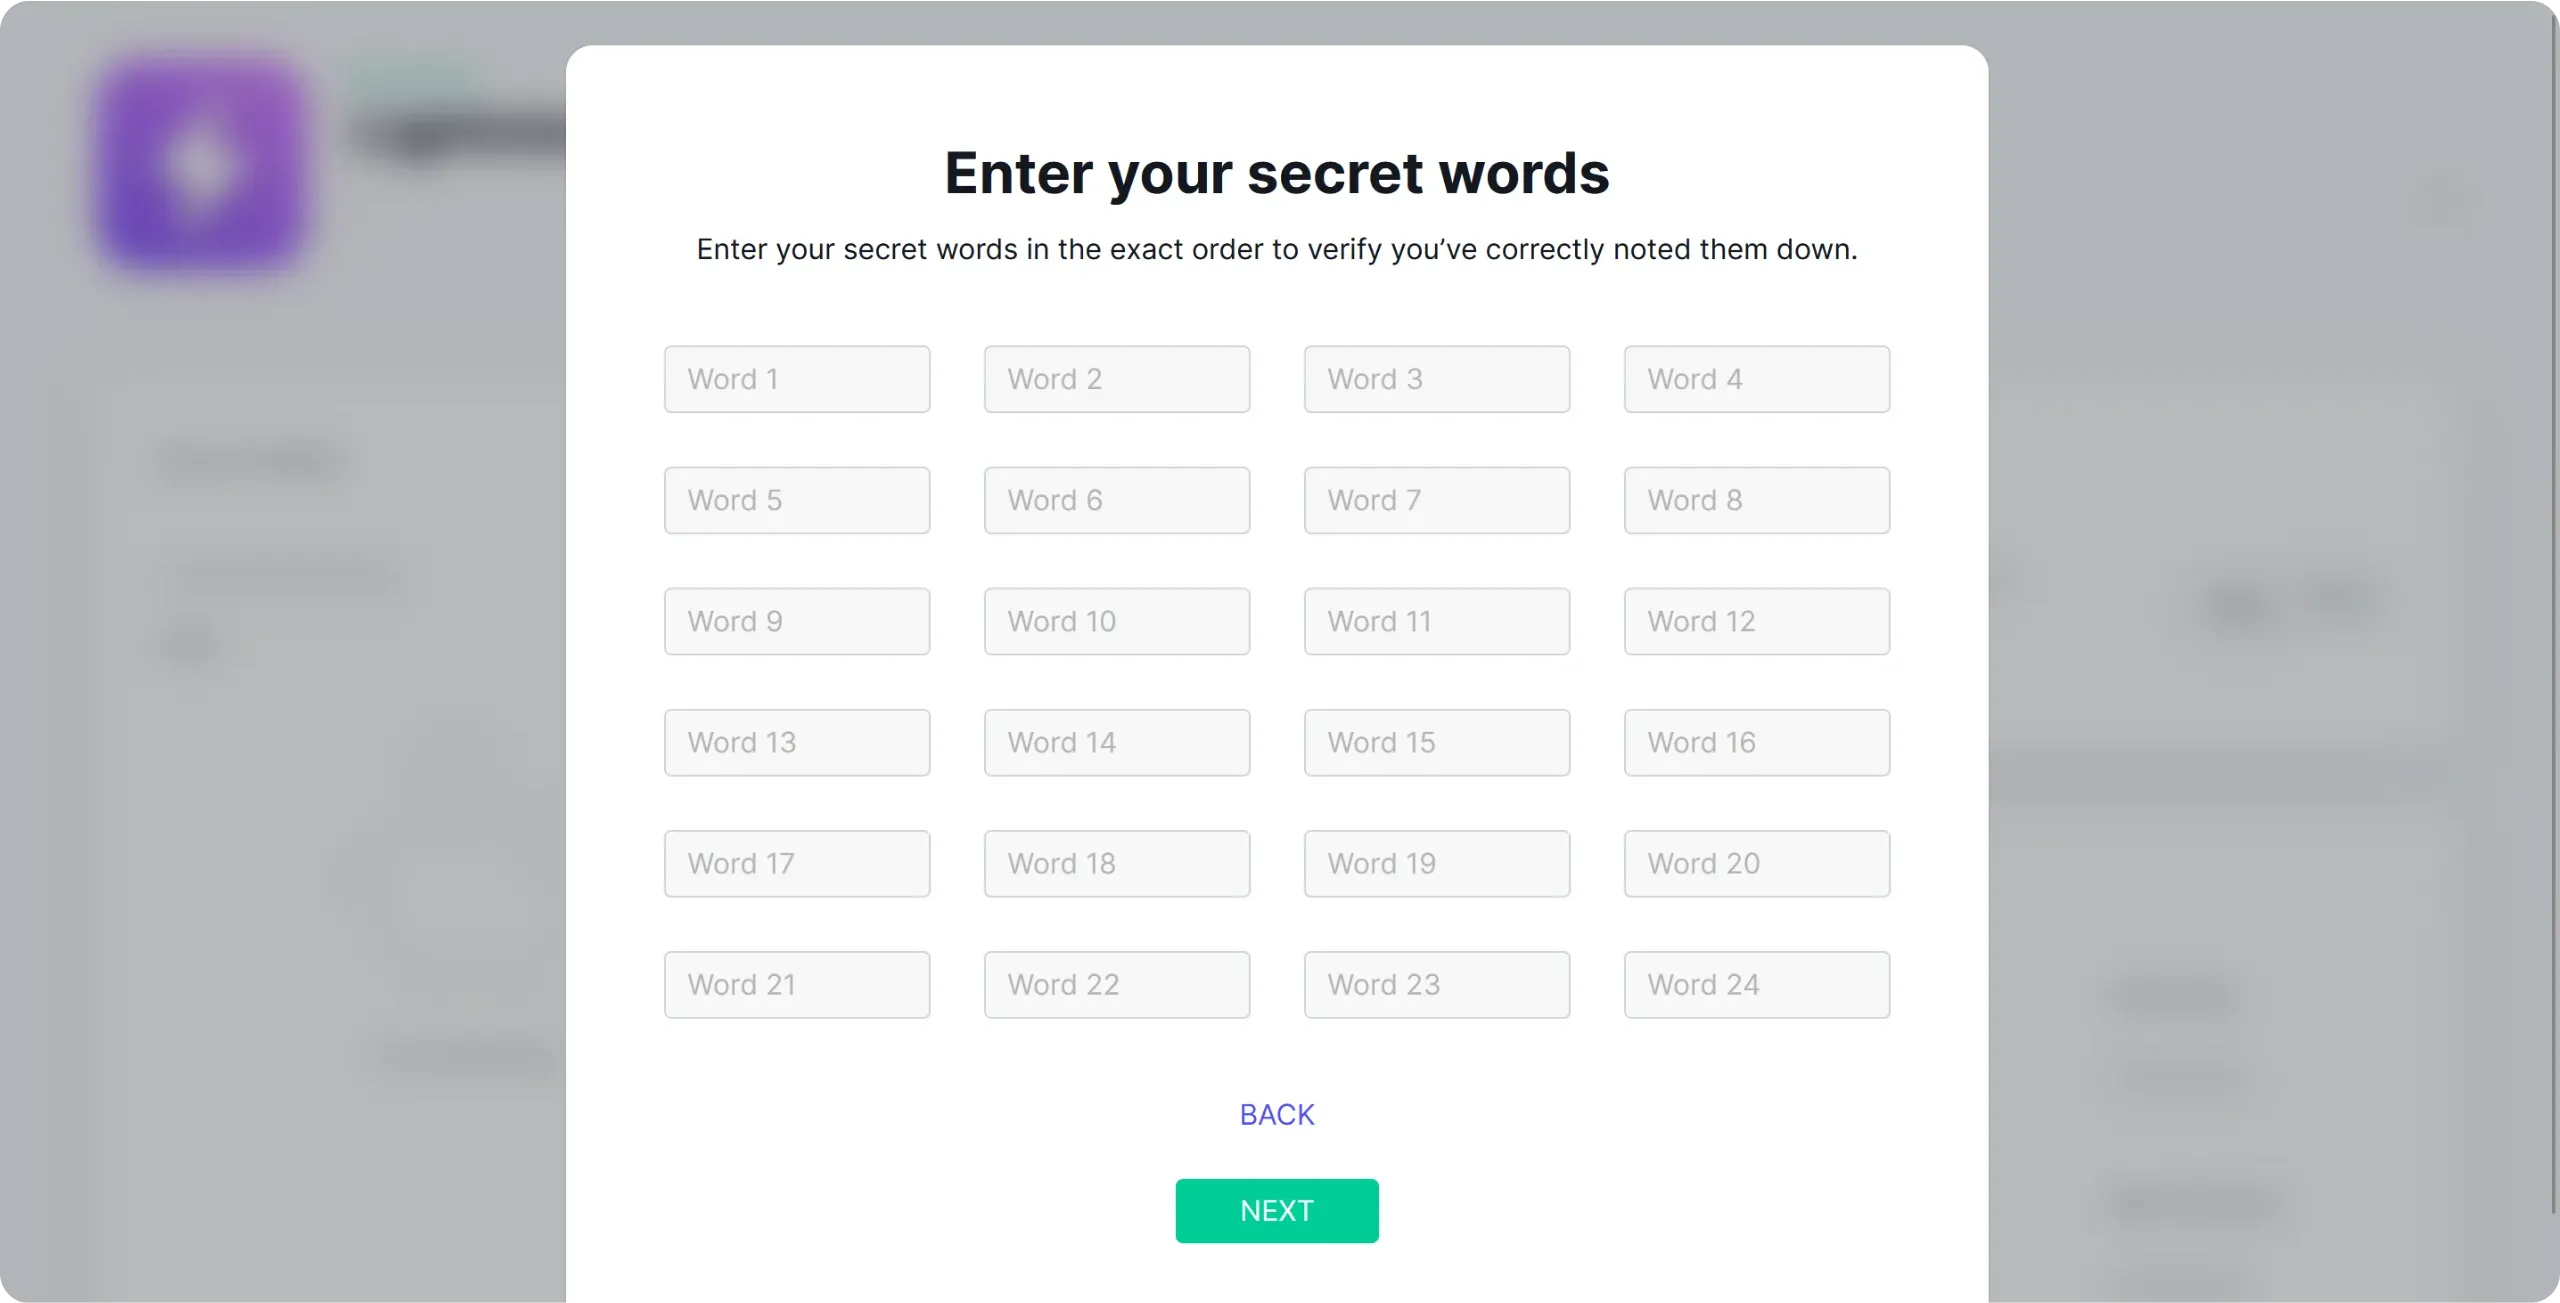
Then enter the words of your sentence to check that you've written them down correctly.
A warning message will remind you that the application is in beta version and that Lightning Network remains an experimental technology. Obviously, never commit amounts to your Lightning node that you're not prepared to lose.
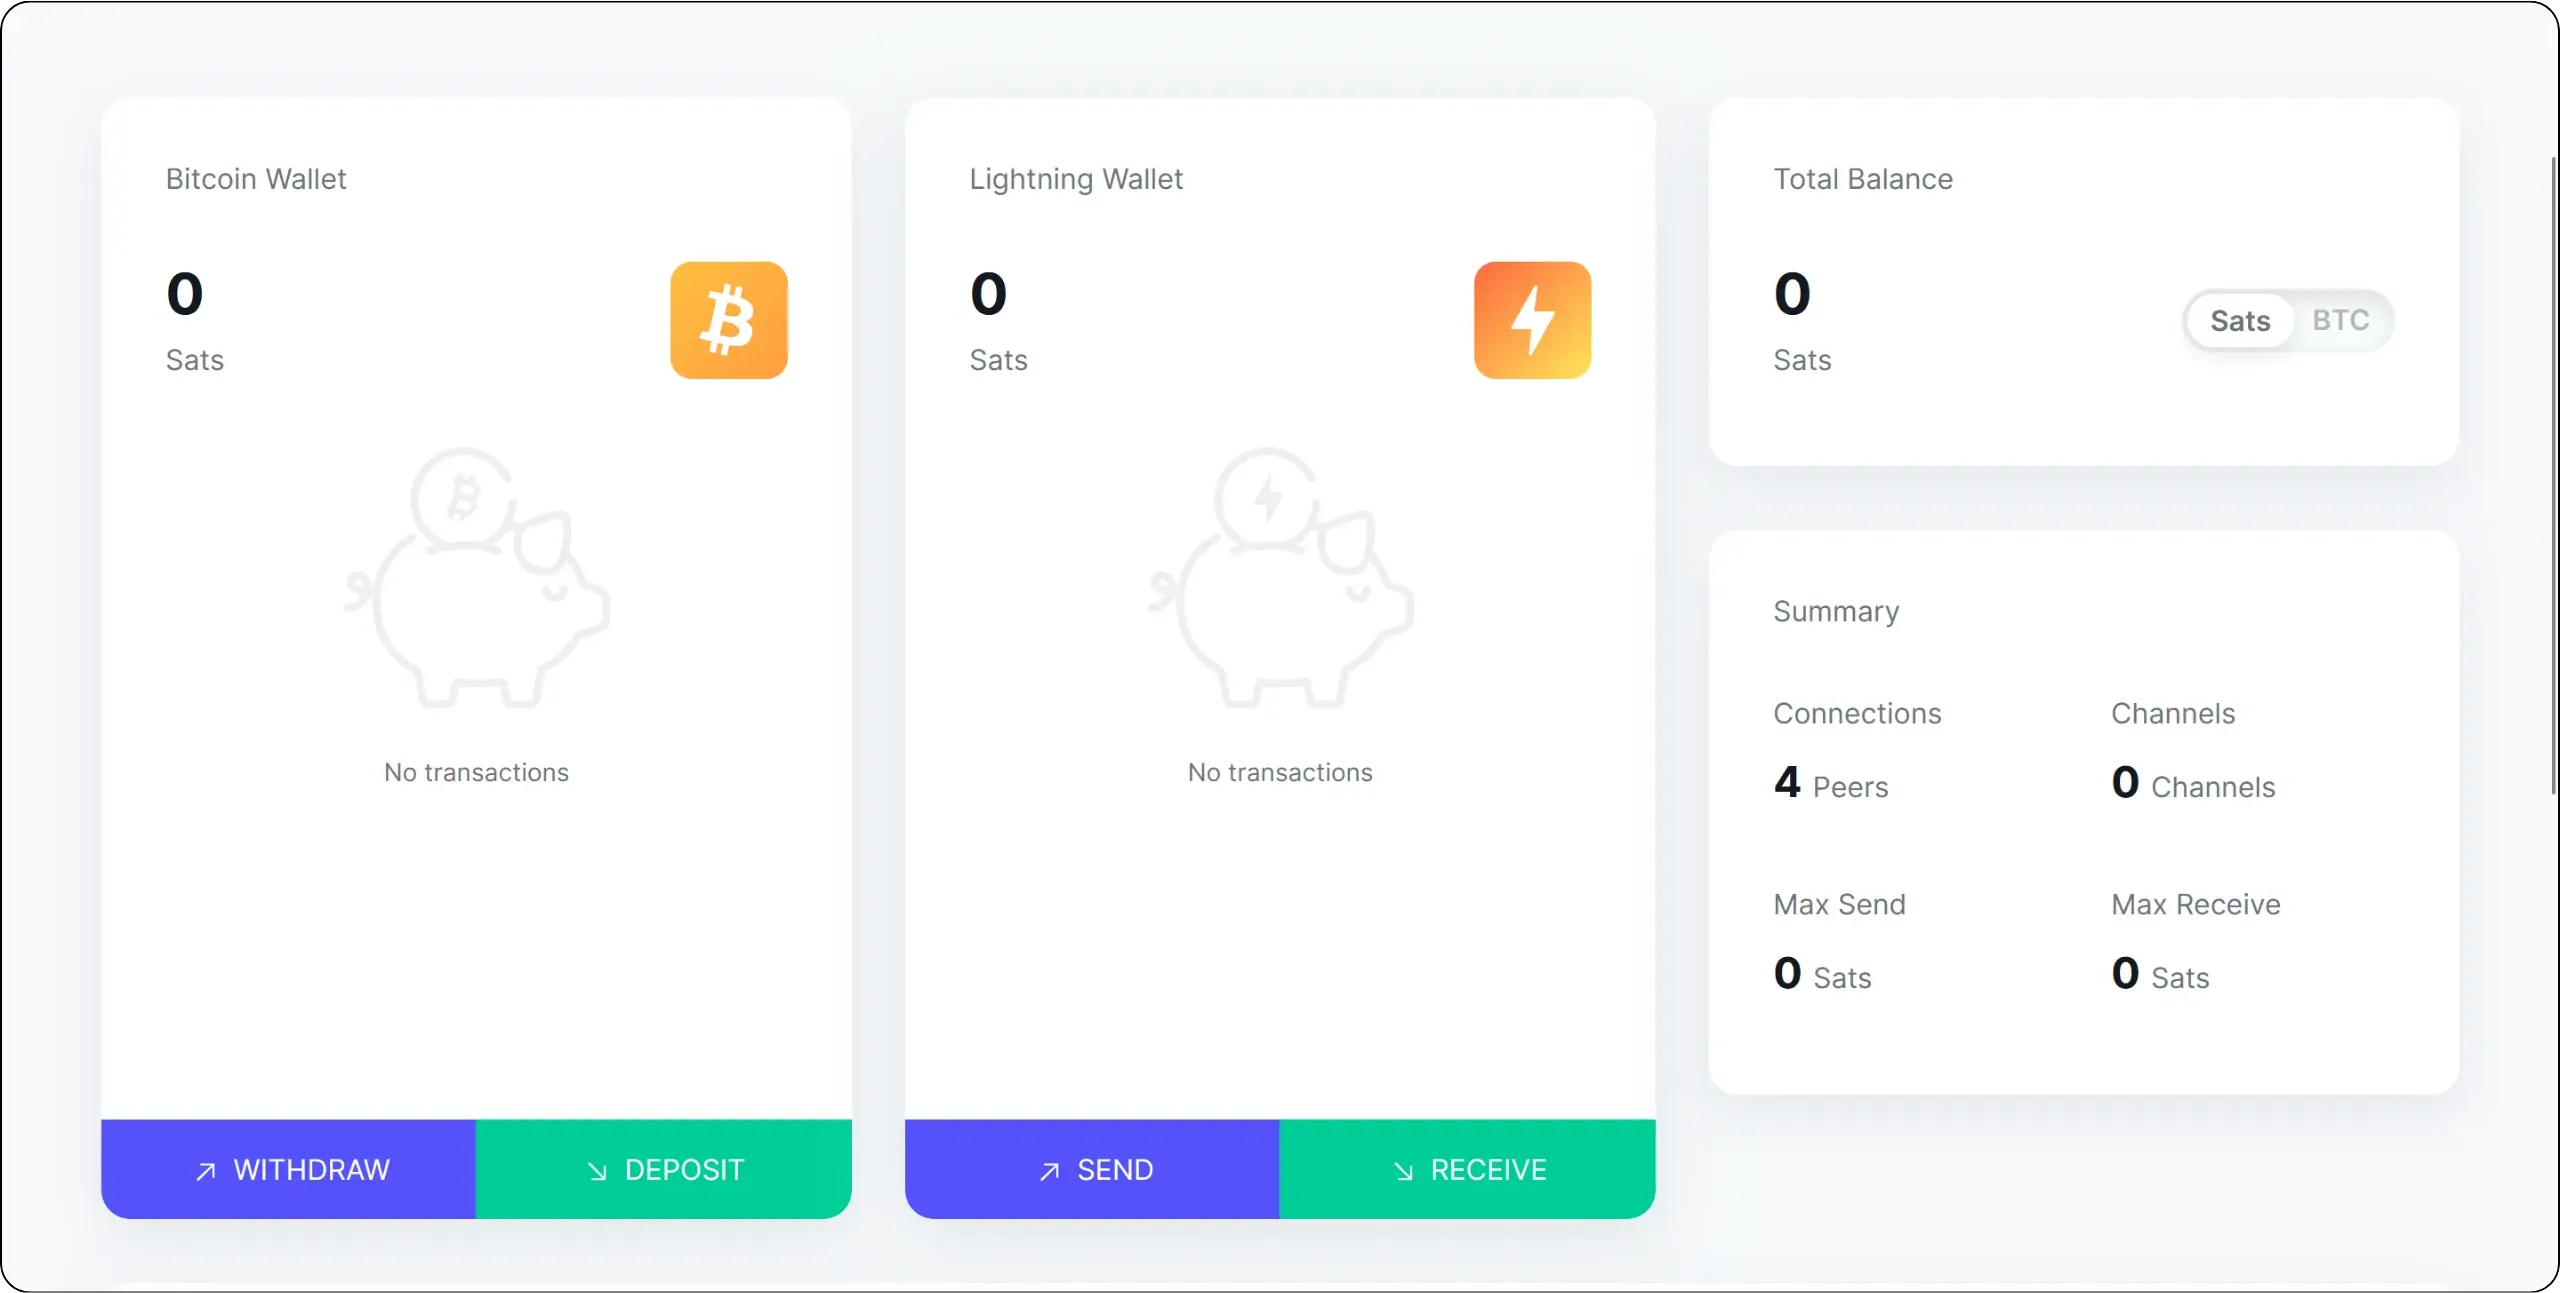
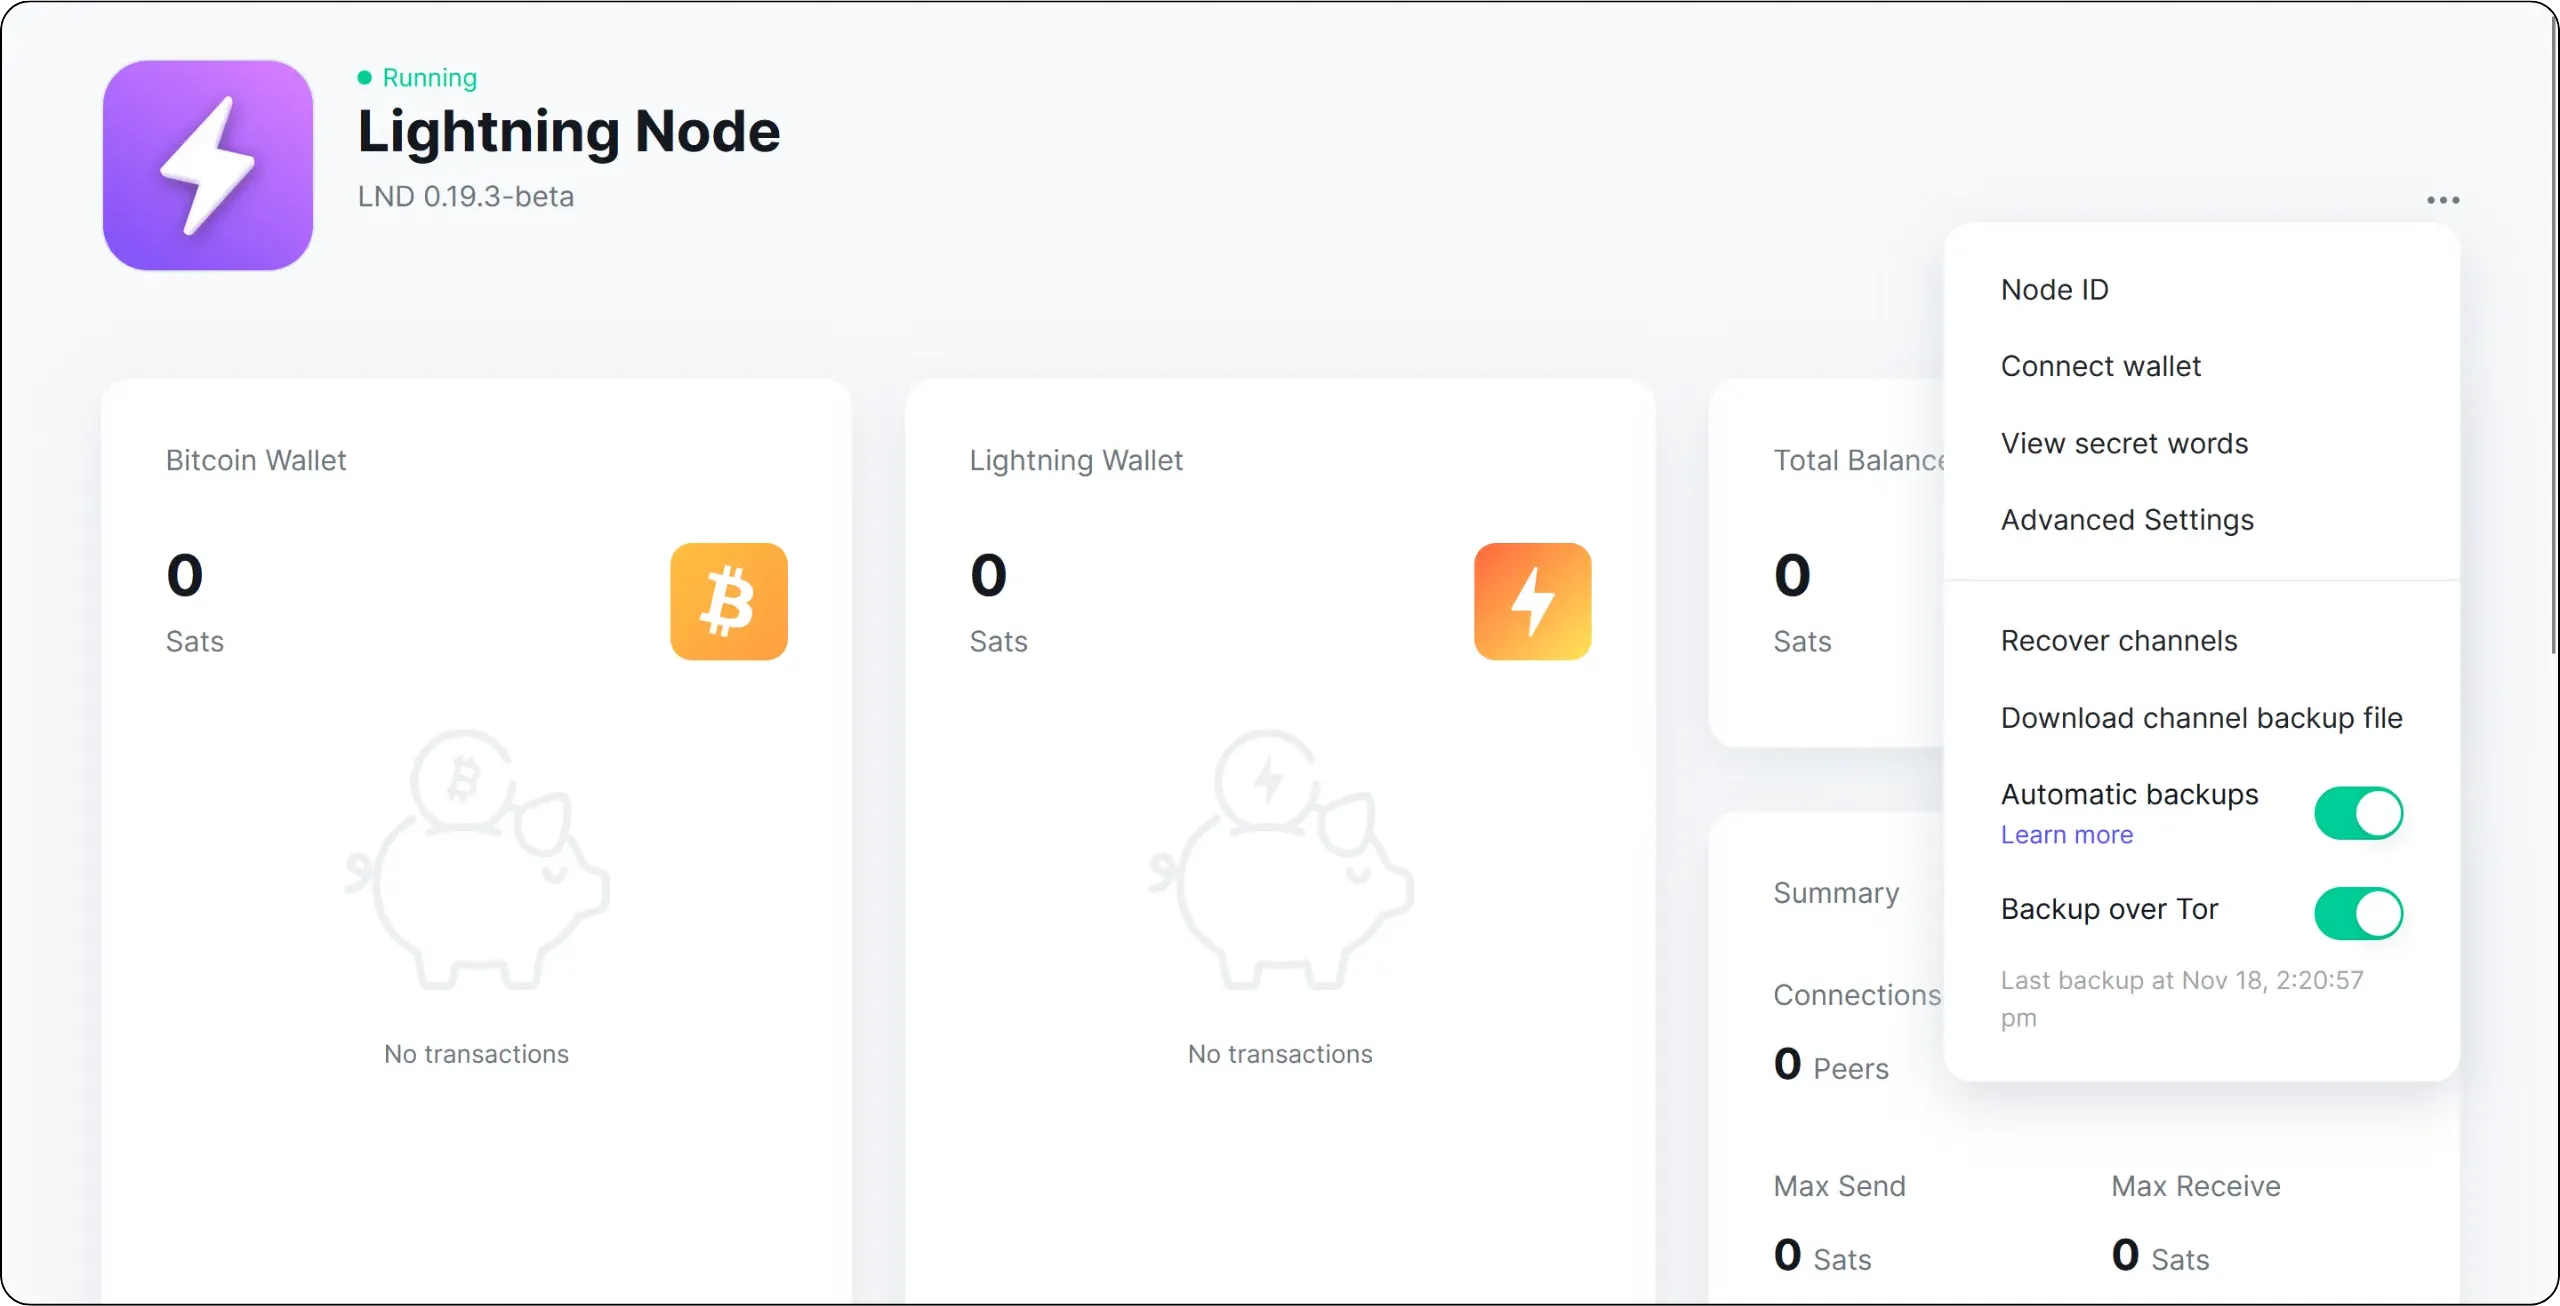
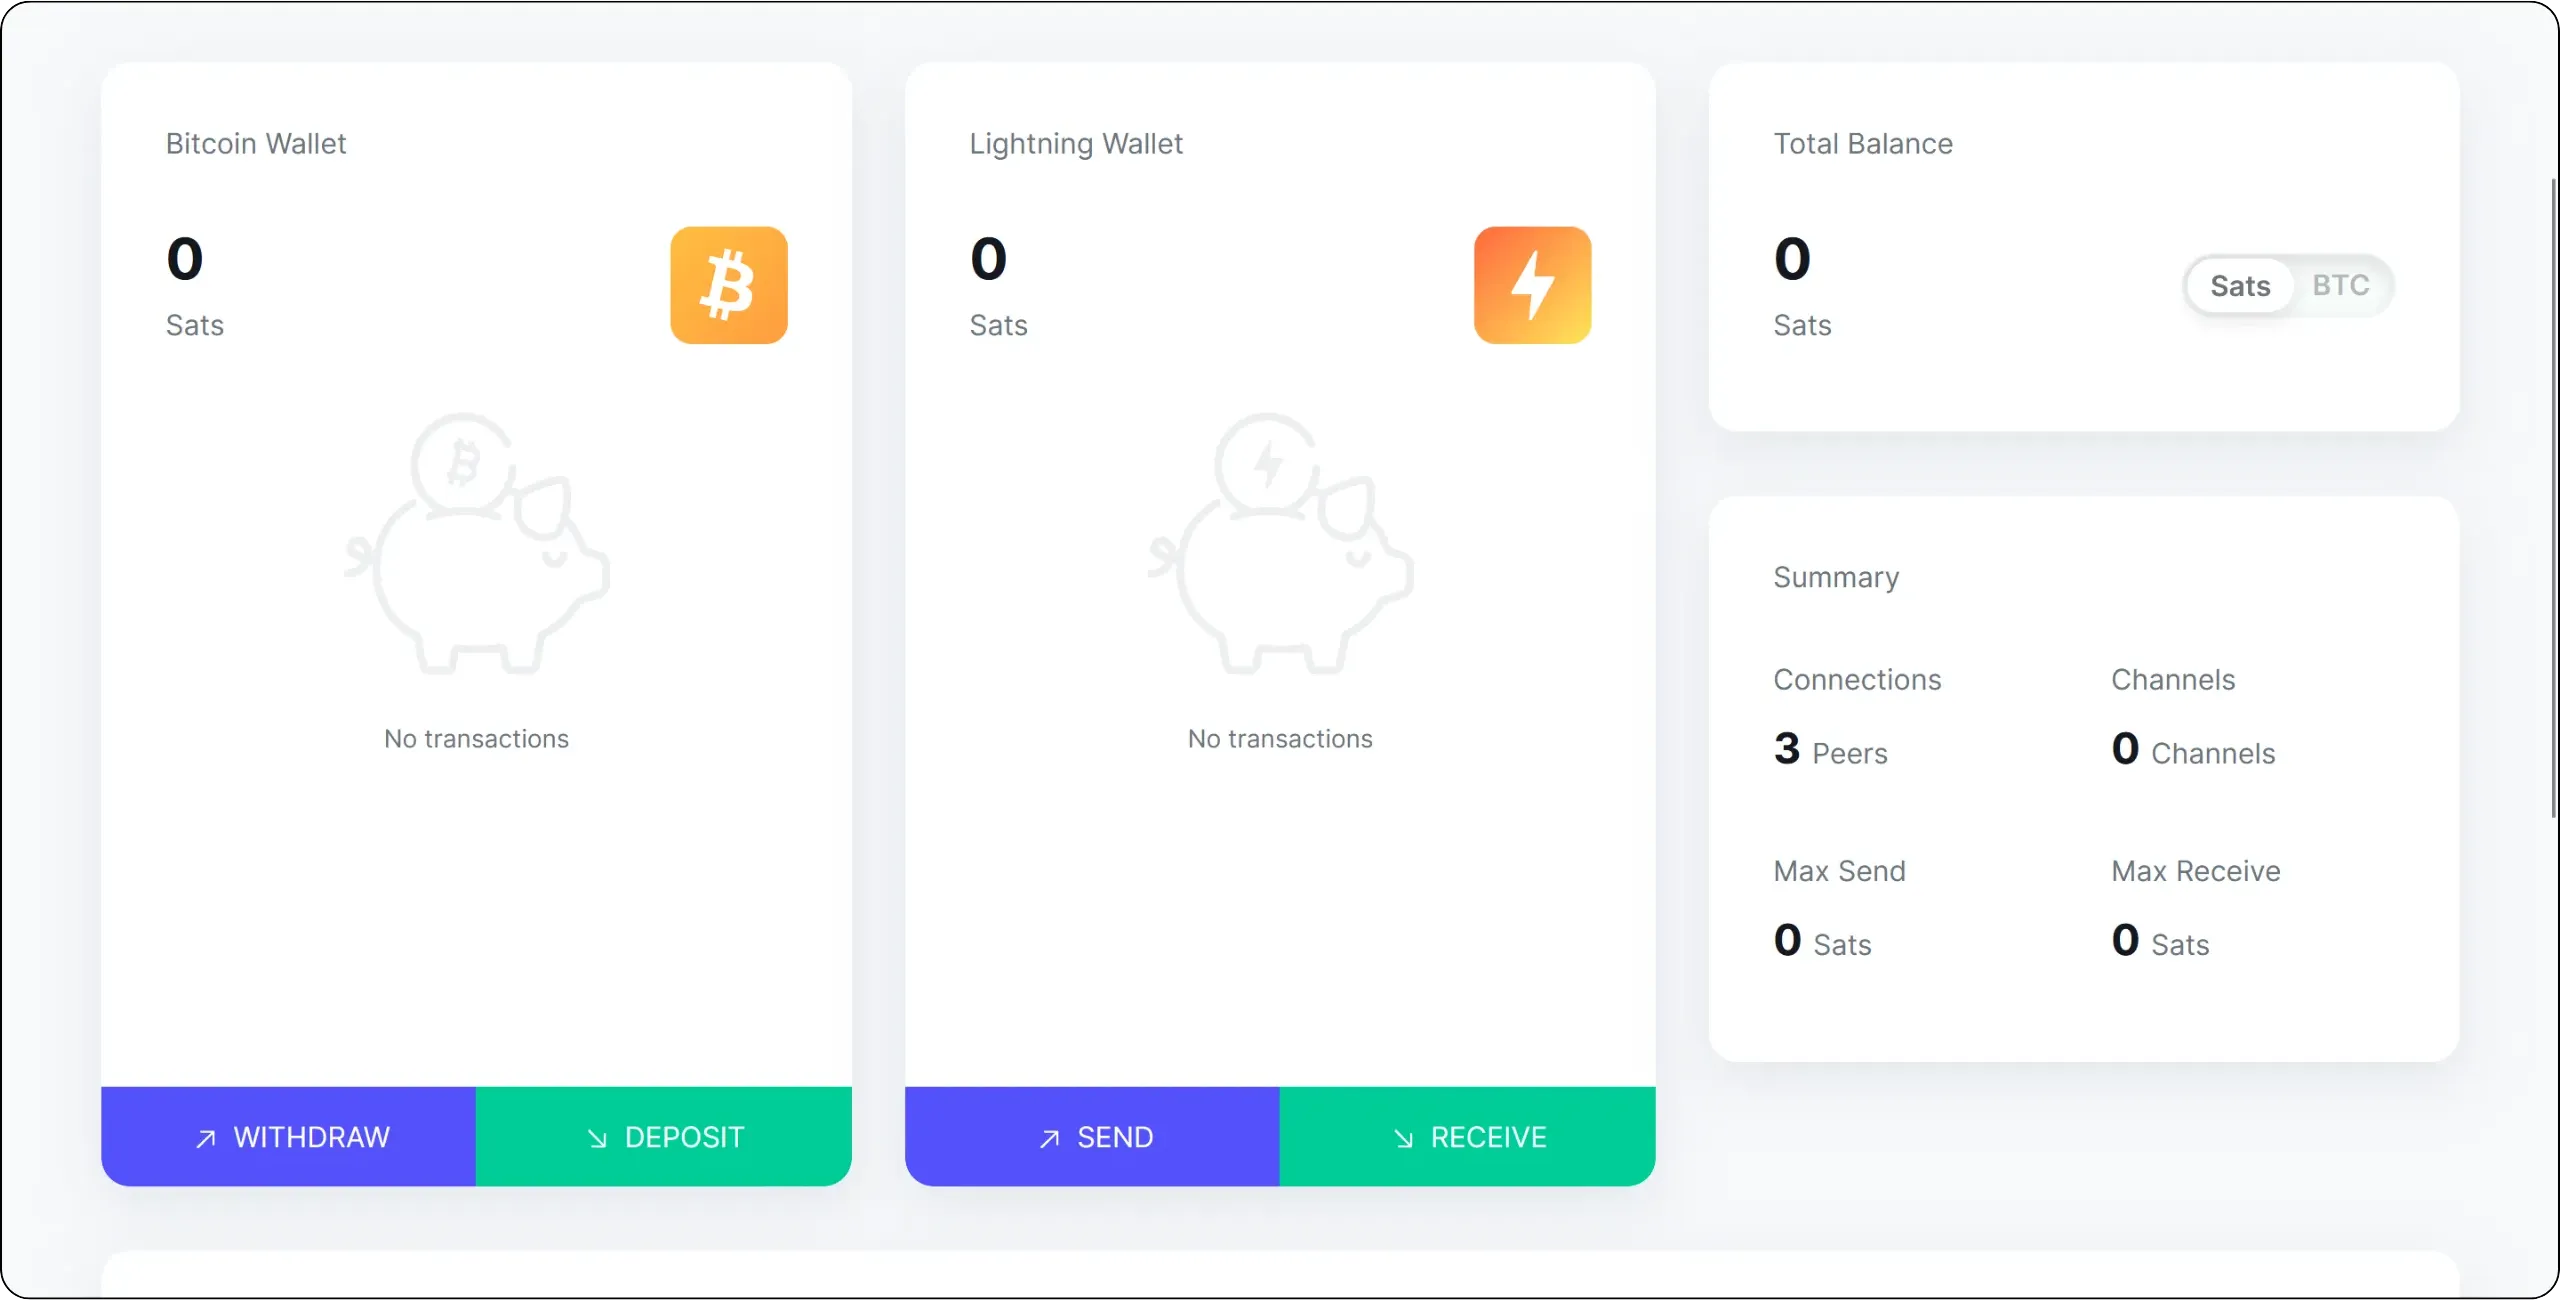
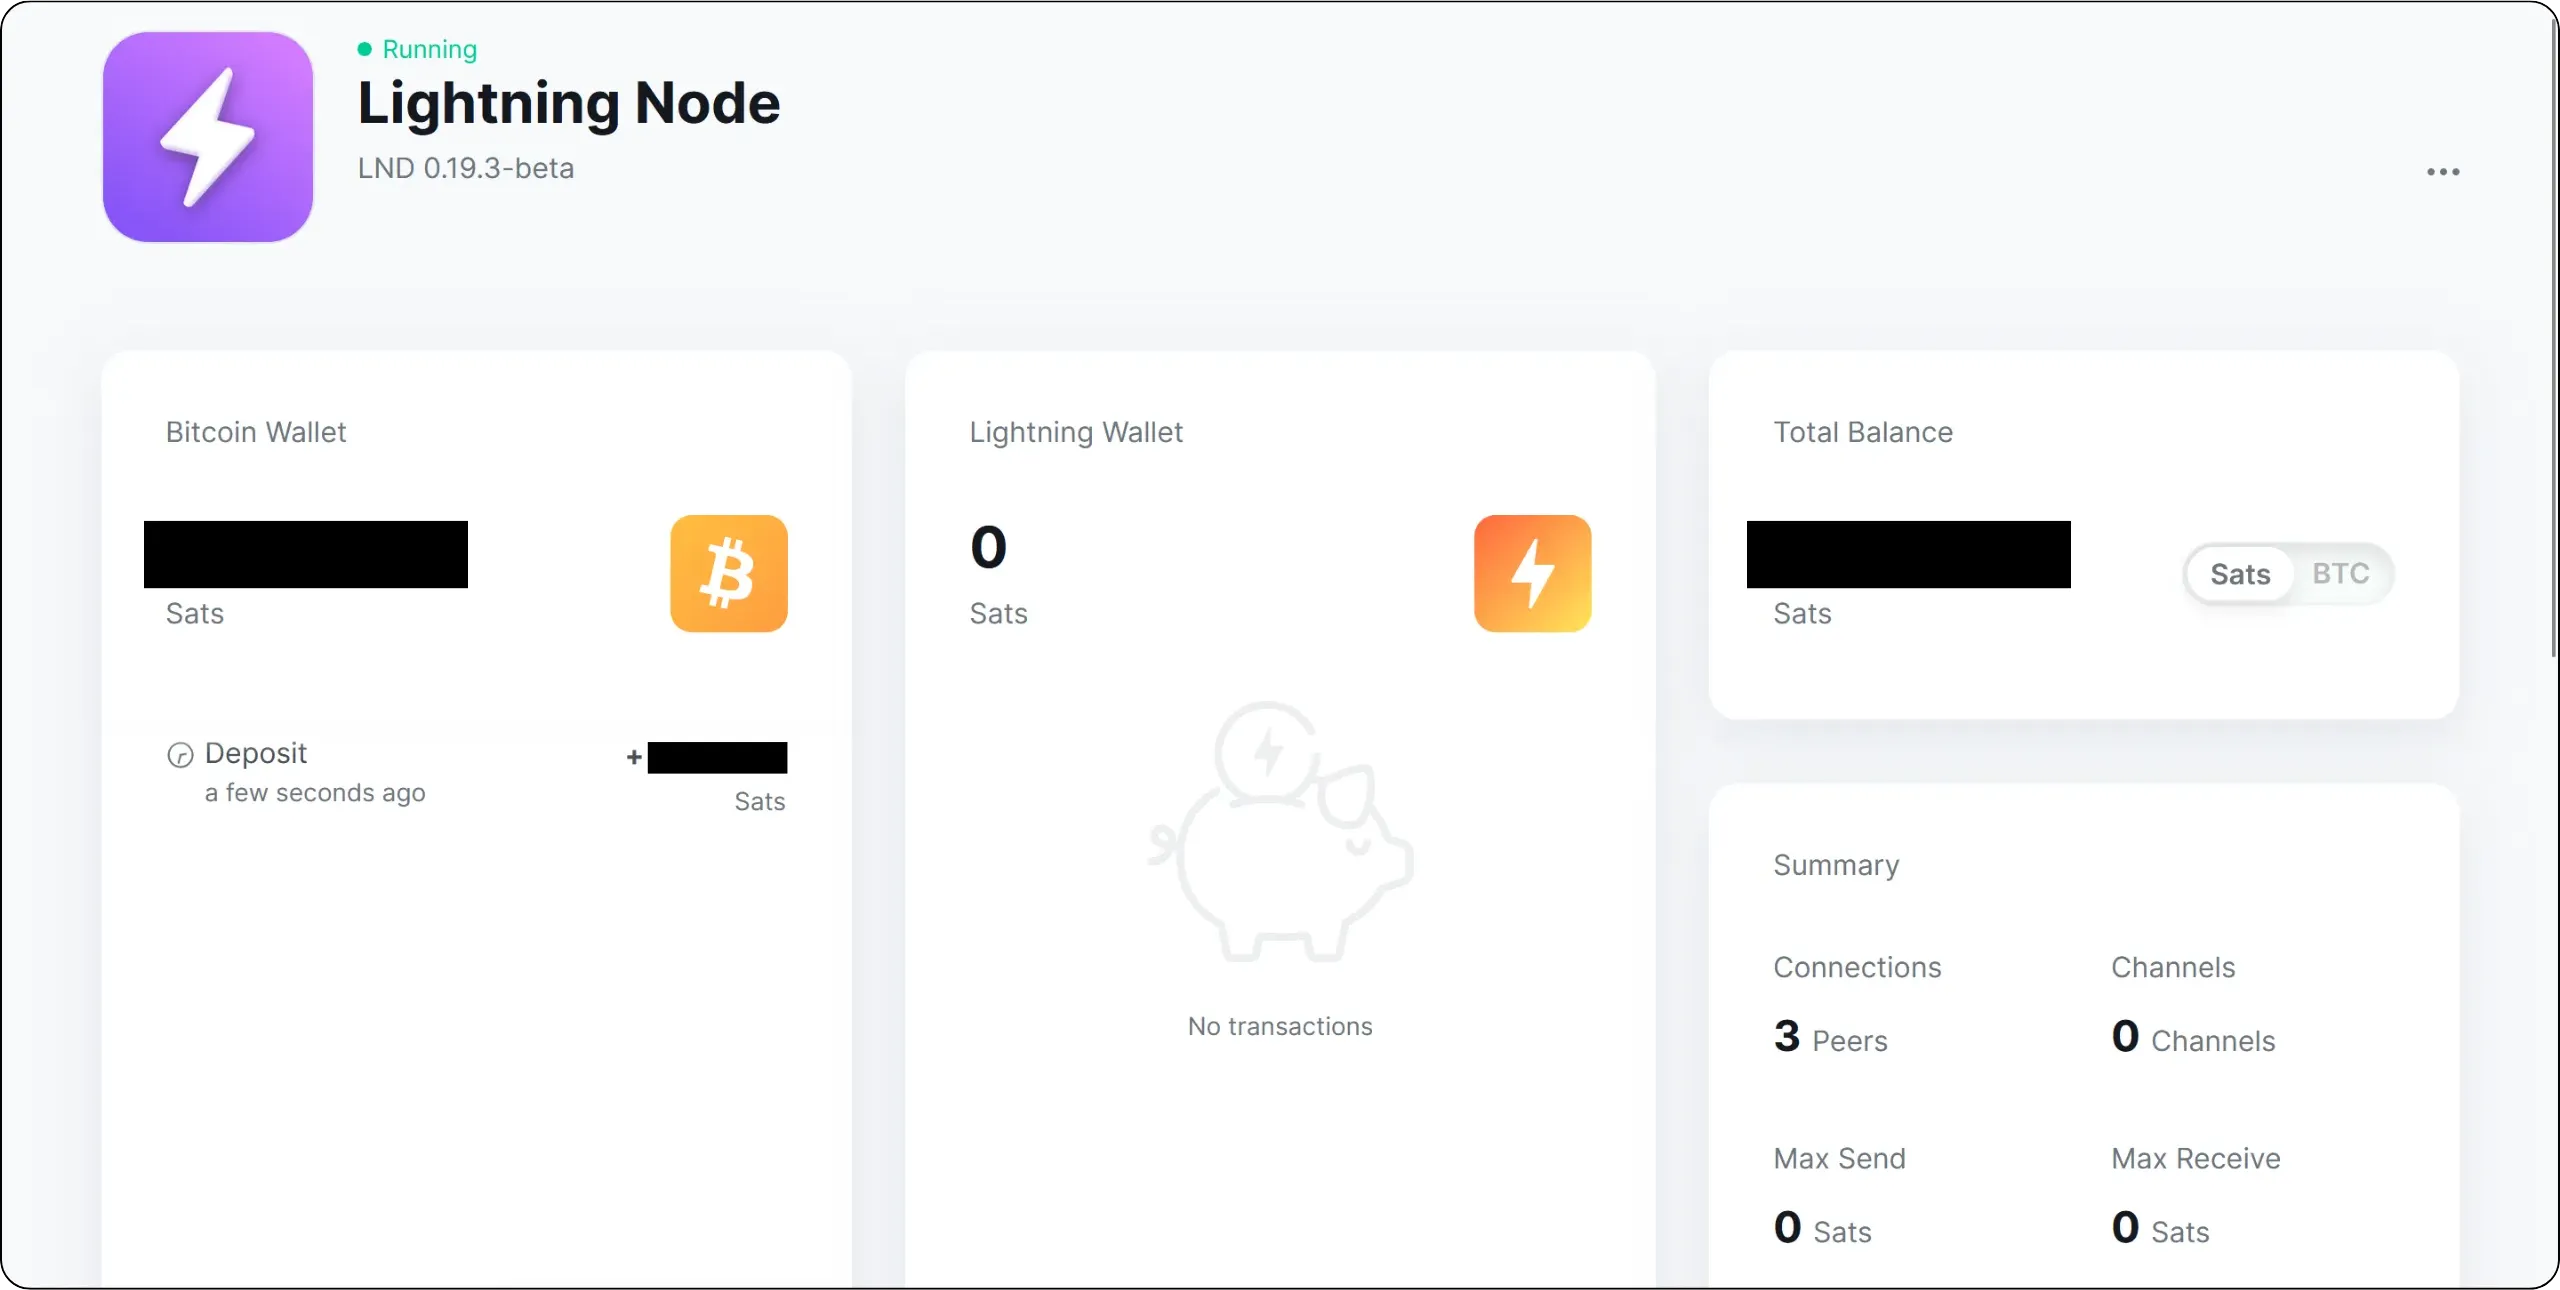
You will then arrive at your Lightning node's main interface. On the left, you'll find your Bitcoin onchain wallet hosted on your node. This is the one generated from the 24-word phrase you've just saved.
In the center, you'll find your Lightning wallet. It actually represents your [outbound liquidity](https://planb.academy/resources/glossary/outbound-capacity), i.e. the bitcoins you own within your Lightning channels.
On the right, you will see several important pieces of information about your node:
- The number of connections and open channels;
- Your total outbound liquidity, i.e. what you can theoretically spend on Lightning;
- Your total inbound liquidity, i.e. what you can theoretically receive on Lightning.
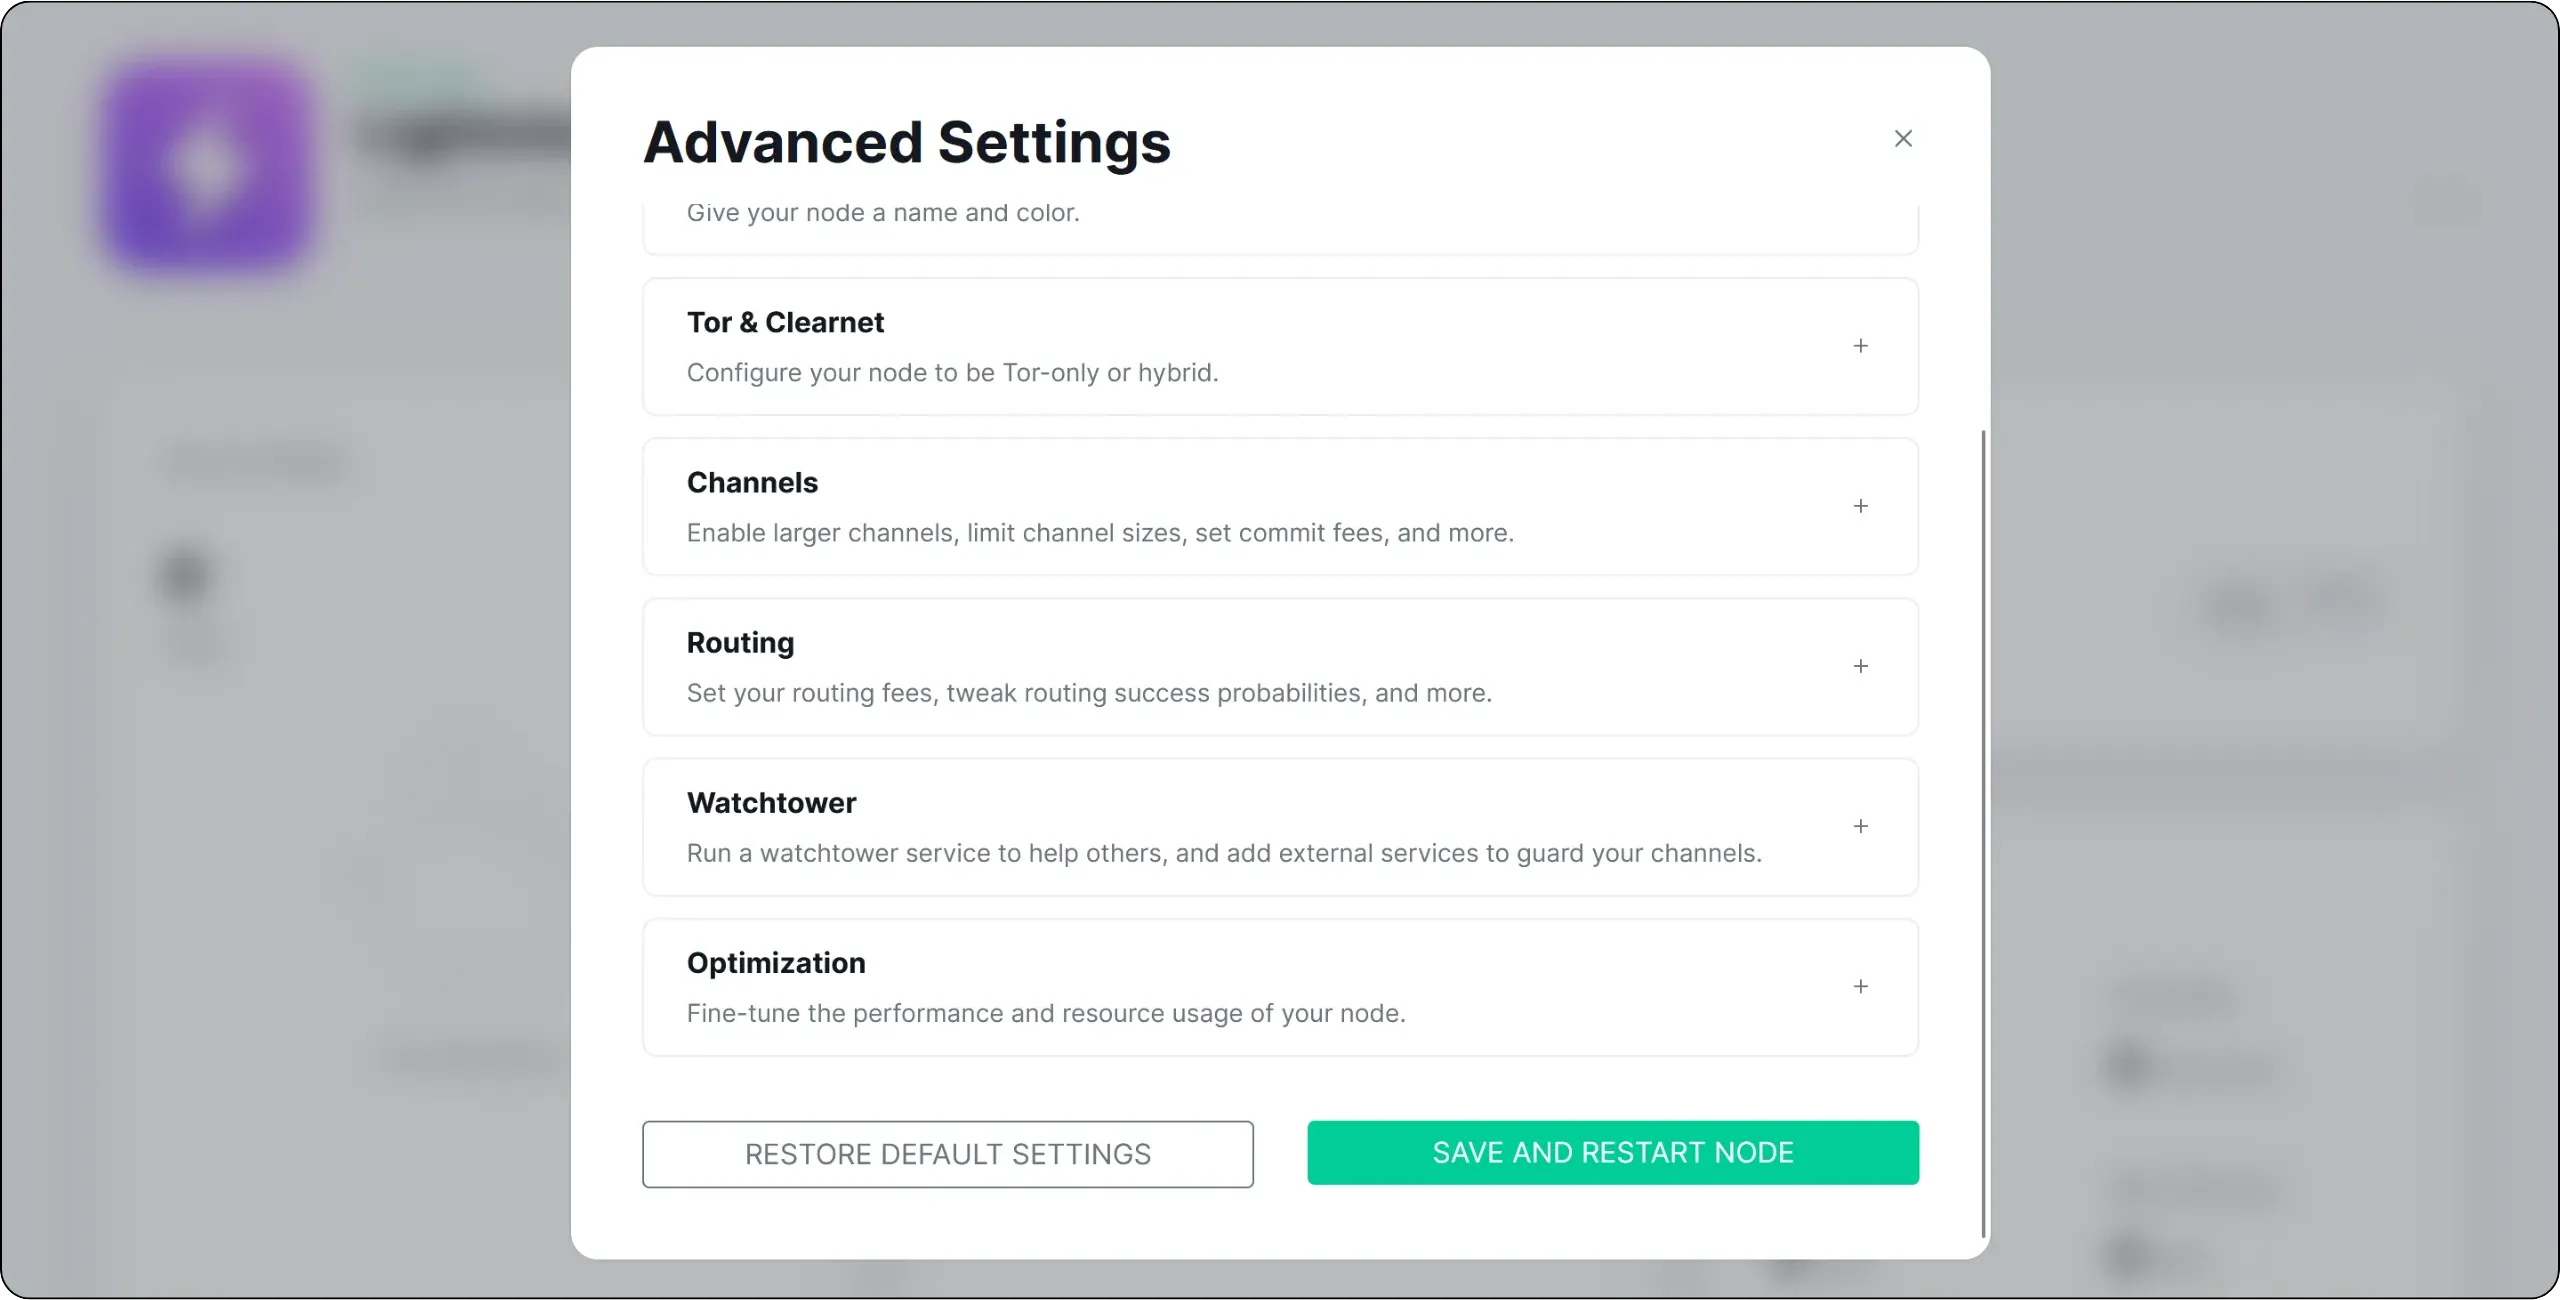
Let's start by customizing our node. Click on the three small dots at the top right of the interface, then on `Advanced Settings`. In the `Personalization` submenu, you can define a public name for your node (avoid using your real name) and choose its color.
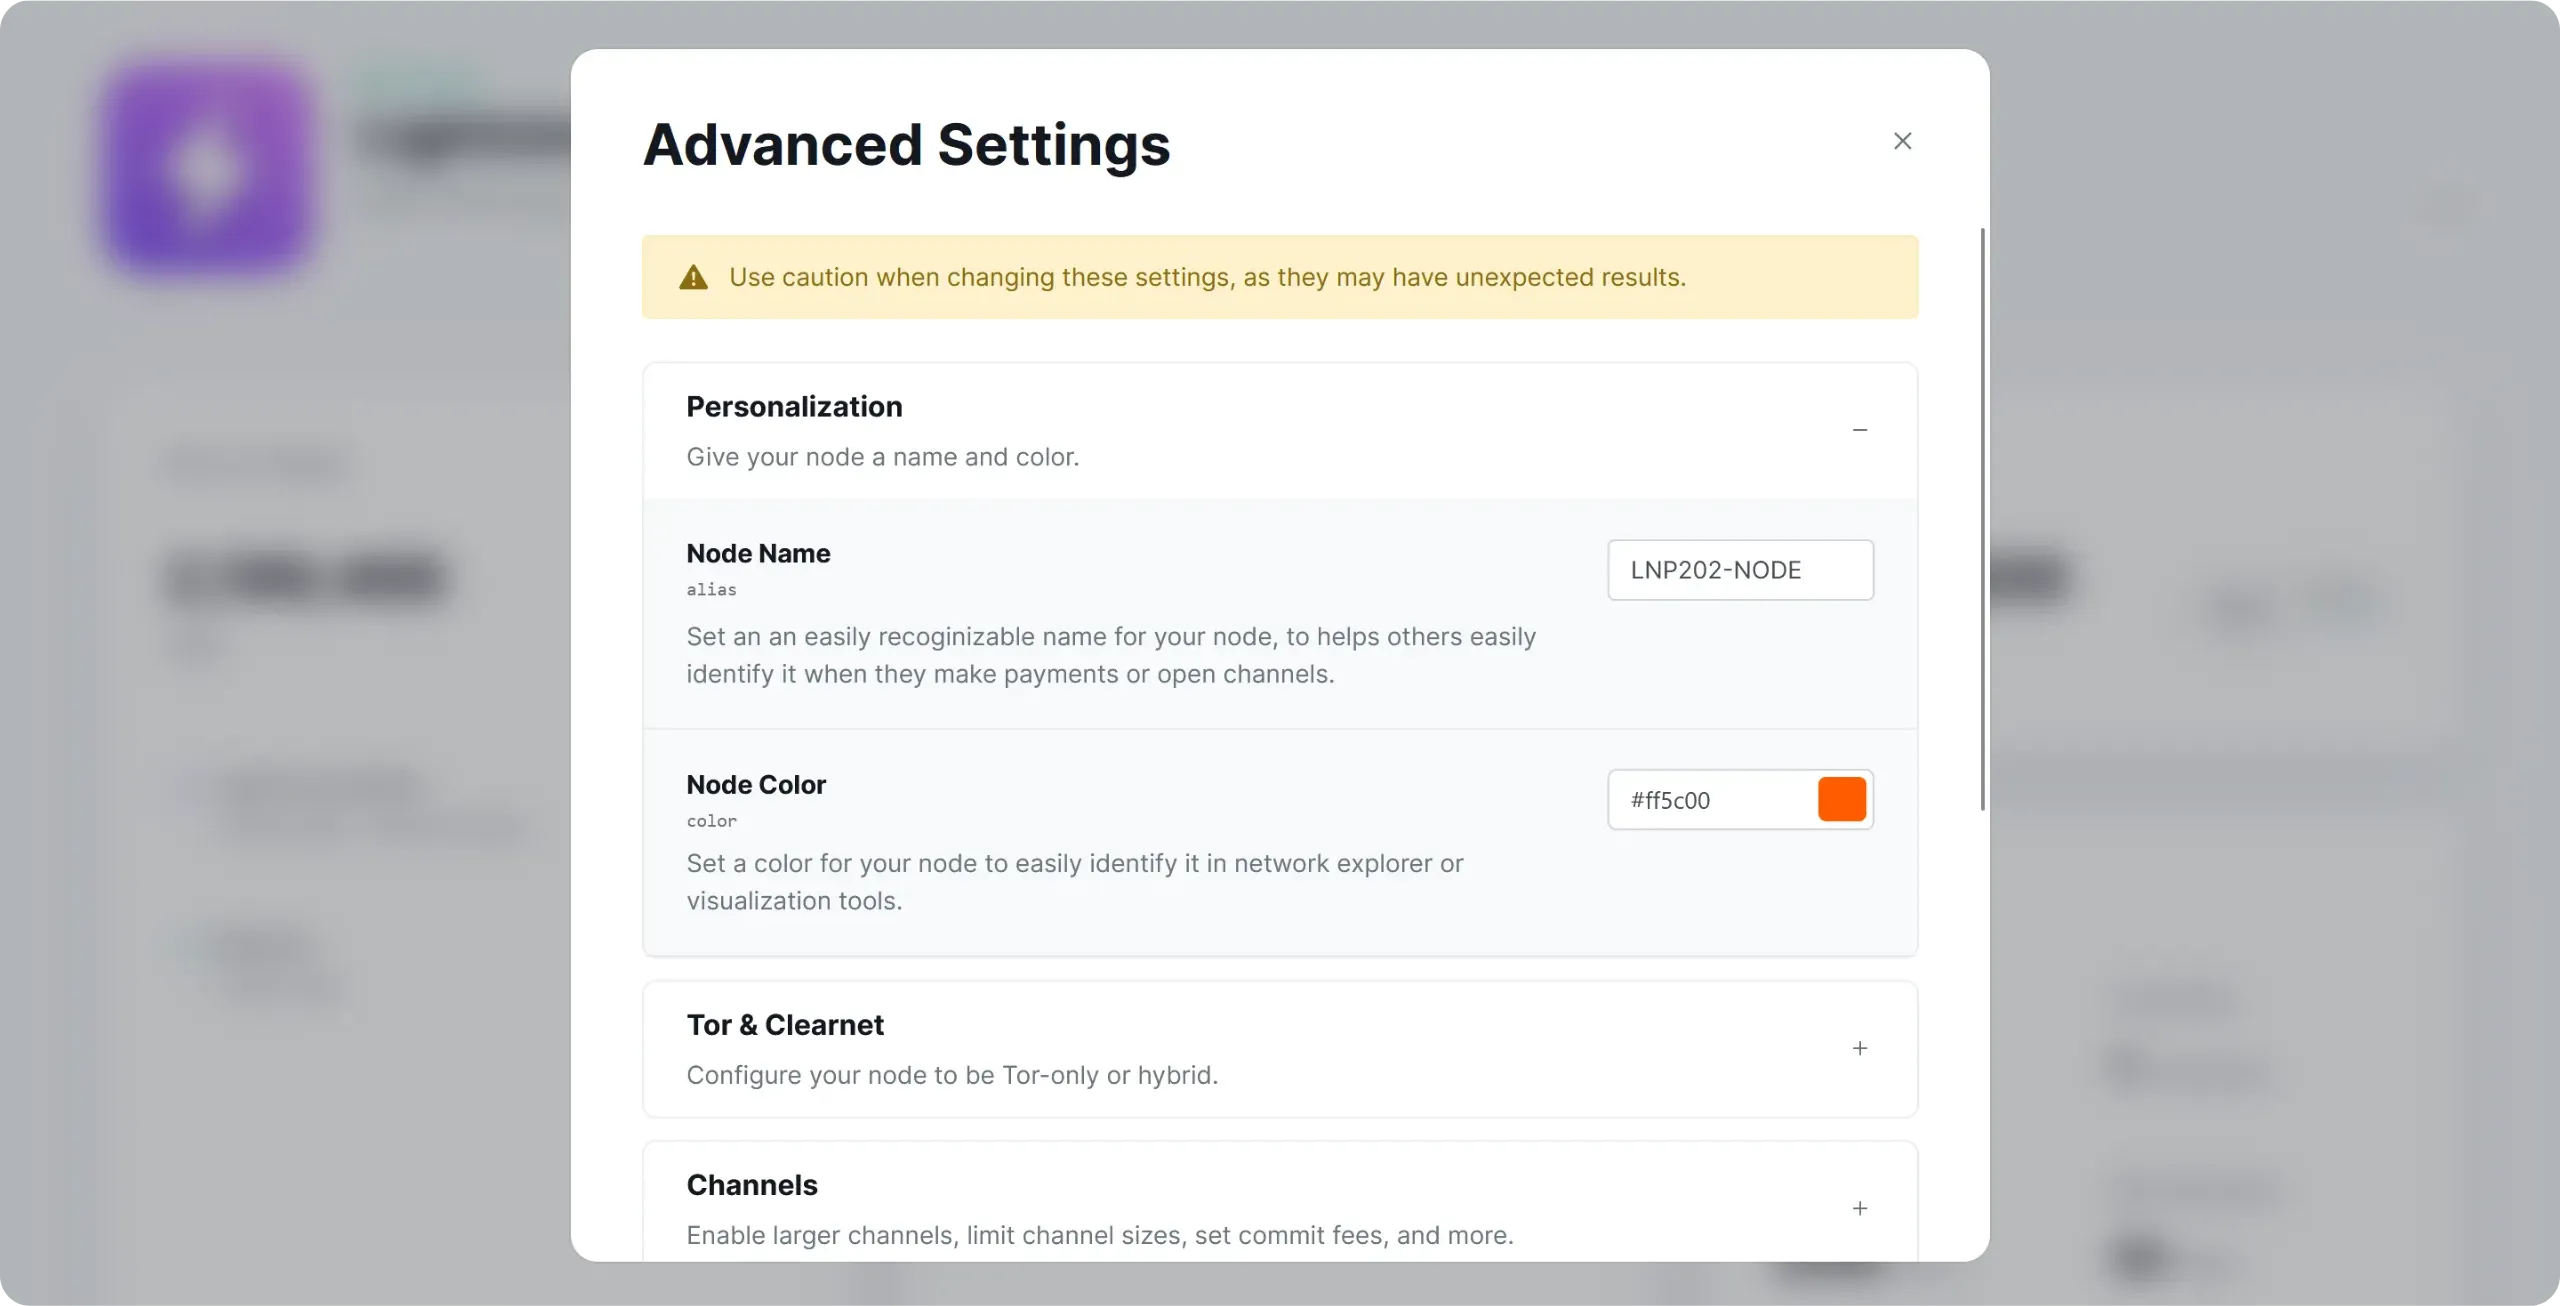
Then click on the green `SAVE AND RESTART` button to restart your node and apply these changes.
Your Lightning node is now ready to open its first channels for making payments. But first, let's take a look at how to protect your sats!
## Backing up your Lightning node
638fa75d-62af-4bf3-ab4a-b7d10ea75815
Before sending your first sats to your node, it's important to understand how its backup works and what the associated risks are. Unlike a simple Bitcoin onchain wallet, backing up a Lightning node is quite complex: the wrong strategy can lead to the permanent loss of your funds. In this chapter, we'll look at what really needs to be backed up, and how Umbrel handles this process with LND.
In this course, we'll be using the LND (*Lightning Network Daemon*) implementation. Although the principles are similar on the other implementations, the recovery files and procedures I'm going to talk about are specific to LND.
### What should I save on a Lightning node?
On a Lightning node, it's not enough to save the seed and hope that everything will return to normal. Several elements play different roles, so it's important to distinguish between them.
#### The seed (*aezeed*)
When you initialize LND, you receive a 24-word seed. This is a LND-specific format called "*aezeed*". It's not a classic seed BIP39, although it looks a lot like one. From this seed, LND derives the private keys of your onchain wallet associated with the Lightning node, i.e. the addresses into which you can receive or to which you can repatriate bitcoins following channel closures.

This seed can therefore be used to recreate the onchain wallet associated with your node, and to retrieve funds that have already been repatriated onchain (e.g. after a channel closure). On the other hand, the seed alone is not sufficient to restore your Lightning channels that are still open, as it does not contain the necessary information on the status of your channels.
#### The channel database (`channel.db`)
LND stores the detailed status of your channels in a database named `channel.db`. This database contains:
- the list of your open channels;
- your peers and their identifiers;
- the last commitment transactions for each channel (the successive states that define who owns what in the channel and enable onchain funds to be recovered in the event of a problem);
- the information needed to punish a peer who tries to broadcast an old report.
The problem with this database is that it's constantly changing: every payment, every routing, every opening or closing of a channel modifies its contents. This is why a conventional backup (e.g. a periodic copy of your `channel.db`) is dangerous. If you restore too old a version of `channel.db` and reassemble the node with this obsolete state, your peers may consider that you are broadcasting an old channel state. In this case, the protocol provides for a penalty: your peer can recover the full amount of the channel's funds, as if you'd tried to cheat.
In practice, then, `channel.db` is not a backup medium as such. It's the living state of your node. The only situation in which it makes sense to use it to restore your node is when you recover this database directly from a machine that has just failed (e.g. a disk that is still readable). In this case, you recover the most recent state and can restart LND on another machine based on this database, safe in the knowledge that this state is as up-to-date as possible, since the old machine is no longer running. Another situation where this method can serve as a relevant backup is in a two-disk configuration, with a dynamic, permanent copy from one to the other. However, this type of set-up is more complex to implement.
But making periodic copies of `channel.db` and storing them as backups to be restored later is a very bad idea: the day you use them, you run the risk of penalizing yourself and losing all your sats.
#### Static Channel Backup (SCB)
To make disaster recovery possible, LND has introduced the *Static Channel Backup* (SCB) mechanism. This is a special file, often called `channel.backup`, which contains static information about your channels: who your peers are, how to contact them and what your channels are.
This file does not contain detailed channel status or update history. It does not allow you to reopen channels in the exact state they were in, nor to continue operating this Lightning node. Rather, its role is to act as an anchor point to ask your peers to help you cleanly close all your channels, and thus receive your sats onchain, on keys that you can retrieve thanks to the seed. So, unlike the `channel.db` file, which is modified with each payment or routing, the SCB file is only updated when a channel is opened or closed.
When recovering via SCB, the process is as follows:
- You restore your seed (*aezeed*), which recreates your onchain wallet associated with the Lightning node;
- You provide LND with your most recent SCB;
- LND uses the SCB to find the list of your peers and the channels you have with them;
- It contacts each peer, tells them that you've suffered a data loss and asks them to "force-close" your channel with them, so that you can recover your onchain share.
The idea is that your peers, noticing that you're reporting a loss of data, will broadcast their last commitment transaction and close the force channel. Once these transactions have been confirmed, your funds reappear in your onchain wallet (linked to the seed).
This recovery mechanism isn't perfect, however. Firstly, it doesn't actually restore your Lightning node, since all channels will be closed. You'll then have to build a new Lightning node from scratch. Secondly, it does not guarantee 100% recovery, although it does considerably increase the chances of recovering your onchain balances in the event of a problem. Indeed, this recovery protocol depends on the cooperation and availability of your peers: if one of them is offline, has lost its own data or refuses to cooperate, your funds may remain blocked, or even be permanently lost. That's why it's important not to keep channels open on your Lightning node with unreachable peers for long periods of time. If you suffer a data loss at that point and the peer remains unreachable, recovery via SCB will be impossible, and your funds will remain lost until that peer comes back online (perhaps forever).
To sum up, a good Lightning backup strategy on LND rests on three pillars:
- Your seed (*aezeed*), for the onchain layer;
- Reliable automatic SCB backup;
- Good channel management by choosing reliable peers and preventively closing those that are often unreachable.
### How does Umbrel manage the backup of your LND node?
Umbrel offers a simplified backup mechanism for the LND node, based precisely on the SCB. The idea is to save you the trouble of manipulating this file yourself, making a backup of it and automating the process as far as possible.
When you create your node on Umbrel, you receive a seed which plays a dual role:
- it derives your Bitcoin onchain wallet associated with your Lightning node;
- it is used to derive a backup identifier and encryption key used for remote SCB backups.
Thanks to this mechanism, Umbrel automatically makes an encrypted backup of your SCB and stores it on its servers via Tor. The SCB is stored encrypted, thanks to a key derived from your seed. So, in the event of data loss, all you have to do is recreate a Bitcoin and Lightning node on Umbrel, on the same or another machine, then enter your seed. You'll then be able to retrieve the latest SCB status from the Umbrel servers, decrypt it and start the process of recovering your funds.
These backups are locally encrypted by your node before being sent, which guarantees the confidentiality of your data: Umbrel cannot read the contents of the SCB. Transmission takes place via Tor, which prevents your IP address from being leaked. What's more, your Umbrel adds noise to the traffic (random padding and false backups sent at irregular intervals) to prevent the server from deducing precisely when you open or close a channel.
The main advantage of this method is that it considerably simplifies the backup of your Lightning node: you only have to back up your seed once during node initialization. This does entail some risk, since it's only a backup of the SCB, but for reasonable amounts it's an acceptable compromise.
### Best practices to limit the risk of loss
Even with Umbrel backup, a few simple good practices can greatly reduce the risk of losing sats:
- Monitor the availability of your peers:
If an important channel is frequently associated with an unreachable or unstable peer, it's safer to close it cleanly while your node is still working. A preventive cooperative or forced closure eliminates a potential source of trouble in the event of SCB recovery.
- Avoid concentrating too much liquidity on unknown peers:
The larger the channel a peer has with you, the more important it is to be reliable. Choose serious, well-connected and active nodes, so that any future recovery via SCB can run smoothly.
- Supplement Umbrel with local backups:
In addition to Umbrel's automatic backup, you can also keep an encrypted copy of your SCB file (`channel.backup`) on external media and update it periodically. Ideally, you should renew it every time you open or close a channel. This gives you a backup solution if, for any reason, Umbrel's automatic backup service becomes unavailable.
- Managing your seed the right way
Your seed Umbrel not only restores your onchain wallet, but also derives the encryption key for backups. An attacker with access to it could therefore launch a recovery and transfer your funds to his own wallet, without even having physical access to your node.
So, if you need to restore your node but no longer have your seed, you won't be able to recover anything: all your sats will be lost. So it's very important to save your seed with the utmost care, only on physical media (paper or metal), and to keep it in a safe place. For more information on managing a seed, please consult this tutorial:
https://planb.academy/tutorials/wallet/backup/backup-mnemonic-22c0ddfa-fb9f-4e3a-96f9-46e2a7954270
### How do I save my Lightning node on Umbrel?
Now that you've understood how the theory works, let's get down to the nitty-gritty. From your Lightning Node application (which is actually LND), click on the three small dots in the top right-hand corner.
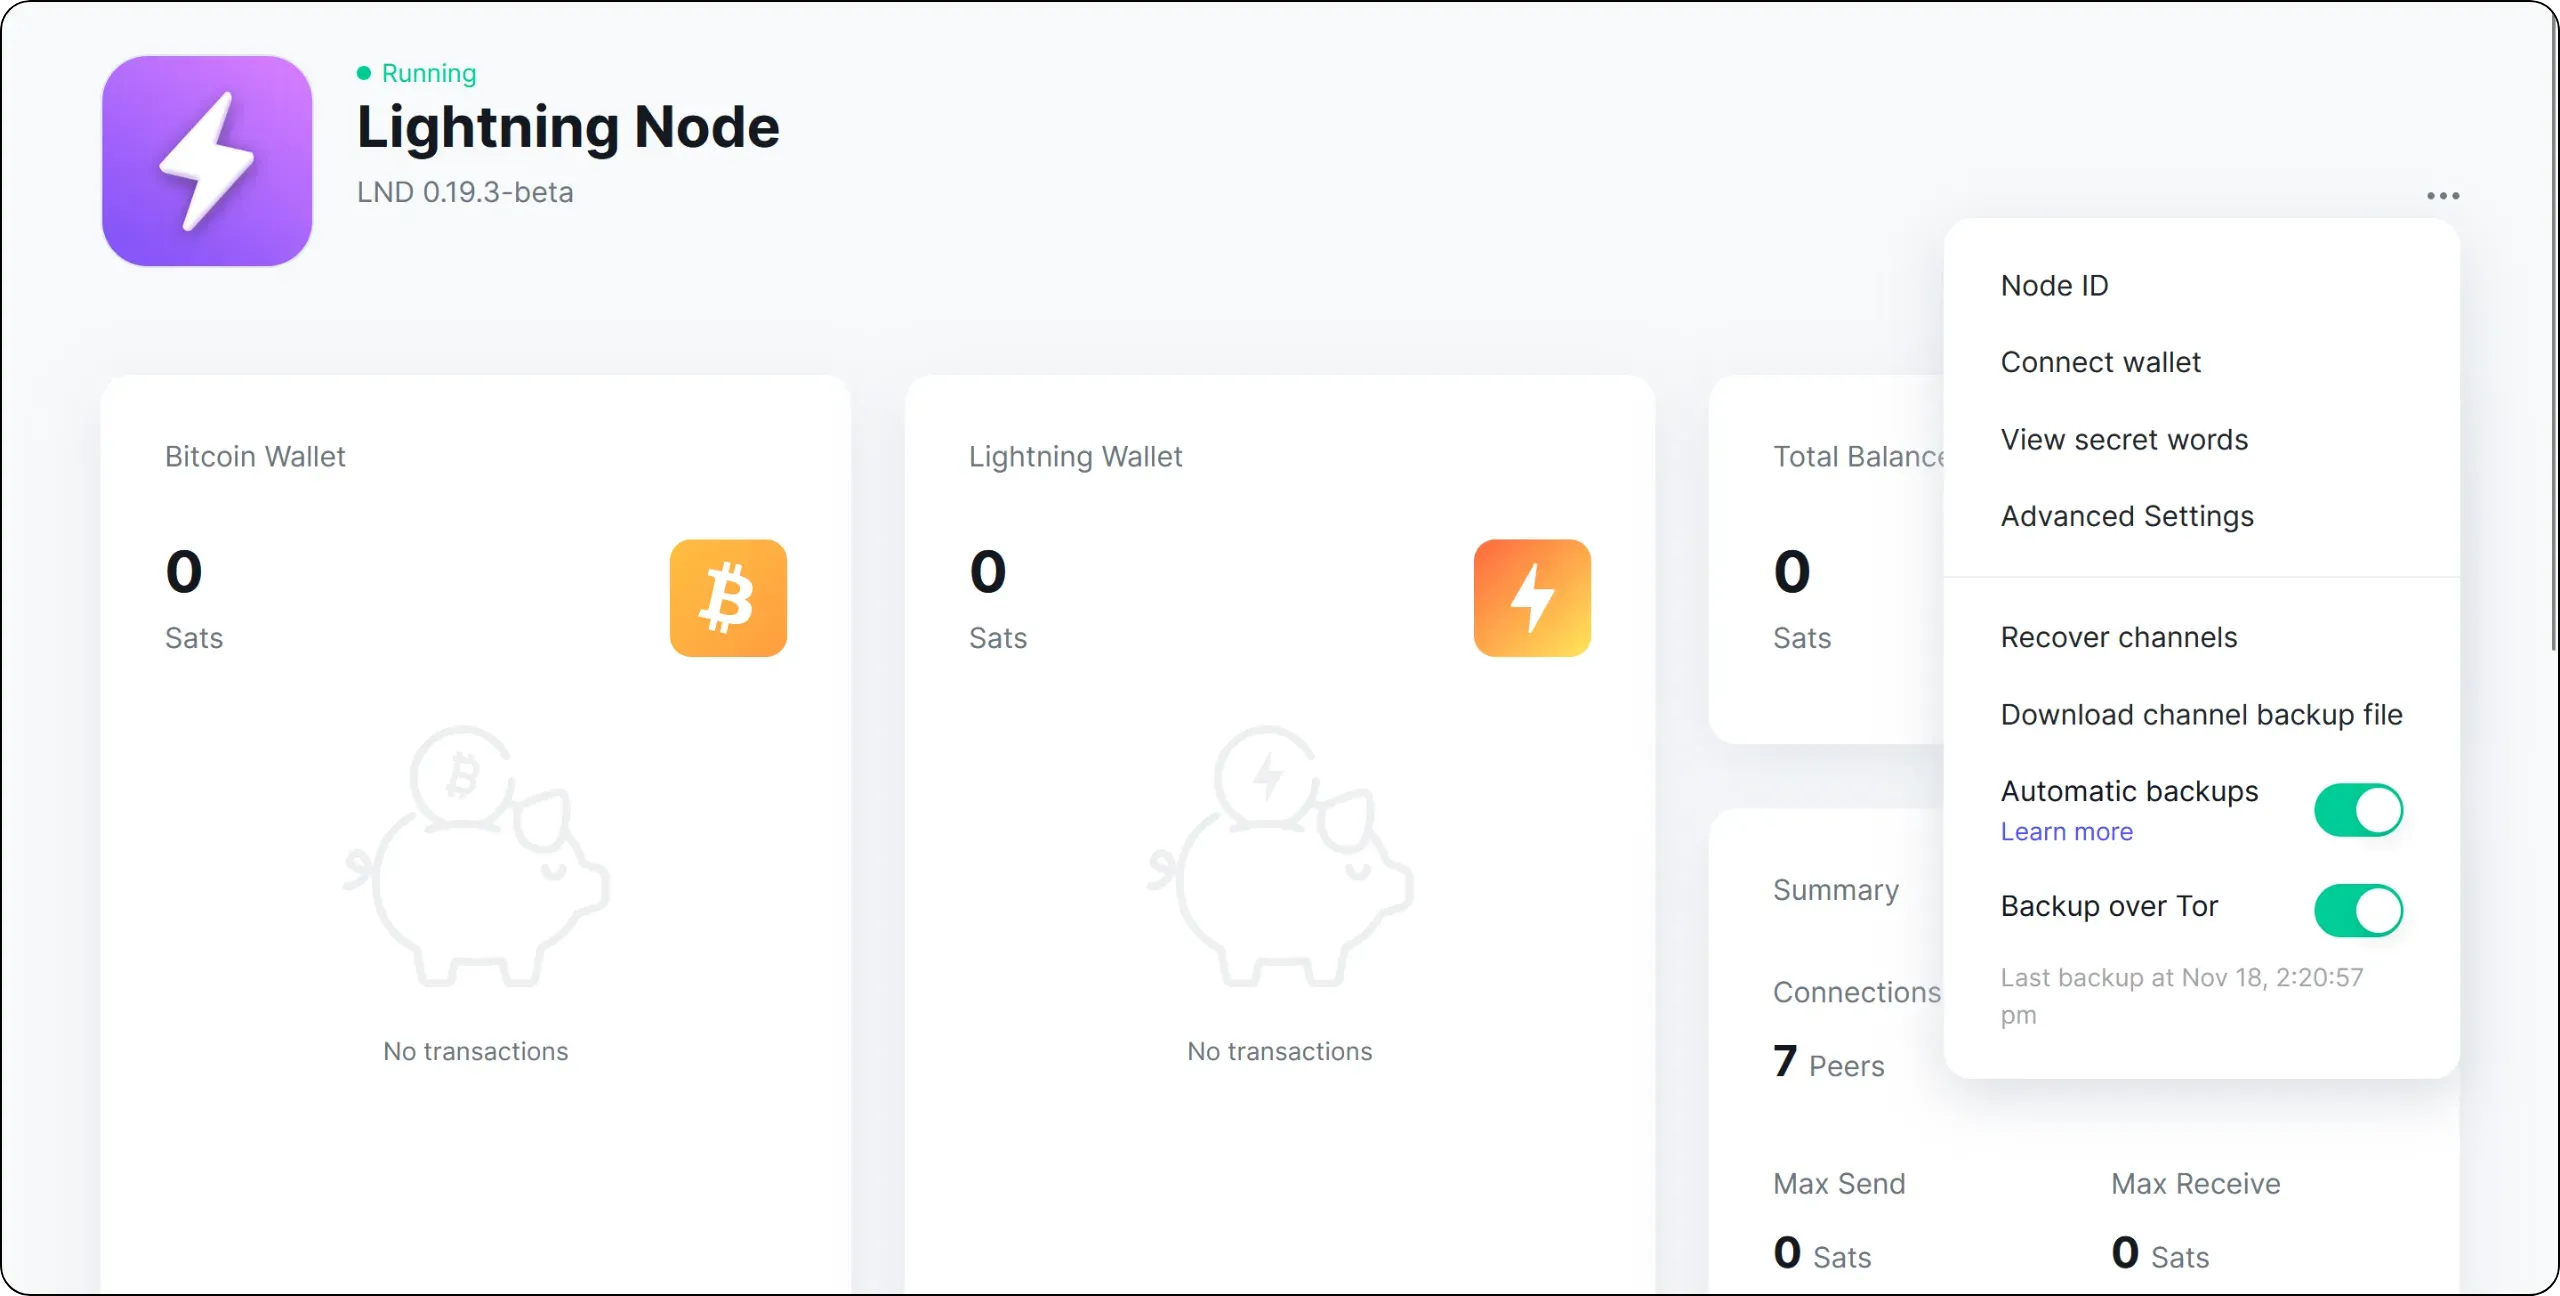
There are three elements of interest here for the backup:
- Check that the `Automatic backups` option is enabled. This will automatically send your encrypted SCB to Umbrel's servers.
- You can then choose whether to send via Tor or clearnet, using the `Backup over Tor` option. As explained in the previous sections, I strongly recommend that you use Tor to preserve your confidentiality.
- Finally, there's a `Download channel backup file` button, which lets you download a `channel.backup` file, i.e. an encrypted snapshot of your SCB, to your computer. This enables you to make additional local backups from time to time, in addition to those automatically sent to Umbrel servers.
Now you know how to protect your Lightning node's sats from data loss. In the next chapter, we'll look at how to secure your node against cheating attempts.
## Watchtowers: role and setup
e6c654dd-26c5-4e4d-8d11-a215bac37812
In Lightning, each channel is based on a sequence of successive states, represented by unpublished commitment transactions. With each Lightning payment or routing, the 2 participants in the channel build a new pair of commitment transactions, reflecting the current distribution of funds in the channel. Old commitment transactions become obsolete.
If one of the parties publishes an out-of-date state, the other has the right to sanction it and recover the full amount of the channel's funds. In this chapter, we'll take a brief look at how this mechanism works, and then explain how to set up a ***watchtower***: a system to protect your Lightning node from possible cheating attempts.
### Understanding how watchtowers work
At any given moment, each party in the channel has a commitment transaction which, if published, would enable them to close the channel and recover their share of the funds. This process is known as *forced closure*. But if they attempted to publish an older commitment transaction, corresponding to a previous state of the channel where it held more sats, then this transaction would be considered a cheating attempt. In this case, the counterparty can use the revocation key associated with this older state to recover the full amount of funds in the channel, while the cheater is temporarily blocked by the timelock.
This system means that publishing an old state, i.e. attempting to cheat, is very risky: if the other party sees this transaction on the mempool or on the blockchain before the timelock expires, they can use the revocation key and recover all the funds. **Therefore, the security of your Lightning channel depends on your ability to detect a cheating attempt within the time window imposed by the timelock**.
#### Why are watchtowers necessary?
The penalty mechanism only works if the injured party is able to:
- monitor each new Bitcoin block to see if a channel commitment transaction has been published;
- determine whether this transaction corresponds to the last valid state or to a revoked state;
- in the event of a revoked status, to broadcast the legal transaction in time, using the revocation key to recover all funds before the timelock expires.

In an ideal scenario, your Lightning node is online 24/7, it is synchronized and continuously monitoring the blockchain. For this reason, it can single-handedly detect a cheating attempt and react. In practice, however, a personal Lightning node can shut down, particularly in the event of a prolonged power cut or Internet connection failure.
It's precisely during these periods of downtime that the risk becomes real: if a dishonest peer publishes an old status while your node is offline, and the timelock runs out without any reaction from you, the cheating becomes effective. You lose some or all of your funds in the channel.
Watchtowers were introduced to reduce this risk. A watchtower is an external service which, monitors the blockchain on your behalf, scanning for the possible publication of an old status on one of your channels, and, if necessary, automatically broadcasts the penalty transaction on your behalf. So, even if your Lightning node remains offline for an extended period, as long as the watchtower you're using is operational, it will be able to protect your funds by monitoring any cheating attempts and applying the corresponding penalty, as soon as it detects one.
#### How a watchtower operates
A watchtower is designed to minimize the information it learns about your channels, while giving it the means to act in the event of a problem:
- For each new channel state with a peer, your node prepares a potential penalty transaction in advance. In the event of this peer cheating, this transaction would allow you to recover all the funds in the channel;
- Your node then encrypts this penalty transaction using the TXID of the corresponding commitment transaction (the one that would be used if the cheater were to attempt a fraud). As long as no closure takes place, the watchtower cannot decrypt this transaction, as it does not fully know the TXID of the cheating transaction;
- Your node sends the watchtower a packet containing the encrypted penalty transaction and half the TXID of the potential cheating transaction.
As the TXID transmitted to the watchtower is incomplete, it cannot decrypt the justice transaction. However, it can monitor the blockchain for a TXID that matches the part it owns. If it detects such a transaction, it then attempts to use the full TXID of that transaction to decrypt your penalty transaction. If the decryption succeeds, it knows it's a cheating attempt and immediately publishes the penalty transaction for you.
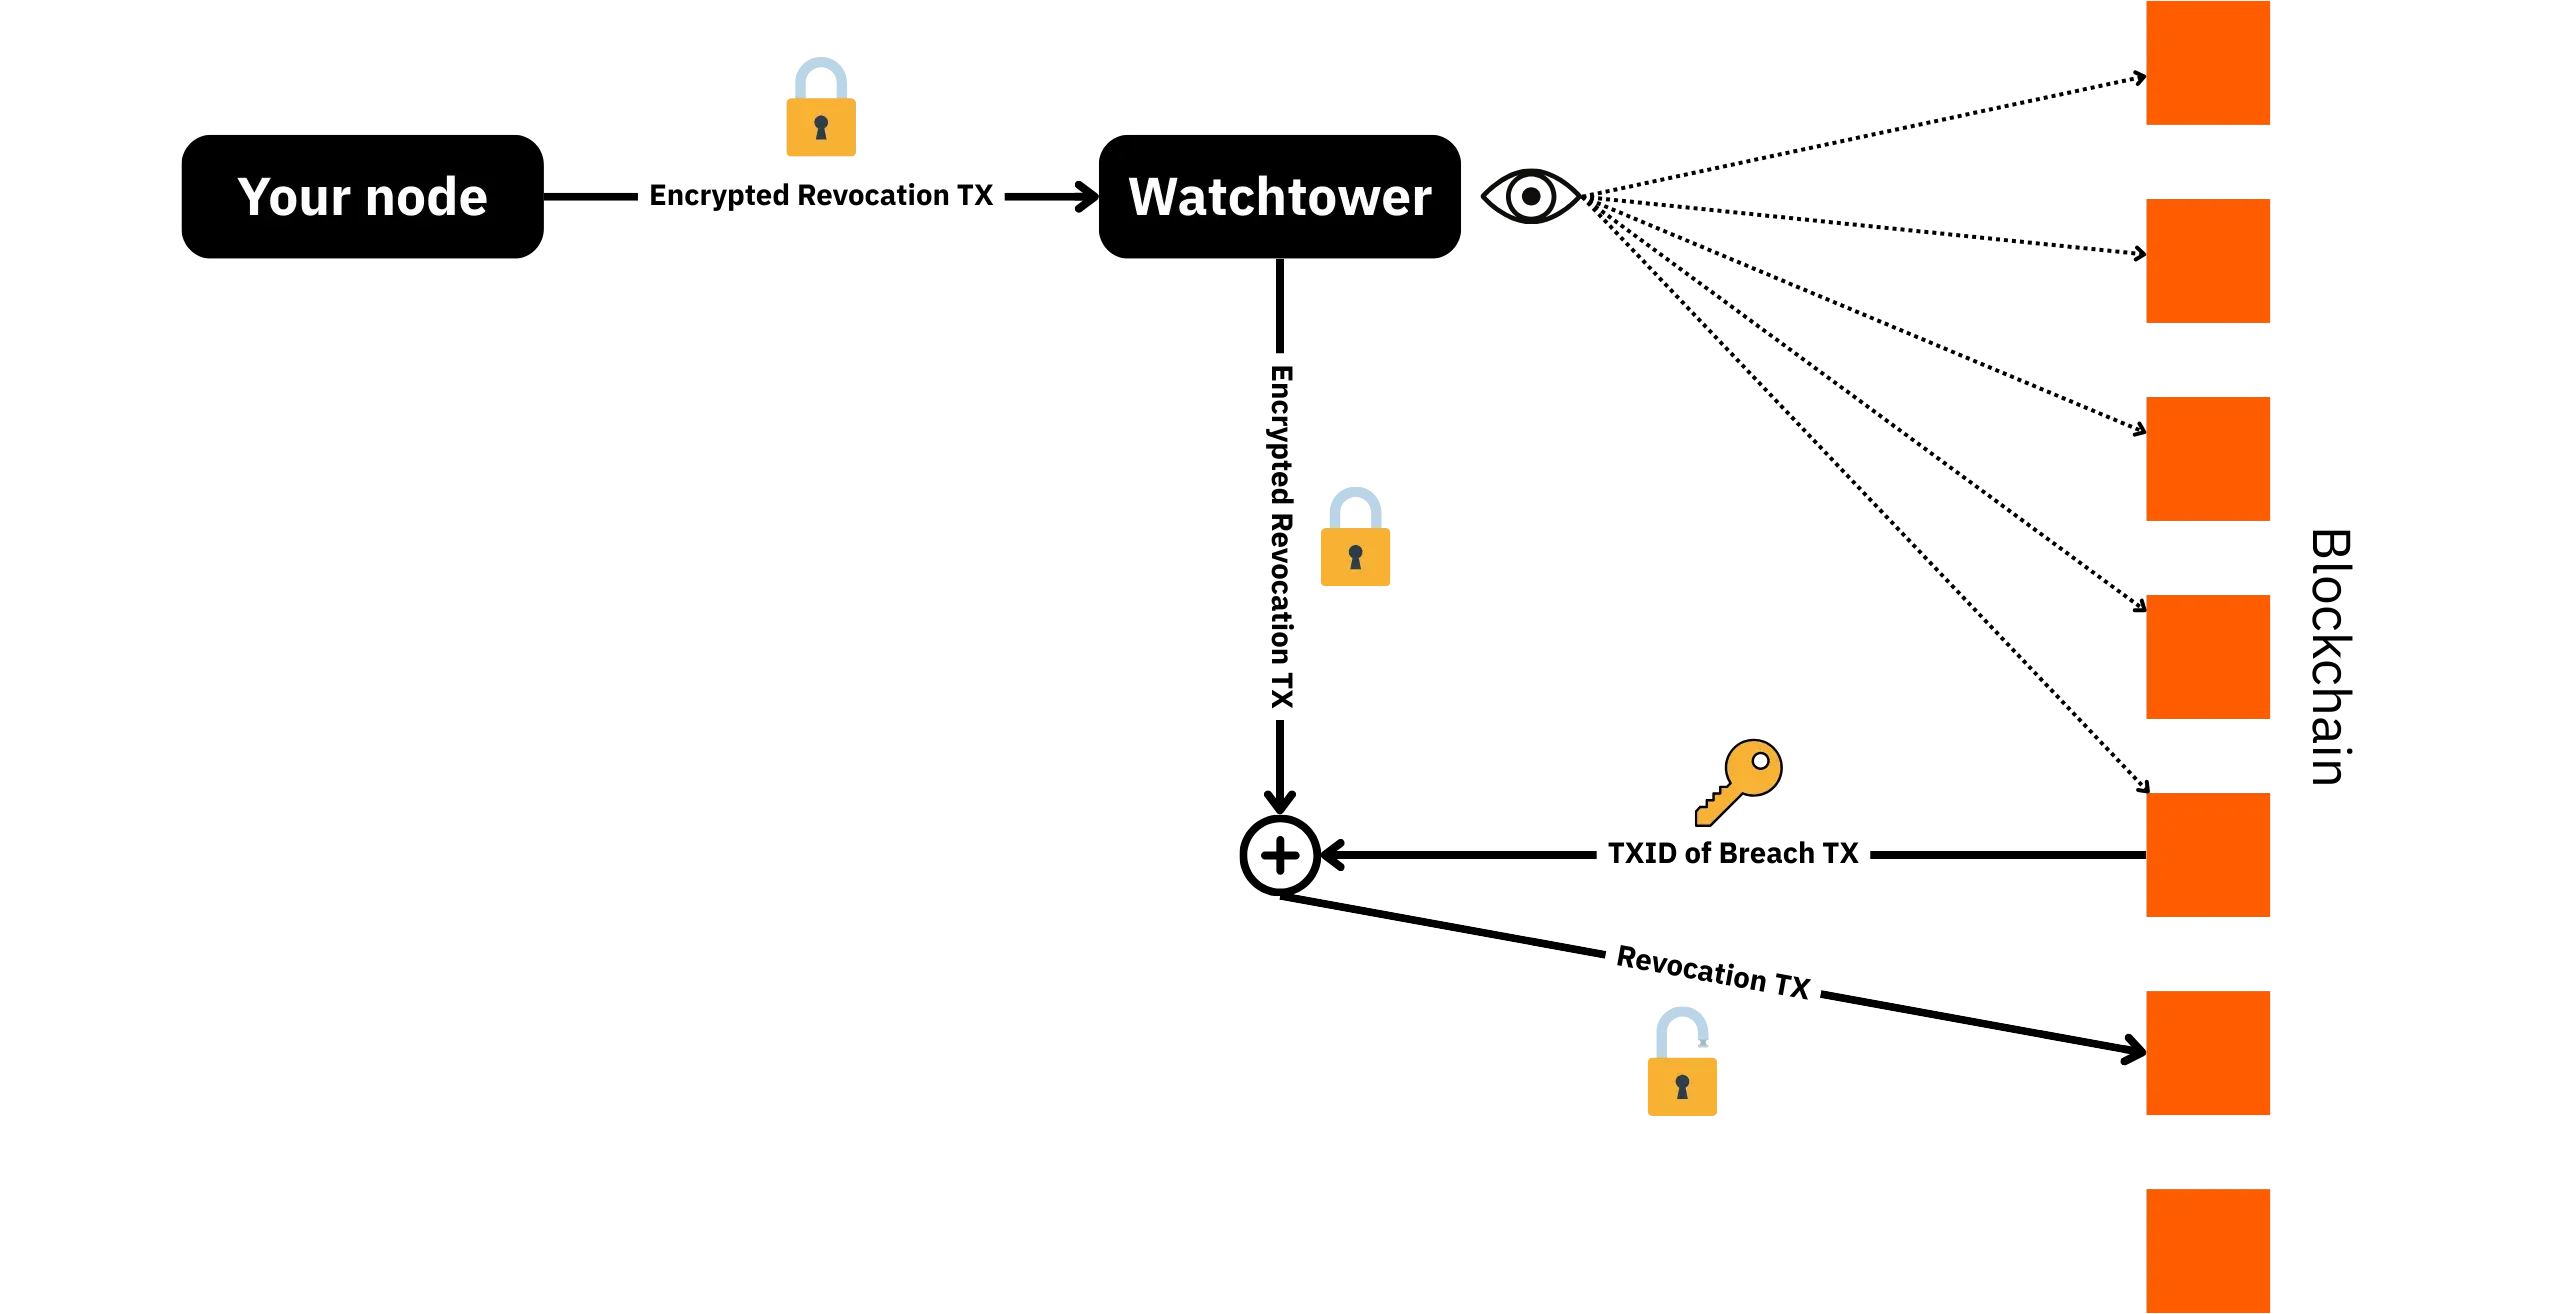
The watchtower therefore has no visibility of the details of your channels: neither the identity of your peers, nor the balances, nor the structure of the transactions. It only sees encrypted packets. The only information it can deduce is the rate at which your channels are updated, since it receives a packet for each new state, but is unable to know its content. In the event of cheating, it will certainly discover the channel information by decrypting the penalty transaction, but at least your sats will be saved.
This mechanism is based on a compromise: you delegate the ability to publish a pre-signed penalty transaction to the watchtower, but this transaction remains totally opaque to the watchtower until some cheating takes place. The watchtower can neither modify the recipients nor divert the funds, since it only has a transaction that has already been signed, with the outputs frozen in your favor. Nor can it know the details of a channel in a legitimate forced or cooperative closure, as the TXIDs don't match. On the other hand, watchtower remains a minimal trusted third party: you need to rely on it to be online and to properly broadcast your justice transaction when you need it.
#### Becoming a watchtower
In theory, any Lightning node can act as a watchtower for other nodes (if they use the same implementation, e.g. LND), while itself being protected by other nodes playing this role for it. In the following practical sections, I'll show you how to set up this simple mechanism on your LND under Umbrel.
As a consequence, an interesting strategy might be to agree with trusted bitcoiner friends to act as each other's watchtower. You monitor their channels, and they monitor yours.
### Find an altruistic watchtower
If you don't know anyone around you who can provide a watchtower service, there are a number of altruistic public watchtowers you can connect to. For example, in this LNP202 course, I suggest you connect to the watchtower service offered jointly by LN+ and Voltage, which is a watchtower for LND.
Here you have the login details:
- Via Tor:
```txt
023bad37e5795654cecc69b43599da8bd5789ac633c098253f60494bde602b60bf@iiu4epqzm6cydqhezueenccjlyzrqeruntlzbx47mlmdgfwgtrll66qd.onion:9911
```
- Via clearnet:
```txt
023bad37e5795654cecc69b43599da8bd5789ac633c098253f60494bde602b60bf@34.216.52.158:9911
```
To thank them for providing this free watchtower service, [you can make a donation via Lightning](https://lightningnetwork.plus/donation).
Now that we are using an altruistic watchtower service, let's see how to configure it on our LND node under Umbrel.
### Setting up a watchtower
From the `Lightning Node` application, click on the three dots at the top right of the interface, then select `Advanced Settings`.
Then go to the `Watchtower` menu.
Activate the `Watchtower Client` option, then click on the `SAVE AND RESTART NODE` button. Wait for LND to restart.
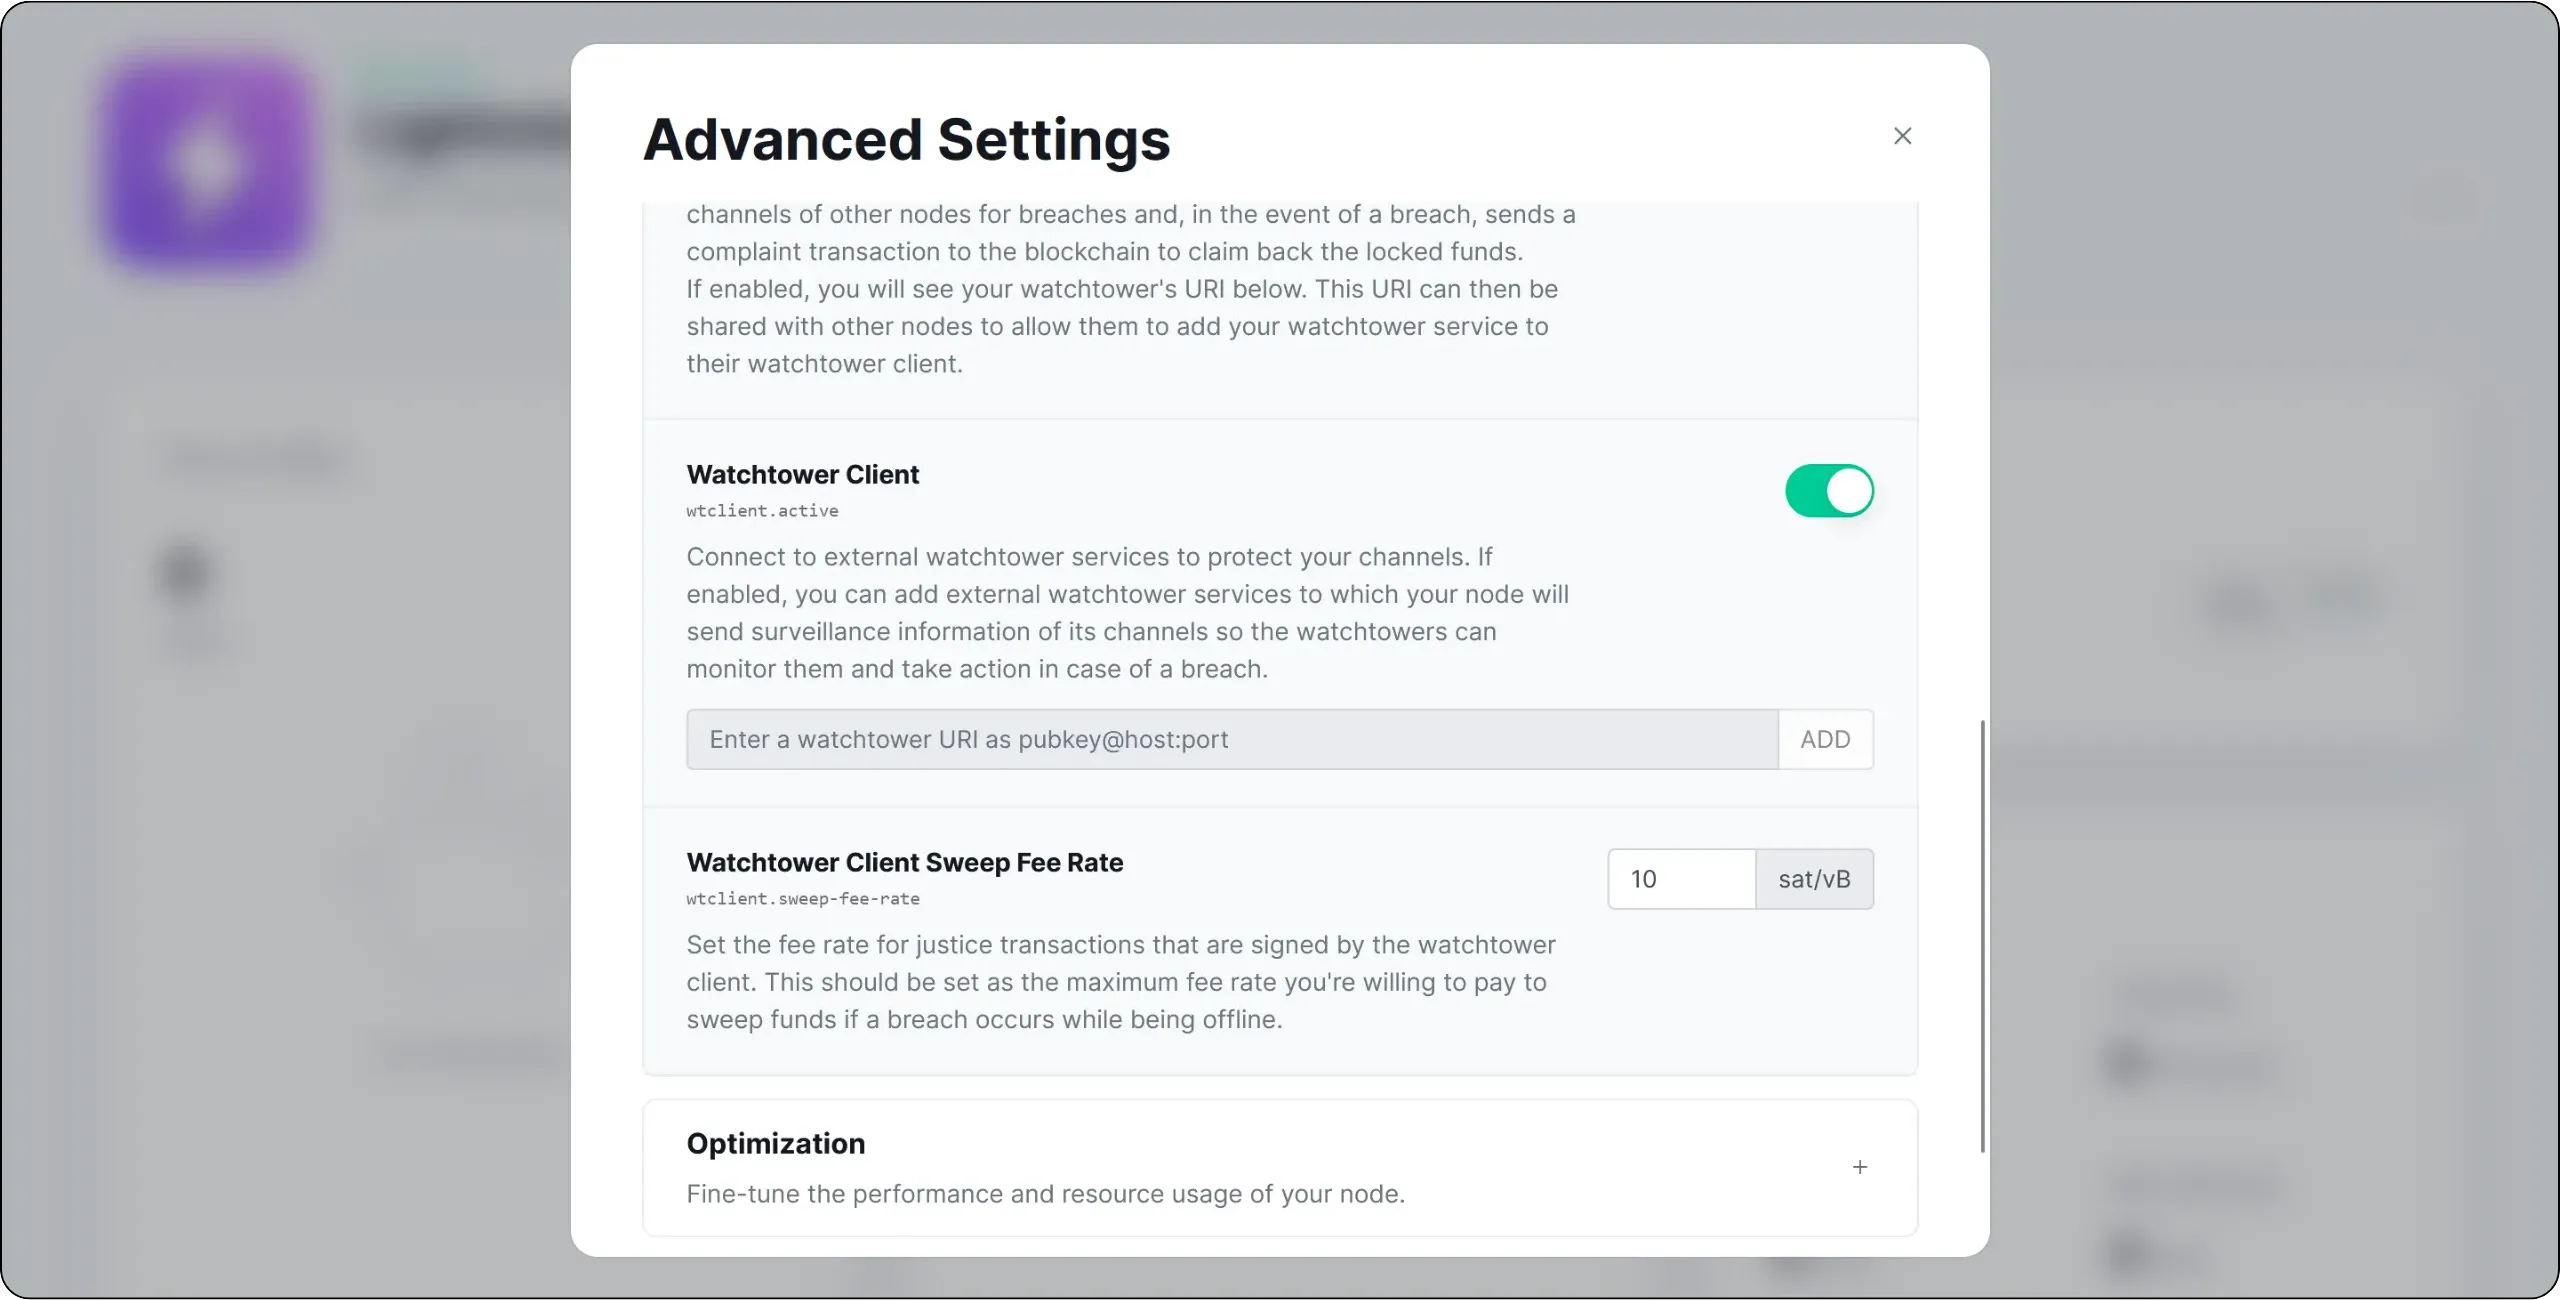
Once the restart is complete, go back to the same menu and enter the ID of the altruistic watchtower of your choice in the field provided. Then click on the `ADD` button to confirm. You can also adjust the `Watchtower Client Sweep Fee Rate` parameter: this is the fee rate you are willing to pay for a possible justice transaction broadcast by the watchtower. There's no need to choose an excessively high rate, but you should also avoid a rate that's too low, otherwise the legal transaction won't be confirmed in time.
Restart your node using the `SAVE AND RESTART NODE` button to apply these changes.
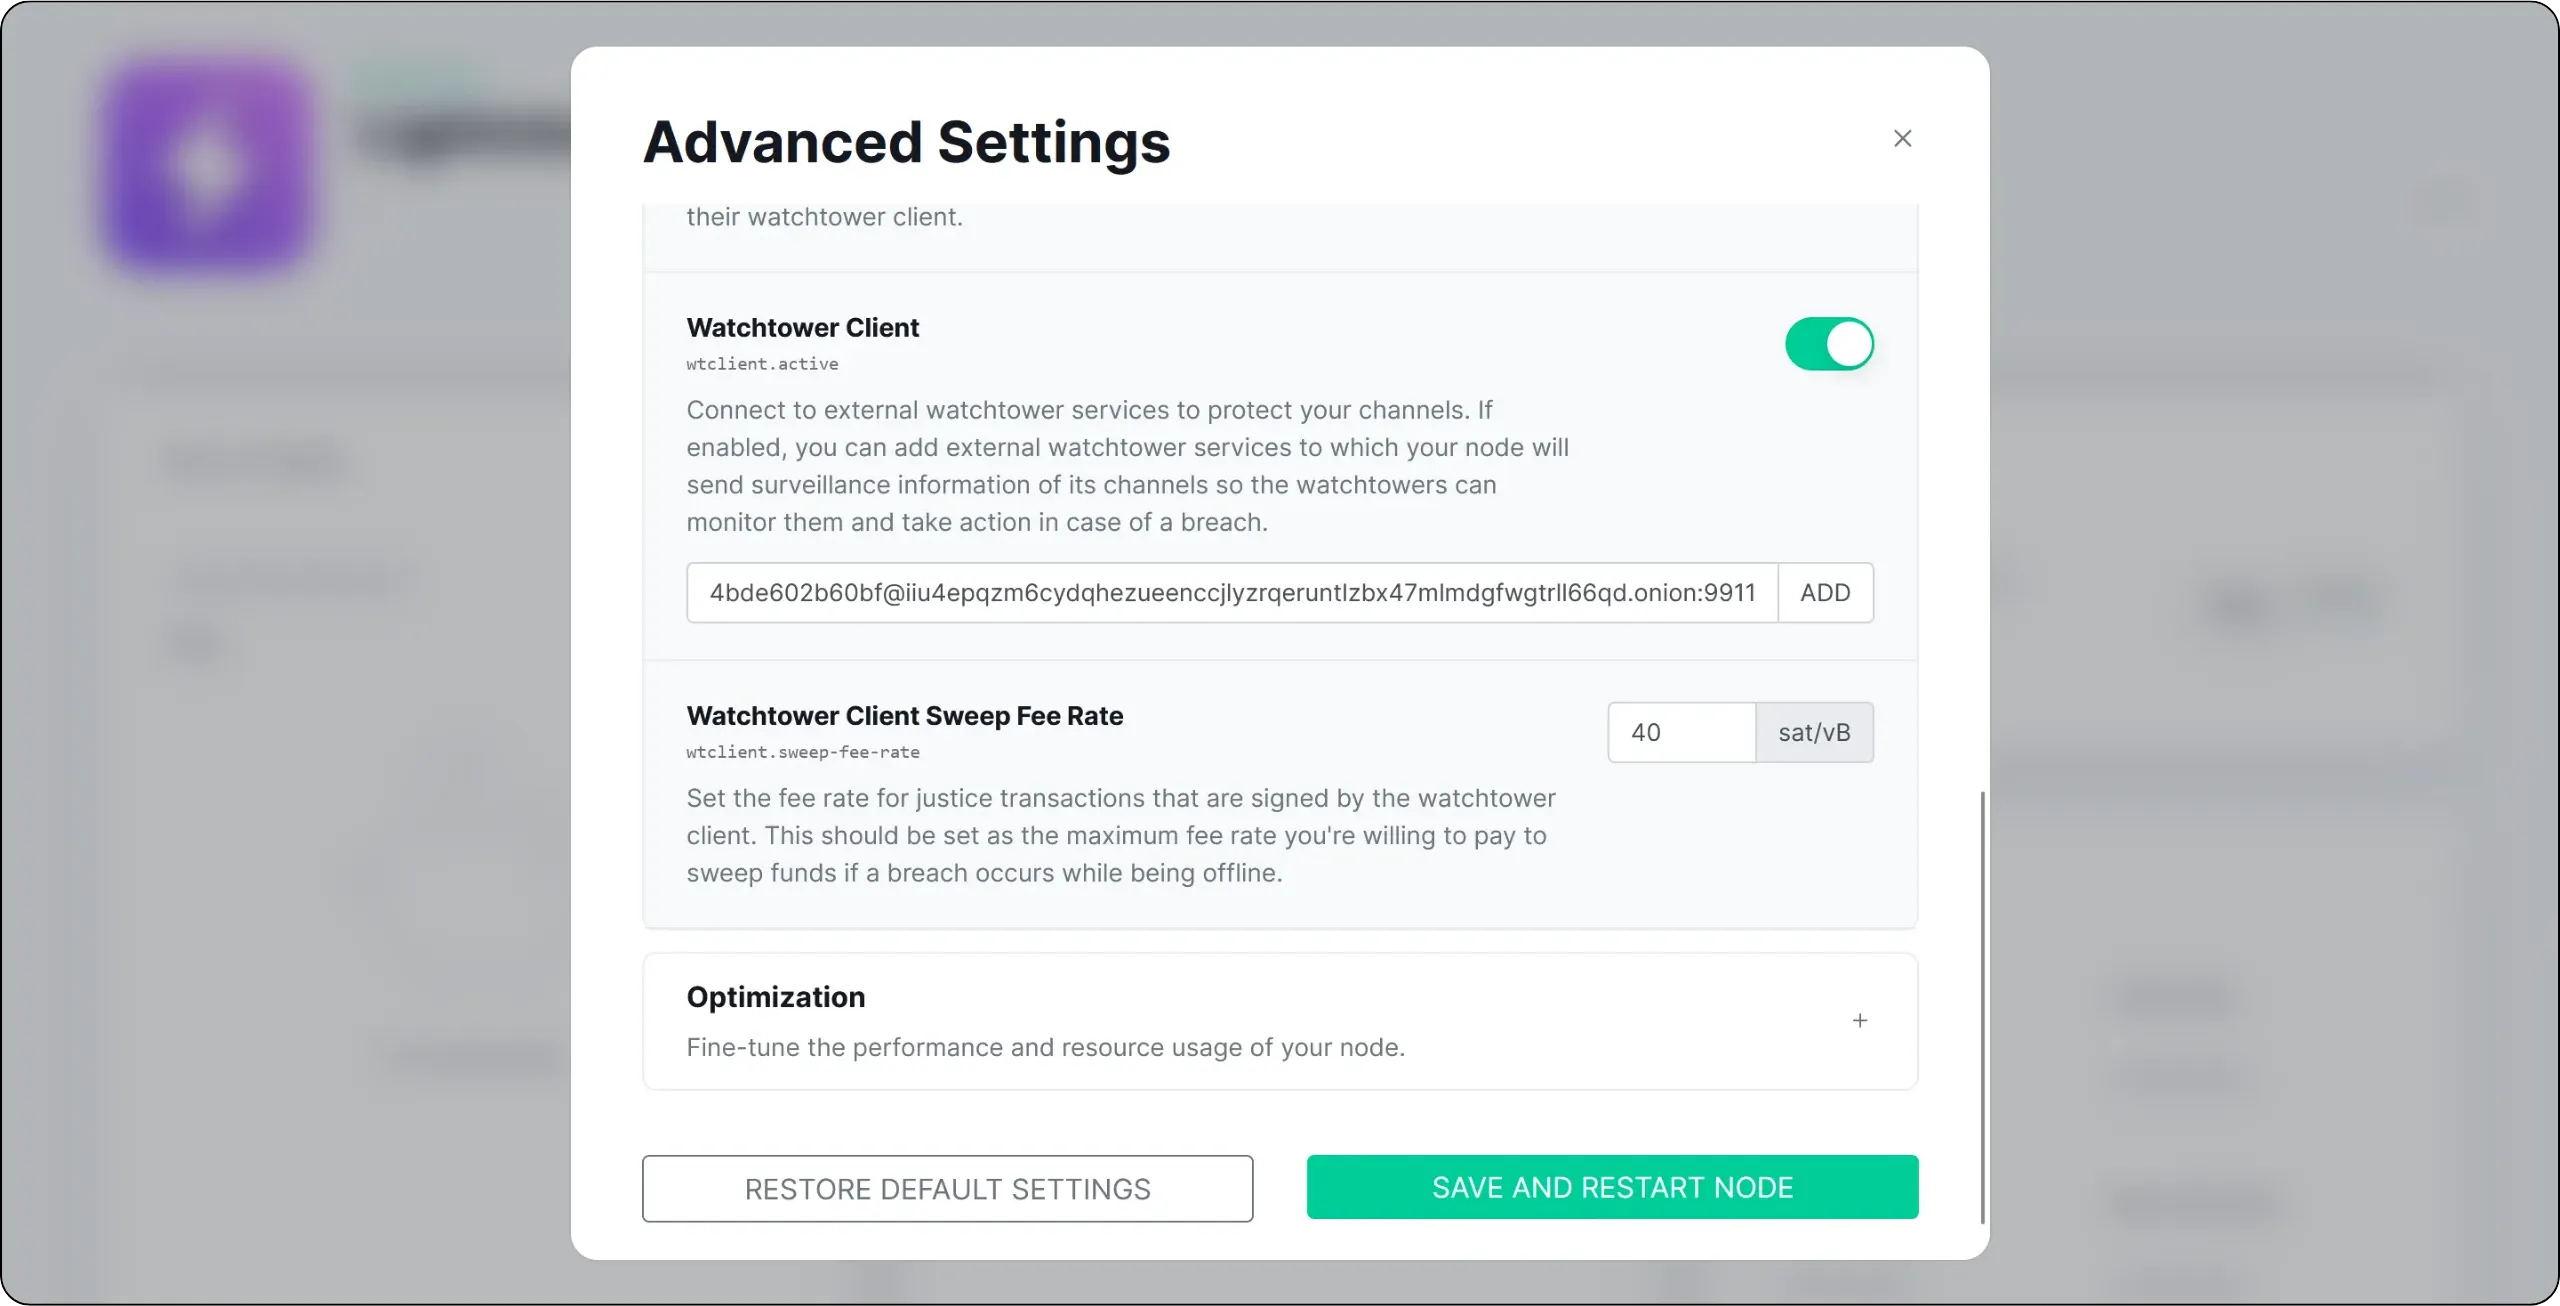
If you return to this same menu, you'll see that your Lightning node is now protected by the watchtower you've just added.

An altruistic watchtower is generally sufficient, especially if you don't place large amounts of money on your Lightning node and if you manage your node well (don't leave it off for too long). For even greater security, you can also add several by repeating the same process.
## Opening your first Lightning channel
00642af7-8f3d-4a25-96d7-34e85de7bd5d
If you've made it this far, you already know that a Lightning node without a channel is a bit like an empty wallet: it exists, but it's useless. To be able to send or receive payments, your node must be connected to at least one other node in the Lightning network via a channel. In the future, we strongly recommend opening several channels, for reasons of resilience and routing efficiency. In the following chapters, we'll also look at how to manage your liquid assets, optimize your channel topology and use more advanced tools than the basic LND interface on Umbrel.
But in this introductory chapter, the aim is simply to understand how to choose a good Lightning peer, where to find the information you need to select your peers, and finally how to open your first channel via the basic LND interface.
### How to choose a good Lightning peer?
When you open a channel, you need to choose a peer: another Lightning node to which your node will be directly connected to, via a channel. This choice of peer is important, as it will have a direct impact on:
- the ease for your payments to find their way;
- the reliability of your channels over time;
- your routing costs.
There's no such thing as a perfect match for everyone, but there are a number of reliable criteria for identifying good candidates.
#### 1. Node connectivity
A good peer is a node that is well connected to the Lightning network. This means not only having a large number of channels (although this can be an indicator), but above all being connected to other reliable nodes and occupying a sufficiently central position in the network graph.
A well-connected node increases your chances of finding an efficient route to most payment destinations. It also reduces the number of intermediary nodes needed, which keeps costs down.
Conversely, opening your first channel to an isolated or weakly connected node may restrict your possibilities: you'll be able to pay this peer, but it will be much harder to pay the rest of the network.
#### 2. Capitalization and channel capacity
A good peer is also a sufficiently capitalized node. This is shown by its total channel capacity (the sum of sats committed to all its channels) and its average channel capacity (it's often better to have just a few well-capitalized channels than many small ones).
A node with ridiculous capacity, or whose channels are all tiny, will not be able to route payments with large amounts, resulting in routing failures for you.
#### 3. Expense policies
Each node sets its own routing fees (`base fee` and `fee rate`). A good peer will not charge exorbitant fees for strategic channels. For a first channel, it's best to choose a node with rather moderate fees, so as not to handicap your own payments.
Remember that your own routing fees also influence how others perceive you as a peer: a node that constantly changes its fees or imposes absurd costs is rarely appreciated.
#### 4. Stability and seniority
Peer stability is a very important criterion. A good node has a high uptime (it's very rarely offline), it keeps its channels open for a long time and it doesn't constantly open/close channels for no reason.
Old and still active channels are a good signal: they suggest that the relationship is profitable for the peer, that the node knows how to manage its capital and that it doesn't close at any time, so you don't have to keep paying onchain fees for closing and reopening.
Conversely, a peer who is often offline, or who quickly closes channels, can be a source of problems for you, and of additional costs for opening new channels.
Even with these criteria, you won't make a perfect choice the first time. That's normal: the real quality of a peer is revealed by its use. So it's important to:
- monitor channel activity (routed volumes, availability, etc.);
- close channels that serve no purpose or whose peers are too often offline;
- reallocate your capital to better peers over time.
The idea is not to open and close channels every day (which would be expensive in onchain costs), but to gradually evolve your topology to converge on a set of reliable, well-connected peers compatible with your needs.
### How do I find a peer?
To apply these criteria, you'll need tools that provide visibility of the Lightning network. There are several explorers and services available to do this. Among the best-known Lightning explorers are [1ML](https://1ml.com/) and [Amboss](https://amboss.space/).
https://planb.academy/tutorials/node/lightning-network/amboss-37044cad-0f85-41eb-af18-491384af1017
https://planb.academy/tutorials/node/lightning-network/1ml-37ada2ab-7a24-4473-87fd-007cb7640e7b
Here, however, I suggest you use [the Lightning Terminal tool from Lightning Labs](https://terminal.lightning.engineering/), which provides a ranking (admittedly based on partly subjective criteria) of the Lightning nodes deemed most relevant for opening a channel.
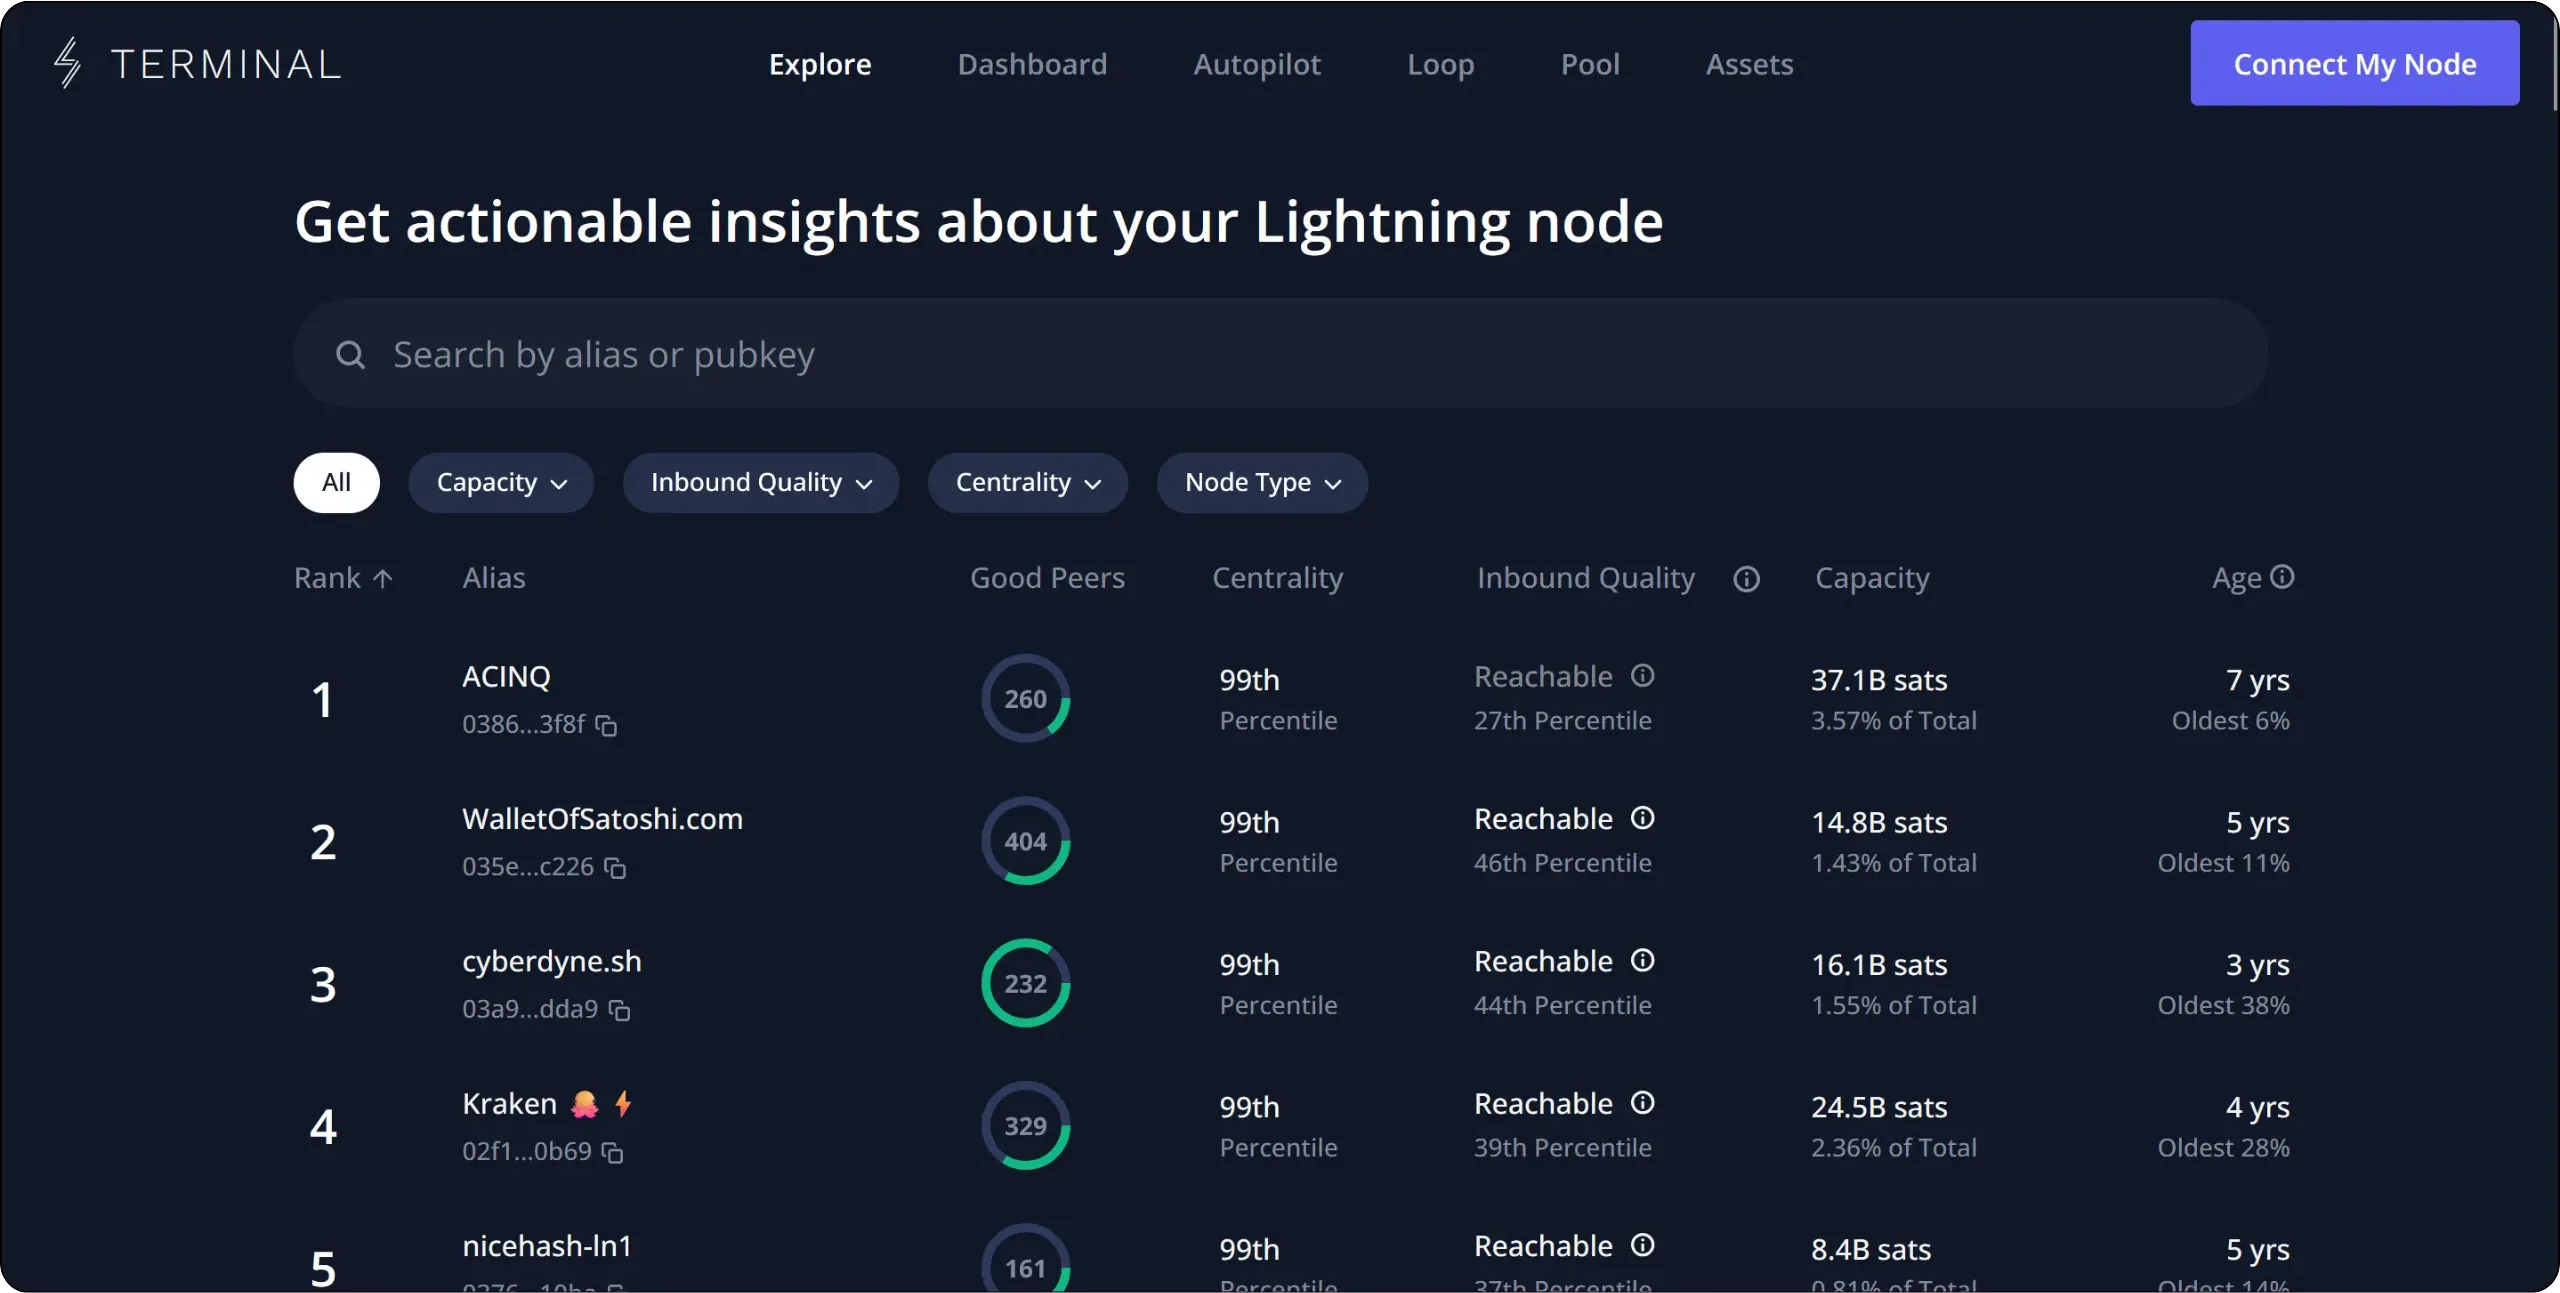
The problem with the very large Lightning nodes at the top of this ranking is that most don't accept channel openings below very high amounts. Many also apply strict peer management policies, which can lead to your channel being closed. On the other hand, these nodes generally have no need for inbound liquidity, given their number of connections.
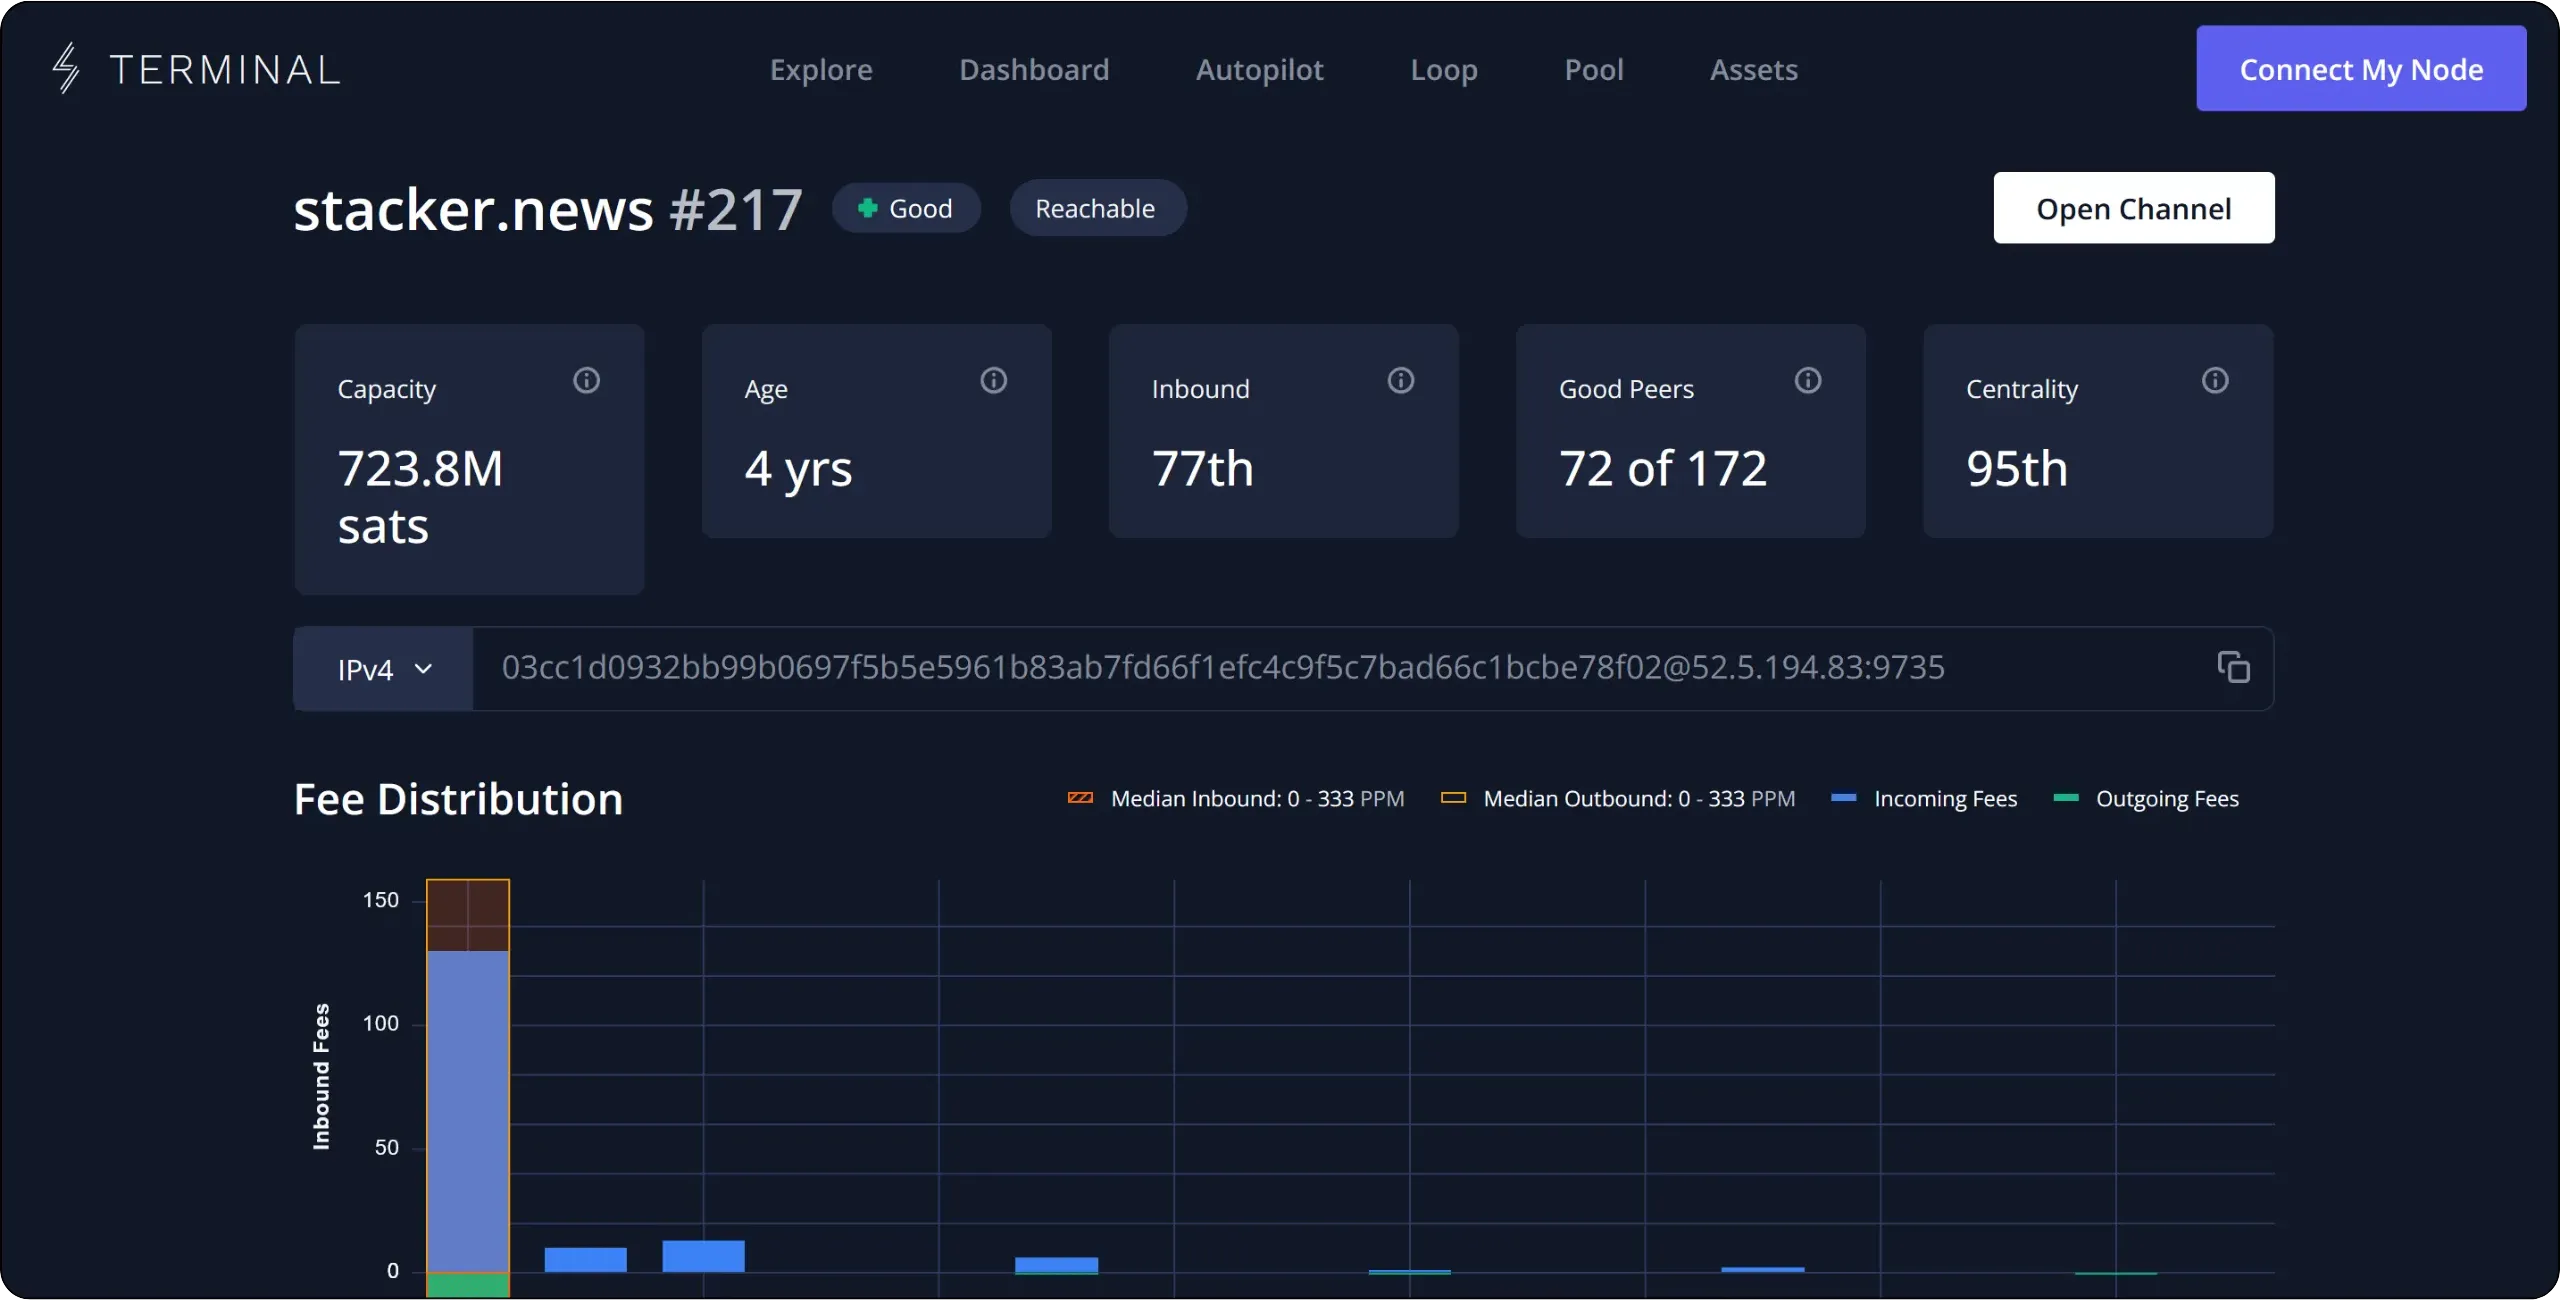
I'd therefore advise you to work your way down the ranking to find a node that's well connected, reliable and sufficiently central in the network graph, without being excessively large. For example, here I've identified the Lightning node on stacker.news, which is very well connected, has high capacity and occupies a central position in the network graph.
Another interesting approach is to open a channel to a node in need of inbound liquidity, such as a merchant you know, an association or a community. This strategy has three advantages:
- Since the chosen entity needs inbound liquidity, it will logically have less incentive to close your channel for no reason;
- Its economic activity increases the chances of routing on this channel, and therefore of collecting some fees;
- You're doing the ecosystem a favor and making a valuable contribution to other bitcoiners.
Once you've identified a relevant node, you can retrieve its Node ID. This is simply a concatenation of the node's public key, a `@` separator, its IP or Tor address, and the port used. This ID is easily accessible from the node's profile on any Lightning explorer.
### Open your first channel via LND
Now that we've identified the node with which to open our first channel, we need sats to lock into it. To do this, you need to feed the Bitcoin onchain wallet associated with your LND.
From the main LND interface, locate your `Bitcoin Wallet`, then click on the `Deposit` button. An onchain receiving address is then generated: send sats to it. The amount you need to transfer depends on the capacity you wish to allocate to your first channel, but bear in mind that you need to send slightly more than the targeted capacity. For example, if you want to open a 500,000 sats channel, don't send exactly 500,000 sats, but a higher amount.
Once the transaction has been broadcast, it appears in the interface. Wait for confirmation before opening the channel. You'll see a green arrow next to it when it's confirmed.
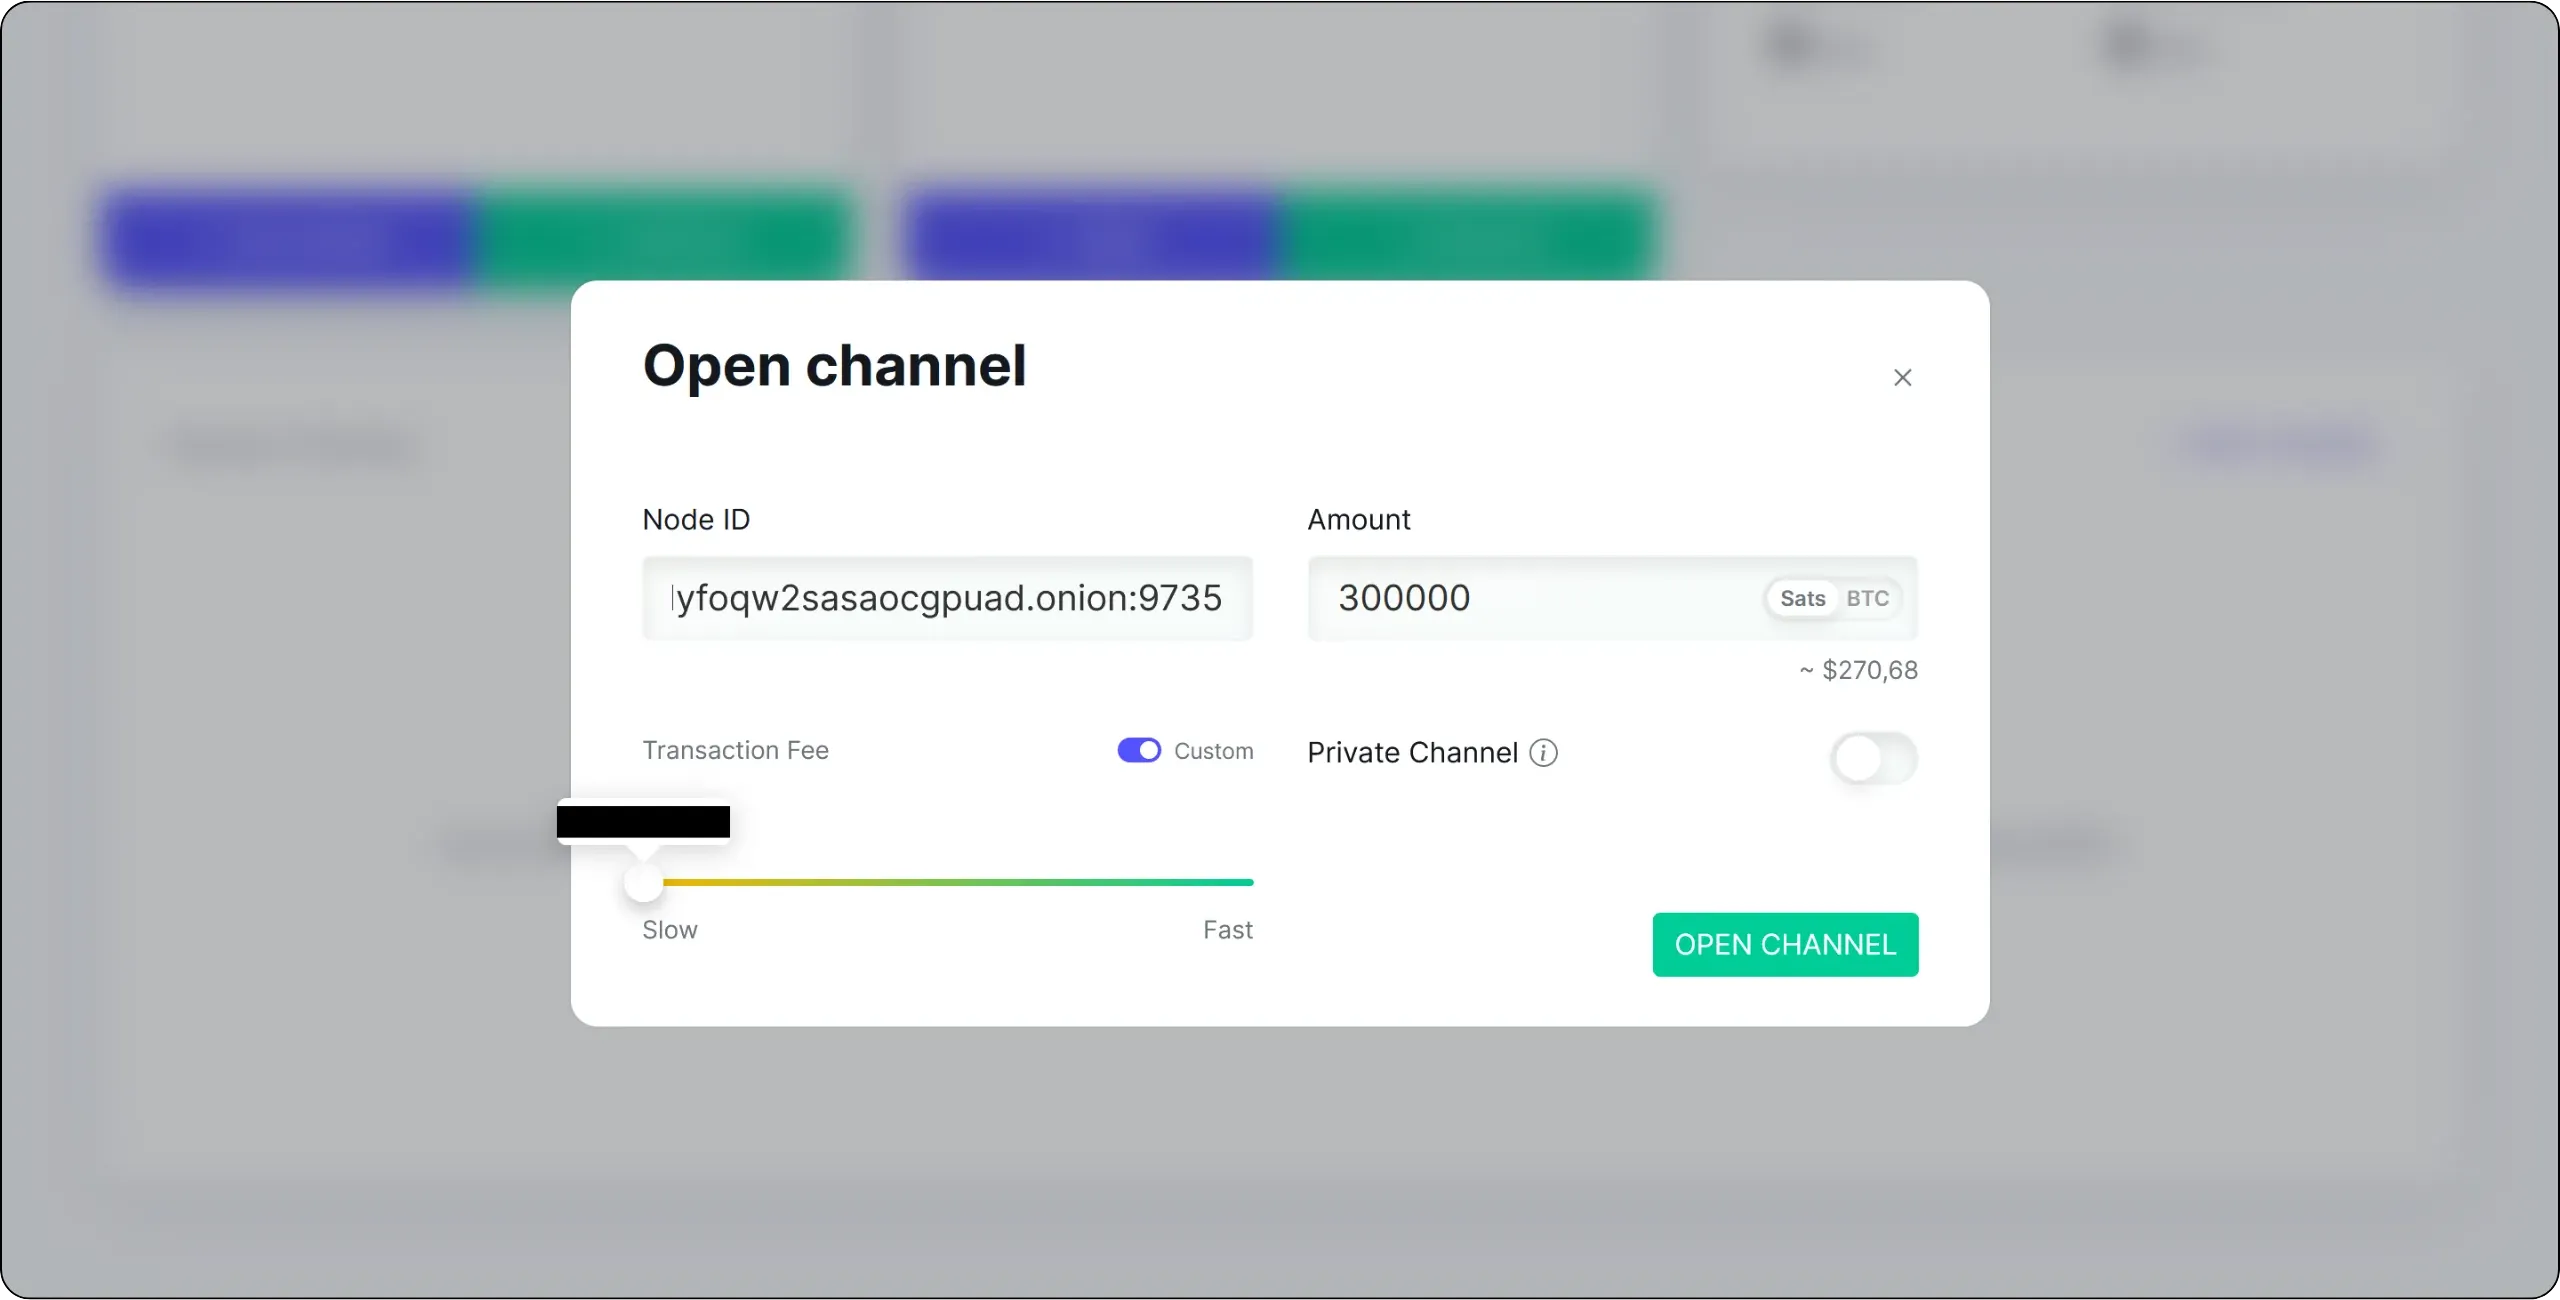
Scroll down to the main interface, then click on `+ OPEN CHANNEL`.

Enter the `Node ID` of the node you wish to open a channel with, indicate the amount you wish to lock in, and then adjust the opening transaction fee according to the state of the onchain fee market. Of course, make sure you have sufficient funds in your LND onchain wallet beforehand.
Once all the parameters have been set, click on the `OPEN CHANNEL` button.
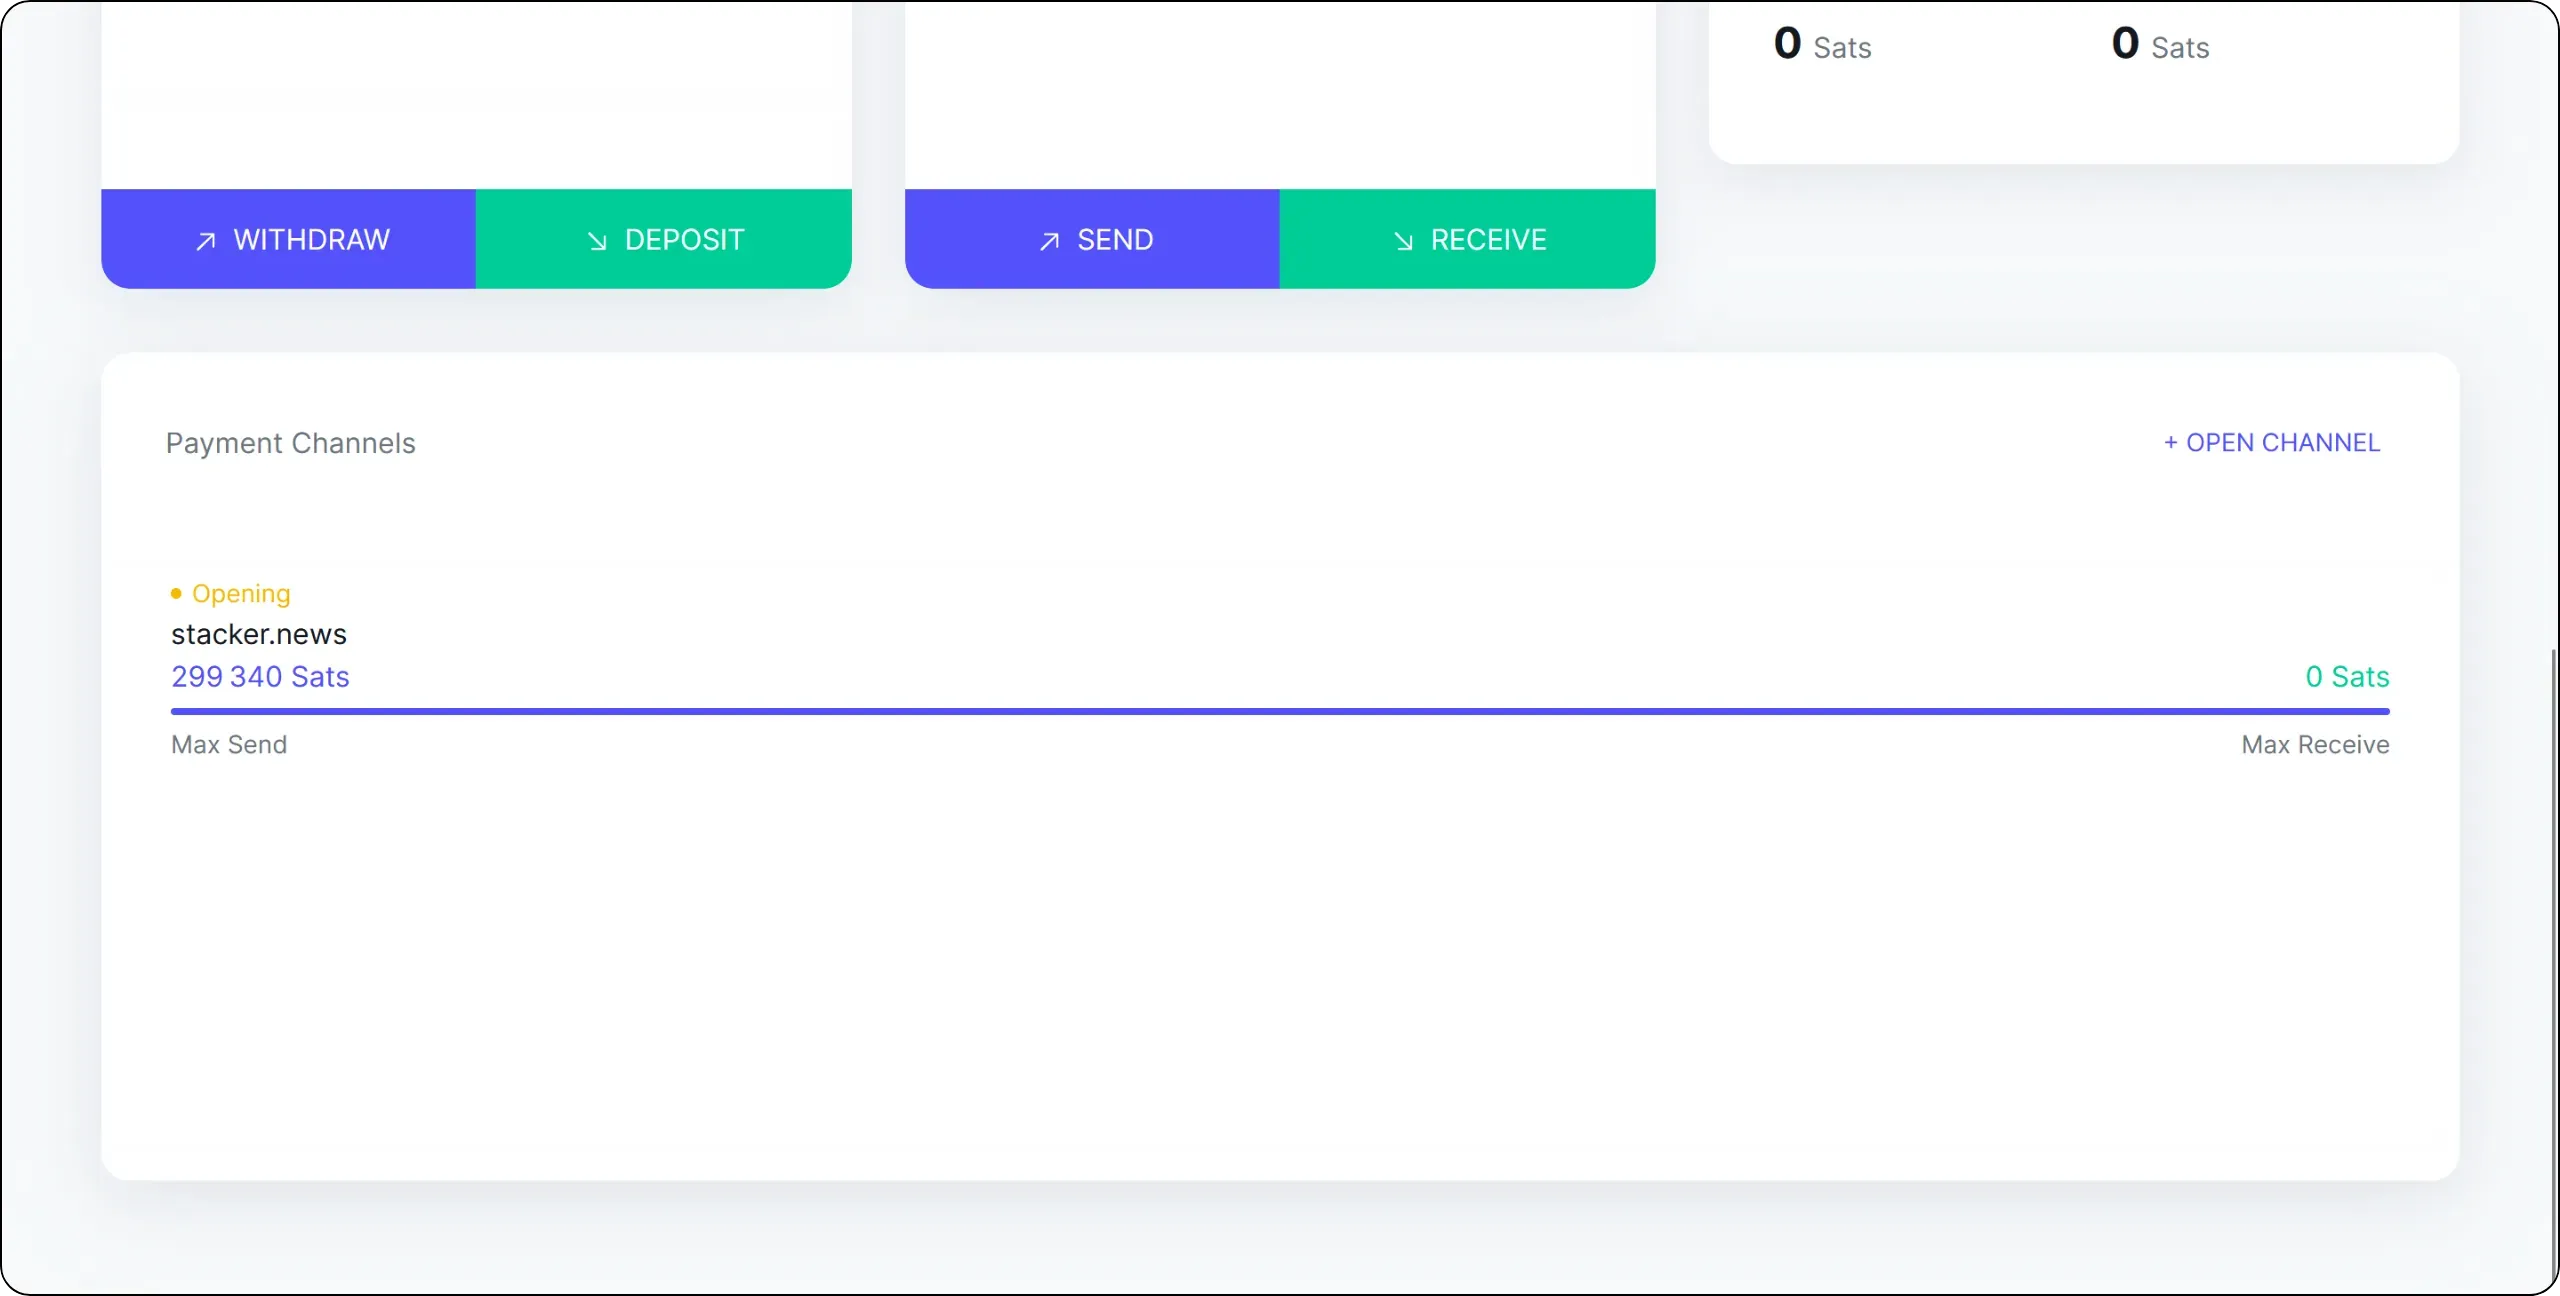
Wait for the opening transaction to be confirmed onchain. Your first channel is now officially operational: congratulations!
You can see that, for the moment, 100% of the channel's liquidity is on my side: that's normal, since I'm the one who opened the channel. As payments and routing evolve, this distribution will change, but the total capacity of the channel will always remain the same.
Now that you have a channel, you can make your first Lightning payments, provided the chosen node is properly connected to the network. Of course, in later chapters we'll look at how to set up a more convenient method of paying Lightning invoices from your mobile. But for now, let's try making a first payment directly from LND to Umbrel.
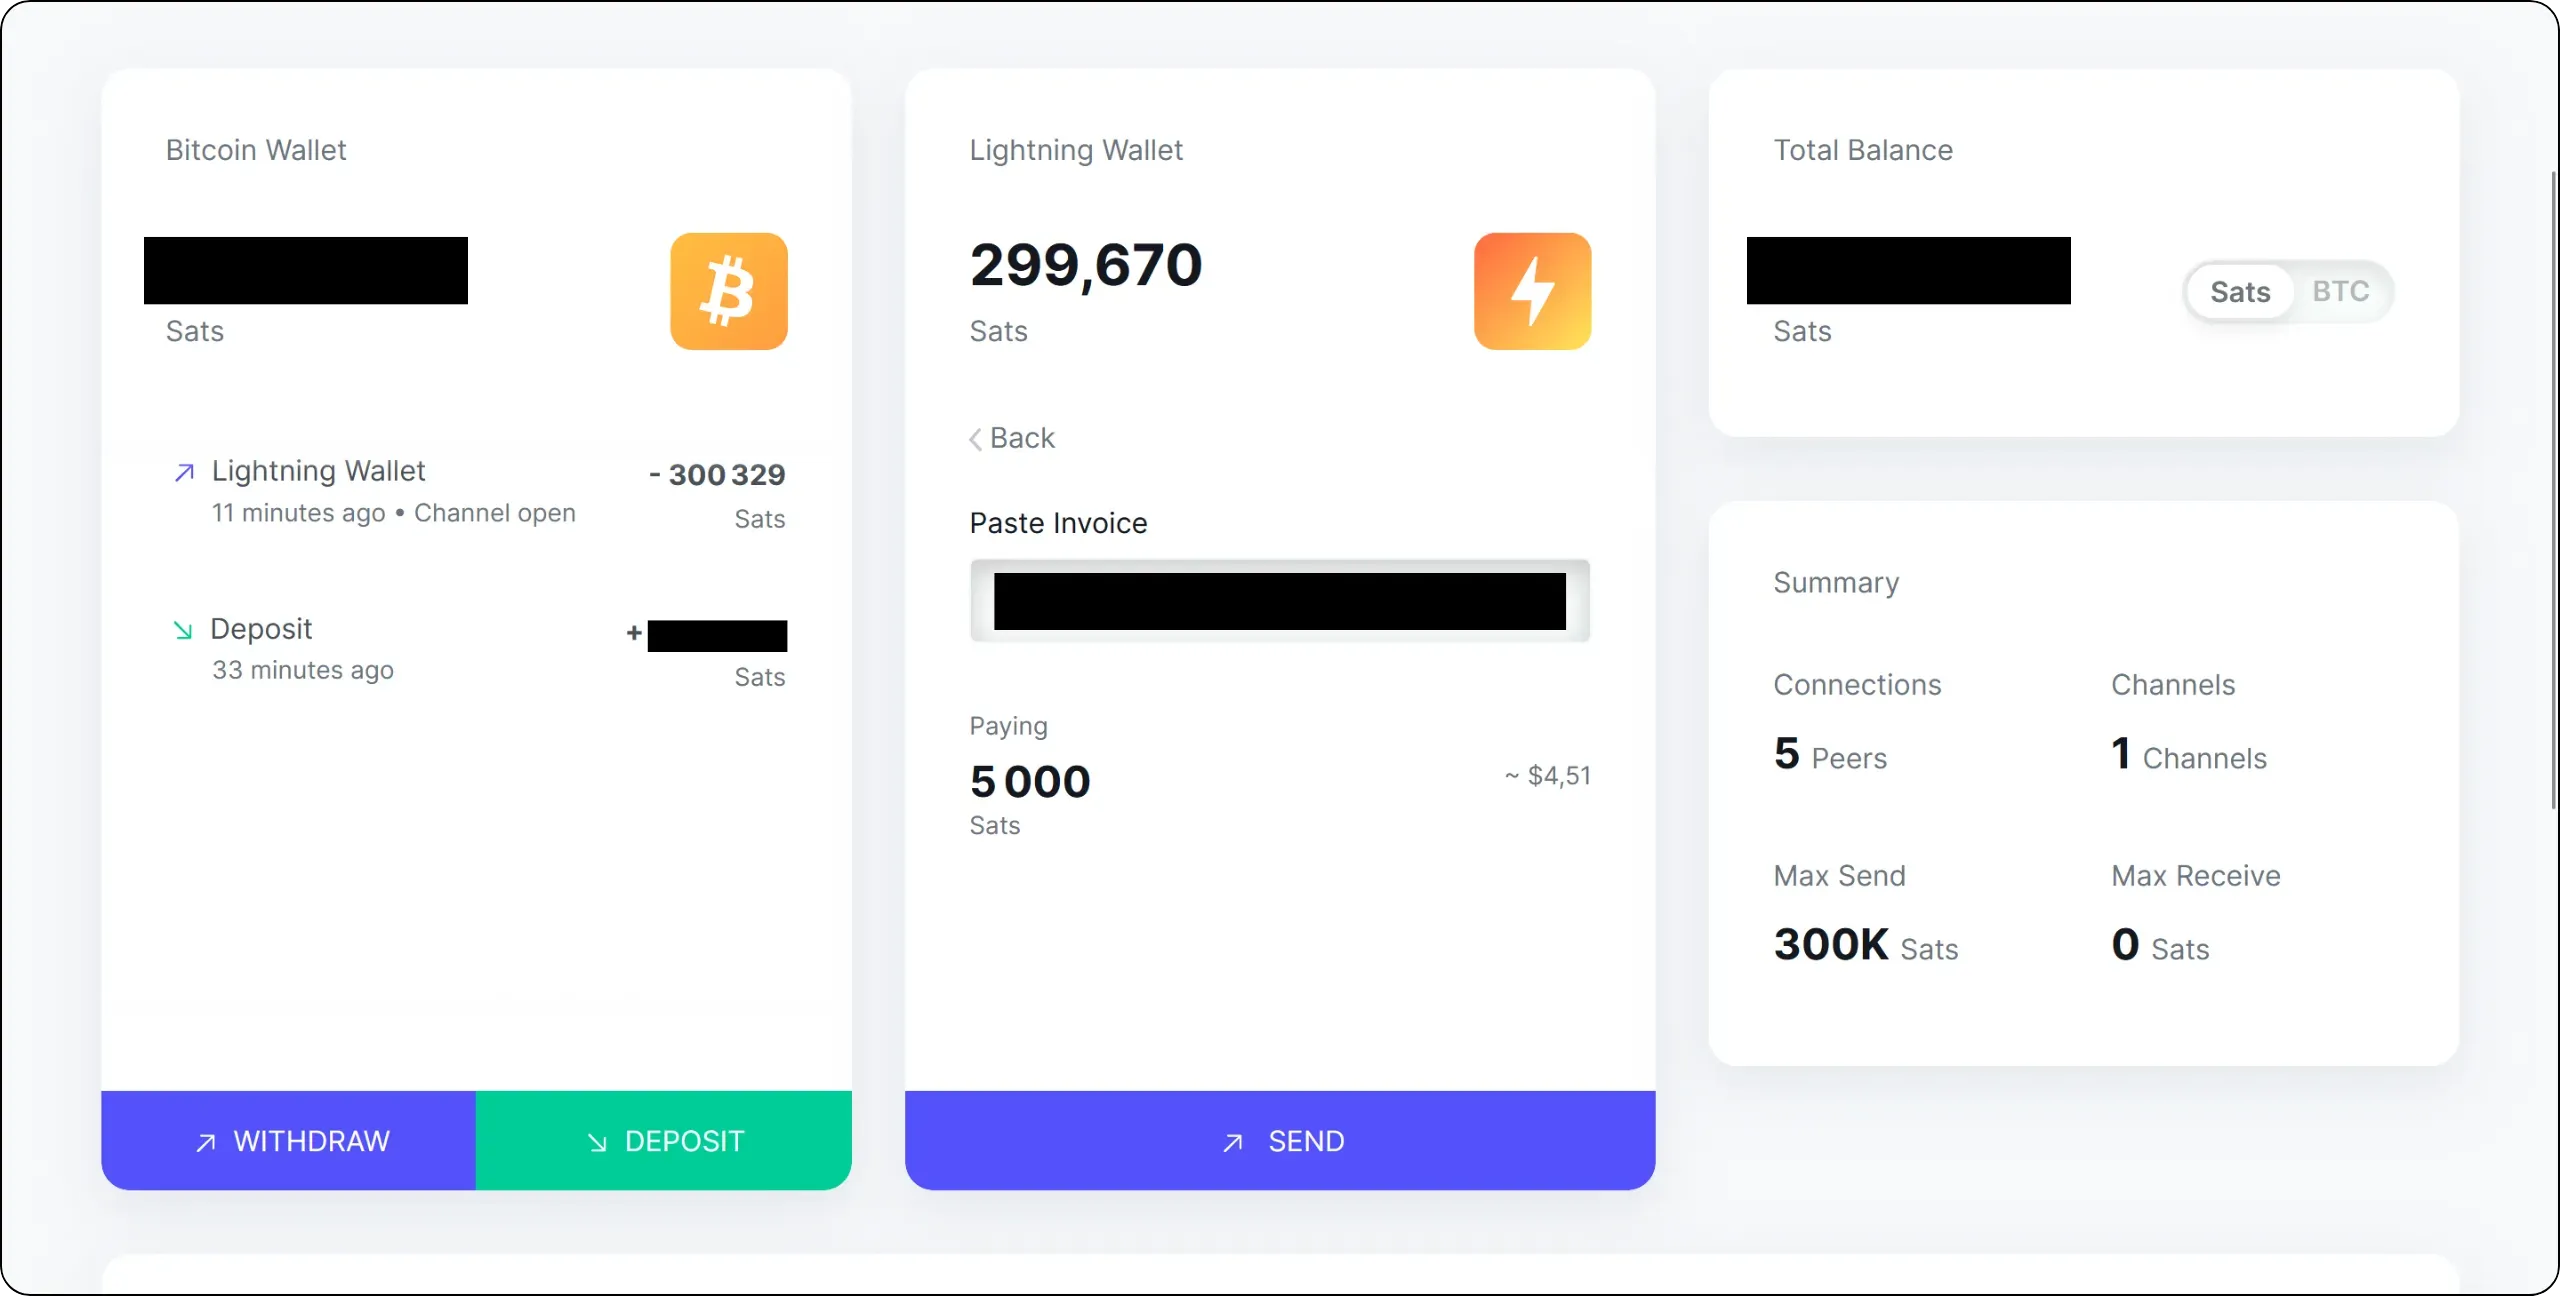
To do this, in the `Lightning Wallet` section, click on the `SEND` button, then paste the invoice to be set.
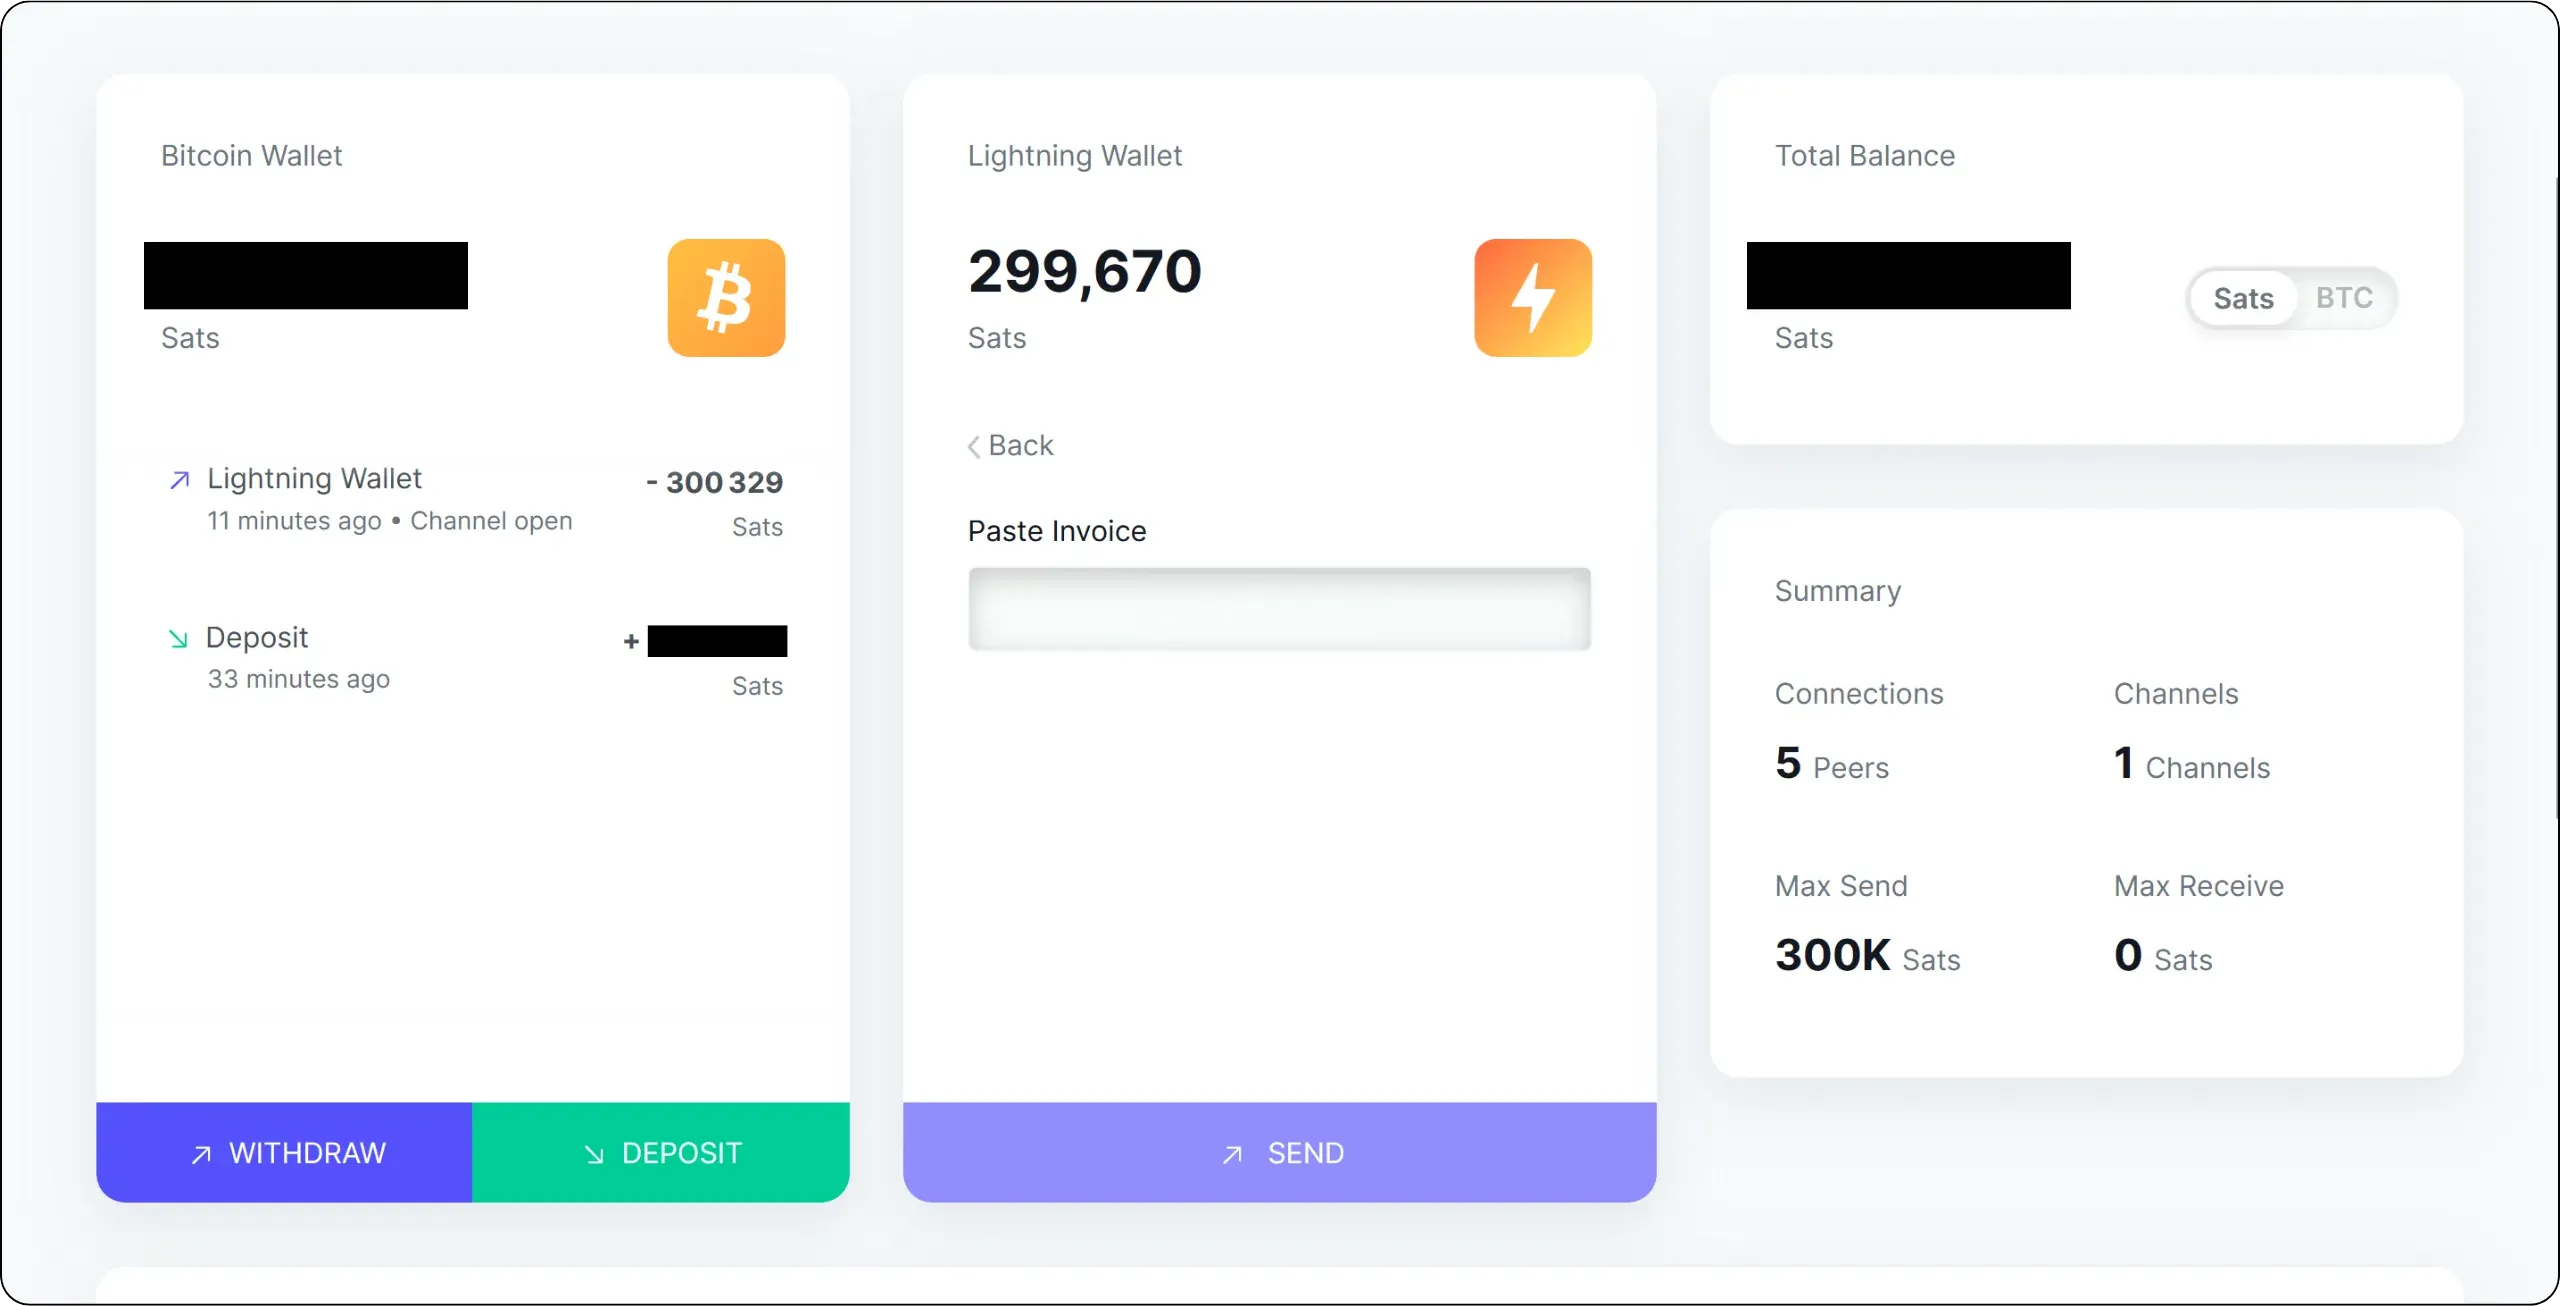
The invoice amount is displayed. Confirm payment by clicking on the `SEND` button.
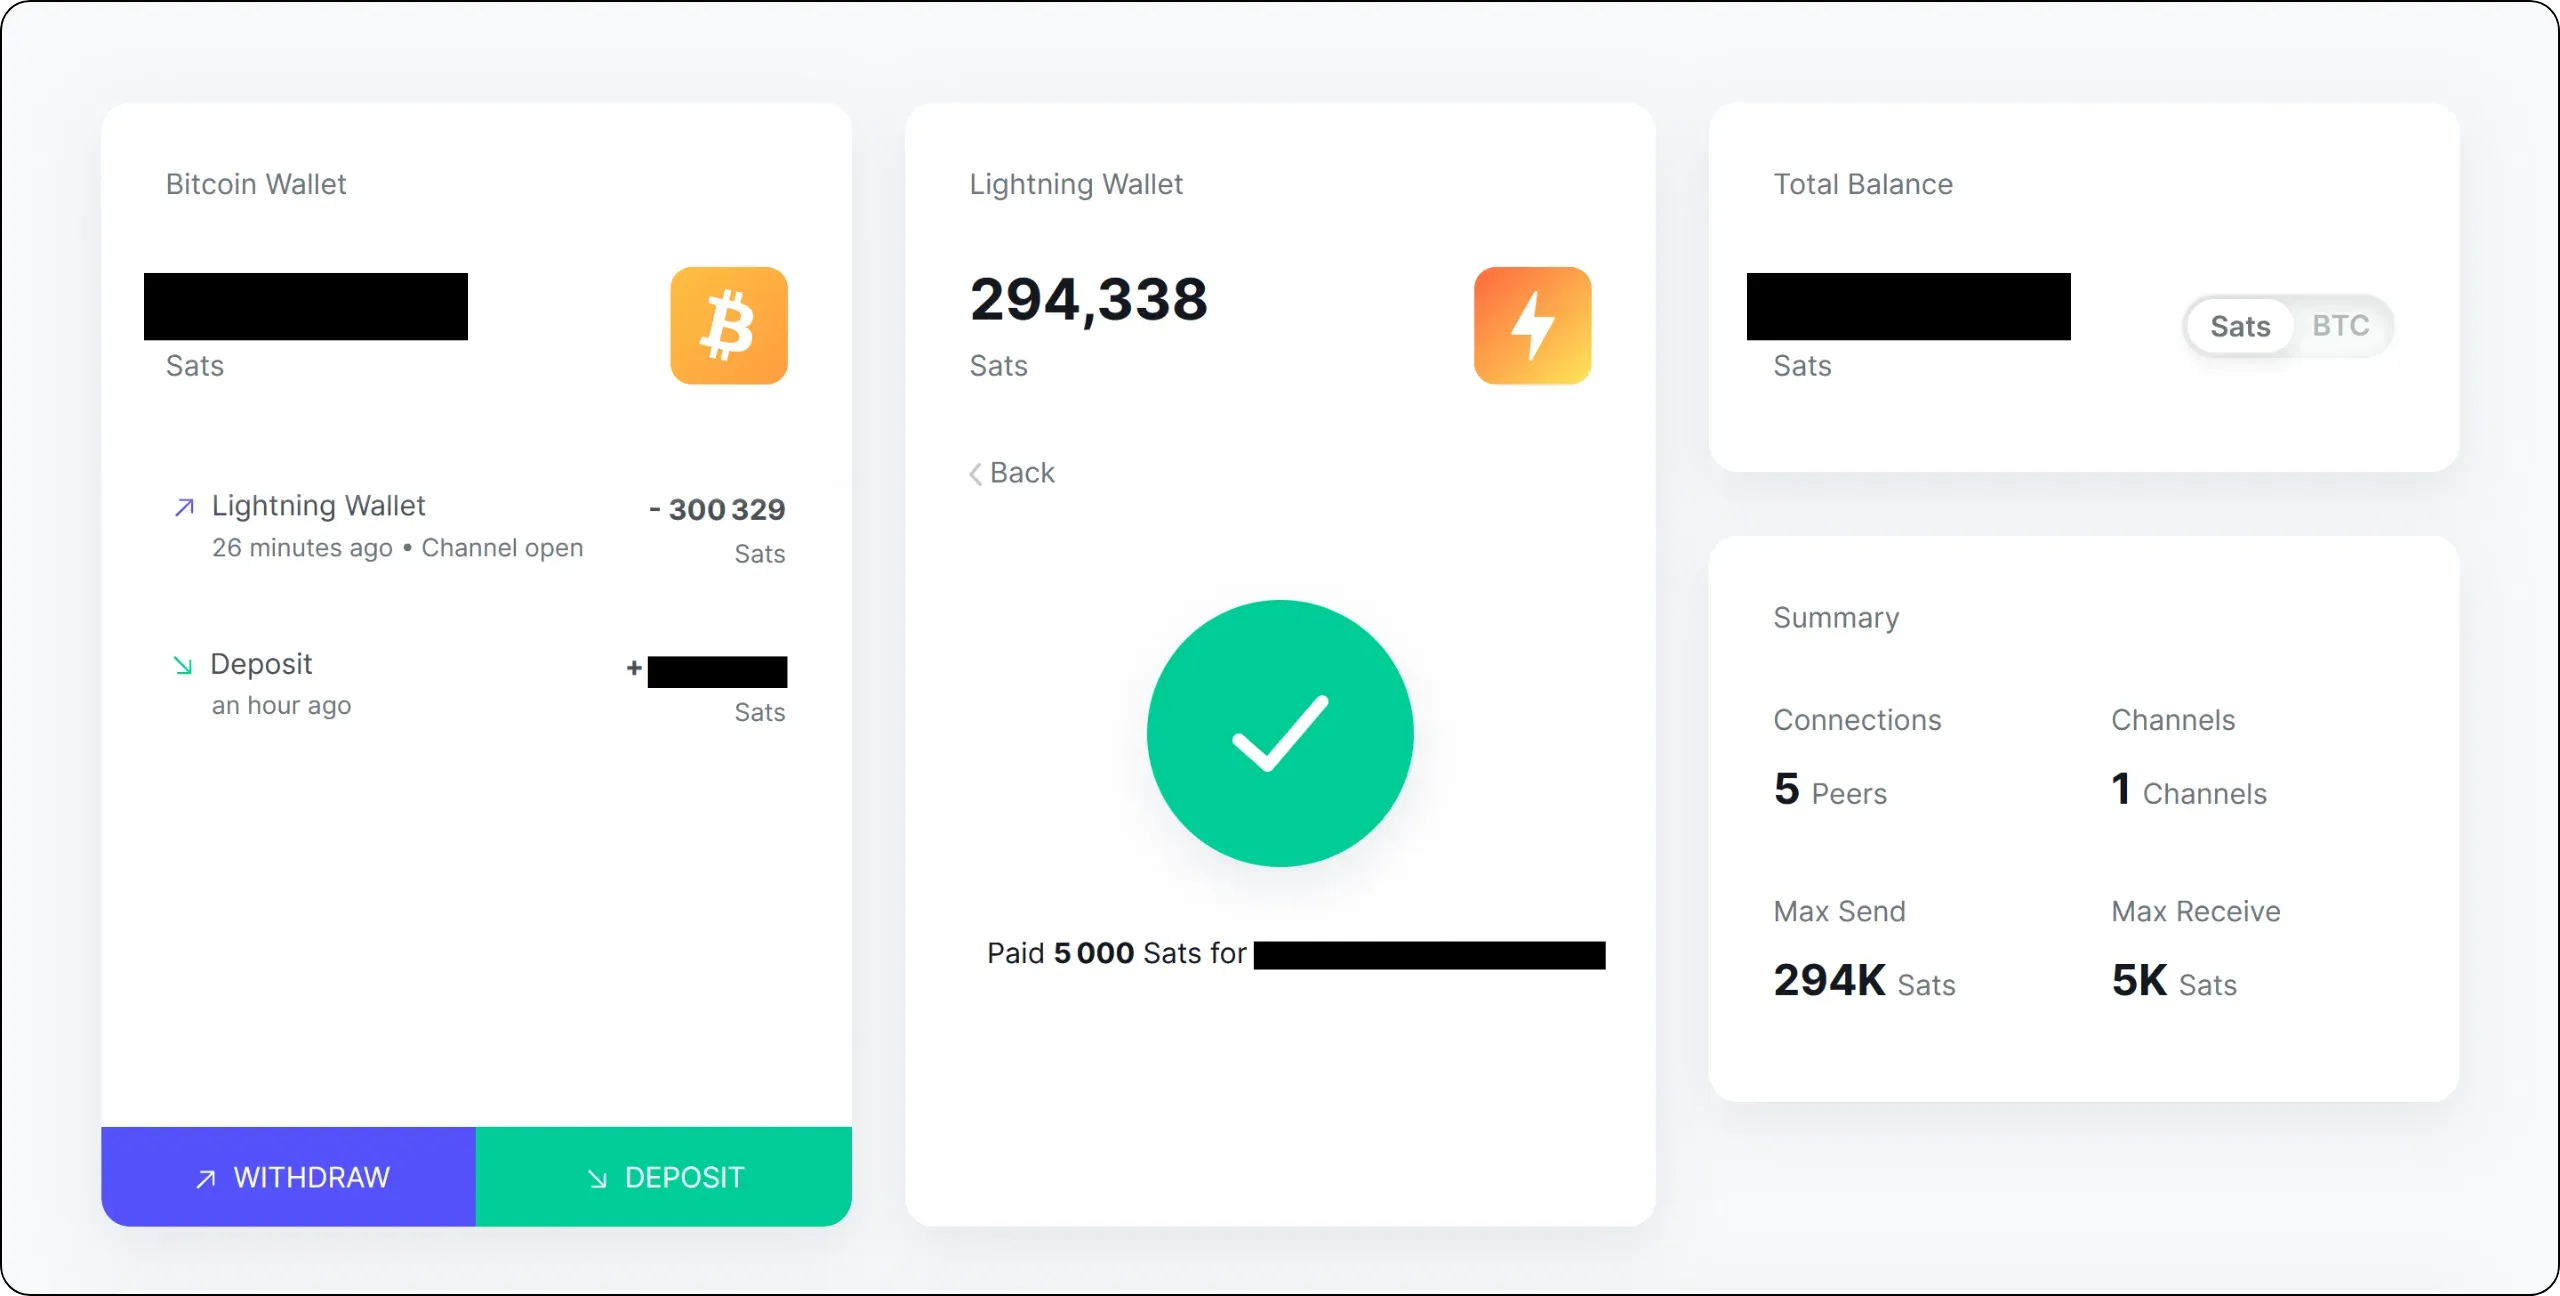
If a valid route is found, your first Lightning payment should be successful.
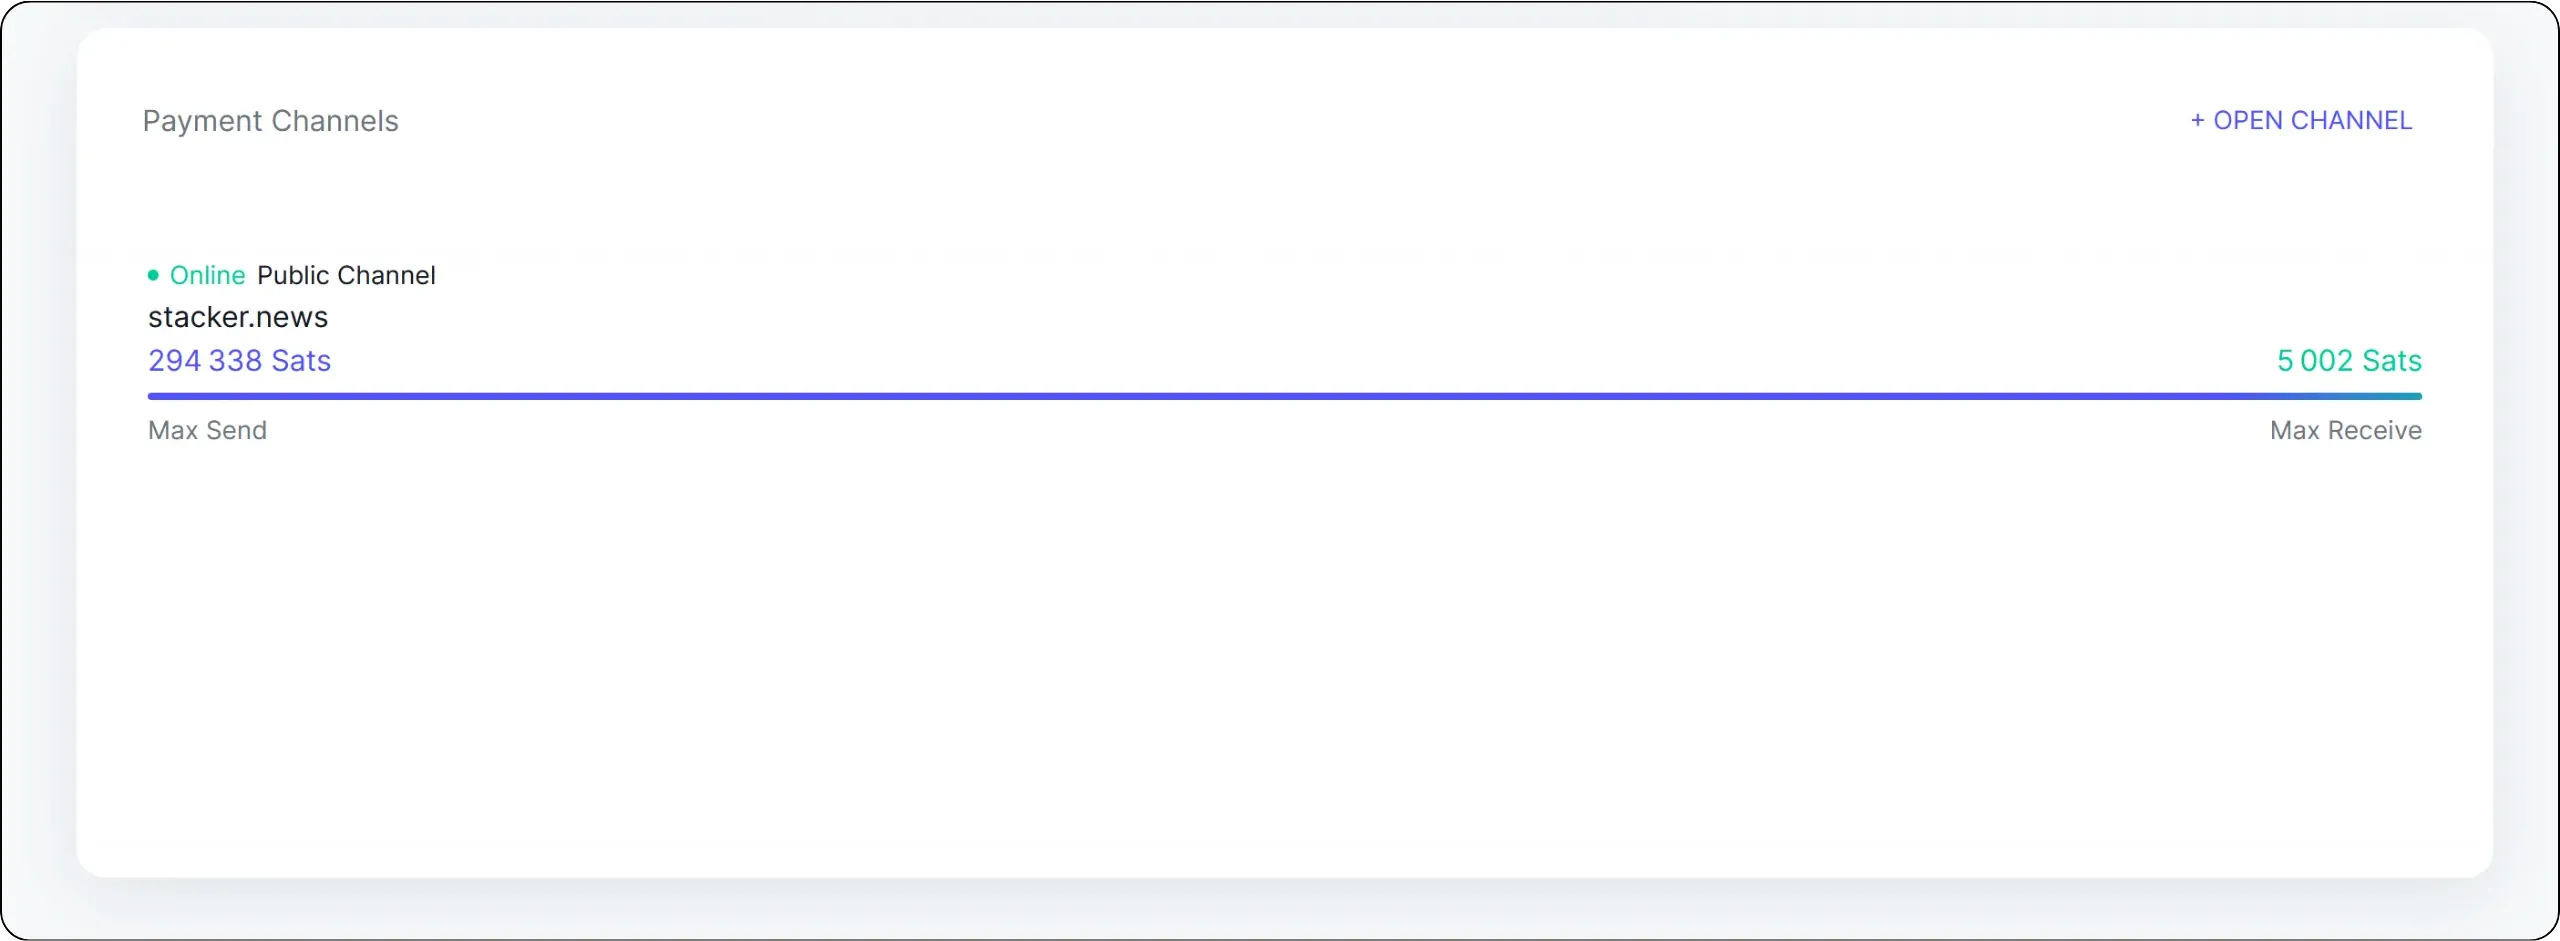
If we then look at the distribution of liquidity in the channel, we see that my peer now has 5,002 sats on his side. This corresponds to the 5,000 sats of the payment I just made, which he routed to the recipient's node. The additional 2 sats represent the routing fees I paid, since the recipient received exactly 5,000 sats.
To improve the reliability of our payments, it will obviously be necessary to open up other channels. Depending on our objectives, we'll also need to find a way of making inbound liquidity available so that we can receive payments on Lightning. This will be the subject of the next section.
# Managing your Lightning node
e27c3e1e-487b-4414-ad6b-d67bdb91c7c5
## Defining your node operator profile
d3b2e163-50f6-4d1d-a5fc-8fd177dfac76
Now that your Lightning node is up and running, the next step is to define your trader profile. This is an important choice, as it determines your channel opening strategy, the type of peers you prefer, and the way you manage liquidity.
On Lightning, for this to work, you need liquidity in the right direction. outbound liquidity corresponds to your ability to pay (sats available on your side of the channels). inbound liquidity corresponds to your capacity to receive (sats available on your peers' side). In other words, your profile boils down to a simple question: most of the time, are your sats leaving your node, or entering it?
### The consumer
This is the profile of the vast majority of users. You use your node to make Lightning payments: to buy goods and services, pay bills, send tips - in short, to use Lightning as a fast means of payment. On the other hand, you receive little from Lightning, or only marginally, for example a few donations, refunds between friends or a few micro-payments.
This profile is the easiest to manage, because your main need is to be able to pay. In practical terms, this means you need outbound liquidity. Once you've opened one or more correctly sized channels to stable, well-connected nodes, your outgoing payments will mechanically move liquidity to the other side of your channels. It's precisely this movement that naturally creates a reasonable amount of inbound liquidity. As a result, even if you're not looking to receive on a regular basis, you'll still be able to receive from time to time without implementing a complex strategy. So you don't need to worry about your inbound liquidity.
In this LNP202 course, we're going to focus on this "consumer" node operator profile, as it's the one that corresponds to almost all Bitcoin users on Lightning.
### The retailer
The merchant is, in a way, the opposite of the consumer. Here, the main objective is not to pay, but to collect. A business, service provider, online store or point of sale that accepts Lightning will receive many incoming payments, and make relatively few outgoing payments from this node.
This profile is more demanding, as a refused payment on Lightning potentially represents a lost sale. The priority therefore becomes inbound liquidity. If your node doesn't have enough inbound, your customers will see their payments fail, even if they have the funds, simply because there's no route to get the liquidity to you in the right direction.
The major challenge for the merchant also comes from the natural evolution of channels. If all you do is receive, your channels will gradually fill up on your side. So you need mechanisms to maintain and renew your inbound liquidity.
There is, however, a simpler case: the mixed consumer/merchant profile. If you collect on Lightning, but also spend on Lightning (business expenses, payments to suppliers, or even personal expenses), then your outgoing payments naturally recreate inbound. Management becomes smoother, as the flows offset each other, and you have less need to resort to artificial mechanisms designed solely to regain inbound liquidity.
### The router
The router is a specific profile. It doesn't use its Lightning node to pay or collect, but to route other people's payments and collect fees. The objective is to be a useful, reliable and economically competitive route within the Lightning graph.
To be honest with you, being a router on Lightning is a more complex business than it looks, and profitability is hard to achieve. First of all, opening and closing channels is expensive in onchain costs. To route efficiently, you often have to adjust your topology, test, close underperforming channels, open new ones, and regularly rebalance your liquidity. Secondly, competition is fierce: large, established nodes naturally capture a large share of traffic, and it's difficult to gain a foothold without tying up significant capital in well-sized channels.
There's also a high operational requirement. A routing node must be extremely stable, monitored, properly backed up, and rigorously managed. You have to monitor channel performance, adapt your fee policy, maintain balanced liquidity, manage peers, and quickly resolve technical problems. This level of involvement can be interesting as a technical hobby or as a contribution to the infrastructure, but if your goal is simply to use Lightning in a sovereign way, getting into routing to make money is rarely relevant. That's why this LNP202 course doesn't cover this profile in depth.
### Clearly situate yourself before going any further
If you fit the consumer profile, your priority will be to be able to pay reliably with simple management. If you're a merchant, your priority will be to cash without failure, which implies an inbound liquidity acquisition strategy. If you're considering routing, you need to approach it as a demanding, economically uncertain and time-consuming activity.
Defining this profile now will help you avoid a classic pitfall: applying a channel strategy designed for a merchant or router, when you're simply a user who wants to pay.
## Using a Lightning node manager
02eb4c09-d14b-4ff0-8b04-b90de3307d34
In the previous part of this LNP202 training course, we used the basic interface of the `Lightning Node` application on Umbrel. This interface is sufficient for essential operations (checking balances, viewing cash distribution, opening and closing channels), but it is deliberately very simplified. This simplicity limits the options available and does not give access to many of the advanced features of your LND node. For this reason, we will now use another, more comprehensive Lightning node management software.
This additional software will simply be a complementary management interface for your node. This means you can continue to use the `Lightning Node` interface in parallel, and even use several different ones if you wish. These are simply different ways of interacting with the same Lightning node.
Among the best-known software programs are:
- [Alby Hub](https://albyhub.com/);
- [Ride The Lightning](https://www.ridethelightning.info/);
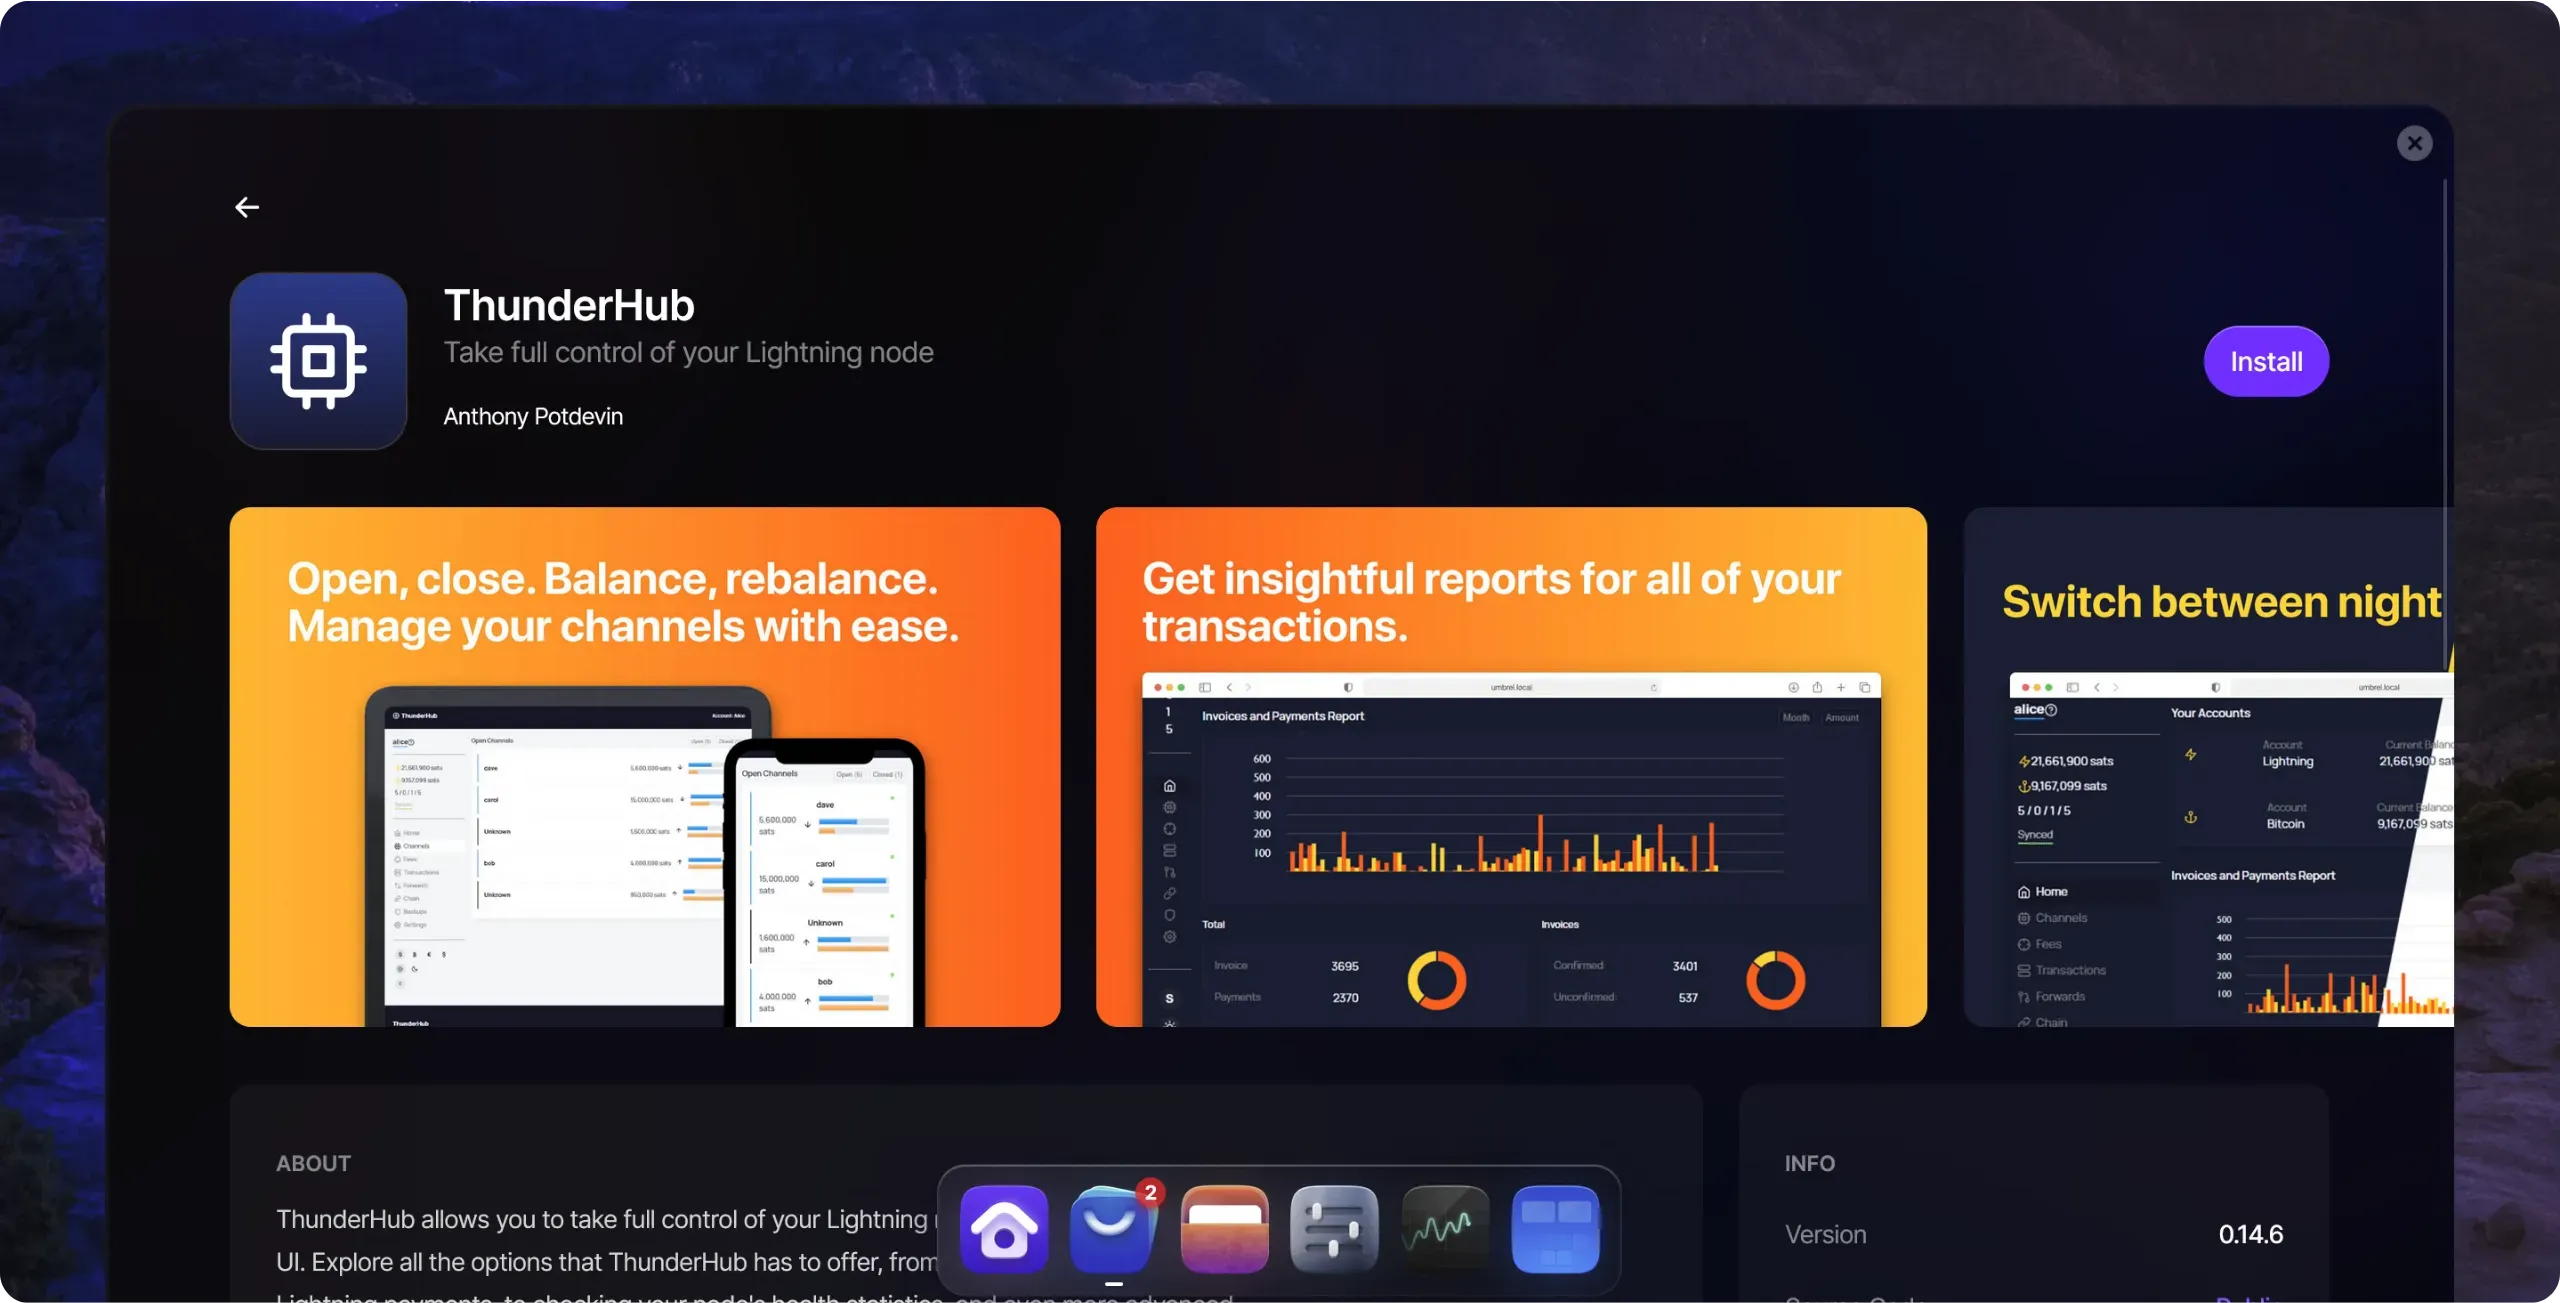
- [ThunderHub](https://thunderhub.io/).
All three are good solutions. If you wish, you can test all three with your node before choosing the one that suits you best. Personally, I use ThunderHub out of habit and because it seems more complete than the others. This is the tool I'll be presenting in this training course, but you can also choose one of the other two alternatives. We have a dedicated tutorial for each of these programs on Plan ₿ Academy.
https://planb.academy/tutorials/node/lightning-network/thunderhub-16909a39-2484-408e-a118-4e34e249bb9a
https://planb.academy/tutorials/node/lightning-network/ride-the-lightning-ca007688-0653-490c-8349-81d330d744b5
https://planb.academy/tutorials/node/lightning-network/alby-hub-62e6356c-6a6d-4134-8f22-c3b6afb9882a
### Install ThunderHub
These programs can all be installed very easily from the Umbrel App Store. As I said, we're going to use ThunderHub here, but if you'd like to test another one later, the procedure will be similar.
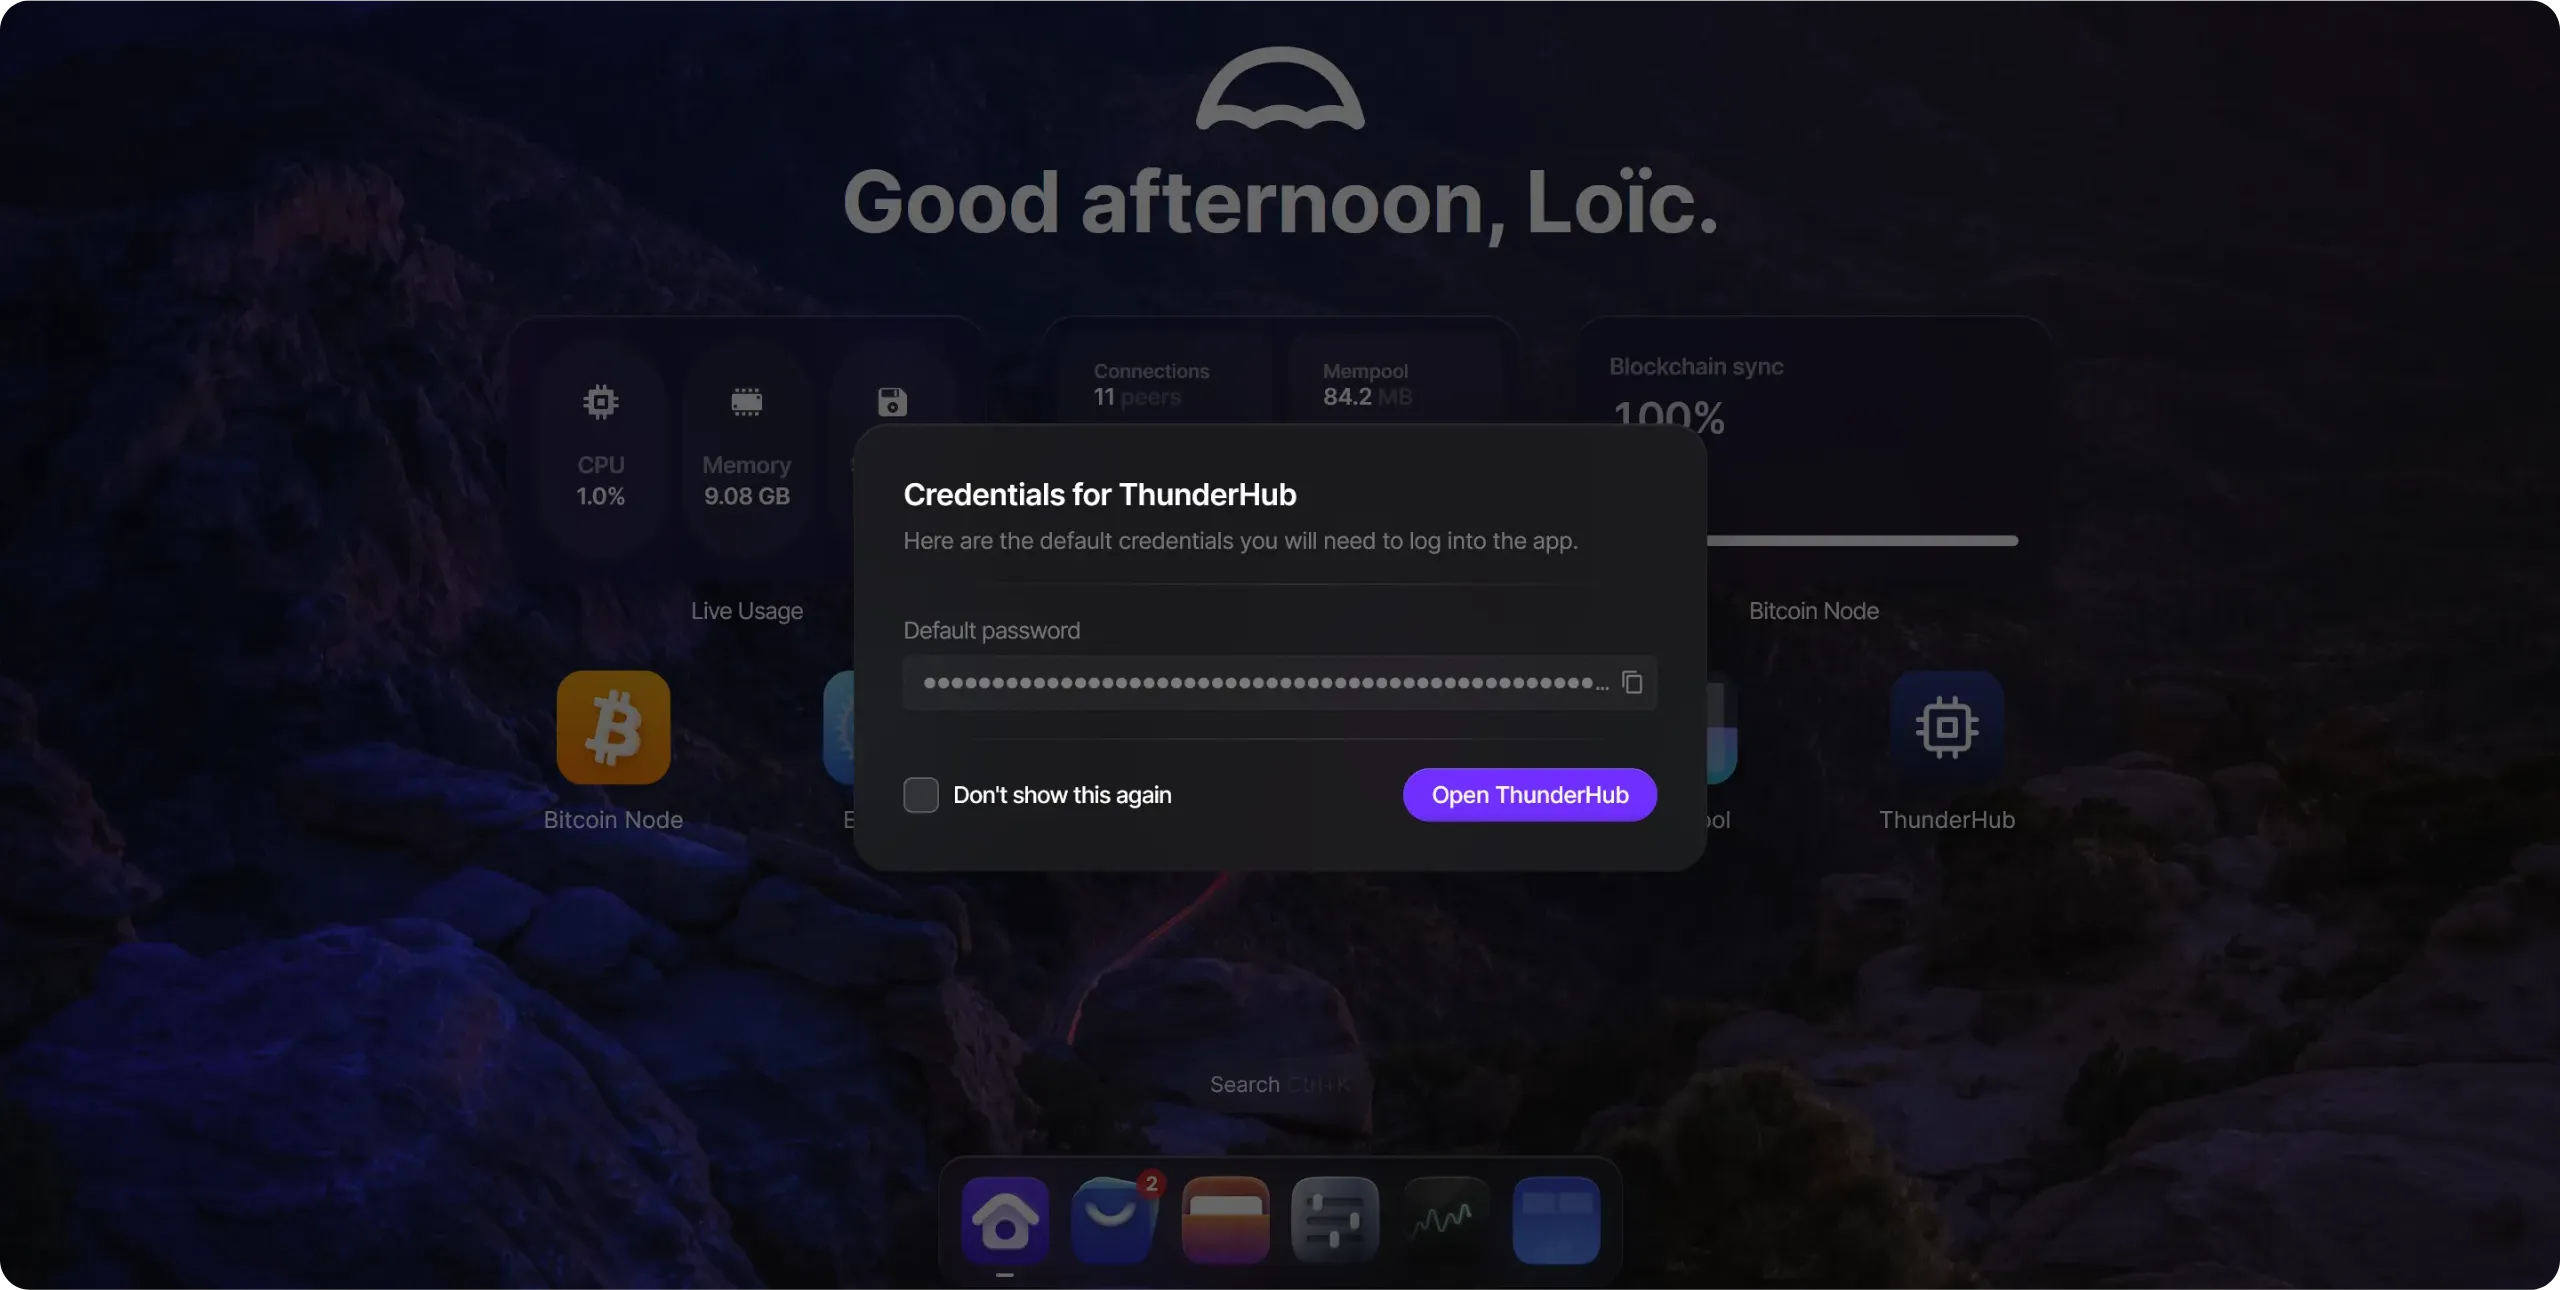
Umbrel provides you with a default password to access ThunderHub. Copy it: you'll need it right away. Remember also to save it in your password manager, as you'll be asked for it every time you open the software.
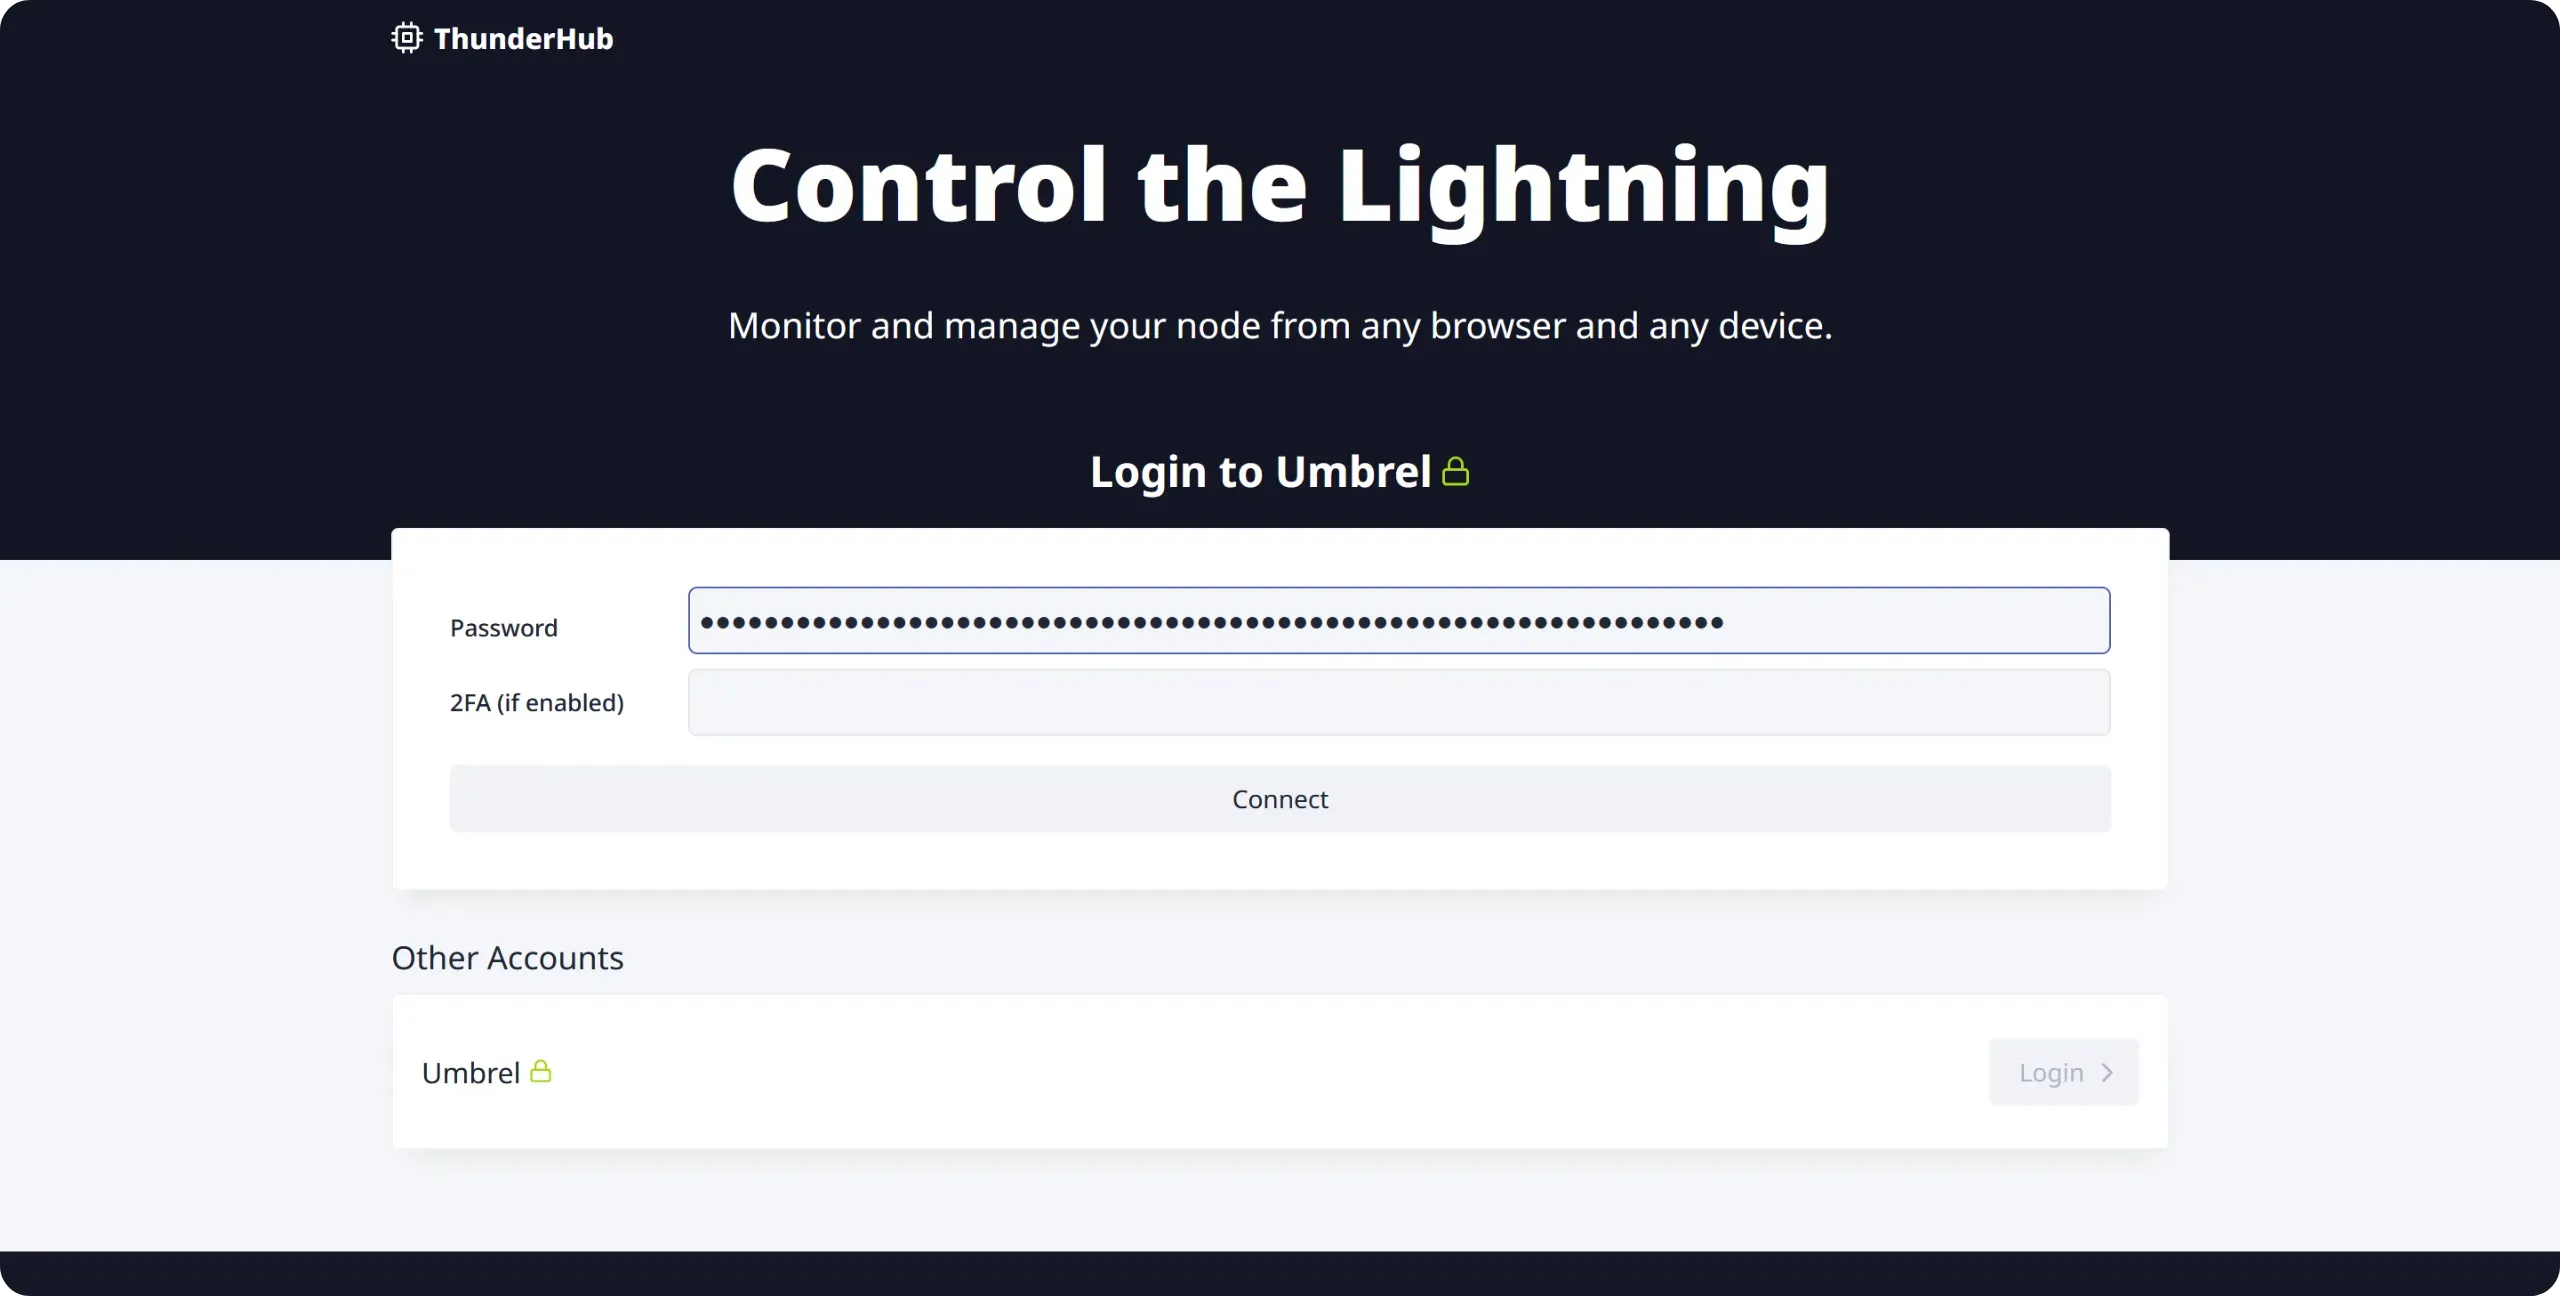
Click on `Login`, then paste the password supplied by Umbrel to log in.
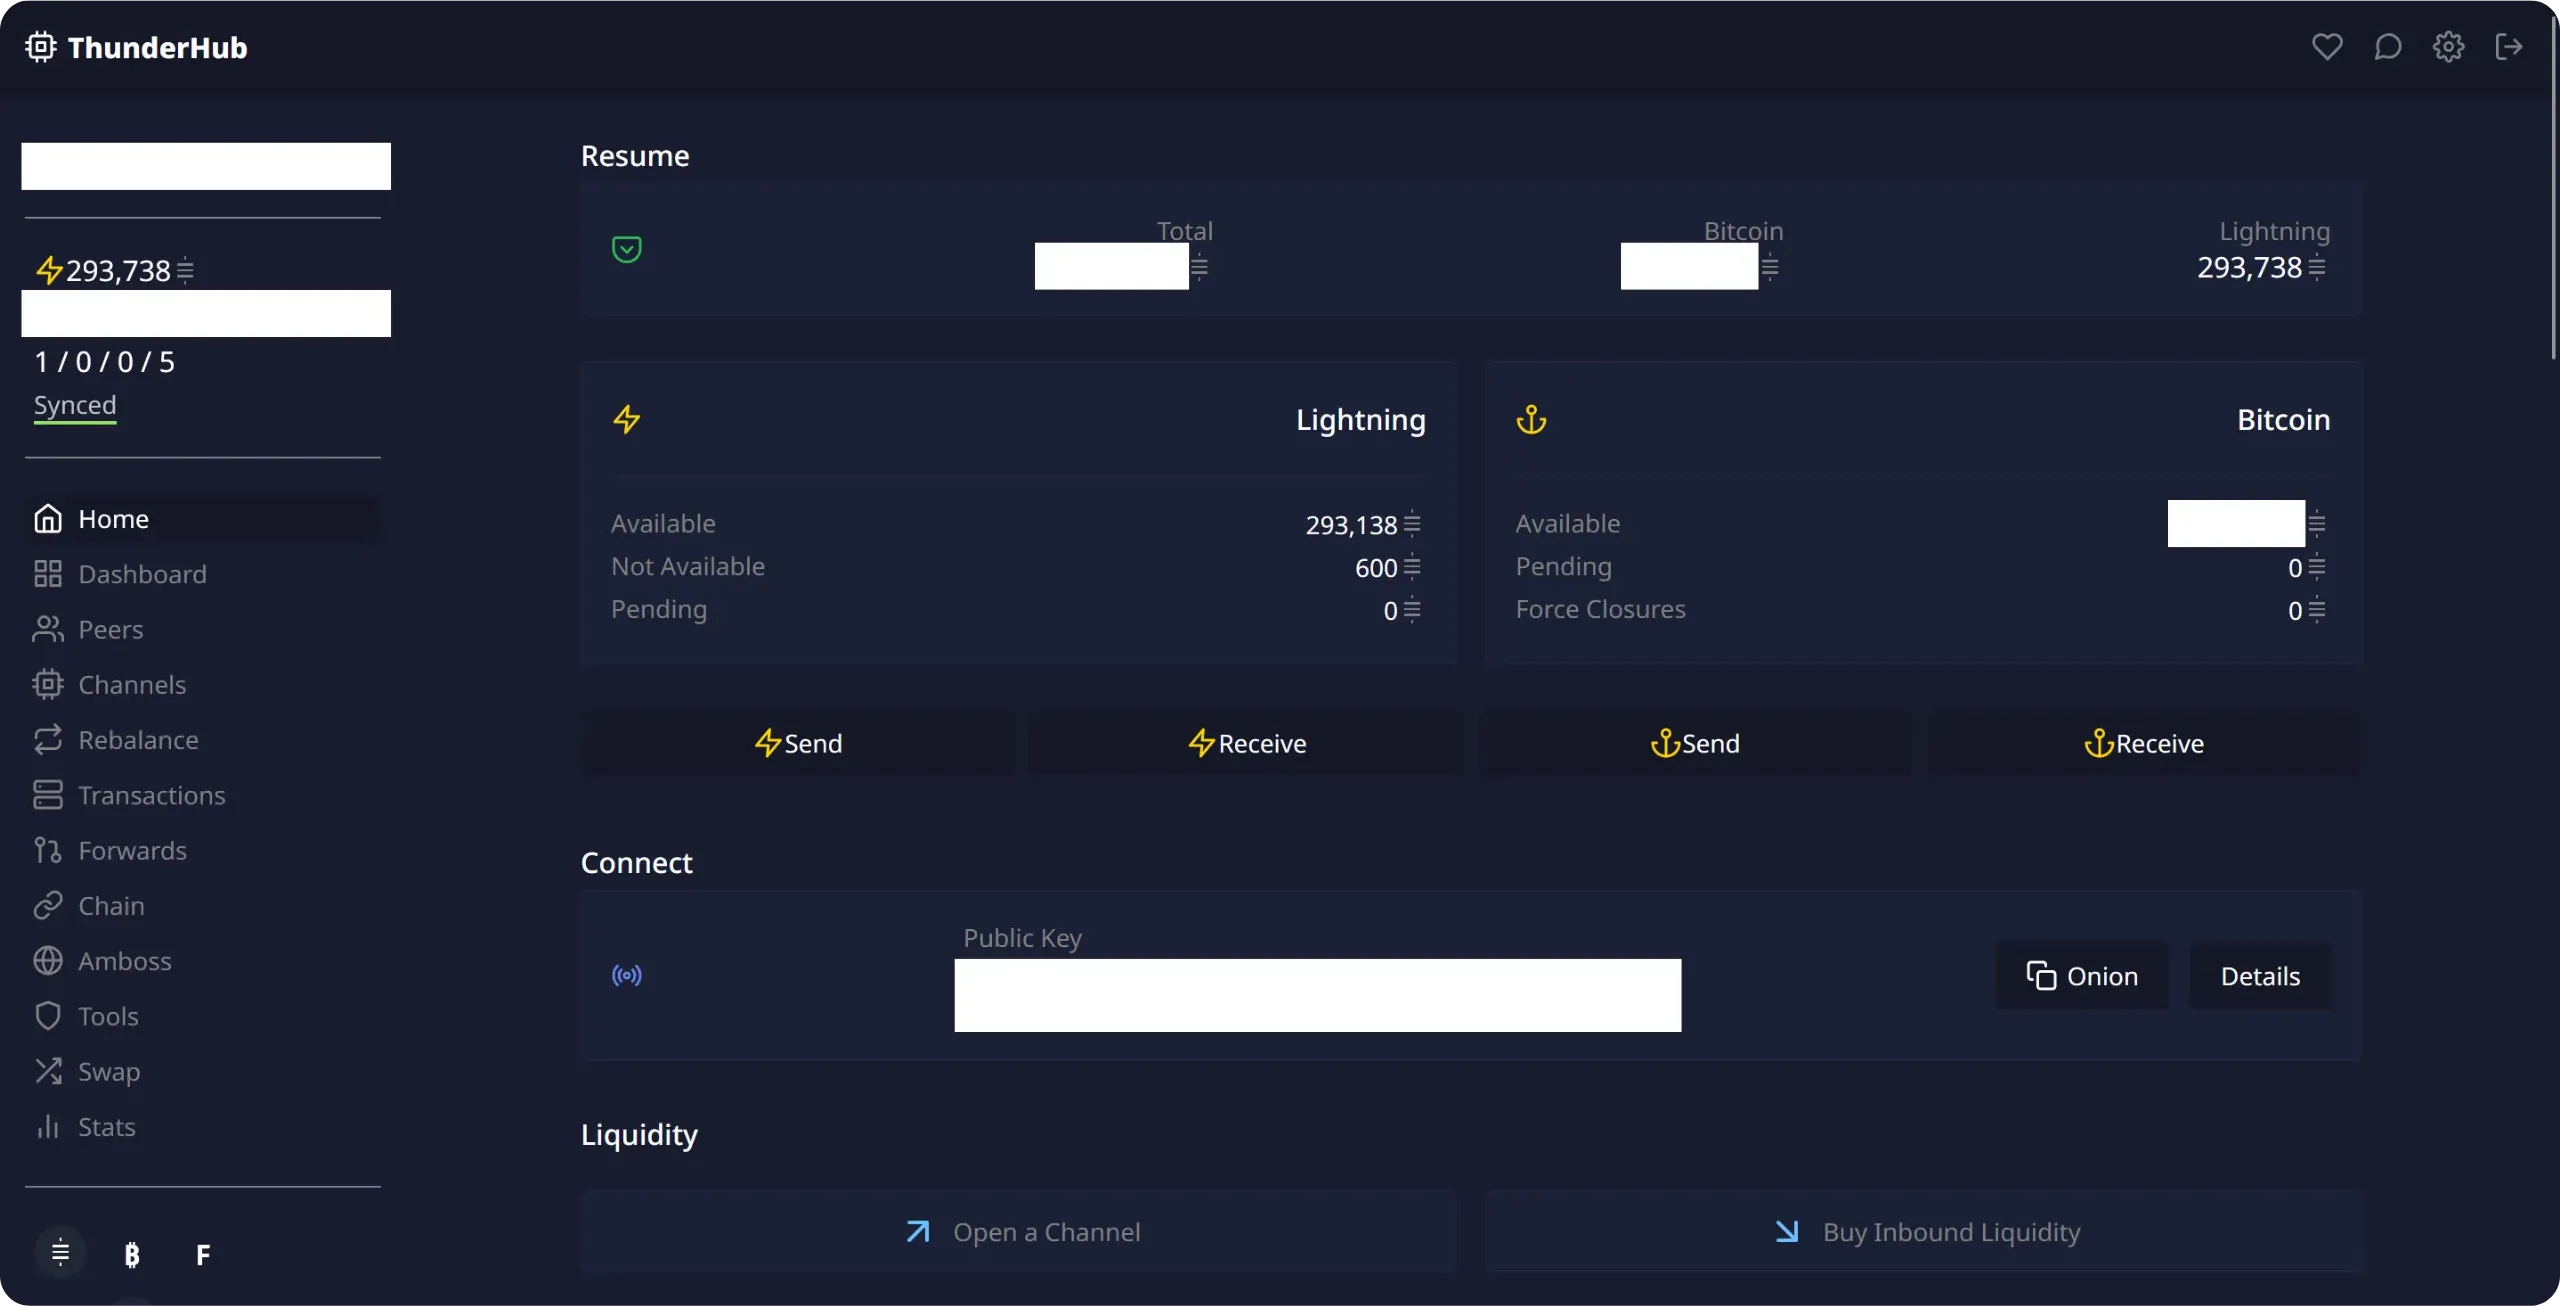
You will then be taken to the ThunderHub home page, which displays the main information about your Lightning node.
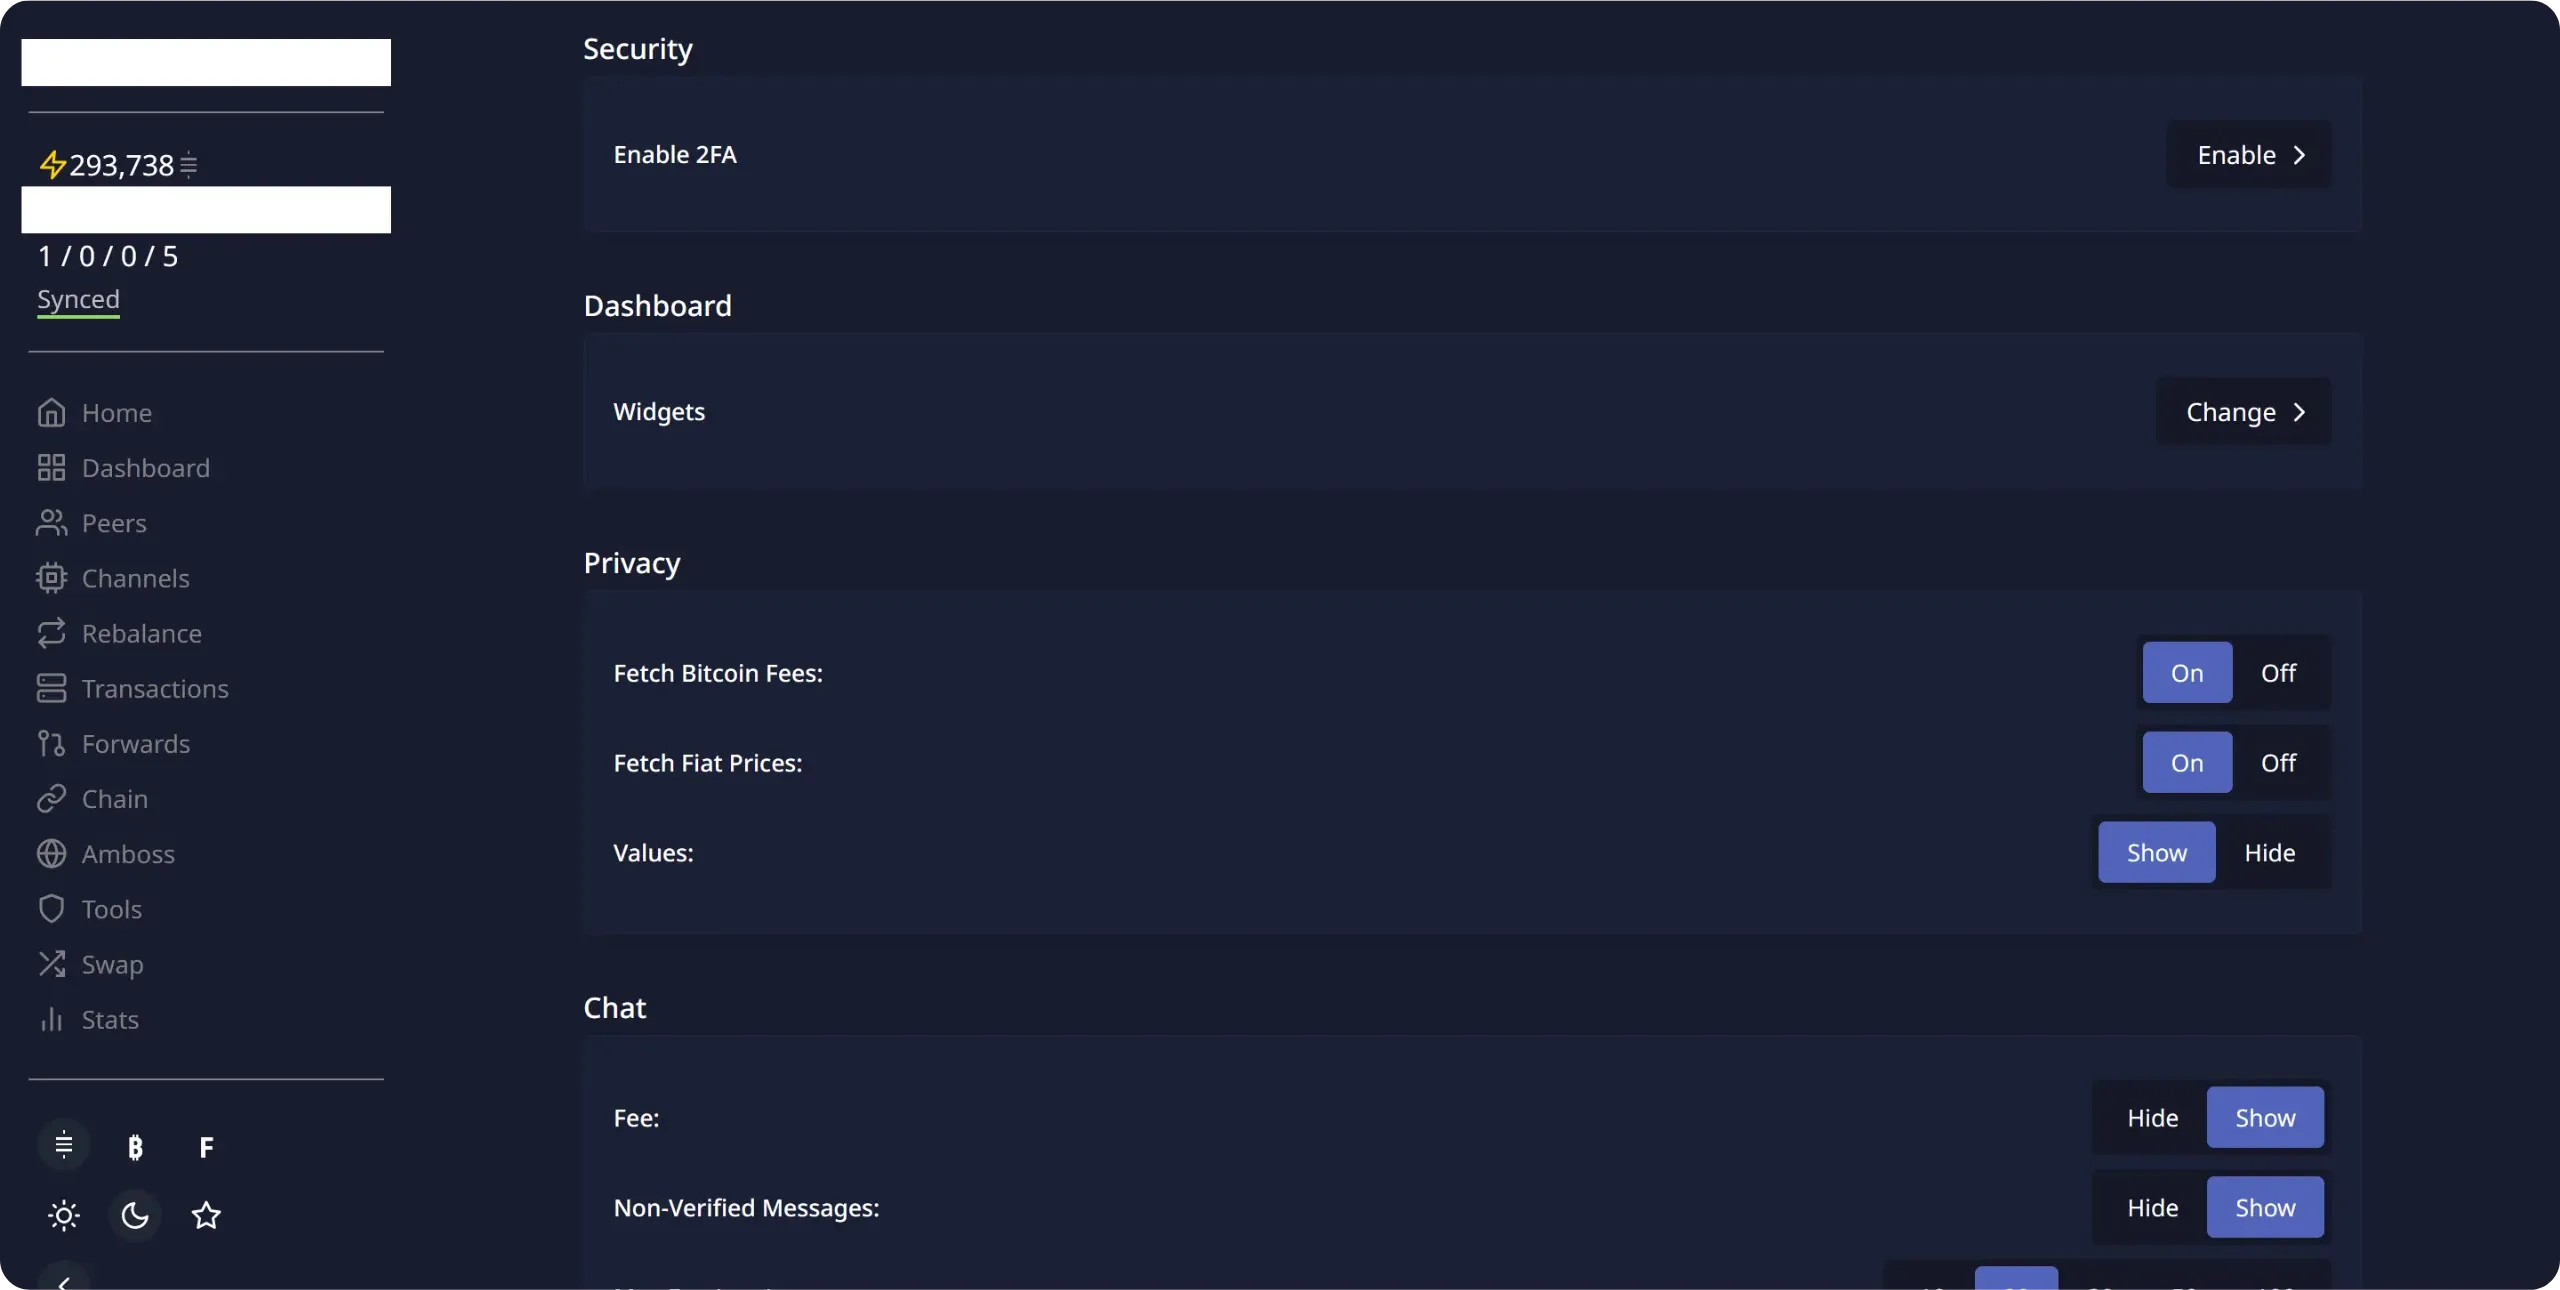
To begin with, I recommend that you activate two-factor authentication (2FA). In the settings, simply click on `Enable` next to `Enable 2FA`, then follow the usual process.
### Use ThunderHub
ThunderHub is relatively easy to learn. All menus are accessible from the left-hand column of the interface. To summarize, here's what each one does:
- home: node overview, balances and quick actions;
- dashboard: customizable dashboard with widgets and metrics;
- peers: view and manage connections to other Lightning nodes;
- channels': complete channel management (liquidity, fees, closure, etc.);
- rebalance": a tool for rebalancing channels via circular payments;
- transactions: history of Lightning payments sent and received;
- forwards`: routing statistics and costs generated by your node;
- `Chain`: Bitcoin onchain wallet (UTXOs and transactions);
- gW-201 integration for monitoring and backup;
- `Tools`: advanced tools (backups, reports, macaroons, signatures, etc.);
- swap: Lightning/onchain swaps via Boltz;
- `Stats`: overall statistics and performance of your Lightning node.
With this set of functions, you have all the tools you need to manage your Lightning node efficiently. It's not essential to master every option in detail right away: we'll be exploring them progressively throughout this course. However, if you'd like to get to grips with the software in greater depth, take a look at our ThunderHub tutorial:
https://planb.academy/tutorials/node/lightning-network/thunderhub-16909a39-2484-408e-a118-4e34e249bb9a
The menu we're most interested in here is `Channels`. It offers a detailed view of all the channels in your node, with their liquidity distribution. In particular, you can see which channels are open in `Open`, which are waiting to be opened or closed in `Pending`, and which are already closed in `Closed`.
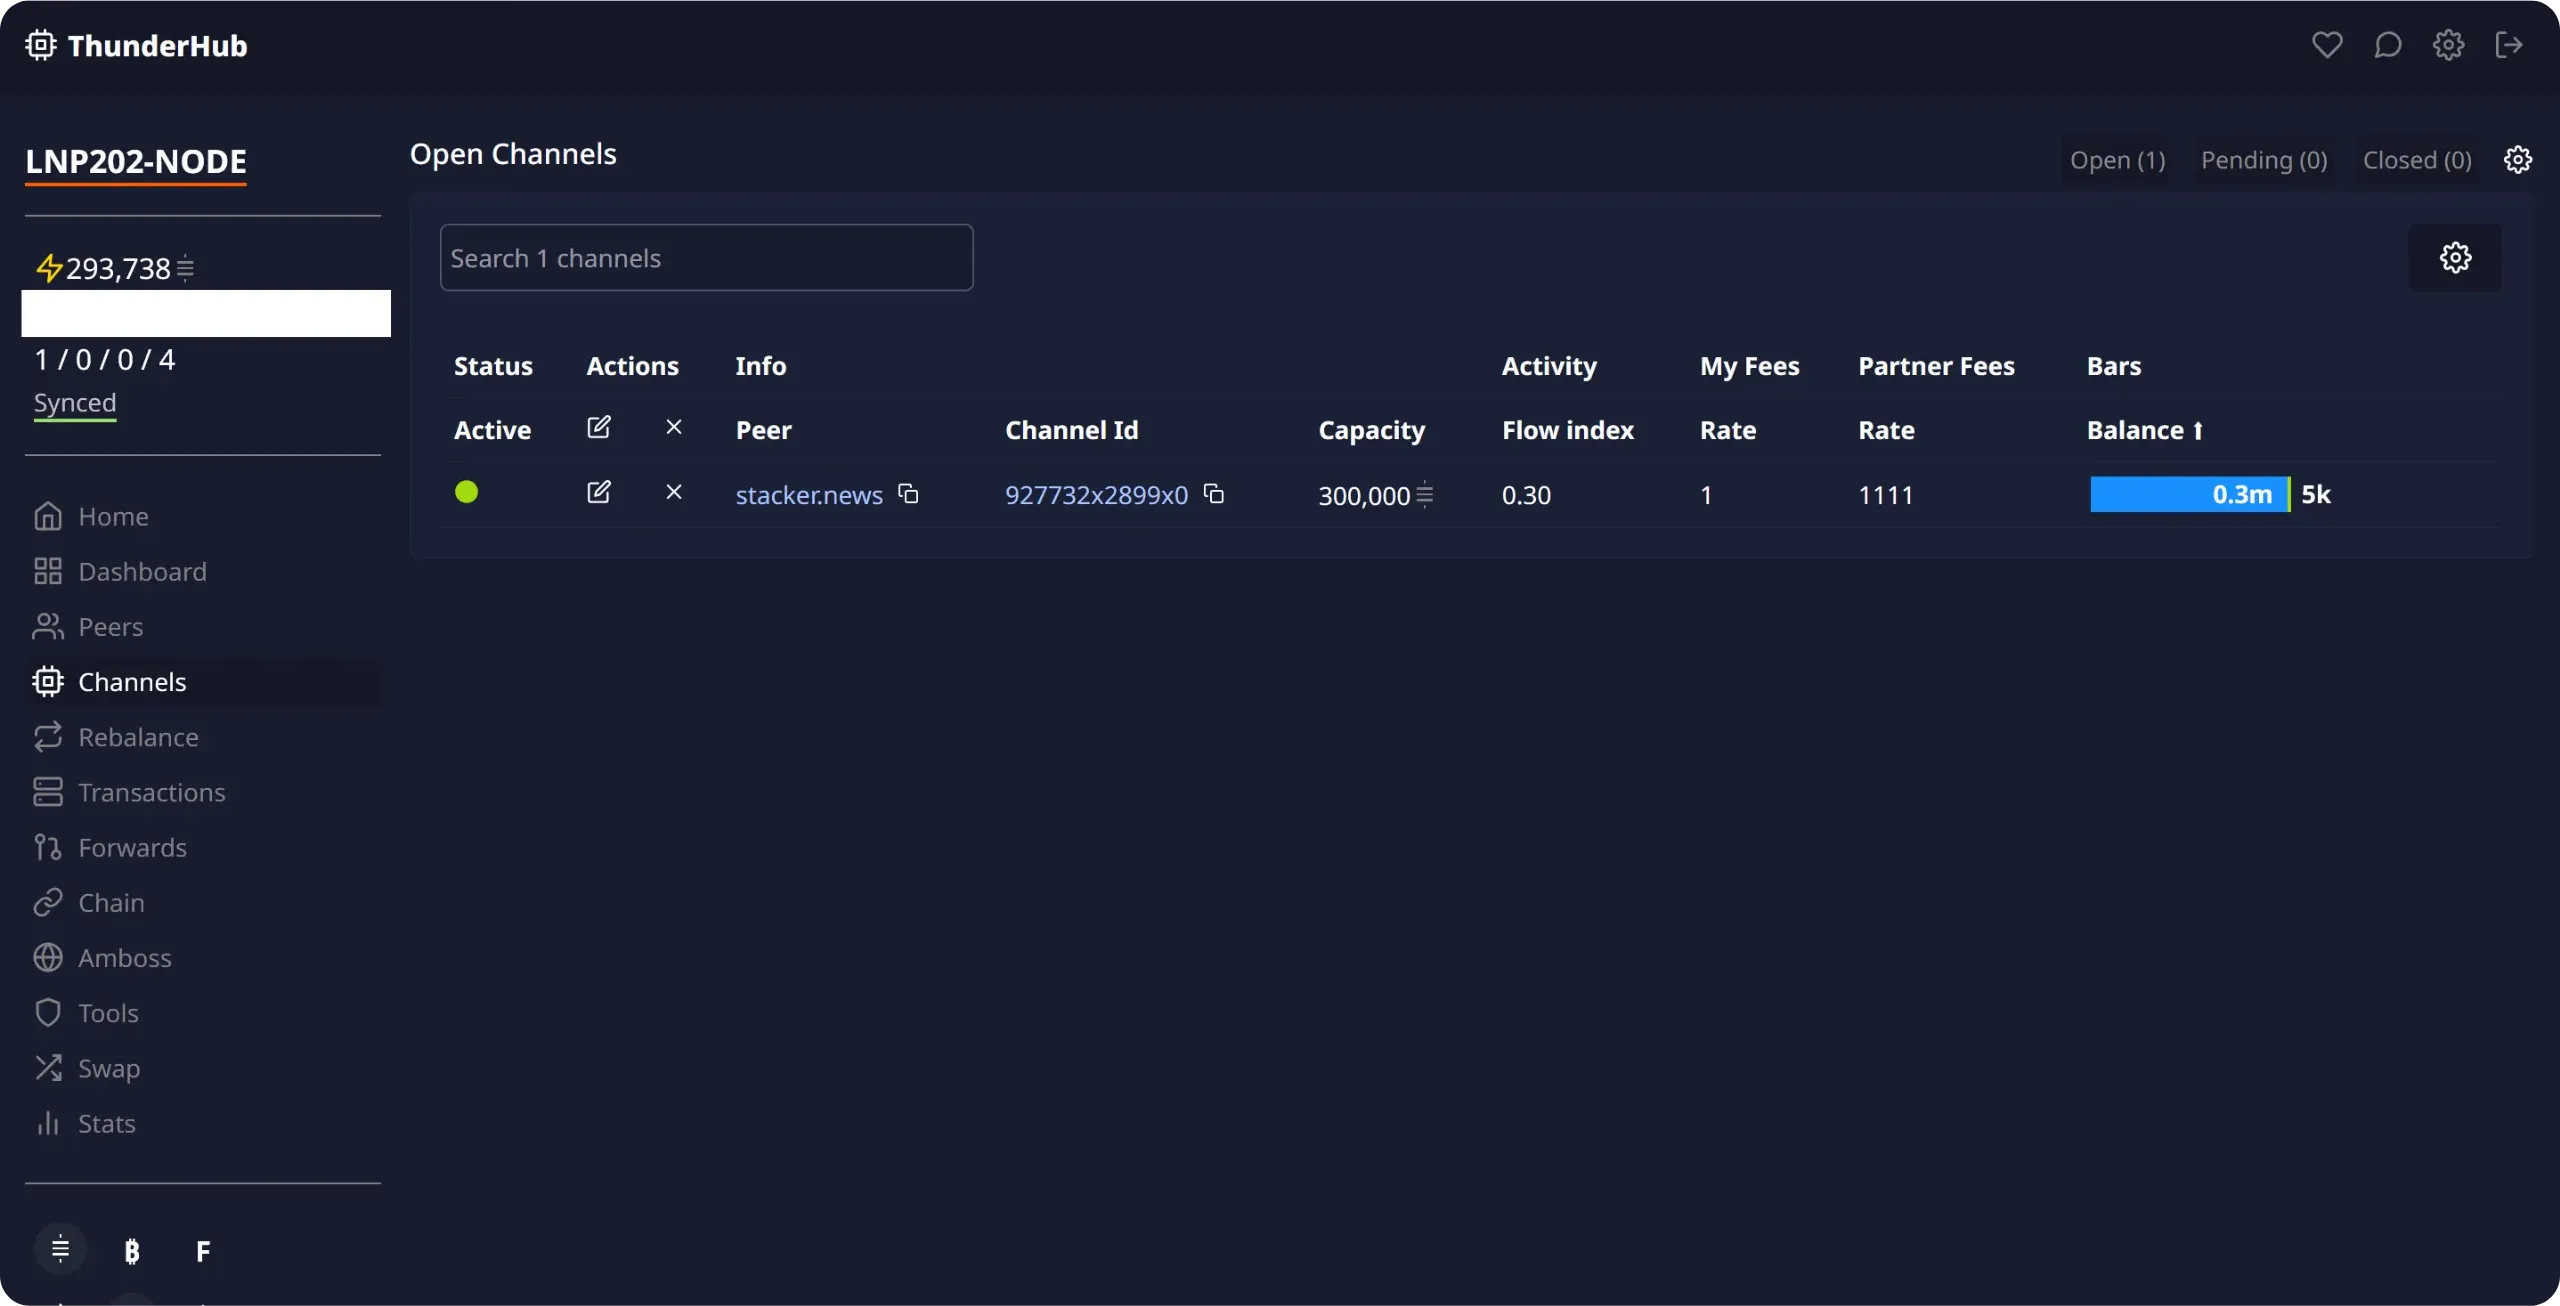
For a given channel, you can click on the peer's name or channel ID to open its Amboss page and get more information. You can also click on the pencil icon to modify the channel's parameters, including the fee policy applied to that channel if your node routes payments to your peer's node.
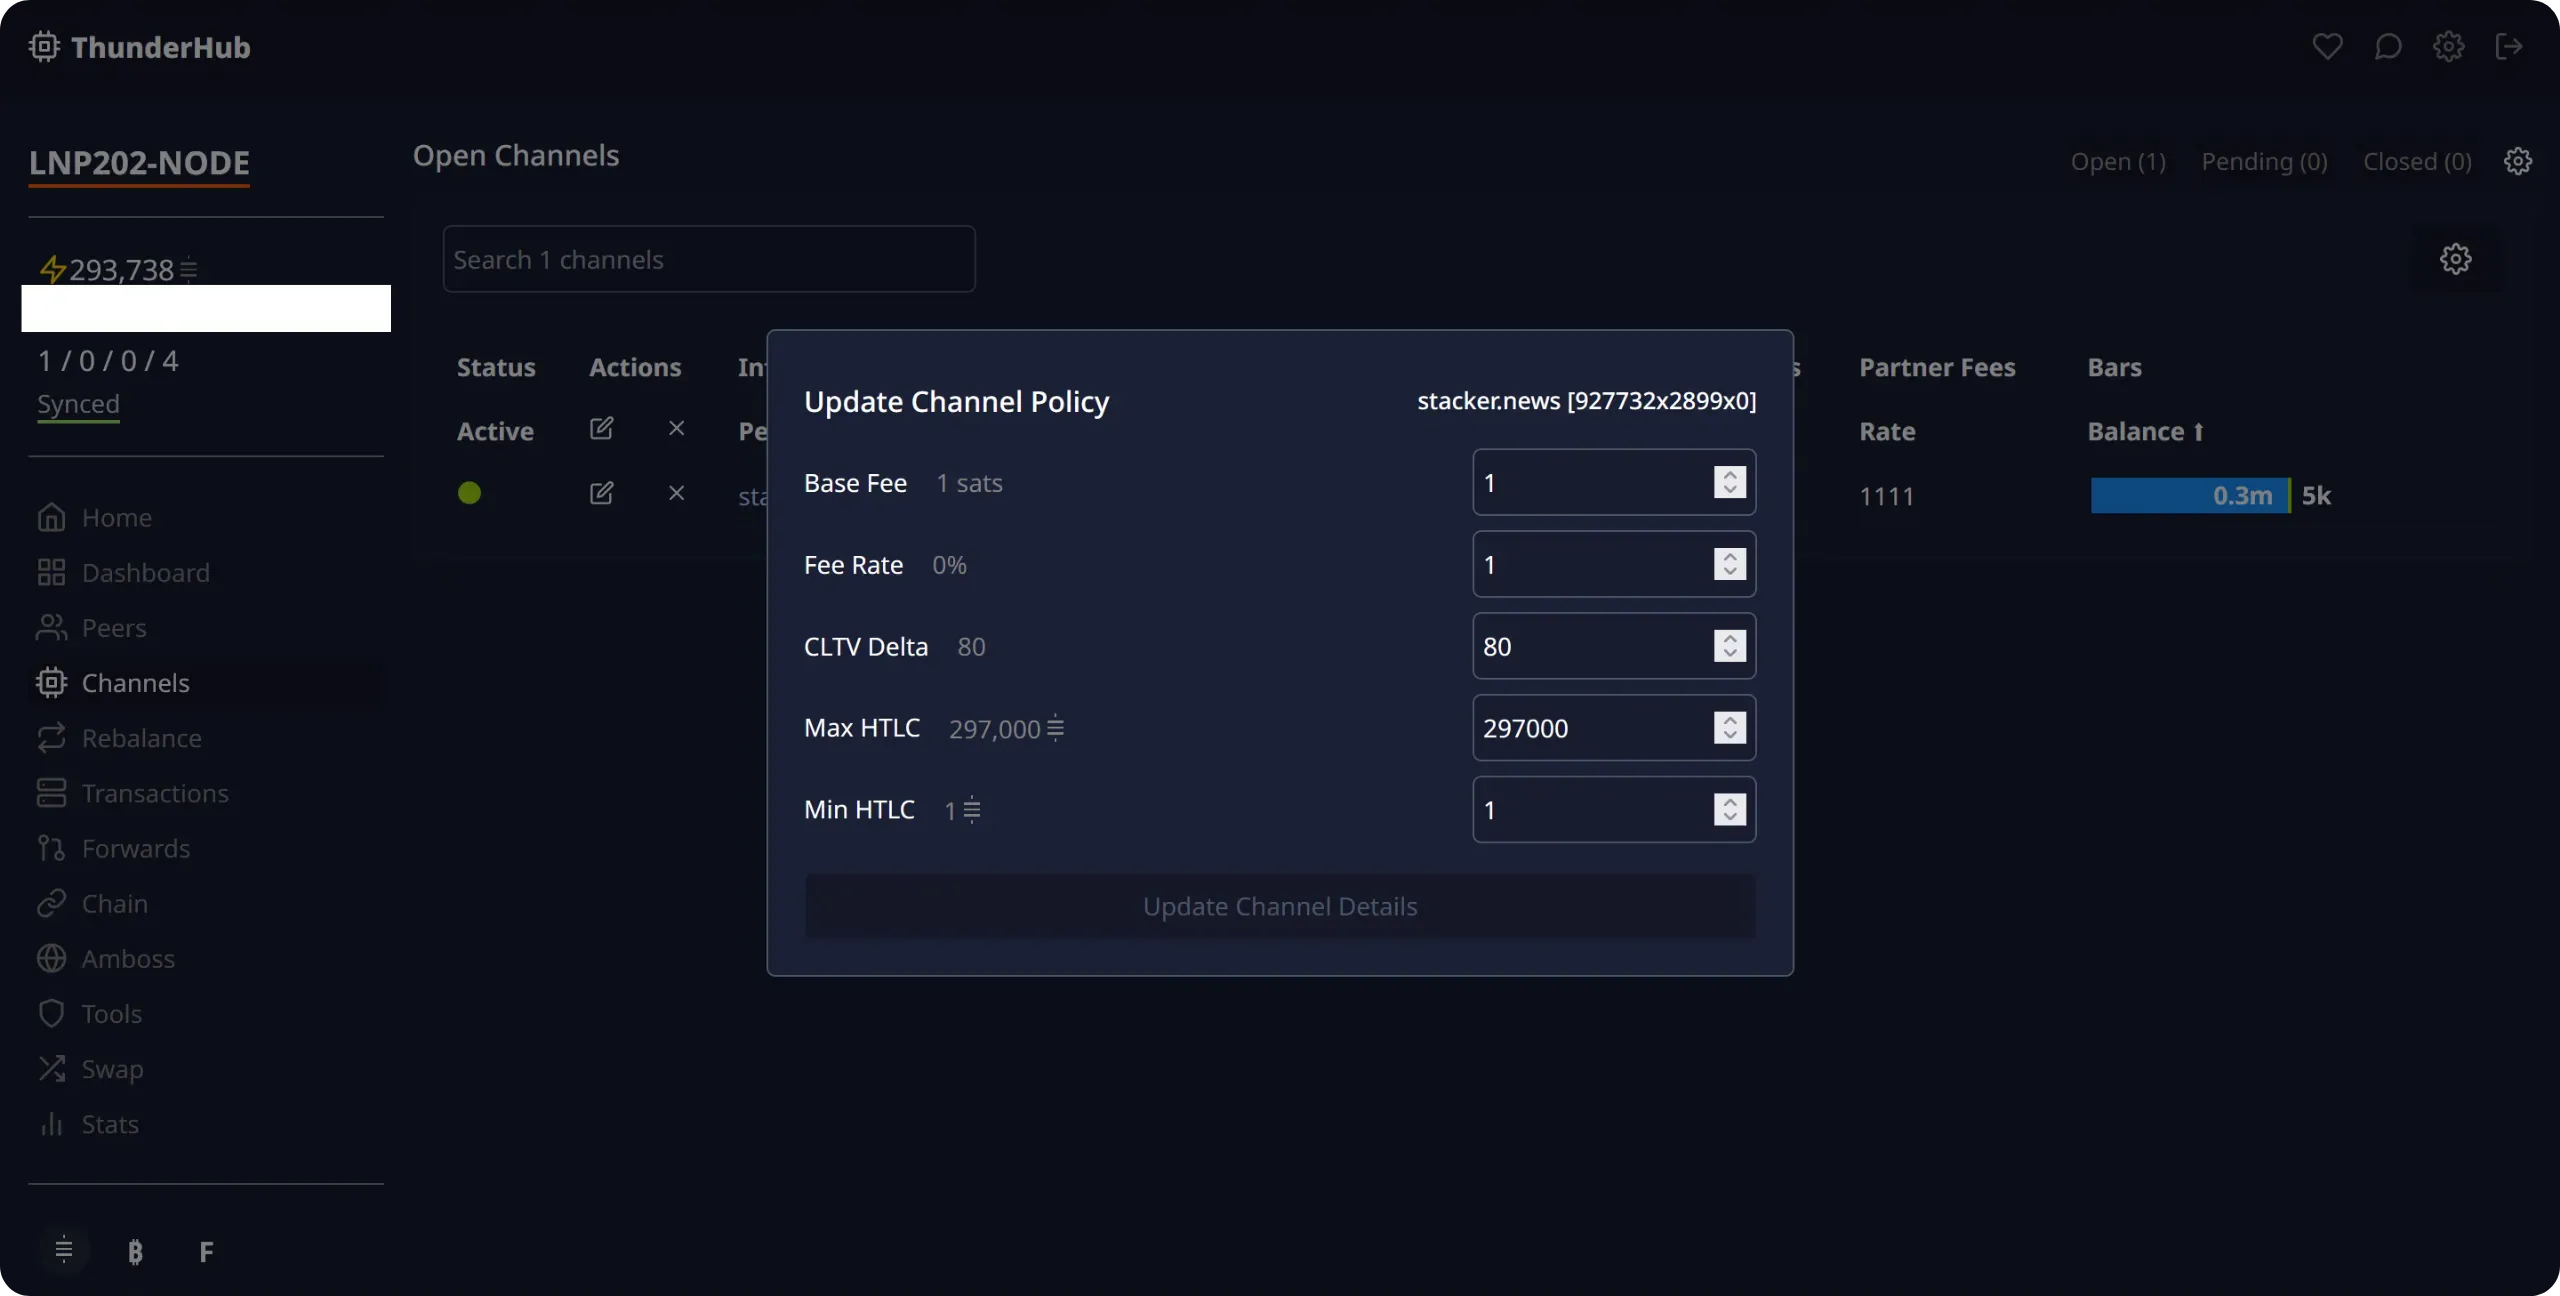
If you're using your Lightning node mainly as a "consumer", you don't need to change these charges: you can keep the default values. On the other hand, if you'd like to better understand how routing charges work on Lightning, I recommend LNP 201 training, and in particular chapter 4.1:
https://planb.academy/courses/34bd43ef-6683-4a5c-b239-7cb1e40a4aeb
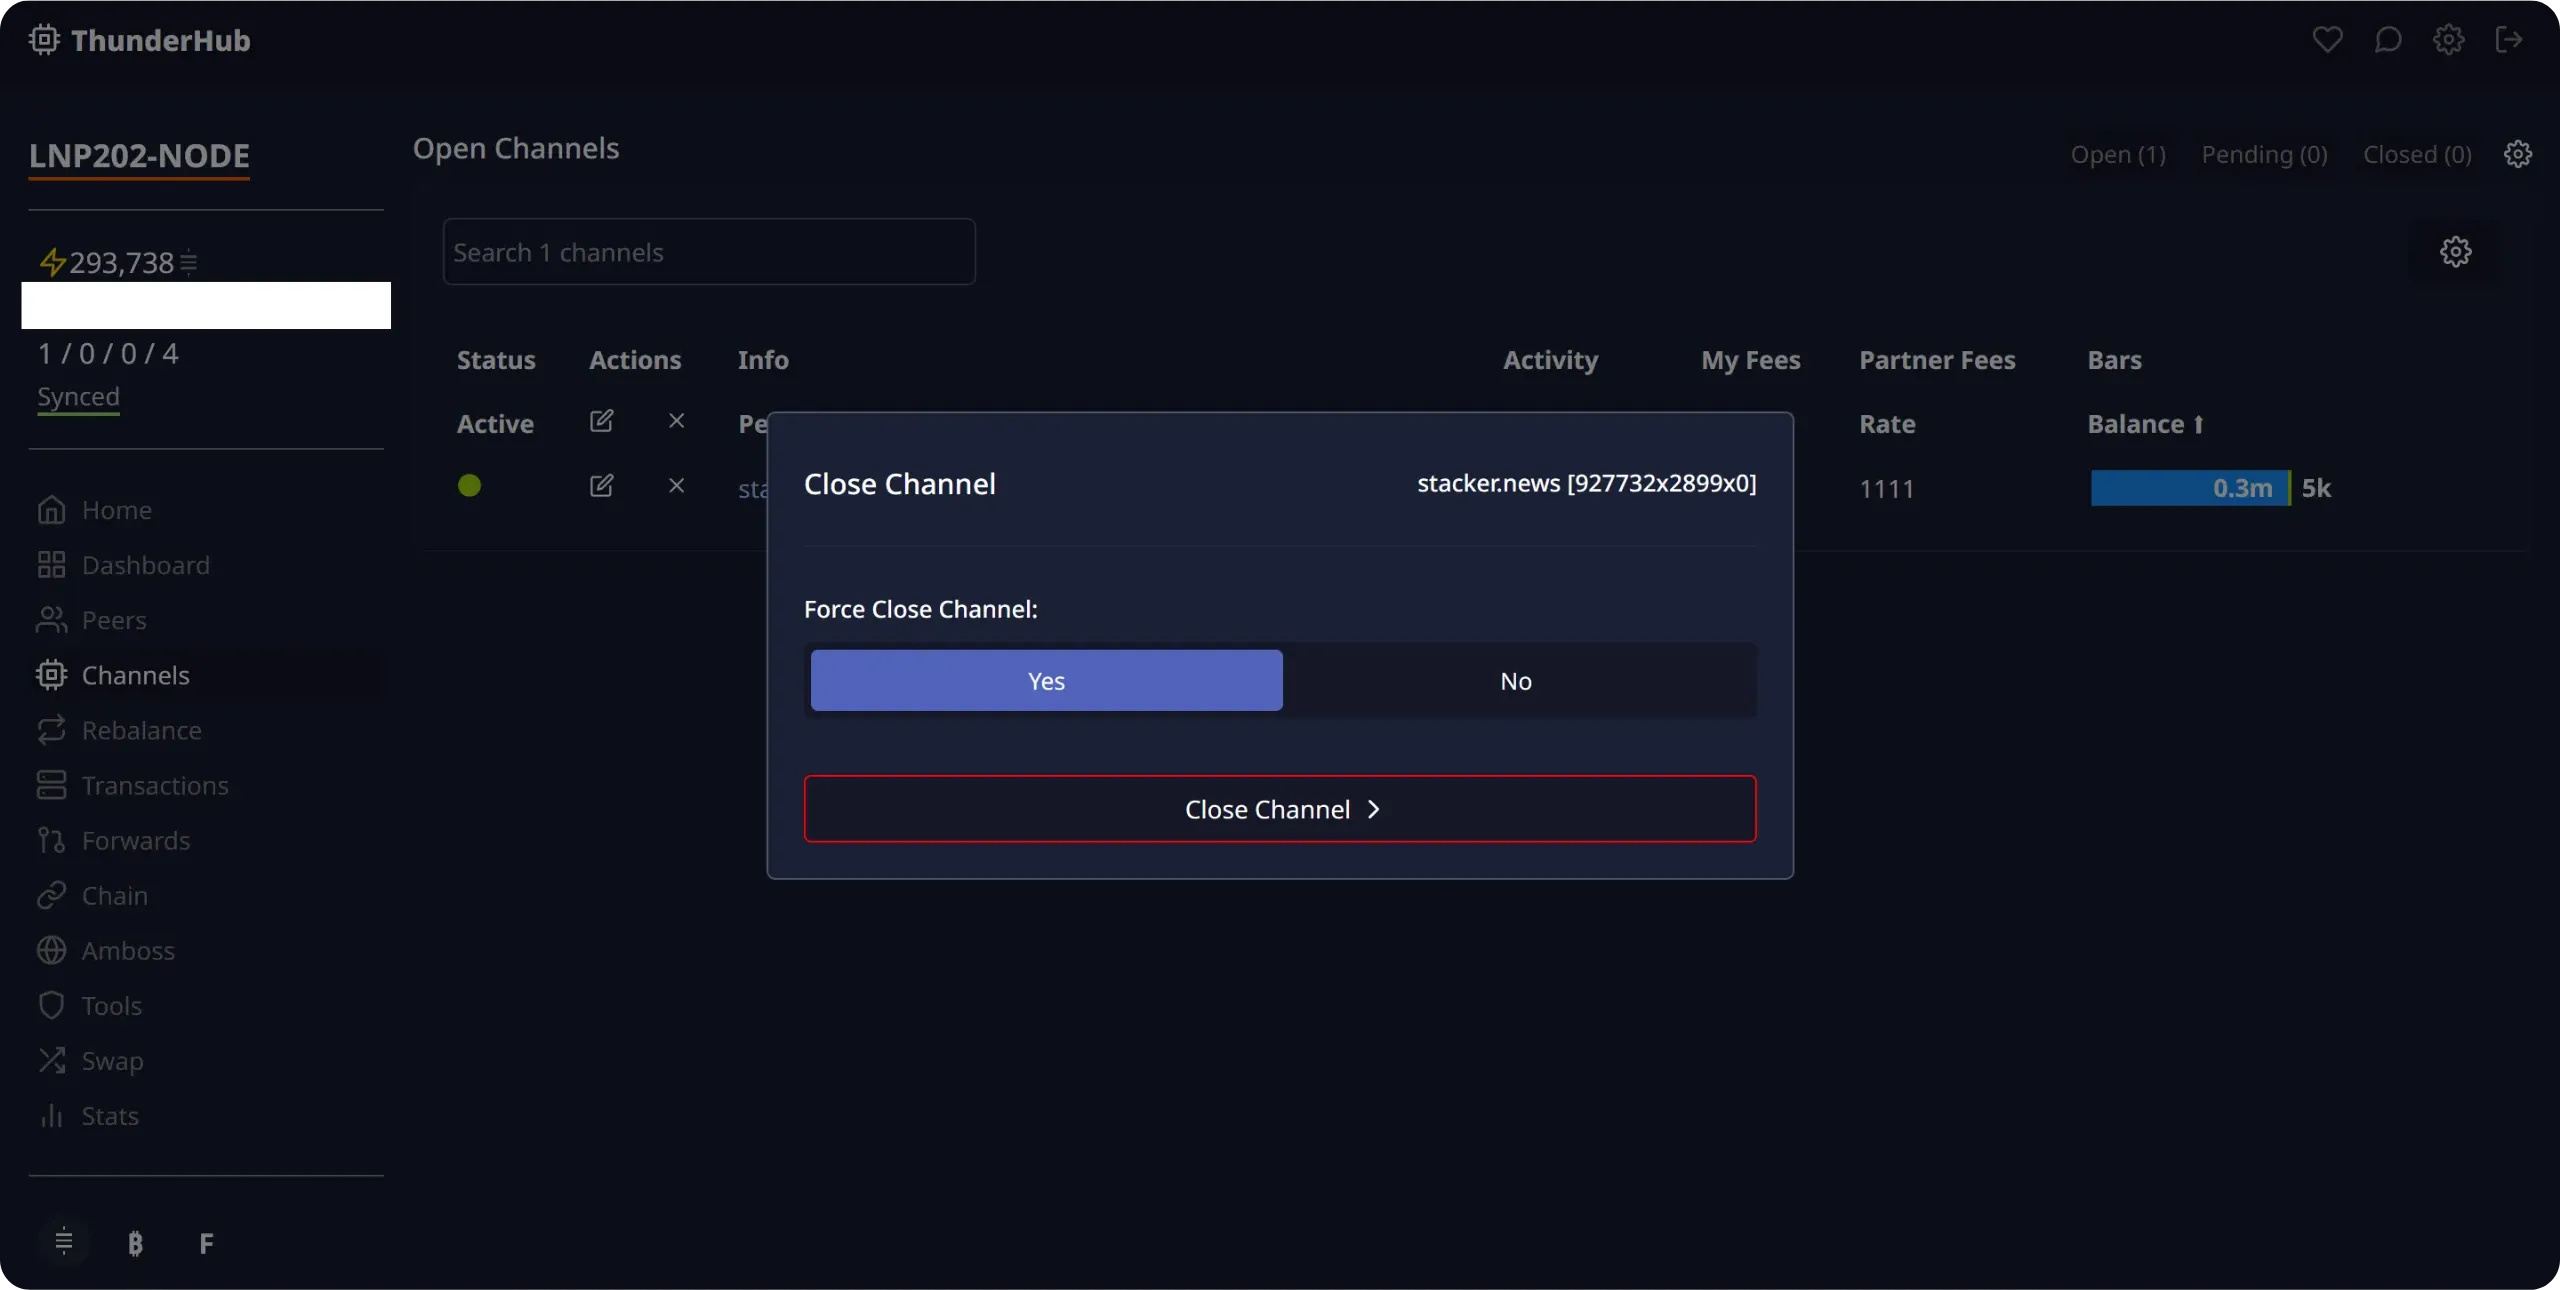
By clicking on the small cross next to a peer, you can initiate the closing of a channel. If you notice, for example, that a peer is regularly inactive, it may be appropriate to close this channel in order to reallocate your capital to a more reliable peer.
You then have two options. The first, and always preferable, is cooperative closure. By confirming this action, your node asks your peer to close the channel jointly. If he accepts, you can broadcast the onchain closing transaction and recover your share of the funds. The advantages of this method are that you choose the onchain fees for the transaction, thus avoiding unnecessary costs, and that the funds are recovered more quickly, without any timelock.
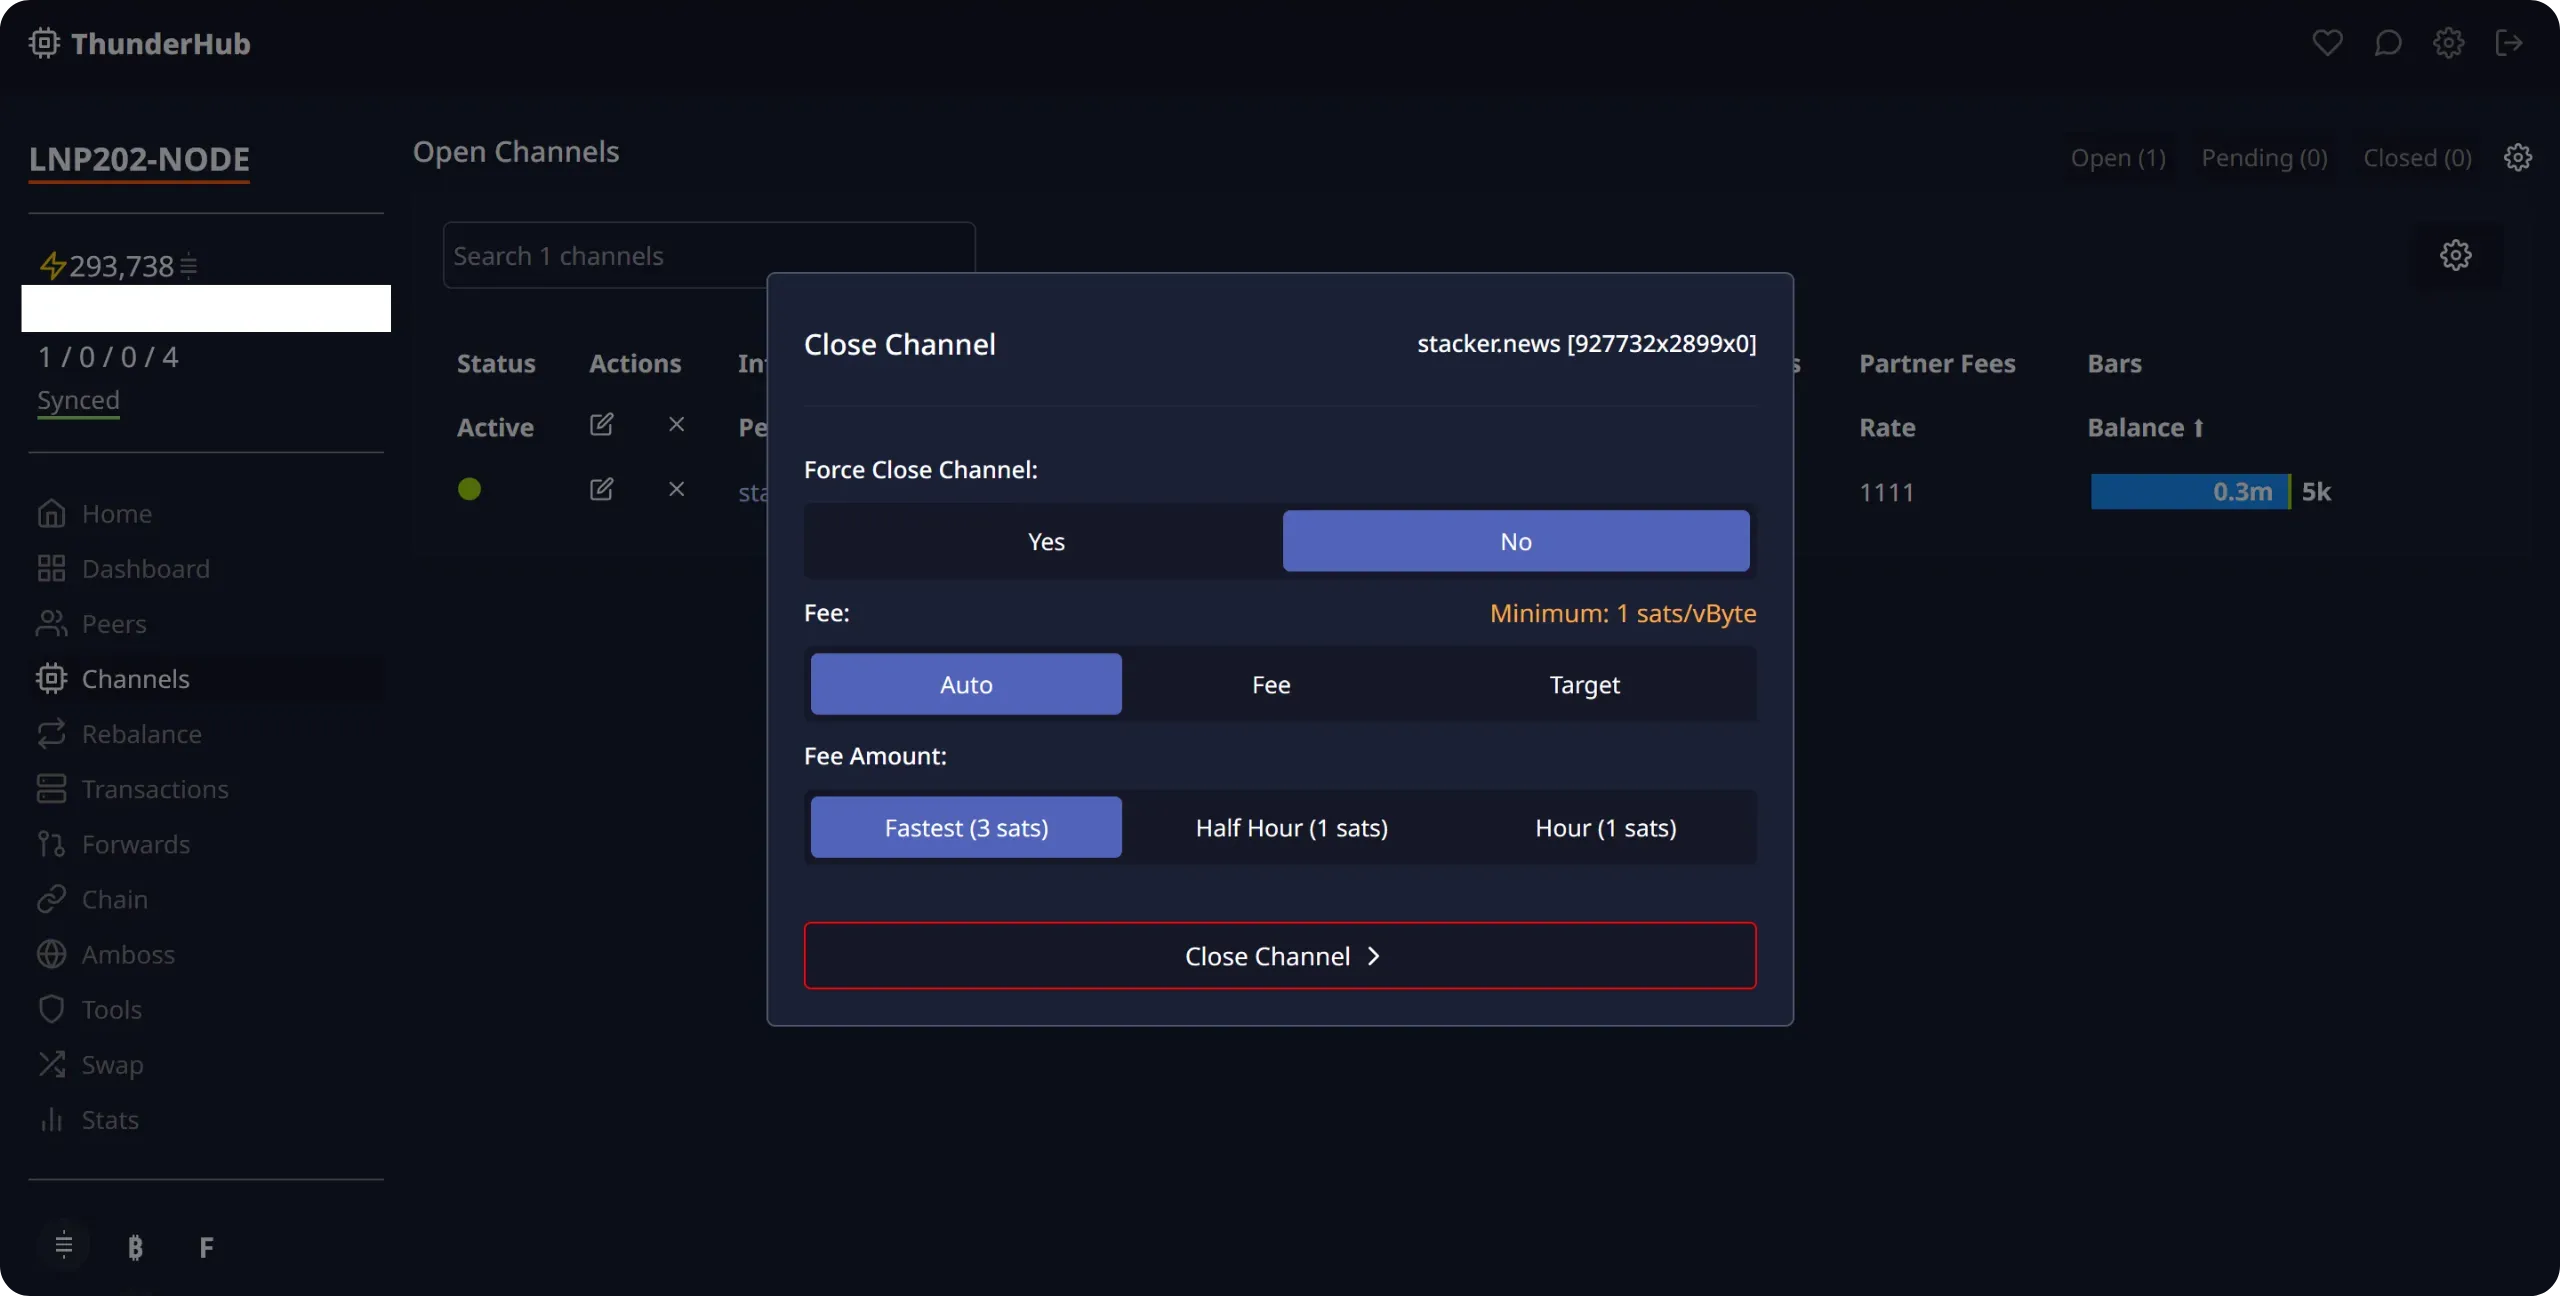
The second option is forced closure. In this case, you don't ask for the peer's agreement and directly broadcast the last commitment transaction in your possession. I wouldn't recommend this method unless it's a last resort, for example if the peer systematically refuses cooperative closures or no longer responds. Forced closure has two major disadvantages: the fees are often very high, as they have been set in advance to anticipate a rise in onchain fees, and there is a delay in recovering the funds, as they are blocked by a timelock. This timelock gives your peer the time to react in the event of a cheating attempt (which is obviously not the case here, but you still have to wait).
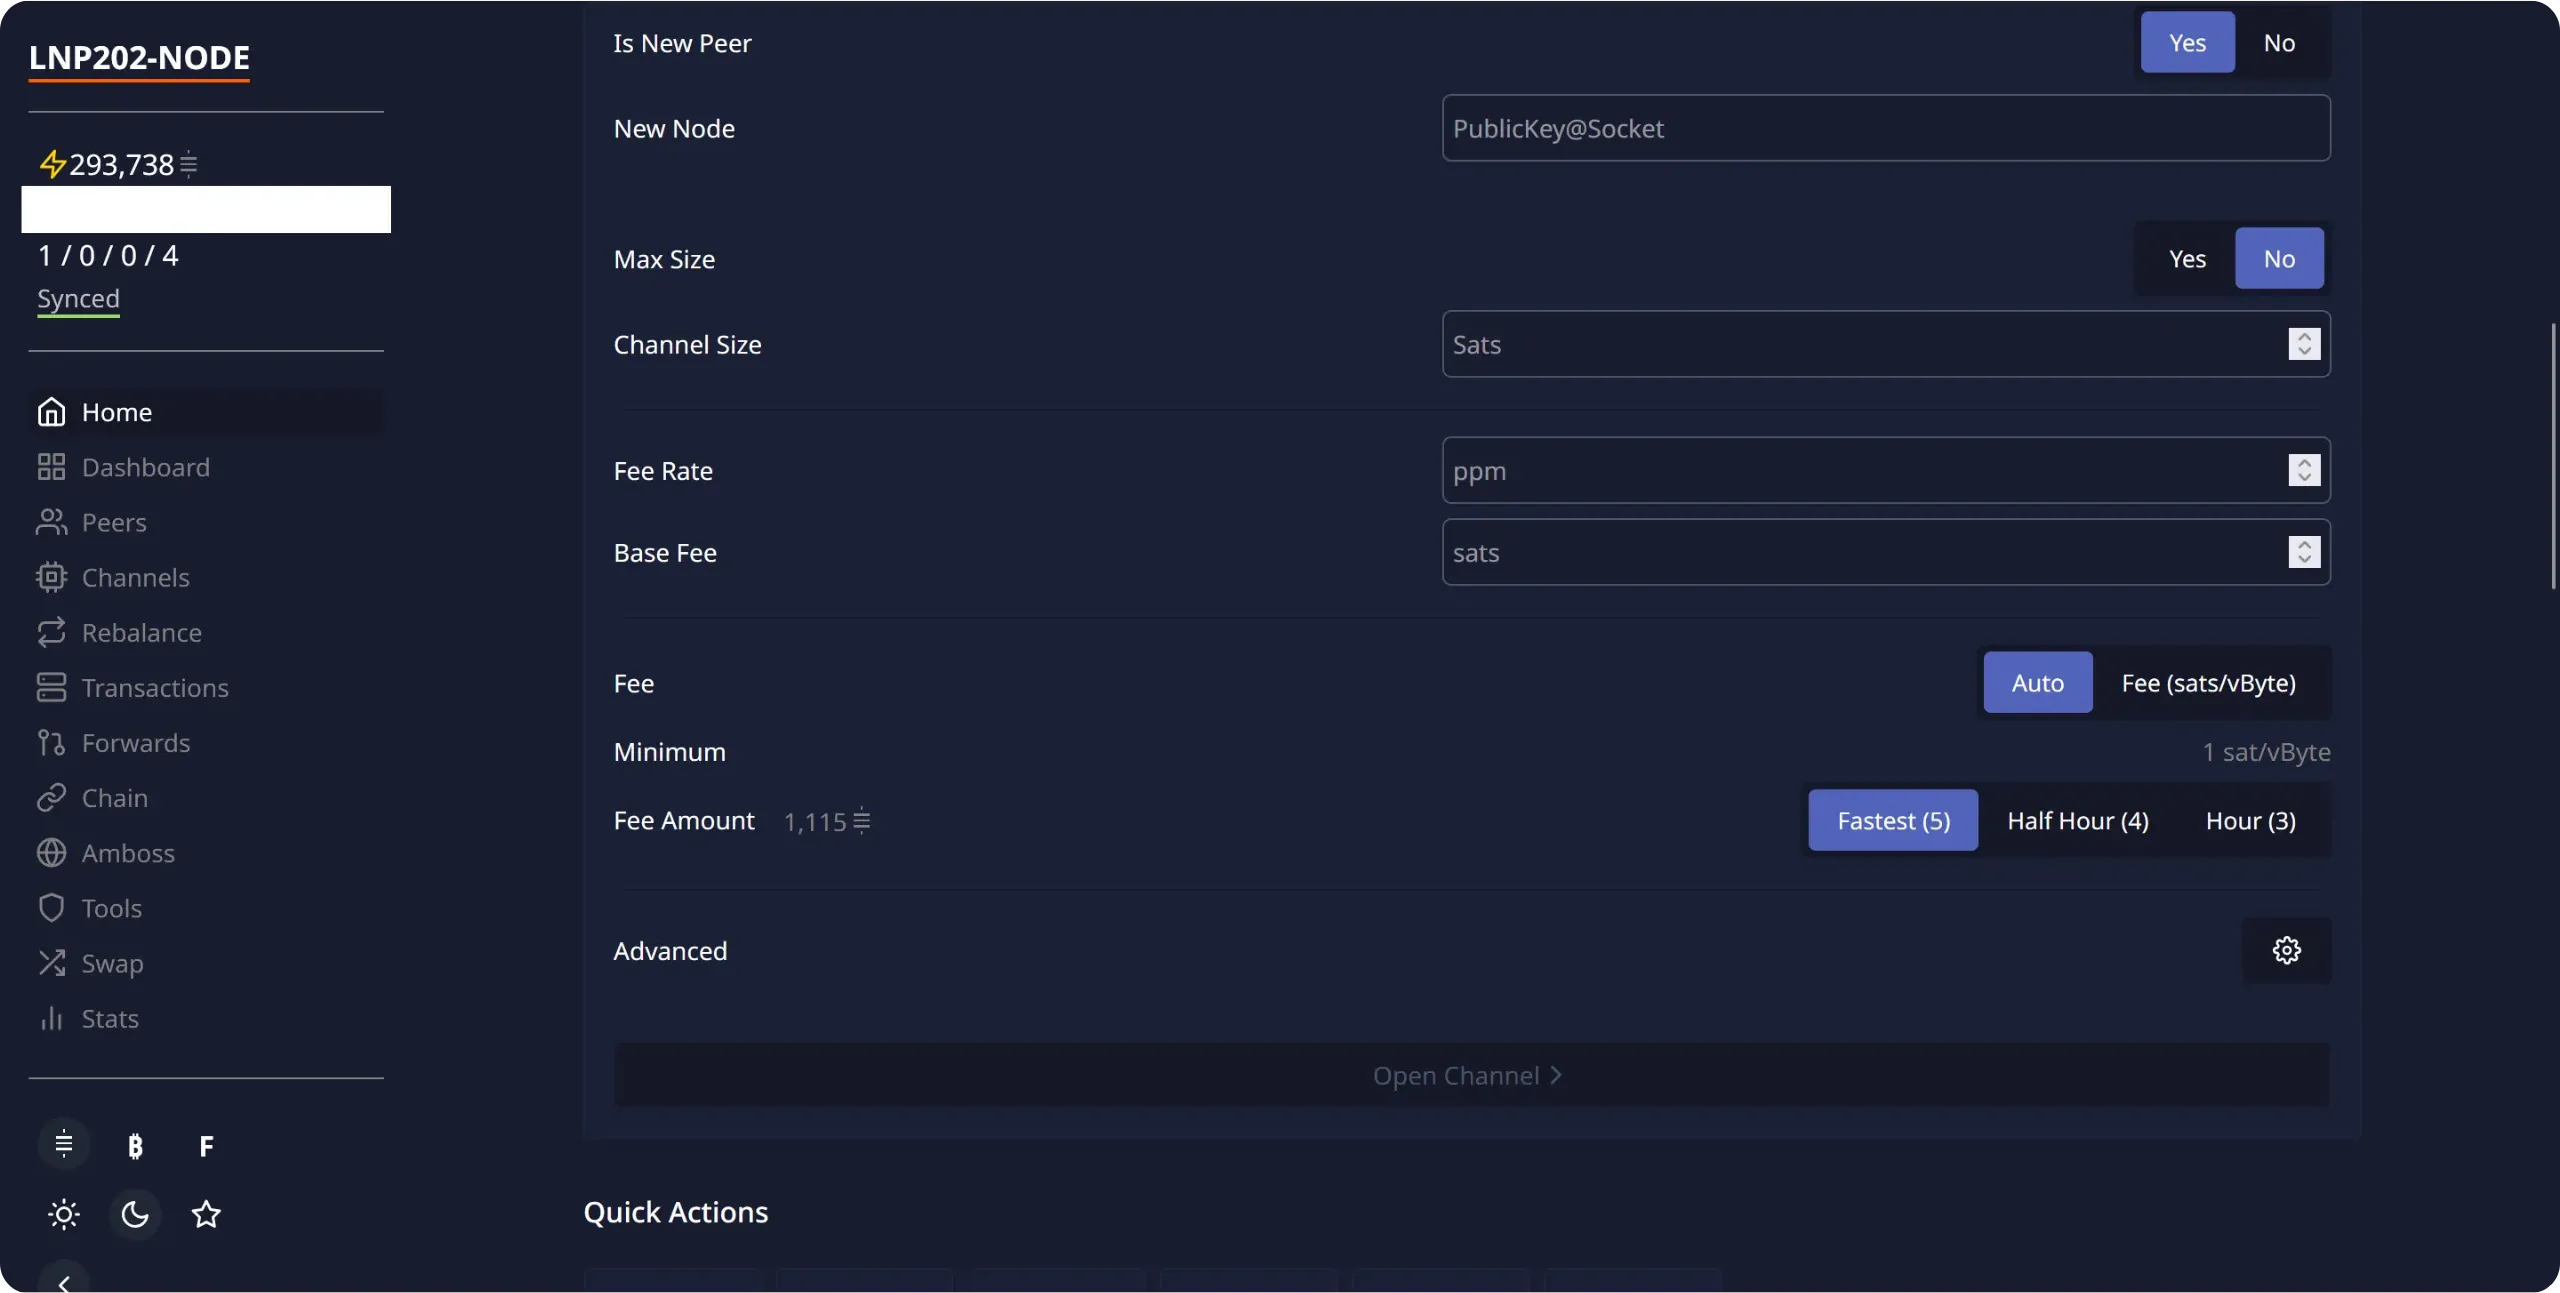
Finally, to open a new channel, go to the `Home` menu and click on `Open a Channel` in the `Liquidity` section. You'll then be able to enter the ID of the chosen node, the channel capacity, the desired Lightning routing fee, and the onchain fee for the opening transaction.
These are the main actions you'll need to perform on ThunderHub. We'll discover other features as we go along in this LNP202 course.
## Obtaining inbound liquidity
b740c656-a897-4d95-af4b-116b718447cd
As you can see, having outbound liquidity to make payments on Lightning is not particularly complex. Simply open channels on your own initiative to other nodes and start sending sats. On the other hand, having inbound liquidity to receive payments on Lightning is more complicated, since you either need other nodes to open channels to you, or you need to move the liquidity yourself by making payments.
If you adopt a "consumer" profile, there's generally no need to worry about inbound liquidity. Your use of the Lightning node will be predominantly payment-oriented, rather than cash-in. By simply making a few Lightning payments, you'll naturally create inbound liquidity over time.
On the other hand, if you have a "merchant" profile, the situation is reversed: you will mainly be collecting payments and making few of them. So you can't rely solely on your own payments for inbound liquidity. It therefore becomes necessary for other Lightning nodes to open channels to yours. But how can this be achieved? How do you get other operators to tie up capital for you? That's precisely what we'll explore in this chapter.
### Buying inbound liquidity
As you'd expect, the most effective way of getting someone to act is to pay them. For inbound liquidity to your Lightning node, the principle is exactly the same. The simplest way to get channels to your node is to pay for the service and the capital tie-up involved.
If you're a business or retailer, this approach means you can quickly obtain reliable channels to collect payments from your customers without friction.
There are many ways to buy inbound liquidity. The one I personally use and recommend is Amboss's [Magma](https://magma.amboss.tech/) platform. It's very easy to use, opening a channel is quick and rates are generally reasonable. Magma works like a marketplace with makers and takers, but version 2 has greatly simplified the experience: simply create a request, pay the price via Lightning, and Magma automatically matches it with the best available offer. After six onchain confirmations, your channel with inbound liquidity is up and running. Here's how it works:
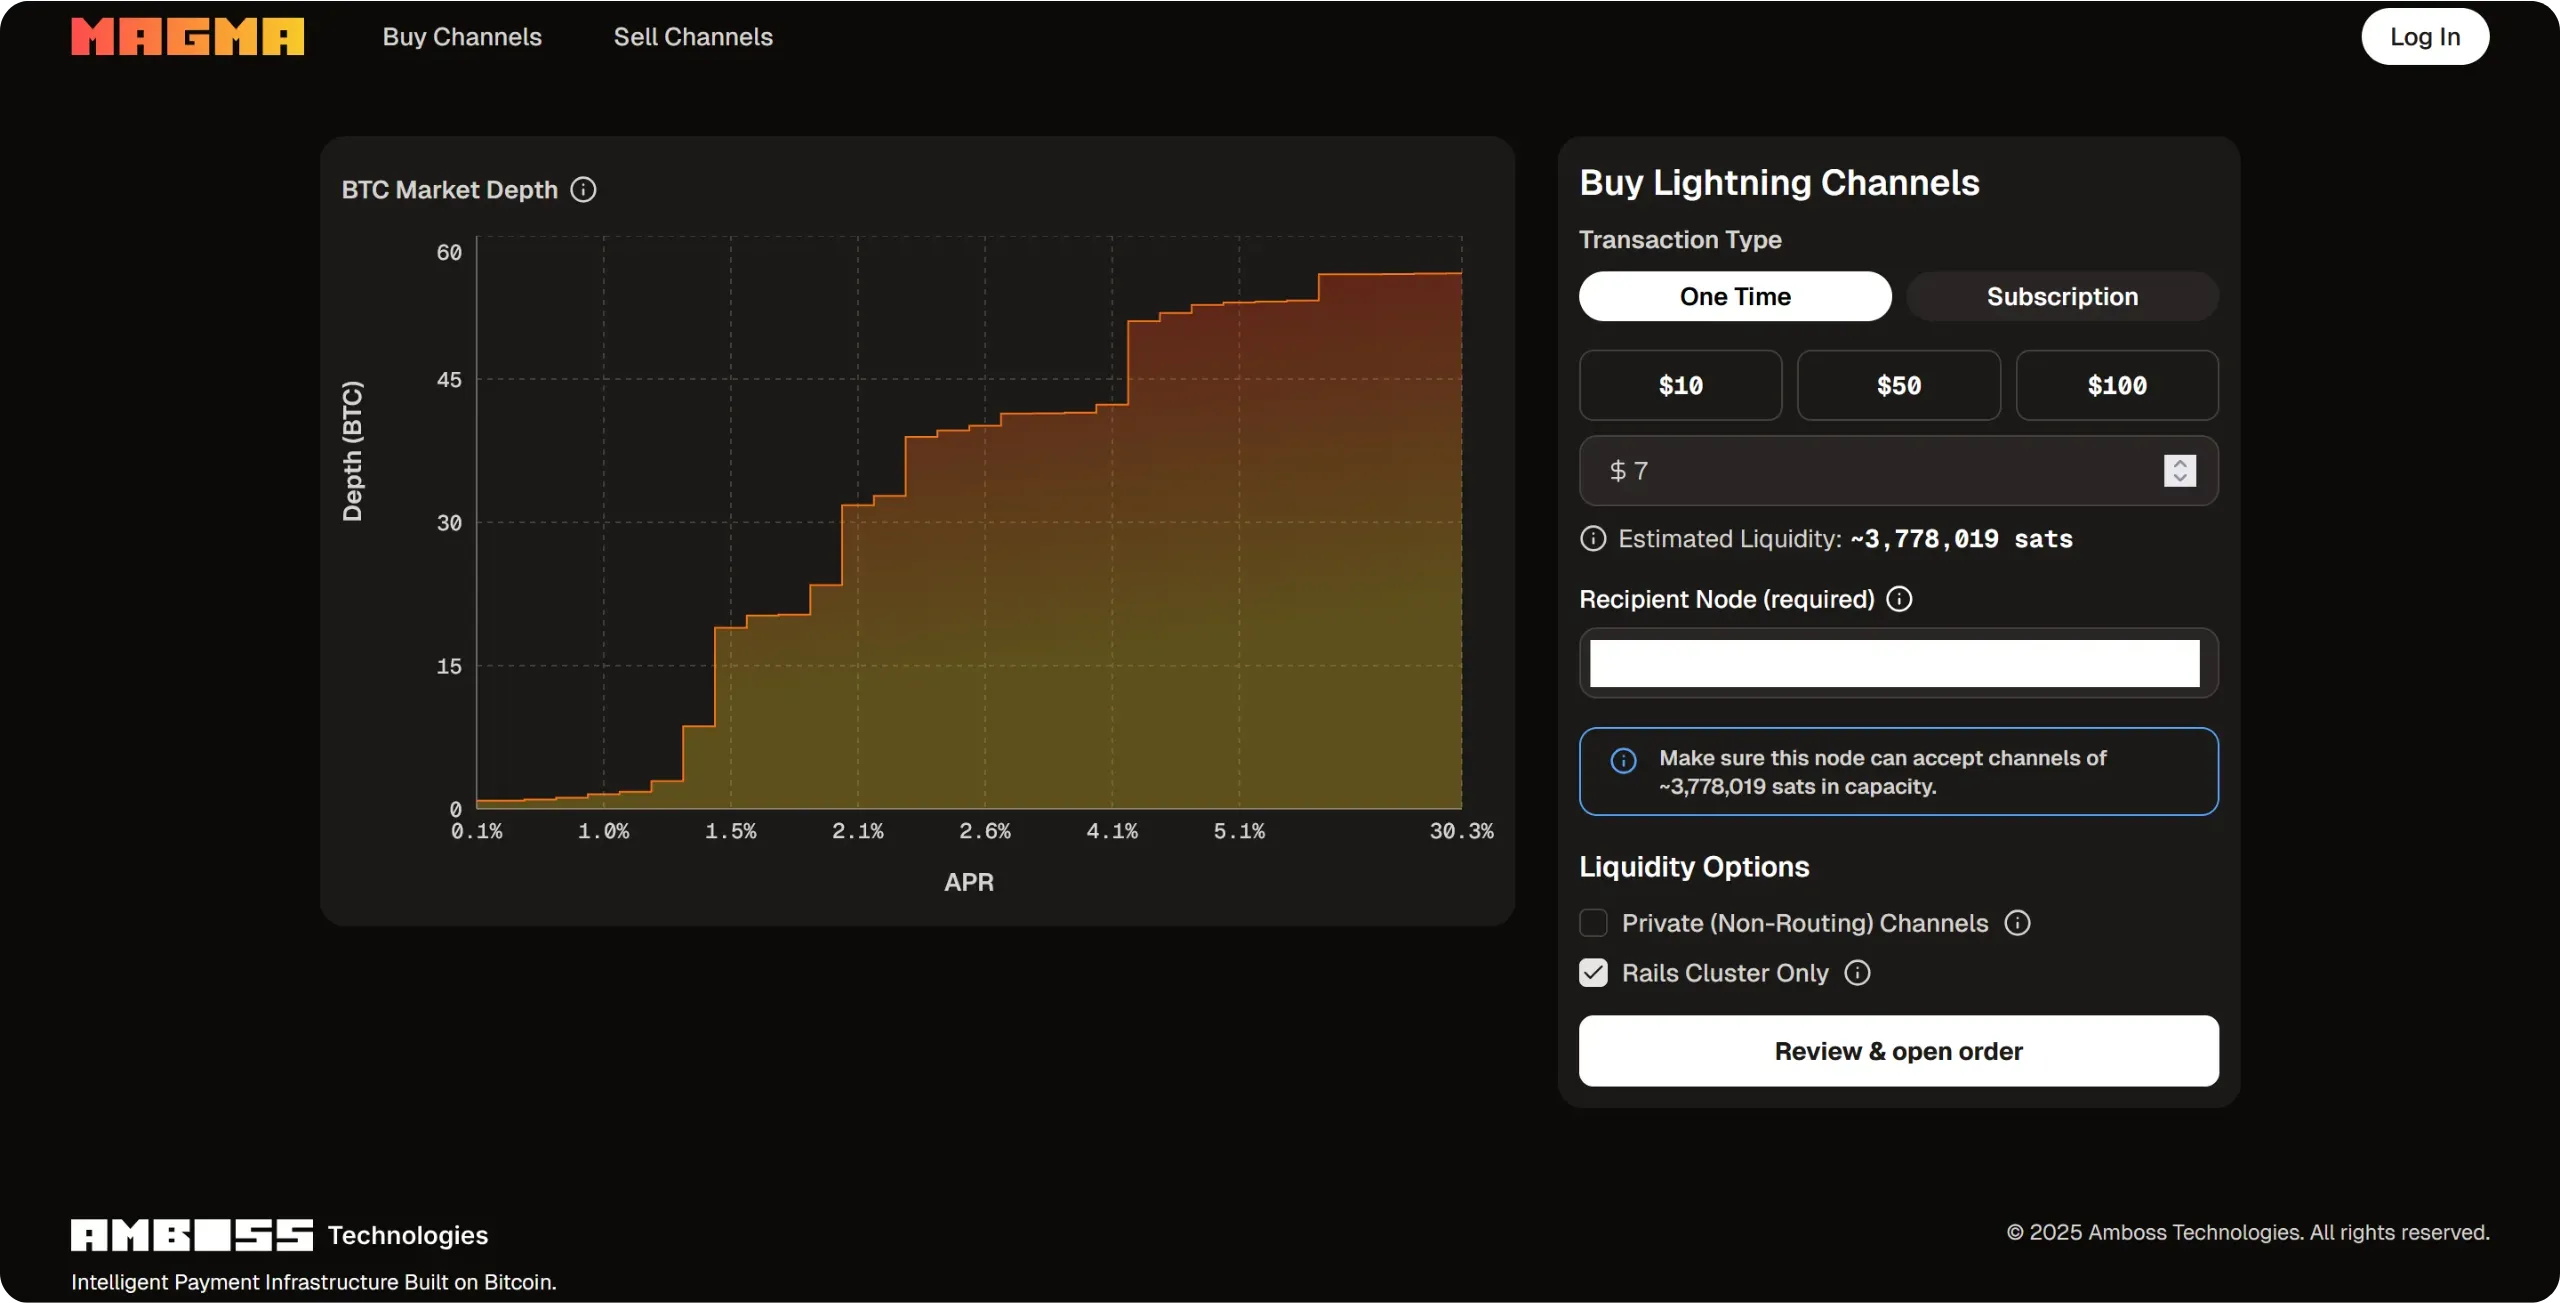
Go to [the Magma website](https://magma.amboss.tech/buy), in the `Buy Channels` section.
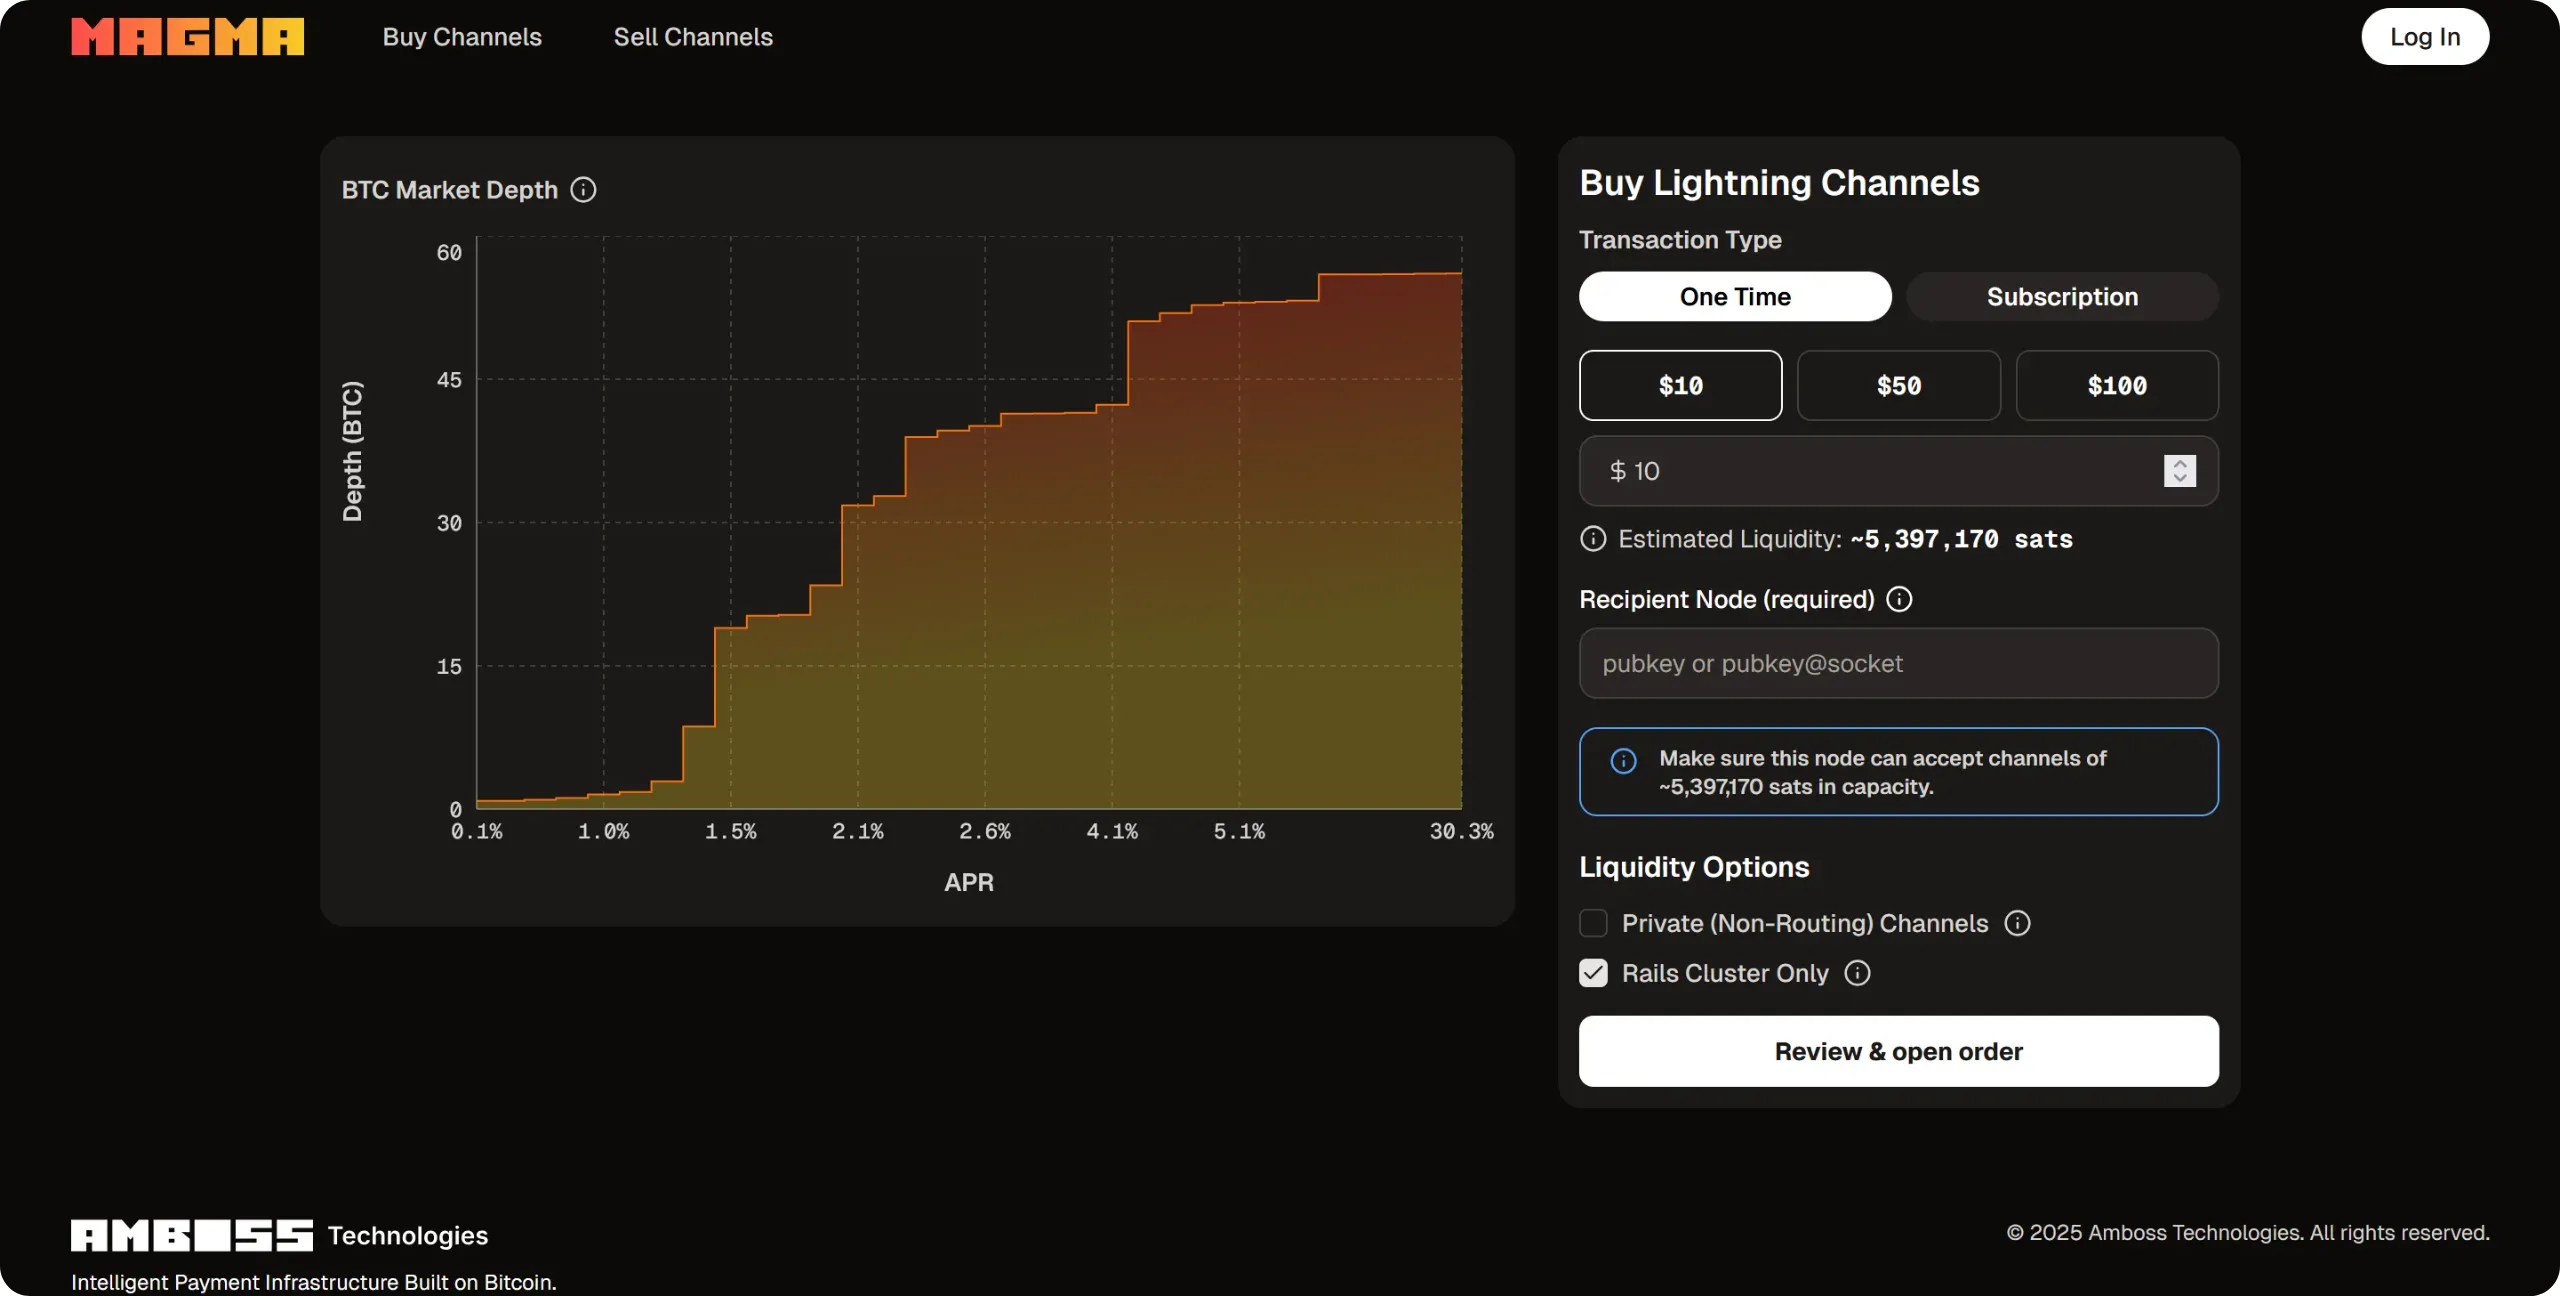
If you wish, you can create an account to track your purchases, but this is not obligatory. If you do not create an account, Magma will simply provide you with a session ID, which will enable you to retrieve your purchases at a later date.
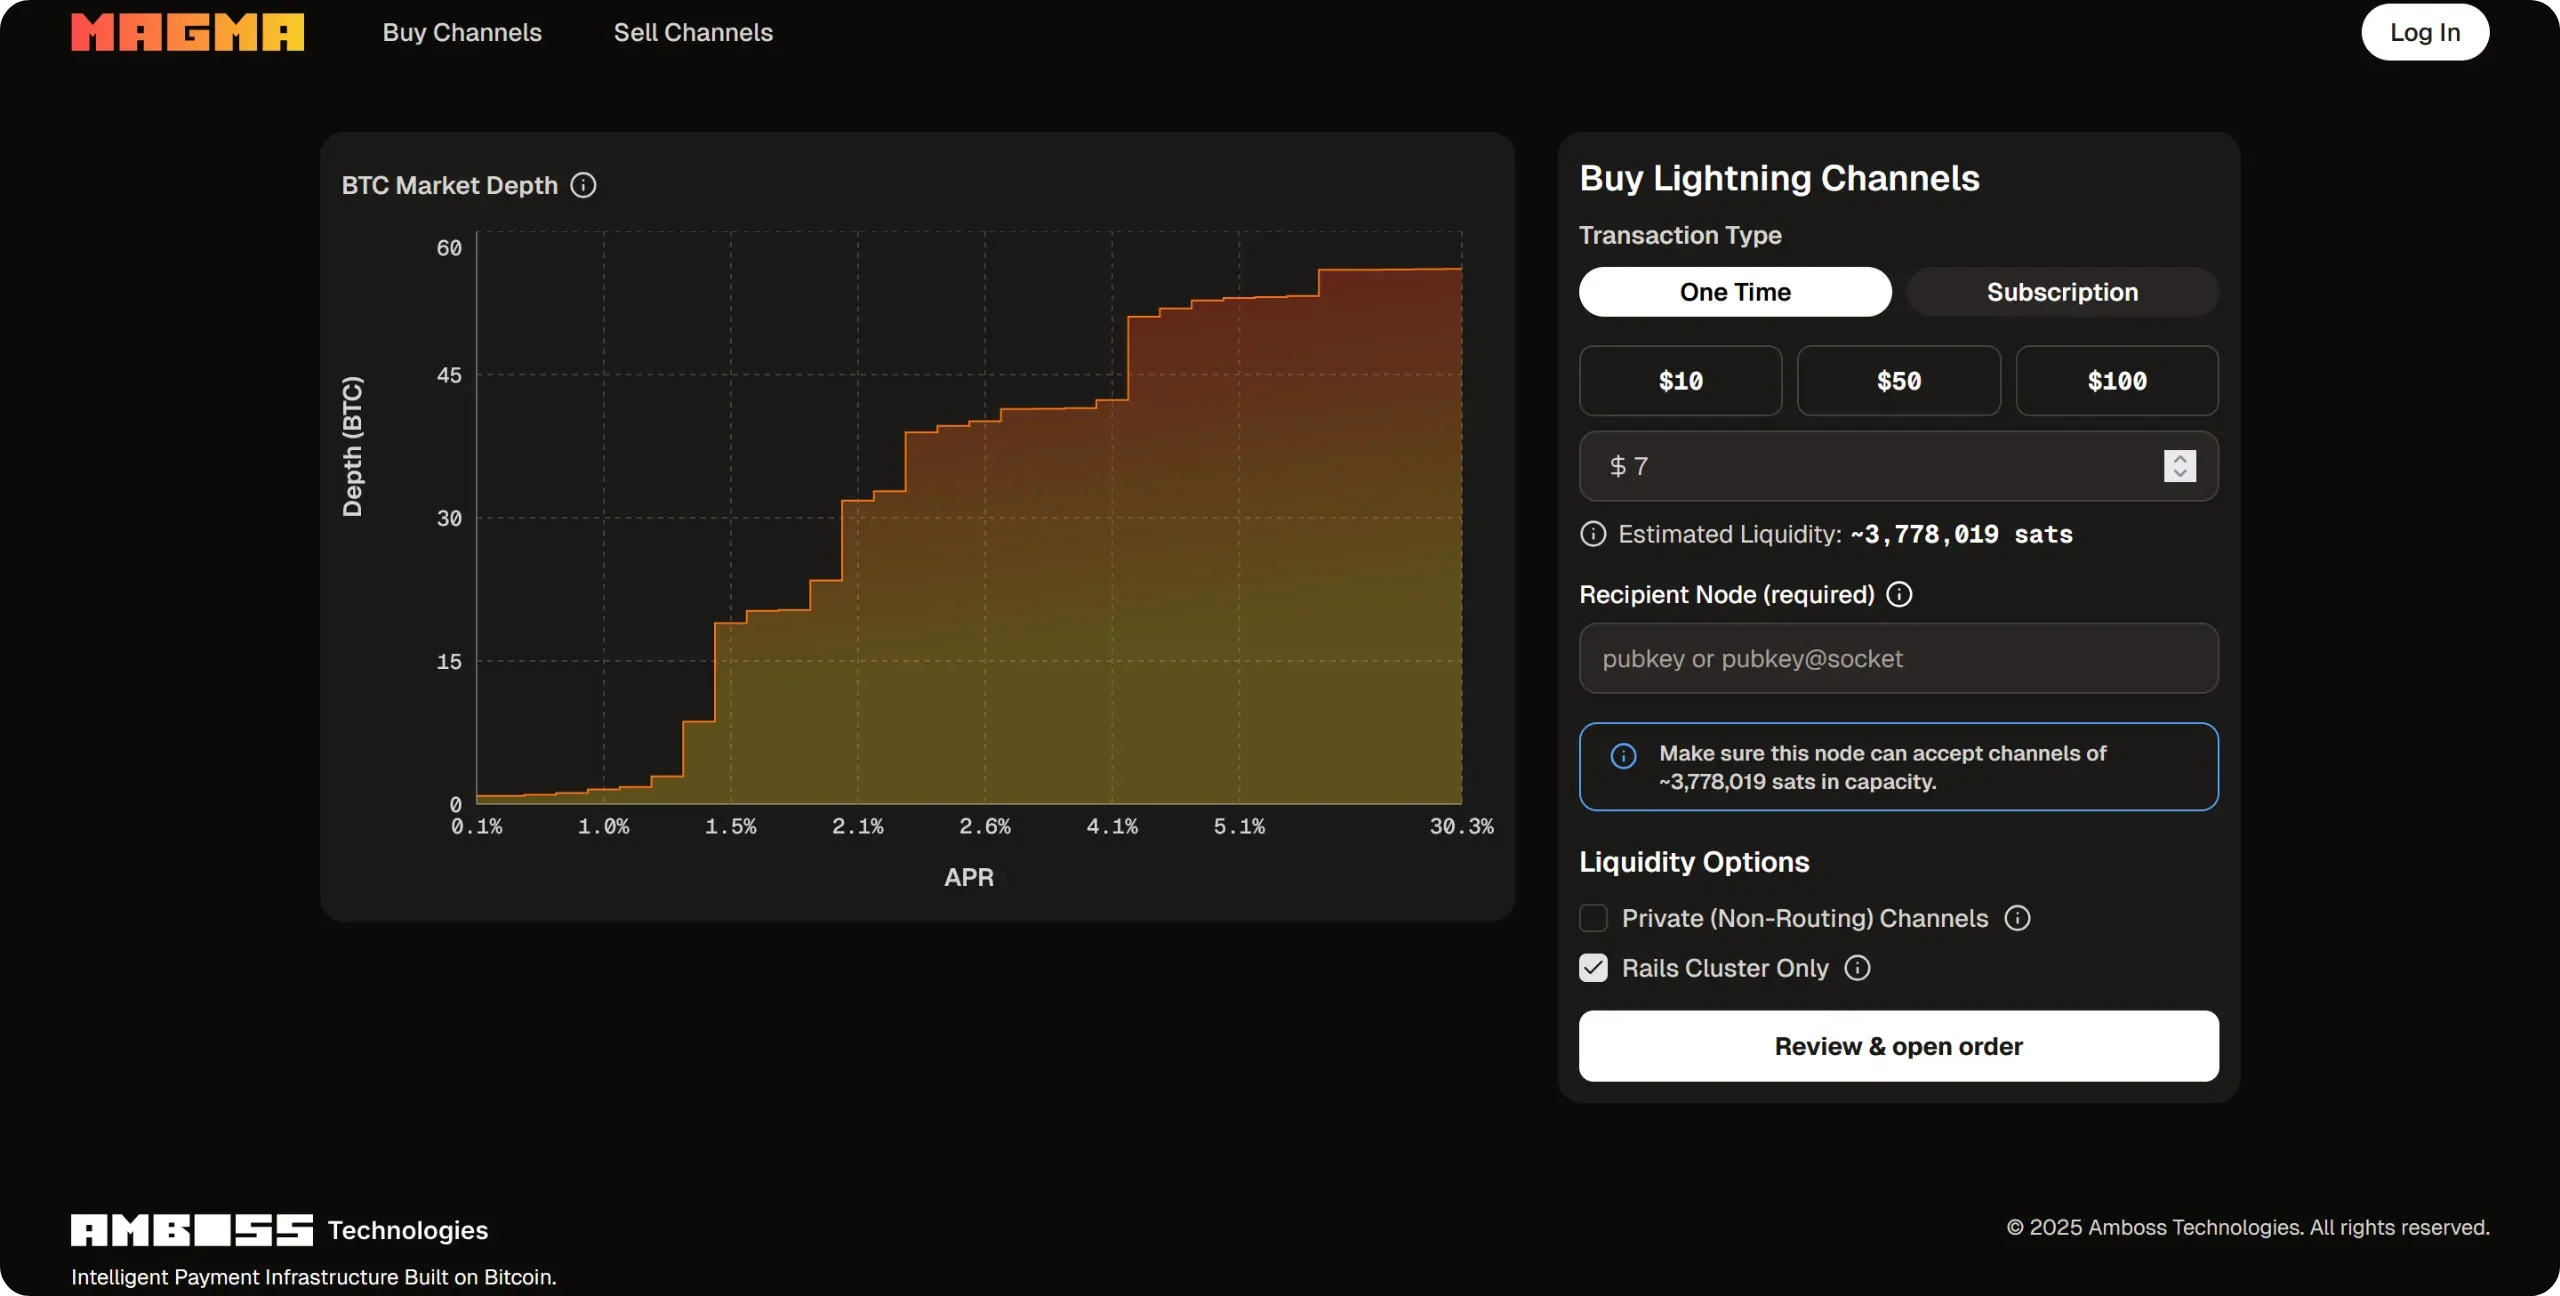
Once on the site, fill in the information required to purchase liquidity. Select `One Time` for a one-off purchase, then enter the amount you're willing to pay for inbound liquidity. The higher the amount paid, the greater the capacity of the channel opened to your node. An estimate of the channel's capacity appears below: this is an approximation, as the final amount will depend on the best offer found by Magma, which is sometimes higher, sometimes lower.
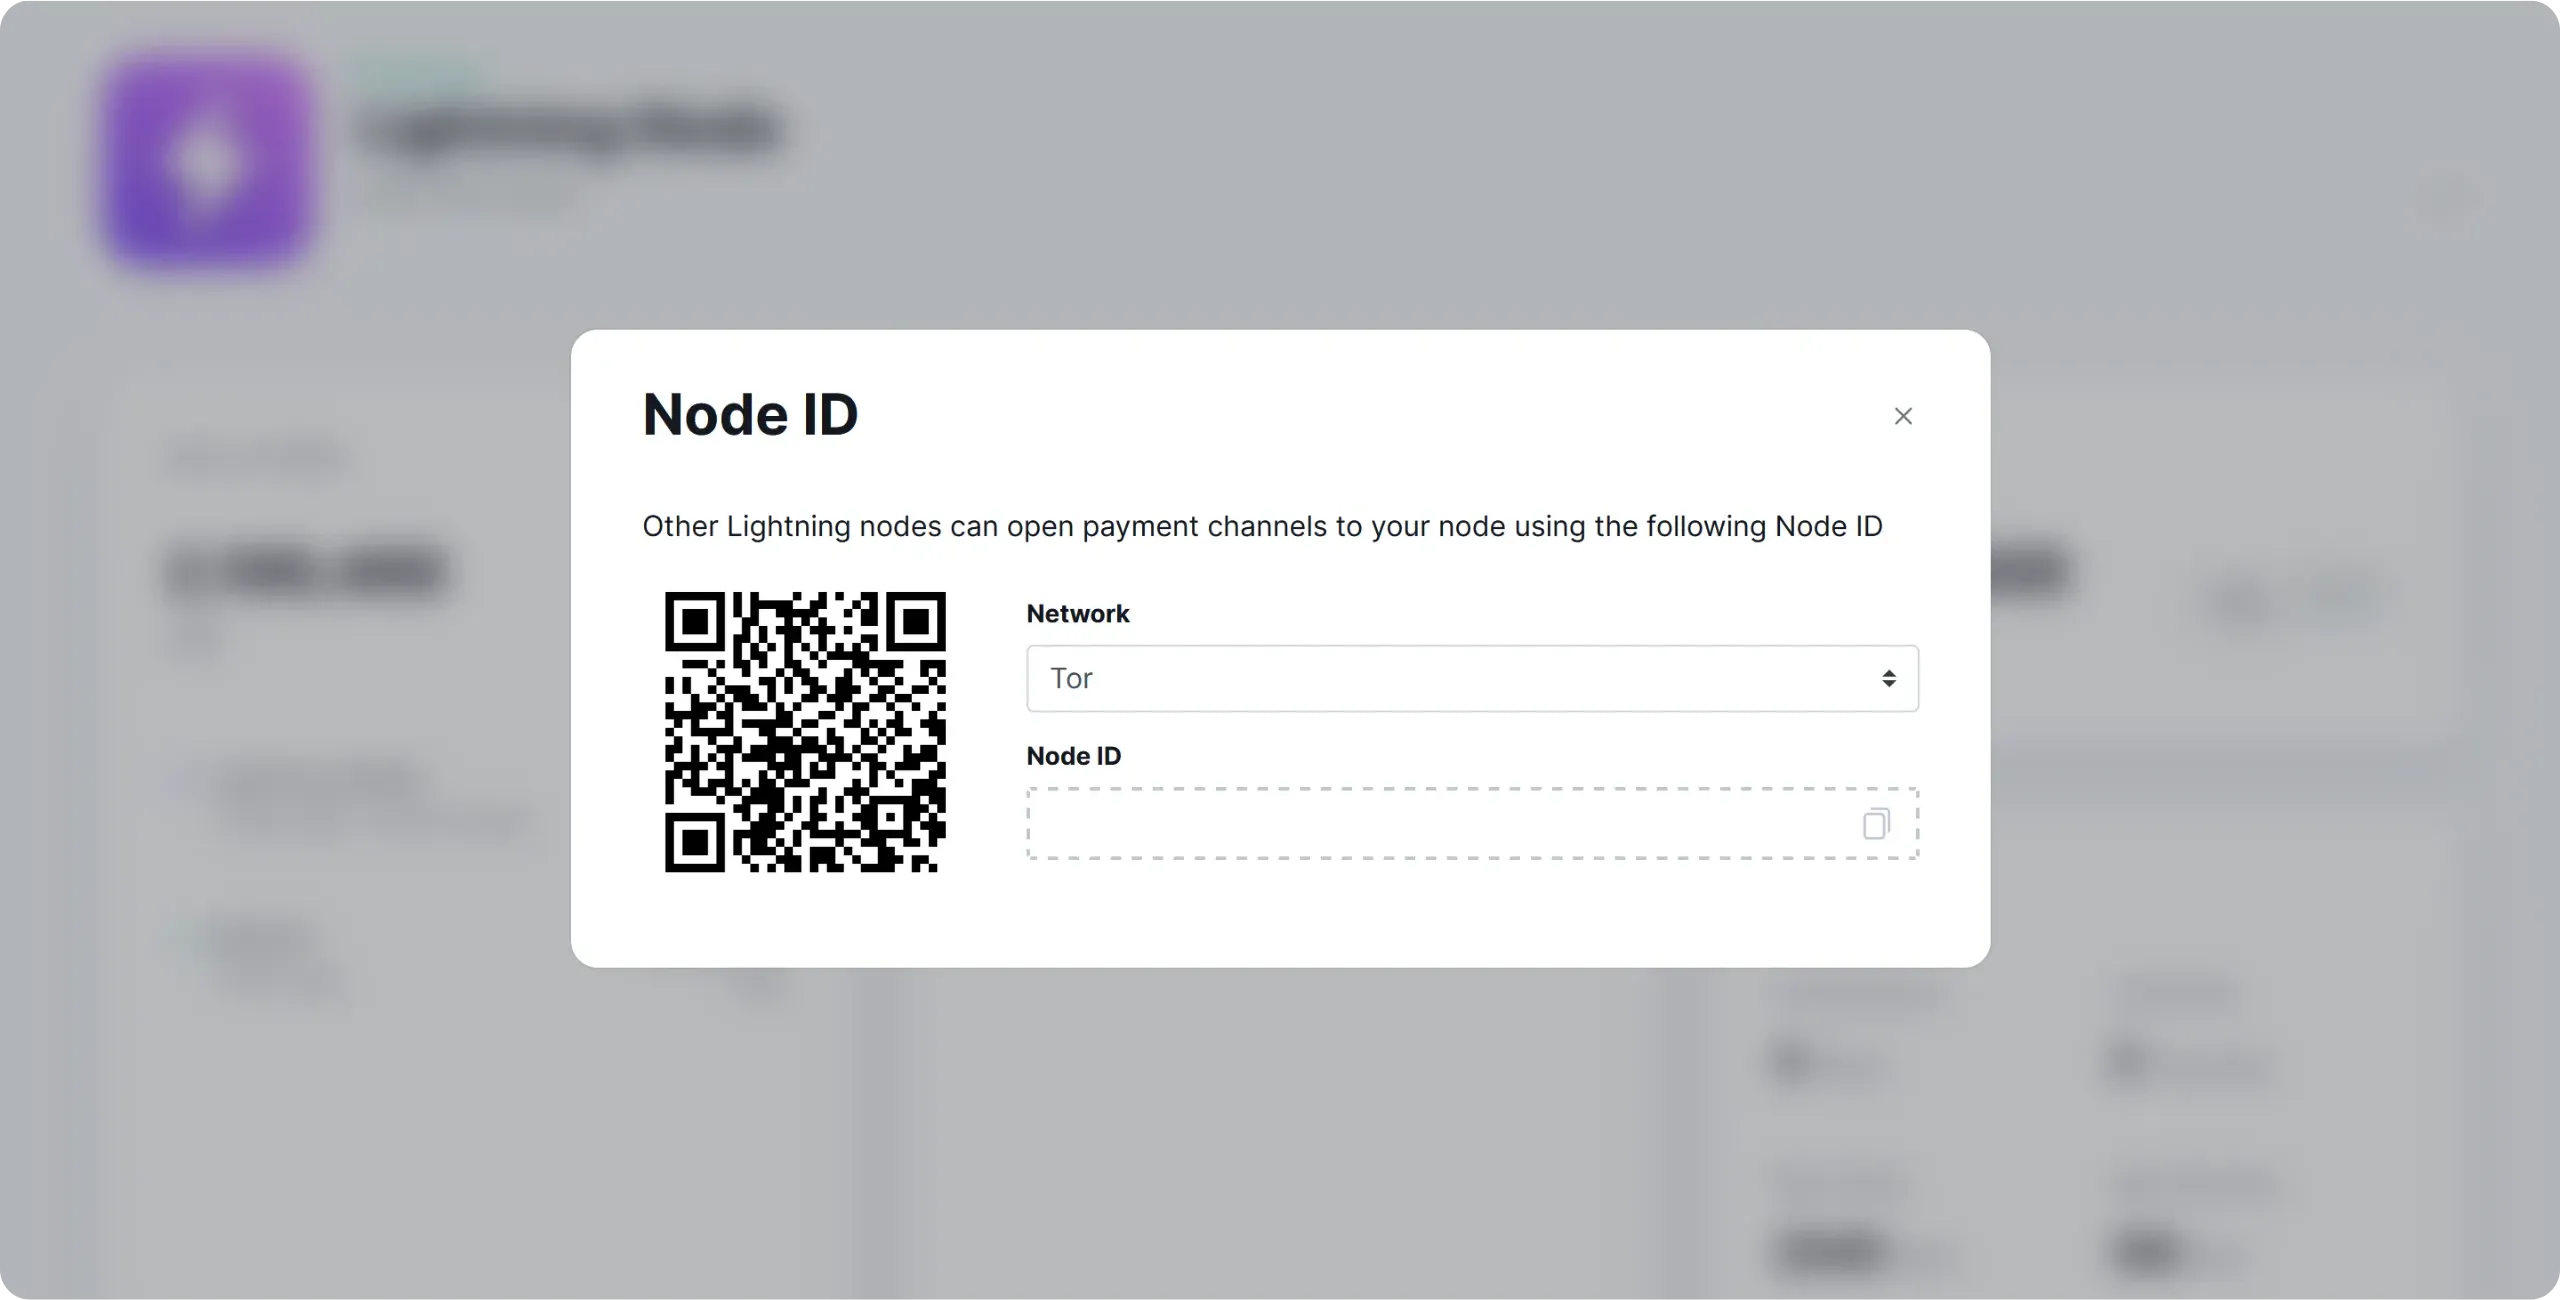
Then enter your node ID. You can find it, for example, in the `Node ID` menu of the `Lightning Node` application on Umbrel.
Once all the information has been completed, click on the `Review & open order` button.
If you have not created an account, Magma will provide you with a session key and a backup file. Keep these two items in a safe place, as they will enable you to retrieve the order at a later date, or to track its status in the event of a problem. Once you've saved the file, click on the `Pay with Lightning` button.

Magma then generates a Lightning invoice for the amount you have chosen. You must pay it. If you already have channels on your Lightning node, you can pay directly from it, or use another external Lightning wallet.
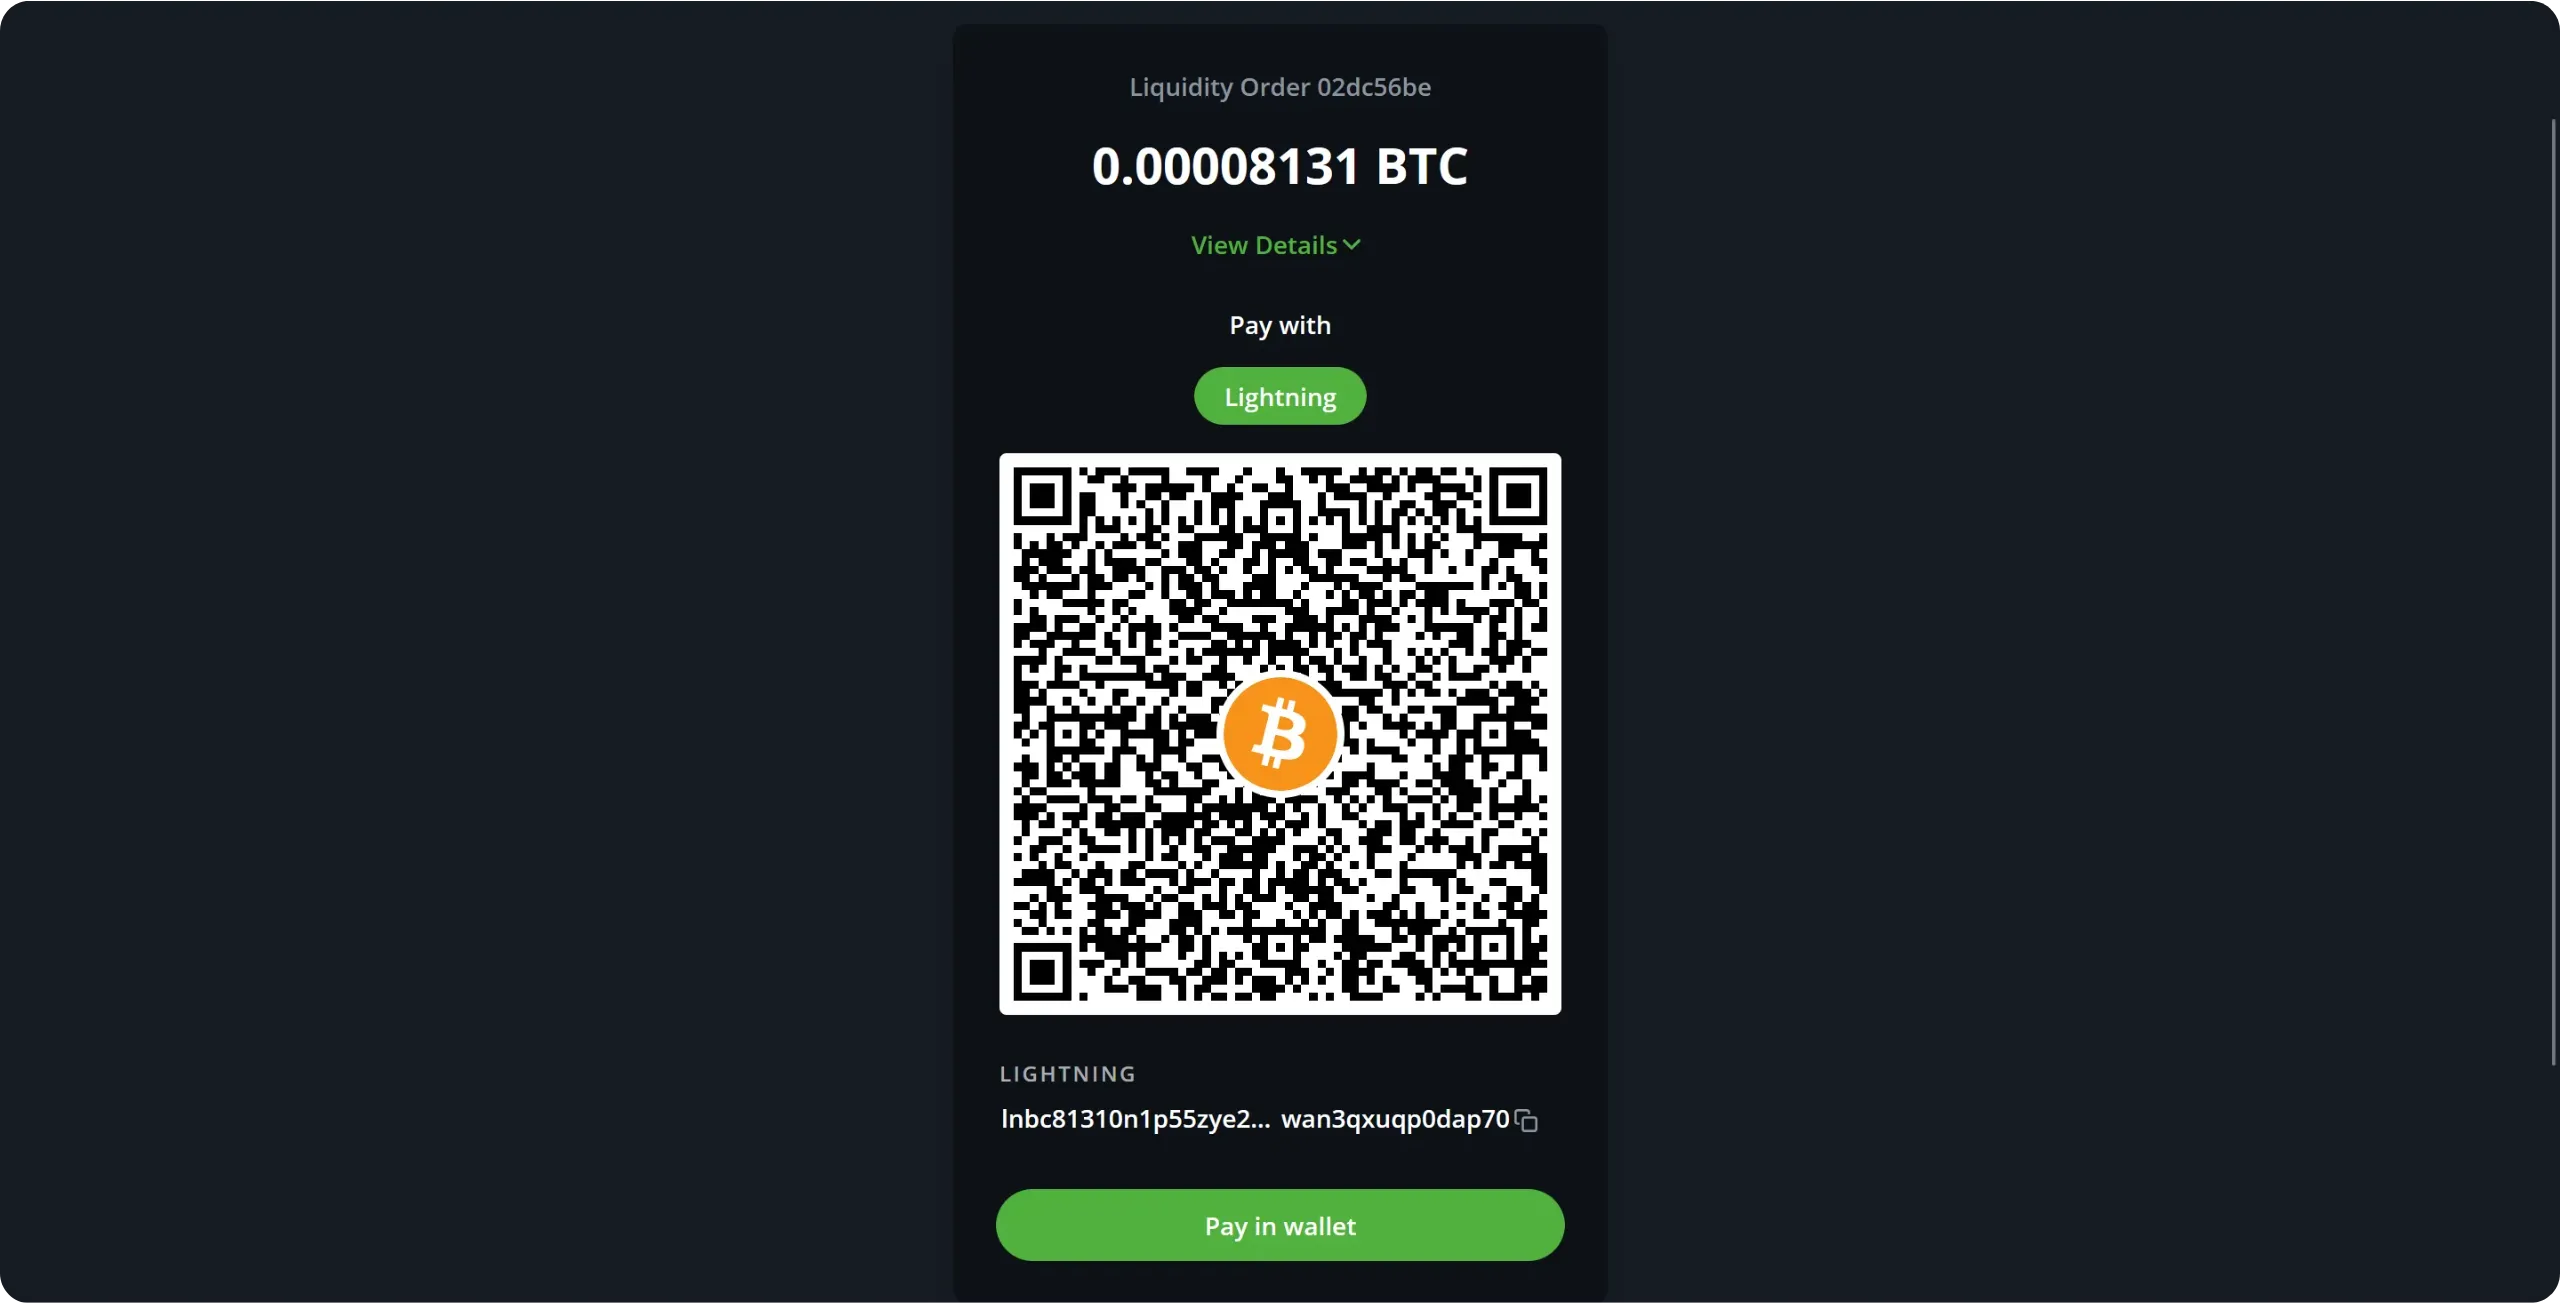
Once payment has been made, the transaction appears as being processed in the Magma interface.
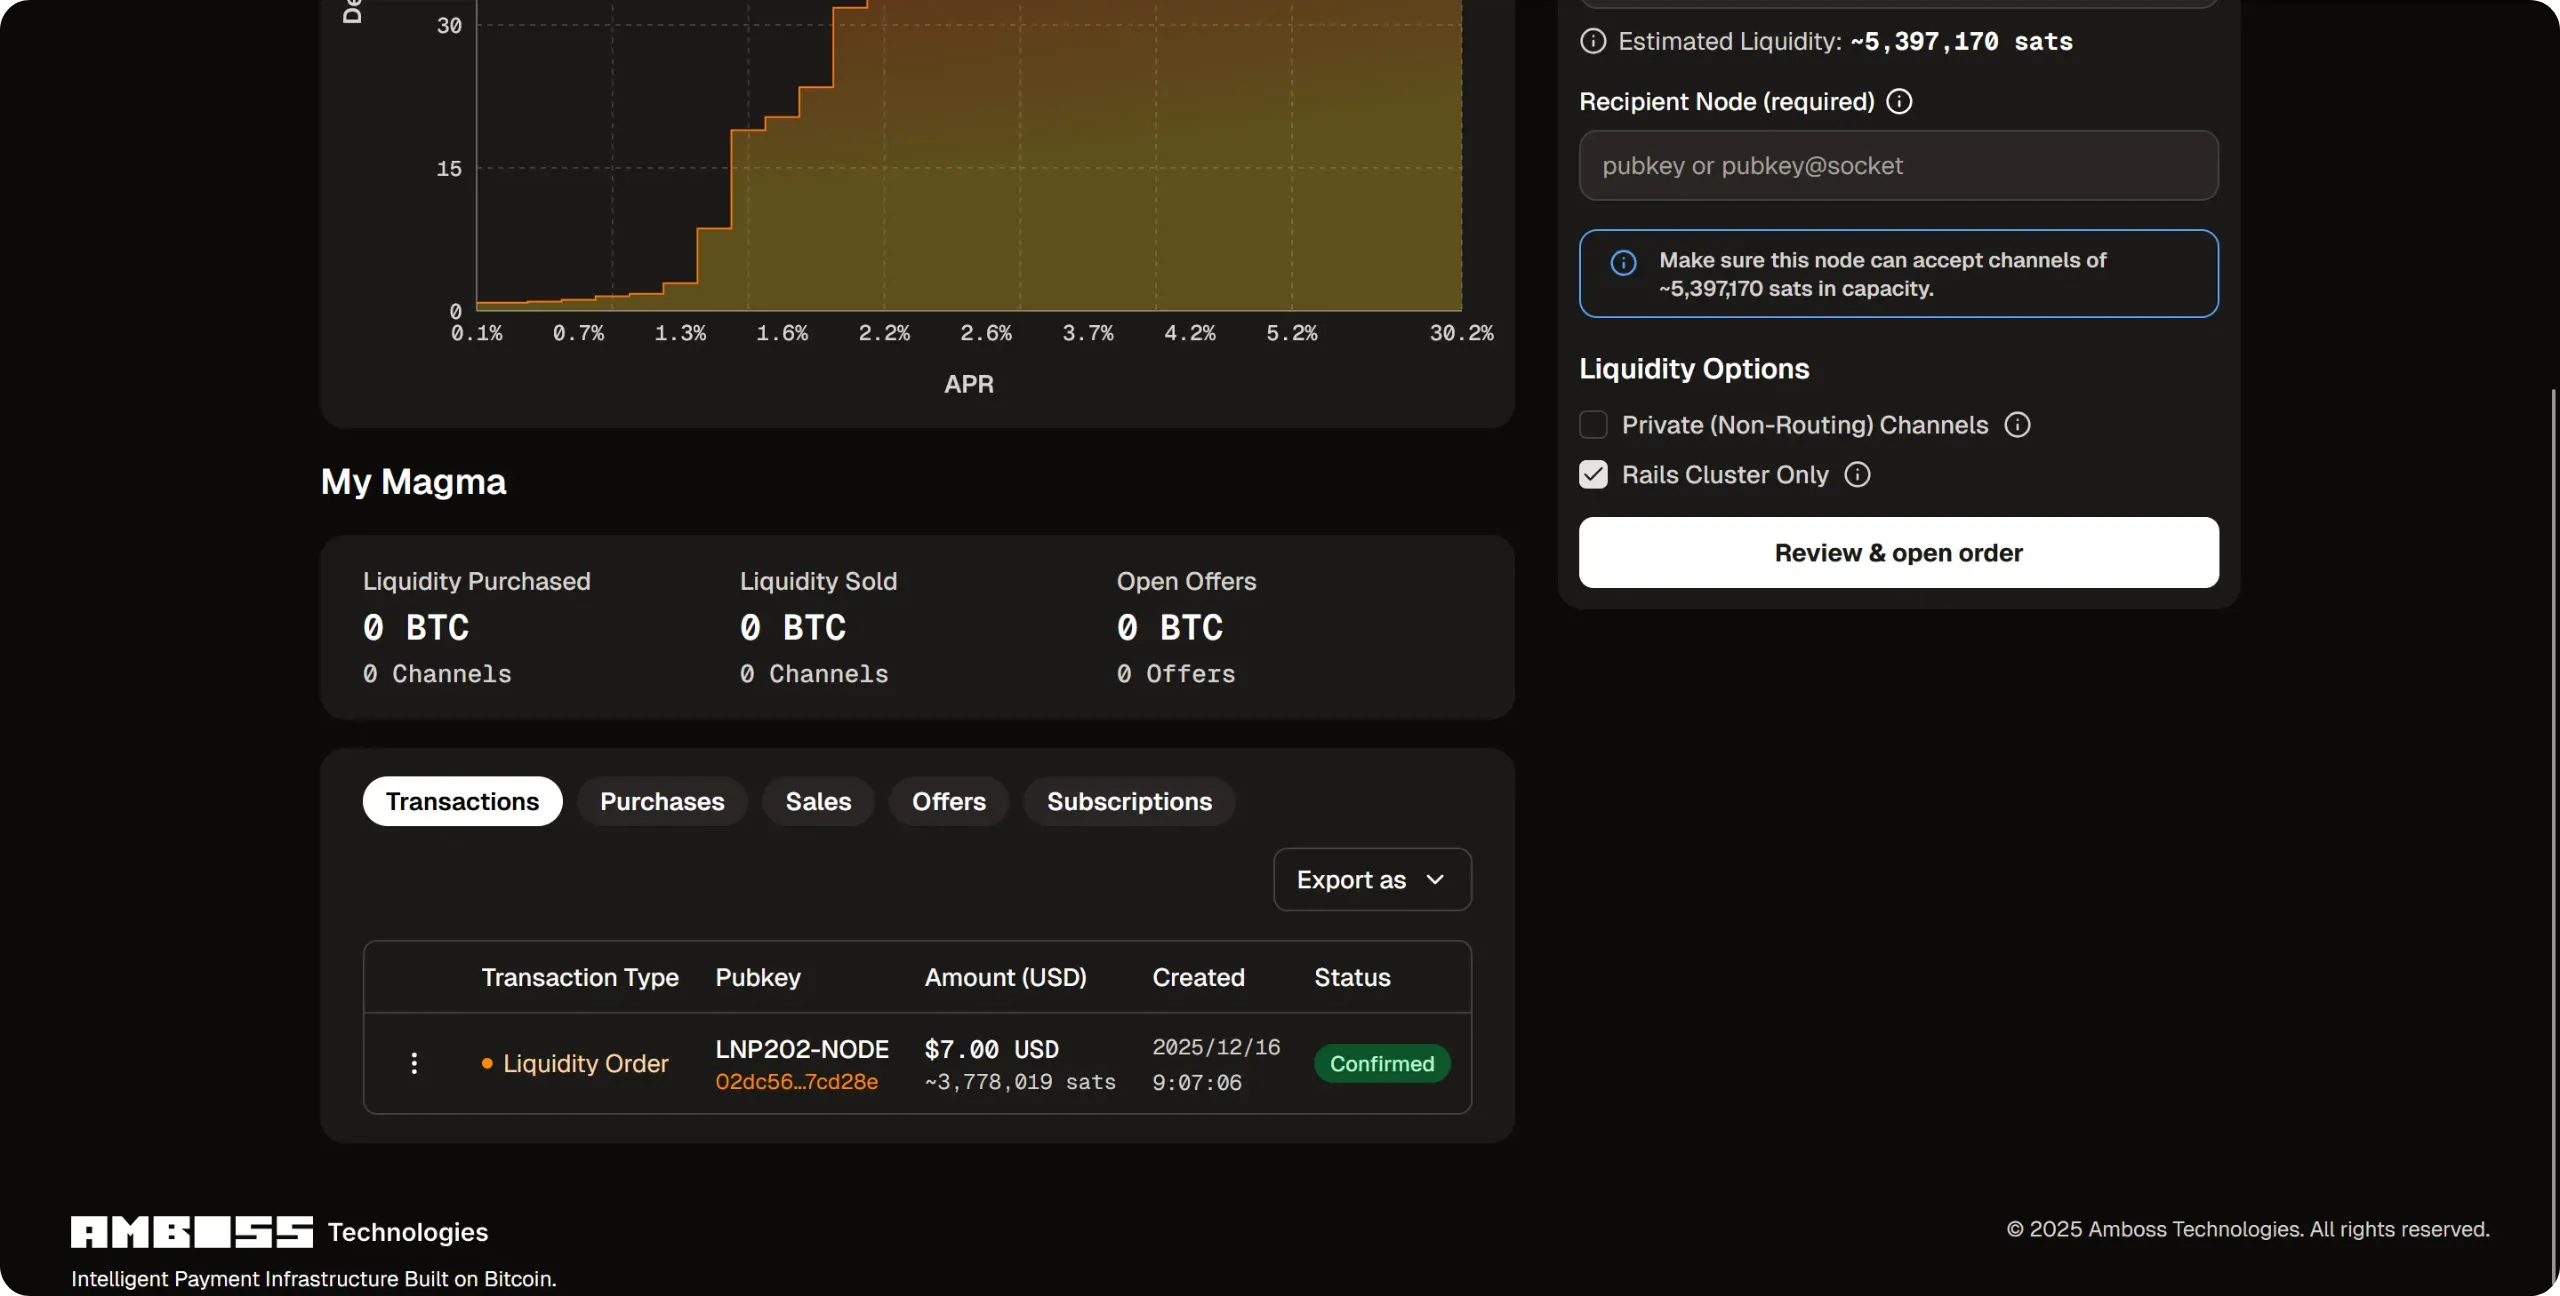
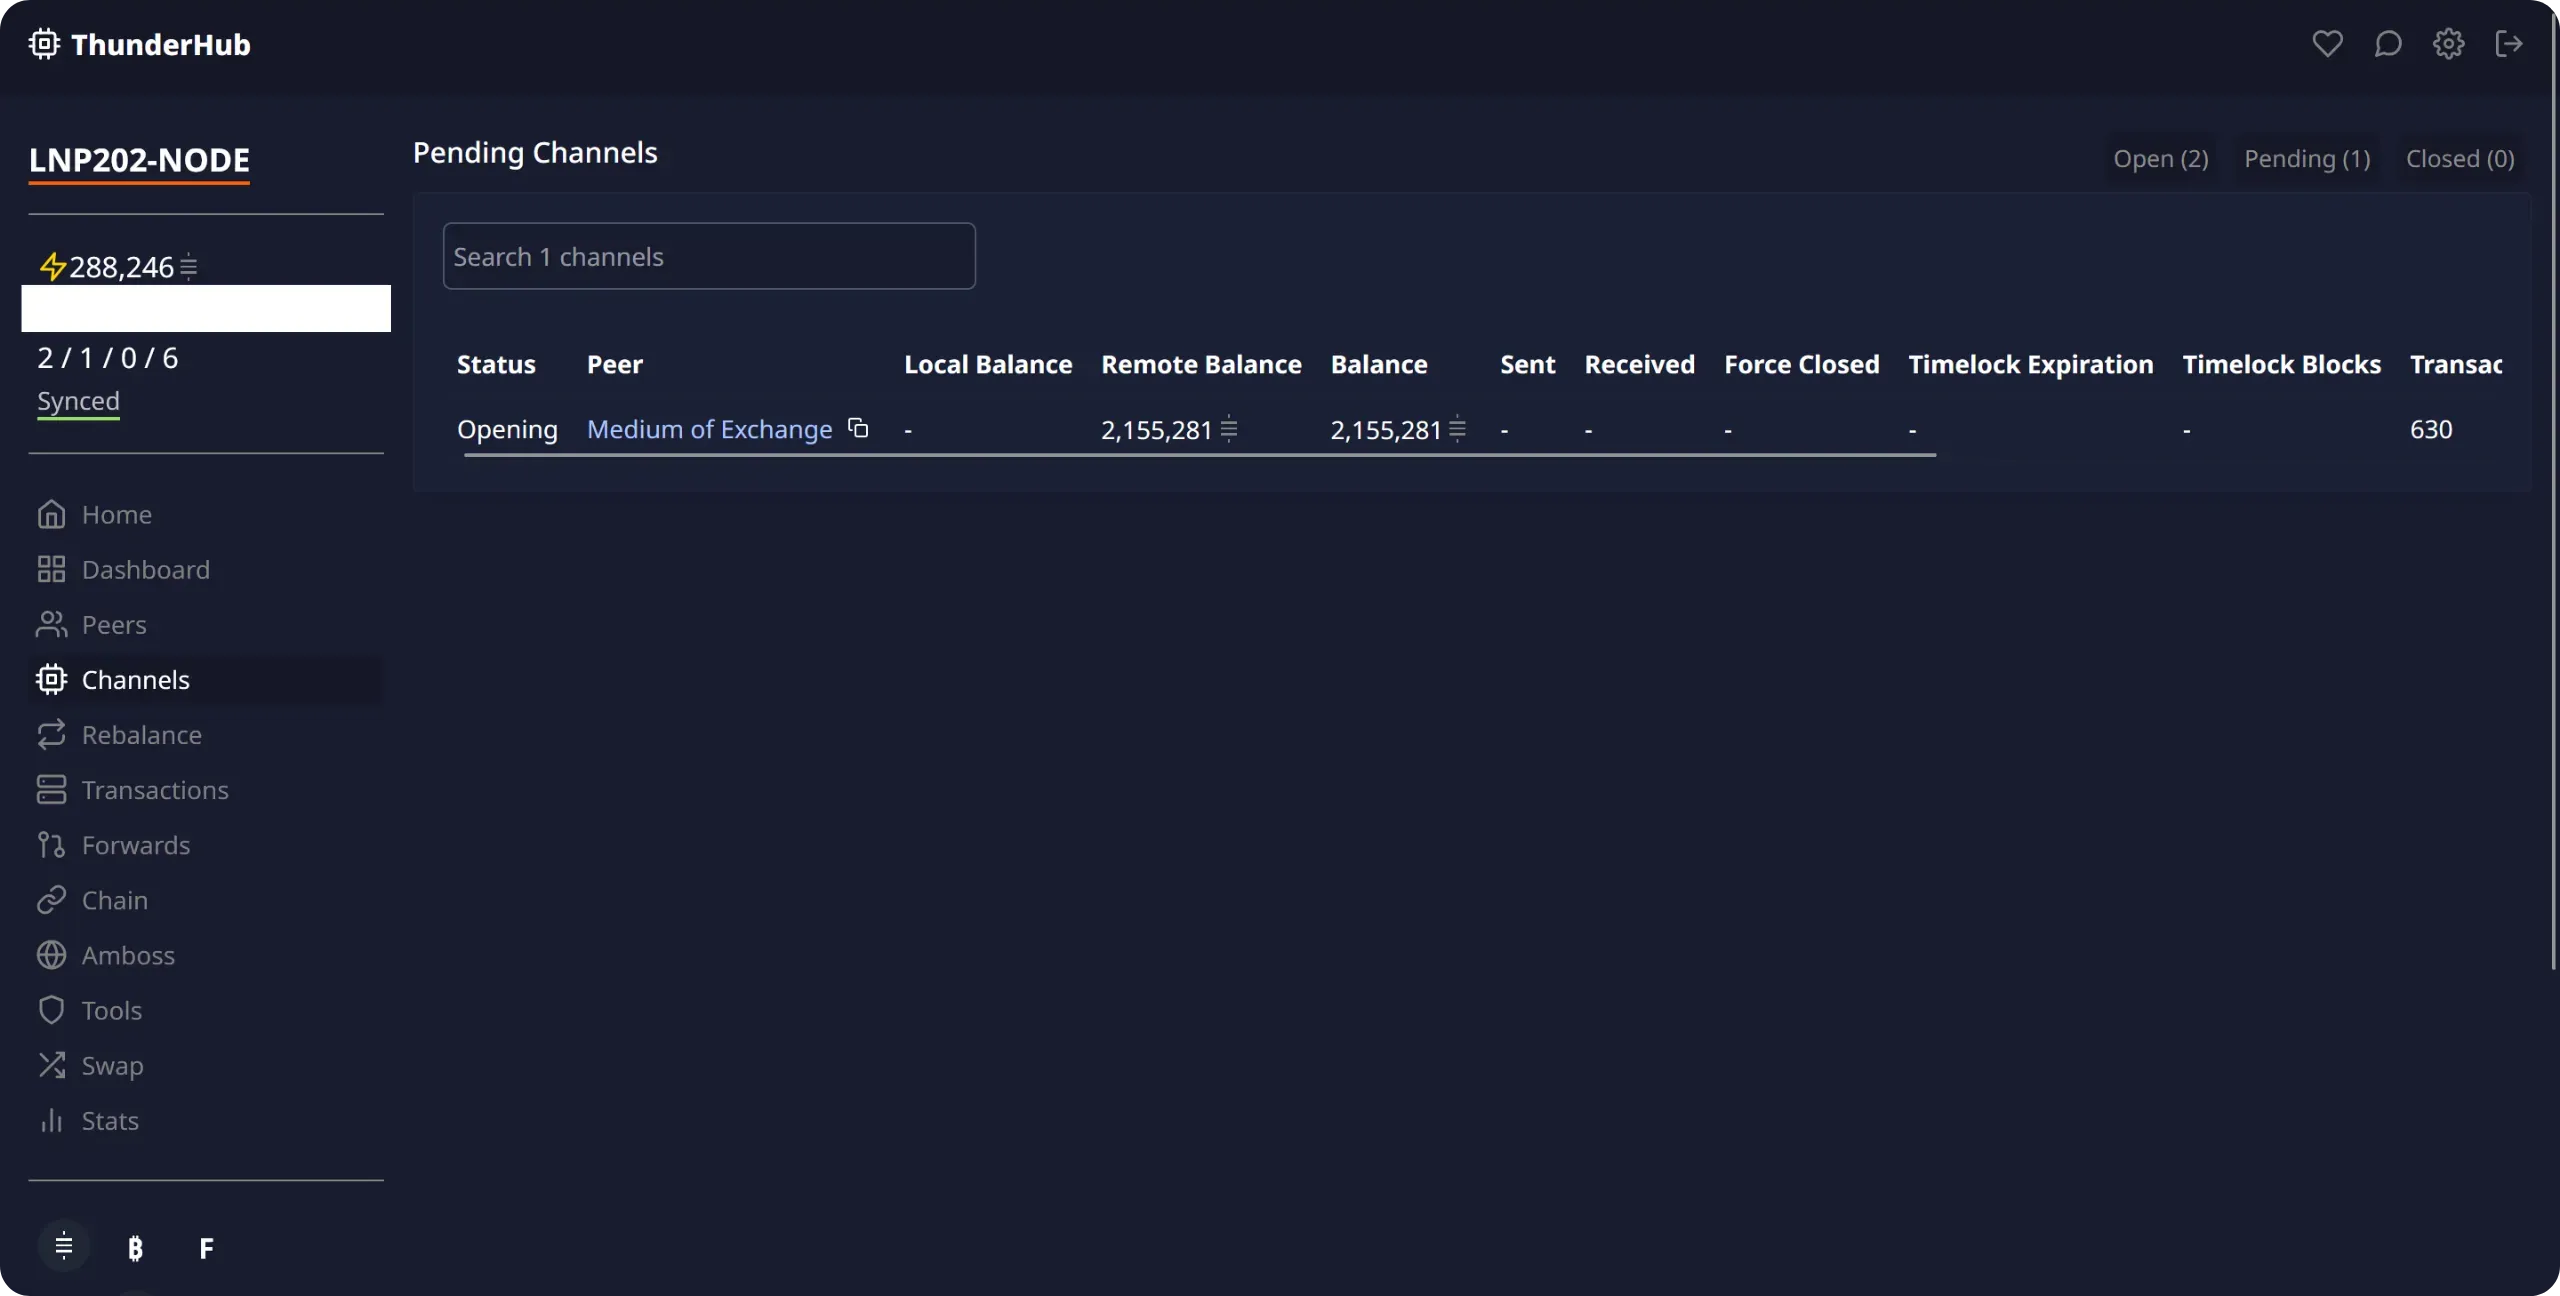
After a few minutes, the request is processed: a channel with sats is being opened to your Lightning node. Once the opening transaction has been confirmed onchain, you'll have access to the corresponding inbound liquidity.
Magma is also integrated directly into ThunderHub. In the `Home` tab, scroll down to the `Liquidity` section and click on `Buy Inbound Liquidity`. All you have to do is enter the desired amount and confirm. You don't need to pay any invoices manually, as ThunderHub automatically takes care of payment from your node.

If you're a merchant, this type of service is particularly suitable, as it enables you to quickly obtain a large amount of inbound liquidity from reliable nodes, guaranteeing that your customers will be able to pay you without difficulty. On the other hand, if you're a private individual, or if you don't wish to pay for inbound liquidity, there are also free solutions. Let's take a look.
### Cooperative inbound liquidity
If you're not a trader, but still need some inbound liquidity (for example, to prime your node at start-up, while you wait for some payments to be made) you don't necessarily have to pay for it. One of my preferred solutions is to cooperate with other node operators who also need inbound liquidity, to open Lightning channels for each other. In this way, opening a channel brings you outbound liquidity, while at the same time providing you with inbound liquidity, free of charge (modulo onchain fees for opening).
You can, of course, arrange this directly with fellow bitcoiners. However, there is a platform dedicated to this type of circular opening: [Lightning Network +](https://lightningnetwork.plus/). The principle is not to open two channels between the same people, but to set up circular openings involving a minimum of three participants, or even more.
Let's take an example to understand how Lightning Network + works:
- A node operator, named `A`, publishes an announcement stating that he wishes to open a 1 million sats channel with two other people;
- The ad remains active until further participants are added;
- Later, two operators, `B` and `C`, join the `A` node announcement. The triangle is now complete, and the opening phase can begin.
- Node `A` opens a channel to node `B`;
- Node `B` opens a channel to node `C`;
- Node `C` opens a channel to node `A`.
At the end of the operation, each node has 1 million sats of outbound liquidity and 1 million sats of inbound liquidity. This scheme can be extended to four or five participants.
Of course, there is no technical mechanism to guarantee that a participant will actually open the channel they have committed to creating. That's why the platform has set up a reputation system, based on positive reviews when operators meet their commitments. And in the worst-case scenario, if you come across someone who doesn't cooperate, you won't have lost any money: you'll simply have missed an opportunity for inbound liquidity.
This solution is particularly suited to a "consumer" profile, as it allows you to obtain inbound liquidity free of charge, while connecting your node to other small operators. On the other hand, if you're a trader, this approach is generally not relevant: every sat of inbound liquidity requires blocking a sat of outbound liquidity, and your large needs for inbound liquidity would then involve tying up too much capital.
To use Lightning Network +, you have two options: either use the application integrated into Umbrel, or use the classic website and create an account by logging in from your node. I recommend the latter, as the integrated application doesn't offer the full range of available functions.
Go to the [Lightning Network +](https://lightningnetwork.plus/) website and click on the `Login` button at the top right of the interface.
To authenticate yourself, you need to sign the message provided using your Lightning node's private key. With ThunderHub, this operation is very simple. Start by copying the message displayed by LN+.
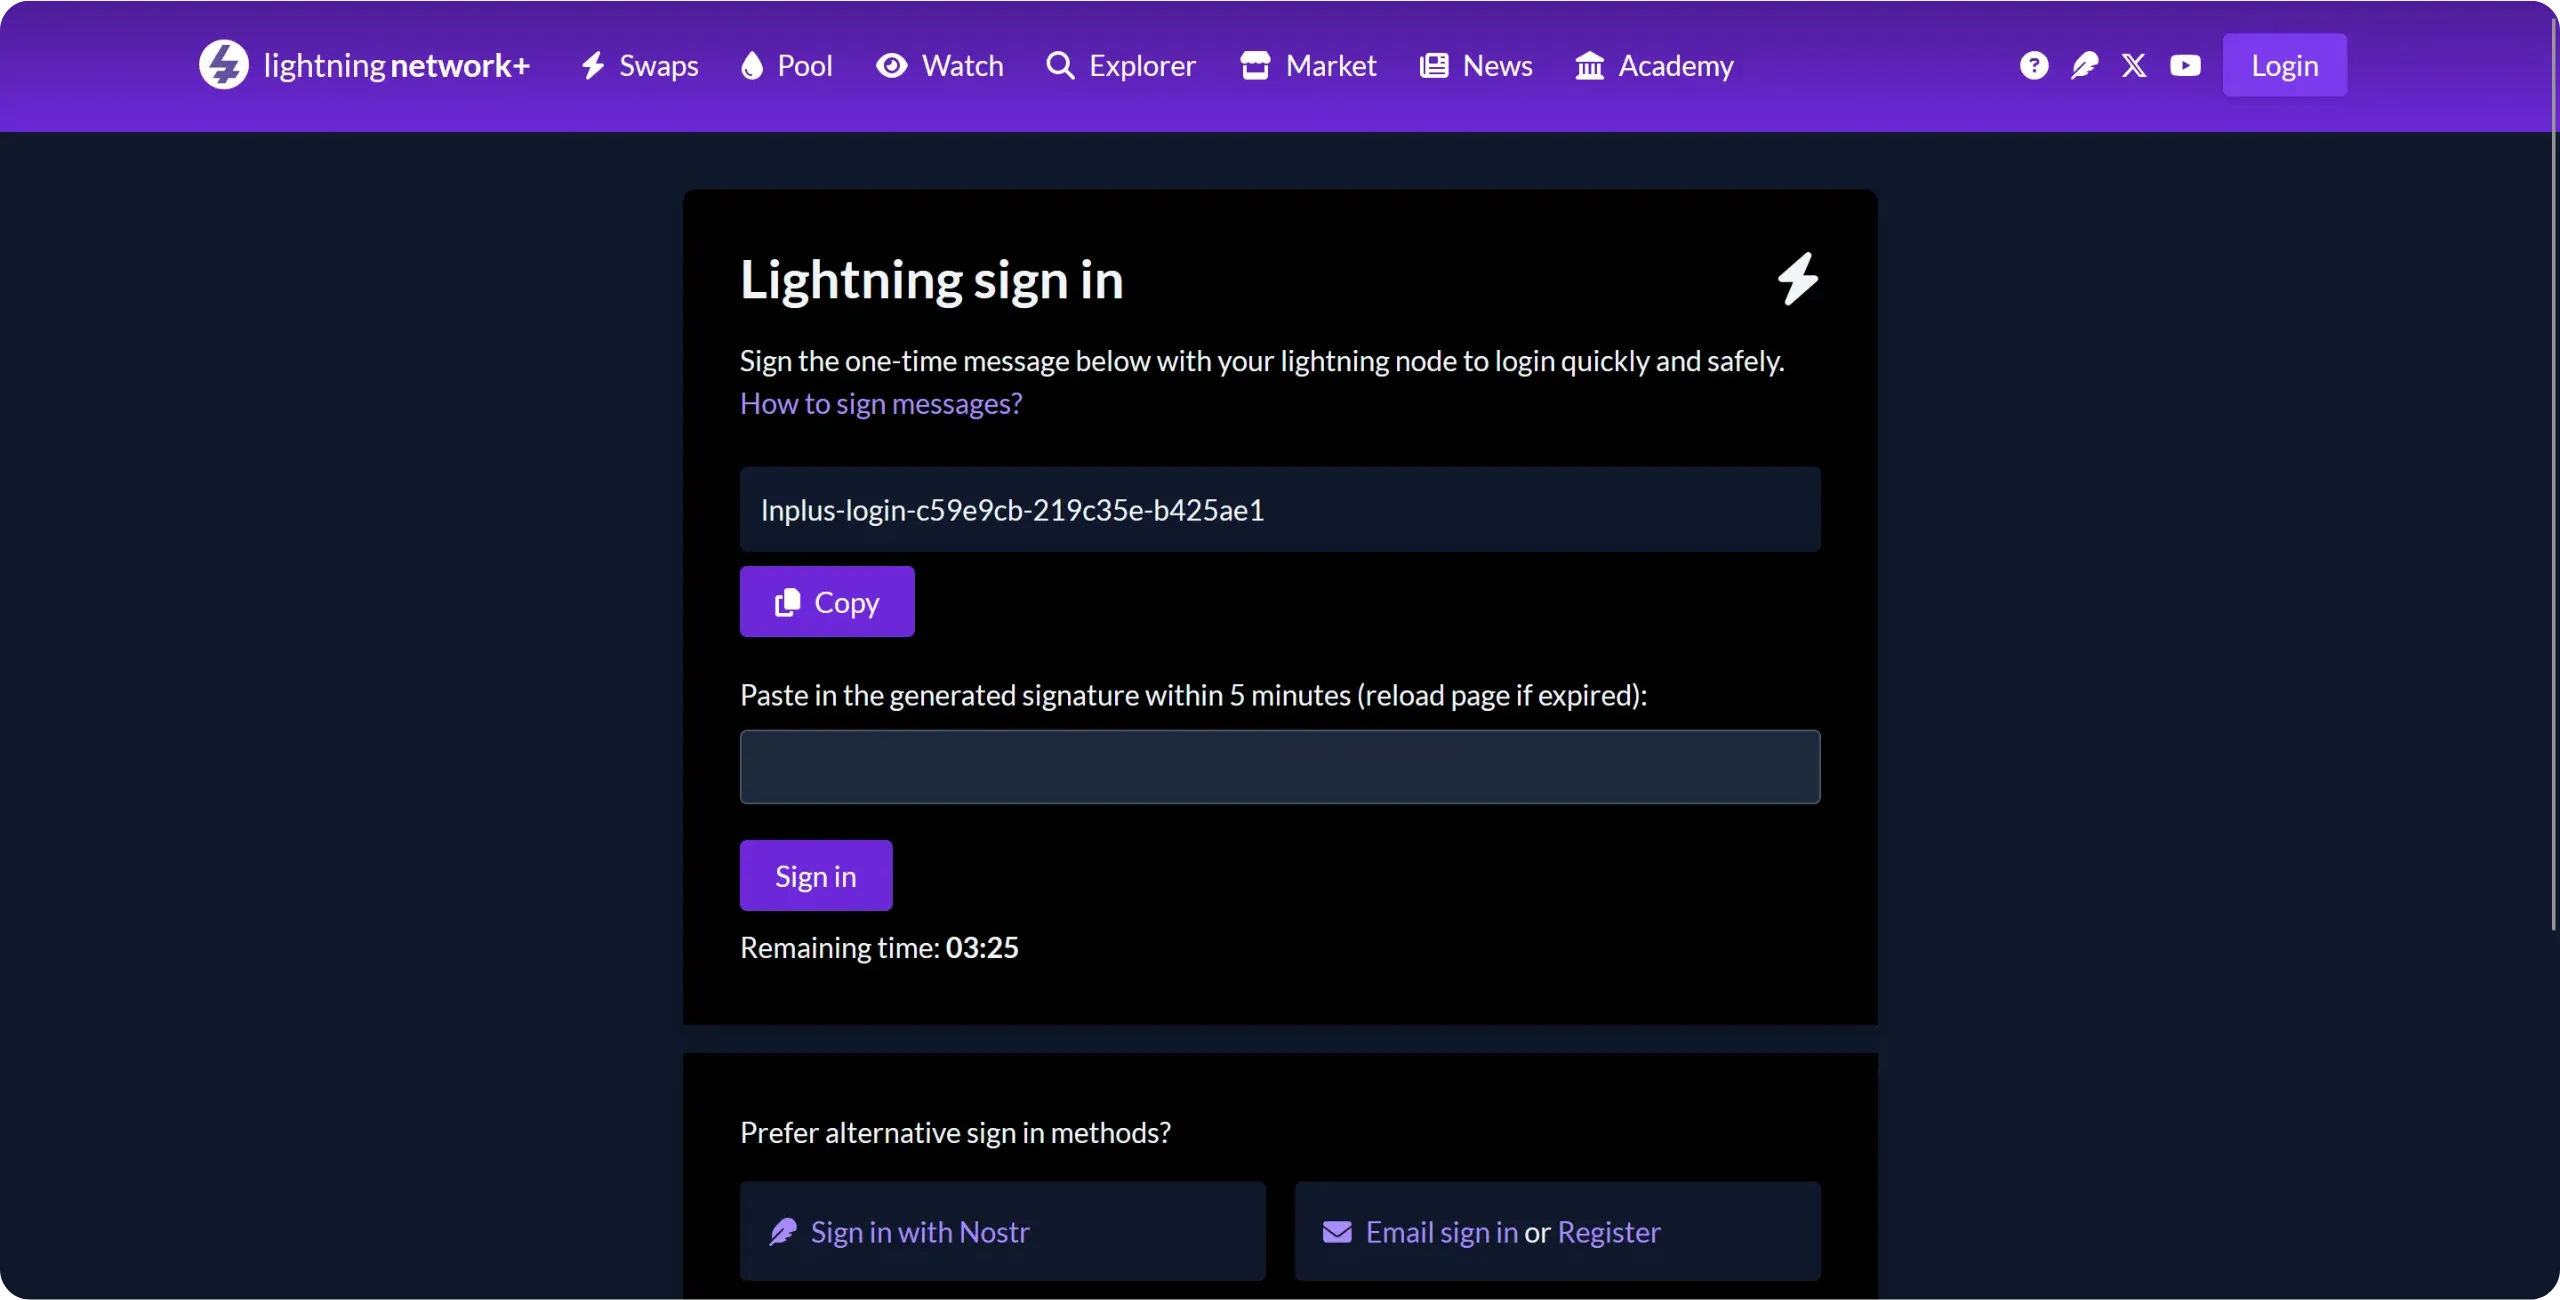
In ThunderHub, go to the `Tools` tab, then click on the `Sign` button in the `Messages` section.
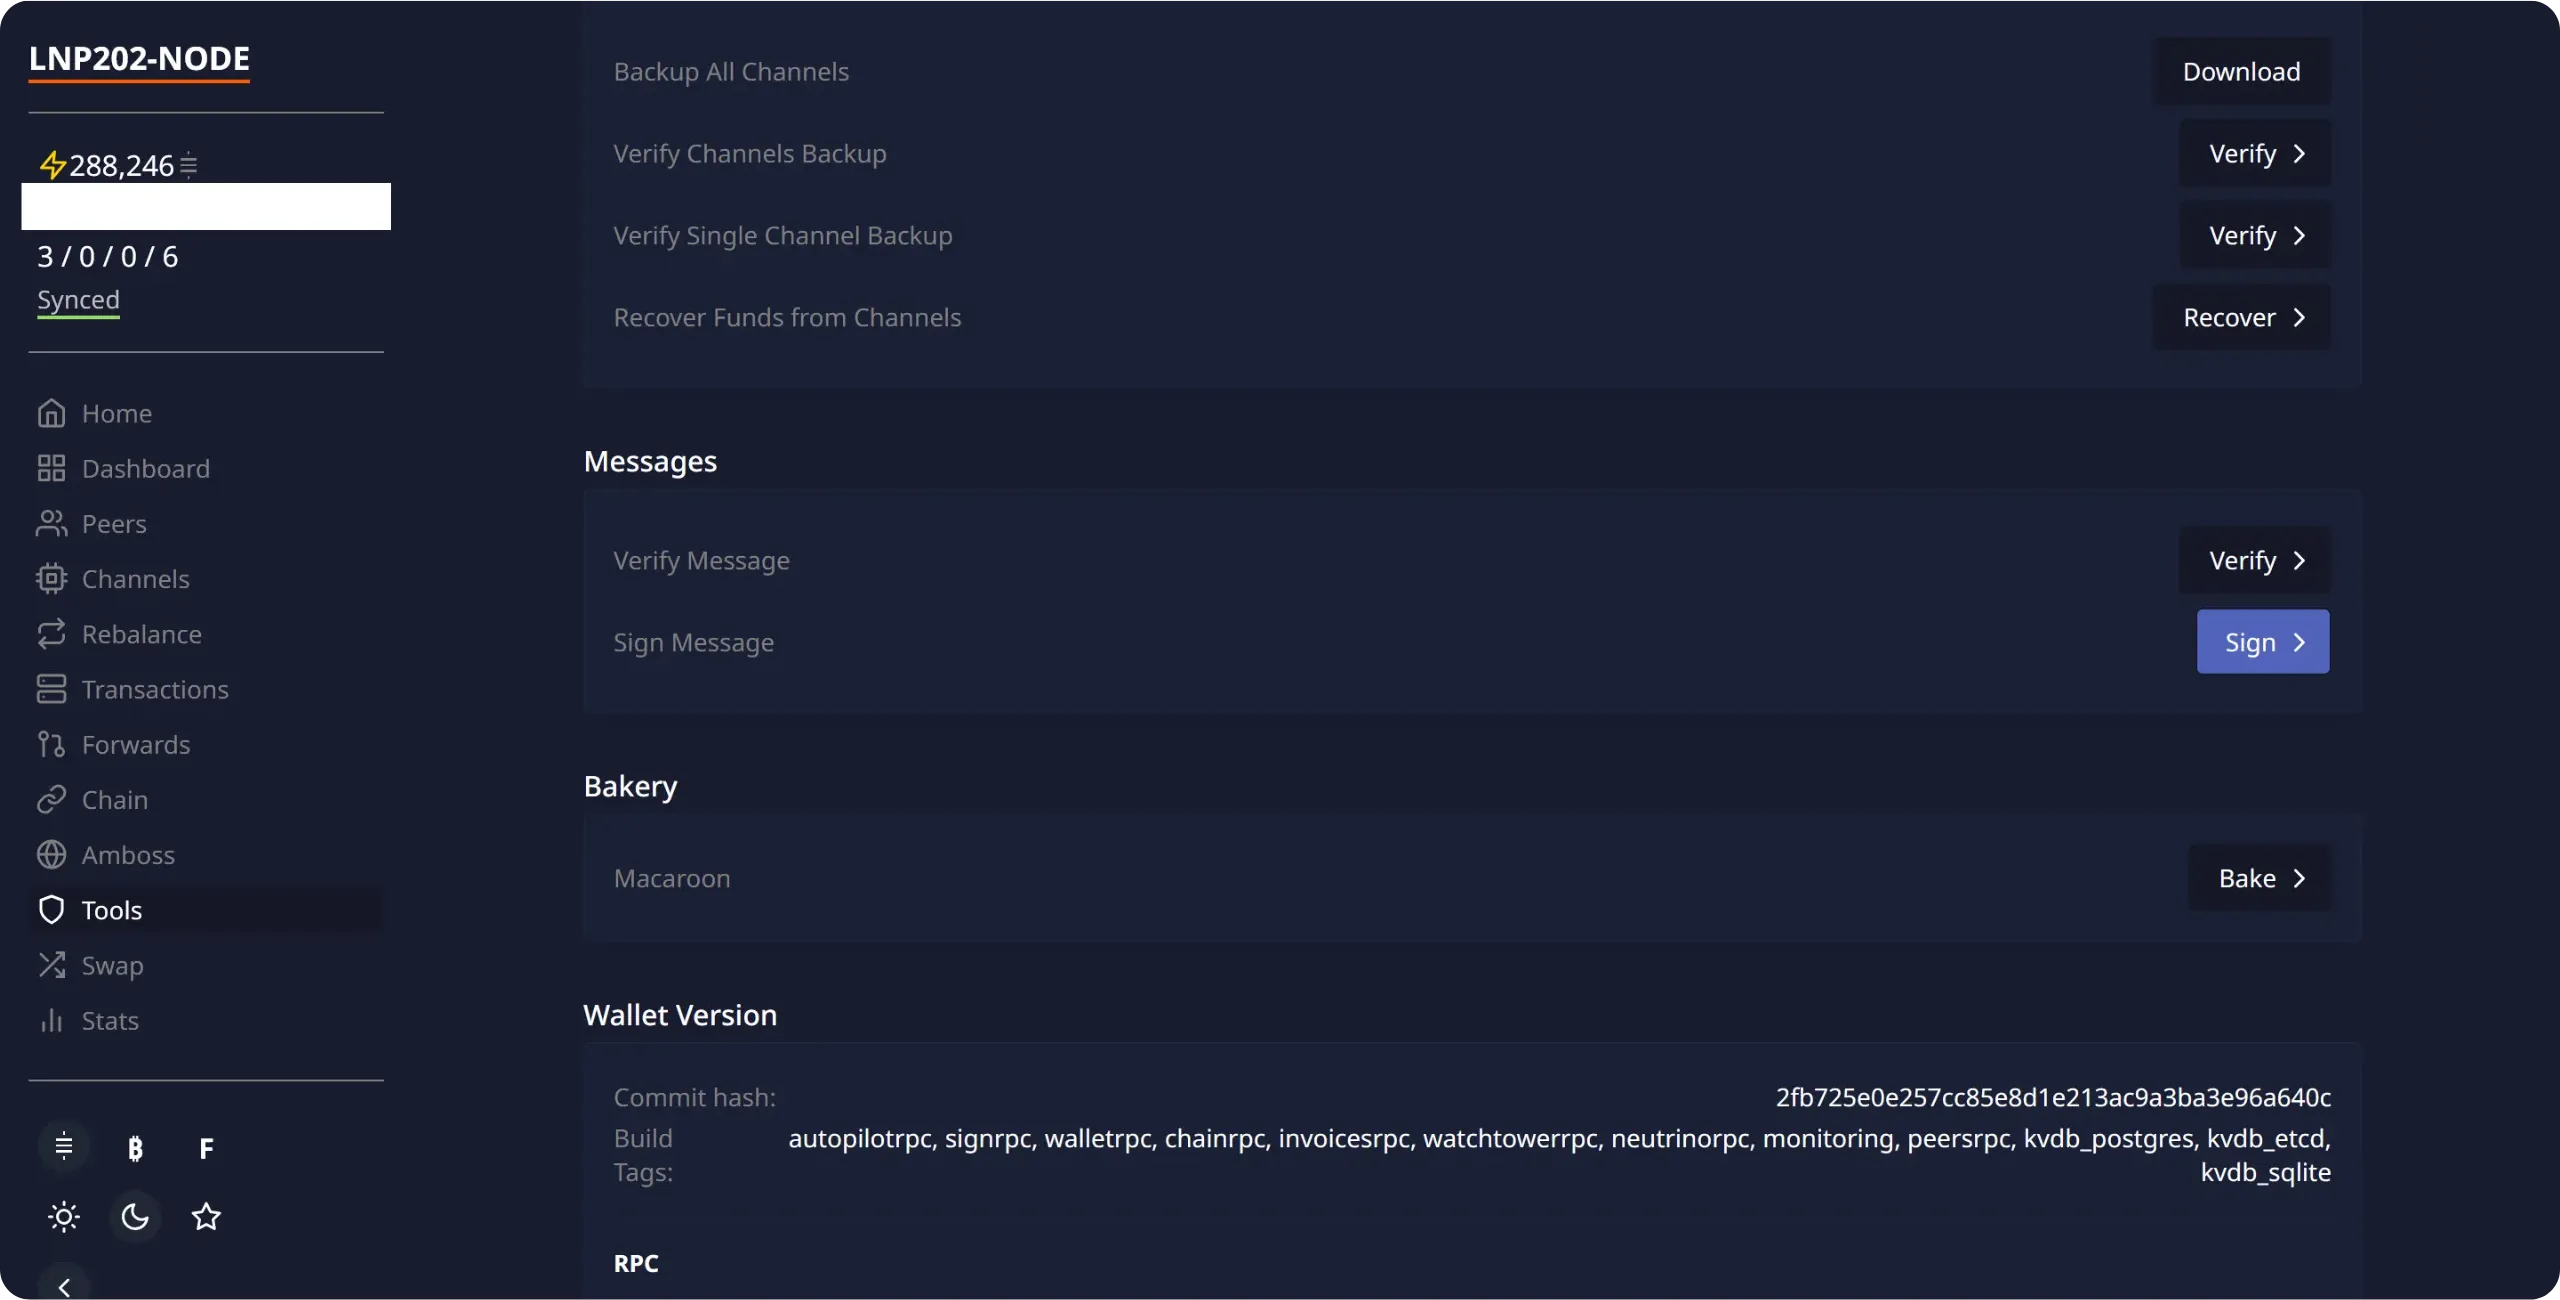
Paste the authentication message provided by LN+, then click `Sign`.
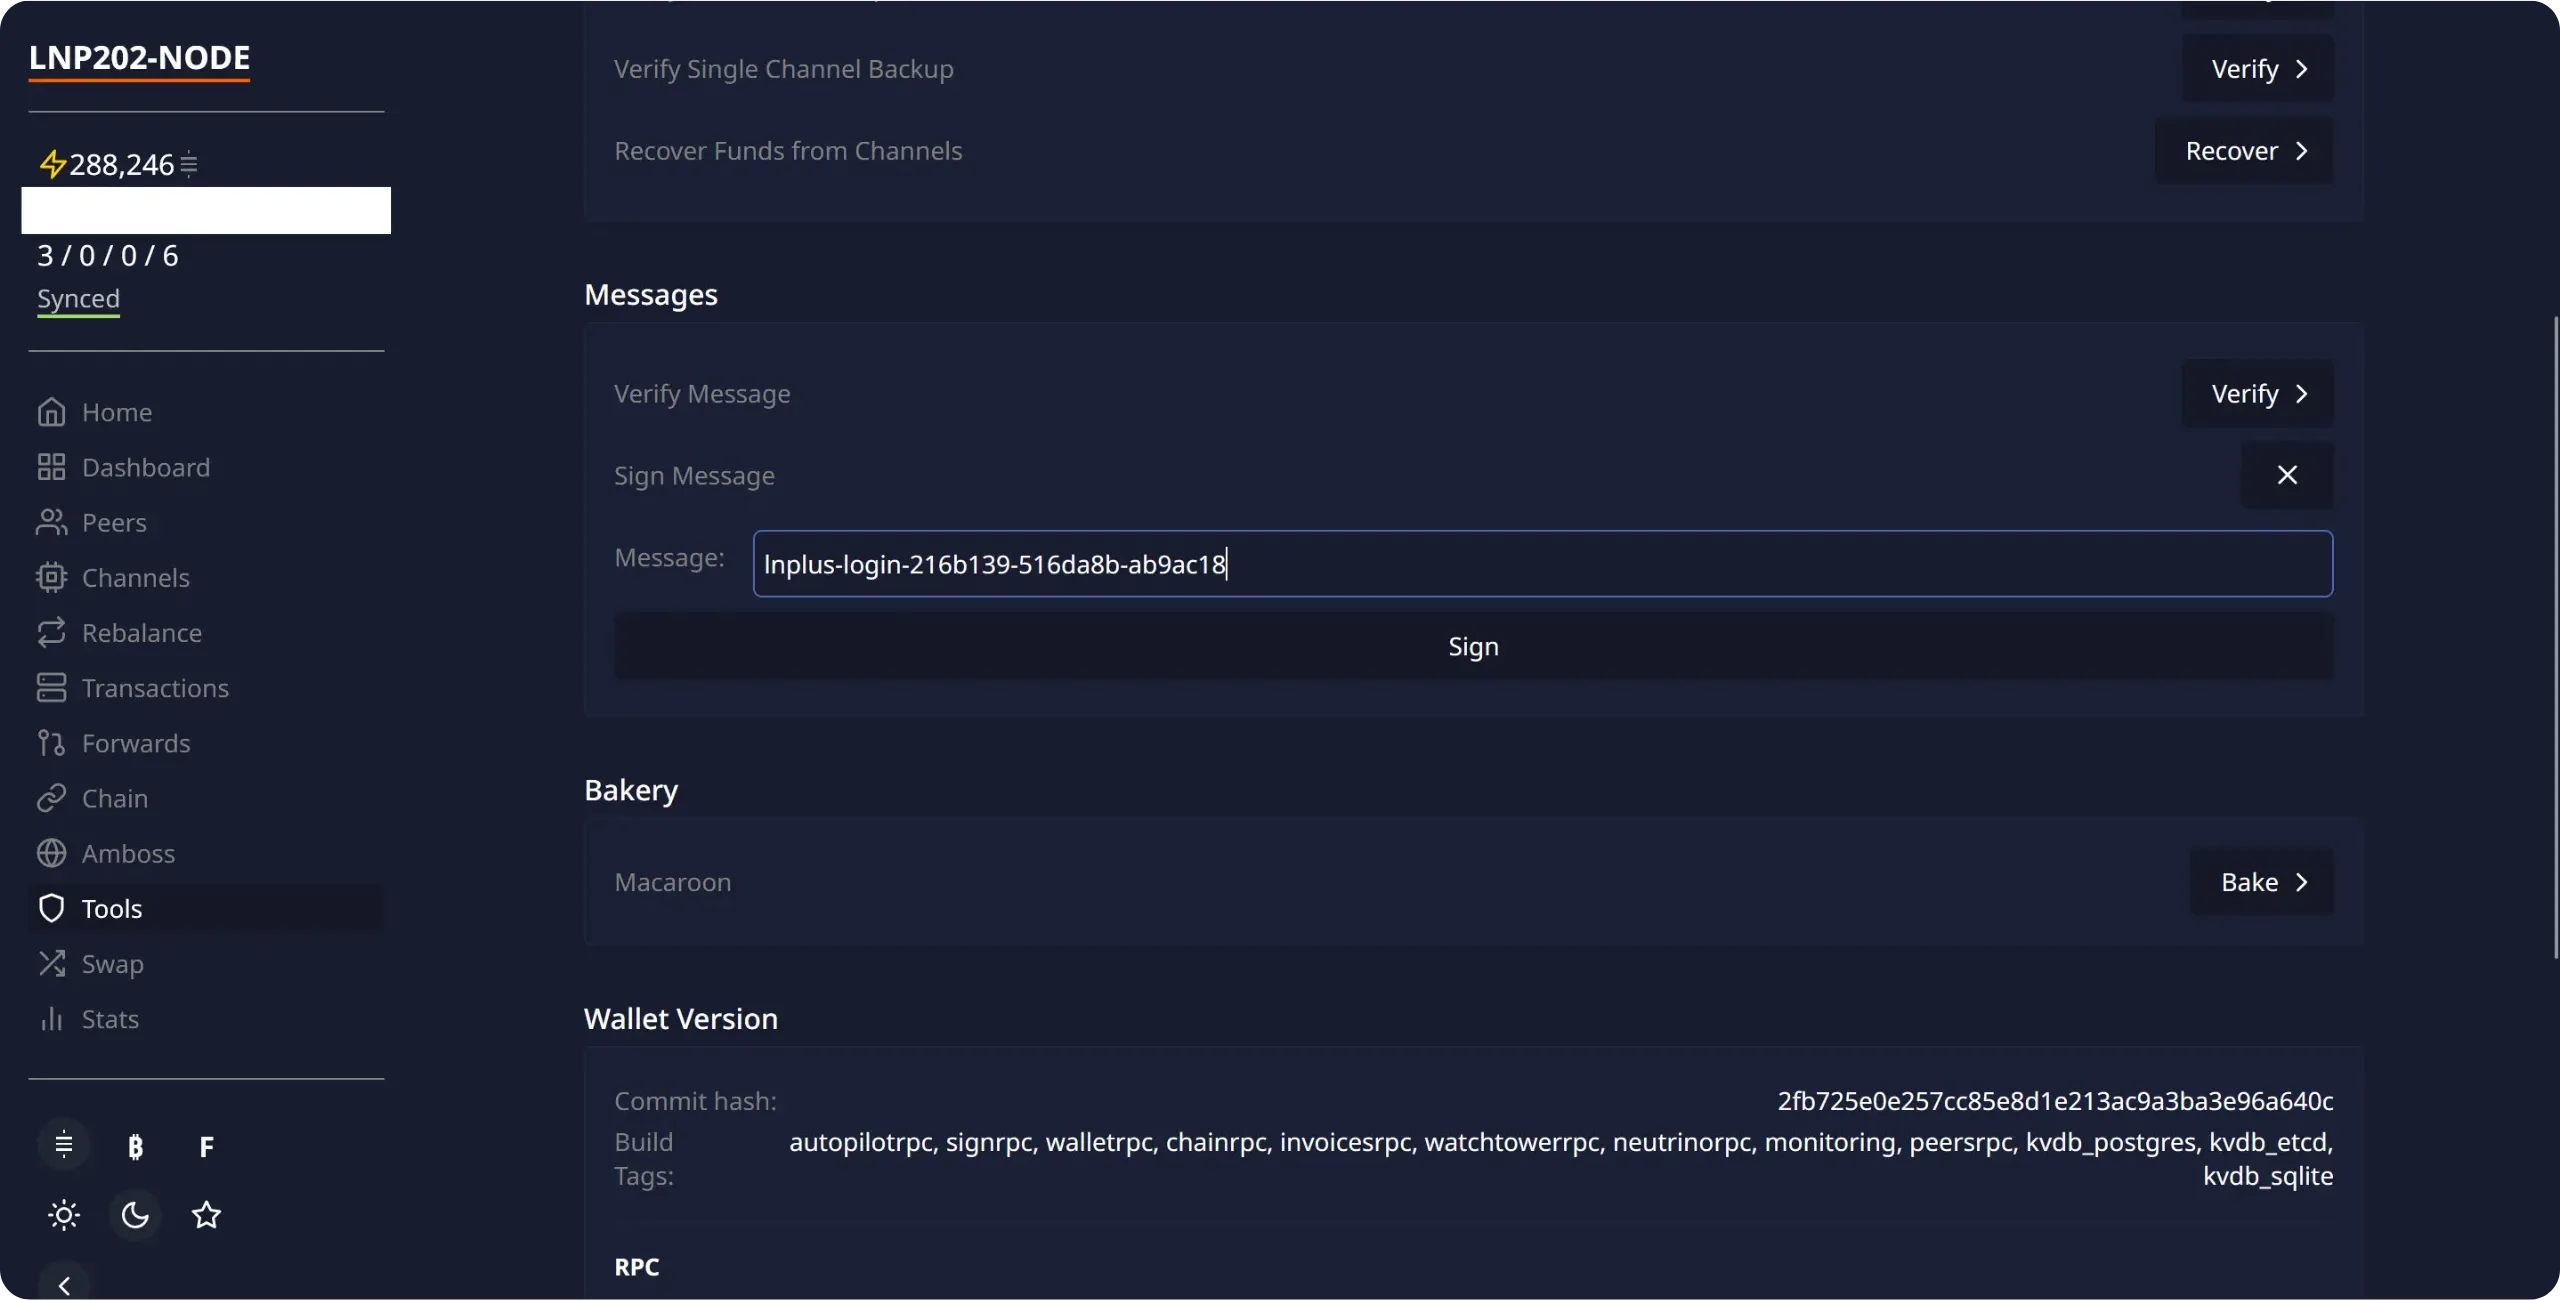
ThunderHub then signs this message using your node's private key. Copy the generated signature.
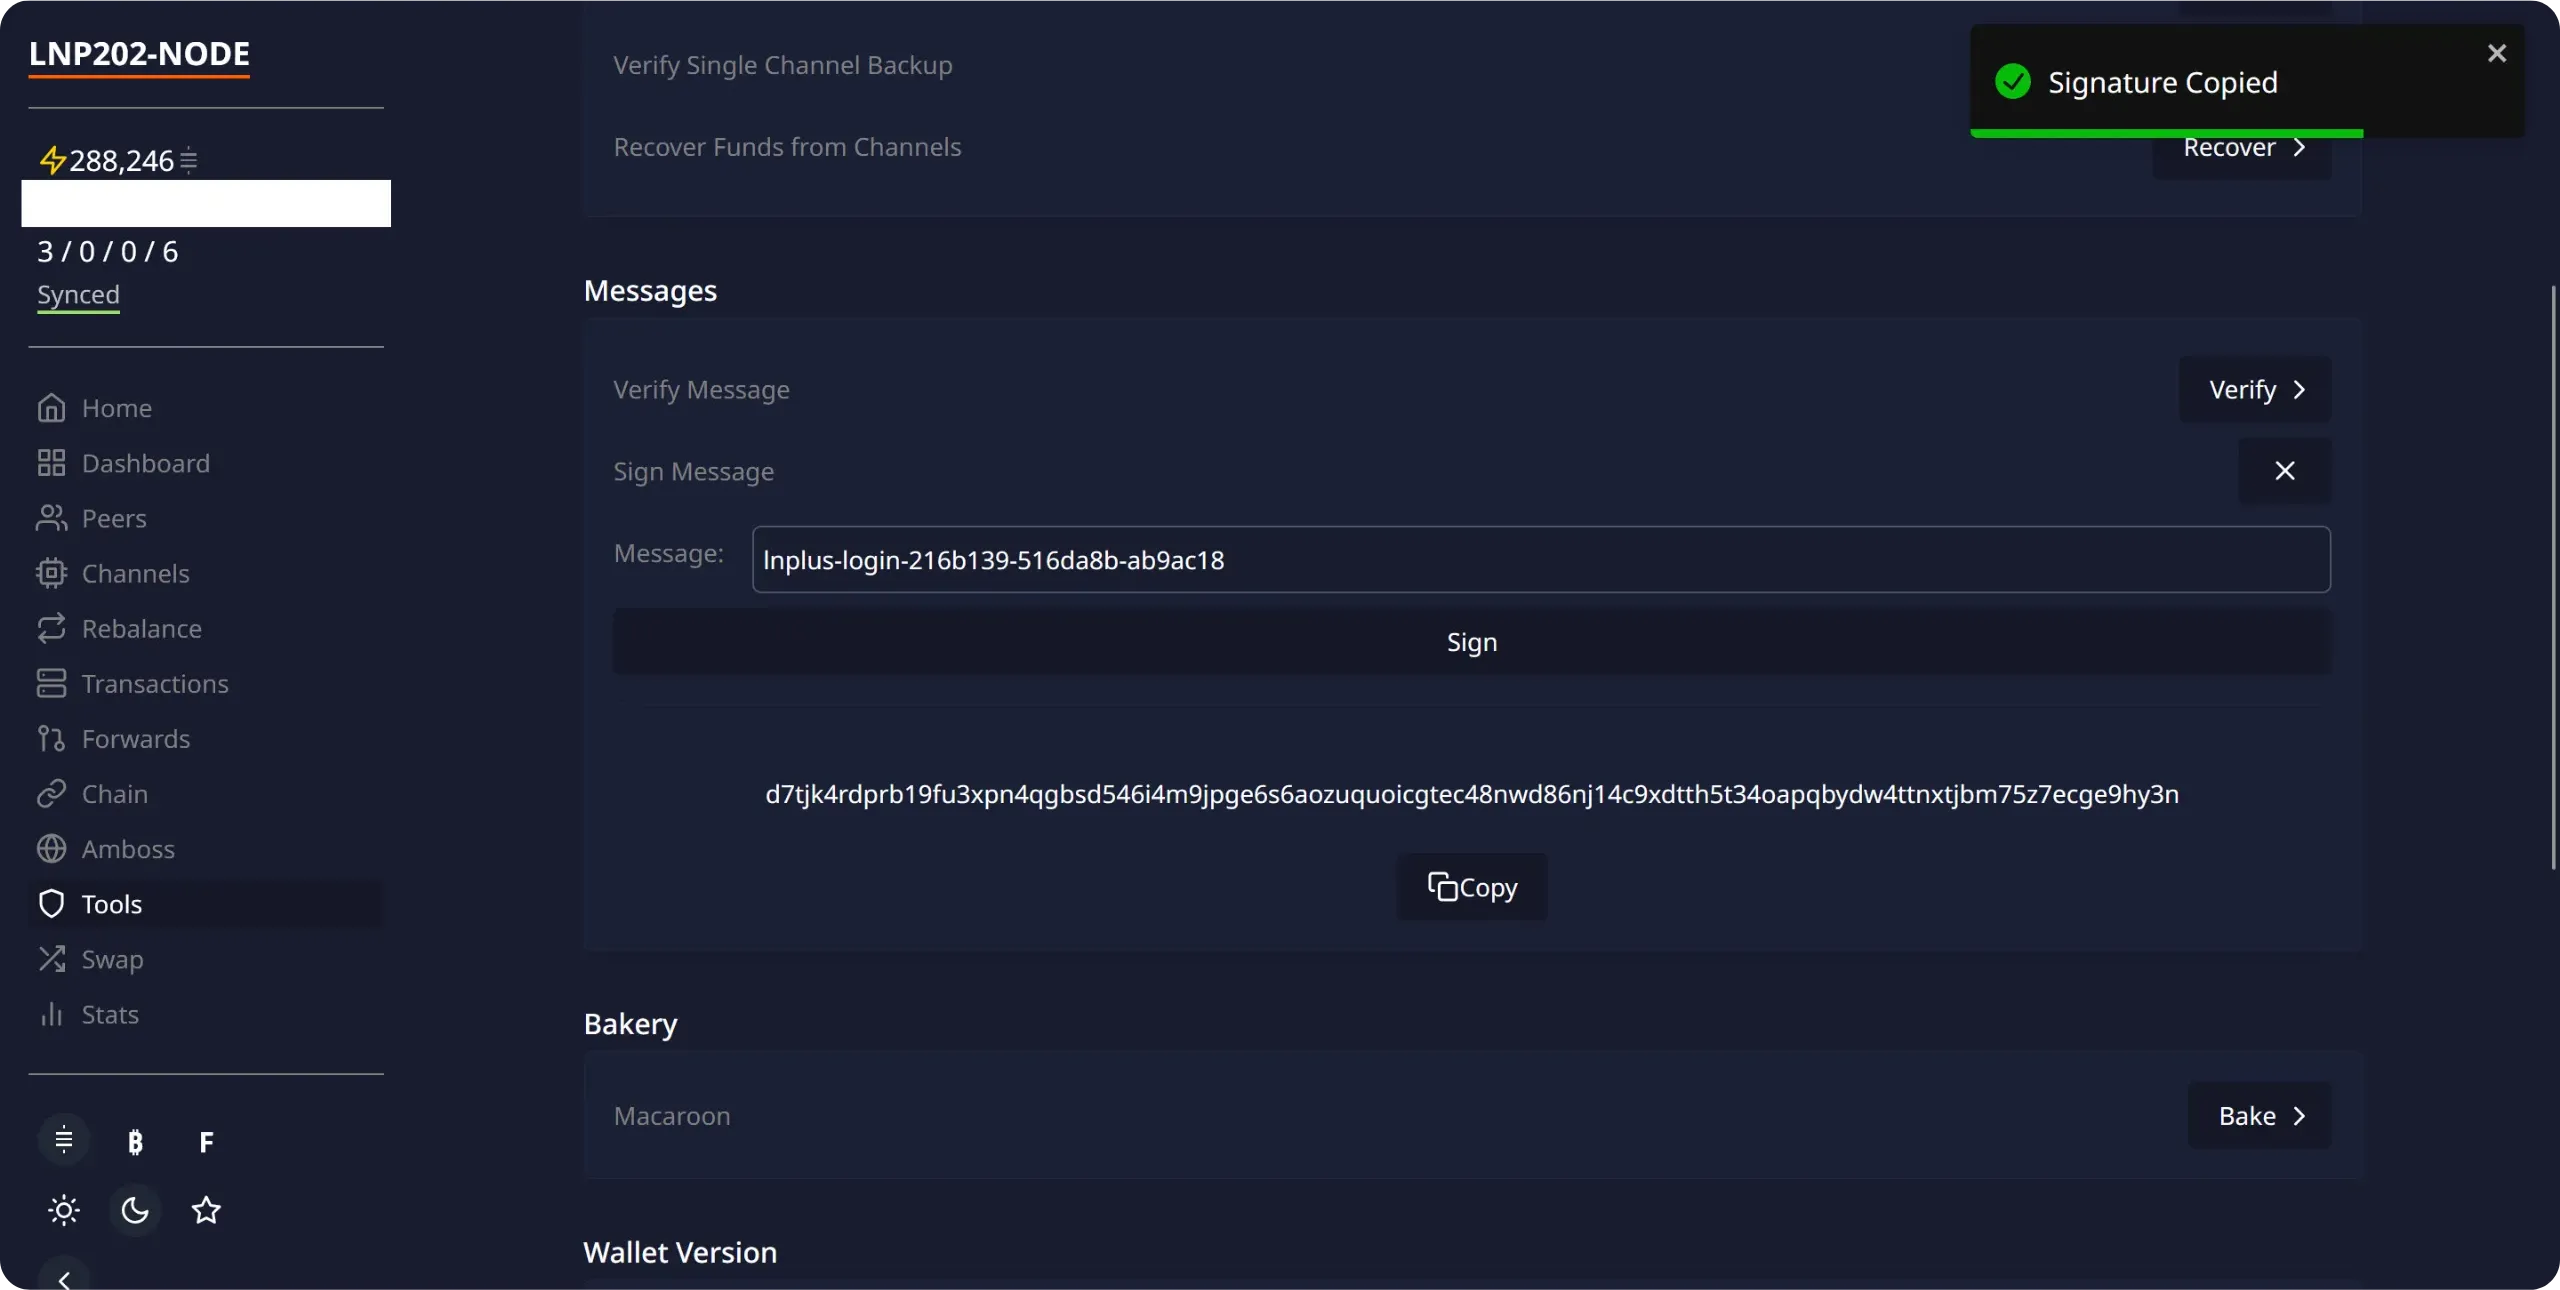
Paste this signature into the corresponding field on the LN+ site, then click `Sign in`.
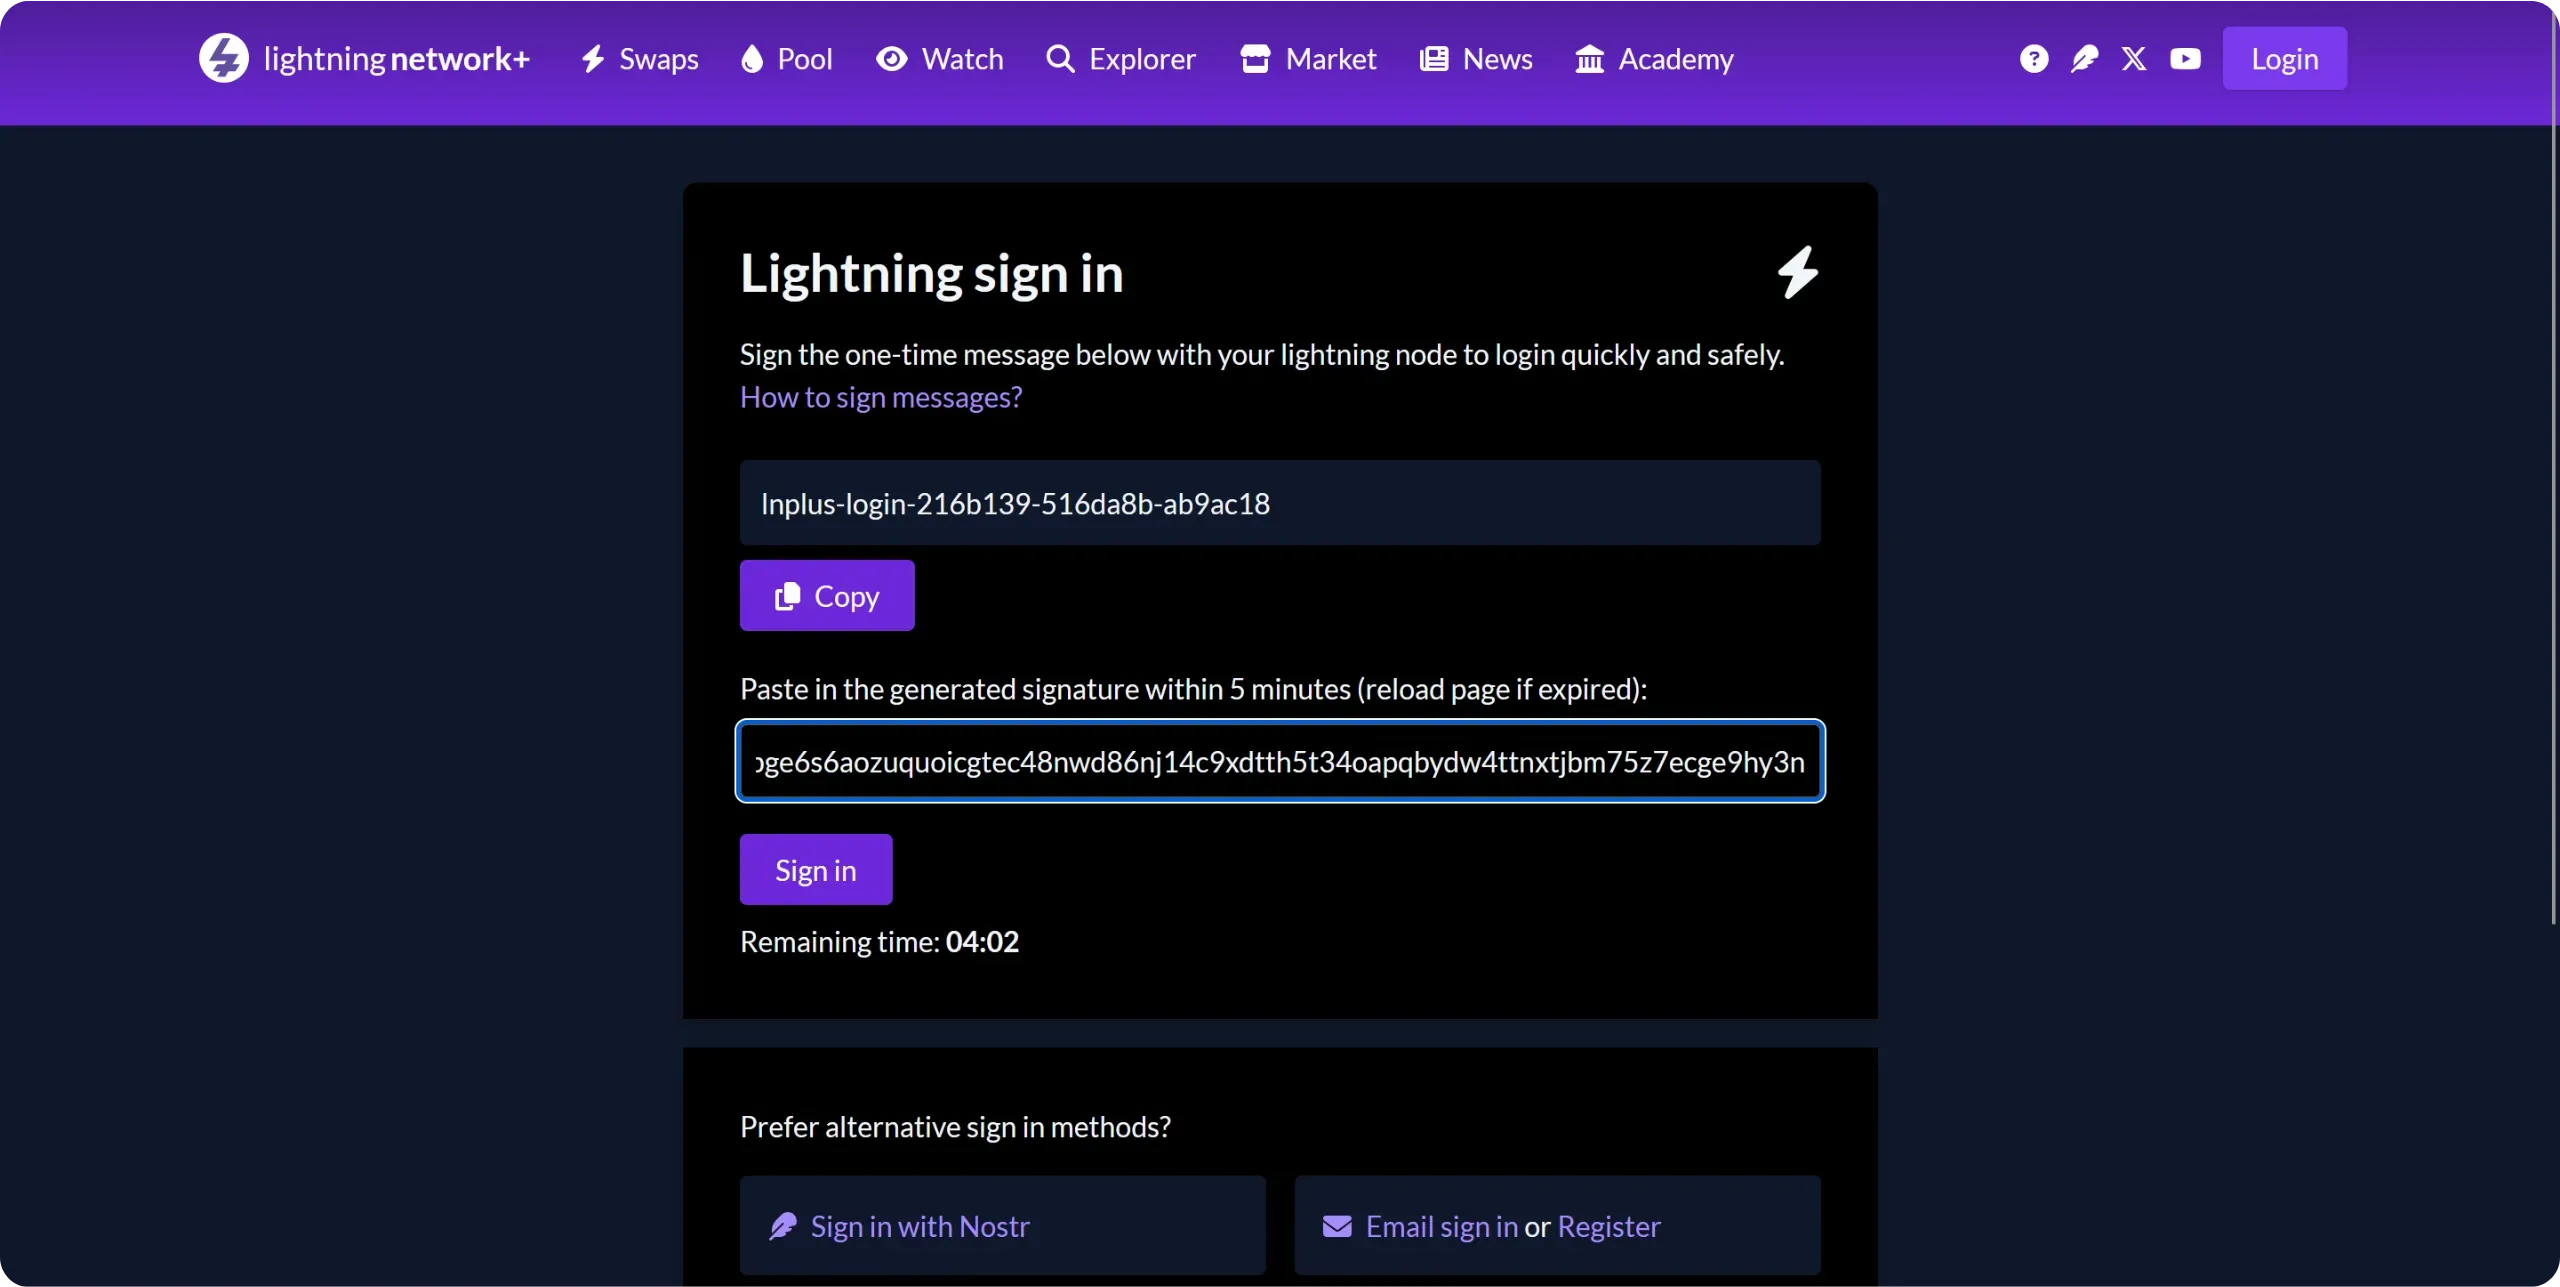
You are now connected to LN+ with your Lightning node. This process allows LN+ to verify that you are the rightful owner of the node you are claiming on their platform.
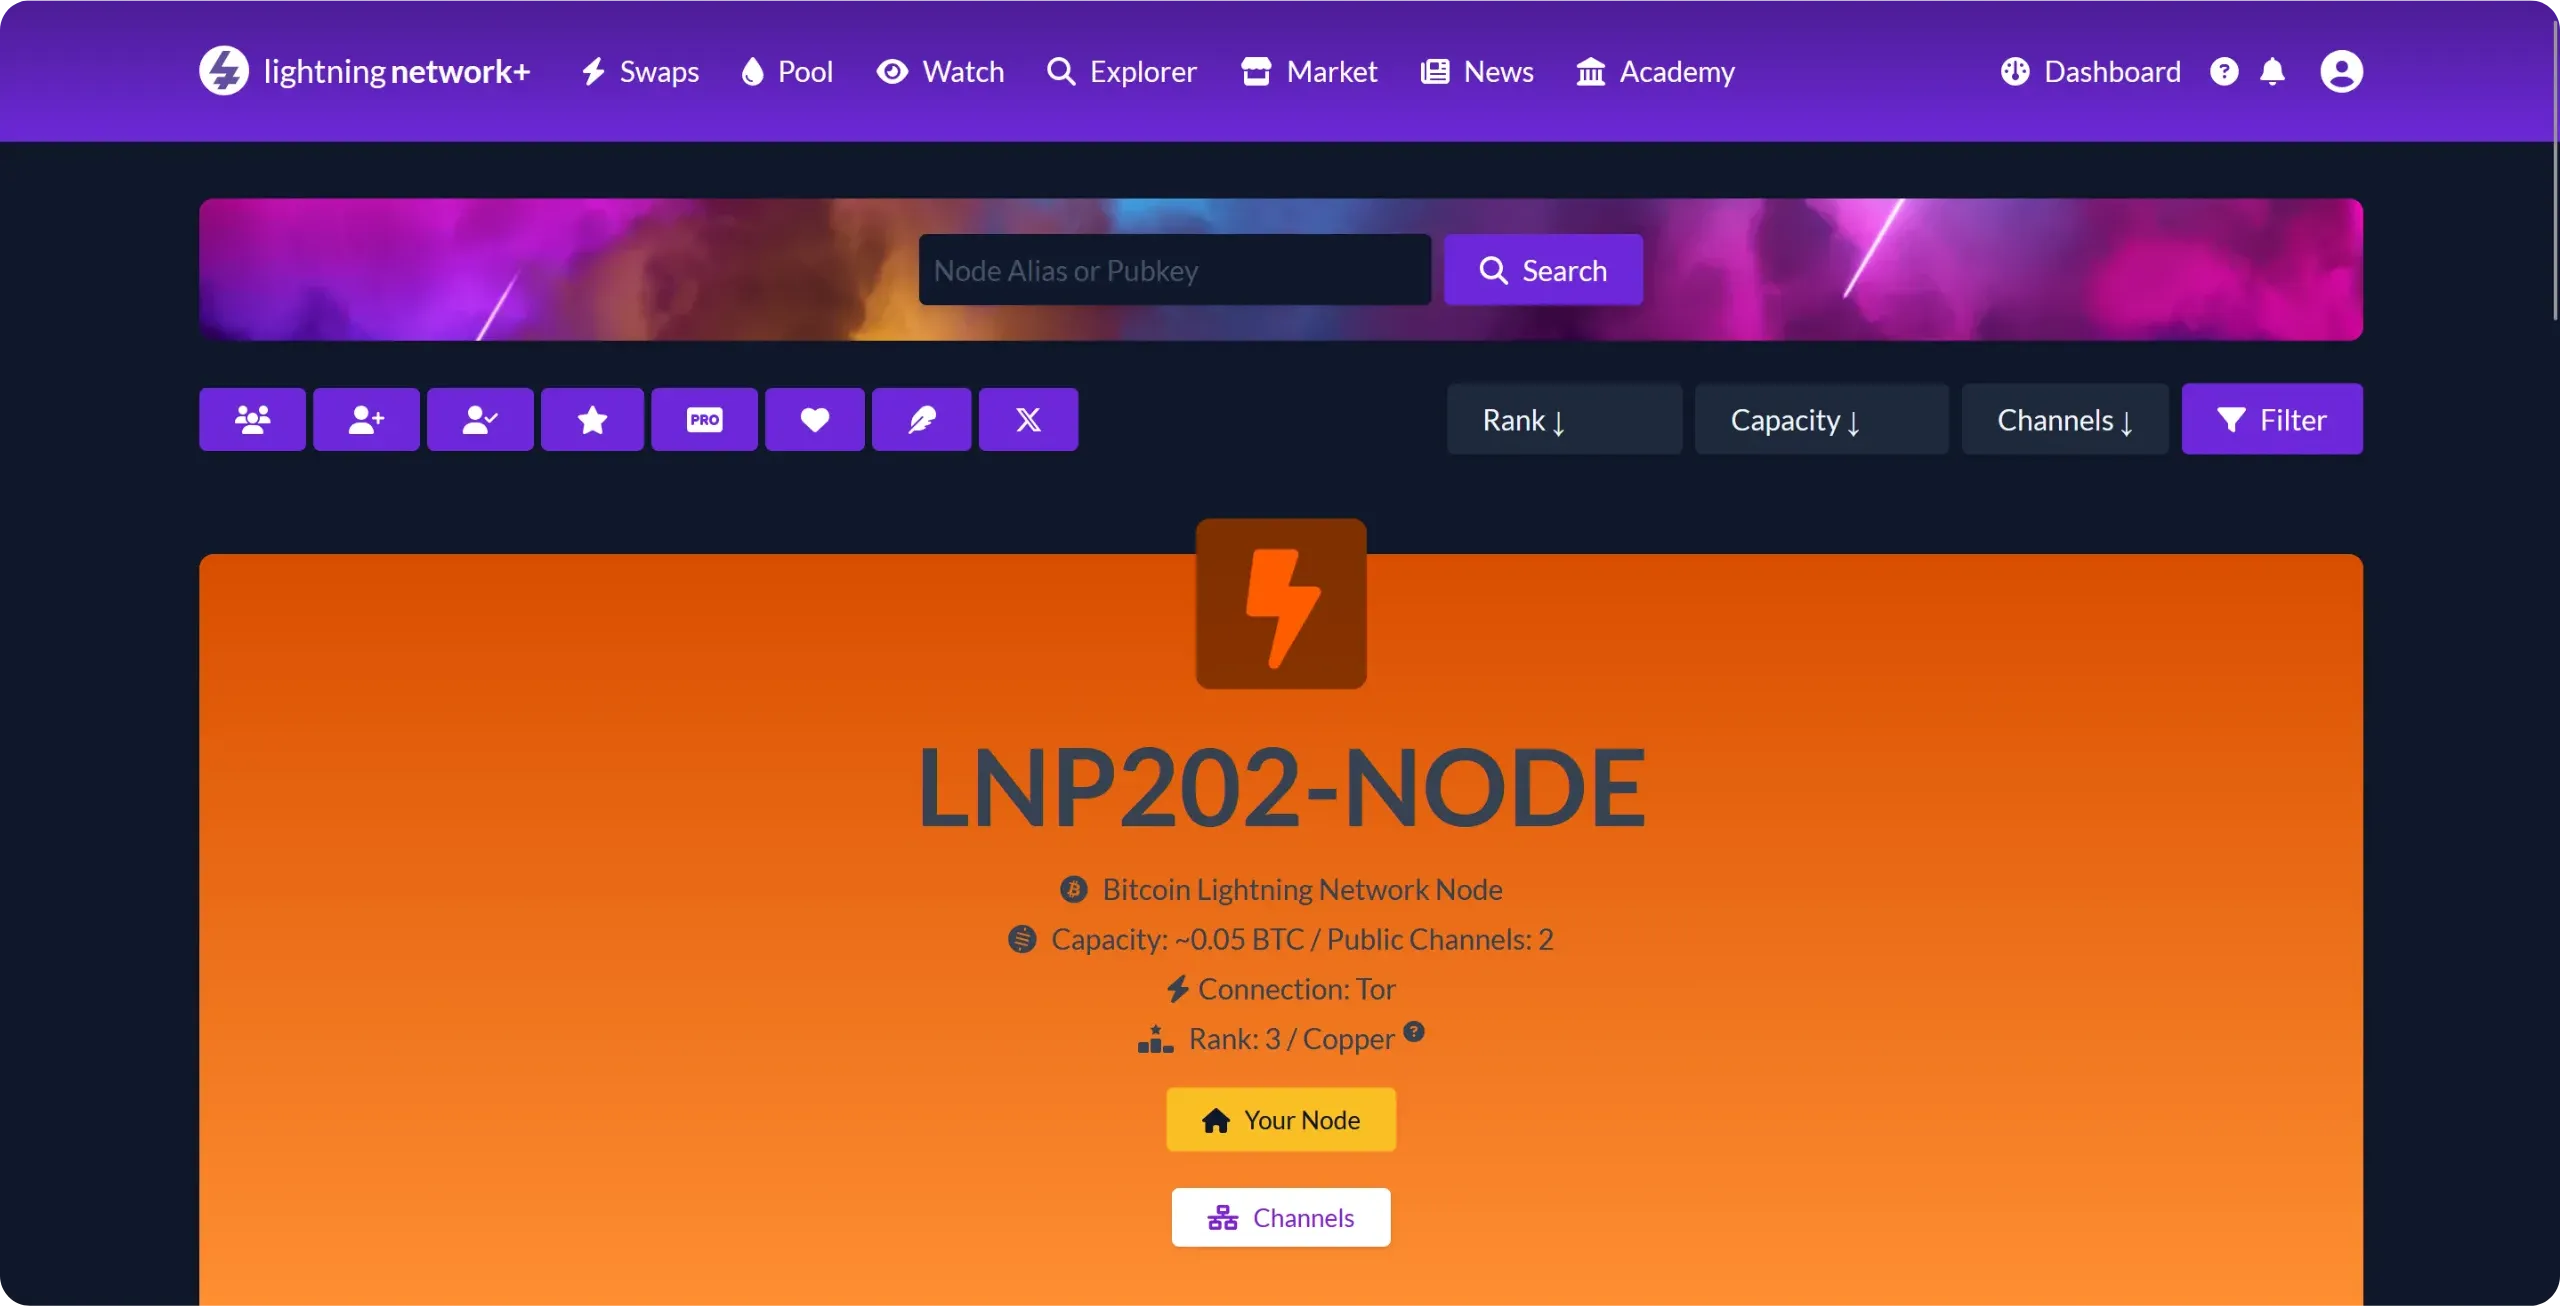
If you wish, you can personalize your LN+ profile, for example by adding a short biography.
To participate in your first circular channel opening, go to the `Swaps` menu at the top of the interface. Here you'll find all the swaps currently available, depending on your node's characteristics.
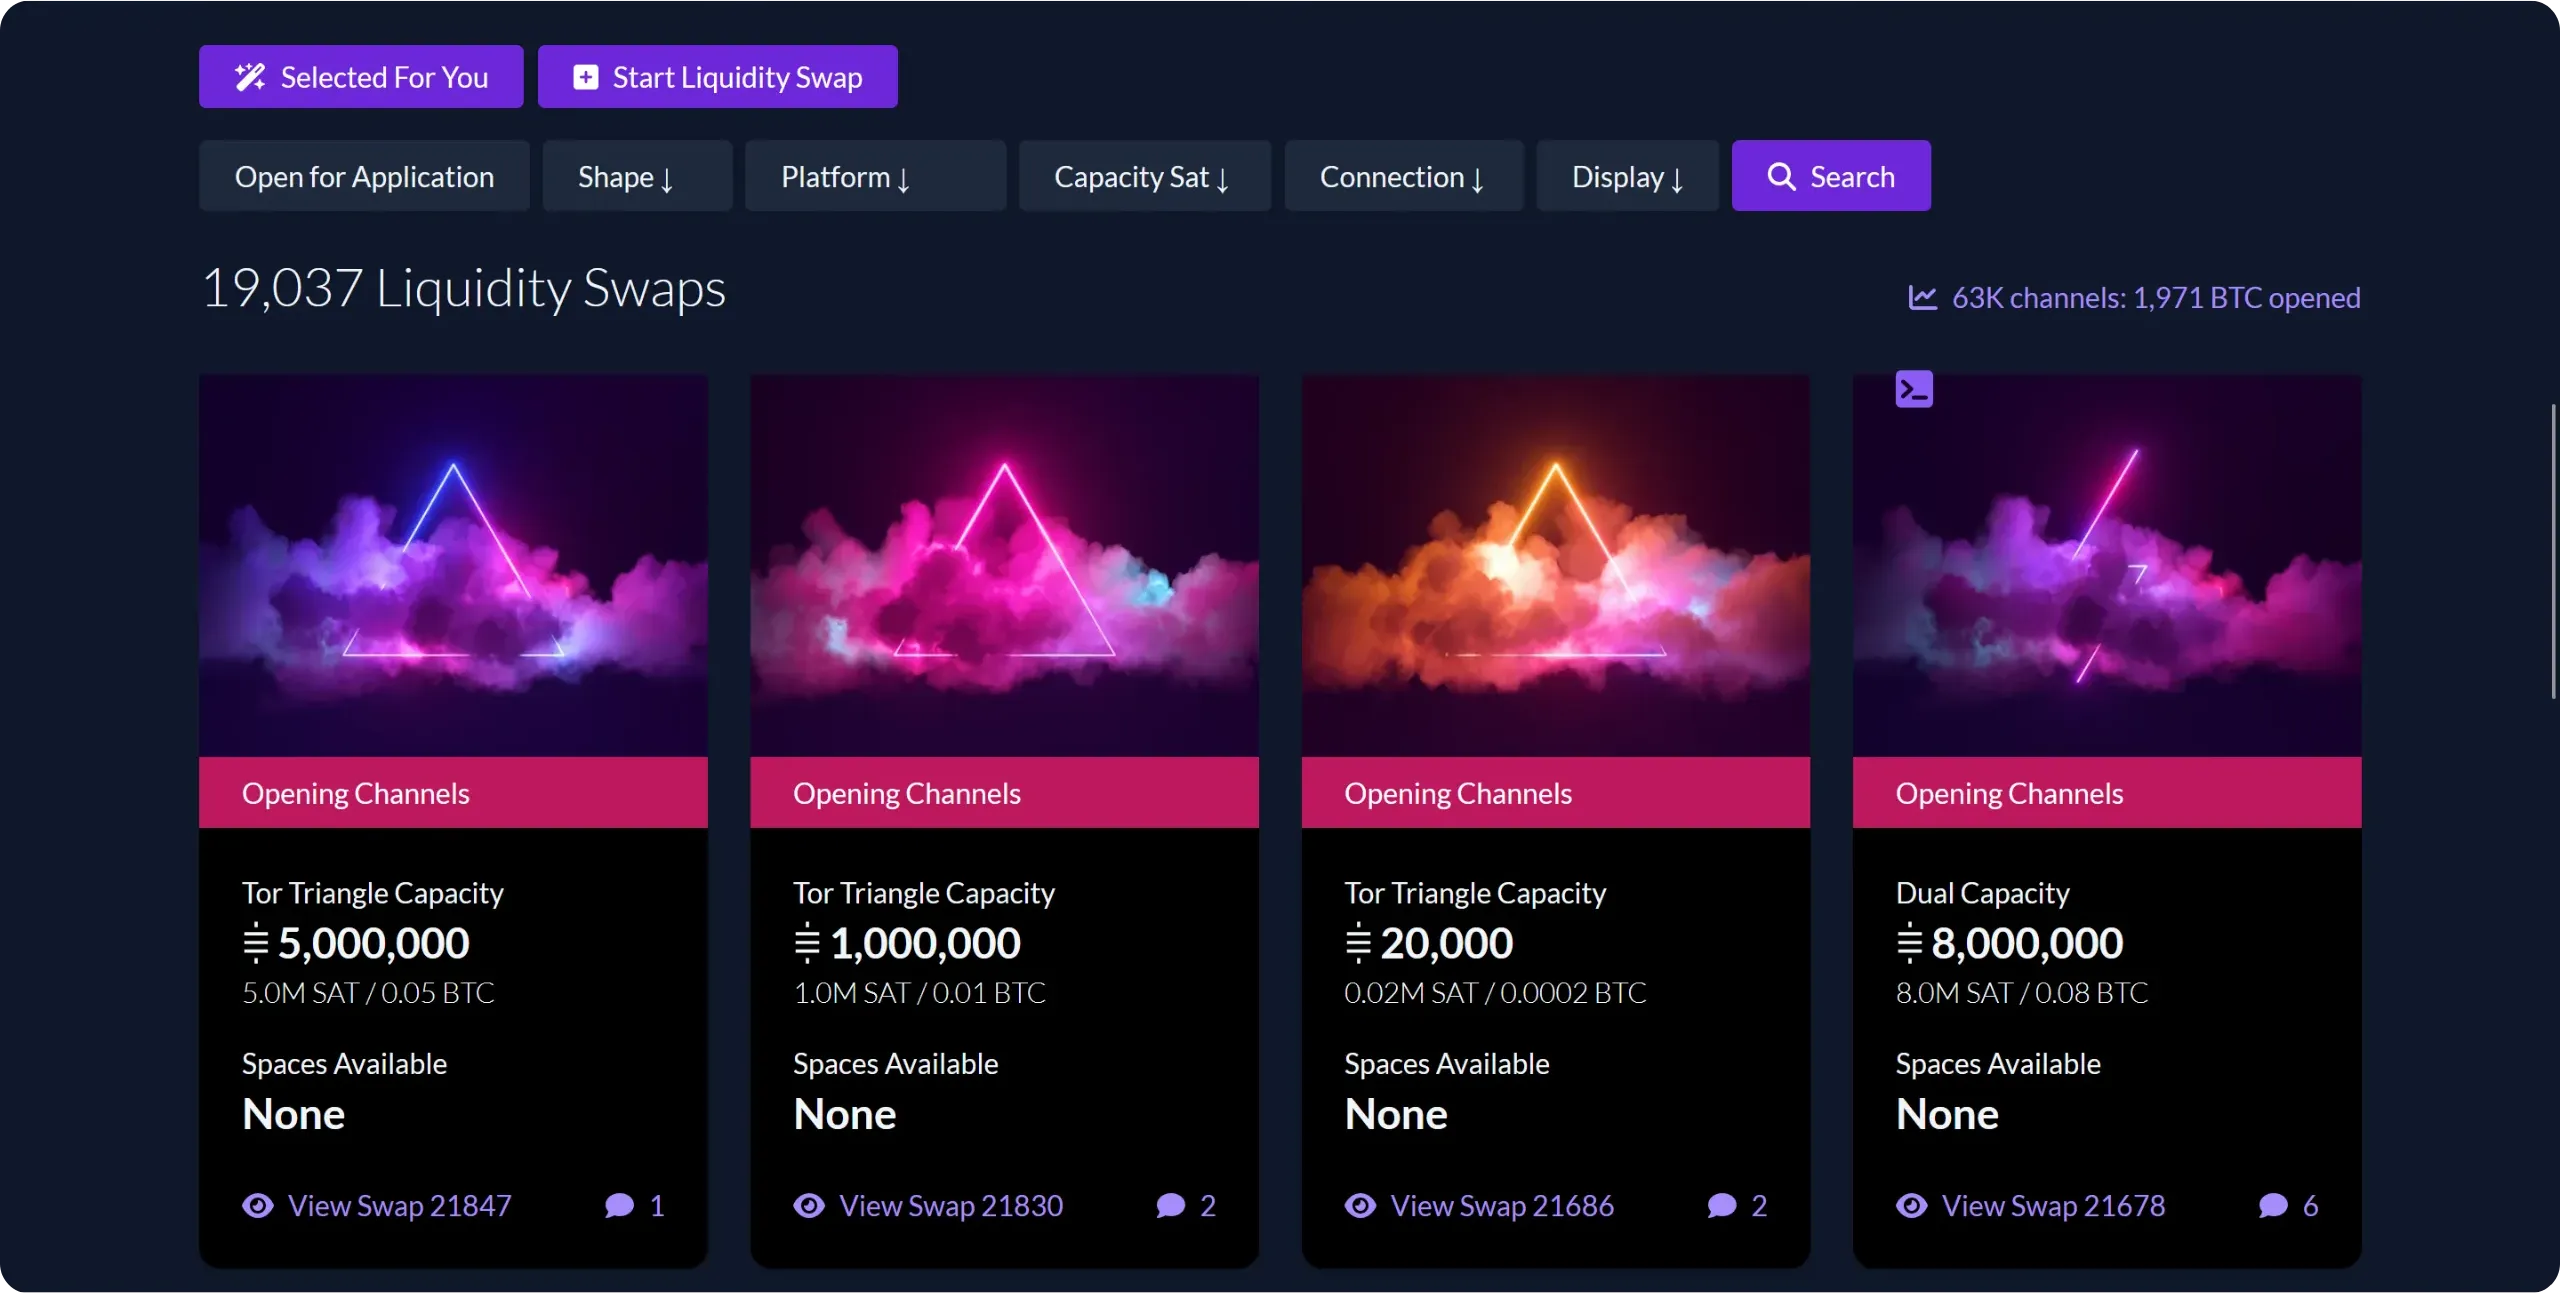
To join an existing swap offer, simply click on it and register. However, on LN+, the creator of a swap may impose certain conditions on participants, such as a minimum number of channels or a minimum total node capacity. It is therefore possible, especially in the early days, that few offers will be available to your node. In my case, despite a few channels already open, no offers were available for my node. So I created my own swap, and you can do the same if you're in the same situation.
Click on `Start Liquidity Swap`, then enter your offer parameters:
- Choose the total number of participants (3, 4 or 5);
- Indicate the amount of channels to be opened (make sure you have at least this amount in your onchain wallet);
- Define the channel open time. This is the period during which participants agree not to close them;
- On the right, you can set restrictions for participants: minimum number of channels, minimum total capacity and type of connection accepted.
Once all the parameters have been set, click on the `Start Liquidity Swap` button.
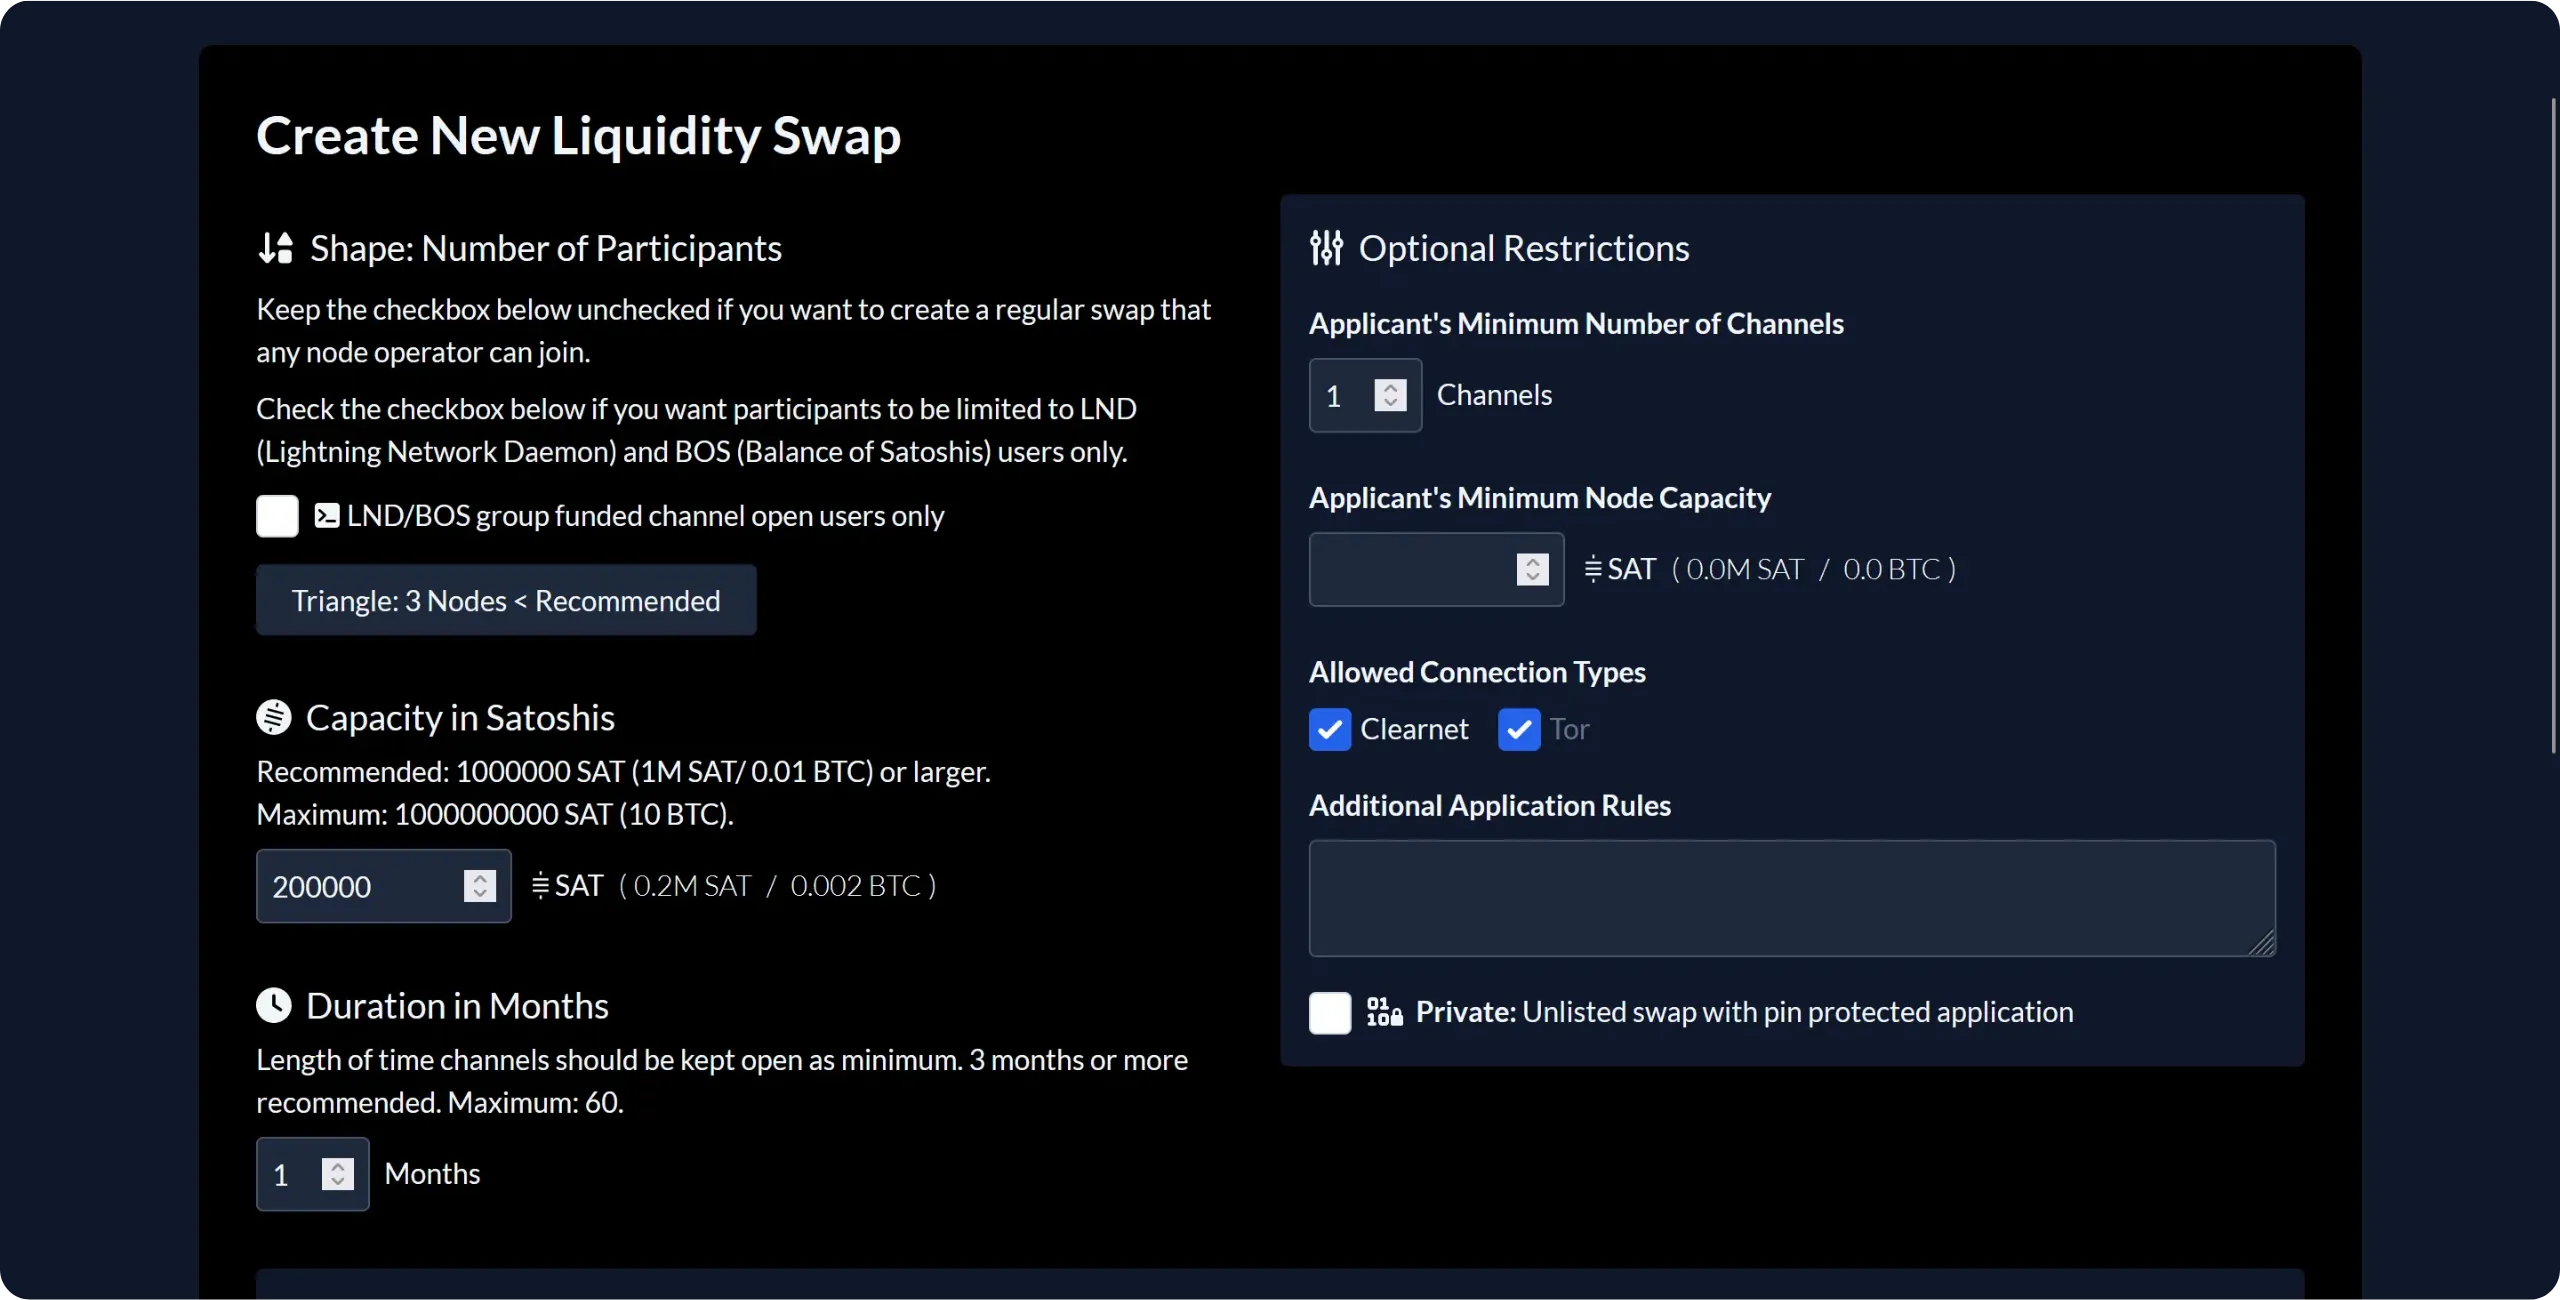
Your swap offer has now been created. Now all you have to do is wait for other node operators to sign up. If your conditions are not too restrictive, this shouldn't take too long. Remember to monitor the status of your swap in the hours or days that follow.
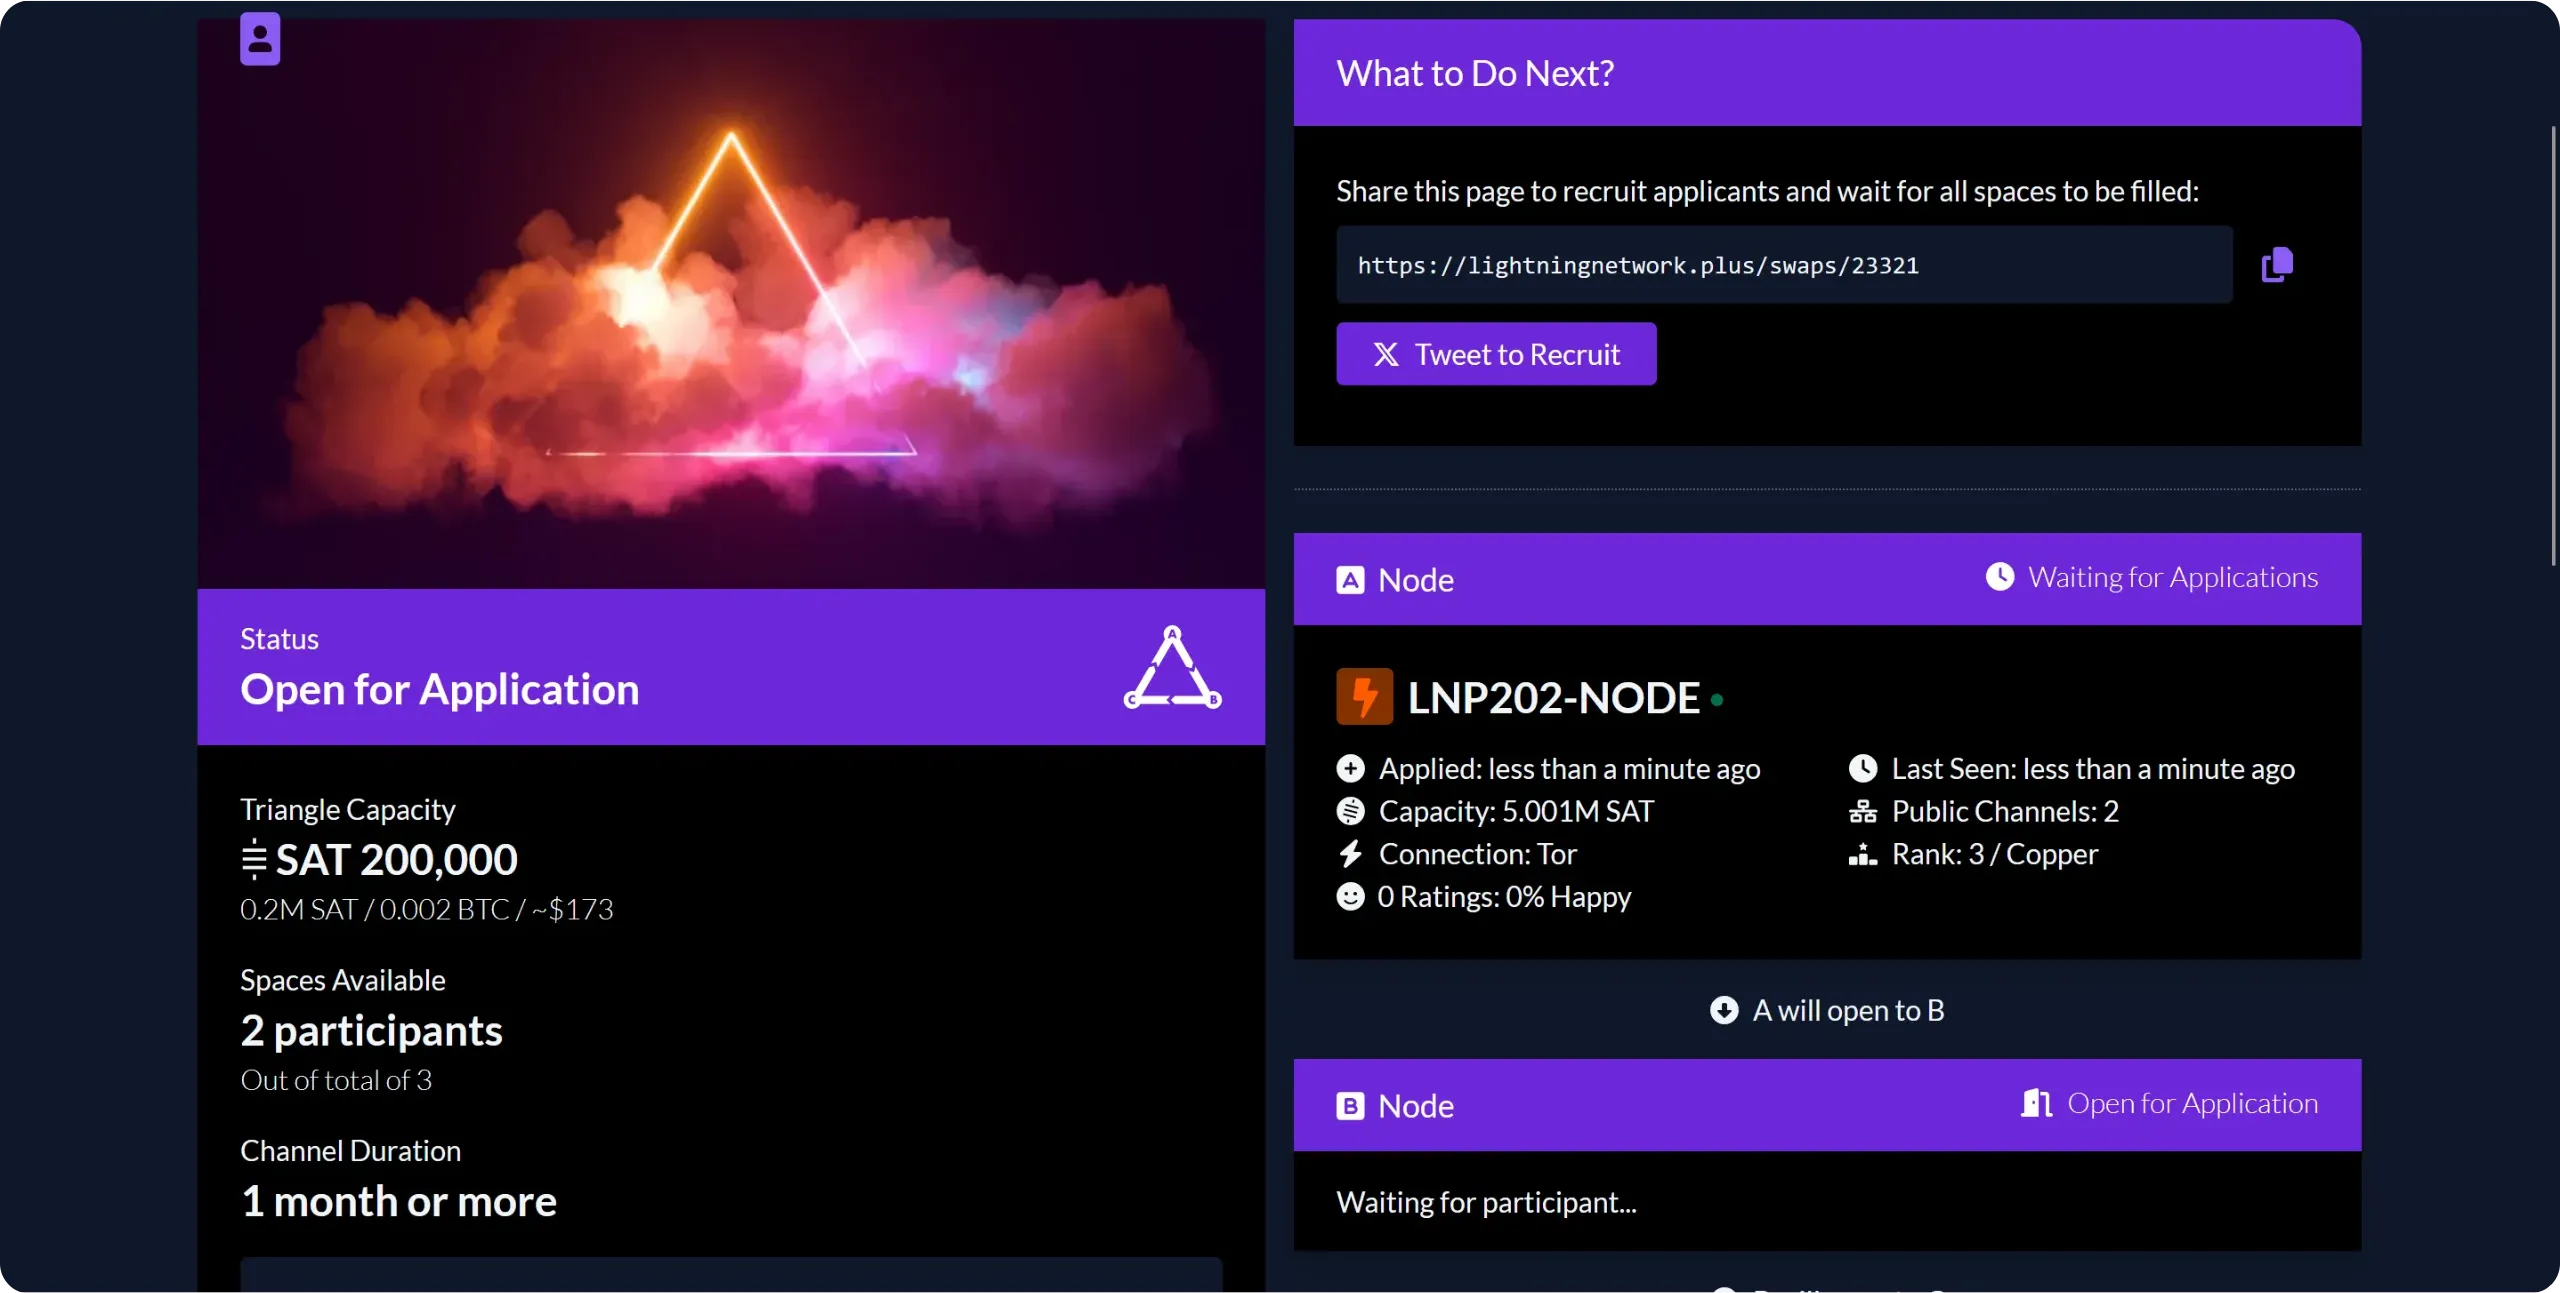
All the swap places have been taken: we now move on to the channel opening phase. Each participant can see, from his LN+ interface, to which node he has to open a Lightning channel.
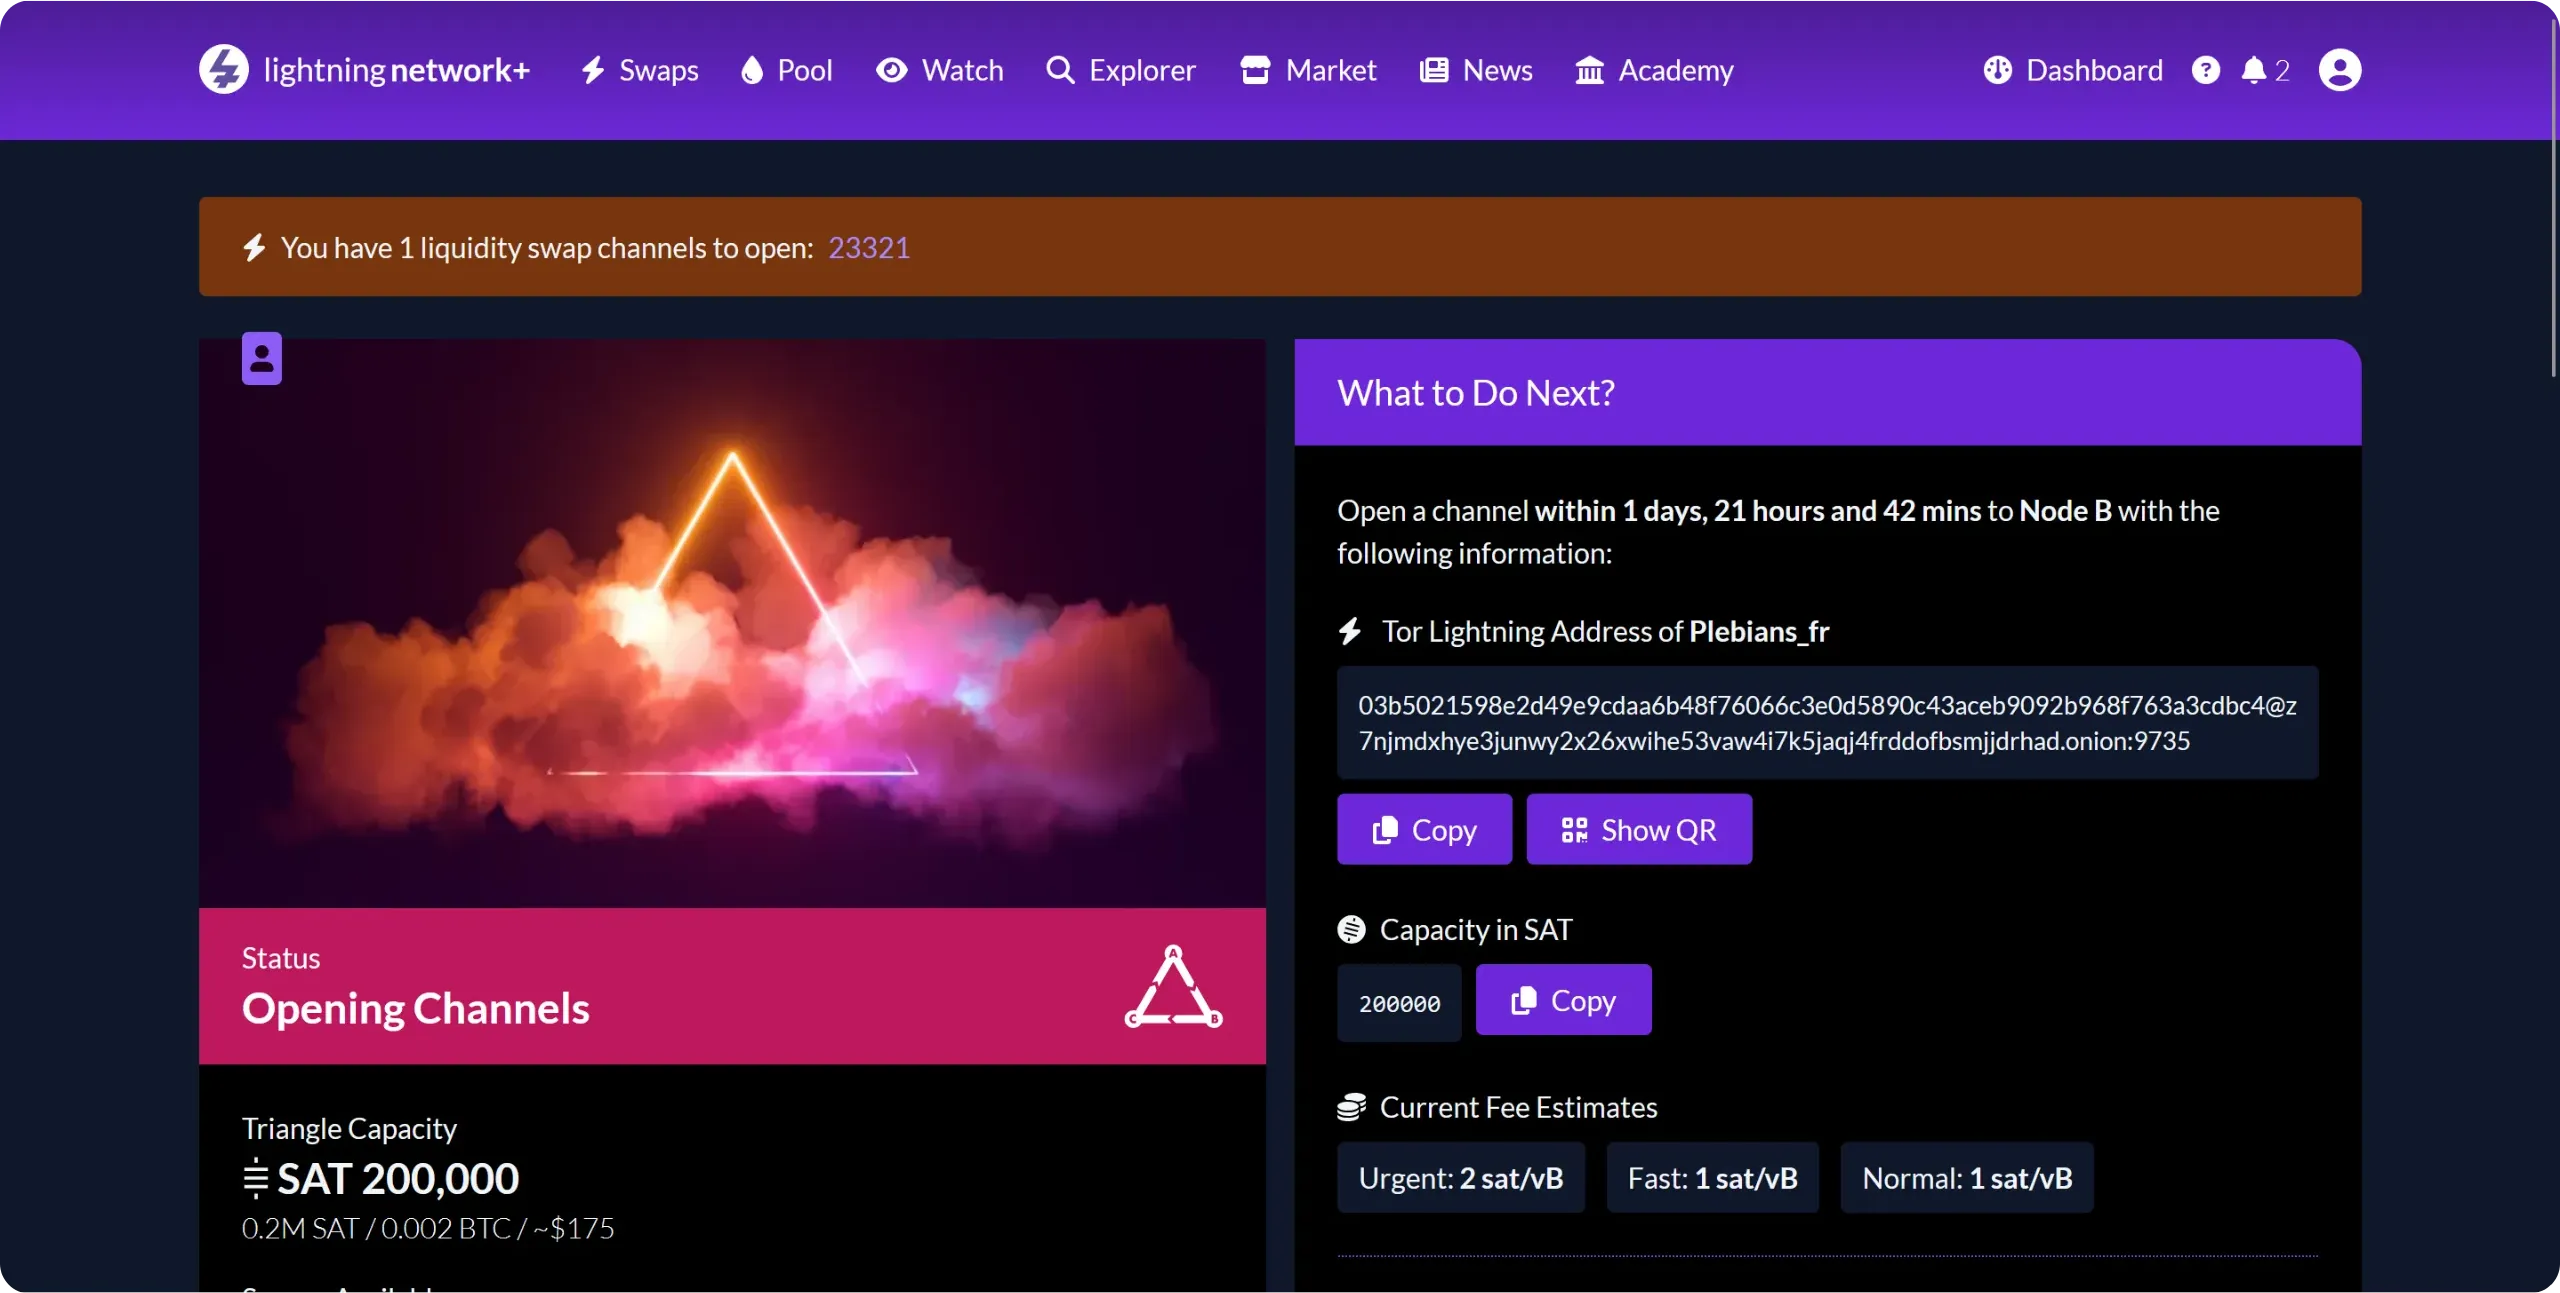
On your side, open the channel using the Node ID supplied by LN+ and respecting the amount indicated. As we've seen in previous chapters, you can do this either via ThunderHub, with another Lightning node manager, or directly from the basic Lightning Node application interface.
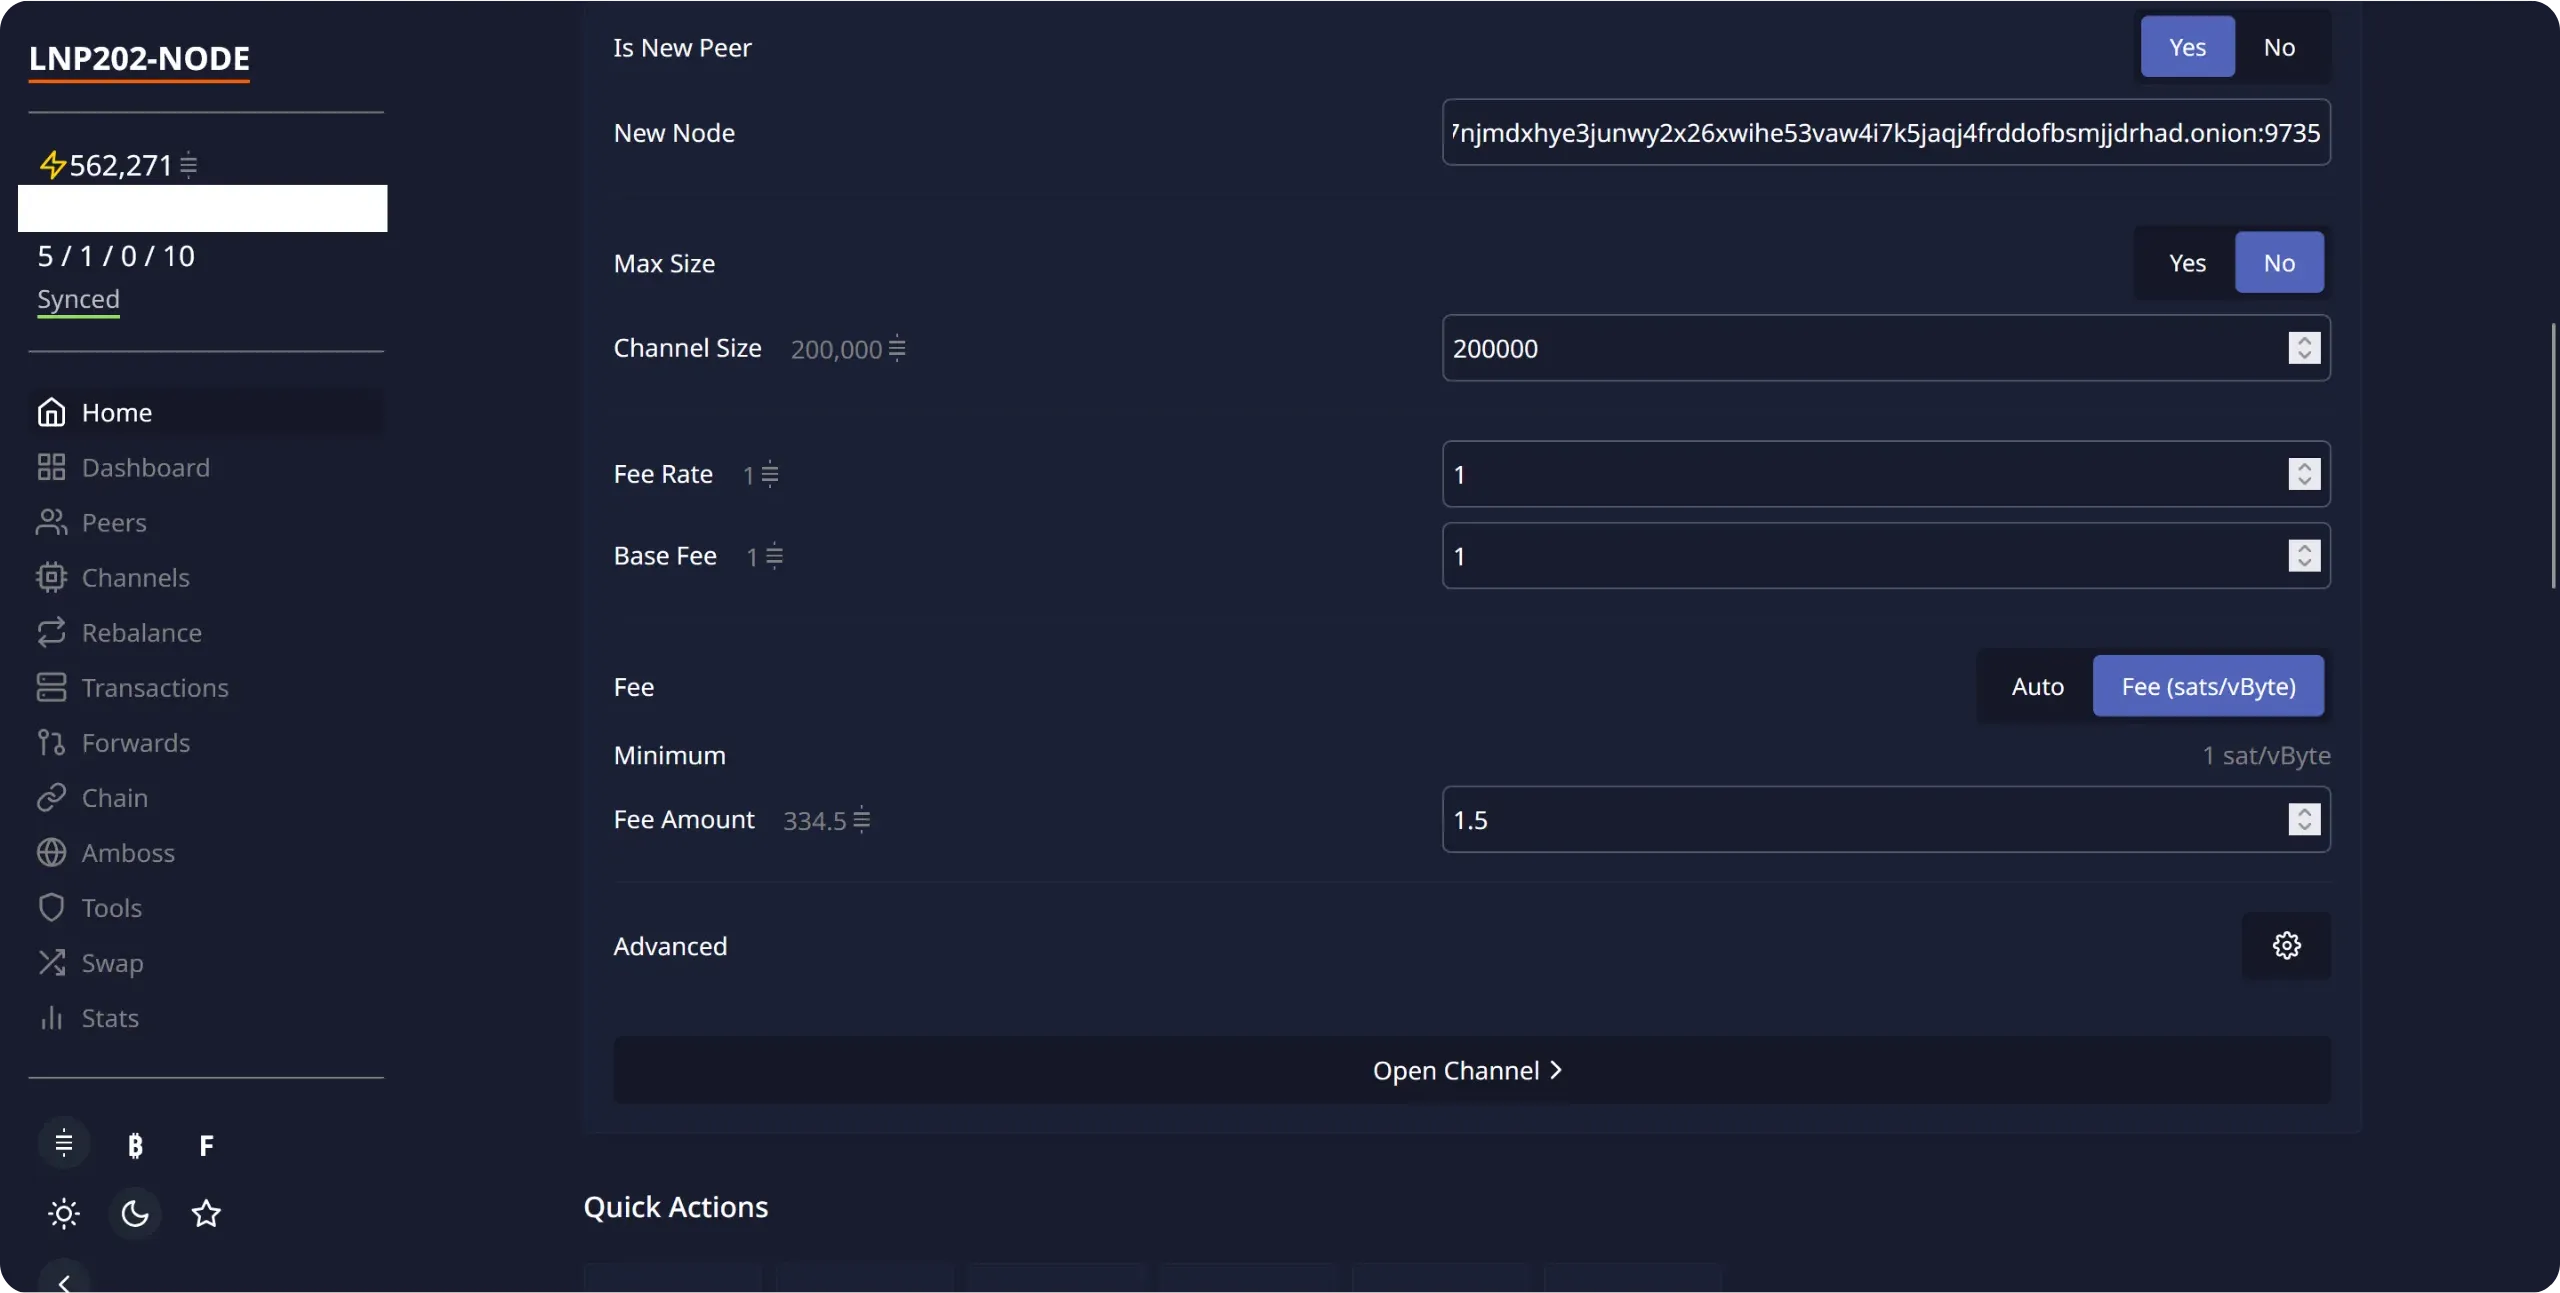
Once the opening has been launched, you can see it appear in the waiting channels section. In my case, it's the channel with the node `Plebian_fr`.
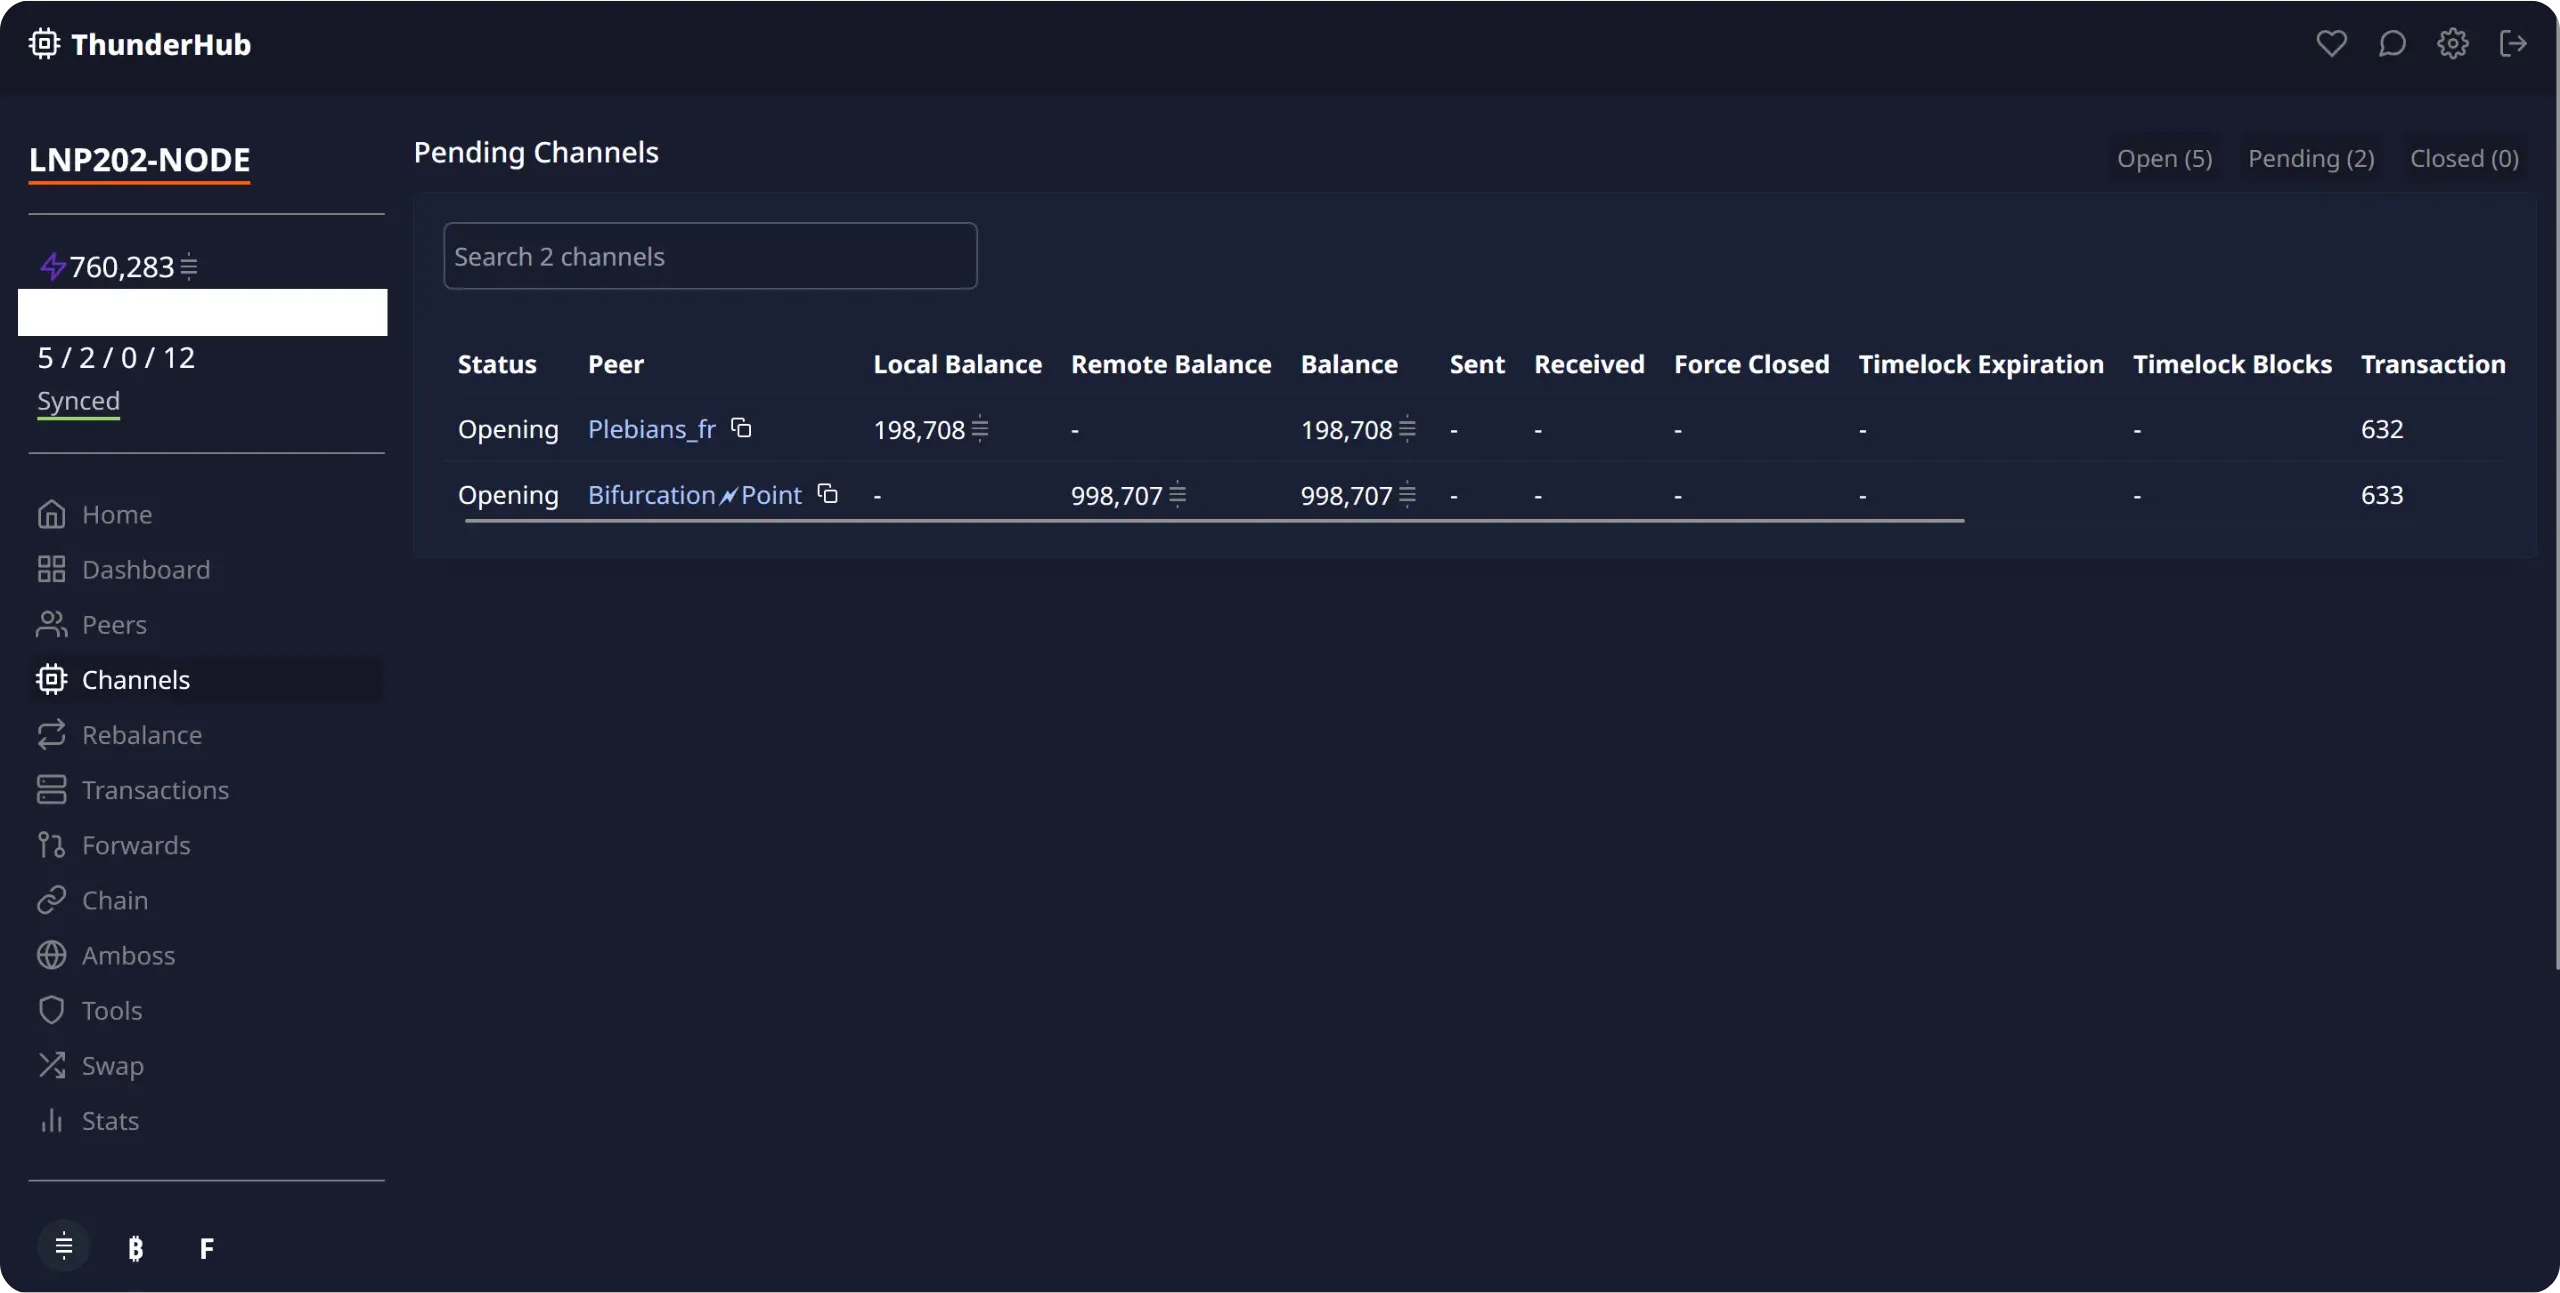
You can then return to LN+ to confirm that you have initiated channel opening. Simply click on the `Channel Opening Started` button.

When all the other participants have also opened the channel to which they have committed, remember to leave them a positive review.
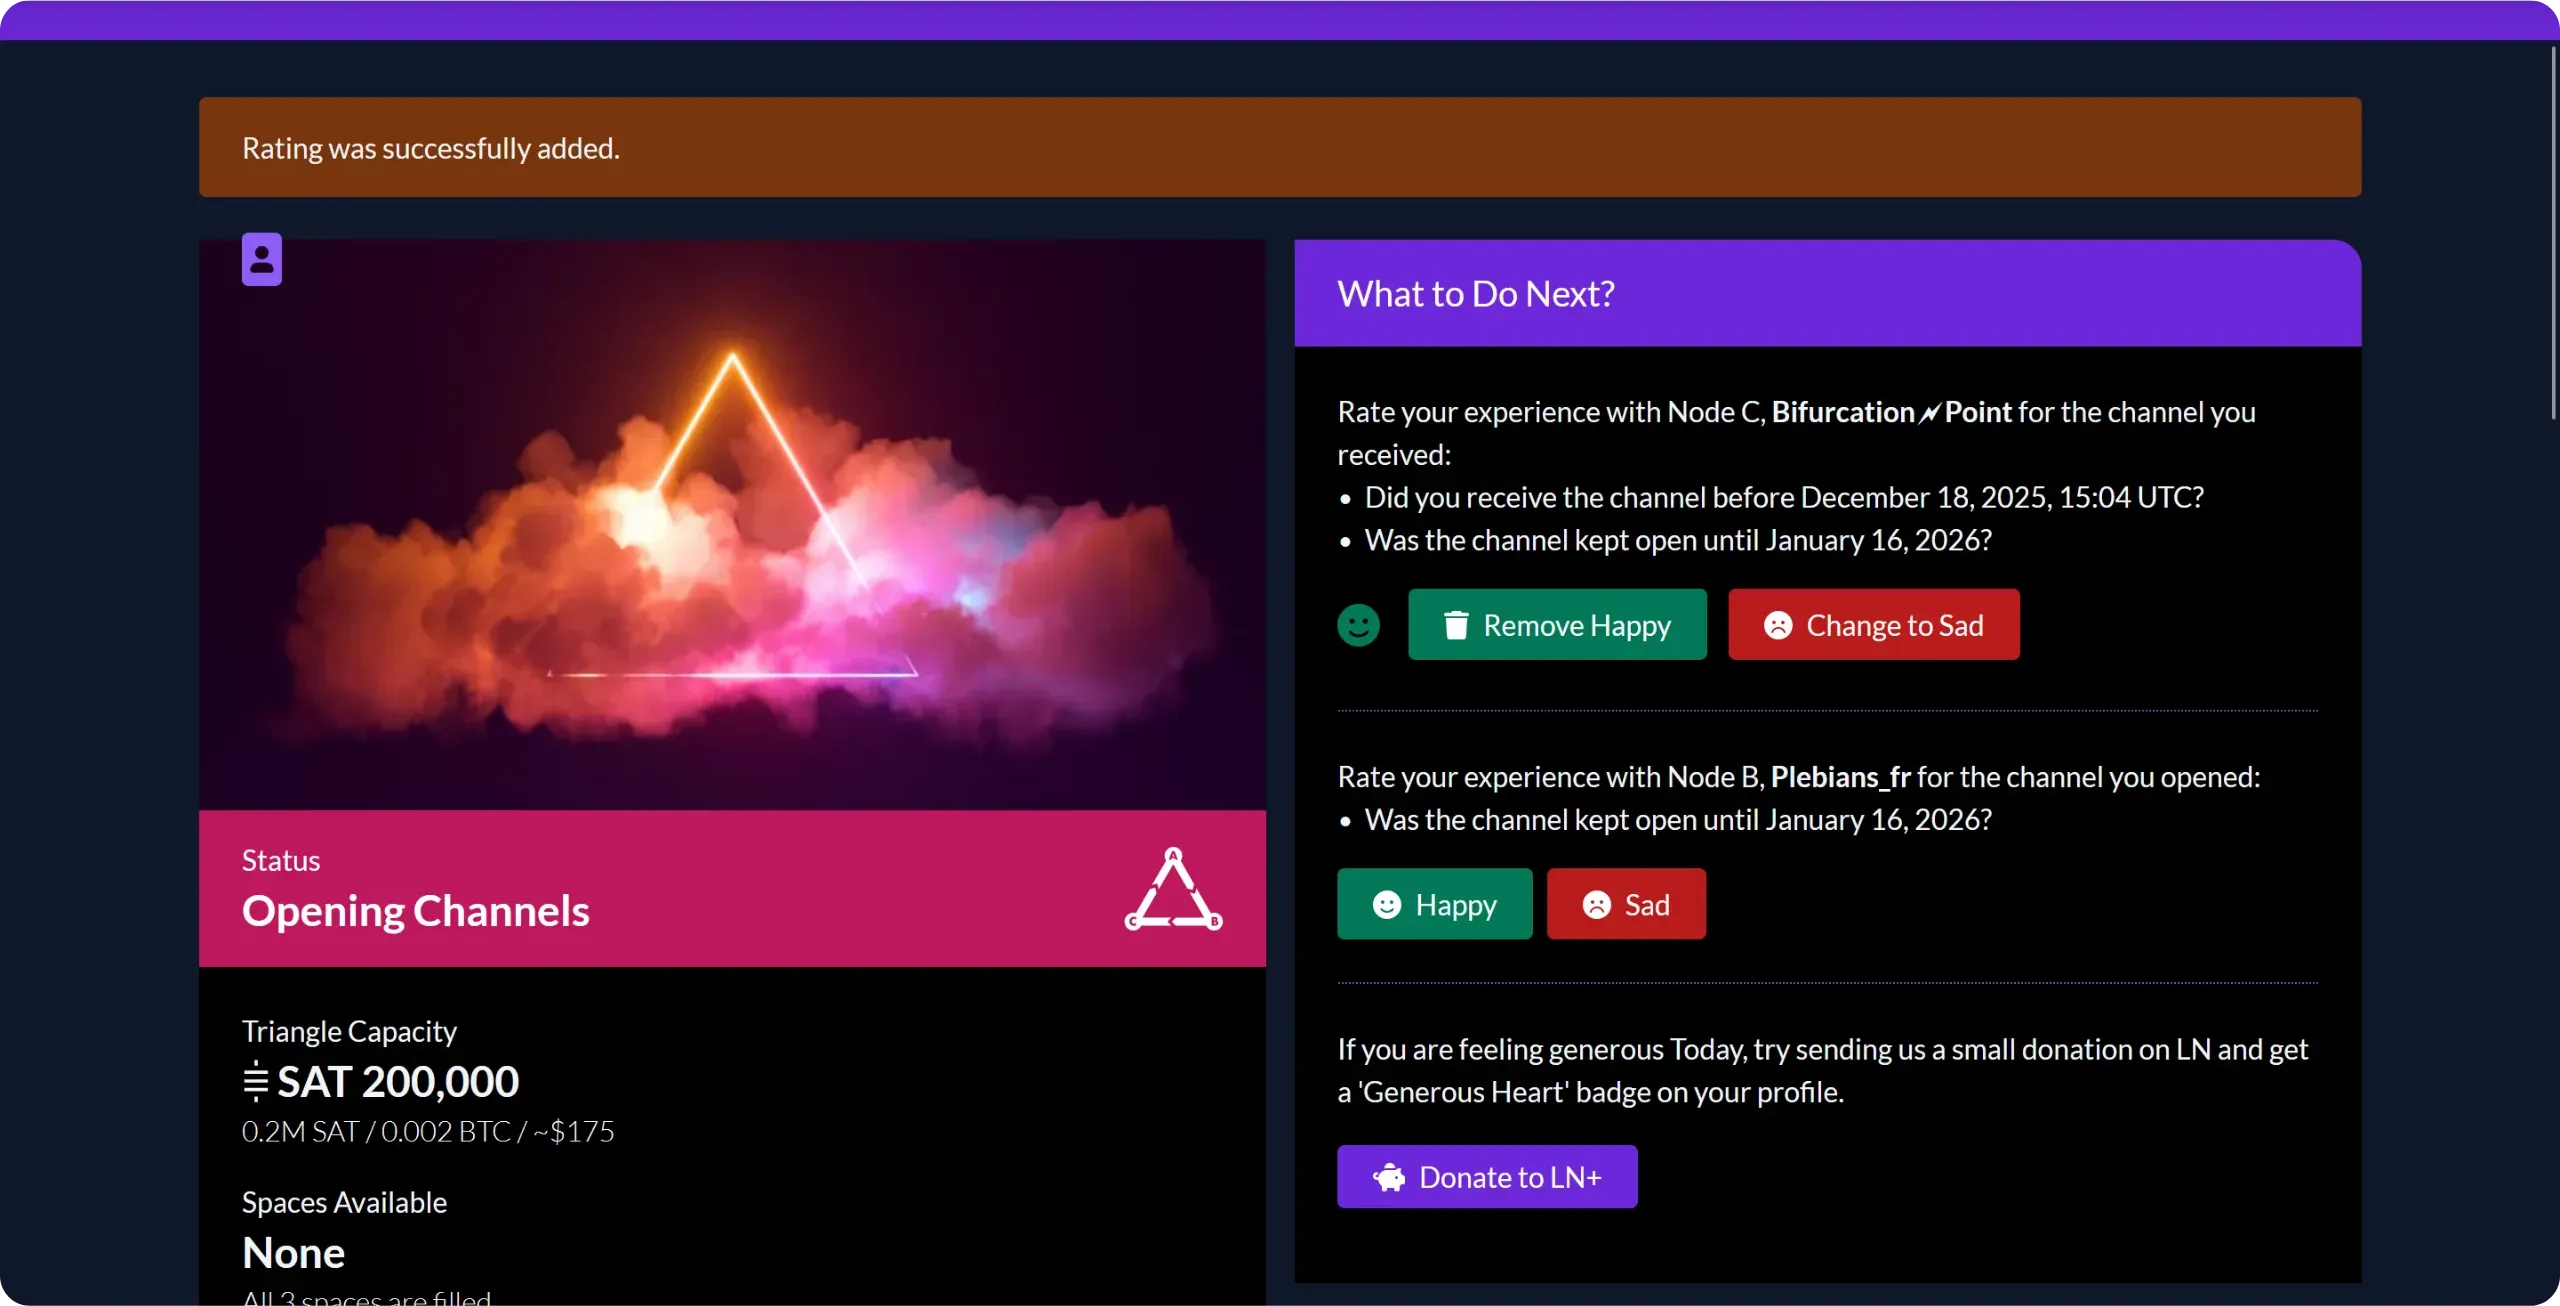
In the event of difficulties or delays, you can contact your peers directly via the comments section at the bottom of the page.
Some participants may wish to rebalance the circular channels from the outset, by making a payment to themselves. This ensures a balanced distribution of cash in each channel. If you're in a "consumer" profile, this isn't essential, but you can either do this rebalancing yourself if you wish, or temporarily set your channel fees to zero to make it easier for the peer who wants to do it. Sometimes nobody wants to do it.

# Unlocking your Lightning node’s full potential
8dcc24b1-6eb9-4a5f-a56b-8a823e5ac0fd
## Connecting a mobile wallet via Tailscale
5fefb222-3f50-4f9d-a170-2ea628be4437
That's it, you now have a well-connected Lightning node, with both inbound and outbound liquidity. So you're all set to use your Lightning node in real life. Up to now, we've always used interfaces directly on Umbrel, either the `Lightning Node` application or the `ThunderHub` interface. These tools work for sending and receiving payments, but are clearly not optimized for everyday Lightning payments. The interface is designed for use on a computer, impractical on a smartphone, and also requires a connection to the same network to function properly (although it is technically possible to connect remotely via Tor).
In practice, what we're looking for as bitcoiners is a classic Lightning wallet interface on a smartphone: the ability to scan invoices via QR code, and a simple interface for paying and cashing out sats. This is precisely what we'll be implementing in this chapter and the next. The general idea is to have a mobile Lightning wallet application on your smartphone, which can be used from anywhere (not just your local network) but which, in the background, relies on your own Lightning node to send and receive payments.
### What are the solutions for connecting a mobile customer?
Today, there are several ways of doing this, both in terms of the mobile application and the type of connection between your node and this application. The three main connection modes are:
- via ***Tor***;
- via VPN ***Tailscale***;
- via ***Nostr Wallet Connect***.
A few years ago, I used to connect via ***Tor***, but I quickly stopped: the number of failures and the communication delays were far too great. In theory, it works, but in practice, the user experience was catastrophic. I would therefore advise against this approach.
The alternative I then adopted was to use a ***Tailscale*** VPN to ensure communication between the mobile application and the node. This solution works very well: even on mobile networks with low throughput, my payments always go through without difficulty. This is the method I'm going to introduce first in this chapter, with the Zeus application.
In the next chapter, we'll look at another, more recent solution, which also works very well: ***Nostr Wallet Connect***. This time, we'll use the Alby Go application to present you with an alternative, although Zeus is also compatible with NWC if you wish.
### Installing and configuring Tailscale
For this first method, we'll need Tailscale. This is a VPN solution based on WireGuard, which allows you to securely connect devices spread across the Internet, while automatically managing encryption, authentication and NAT traversal. Put simply, it's as if all your devices were connected to the same LAN as your router, even though they could be anywhere on the Internet.
To use it, first create an account. Go to the Tailscale website, then click on the `Get Started` button.
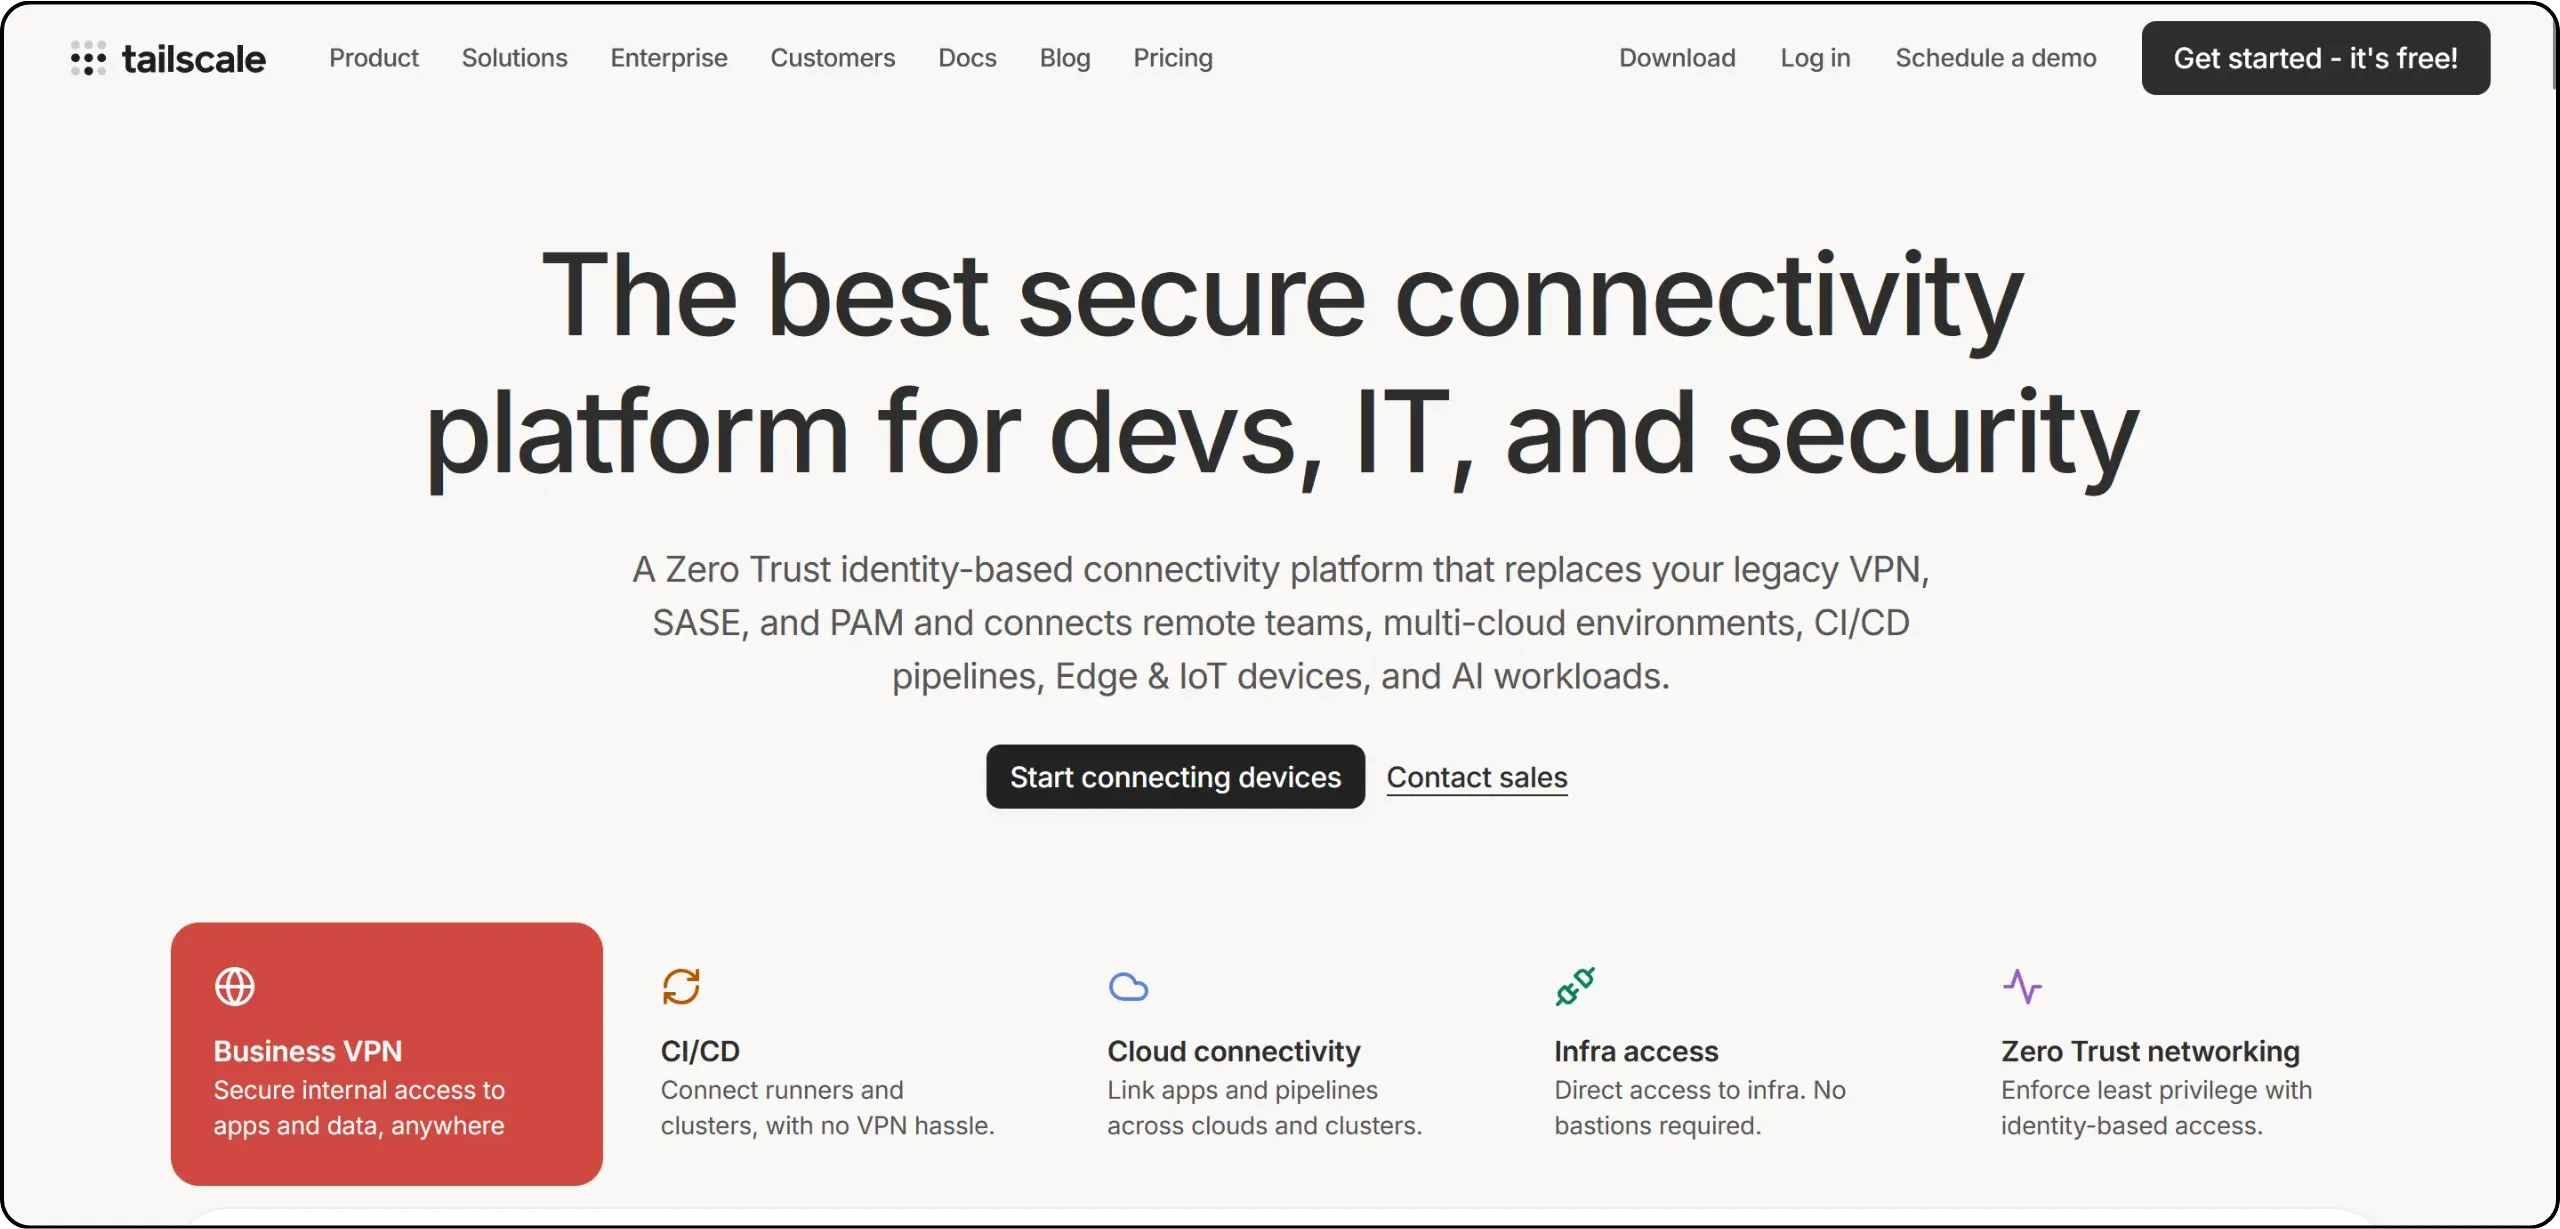
Then choose an identity provider for your Tailscale account. Personally, I used one of my GitHub accounts to log in.

Once you've logged in, you'll be asked a few questions about your usage. Answer them briefly to continue.
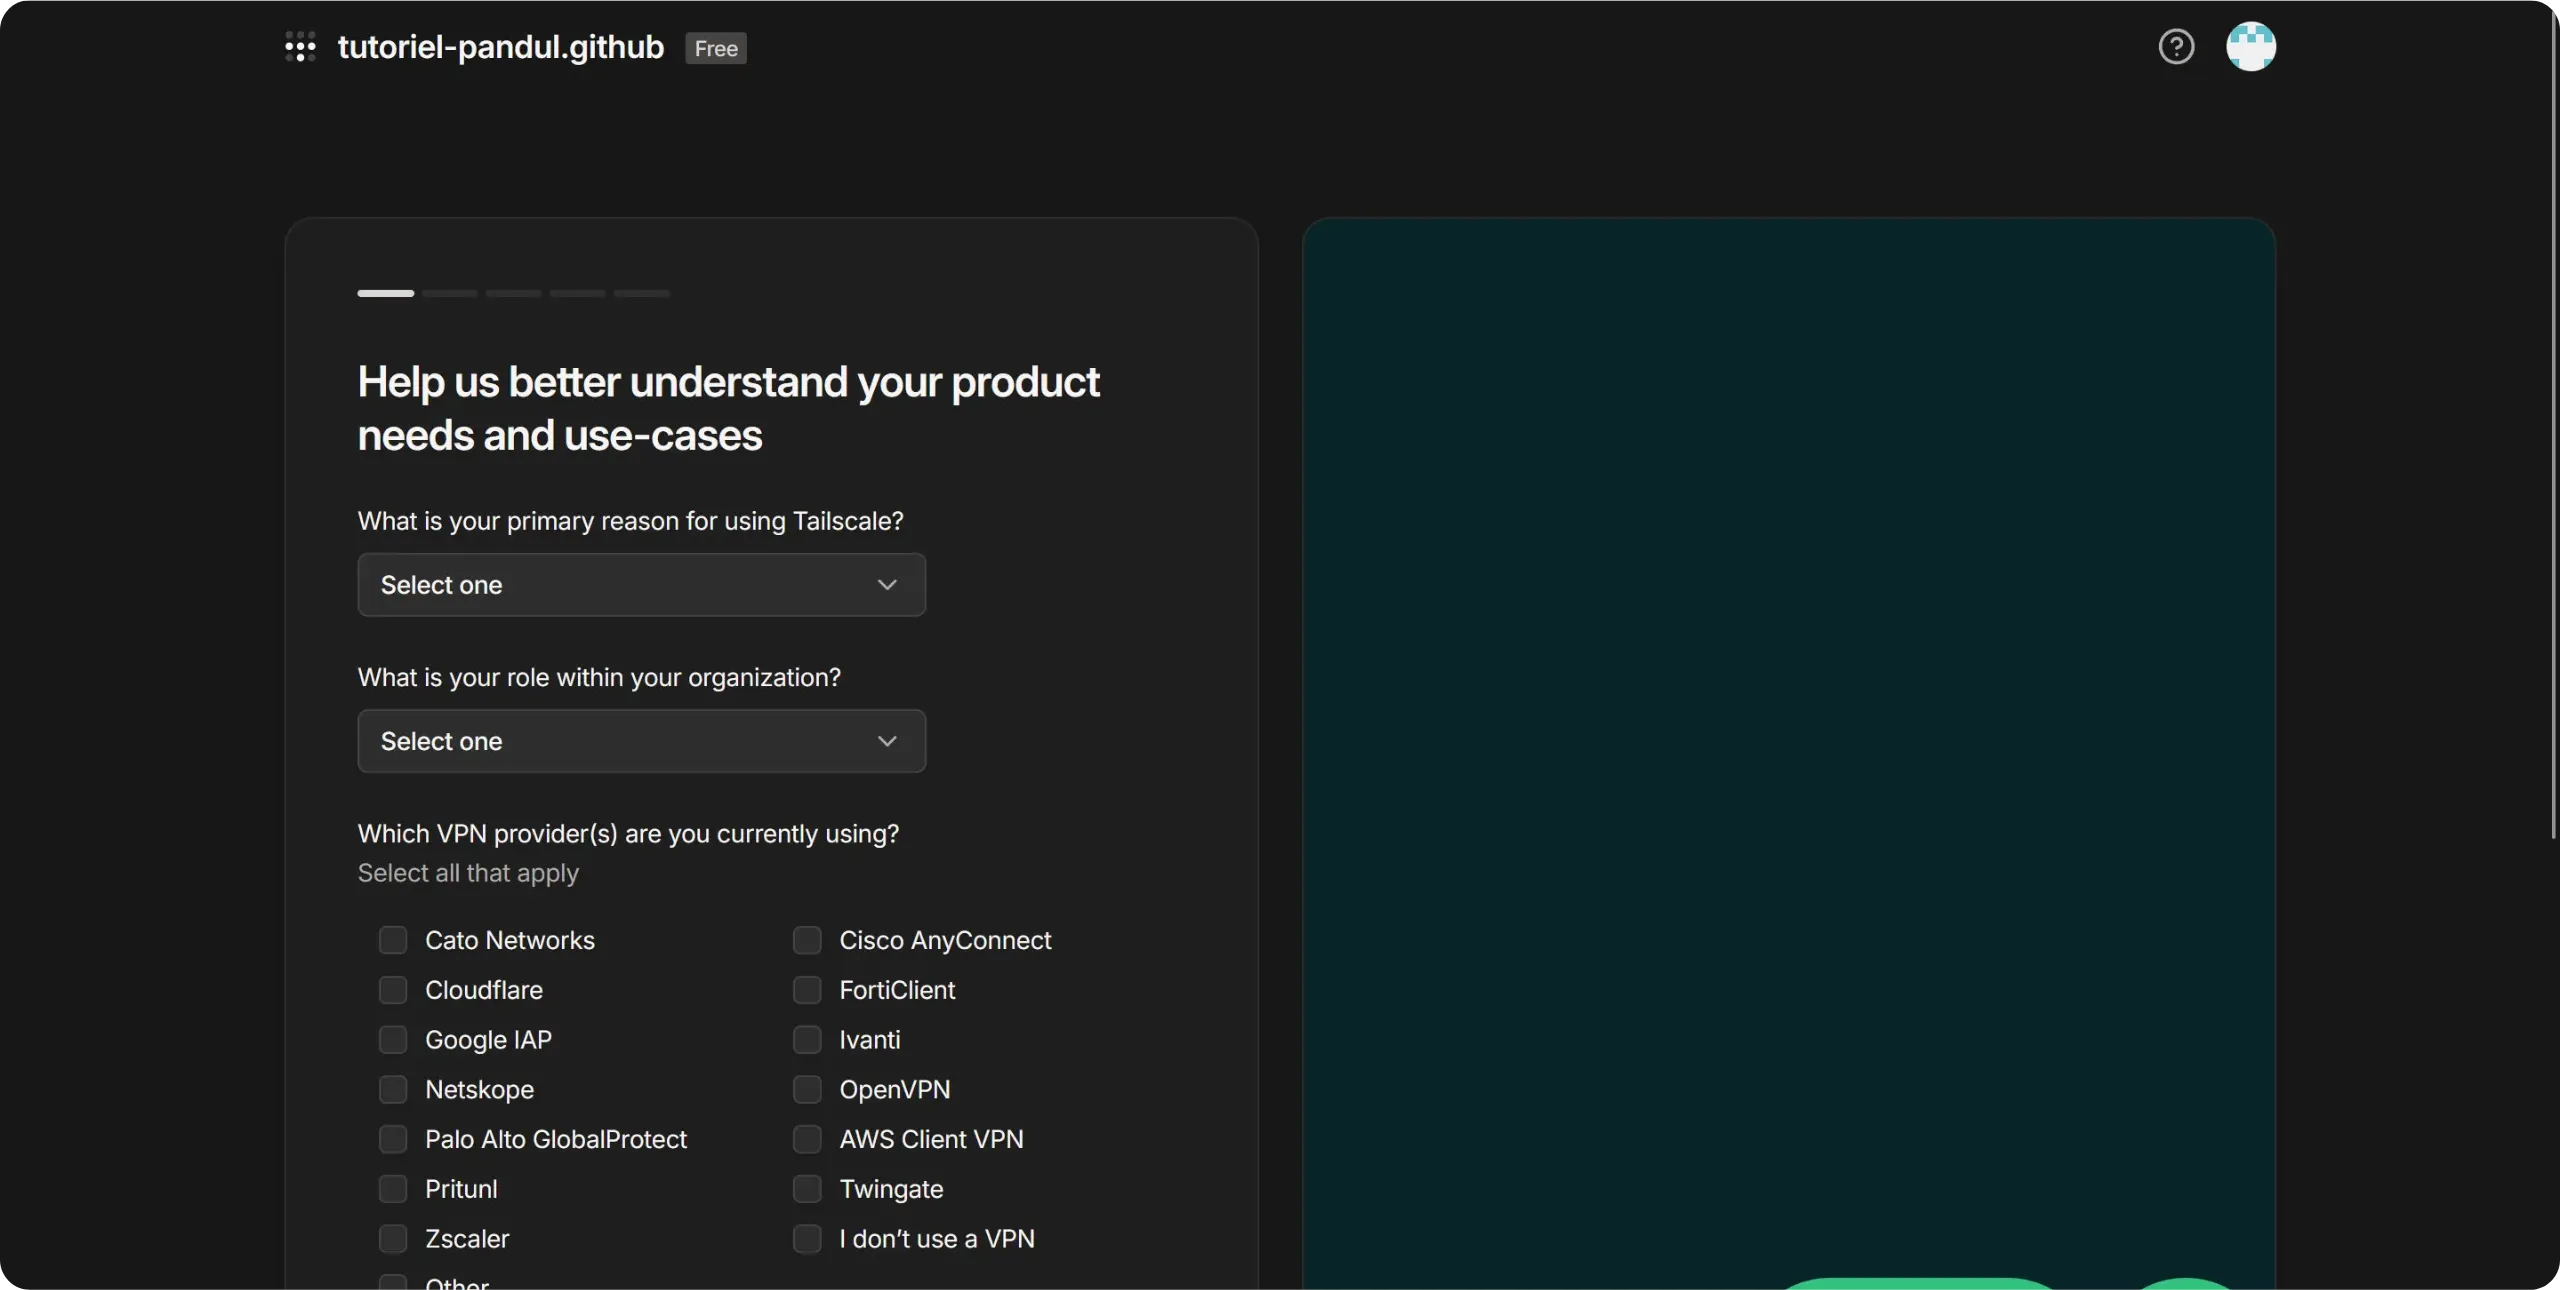
Tailscale then offers to install a client on your machine. For the moment, that's not what we're interested in: go directly to Umbrel and install the Tailscale application from the App Store.
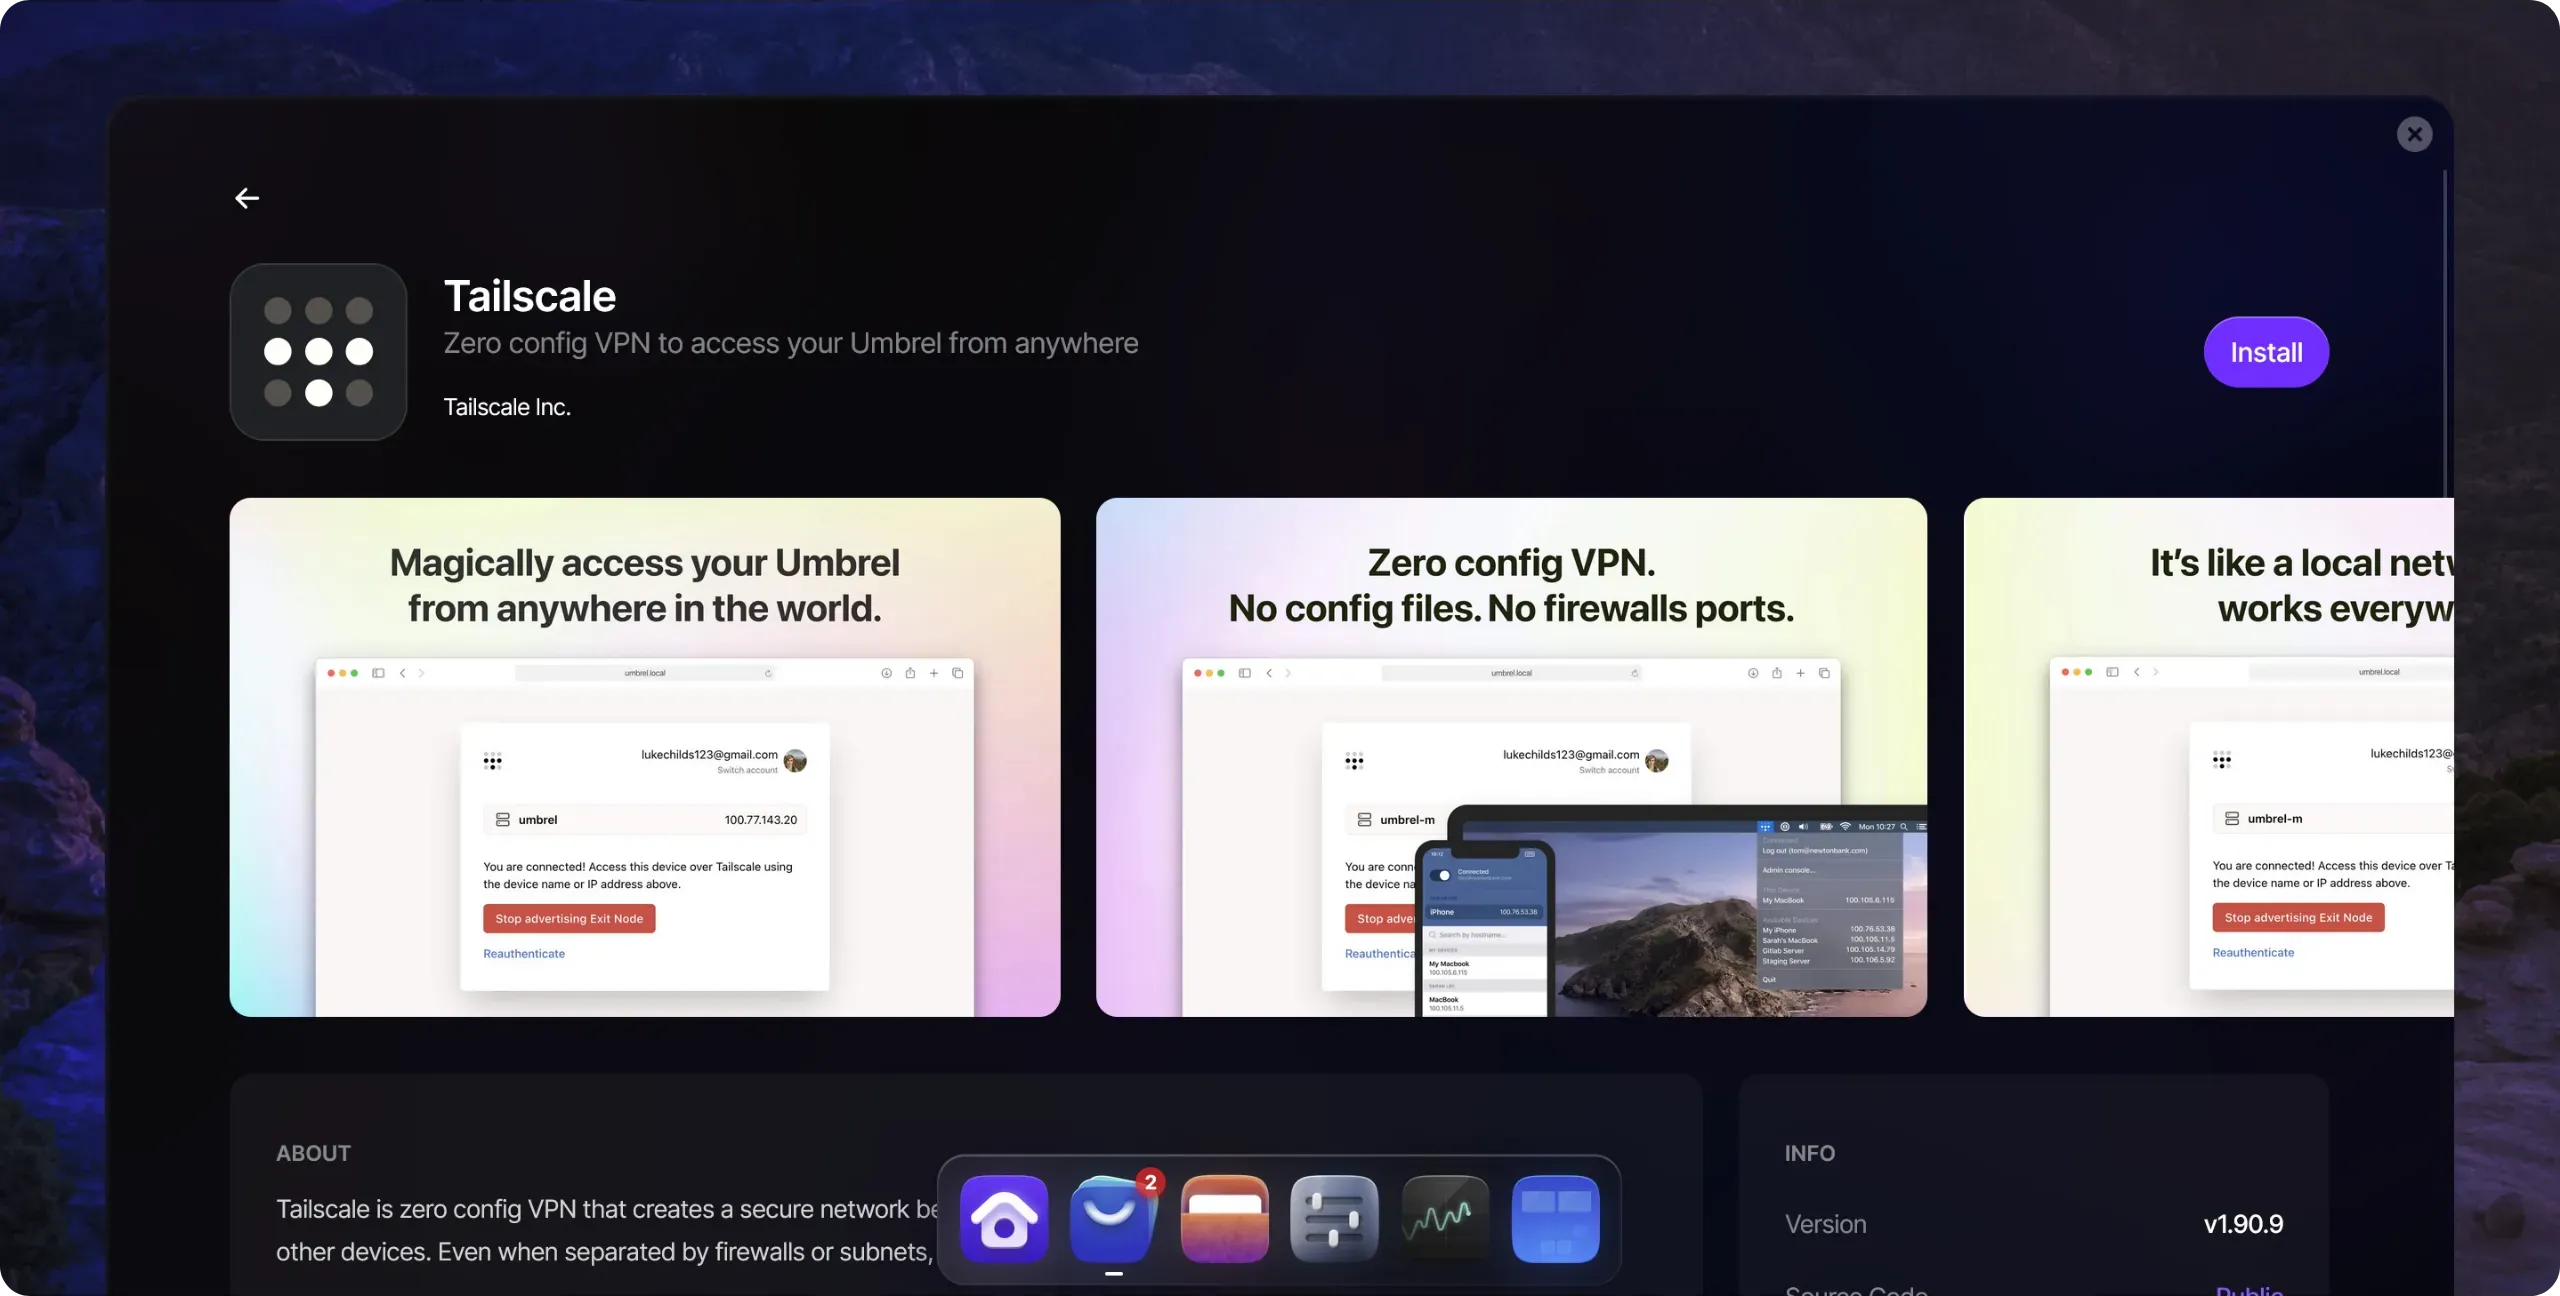
When the application opens, click on `Log In`, then follow the authentication process, using the same method as when you created your account.
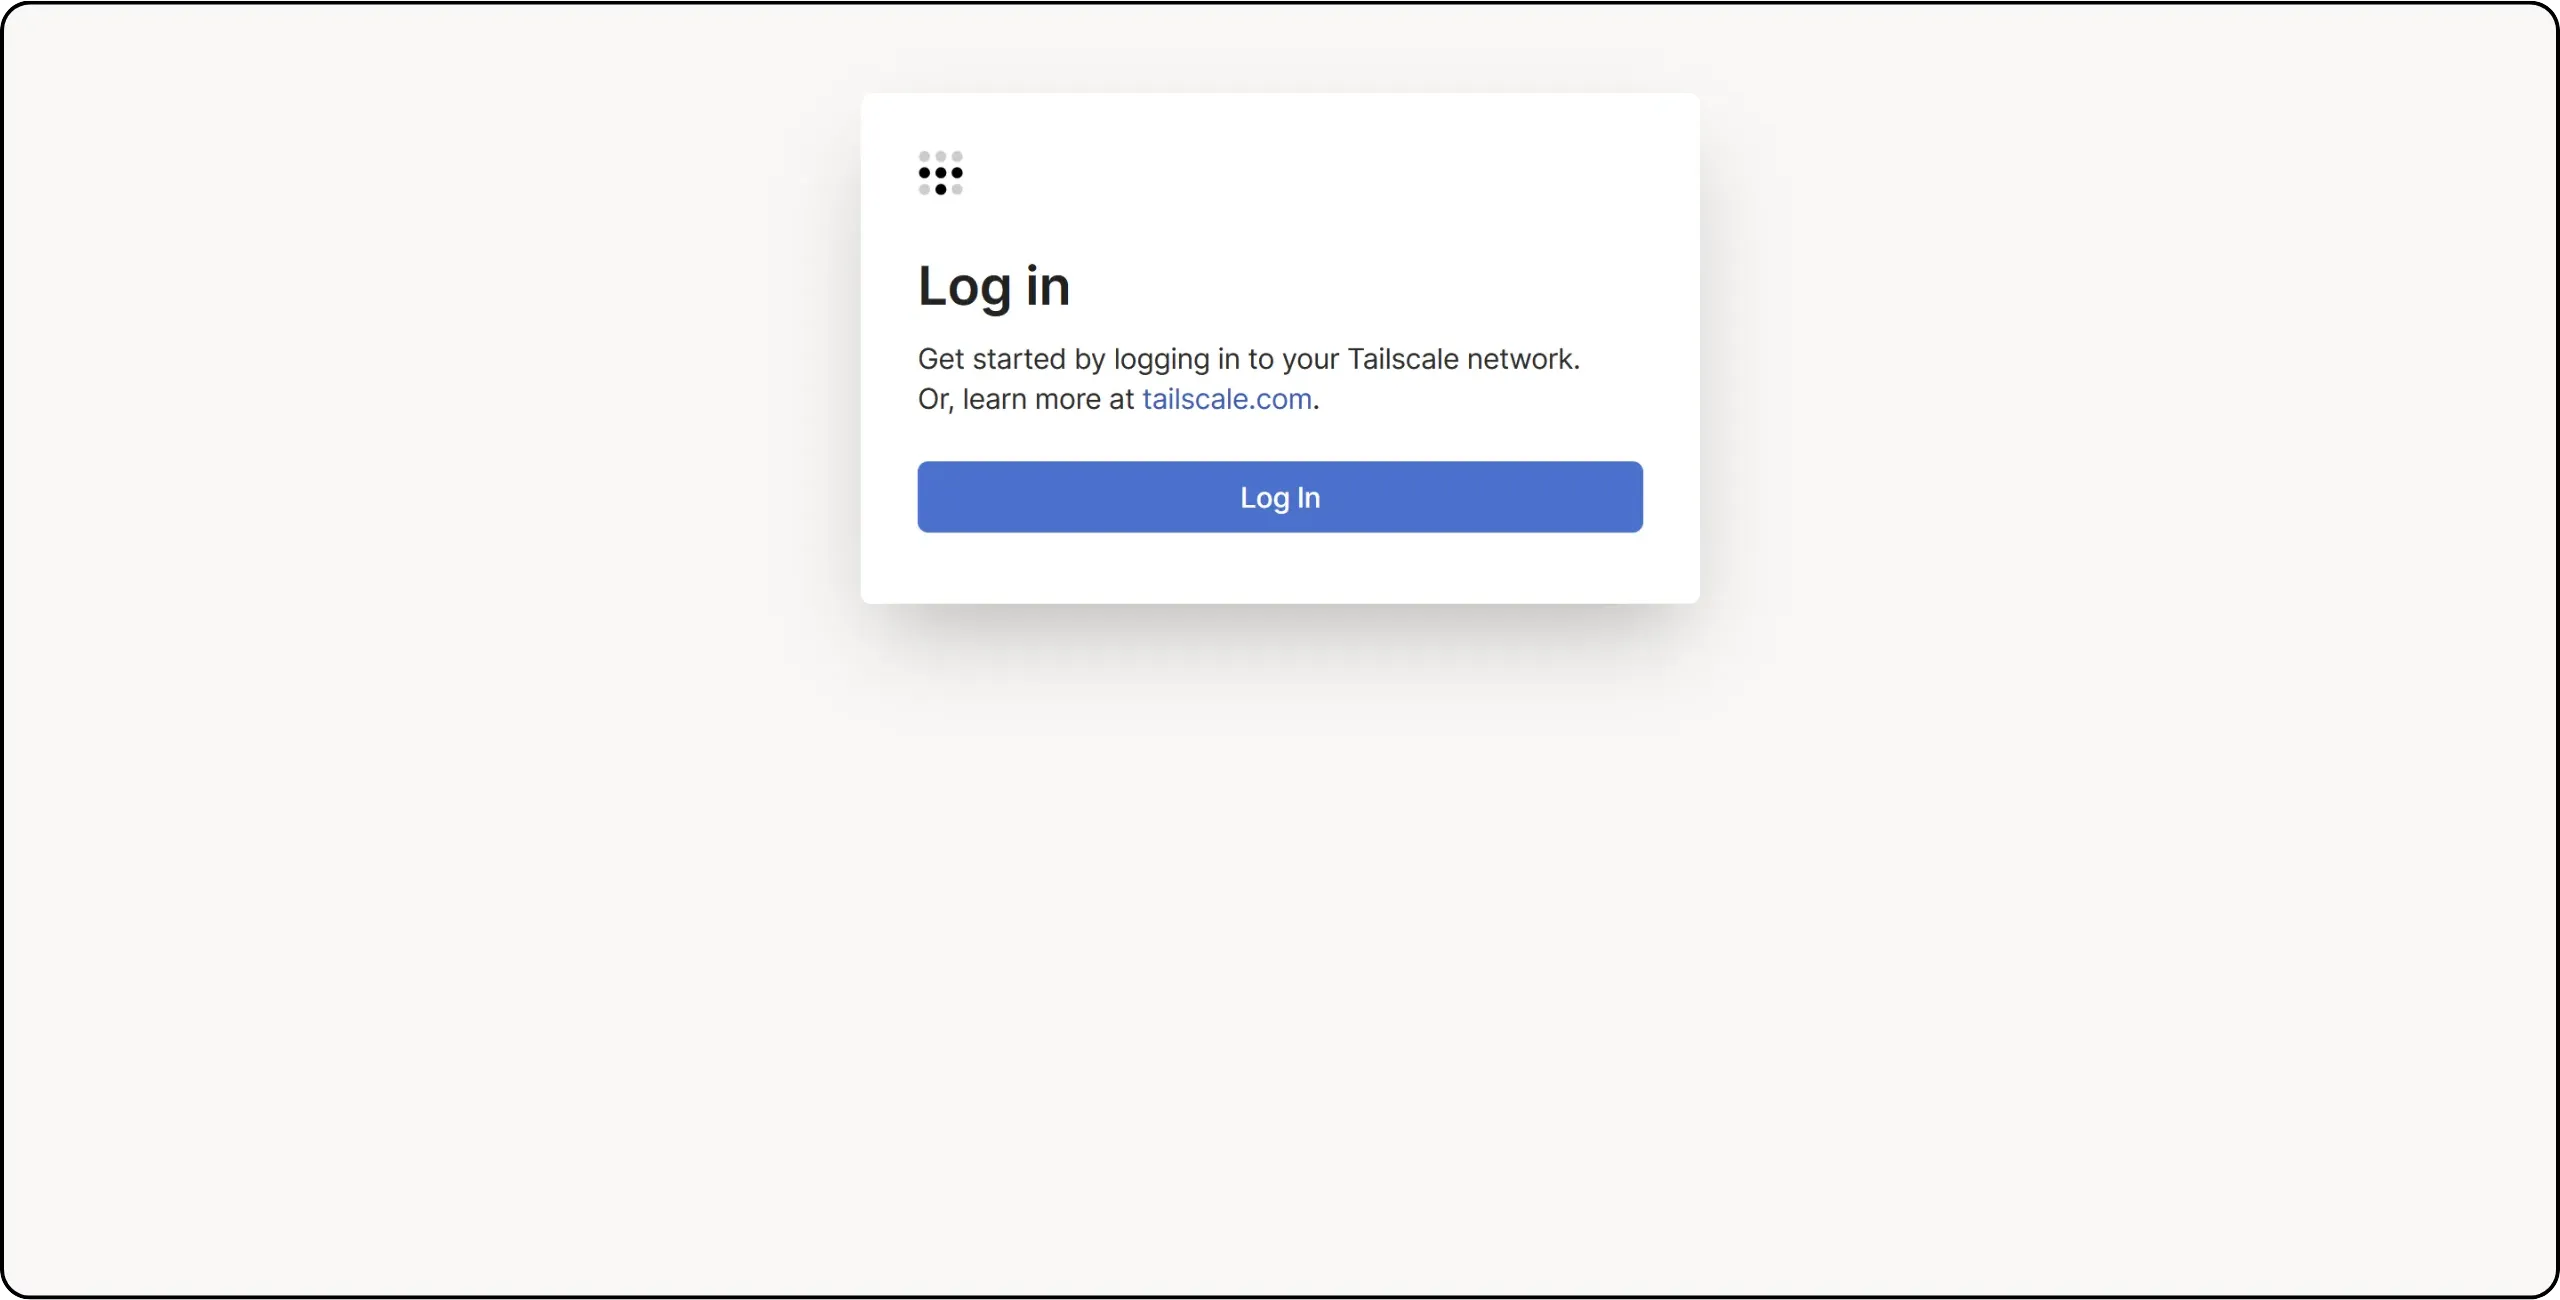
Click `Connect` to confirm. Your Umbrel is now connected to your VPN network.
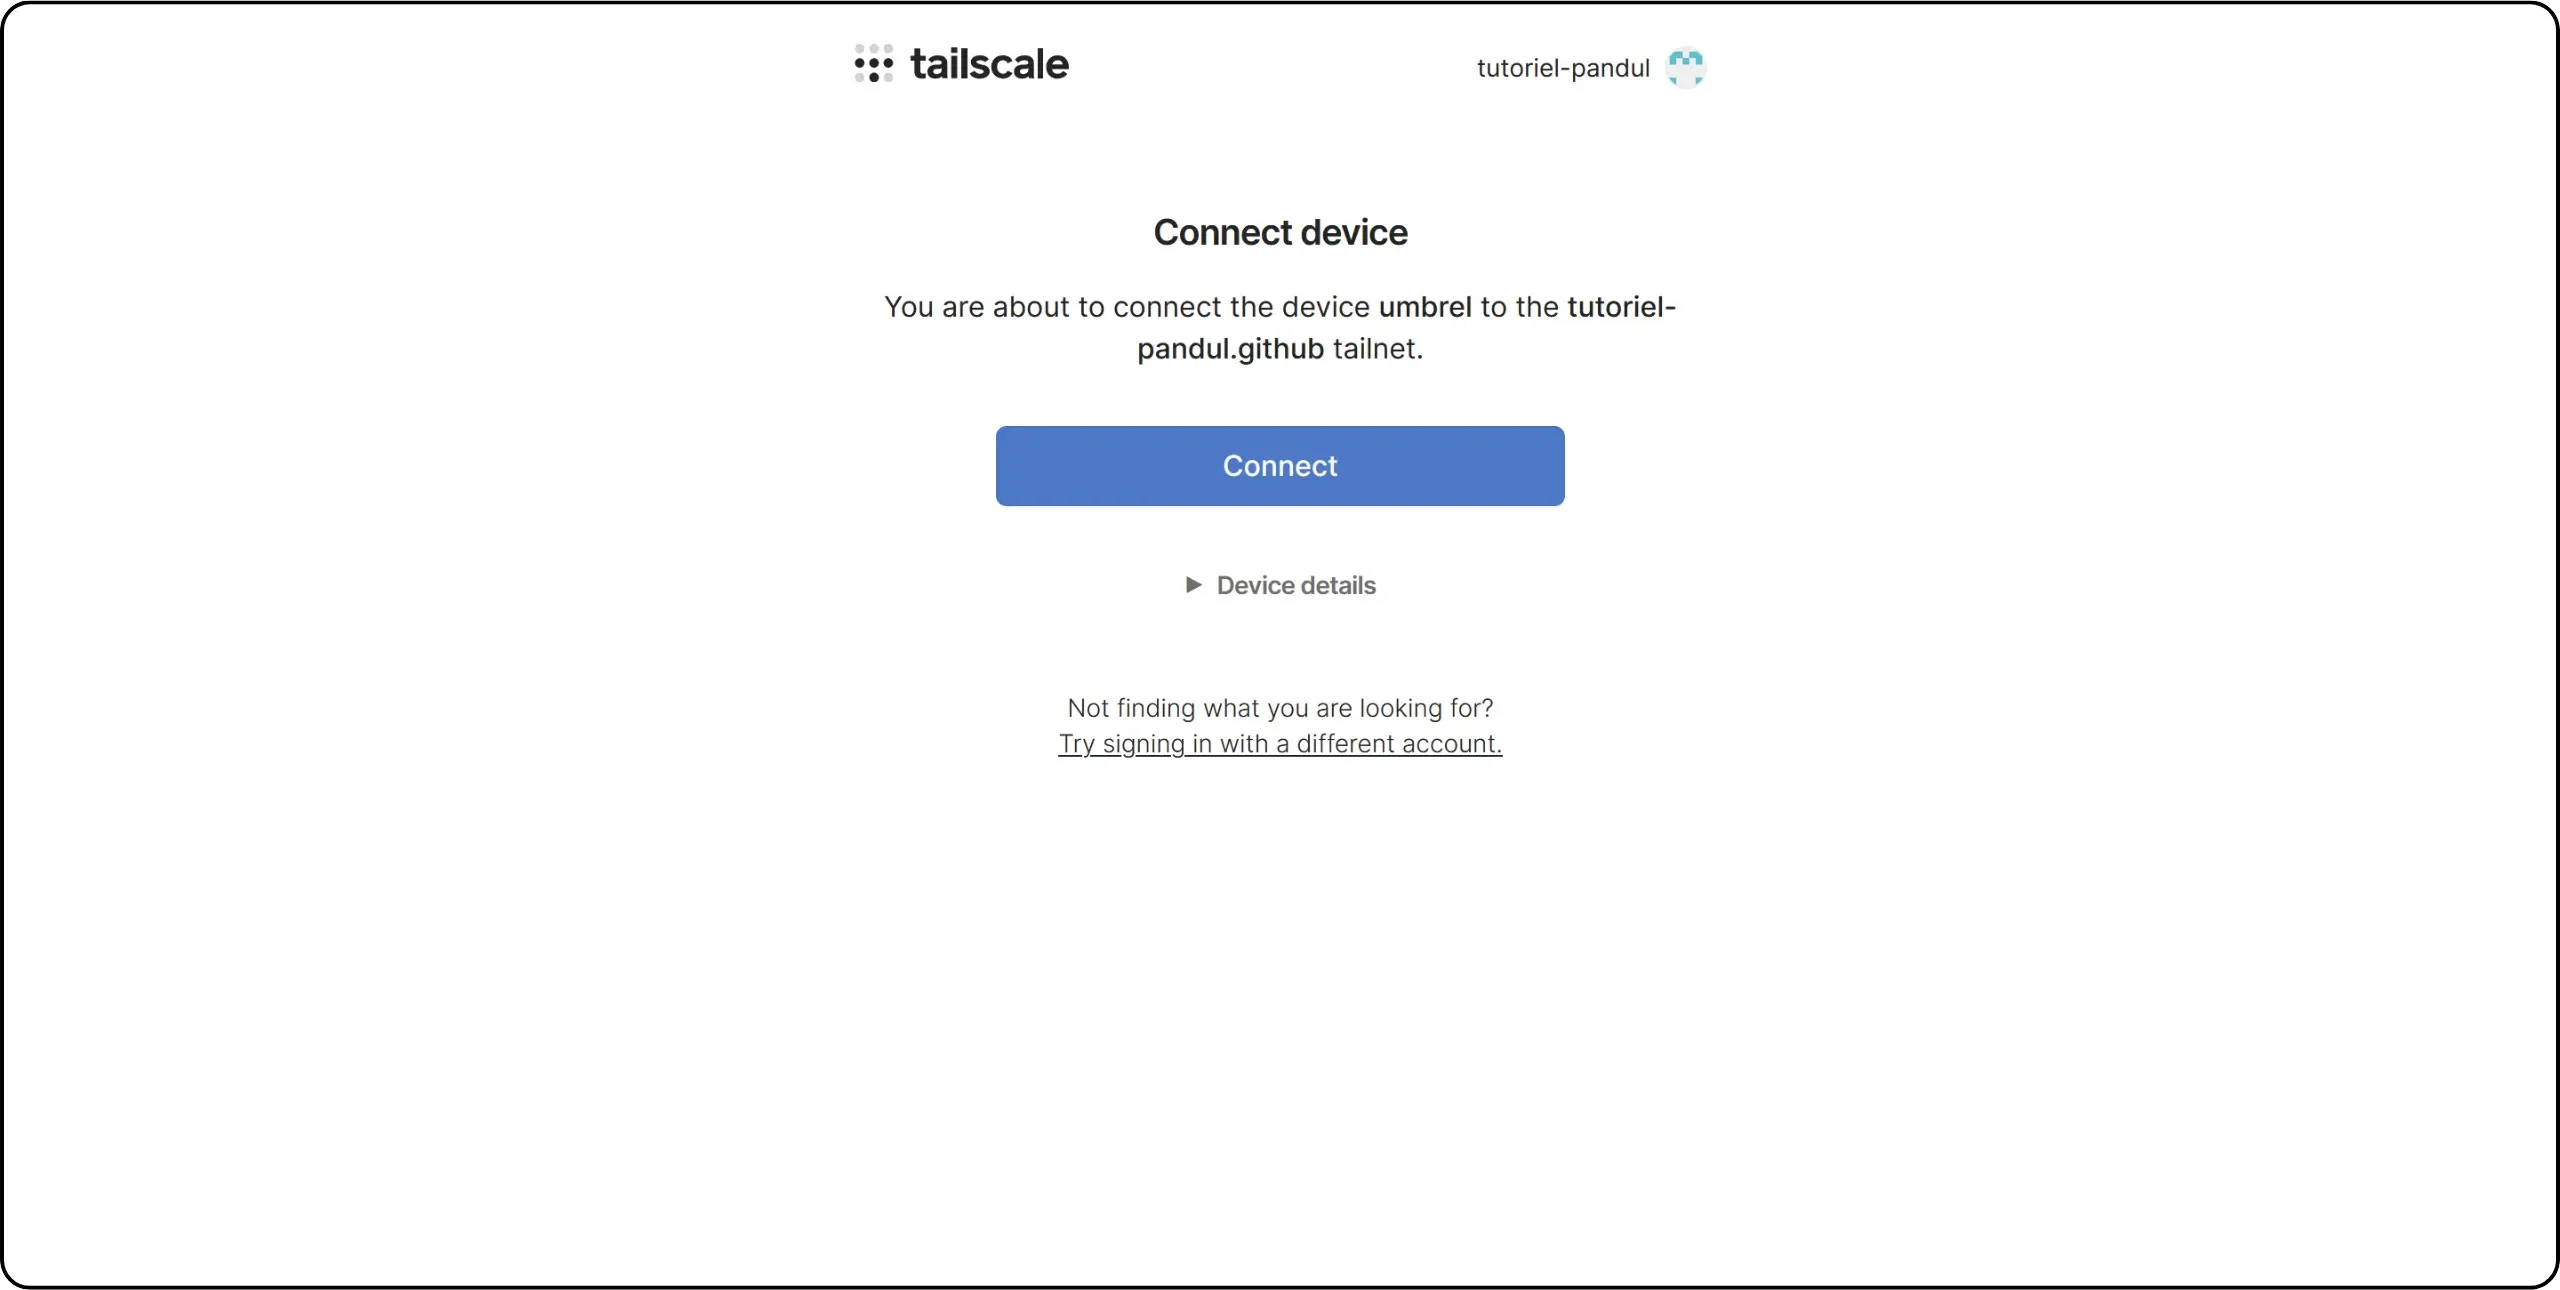
Then download the Tailscale application onto your smartphone and log in using the same account. Please note: on Android, it's not possible to use two VPNs simultaneously. For Tailscale to work, you'll need to disable any other active VPN. What's more, every time you want to use your Lightning node via Zeus, you'll need to activate the Tailscale VPN, otherwise the connection won't be established.
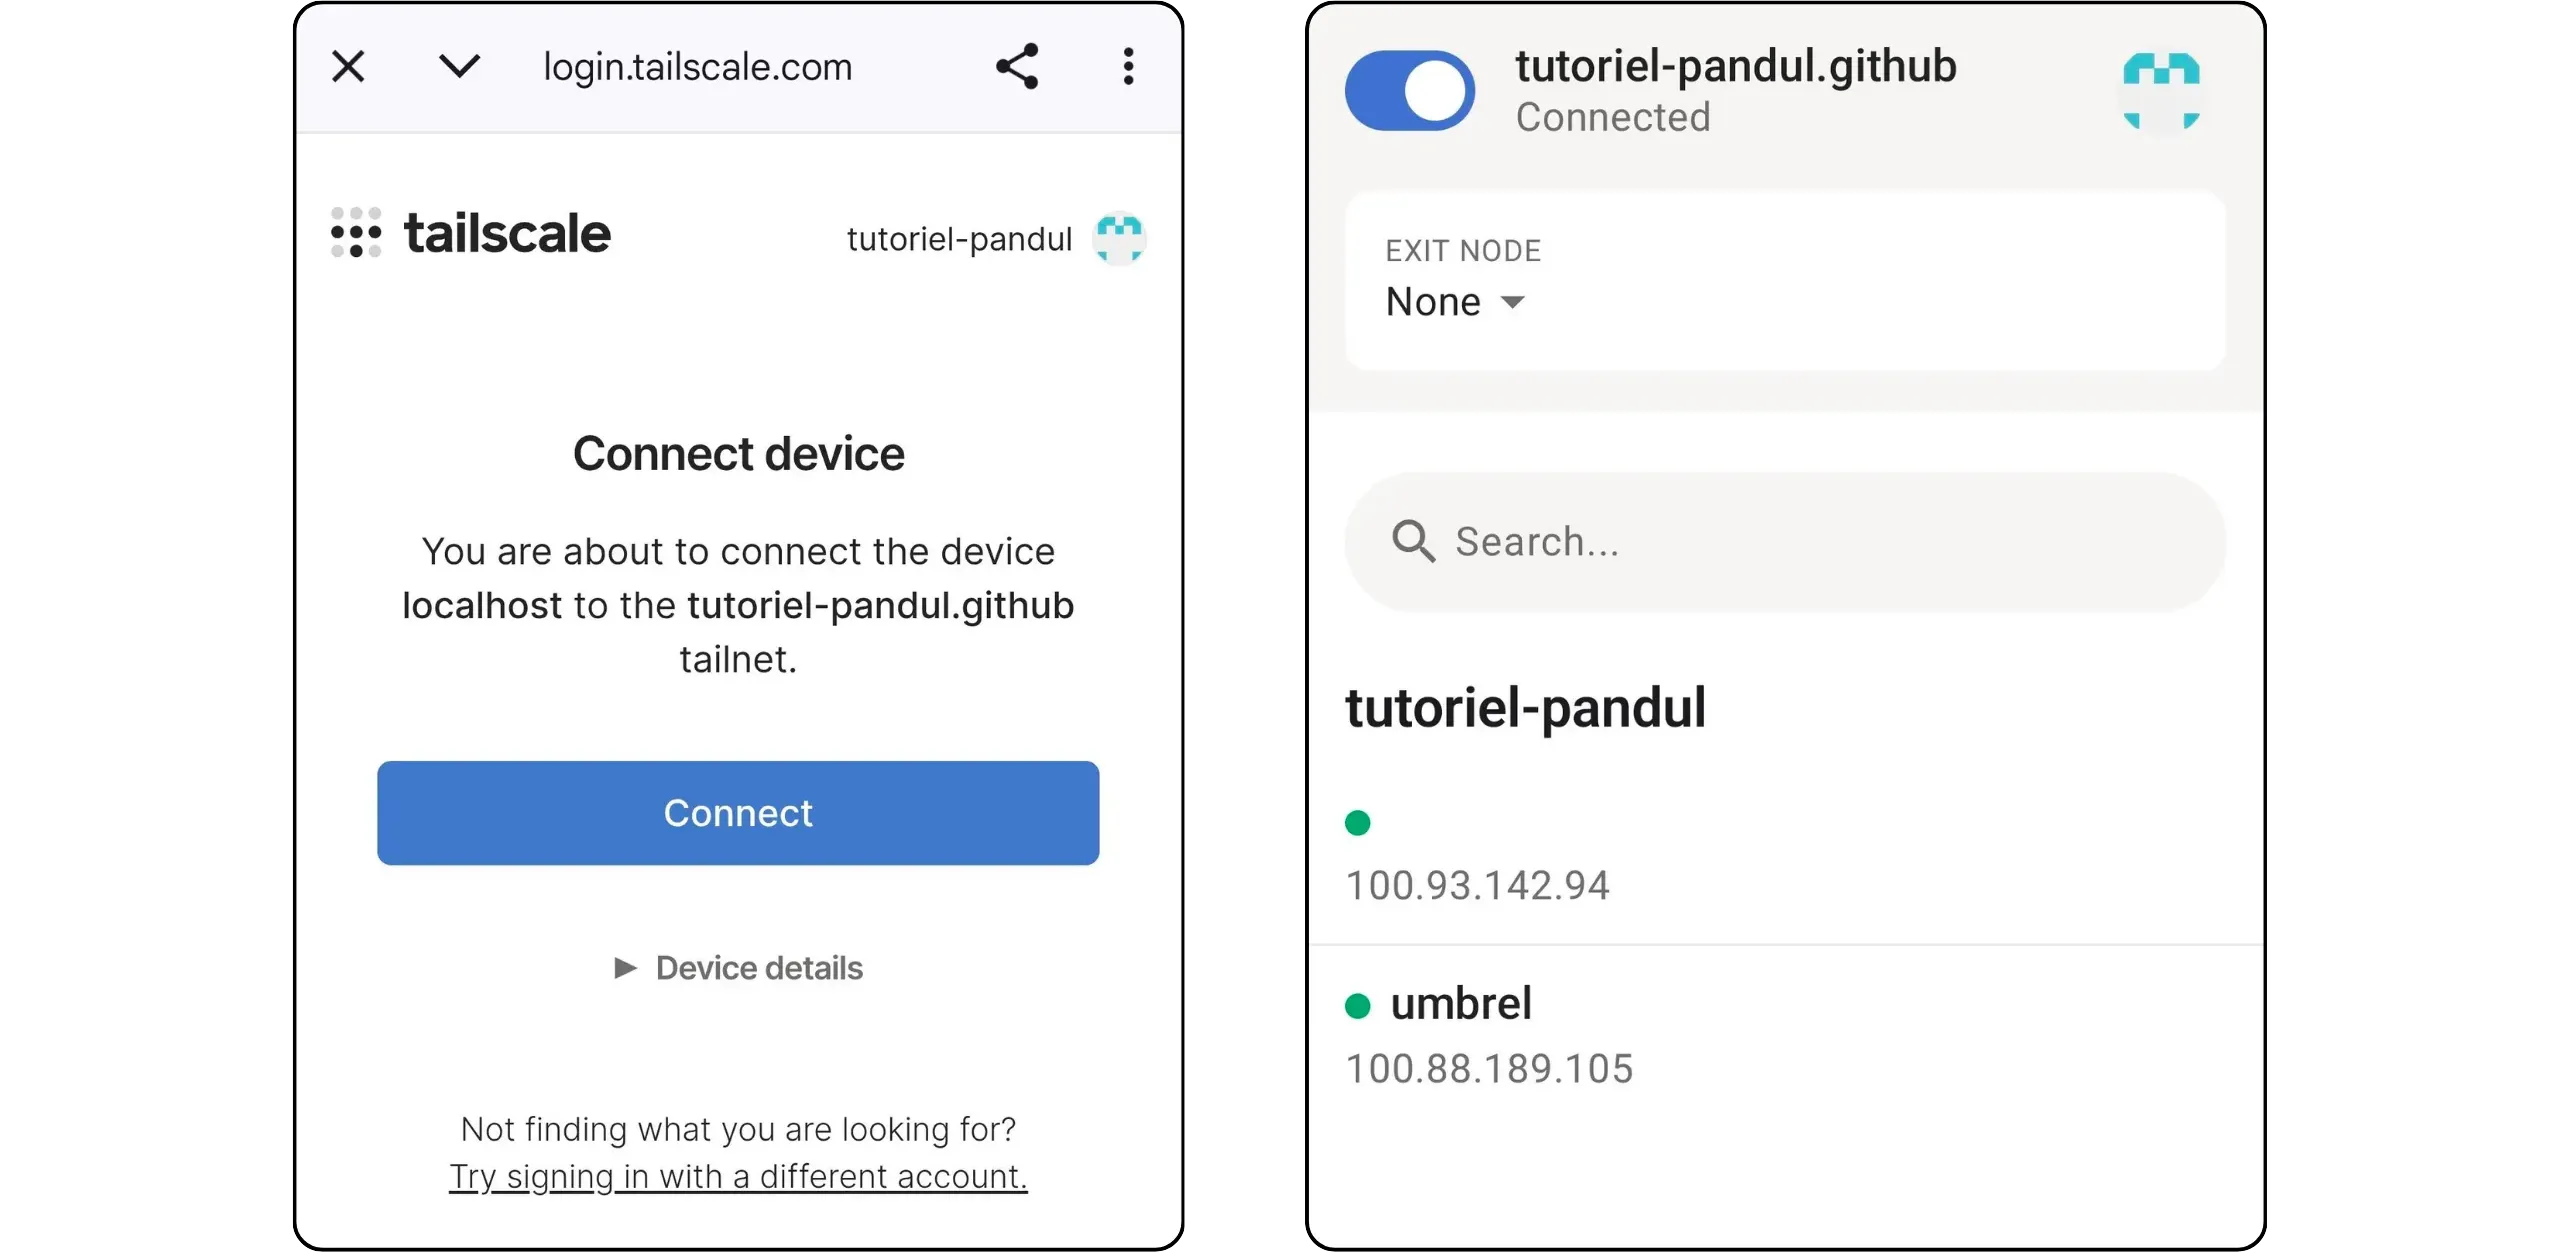
On the Tailscale site, now that at least two clients are connected, you can access the administration console with a list of all your devices connected to the network and their Tailscale IP addresses.
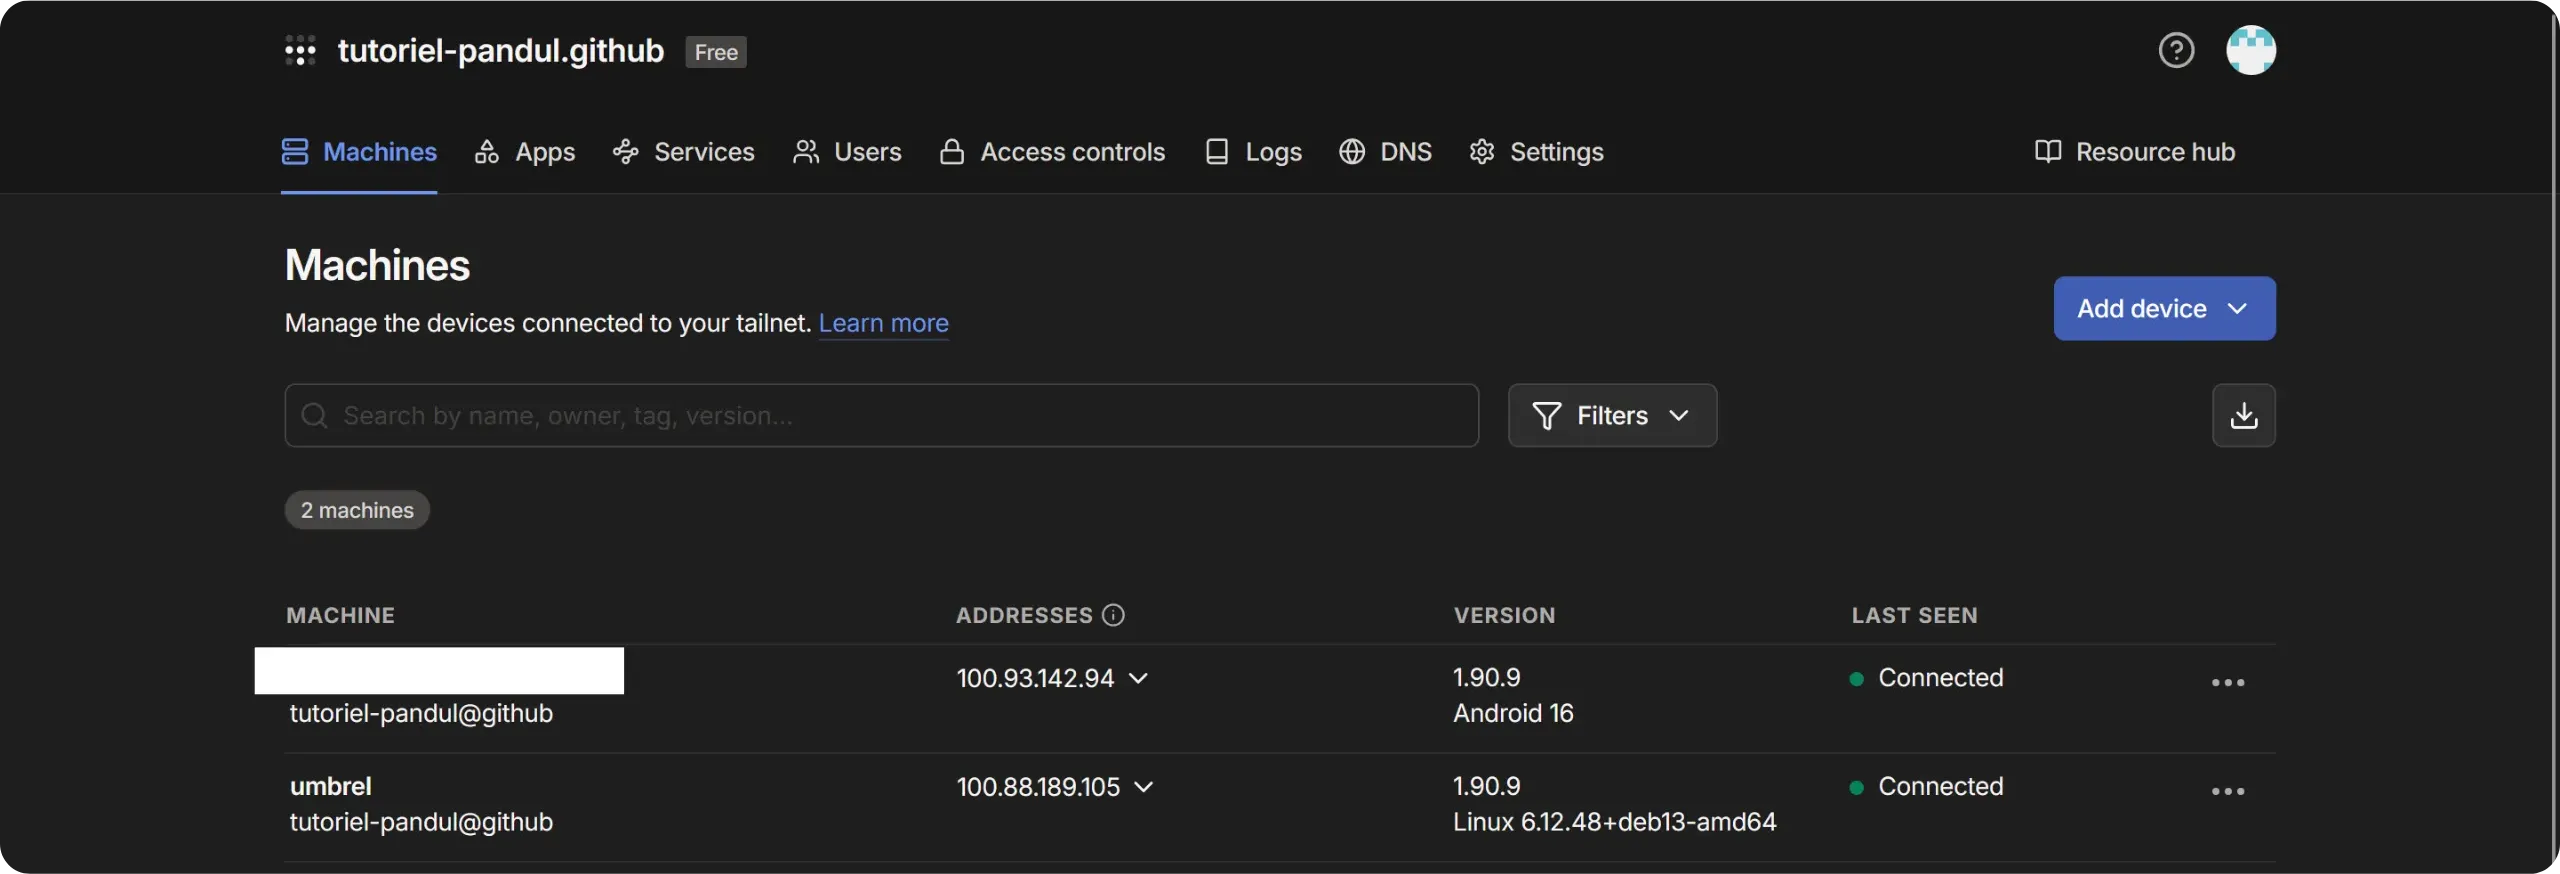
### Connect Zeus
Install the Zeus application on your phone. When it opens, select `Advanced Setup`, then `Create or connect a wallet`.
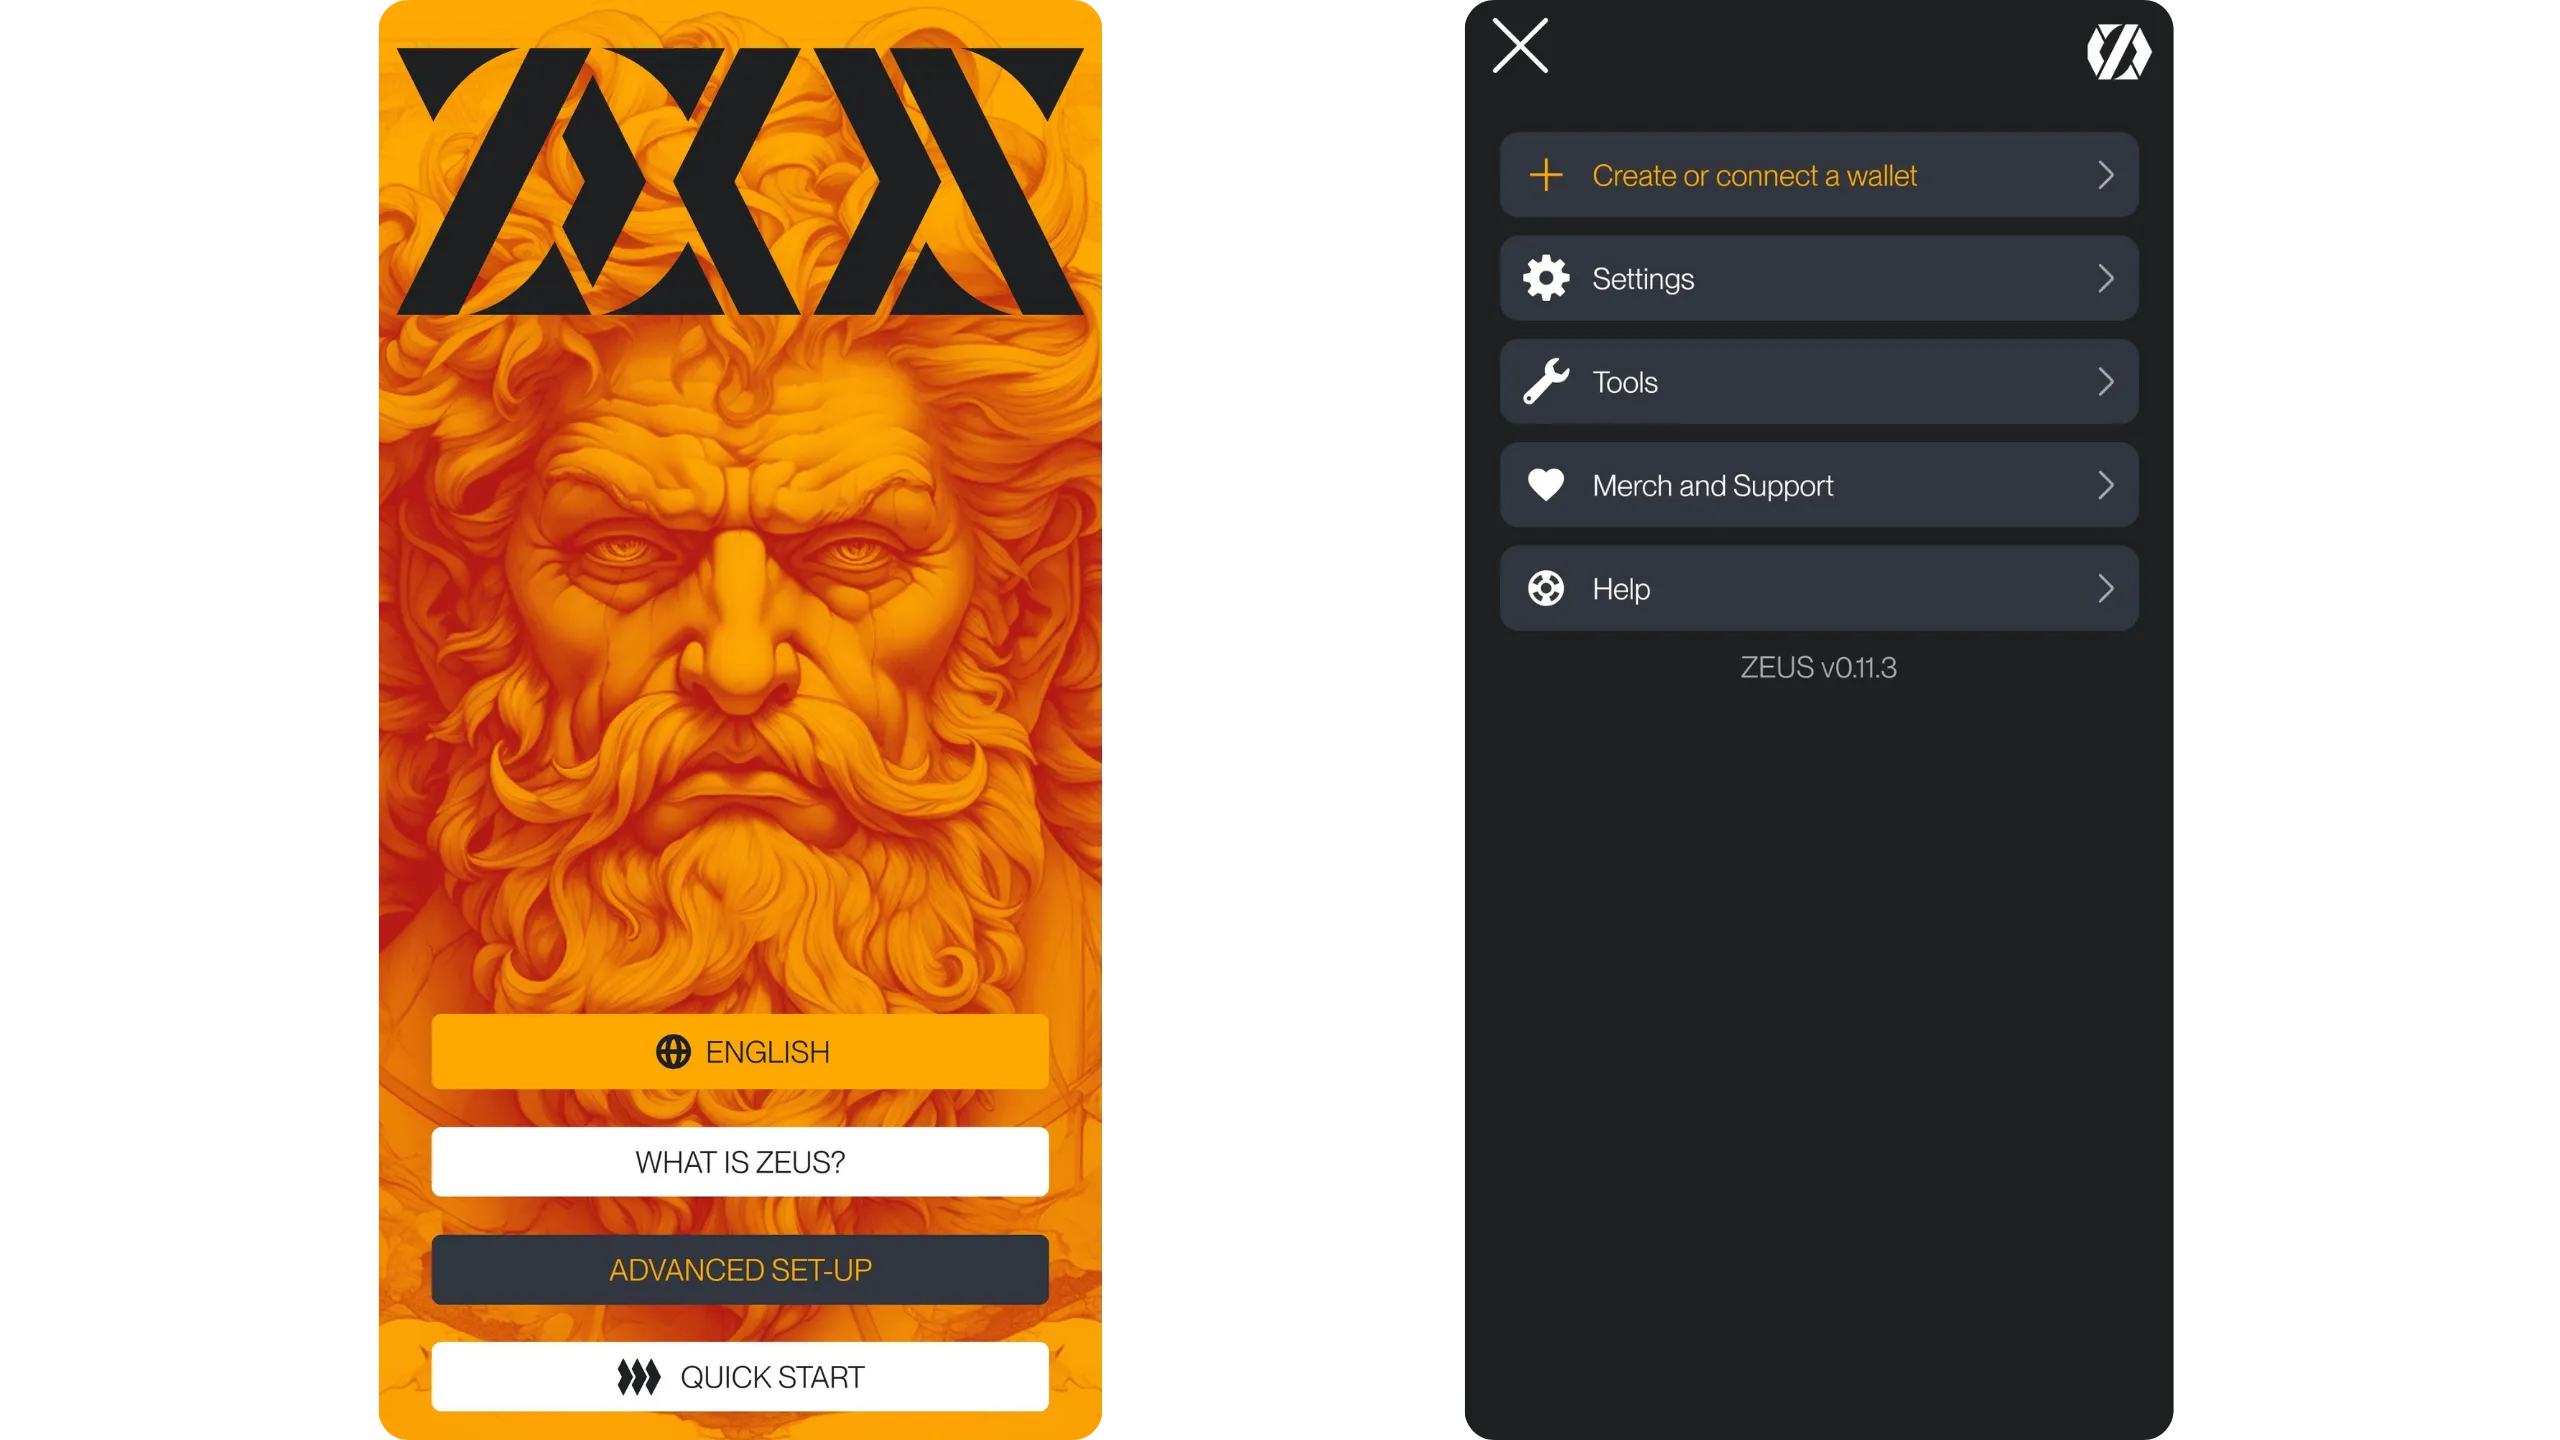
In the `Wallet interface` section, choose `LND (REST)`. Then enter the Tailscale address of your Umbrel, which you can find from your Tailscale dashboard or directly in the Tailscale application on Umbrel. For the port, enter `8080`.

Zeus then asks you to provide a `Macaroon`. This is an authorization token which allows you to precisely define the rights granted to an application (in this case Zeus) to interact with your Lightning node. It is possible to generate a macaroon from ThunderHub, in the `Tools` menu, `Bakery` sub-menu, but for this purpose, the easiest way is to retrieve it directly from the `Lightning Node` application.
Click on the three small dots at the top right of the interface, then on `Connect Wallet`. Choose `REST (Local Network)`. You will then be able to copy a macaroon with the appropriate rights.
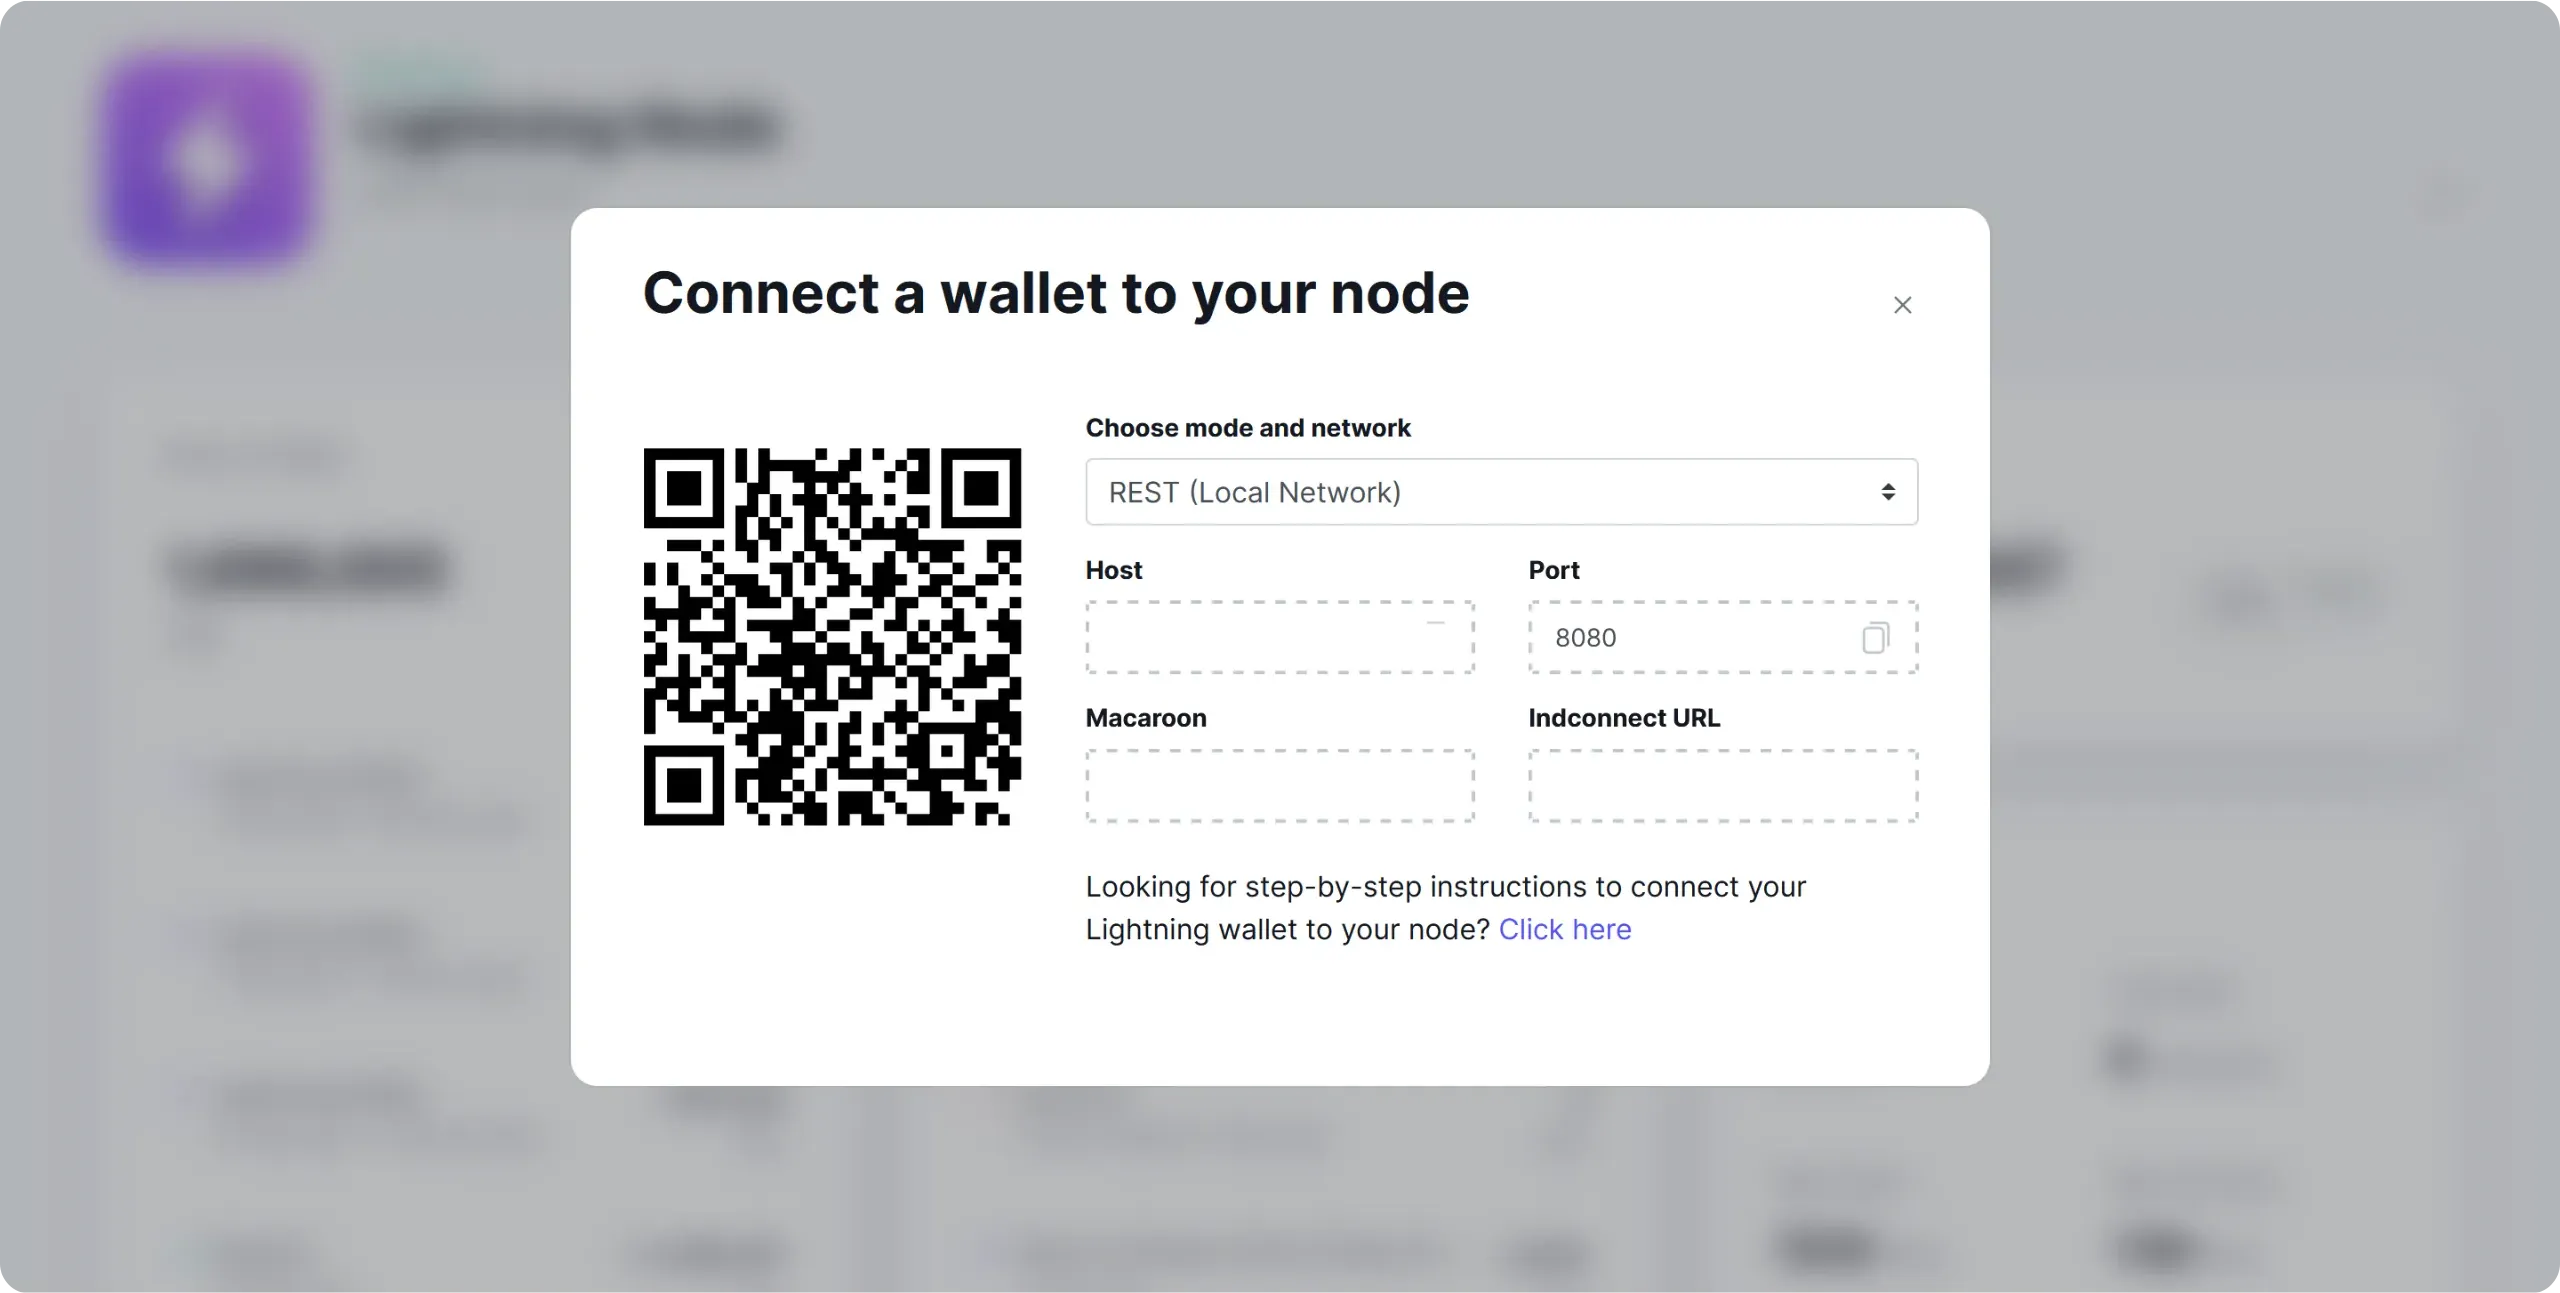
Paste it into the corresponding field in Zeus, then click on the `SAVE WALLET CONFIG` button.
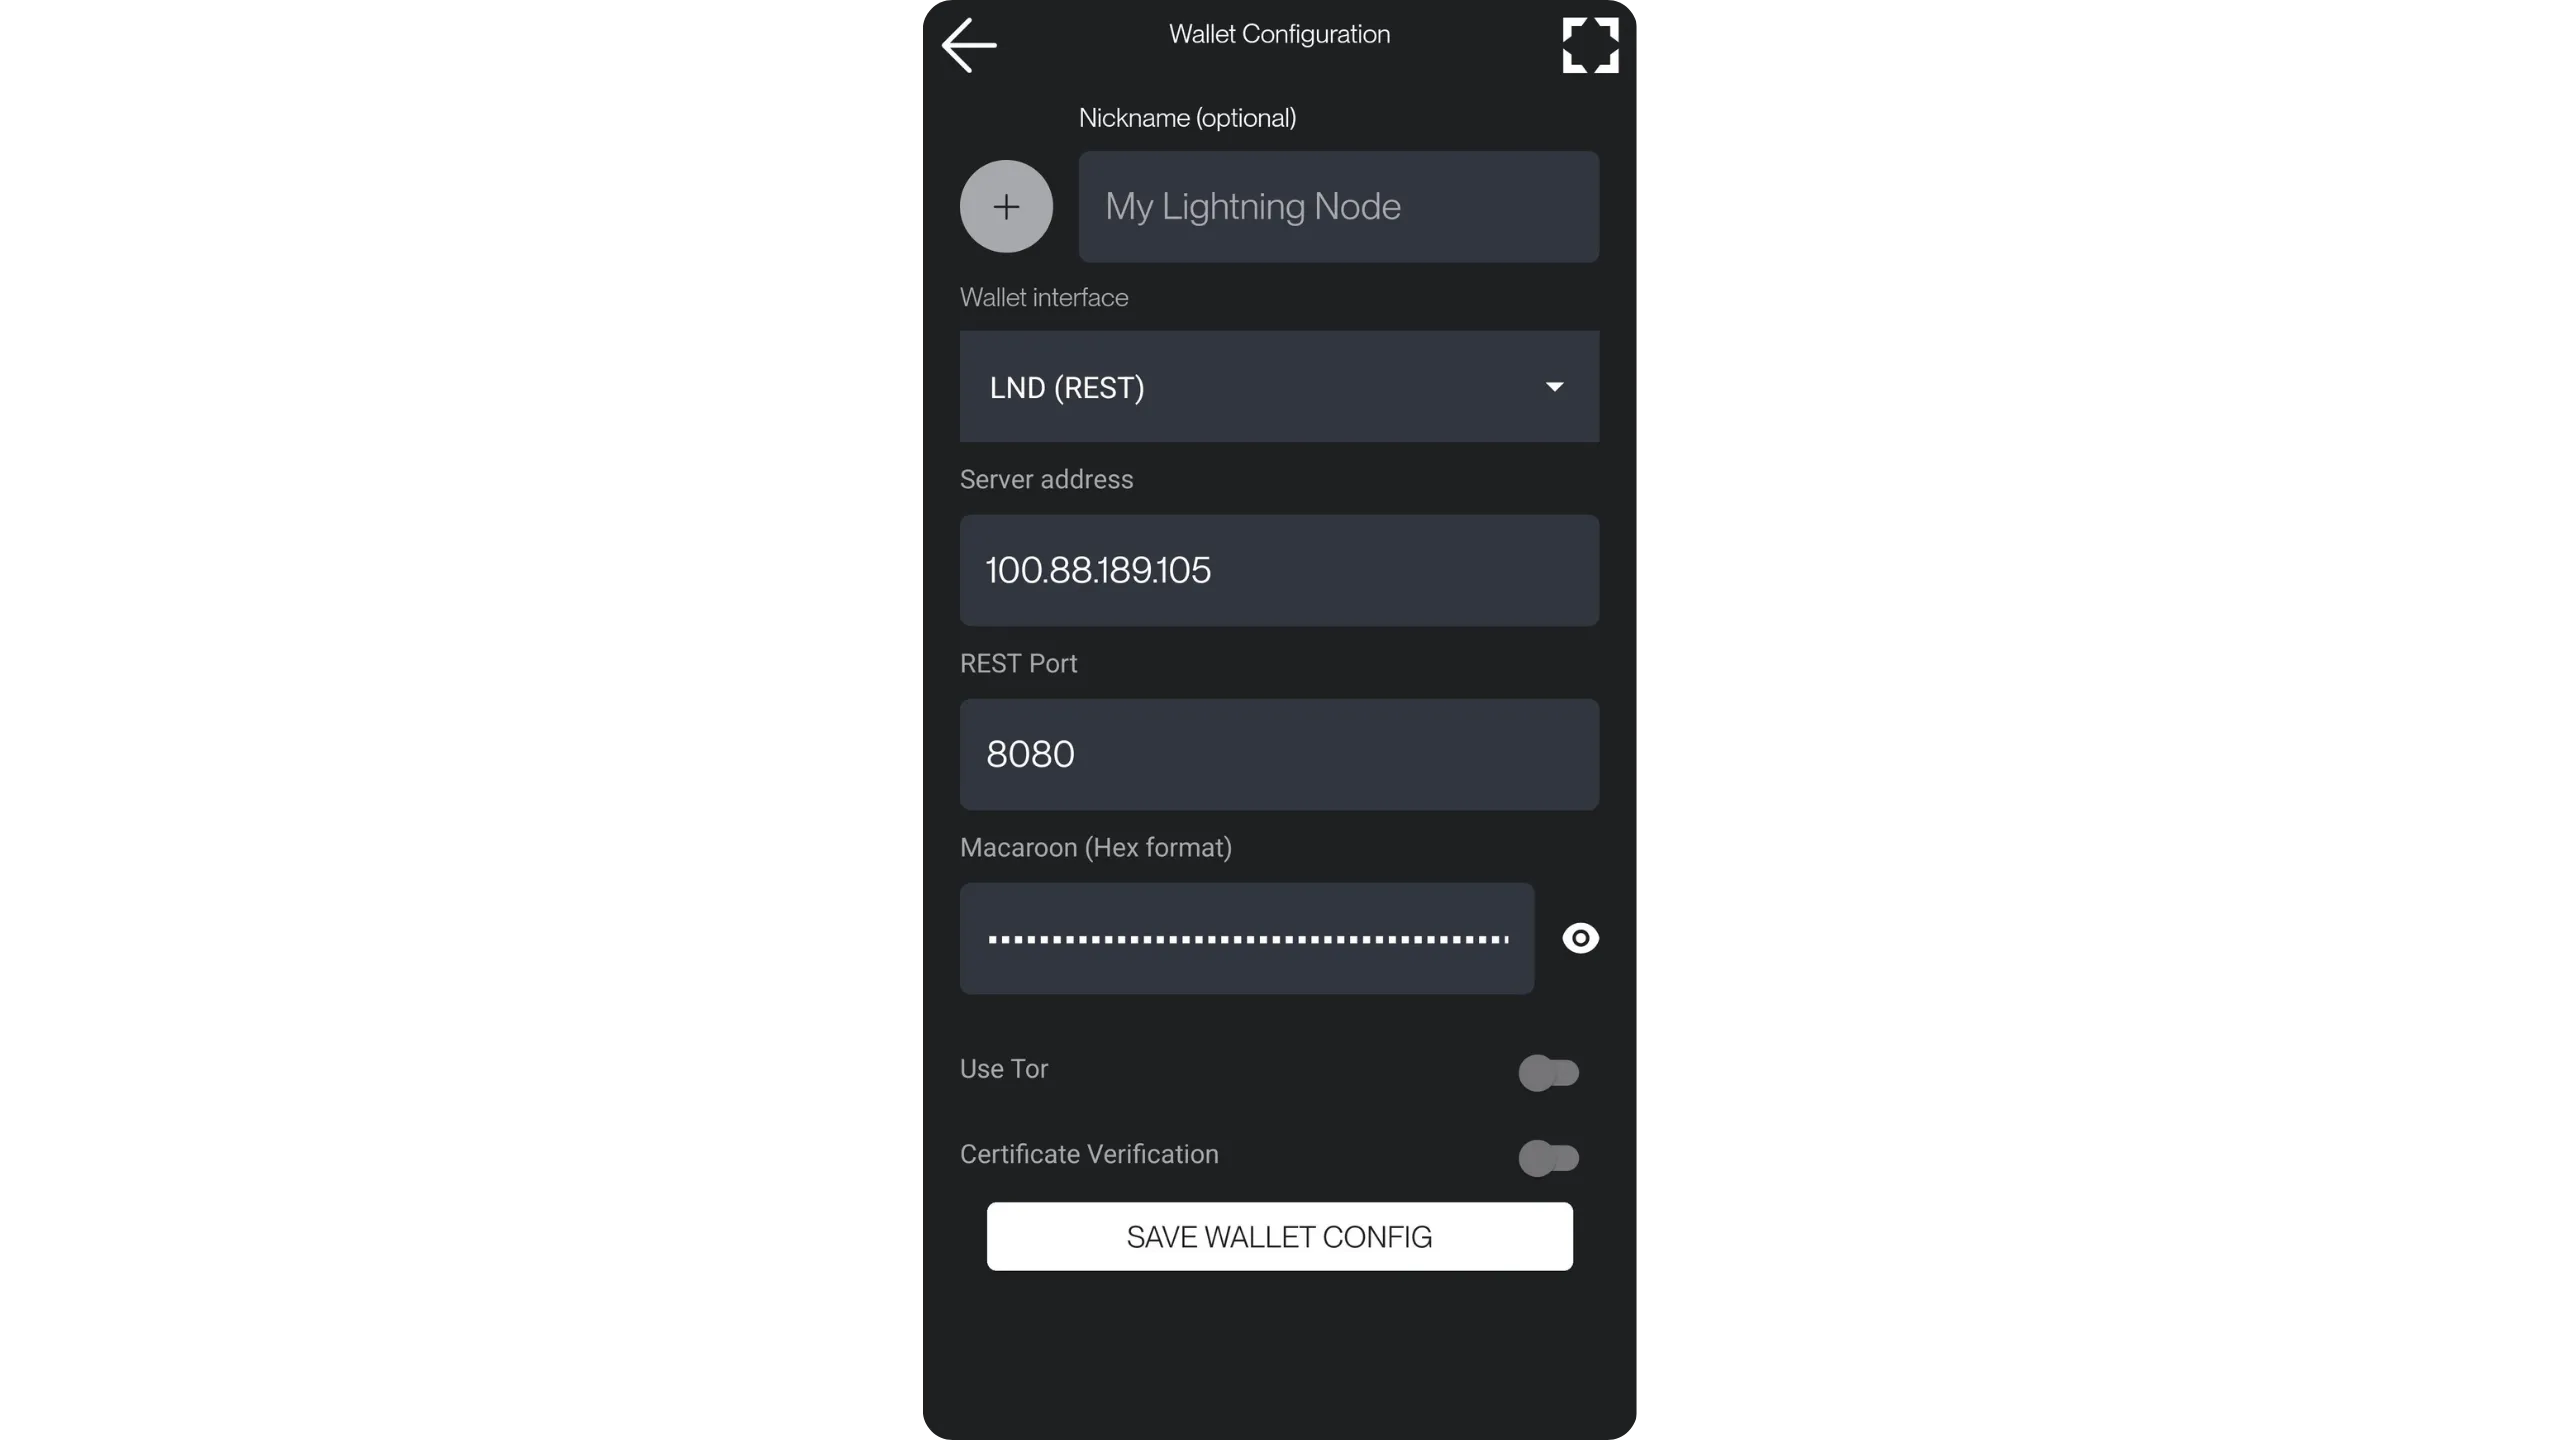
You can now access your Lightning node from the Zeus app. This means you can generate invoices to receive payments directly on your Lightning node from your smartphone, and also pay Lightning invoices wherever you are.
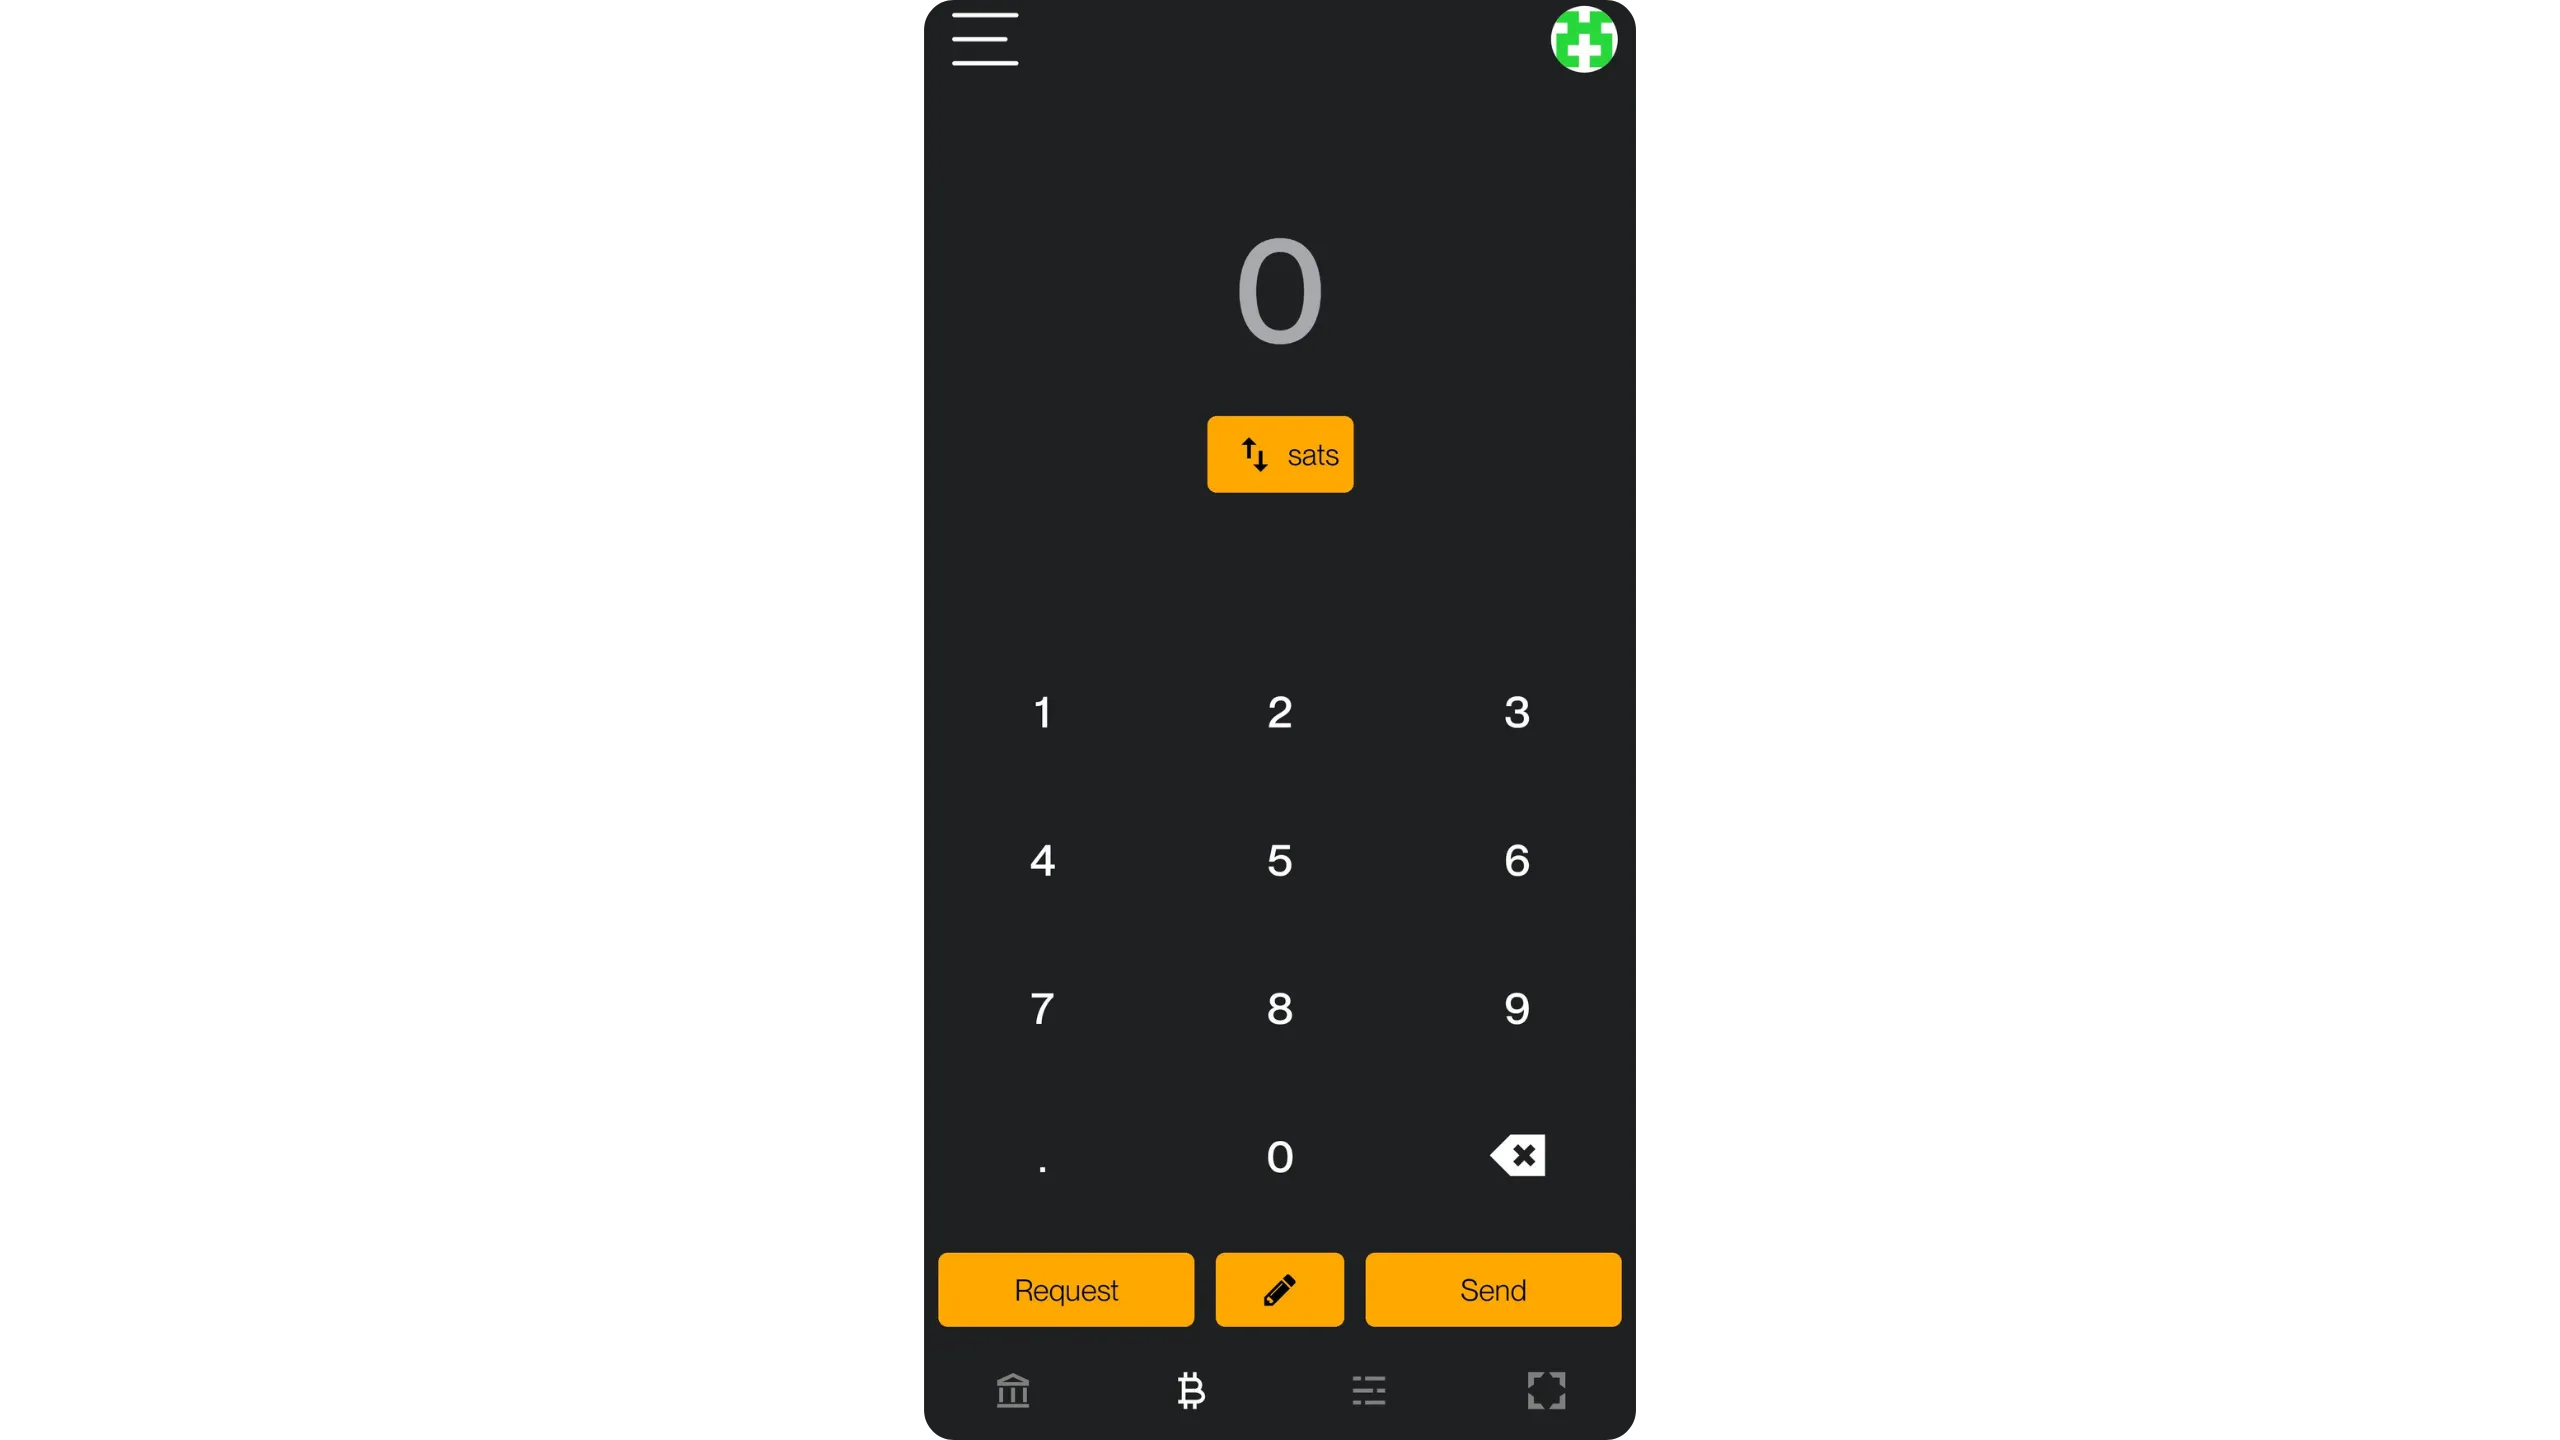
Tip: Tailscale is not limited to using your Lightning node remotely. It lets you access all your Umbrel's tools from other software, even remotely. For example, you can use the Tailscale IP address of your Umbrel to connect your Bitcoin node (via Electrs or Fulcrum) to Sparrow Wallet, without going through Tor. Once again, this avoids the slowness inherent in Tor. Simply install the Tailscale client on your computer and connect it to your network.
https://planb.academy/tutorials/computer-security/communication/tailscale-9acbd7de-04d9-40f6-ab80-35f0dfedb632
In the next chapter, we'll look at another, equally effective way of connecting a mobile client to your Lightning node: Nostr Wallet Connect. We'll be using a different application from Zeus (although Zeus is also compatible with NWC), namely Alby Go.
## Connecting a mobile wallet via NWC
f5c97e43-e66e-4ba3-bcc9-fee1a04fc7f4
If you're not convinced by the Tailscale connection, or if managing a dual VPN seems too much of a hassle, this chapter suggests another way of using a remote mobile client to pay for and receive sats via your Lightning node: ***Nostr Wallet Connect***.
For this example, we'll be using the Alby Go mobile application, which is very well designed and particularly easy to learn. That said, you can also use Zeus or any other NWC-compatible mobile application. You'll find a list of compatible applications on [the `awesome-nwc` GitHub repository](https://github.com/getAlby/awesome-nwc).
### How does Nostr Wallet Connect work?
Nostr Wallet Connect is a standardized protocol that allows an application or website to trigger actions on a remote Lightning node, without establishing a direct network connection to that node (no API LND exposed, no VPN, no `.onion` service...). NWC defines how an application formulates an intent (e.g. `pay_invoice`) and receives the result.
It works quite simply. You initialize a session by scanning a QR code or via a deeplink `nostr+walletconnect:`. This string contains the session parameters and an authorization secret. Then, when the application wants to pay, it serializes the request, encrypts it, and publishes it as an event on a Nostr relay. The node reads the event on the relay, decrypts it, checks that the author is authorized for this session, executes the payment, then returns an encrypted response (success with preimage, or error). The relay only acts as a transport intermediary: it cannot read the content, but it can observe the timing and frequency of requests.
Compared with a connection via Tailscale or Tor, the main advantage of NWC is that your node is not directly reachable from the outside. This greatly simplifies mobile use: your node doesn't need to accept incoming connections, it just needs to be able to communicate with a relay. On the other hand, you introduce a functional dependency on Nostr relays: if they are unavailable, the experience degrades. Also, even if messages are encrypted, the relay can observe a certain level of activity metadata.
The difference in security models is also important. With Tailscale or Tor, you expose direct access to your node (via API of LND) protected by highly sensitive secrets. This is powerful, because you can administer everything, but it's also a lower-layer attack surface. With NWC, access is more applicative: you delegate a session token that authorizes only certain actions.
### Install Alby Hub on your Lightning node
Previously, there was an application specifically dedicated to NWC connections in the Umbrel App Store, but unfortunately this is no longer available. You'll now need to use Alby Hub to establish this type of connection. To do this, start by installing the Alby Hub application directly from the store.
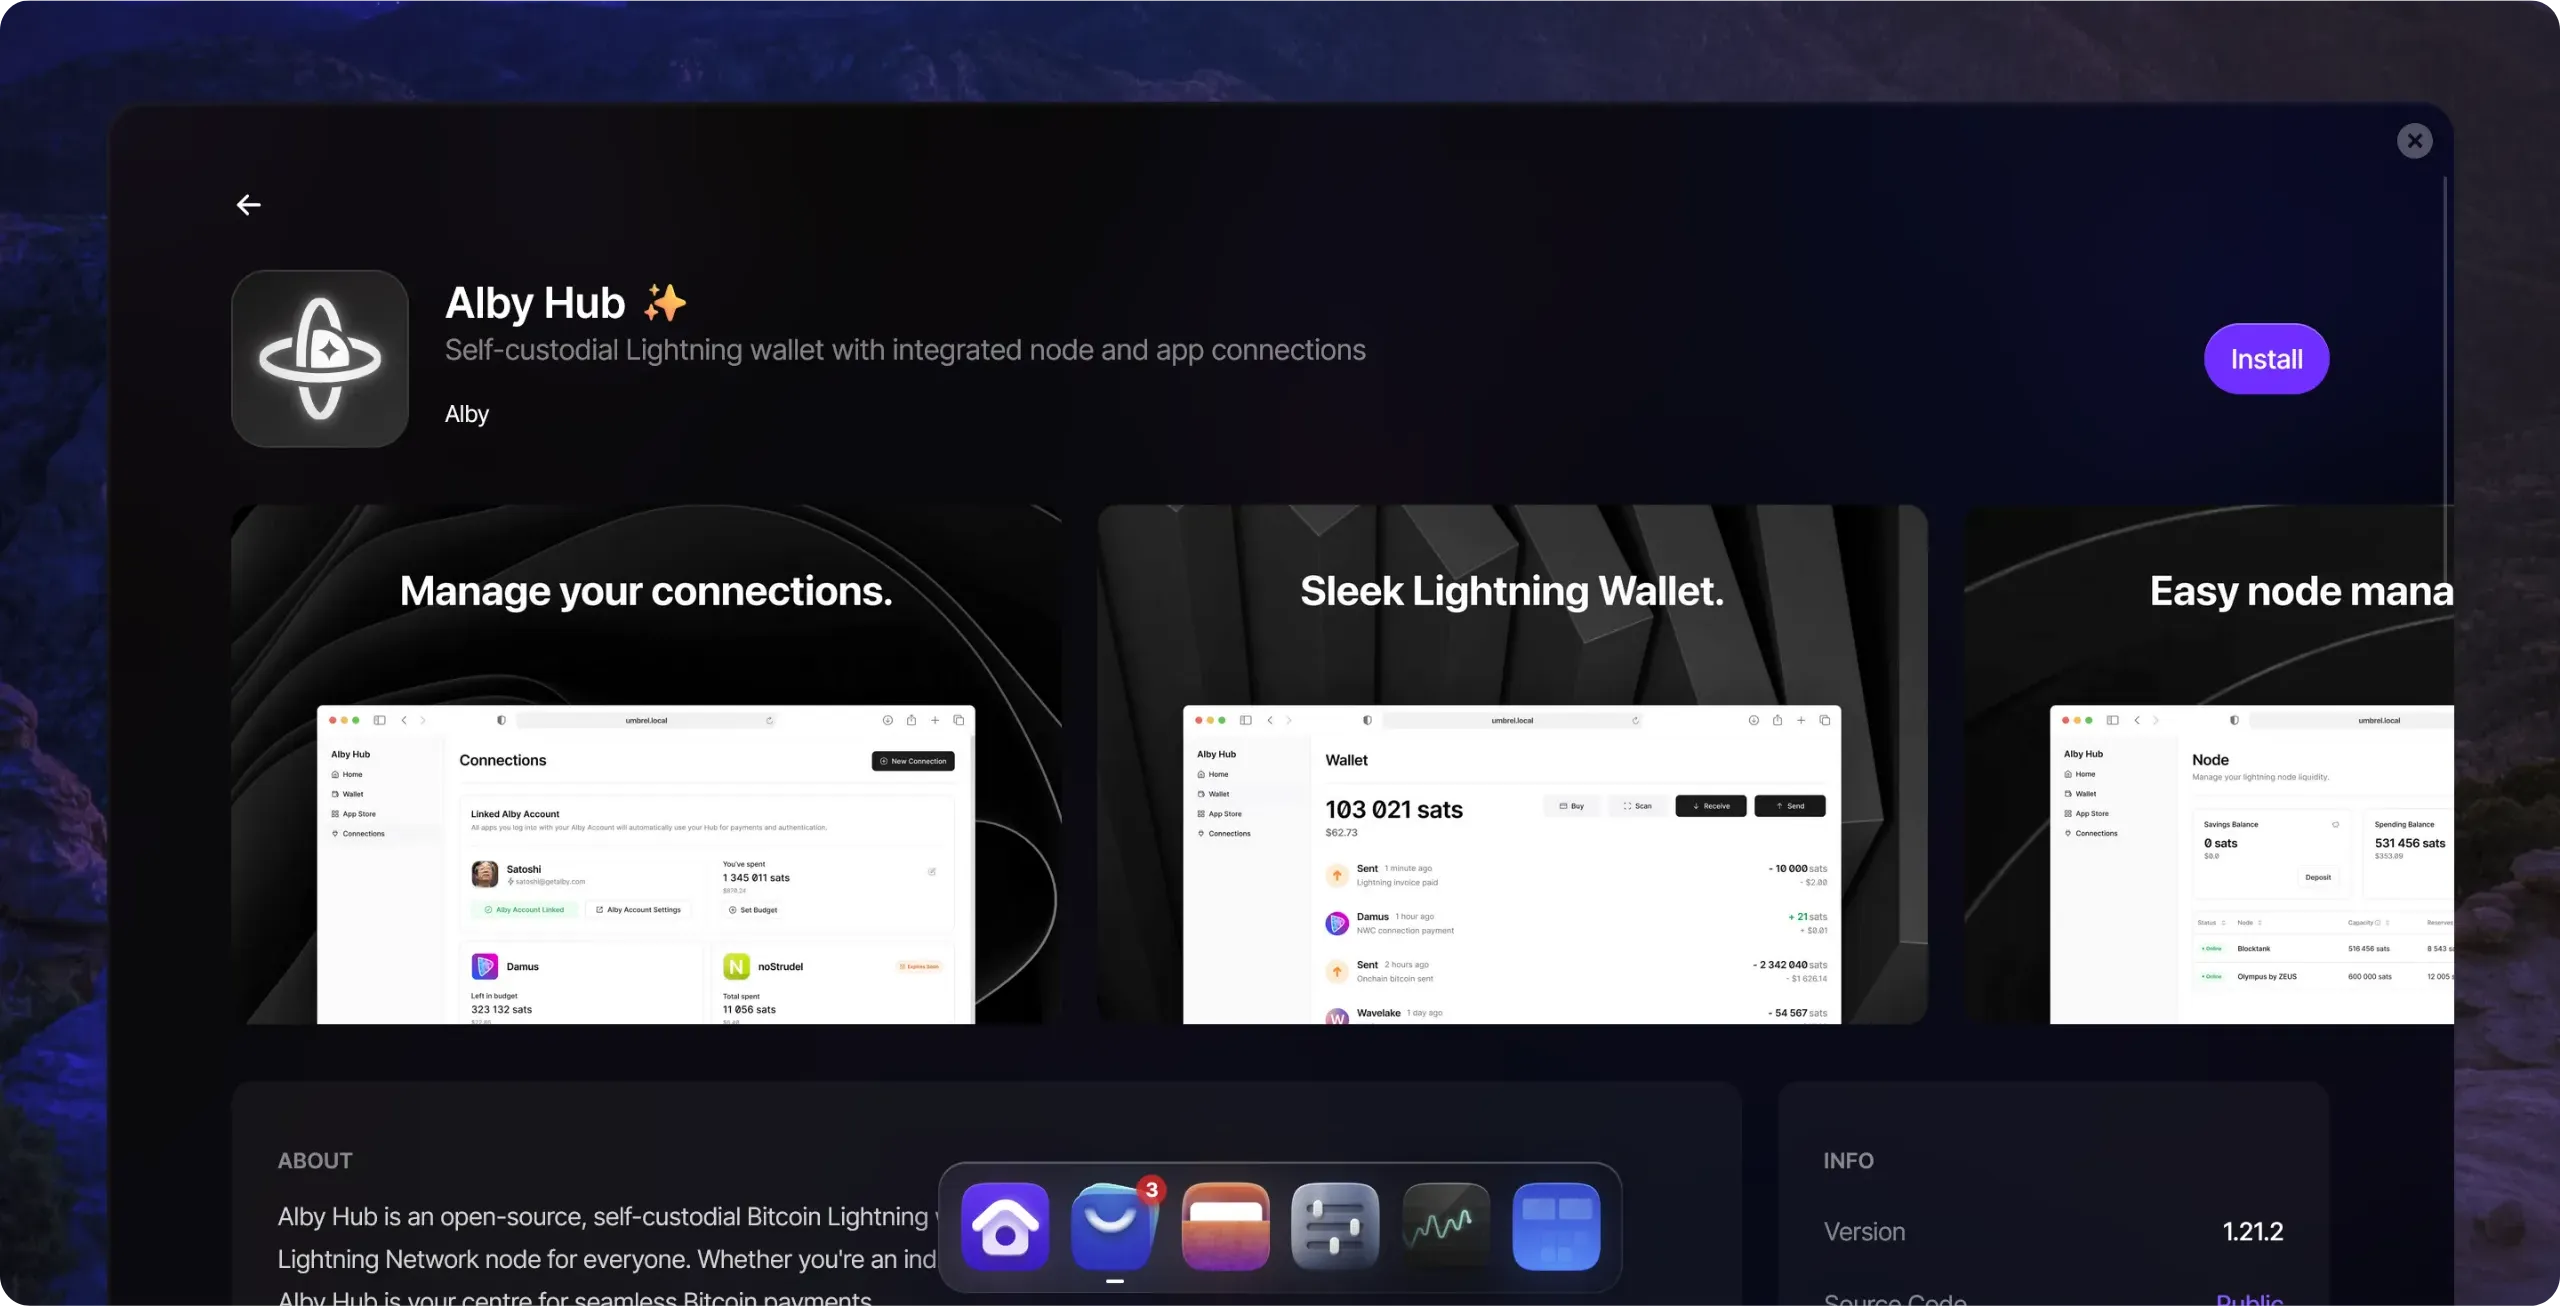
On opening, skip the introductory screens, then click on the `Get Started (LND)` button. It's important to check that it says `LND`, not `LDK`, in brackets. If `LND` appears, this means that Alby Hub has correctly detected your existing Lightning node and will configure itself as the interface for it. On the other hand, if `LDK` is displayed, this indicates that Alby Hub has not detected your node and is about to create a new one, which is not the aim here.
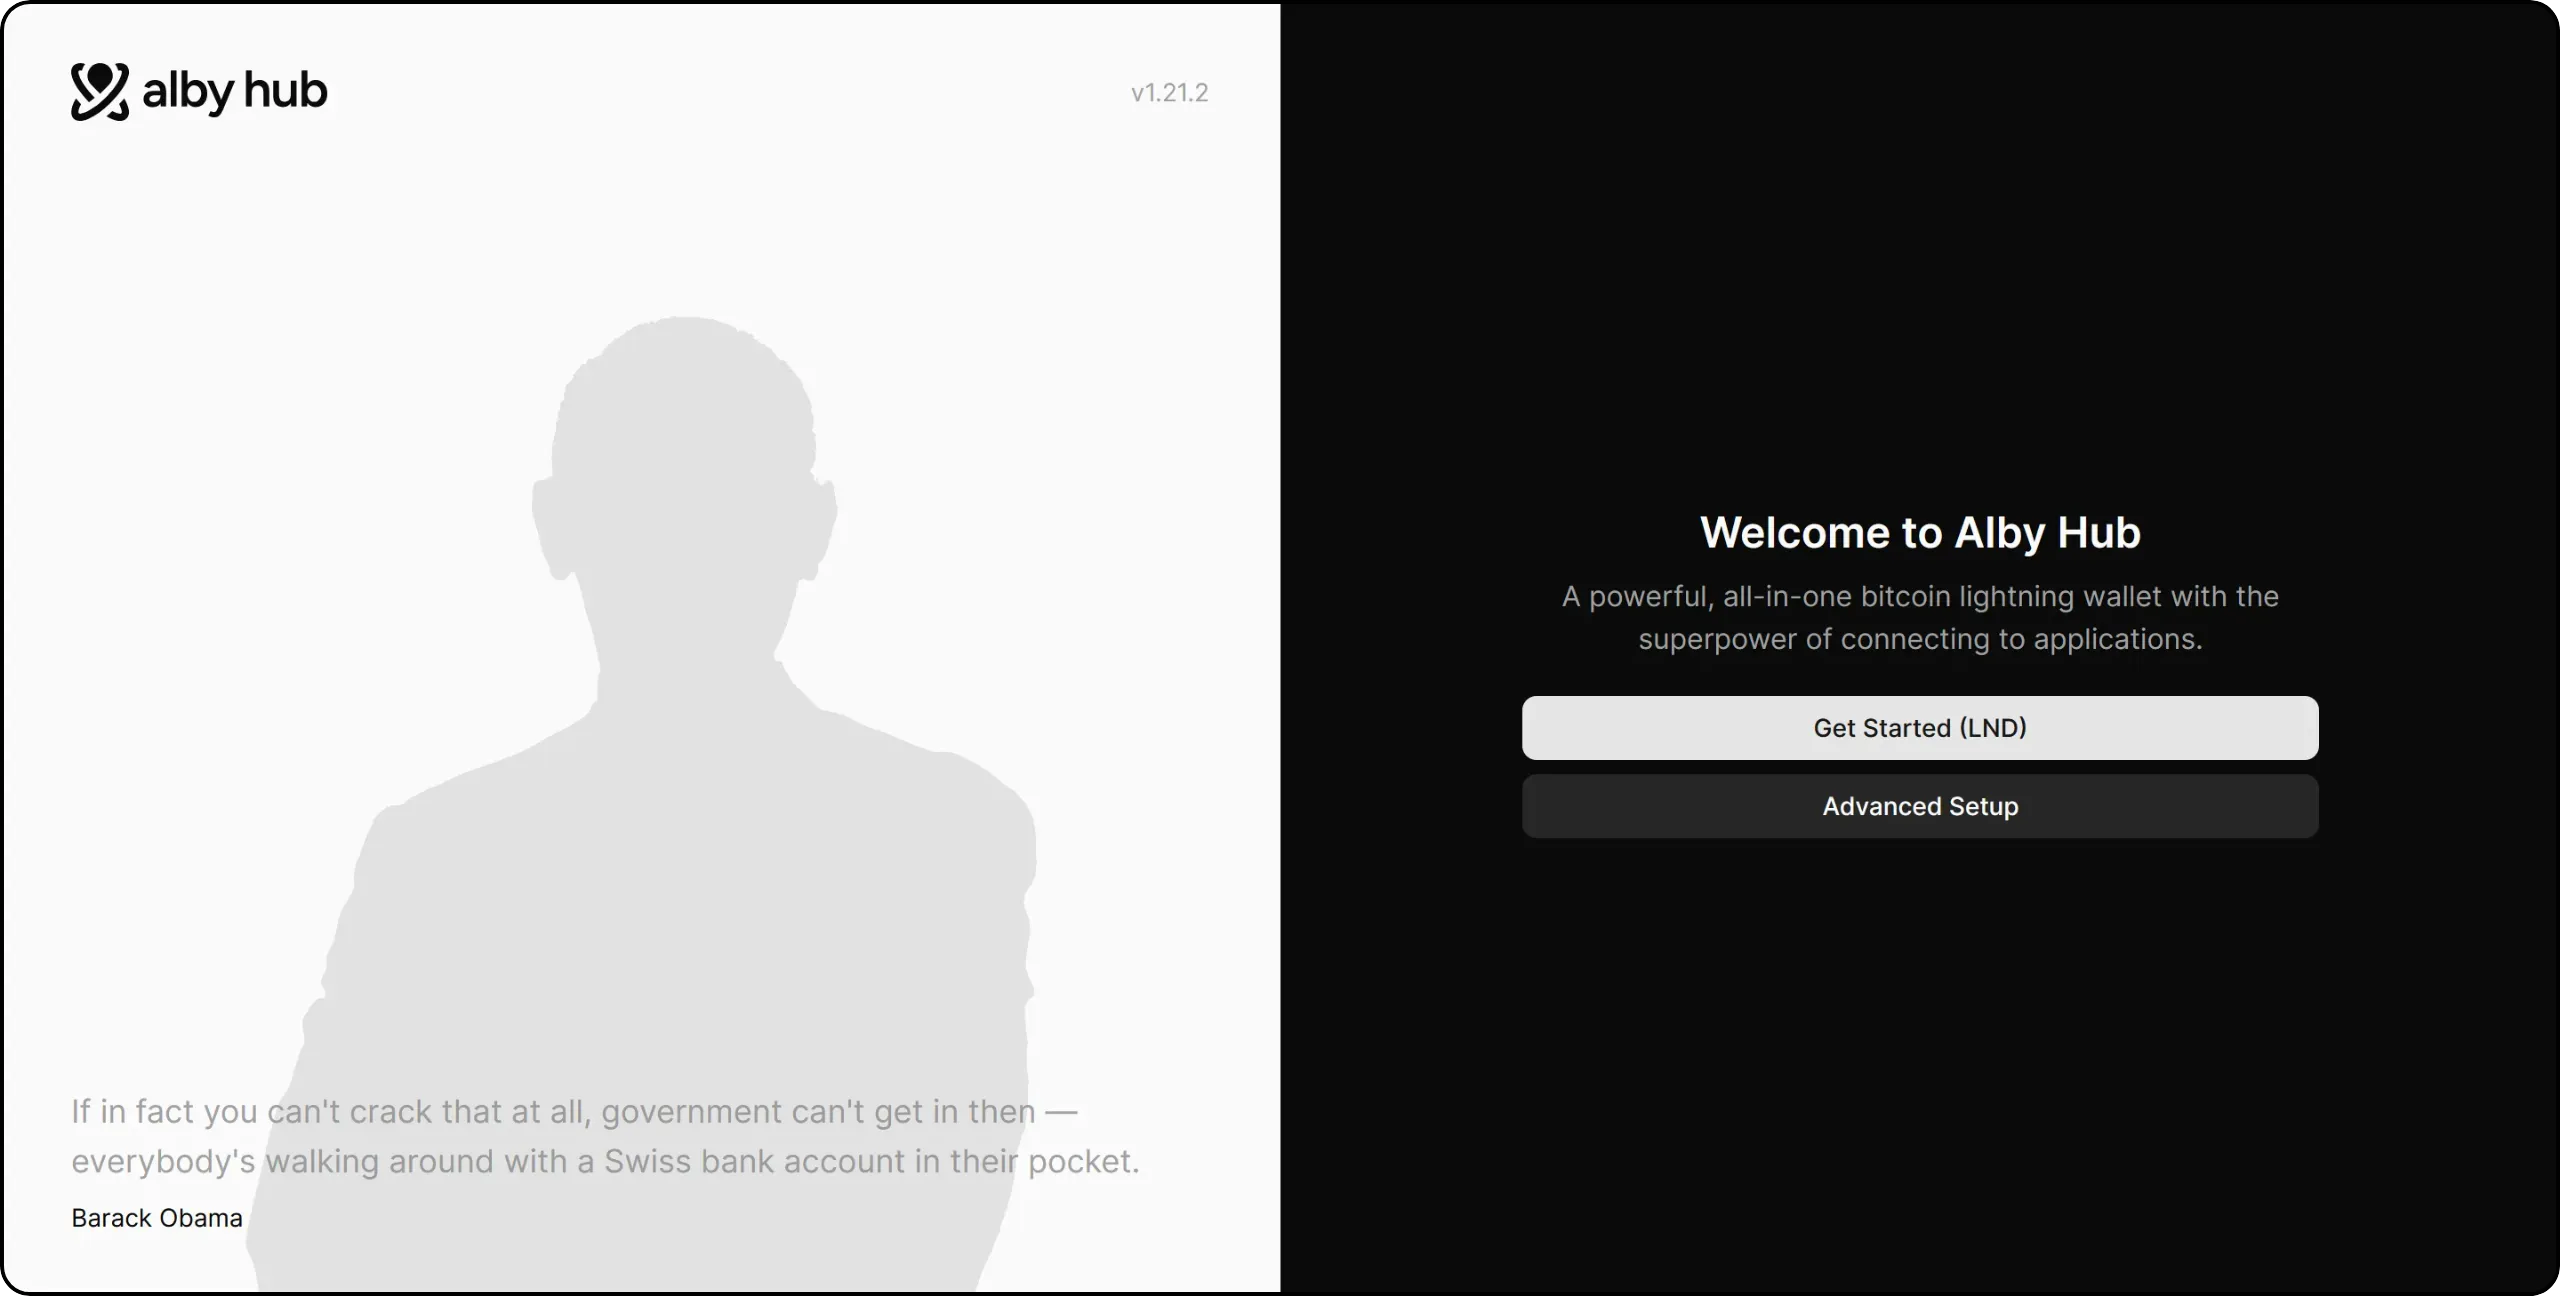
You will then be asked to set up a Alby account. For use limited to NWC, this is not necessary, but you may wish to do so if you wish to take advantage of Alby's specific services. If not, click on `Maybe later` to continue.
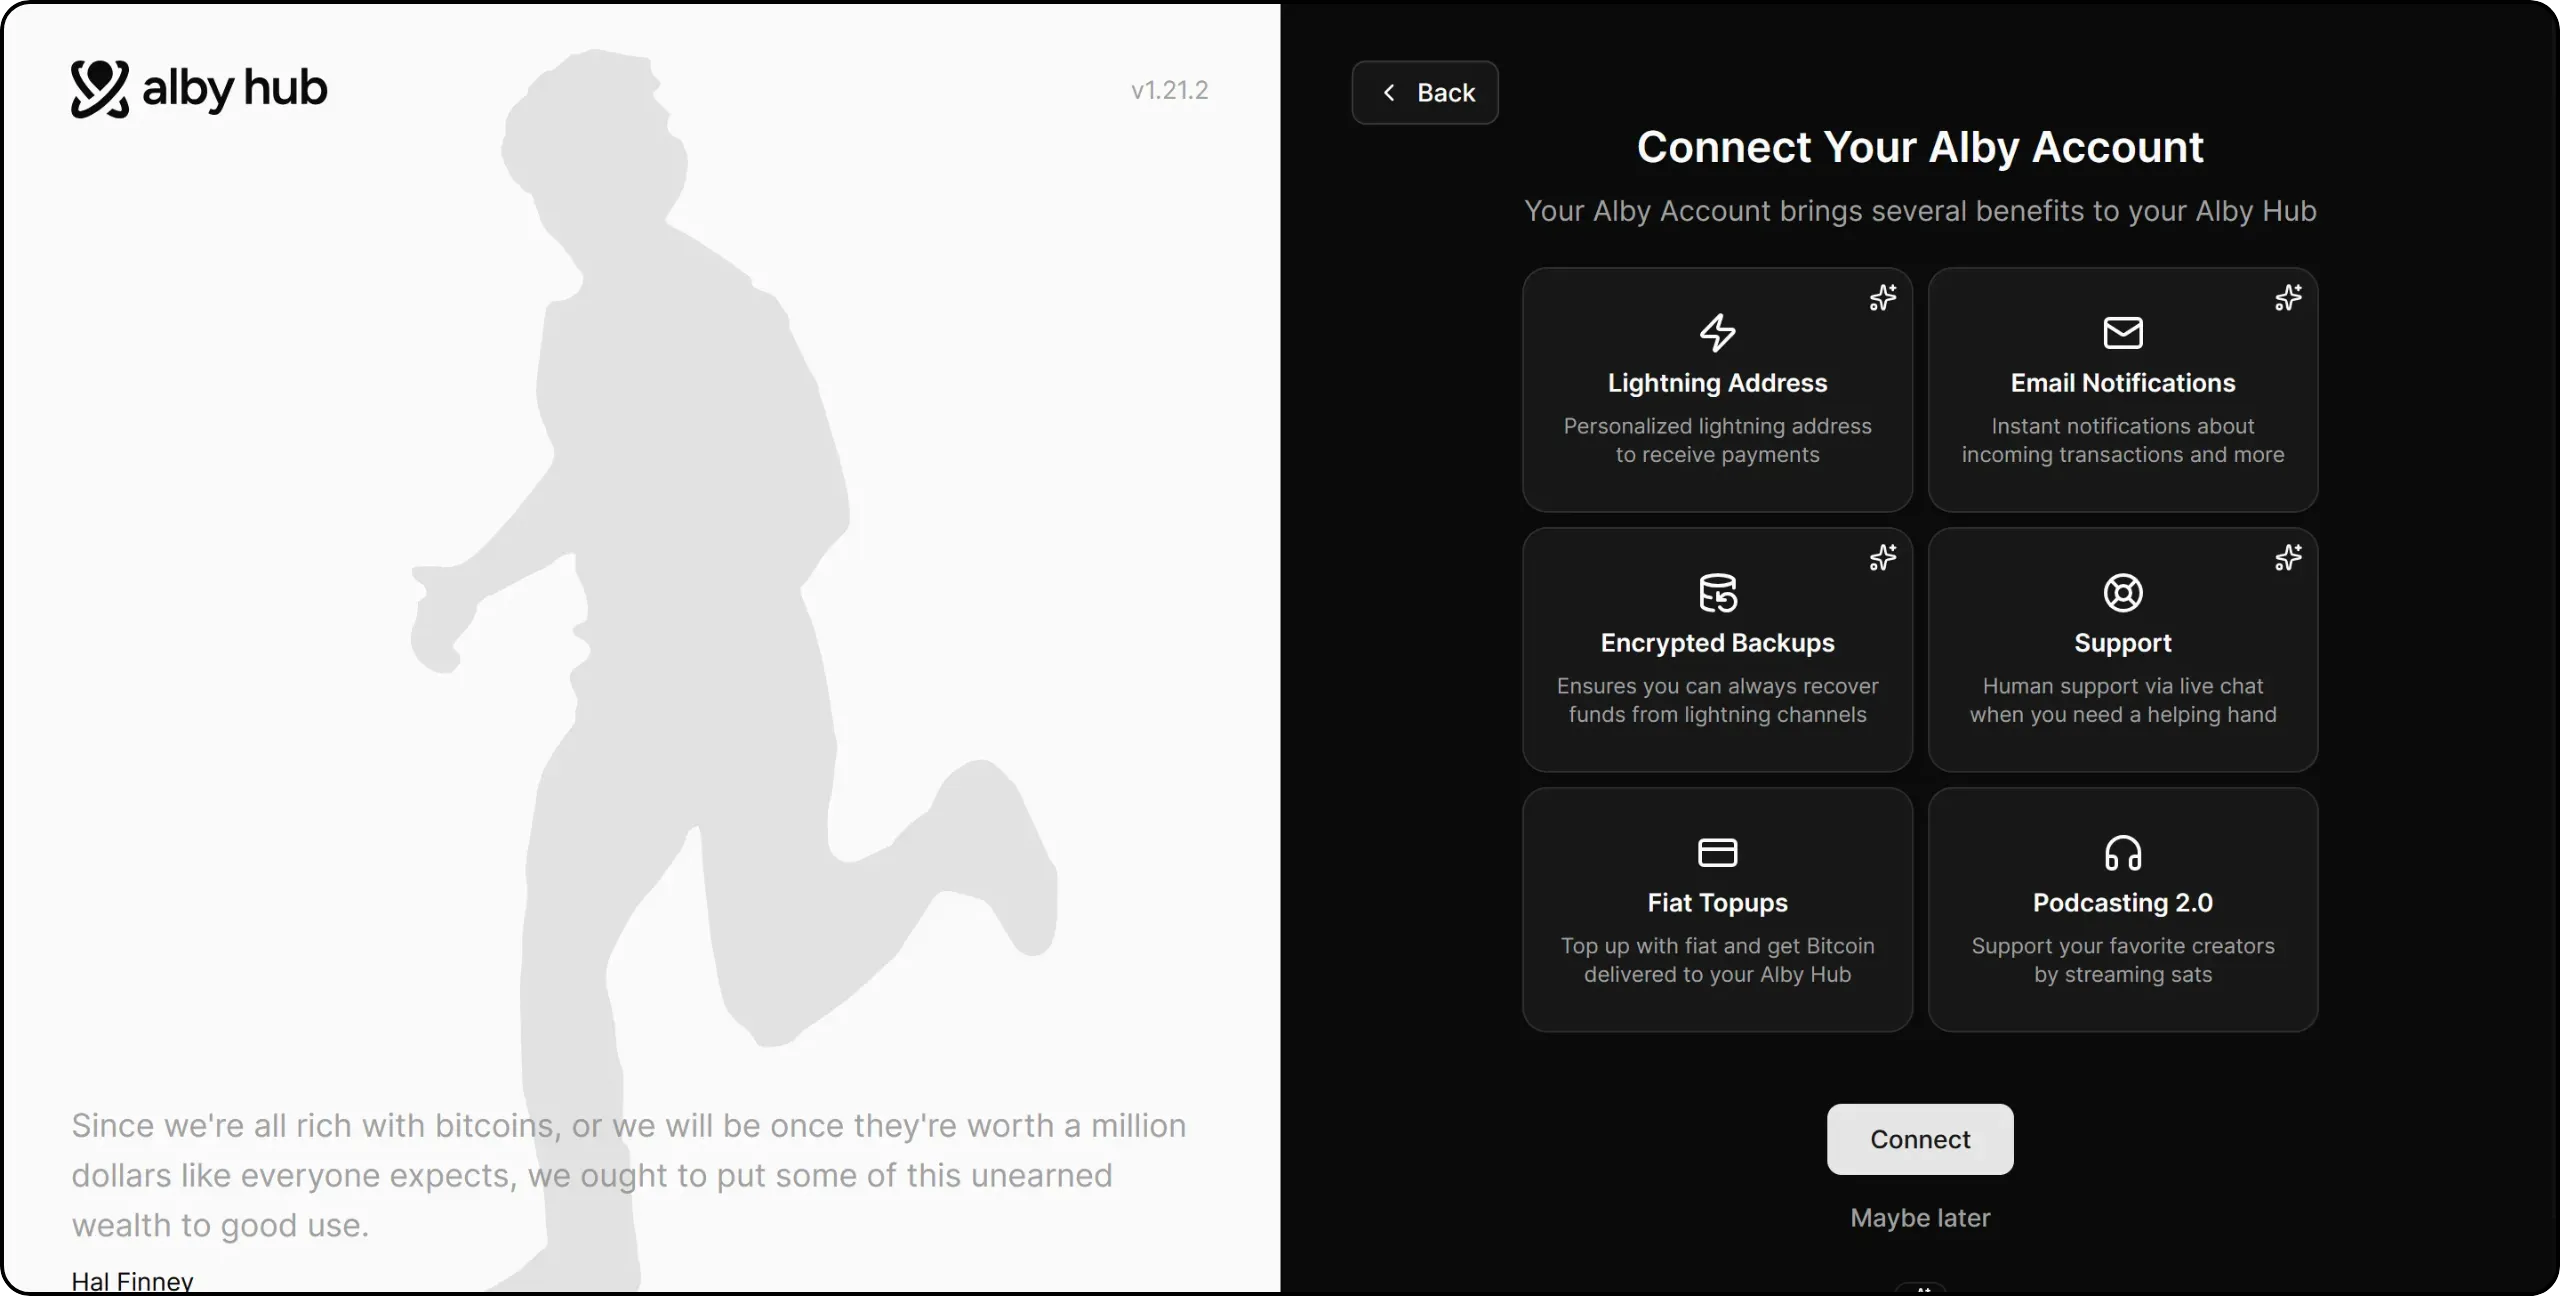
Then choose a strong, unique password. This will protect access to Alby Hub on your node. Remember to save it in your password manager.
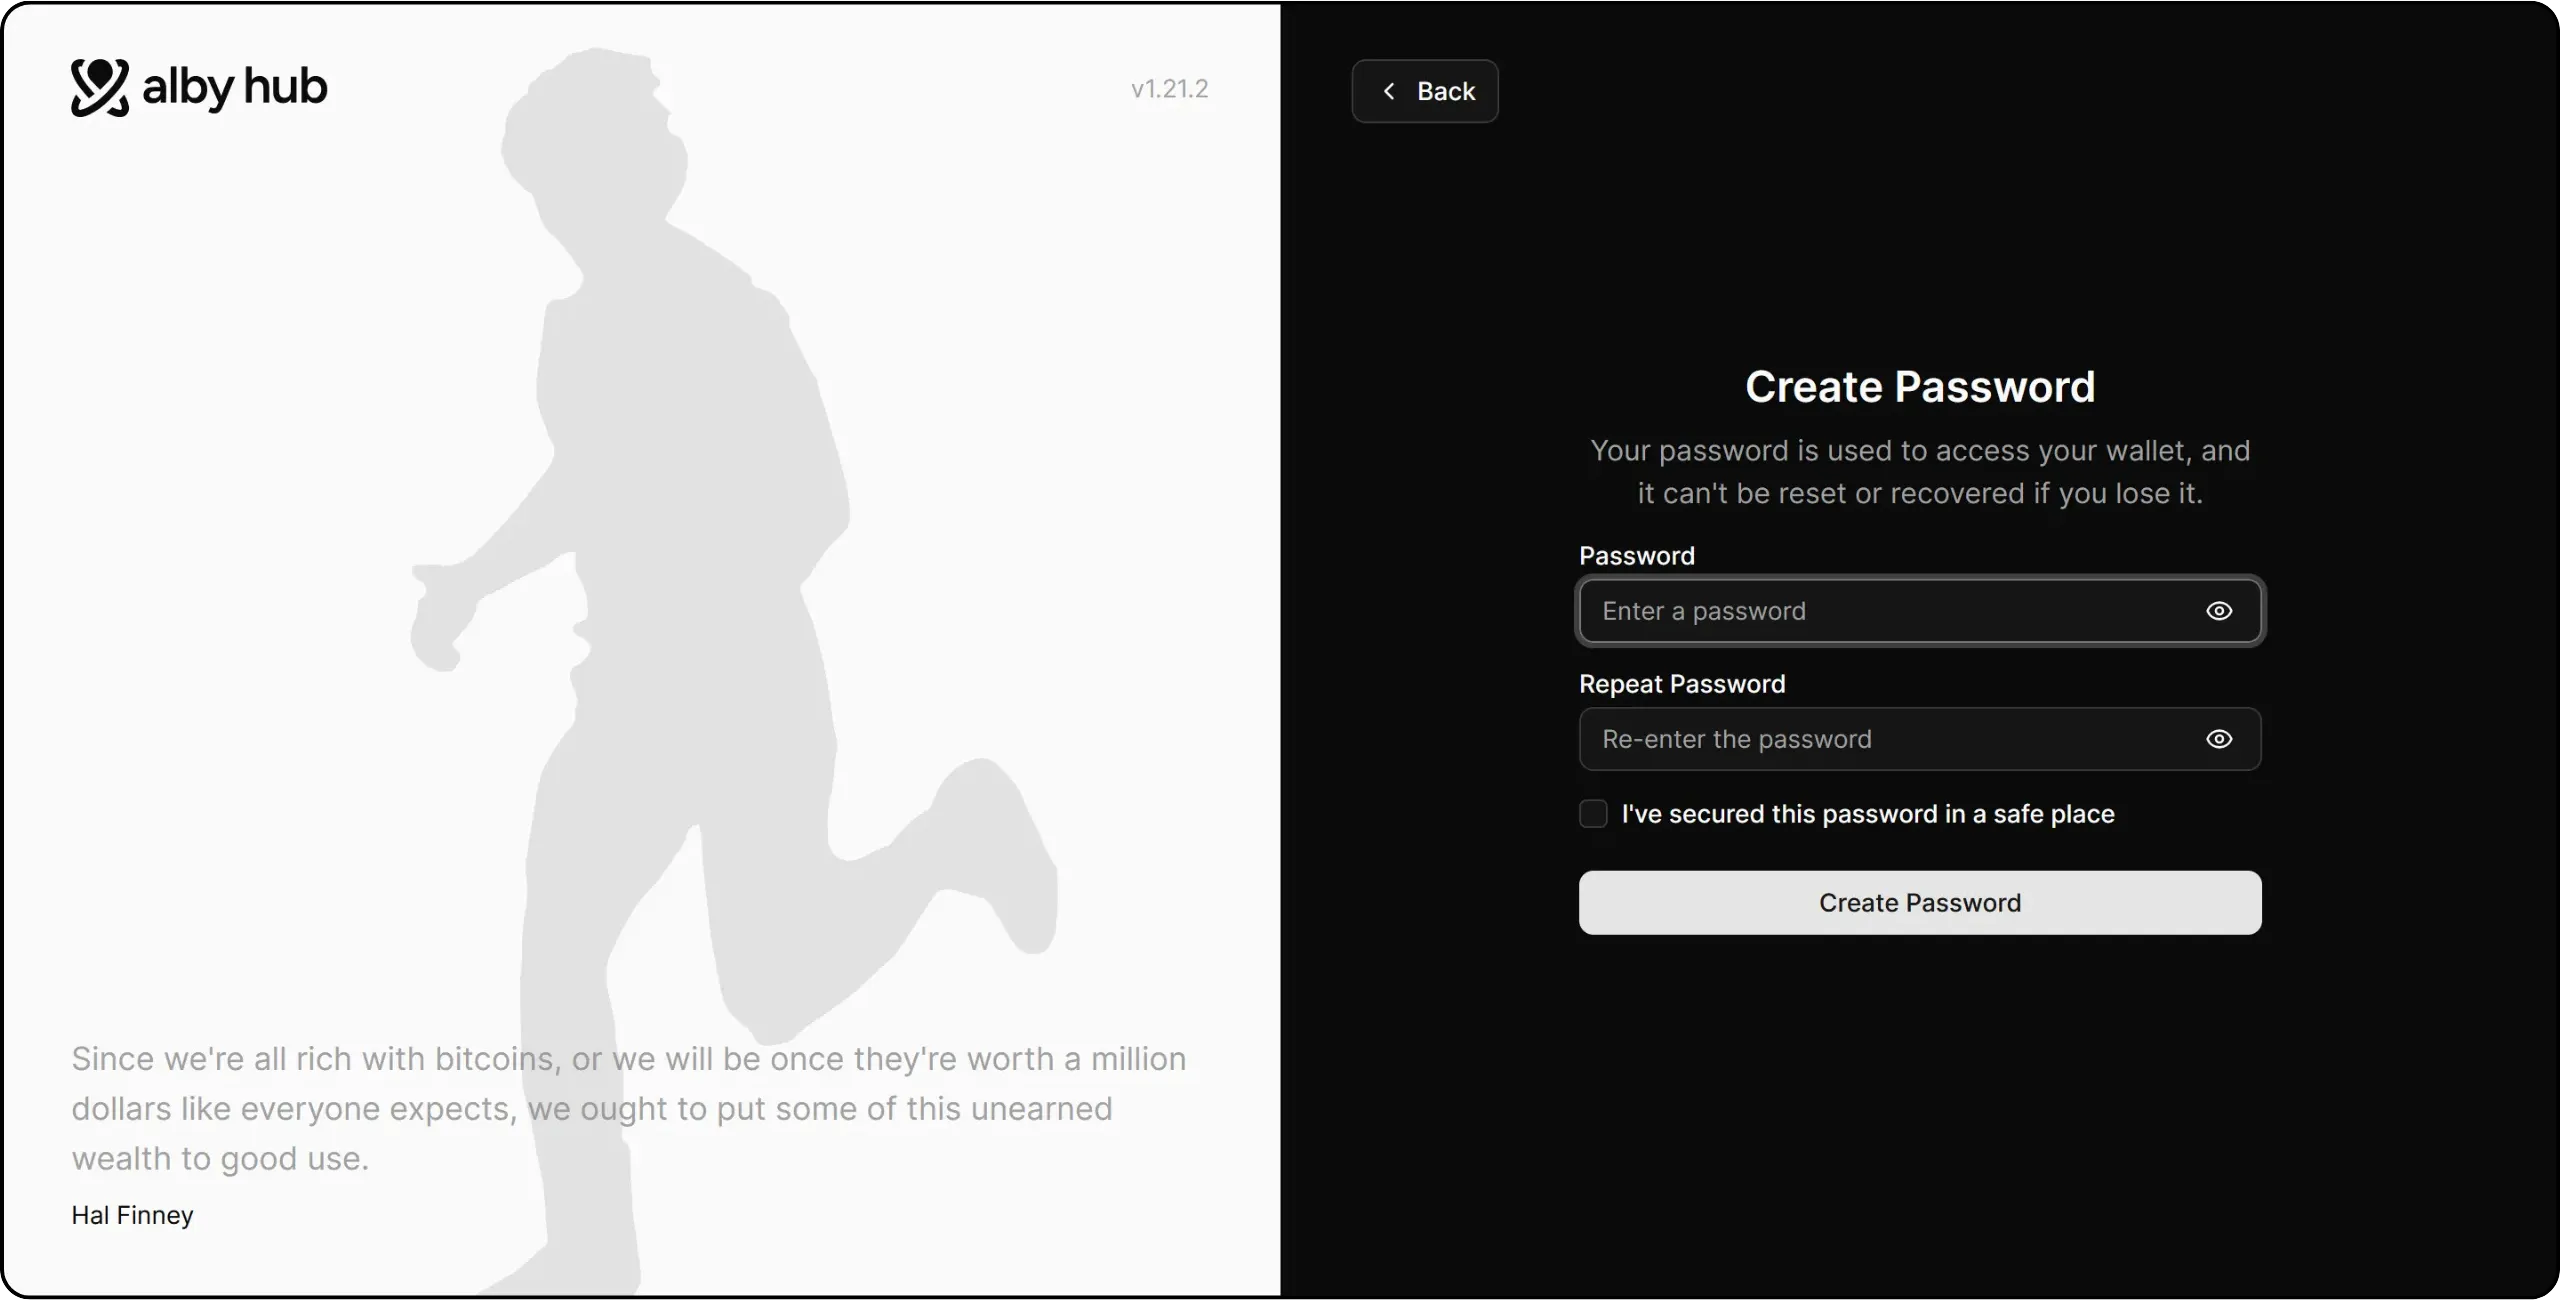
This brings you to the Alby Hub interface. You don't need to go through the whole configuration process, unless you want to use it as the main manager of your Lightning node. As we saw earlier, Alby Hub can in fact replace the use of ThunderHub for the administration of your node. If you'd like to find out more about Alby Hub's options, take a look at our dedicated tutorial:
https://planb.academy/tutorials/node/lightning-network/alby-hub-62e6356c-6a6d-4134-8f22-c3b6afb9882a
Go to the `Connections` menu.
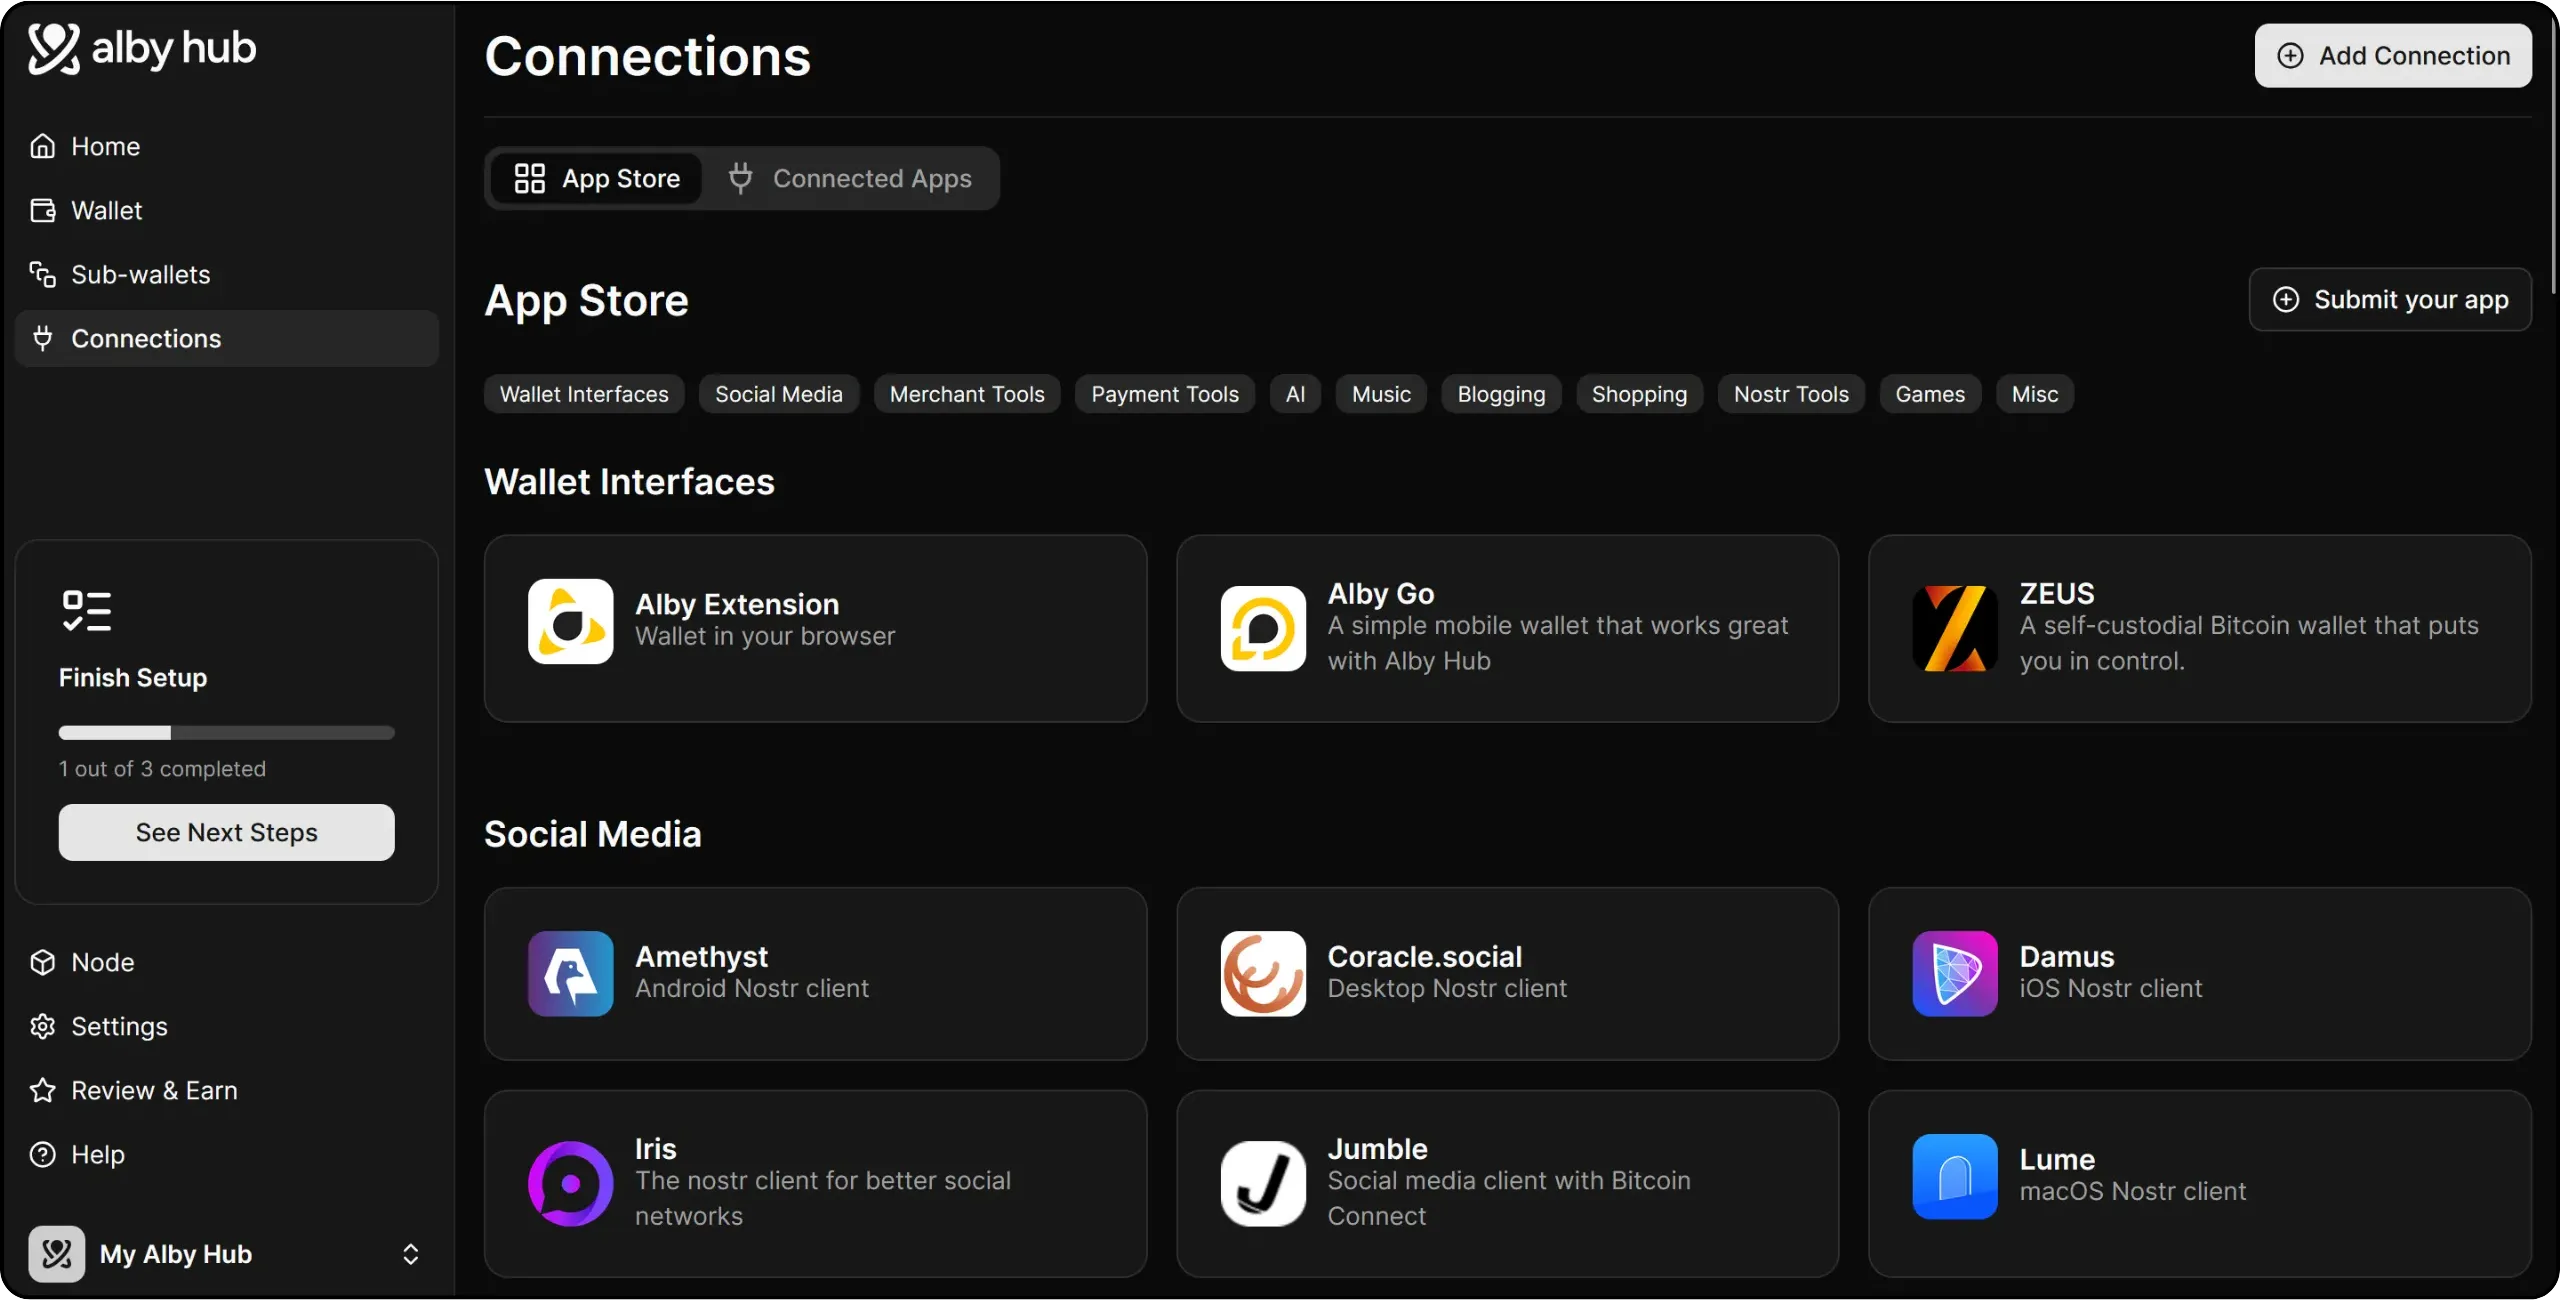
Here you can see all the applications that can connect to your Lightning node via NWC. These include Zeus, already mentioned in the previous chapter. Here, we'll be using Alby Go. Click on Alby Go, then on the `Connect to Alby Go` button to start the connection process.

### Installing and connecting Alby Go
On your smartphone, install the Alby Go application:
- [Google Play Store](https://play.google.com/store/apps/details?id=com.getalby.mobile);
- [Apple App Store](https://apps.apple.com/us/app/alby-go/id6471335774);
- [Zapstore](https://zapstore.dev/apps/naddr1qvzqqqr7pvpzq3jhml5fvklgnq9fxpete767txn9zfzqdkc0sxfptmnchfrexje7qqfxxmmd9enk2arpd338jtndda3xjmr9pzj5tk).
In Alby Hub, configure the rights you wish to grant to the Alby Go application on your Lightning node. You can, for example, set spending limits per period, an expiry date for the NWC link, or leave total control. Once you've set the parameters, click on the `Next` button.
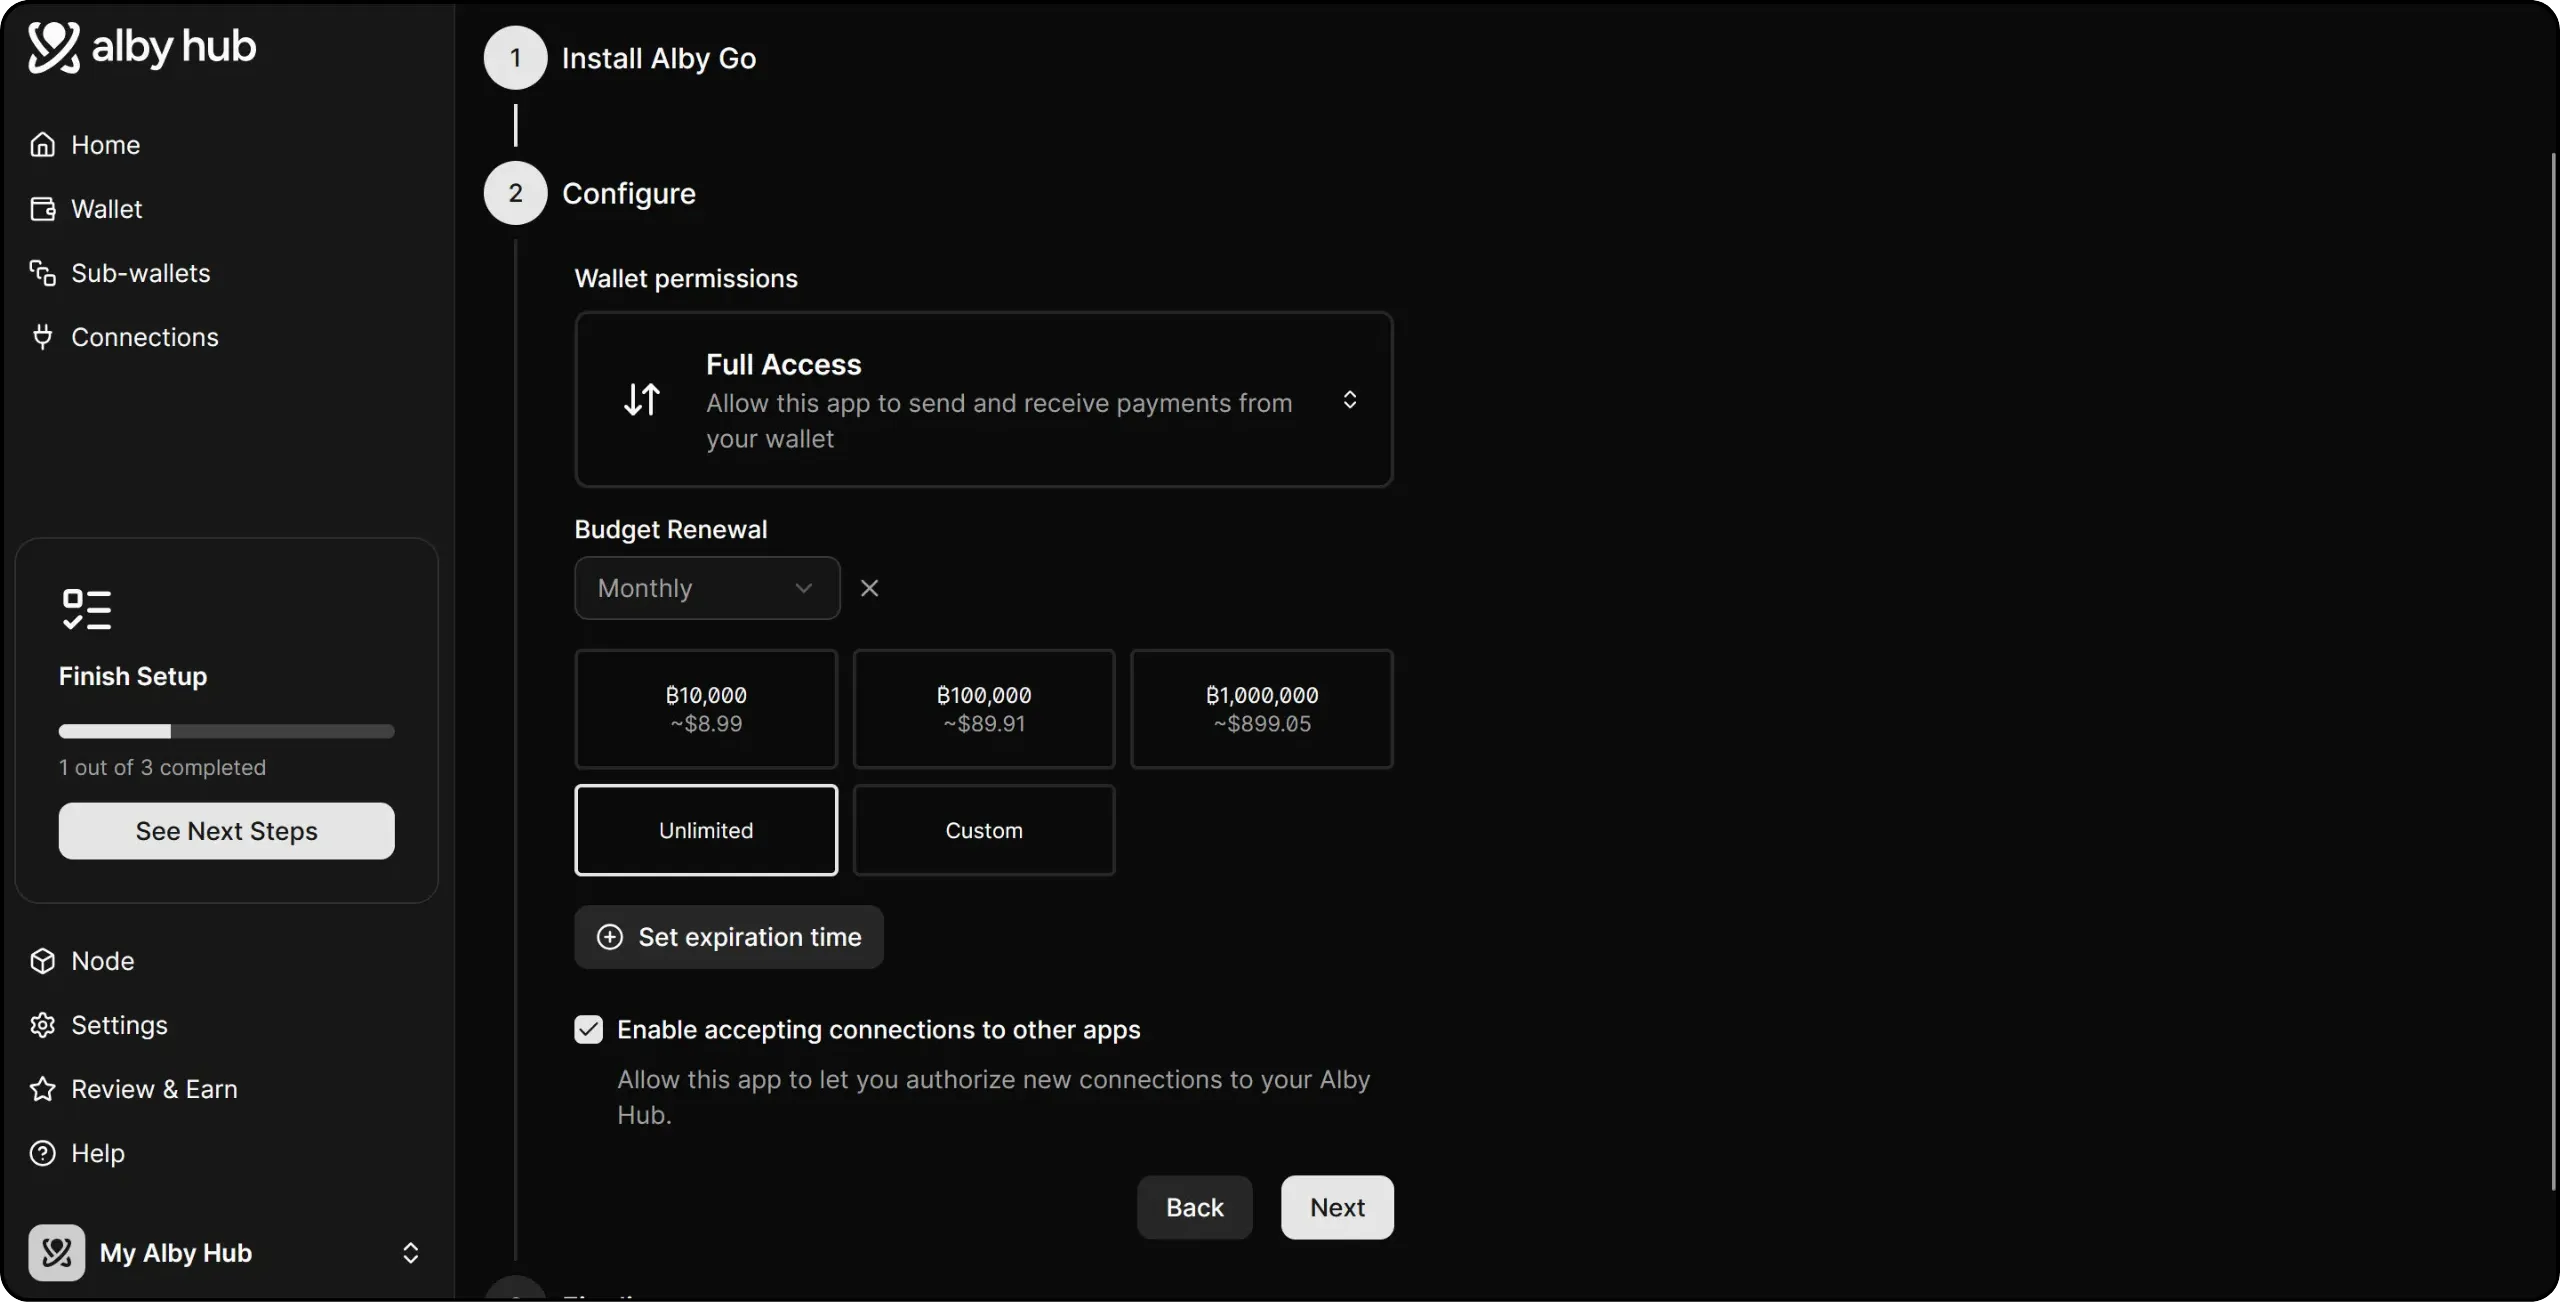
Alby Hub then generates a QR code to establish the NWC connection between your Lightning node and Alby Go.
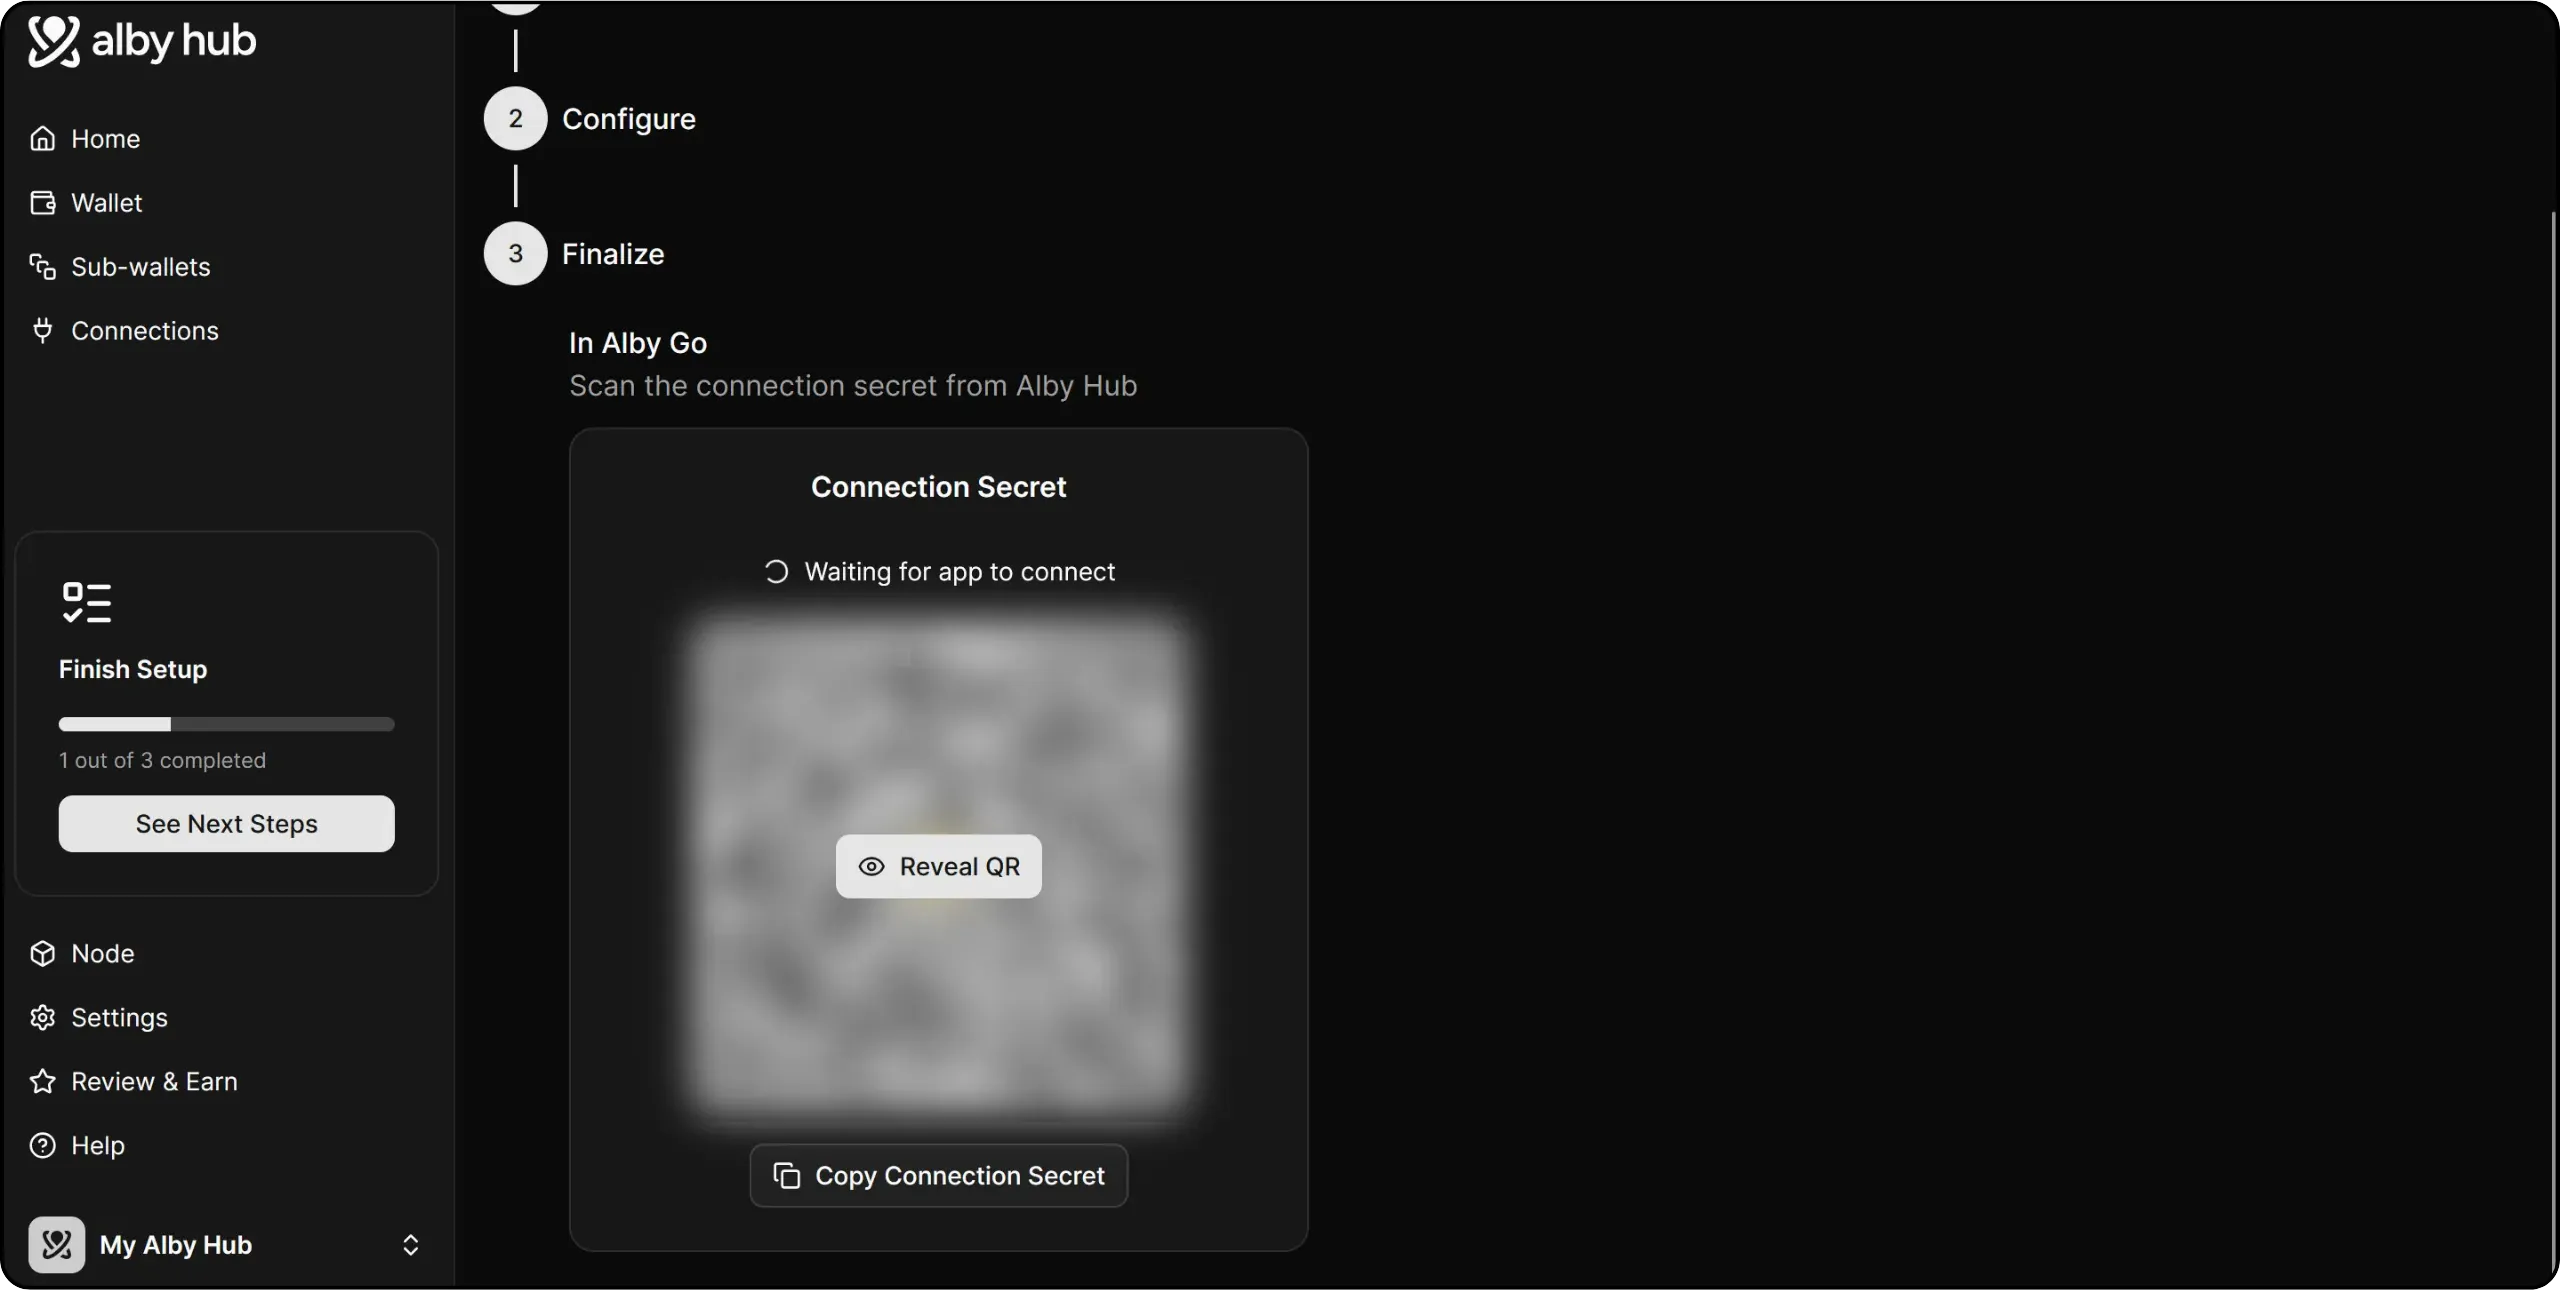
On the Alby Go application, when first opened, click on `Connect Wallet`, then scan the QR code supplied by Alby Hub.
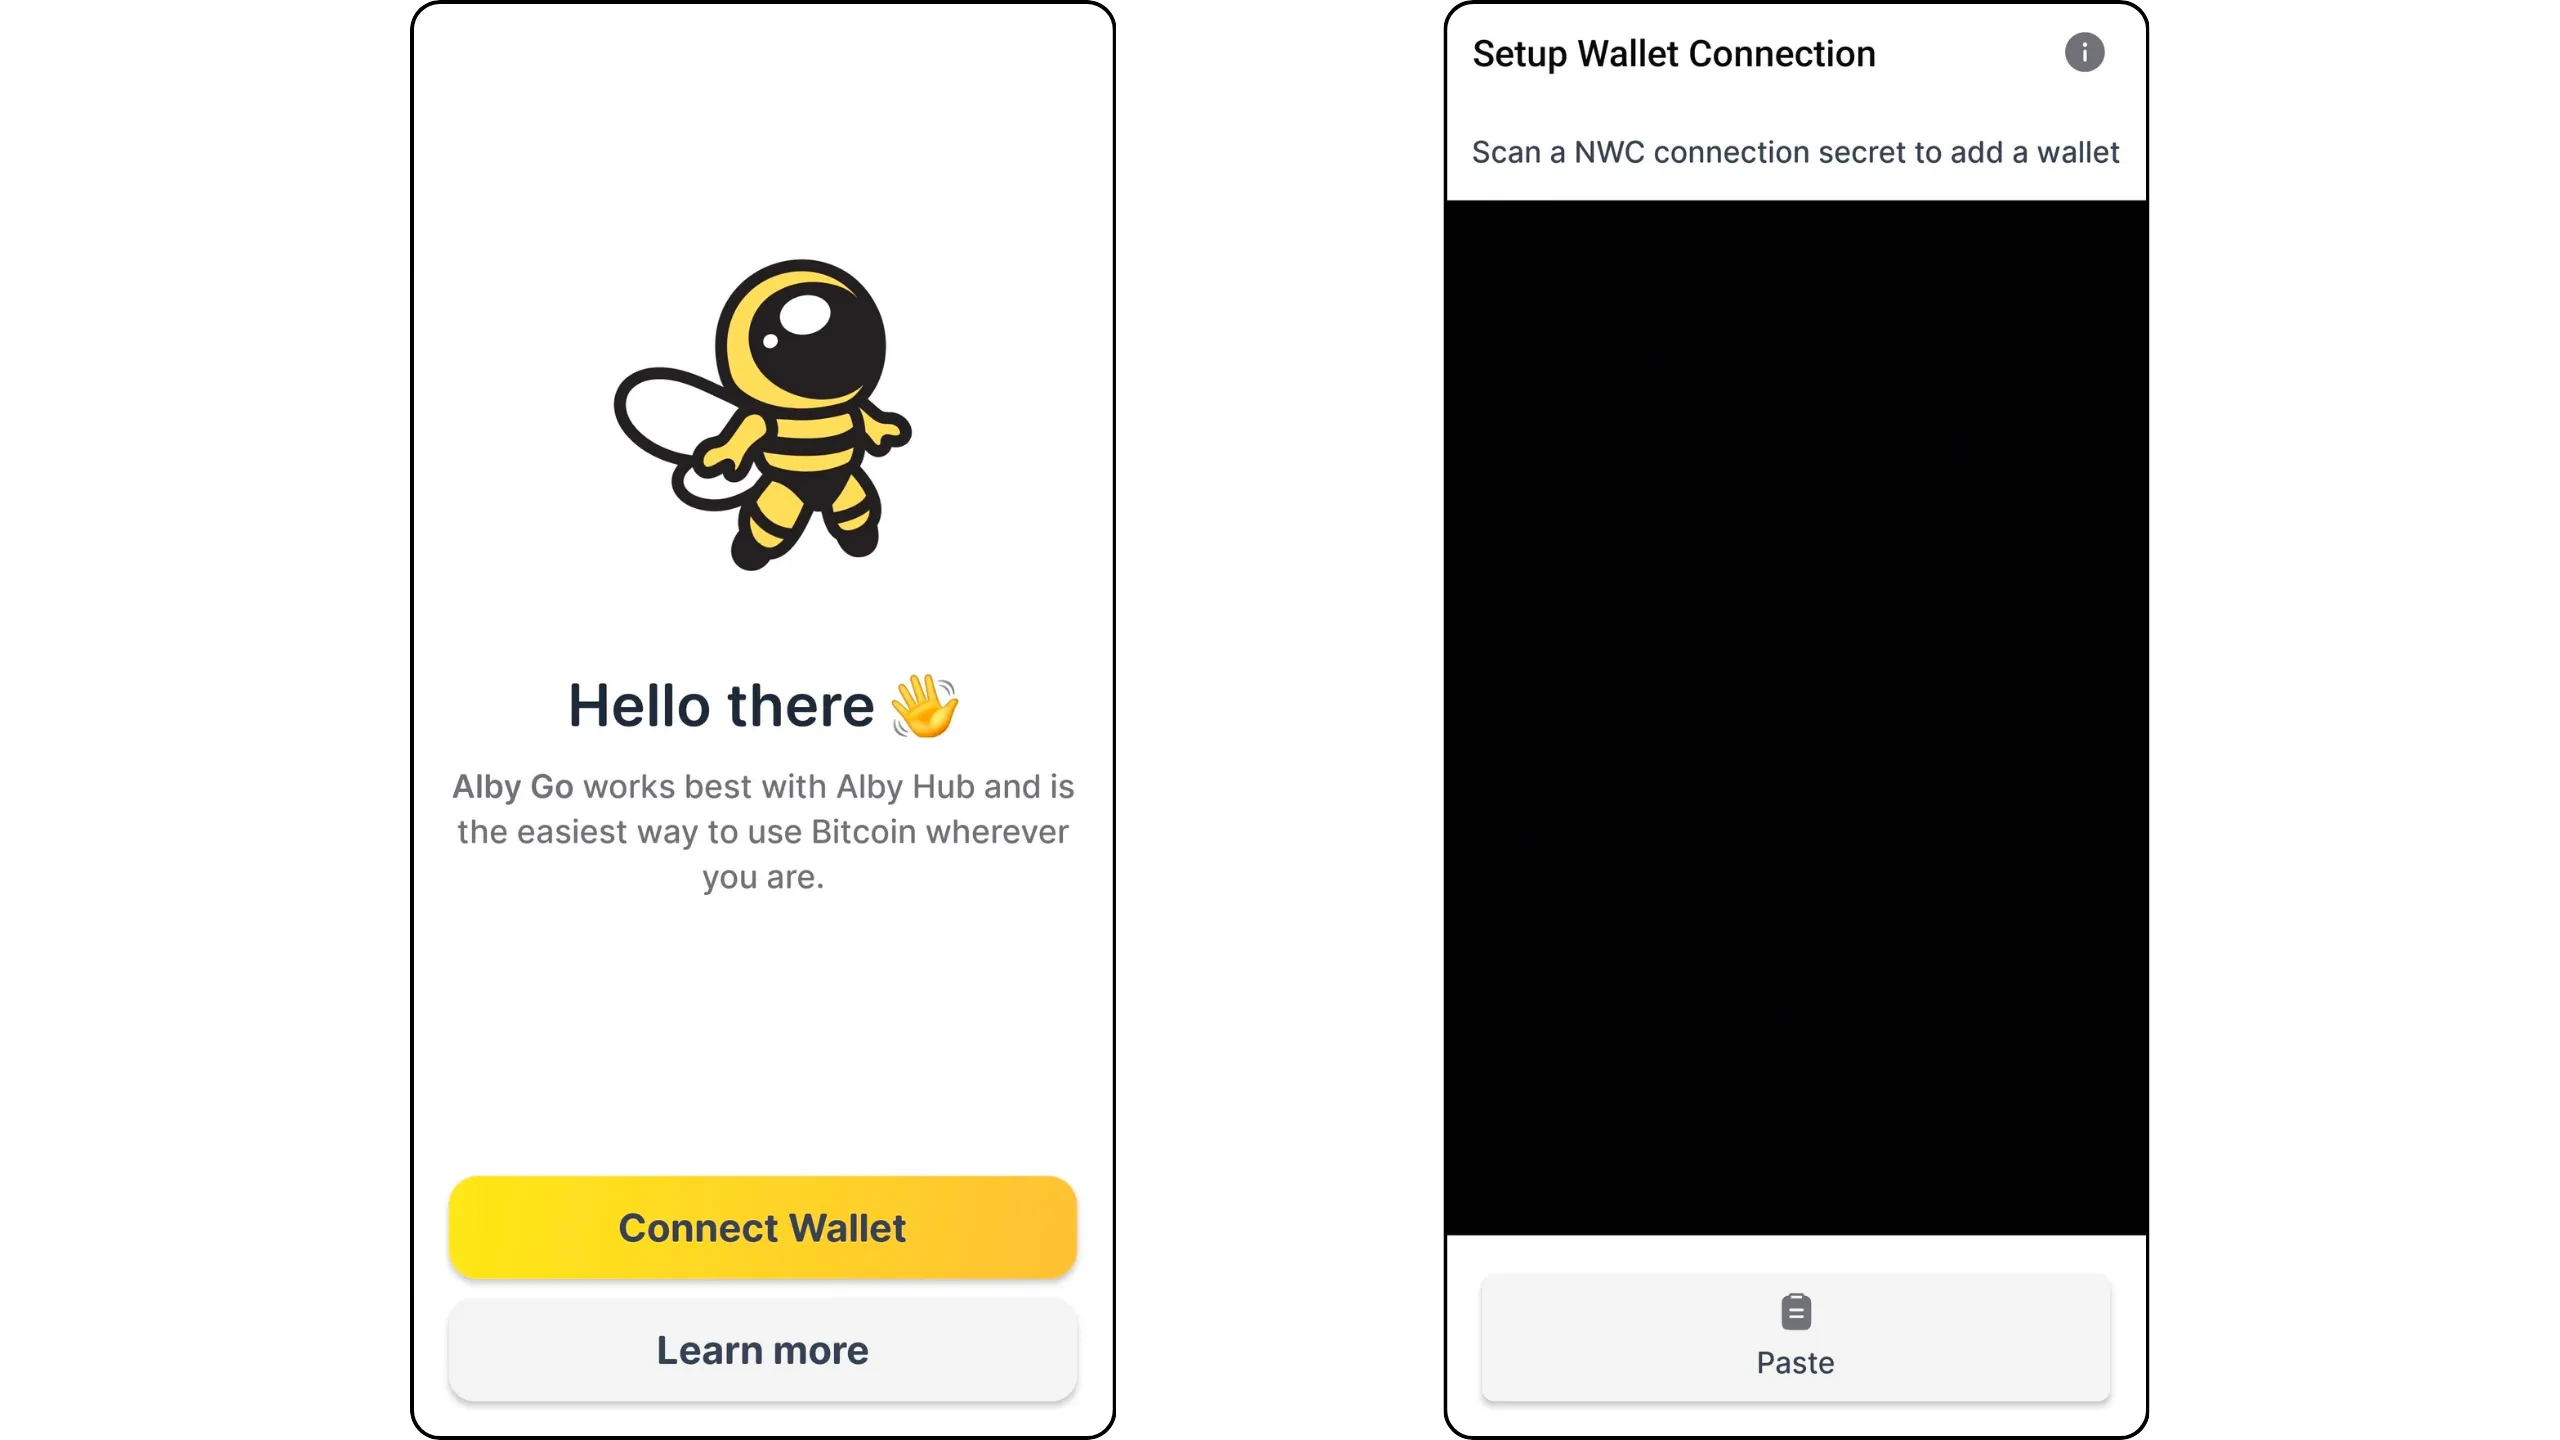
Choose a name to identify this wallet. You now have remote access to your Lightning node via Alby Go. You can generate invoices to receive sats on your node, or set Lightning invoices directly with it.
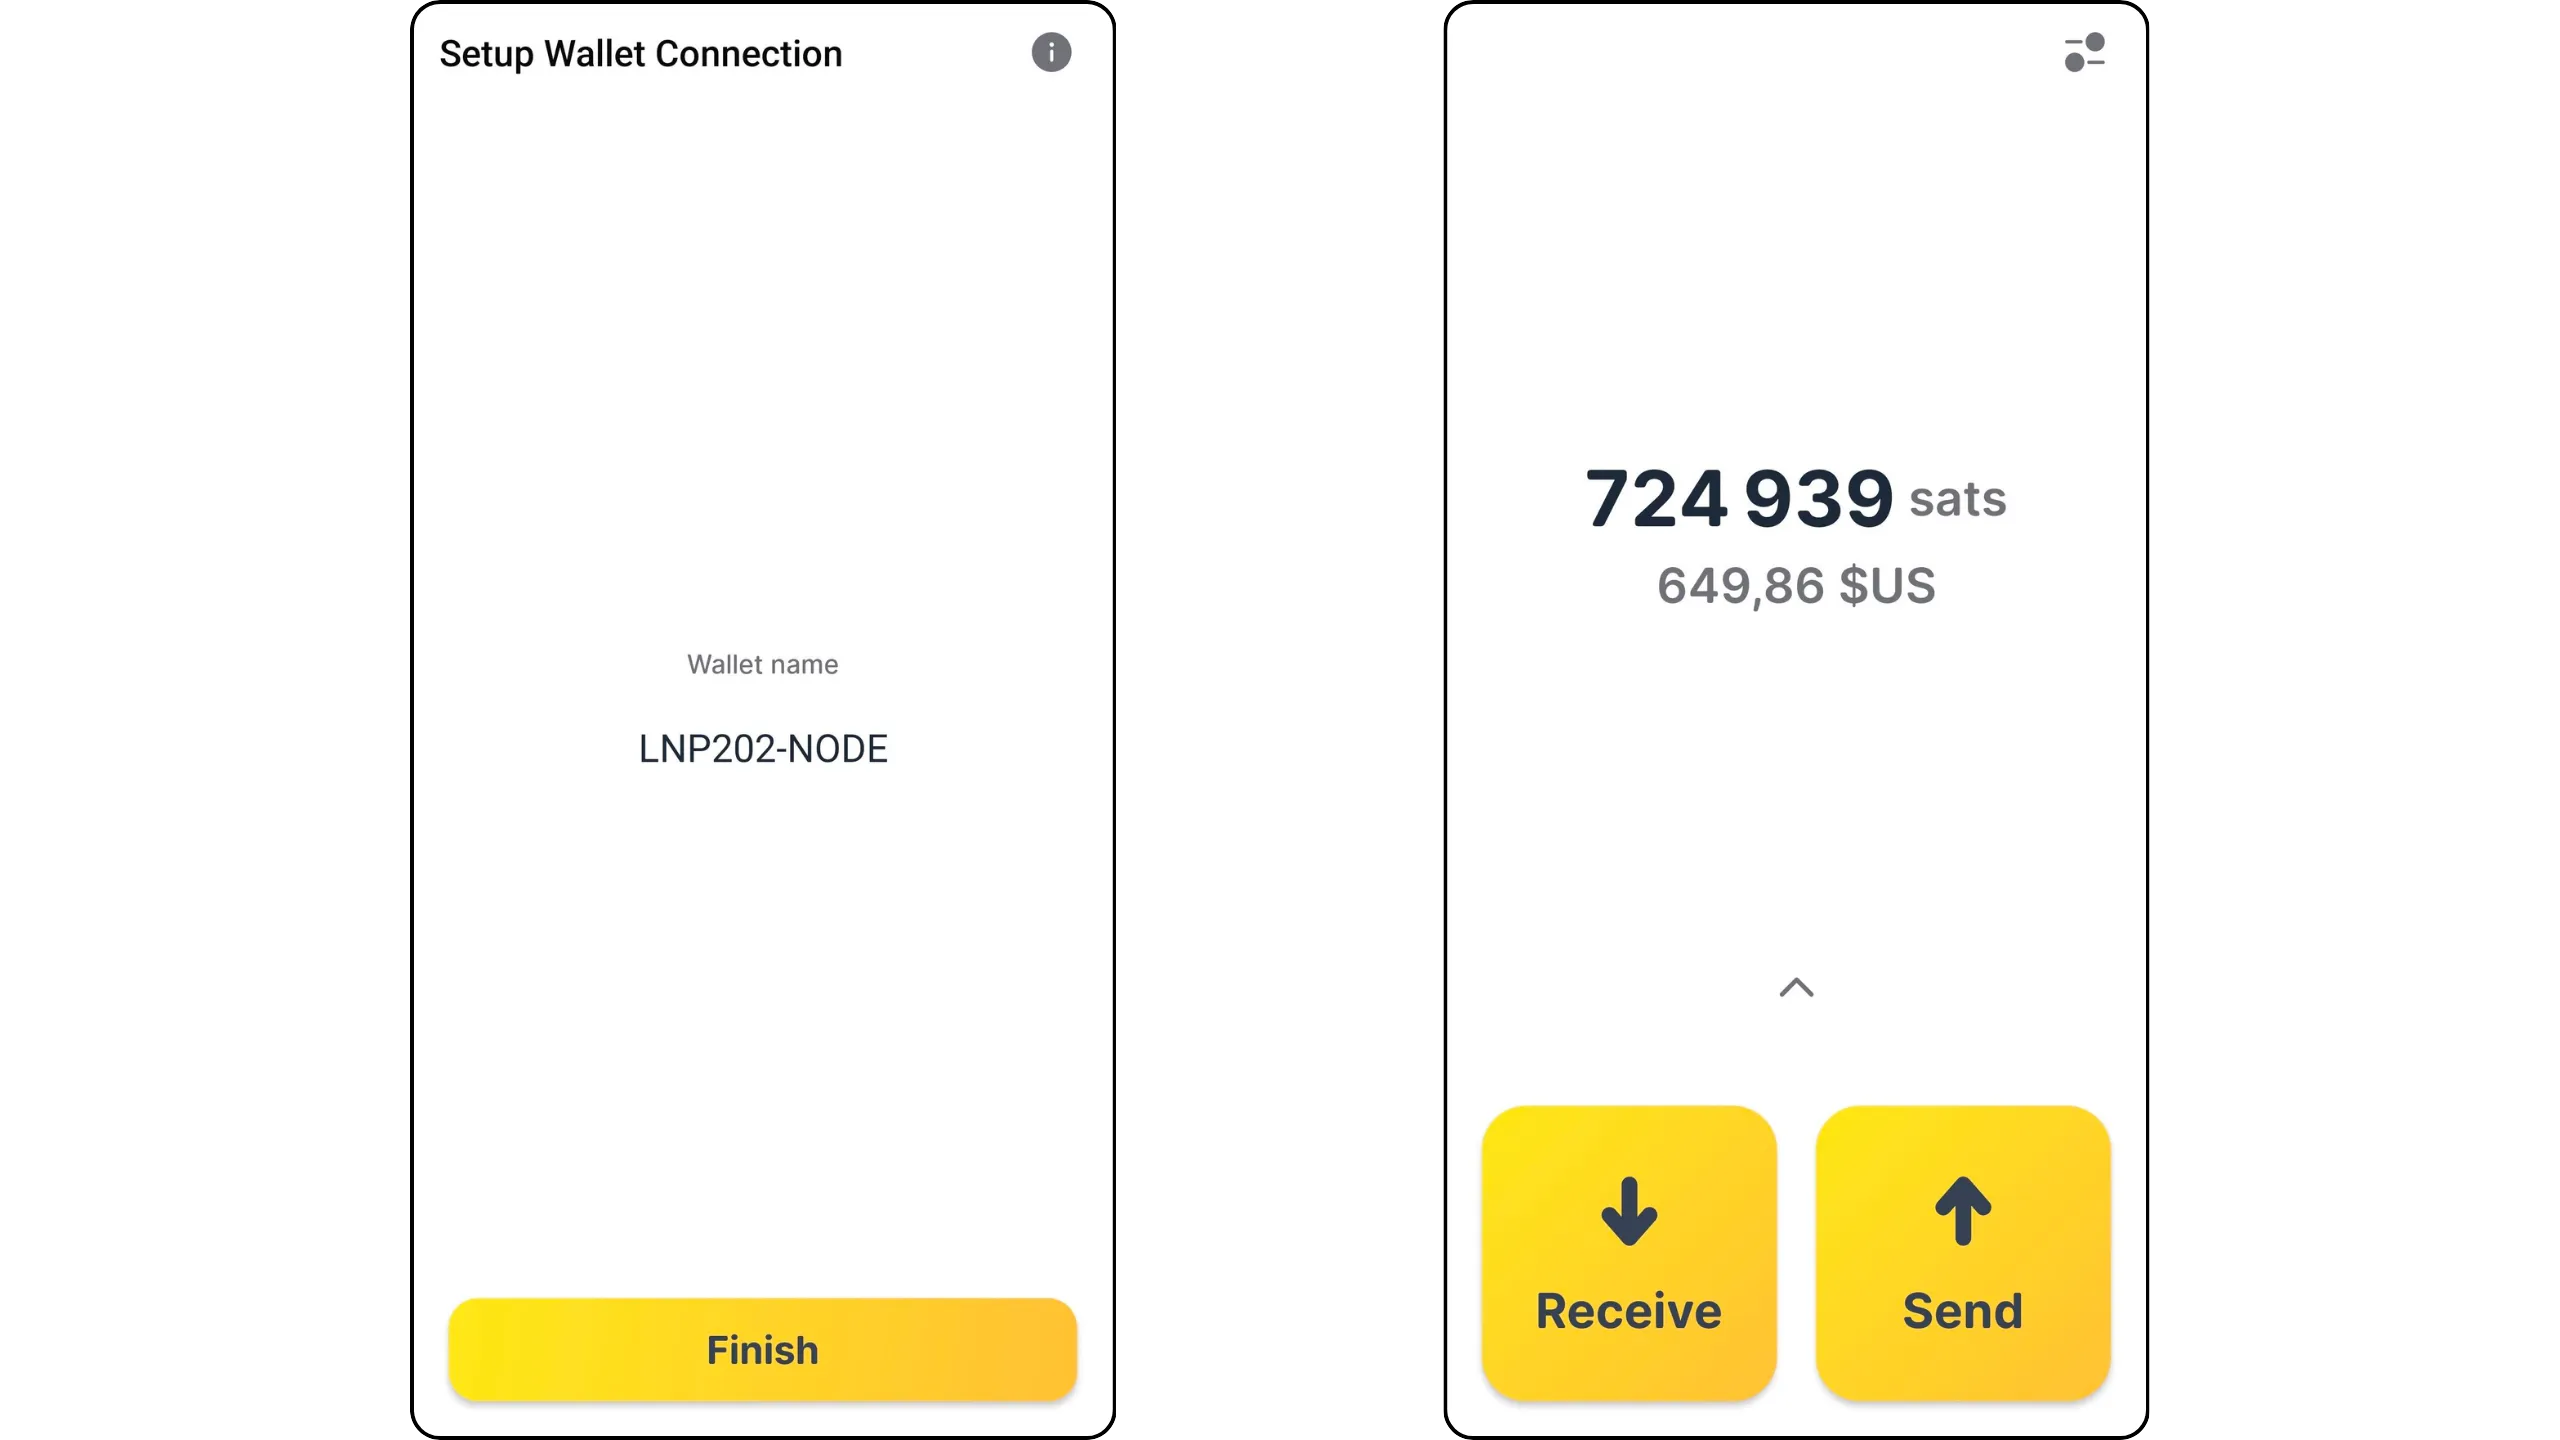
For example, I sent 1543 sats from the Alby Go interface.
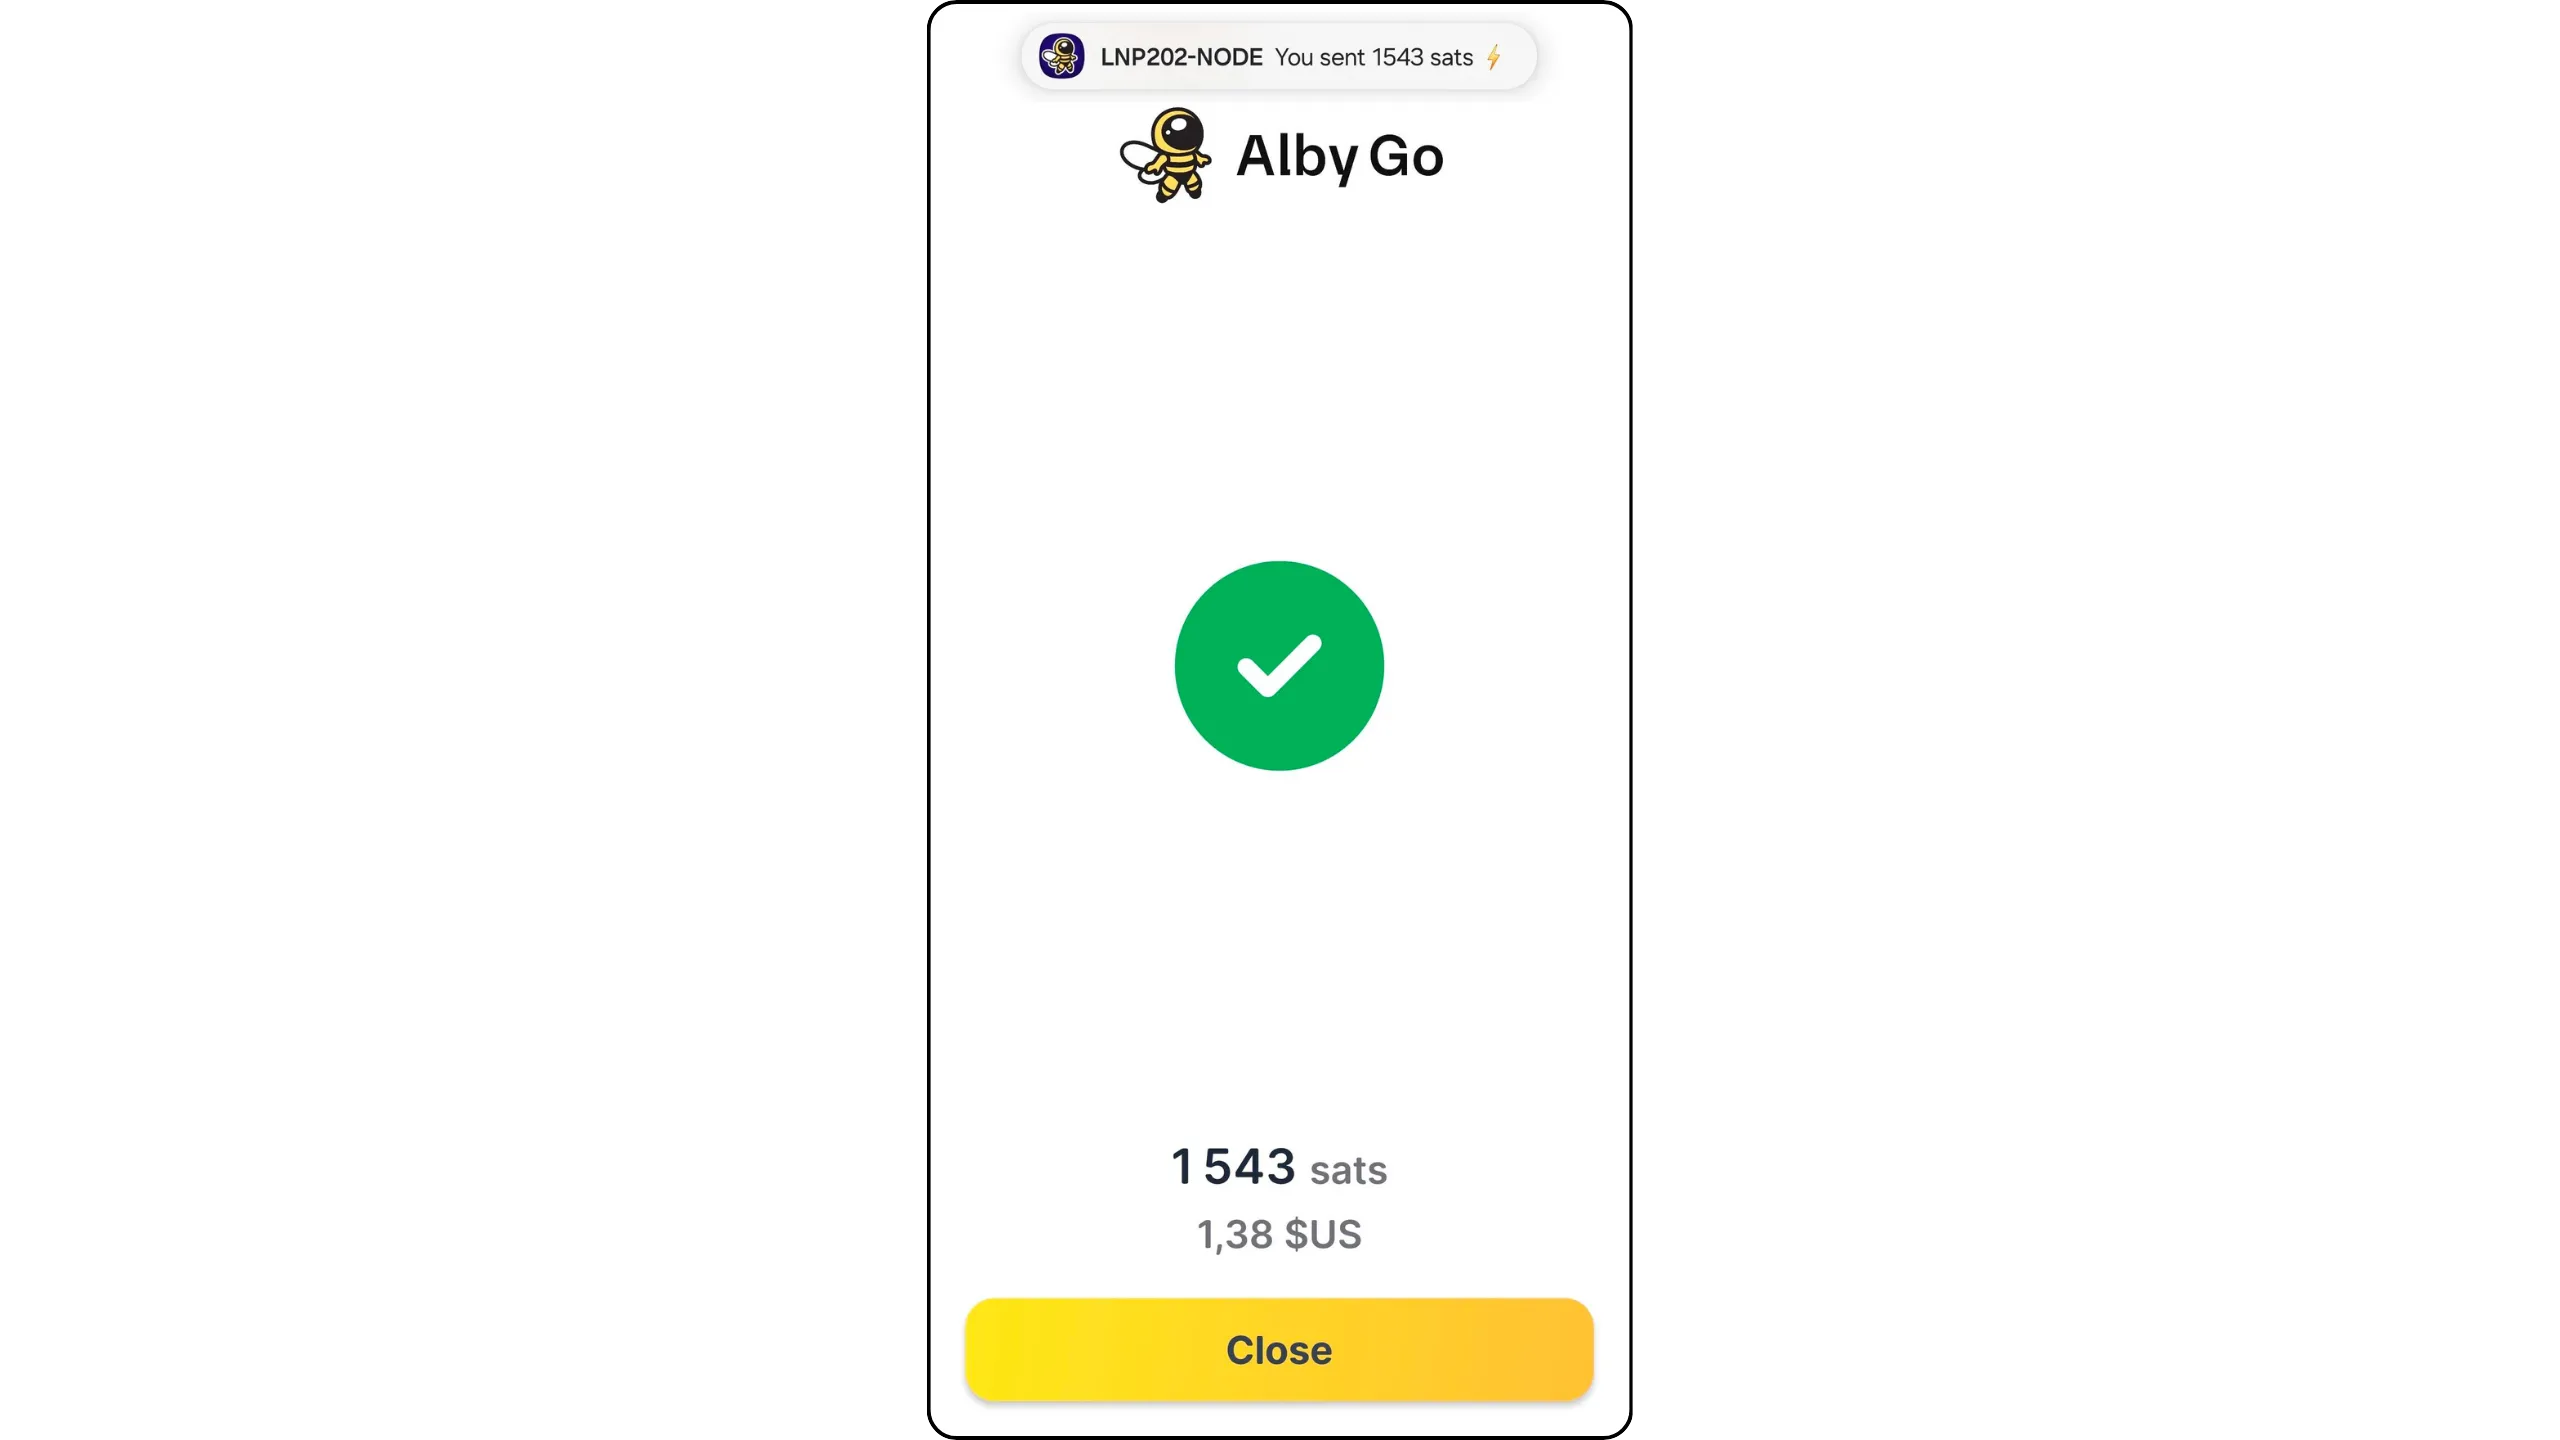
If I go to the basic interface of my Lightning node on Umbrel, I can see that this payment has indeed been made by my node.
Now you know how to easily use your Lightning node from anywhere.
## Sustaining your Lightning self-sovereignty
691a0942-b46d-482a-8fbc-fe19b3814992
We've now come to the end of this LNP202 hands-on course. You now have the basics you need to use Lightning Network in a sovereign way: you understand the real role of a node, the trade-offs of different approaches, and you've set up a LND instance on Umbrel with a consistent backup and protection strategy. You've also opened your first channels, learned how to manage liquidity, to make your payments reliable on a daily basis.
From an operational point of view, your node should now enter a maintenance rhythm. The main thing is to monitor it (uptime, synchronization, channel status, payment failures, etc.), apply the updates offered by Umbrel when stable versions are available, and periodically check that your backups and watchtower configuration are still active.
When it comes to channels, take a pragmatic approach: keep those that are useful to you, close those that are permanently inactive or associated with unstable peers, and gradually reallocate your capital towards a more robust topology.
**One of the most common pitfalls at this stage is allocating too much capital to your Lightning node. Bear in mind that your Lightning node is much less secure than a hardware wallet, and that the availability of funds committed to your channels relies on backup mechanisms that remain imperfect. It's therefore very important to keep to reasonable amounts, which you can afford to lose in the event of a problem, and always keep the majority of your sats on an onchain hardware wallet.
As far as tools are concerned, I recommend that you remain curious and attentive to new developments. In this training session, we discovered several of them, whether for managing your node, its connectivity or remote use to make payments. However, Lightning is a particularly dynamic field. Every year, new and relevant tools emerge, and many new applications also appear on Umbrel. Keeping abreast of these new developments may enable you to discover more powerful or more practical solutions than those presented in this course.
On the educational front, if you haven't already done so, I strongly advise you to take Fanis Michalakis' LNP 201 theory course, dedicated to the operation of the Lightning Network. It will help you better understand the manipulations performed in this LNP202 course, and give you greater confidence in the day-to-day management of your node.
https://planb.academy/courses/34bd43ef-6683-4a5c-b239-7cb1e40a4aeb
In a different vein, but just as essential to your bitcoin journey, I also recommend Ludovic Lars' excellent course on the history of the creation of Bitcoin.
https://planb.academy/courses/a51c7ceb-e079-4ac3-bf69-6700b985a082
But before moving on, you can write a review of this LNP202 course and, of course, take the diploma to confirm that you've understood all of its content.
# Final Section
683c998f-ba0a-4ffb-a7e8-4cd8369cb9b3
## Reviews & Ratings
aec048c7-7130-425d-8eca-9cd7f90c27f3
true
## Final Exam
3951ccbb-14a3-4322-b81b-8dd2a6da19cb
true
## Conclusion
30cd6309-5139-40d9-8927-92de0f76414a
true