# Data Collection: Quick Demo
If you just want to run the completed project in order to collect your training and validation data this section can help do it.
To learn how to build something like this from scratch, see [Part 1](1_set_up_the_scene.md) and [Part 2](2_set_up_the_data_collection_scene.md) of our tutorial.
**Table of Contents**
- [Prerequisites](#Prerequisites)
- [Setup](#setup)
- [Switching to Data Collection Mode](#switch)
- [Data Collection](#data-collection)
## Prerequisites
To follow this tutorial you need to **clone** this repository even if you want to create your Unity project from scratch.
1. Open a terminal and navigate to the folder where you want to host the repository.
```bash
git clone --recurse-submodules https://github.com/Unity-Technologies/Robotics-Object-Pose-Estimation.git
```
2. [Install Unity `2020.2.*`.](install_unity.md)
3. Open the completed project. To do so, open Unity Hub, click the `Add` button, and select `PoseEstimationDemoProject` from the root `Robotics-Object-Pose-Estimation` folder.
## Setup
1. Once the project is opened, in the ***Project*** tab, go to `Assets > Scenes` and double click on `TutorialPoseEstimation` to open the Scene created for this tutorial.
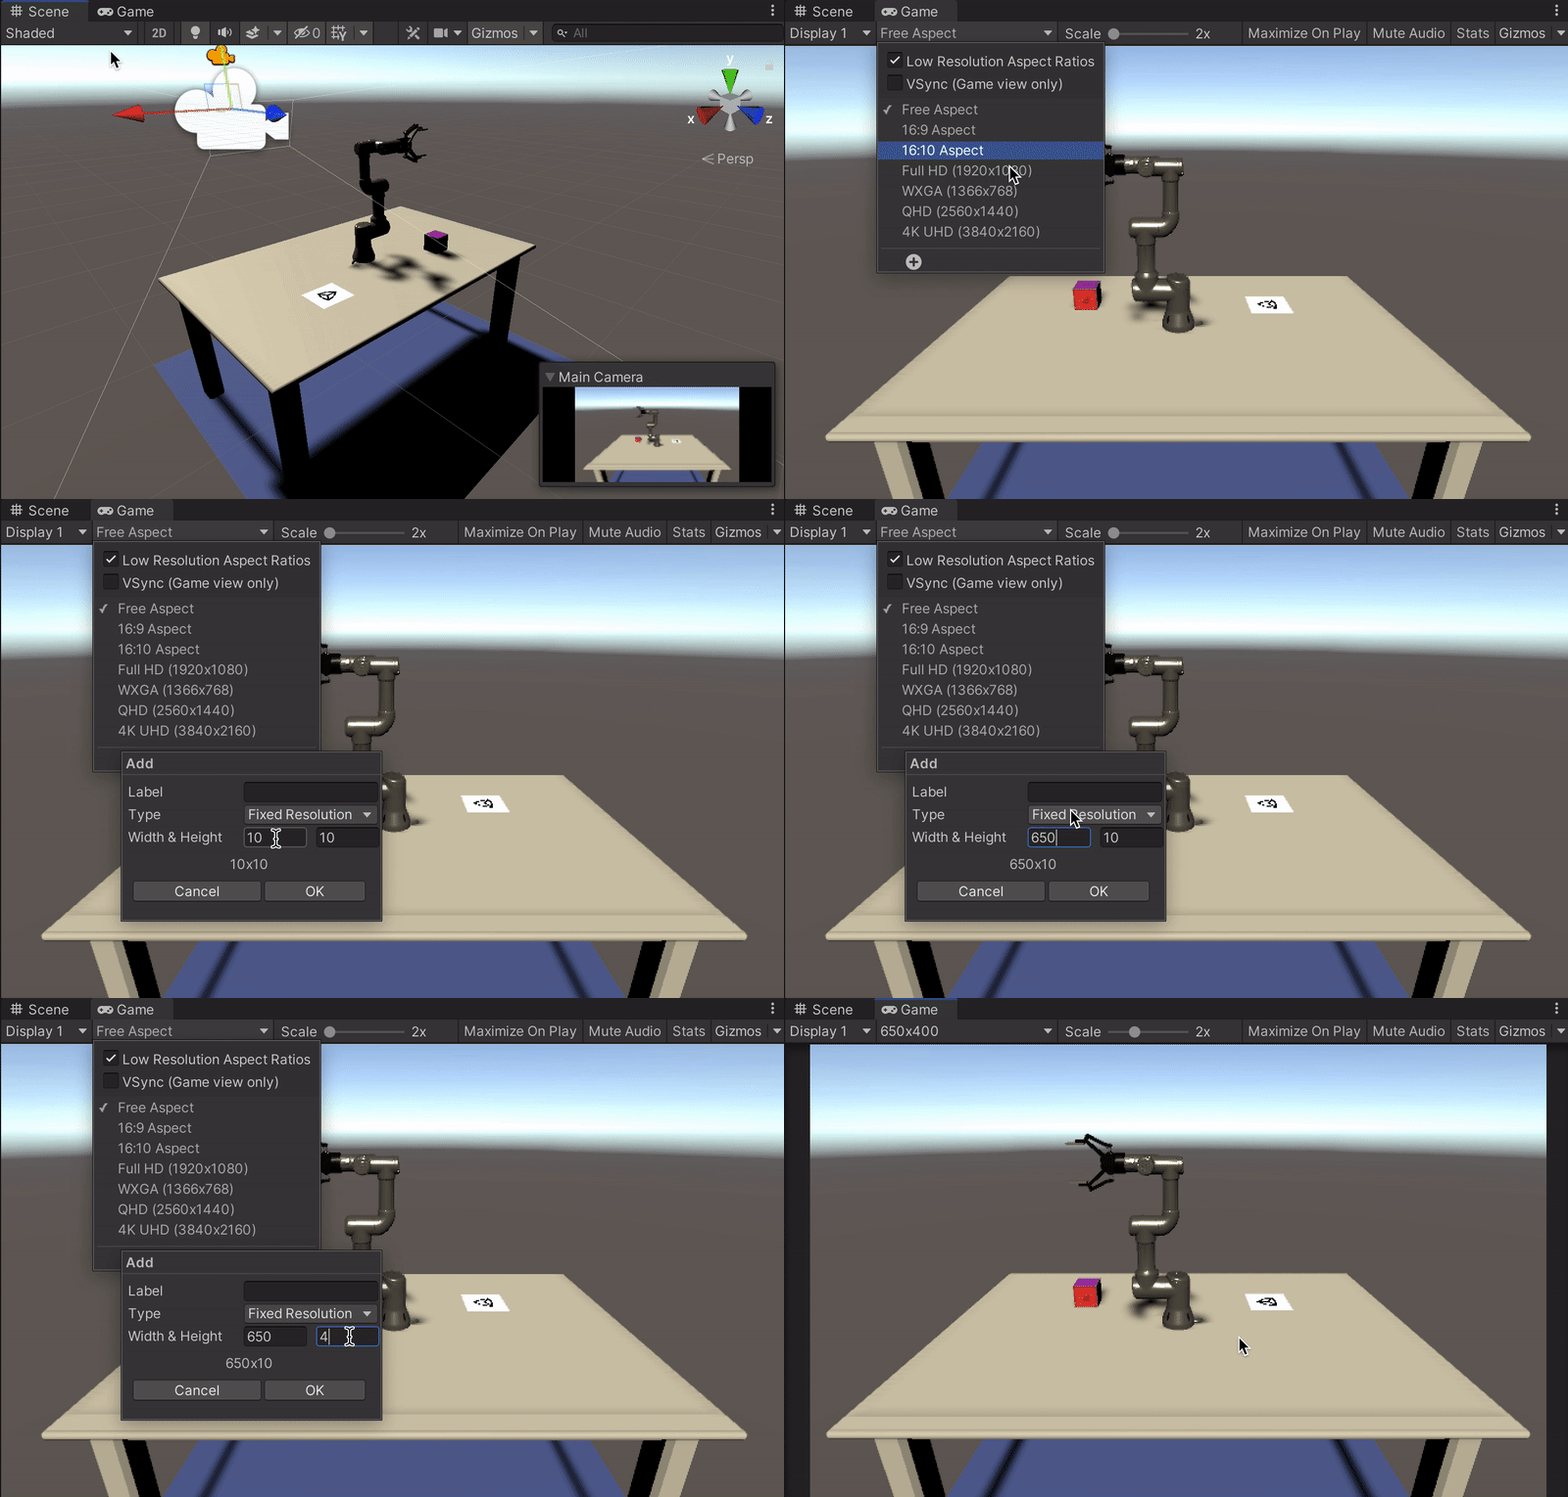
2. We now need to set the size of the images used. In the ***Game*** view, click on the dropdown menu in front of `Display 1`. Then, click **+** to create a new preset. Make sure `Type` is set to `Fixed Resolution`. Set `Width` to `650` and `Height` to `400`. The gif below depicts these actions.
## Switching to Data Collection Mode
The completed project is set up for inference mode by default, so we must switch it to data collection mode.
1. Uncheck the `ROSObjects` GameObject in the _**Hierarchy**_ tab to disable it.
2. On the `Simulation Scenario` GameObject, make sure that `Pose Estimation Scenario` is enabled, and that its `Automatic Iteration` property is checked.
3. On the `Main Camera` GameObject, check the `Perception Camera (Script)` component to enable it.
## Data Collection
To get started with the data collection, follow the instructions in [Part 3: Collect the Training and Validation Data](3_data_collection_model_training.md#step-1) of the tutorial. This section will explain how to set the a random seed for the environment, choose how many training data examples you'd like to collect, and get things running.
If you'd like to move on to training a pose estimation model on the data you've collected, navigate to [Part 3: Train the Deep Learning Model](3_data_collection_model_training.md#step-2).
Have fun!