# OpenAPI Specification Support (formerly Swagger)
API Platform natively supports the [OpenAPI](https://www.openapis.org/) API specification format.
Watch the OpenAPI screencast
The specification of the API is available at the `/docs.jsonopenapi` path.
By default, OpenAPI v3 is used.
You can also get an OpenAPI v3-compliant version thanks to the `spec_version` query parameter: `/docs.jsonopenapi?spec_version=3`
It also integrates a customized version of [Swagger UI](https://swagger.io/swagger-ui/) and [ReDoc](https://rebilly.github.io/ReDoc/), some nice tools to display the
API documentation in a user friendly way.
## Using the OpenAPI Command
> [!WARNING]
> These commands are not yet available with Laravel, you're welcome to contribute [on GitHub](https://github.com/api-platform/core)
You can also dump an OpenAPI specification for your API.
OpenAPI, JSON format:
```console
bin/console api:openapi:export
```
OpenAPI, YAML format:
```console
bin/console api:openapi:export --yaml
```
Create a file containing the specification:
```console
bin/console api:openapi:export --output=swagger_docs.json
```
If you want to use the old OpenAPI v2 (Swagger) JSON format, use:
```console
bin/console api:swagger:export
```
It is also possible to use OpenAPI v3.0.0 format:
```console
bin/console api:openapi:export --spec-version=3.0.0
```
## Overriding the OpenAPI Specification
### Overriding the OpenAPI Specification with Symfony
Symfony allows to [decorate services](https://symfony.com/doc/current/service_container/service_decoration.html), here we
need to decorate `api_platform.openapi.factory`.
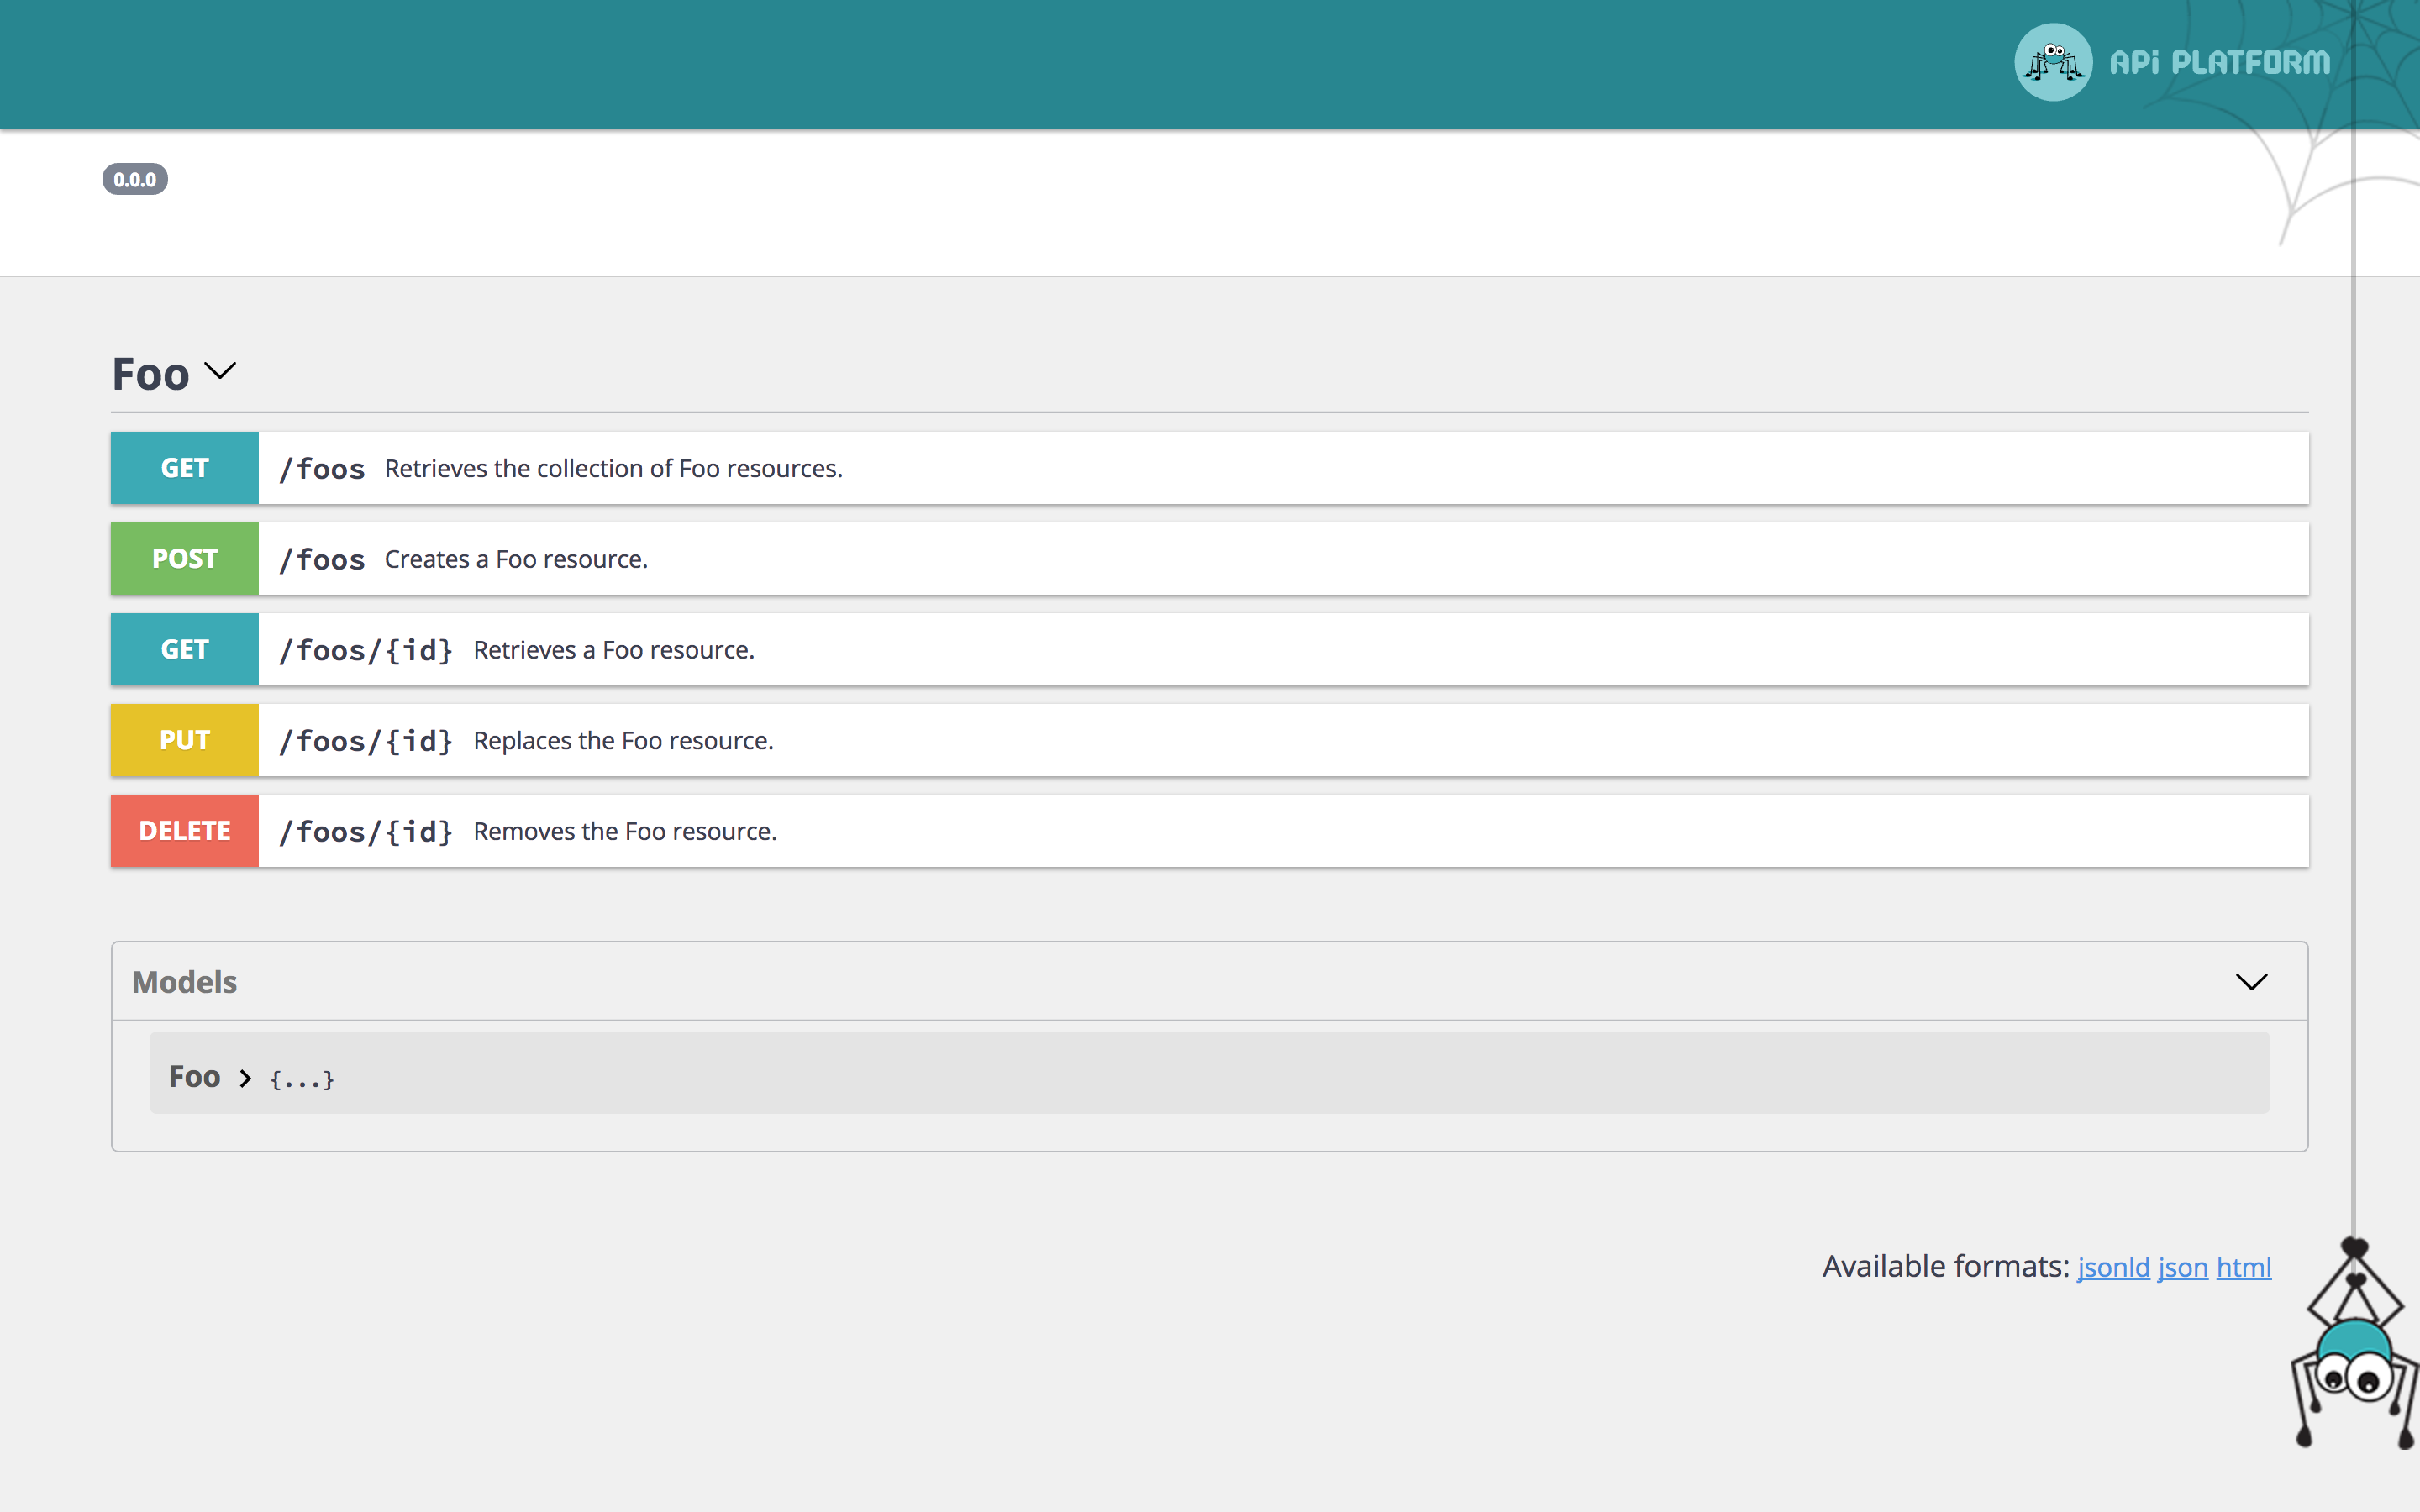
In the following example, we will see how to override the title and the base path URL of the Swagger documentation and add a custom filter for
the `GET` operation of `/foos` path.
```yaml
# api/config/services.yaml
App\OpenApi\OpenApiFactory:
decorates: 'api_platform.openapi.factory'
arguments: ['@App\OpenApi\OpenApiFactory.inner']
autoconfigure: false
```
```php
decorated->__invoke($context);
$pathItem = $openApi->getPaths()->getPath('/api/grumpy_pizzas/{id}');
$operation = $pathItem->getGet();
$openApi->getPaths()->addPath('/api/grumpy_pizzas/{id}', $pathItem->withGet(
$operation->withParameters(array_merge(
$operation->getParameters(),
[new Model\Parameter('fields', 'query', 'Fields to remove of the output')]
))
));
$openApi = $openApi->withInfo((new Model\Info('New Title', 'v2', 'Description of my custom API'))->withExtensionProperty('info-key', 'Info value'));
$openApi = $openApi->withExtensionProperty('key', 'Custom x-key value');
$openApi = $openApi->withExtensionProperty('x-value', 'Custom x-value value');
// to define base path URL
$openApi = $openApi->withServers([new Model\Server('https://foo.bar')]);
return $openApi;
}
}
```
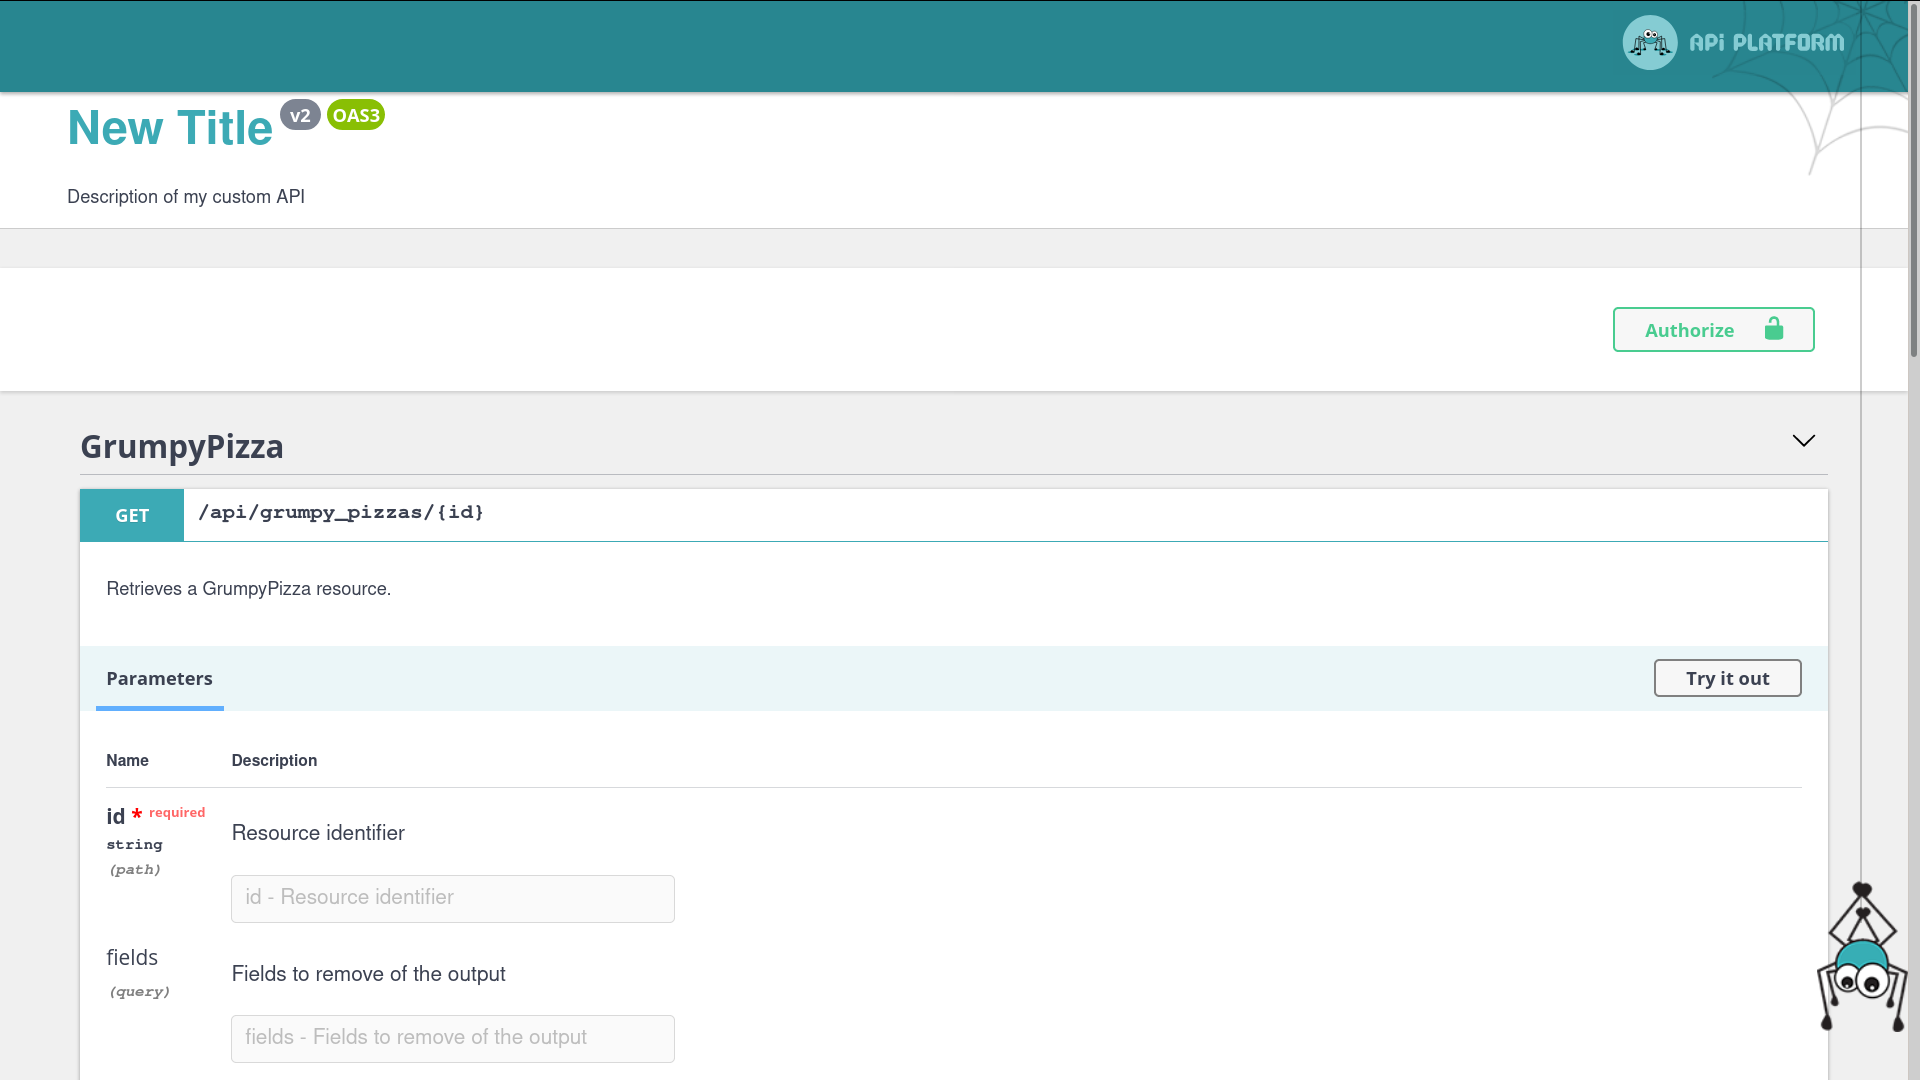
The impact on the swagger-ui is the following:
### Overriding the OpenAPI Specification with Laravel
Laravel allows to [decorate services](https://laravel.com/docs/container#extending-bindings), here we
need to decorate `api_platform.openapi.factory`.
In the following example, we will see how to override the title and the base path URL of the Swagger documentation and add a custom filter for
the `GET` operation of `/foos` path.
```php
app->extend(OpenApiFactoryInterface::class, function (OpenApiFactoryInterface $factory) {
return new OpenApiFactory($factory);
});
}
}
```
```php
decorated->__invoke($context);
$pathItem = $openApi->getPaths()->getPath('/api/grumpy_pizzas/{id}');
$operation = $pathItem->getGet();
$openApi->getPaths()->addPath('/api/grumpy_pizzas/{id}', $pathItem->withGet(
$operation->withParameters(array_merge(
$operation->getParameters(),
[new Model\Parameter('fields', 'query', 'Fields to remove of the output')]
))
));
$openApi = $openApi->withInfo((new Model\Info('New Title', 'v2', 'Description of my custom API'))->withExtensionProperty('info-key', 'Info value'));
$openApi = $openApi->withExtensionProperty('key', 'Custom x-key value');
$openApi = $openApi->withExtensionProperty('x-value', 'Custom x-value value');
// to define base path URL
$openApi = $openApi->withServers([new Model\Server('https://foo.bar')]);
return $openApi;
}
}
```
The impact on the swagger-ui is the following:

## Using the OpenAPI and Swagger Contexts
Sometimes you may want to change the information included in your OpenAPI documentation.
For the full list of available configurations, please refer to the [OpenAPI Specifications](https://spec.openapis.org/oas/latest.html). The current doc page only gives some examples but focuses mostly on the OpenAPI integration inside API Platform without telling you all you can pass into the attributes.
The following configuration will give you total control over your OpenAPI definitions:
```php
'integer',
'example' => 1
]
)]
#[Assert\NotBlank]
private ?int $id = null;
/**
* @param string $name A name property - this description will be available in the API documentation too.
*
*/
#[Assert\NotBlank]
#[ApiProperty(
description: 'A name property - this description will be available in the API documentation too.',
openapiContext: [
'type' => 'string',
'enum' => ['one', 'two'],
'example' => 'one'
]
)]
#[Assert\NotBlank]
public string $name;
#[ApiProperty(
description: 'A timestamp property.',
openapiContext: [
'type' => 'string',
'format' => 'date-time',
]
)]
#[Assert\DateTime]
public string $timestamp;
// Optionnel : Ajout d'un constructeur pour faciliter l'initialisation
public function __construct(string $name, string $timestamp)
{
$this->name = $name;
$this->timestamp = $timestamp;
}
}
```
```yaml
# api/config/api_platform/properties.yaml
# The YAML syntax is only supported for Symfony
properties:
App\ApiResource\Product:
name:
openapiContext:
type: string
enum: ['one', 'two']
example: one
timestamp:
openapiContext:
type: string
format: date-time
```
```xml
type
one
two
one
string
date-time
```
This will produce the following Swagger documentation:
```json
"components": {
"schemas": {
"GrumpyPizza:jsonld": {
"type": "object",
"description": "",
"properties": {
"@context": {
"readOnly": true,
"type": "string"
},
"@id": {
"readOnly": true,
"type": "string"
},
"@type": {
"readOnly": true,
"type": "string"
},
"timestamp": {
"type": "string",
"format": "date-time"
},
"id": {
"readOnly": true,
"type": "integer"
},
"name": {
"type": "string",
"enum": [
"one",
"two"
],
"example": "one"
}
}
}
}
}
```
To pass a context to the OpenAPI **v2** generator, use the `swaggerContext` attribute (notice the prefix: `swagger` instead of `openapi`).
## Disabling an Operation From OpenAPI Documentation
Sometimes you may want to disable an operation from the OpenAPI documentation, for example to not exposing it.
Using the `openapi` boolean option disables this operation from the OpenAPI documentation:
```php
```
Note: as your route is not exposed, you may want to return a HTTP 404 if it's called. Prefer using the `NotExposedAction` controller instead.
## Changing the Name of a Definition
API Platform generates a definition name based on the serializer `groups` defined in the (`de`)`normalizationContext`.
It's possible to override the name thanks to the `openapi_definition_name` option:
```php
use ApiPlatform\Metadata\ApiResource;
use ApiPlatform\Metadata\Post;
#[ApiResource]
#[Post(denormalizationContext: ['groups' => ['user:read'], 'openapi_definition_name' => 'Read'])]
class User
{
// ...
}
```
It's also possible to re-use the (`de`)`normalizationContext`:
```php
use ApiPlatform\Metadata\ApiResource;
use ApiPlatform\Metadata\Post;
#[ApiResource]
#[Post(denormalizationContext: [User::API_WRITE])]
class User
{
const API_WRITE = [
'groups' => ['user:read'],
'openapi_definition_name' => 'Read',
];
}
```
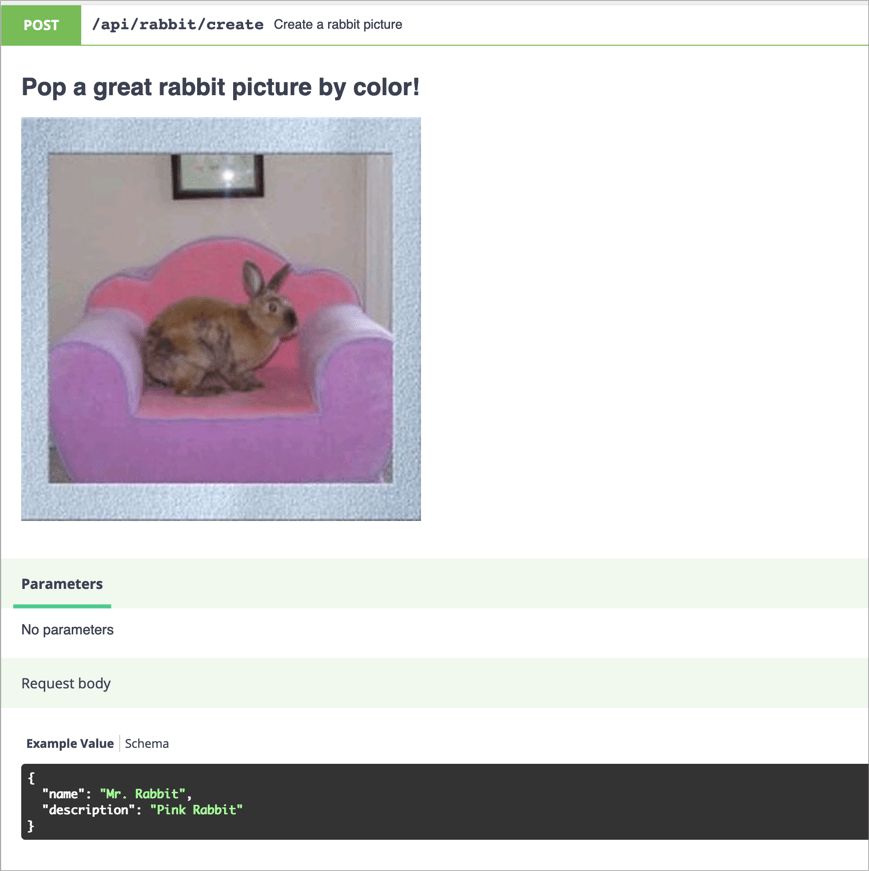
## Changing Operations in the OpenAPI Documentation
You also have full control over both built-in and custom operations documentation.
```php
[
'schema' => [
'type' => 'object',
'properties' => [
'name' => ['type' => 'string'],
'description' => ['type' => 'string']
]
],
'example' => [
'name' => 'Mr. Rabbit',
'description' => 'Pink Rabbit'
]
]
])
)
)
)]
class Rabbit
{
// ...
}
```
```yaml
# The YAML syntax is only supported for Symfony
resources:
App\ApiResource\Rabbit:
operations:
create_rabbit:
class: ApiPlatform\Metadata\Post
path: '/rabbit/create'
controller: App\Controller\RandomRabbit
openapi:
summary: Random rabbit picture
description: >
# Pop a great rabbit picture by color!

requestBody:
content:
application/json:
schema:
type: object
properties:
name: { type: string }
description: { type: string }
example:
name: Mr. Rabbit
description: Pink rabbit
```
```xml
object
string
string
```
## Disabling Swagger UI or ReDoc
### Disabling Swagger UI or ReDoc with Symfony
To disable Swagger UI (ReDoc will be shown by default):
```yaml
# api/config/packages/api_platform.yaml
api_platform:
# ...
enable_swagger_ui: false
```
To disable ReDoc:
```yaml
# api/config/packages/api_platform.yaml
api_platform:
# ...
enable_re_doc: false
```
### Disabling Swagger UI or ReDoc with Laravel
To disable Swagger UI (ReDoc will be shown by default):
```php
false,
];
```
To disable ReDoc:
```php
false,
];
```
## Changing the Location of Swagger UI
By default, the Swagger UI is available at the API location (when the HTML format is asked) and at the route `/docs`.
You may want to change its route and/or disable it at the API location.
### Changing the Route
#### Changing the Route with Symfony
Manually register the Swagger UI controller:
```yaml
# app/config/routes.yaml
api_doc:
path: /api_documentation
controller: api_platform.action.documentation
```
Change `/api_documentation` to the URI you wish Swagger UI to be accessible on.
#### Changing the Route with Laravel
Manually register the Swagger UI controller:
```php
// routes/web.php
use Illuminate\Support\Facades\Route;
use ApiPlatform\Laravel\Controller\DocumentationController;
Route::post('/api_documentation', DocumentationController::class)
->name('api_doc');
```
Change `/api_documentation` to the URI you wish Swagger UI to be accessible on.
### Disabling Swagger UI at the API Location
To disable the Swagger UI at the API location, disable both Swagger UI and ReDoc.
With Symfony use:
```yaml
# api/config/packages/api_platform.yaml
api_platform:
# ...
enable_swagger_ui: false
enable_re_doc: false
```
Or with Laravel use:
```php
false,
'enable_re_doc' => false,
];
```
If you have manually registered the Swagger UI controller, the Swagger UI will still be accessible at the route you have chosen.
## Using a custom Asset Package in Swagger UI
> [!WARNING]
> This feature is not yet available with Laravel, you're welcome to contribute [on GitHub](https://github.com/api-platform/core)
Sometimes you may want to use a different [Asset Package](https://symfony.com/doc/current/reference/configuration/framework.html#packages) for the Swagger UI.
In this way you'll have more fine-grained control over the asset URL generations.
This is useful i.e. if you want to use different base path, base URL or asset versioning strategy.
Specify a custom asset package name:
```yaml
# config/packages/api_platform.yaml
api_platform:
asset_package: 'api_platform'
```
Set or override asset properties per package:
```yaml
# config/packages/framework.yaml
framework:
# ...
assets:
base_path: '/custom_base_path' # the default
packages:
api_platform:
base_path: '/'
```
## Overriding the UI Template
You can extend the default UI Template using the Symfony and Laravel instructions below:
### Overriding the UI Template using Symfony
As described [in the Symfony documentation](https://symfony.com/doc/current/templating/overriding.html), it's possible to override the Twig template that loads Swagger UI and renders the documentation:
```twig
{# templates/bundles/ApiPlatformBundle/SwaggerUi/index.html.twig #}
{% if title %}{{ title }} {% endif %}My custom template
{# ... #}
```
You may want to copy the [one shipped with API Platform](https://github.com/api-platform/core/blob/main/src/Symfony/Bundle/Resources/views/SwaggerUi/index.html.twig) and customize it.
### Overriding the UI Template using Laravel
As described [in the Laravel documentation](https://laravel.com/docs/blade#extending-a-layout), it's possible to override the Blade template that loads Swagger UI and renders the documentation:
```html
{# resources/views/swagger-ui.blade.php #}
@if(isset($title))
{{ $title }}
@endif
My custom template
{# ... #}
```
You may want to copy the [one shipped with API Platform](https://github.com/api-platform/core/blob/main/src/Laravel/resources/views/swagger-ui.blade.php) and customize it.
## Compatibility Layer with Amazon API Gateway
[AWS API Gateway](https://aws.amazon.com/api-gateway/) supports OpenAPI partially, but it [requires some changes](https://docs.aws.amazon.com/apigateway/latest/developerguide/api-gateway-known-issues.html).
API Platform provides a way to be compatible with Amazon API Gateway.
To enable API Gateway compatibility on your OpenAPI docs, add `api_gateway=true` as query parameter: `http://www.example.com/docs.jsonopenapi?api_gateway=true`.
The flag `--api-gateway` is also available through the command-line.
## OAuth
### OAuth using Symfony
If you implemented OAuth on your API, you should configure OpenApi's authorization using API Platform's configuration:
```yaml
# config/packages/api_platform.yaml
api_platform:
oauth:
# To enable or disable OAuth.
enabled: false
# The OAuth client ID.
clientId: ''
# The OAuth client secret.
clientSecret: ''
# The OAuth type.
type: 'oauth2'
# The OAuth flow grant type.
flow: 'application'
# The OAuth token url.
tokenUrl: '/oauth/v2/token'
# The OAuth authentication url.
authorizationUrl: '/oauth/v2/auth'
# The OAuth scopes.
scopes: []
```
Note that `clientId` and `clientSecret` are being used by the SwaggerUI if enabled.
### OAuth using Laravel
If you implemented OAuth on your API, you should configure OpenApi's authorization using API Platform's configuration:
```php
[
'enabled' => false, // To enable or disable OAuth.
'clientId' => '', // The OAuth client ID.
'clientSecret' => '', // The OAuth client secret.
'type' => 'oauth2', // The OAuth flow grant type.
'authorizationUrl' => '/oauth/v2/auth' // The OAuth authentication url.
'scopes' => [], // The OAuth scopes.
],
];
```
Note that `clientId` and `clientSecret` are being used by the SwaggerUI if enabled.
### Configure the OAuth Scopes Option
#### Configure the OAuth Scopes Option using Symfony
The `api_platform.oauth.scopes` option requires an array value with the scopes name and description. For example:
```yaml
api_platform:
oauth:
scopes:
profile: "This scope value requests access to the End-User's default profile Claims, which are: name, family_name, given_name, middle_name, nickname, preferred_username, profile, picture, website, gender, birthdate, zoneinfo, locale, and updated_at."
email: 'This scope value requests access to the email and email_verified Claims.'
address: 'This scope value requests access to the address Claim.'
phone: 'This scope value requests access to the phone_number and phone_number_verified Claims.'
```
> [!NOTE]
> If you're using an OpenID Connect server (such as Keycloak or Auth0), the `openid` scope **must** be set according
> to the [OpenID Connect specification](https://openid.net/specs/openid-connect-core-1_0.html).
#### Configure the OAuth Scopes Option using Laravel
The `api_platform.oauth.scopes` option requires an array value with the scopes name and description. For example:
```php
[
'scopes' => [
'profile' => "This scope value requests access to the End-User's default profile Claims, which are: name, family_name, given_name, middle_name, nickname, preferred_username, profile, picture, website, gender, birthdate, zoneinfo, locale, and updated_at.",
'email' => 'This scope value requests access to the email and email_verified Claims.',
'address' => 'This scope value requests access to the address Claim.',
'phone' => 'This scope value requests access to the phone_number and phone_number_verified Claims.',
]
],
];
```
> [!NOTE]
> If you're using an OpenID Connect server (such as Keycloak or Auth0), the `openid` scope **must** be set according
> to the [OpenID Connect specification](https://openid.net/specs/openid-connect-core-1_0.html).
## Info Object
The [info object](https://swagger.io/specification/#info-object) provides metadata about the API like licensing
information or a contact. You can specify this information using API Platform's configuration below:
### Info Object Configuration using Symfony
```yaml
api_platform:
# The title of the API.
title: 'API title'
# The description of the API.
description: 'API description'
# The version of the API.
version: '0.0.0'
openapi:
# The contact information for the exposed API.
contact:
# The identifying name of the contact person/organization.
name:
# The URL pointing to the contact information. MUST be in the format of a URL.
url:
# The email address of the contact person/organization. MUST be in the format of an email address.
email:
# A URL to the Terms of Service for the API. MUST be in the format of a URL.
termsOfService:
# The license information for the exposed API.
license:
# The license name used for the API.
name:
# URL to the license used for the API. MUST be in the format of a URL.
url:
```
### Info Object Configuration using Laravel
```php
'API title', // The title of the API.
'description' => 'API description', // The description of the API.
'version' => '0.0.0', // The version of the API.
//...
'openapi' => [
'contact' => [ // The contact information for the exposed API.
'name' => '', // The identifying name of the contact person/organization.
'url' => '', // The URL pointing to the contact information. MUST be in the format of a URL.
'email' => '', // The email address of the contact person/organization. MUST be in the format of an email address.
],
'termsOfService' => '', // A URL to the Terms of Service for the API. MUST be in the format of a URL.
'license' => [ // The license information for the exposed API.
'name' => '', // The license name used for the API.
'url' => '', // URL to the license used for the API. MUST be in the format of a URL.
]
],
];
```