
In Getting Started document, a new sample project is created named "Acme.PhoneBook". This document is a guide while developing your project. We definitely suggest to read this document before starting to the development. Since ASP.NET Zero is built on ASP.NET Boilerplate application framework, this document highly refers it's documentation.
Before reading this document, it's suggested to run the application and explore the user interface. This will help you to have a better understanding of concepts defined here.
About Server Side
This document is only for the Angular application. For server side, see ASP.NET Core documentation too.
Following tools are needed in order to use the solution:
In addition, see ASP.NET Core documentation for server side requirements and other server side features.
It's suggested to use an IDE to develop your project. We used Visual Studio 2017, but you can use VS Code or any other IDE/Editor you like (VS Code, for instance). You can also use any OS you like (MacOS/Linux/Windows).
The diagram below shows the overall architecture:

Entrance point of the Angular solution is src/main.ts. It simply bootstraps the root Angular module: RootModule. Fundamental modules of the solution are shown below:

Fundamental modules have their own routes. For example; AccountModule views start with "/account" (like "/account/login"), AdminModule views starts with "/app/admin" (like "/app/admin/users"). Angular's router lazy loads modules based on their url. For instance, when you request a url starts with "app/admin", the AdminModule and all it's components are loaded. They are not loaded if you don't request those pages. That brings better startup time (and also better development time since they are independently splitted to chunks).
In addition to those fundamental modules, there are some share modules:
Angular solution contains src/assets/appconfig.json file which contains some configuration for the client side:
appBaseUrl is configured since we use it to define format of our URL. If we want to use tenancy name as subdomain for a multi-tenant application then we can define appBaseUrl as
http://{TENANCY_NAME}.mydomain.com
{TENANCY_NAME} is the place holder here for tenant names. Tenancy name can also be configured for remoteServiceBaseUrl as similar. To make tenancy name subdomains properly work, we should also make two configurations beside the application:
There may be other ways of doing it but this is the most simple way.
AccountModule provides login, register, forgot password and email activation pages and located under src/account folder:
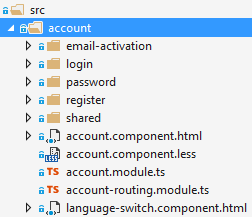
account.component is the root component of account.module. account-routing.module defines routes for the account application.
Default route for AccountModule is the login/login.component:
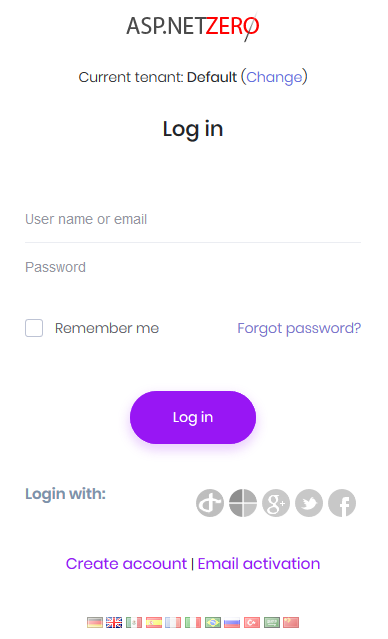
The tenant selection section above login section is shown only in a multi-tenant application and if "tenancy name detection" is not possible from url (for example, if you use subdomain as tenancy names, no need to show a tenant selection). When we click Change link, tenant change dialog appears and we can change the tenant. There is a single tenant named Default in the initial database. Leave tenancy name input as blank to login as host.
We can use admin user name and 123qwe password in first run the application. At first login, we should change admin password since 123qwe is not very secure:
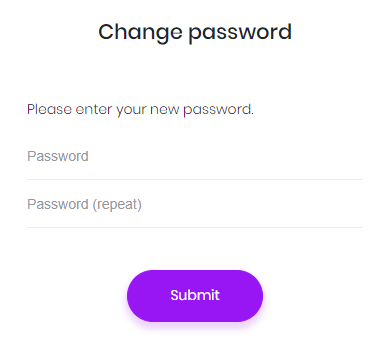
After changing password we are redirected to the application (app.module).
Social logins can be enabled and configured from backend. Once they are properly configured, they are automatically shown in the user interface. login/login.service implements client side logic for social logins. Note that currently only Facebook and Google authentication is implemented for Angular2 application. Microsoft and Twitter logins are on the road map.
ASP.NET Zero is ready to provide two factor login, but it's disabled as default. You can easily enable it in host settings page (in Security tab):
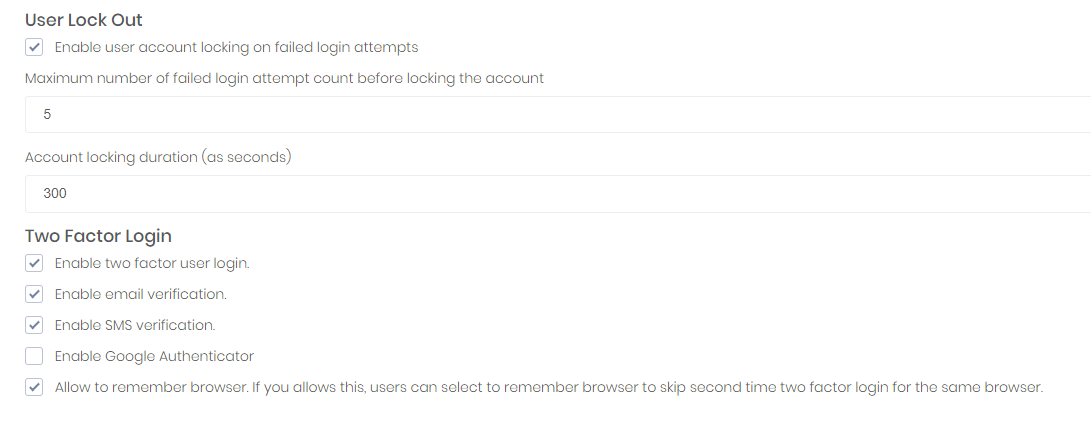
Note: In a multi-tenant application, two factor authentication is available to tenants only if it's enabled in the host settings. Also, email verification and SMS verification settings are only available in the host side. This is by design.
When it's enabled, user is asked to select a verification provider after entering user name and password:
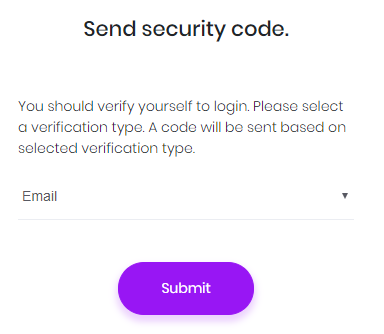
Then a confirmation code is sent to the selected provider and user enters the code in the next page:
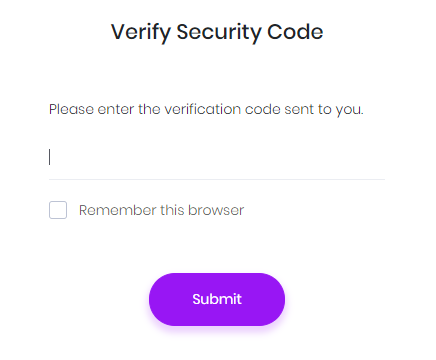
This is available if user has a confirmed email address. Since email sending is disabled in debug mode, you can see the code in logs. In release mode, email will be sent (You can change this from server side).
This is available if user has a confirmed phone number. SMS sending is not implemented actually (because it requires an integration to an SMS vendor). Current implementation just writes security code to logs. You should complete SmsSender class in the server side to make it usable. Otherwise, disable SMS verification in the settings.
As seen in the previous section, you can configure user lockout settings. Users are lockout when they enter wrong password for a specified count and duration.
When we click the "Create Account" link (which is only available for tenants for multitenant applications) in the login page, a registration form is shown:
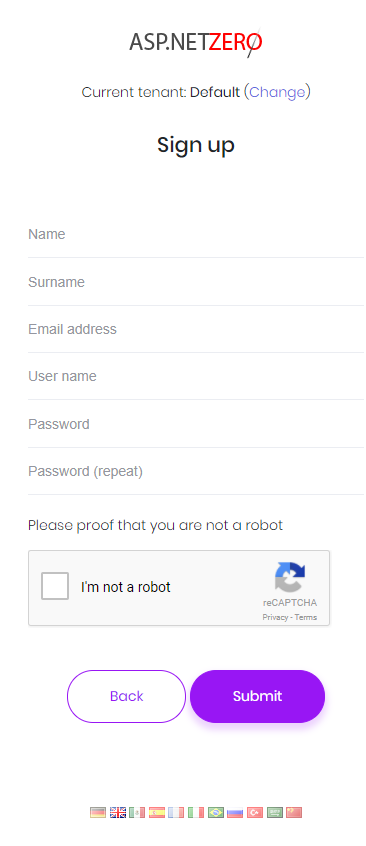
Recaptcha (security question) is optional. It uses Google's recaptcha service. Recaptcha service works per domain. So, to make it properly work, you should create your own private and public keys for your domain on https://www.google.com/recaptcha and replace keys in appsettings.json file in the server side and in the appconfig.json in the client side.
When a user registers as shown above, an email confirmation code is sent to his email address. If user did not receive this email for some reason, they can click Email activation and re-send the confirmation code.
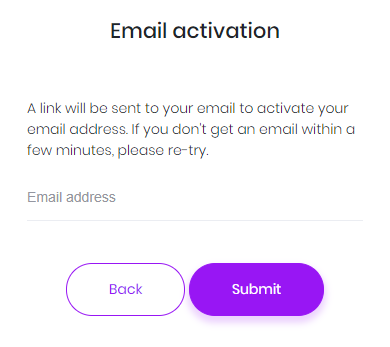
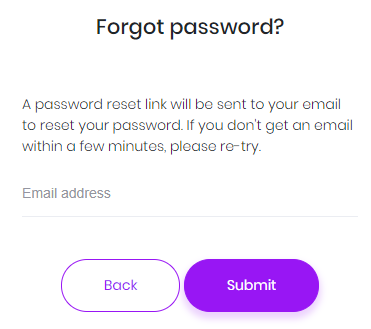
If a user forgots his password, he can click the "Forgot Password" link to get an email to reset the password.
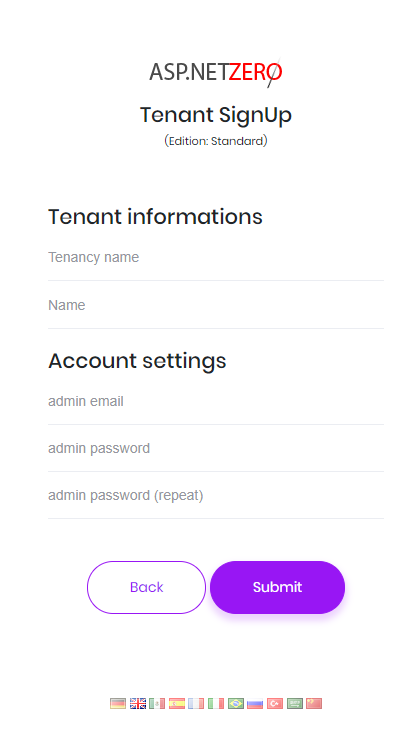
Tenant registration link is shown on the login form only if you are in the host context. When you click to the link, a registration form is shown:
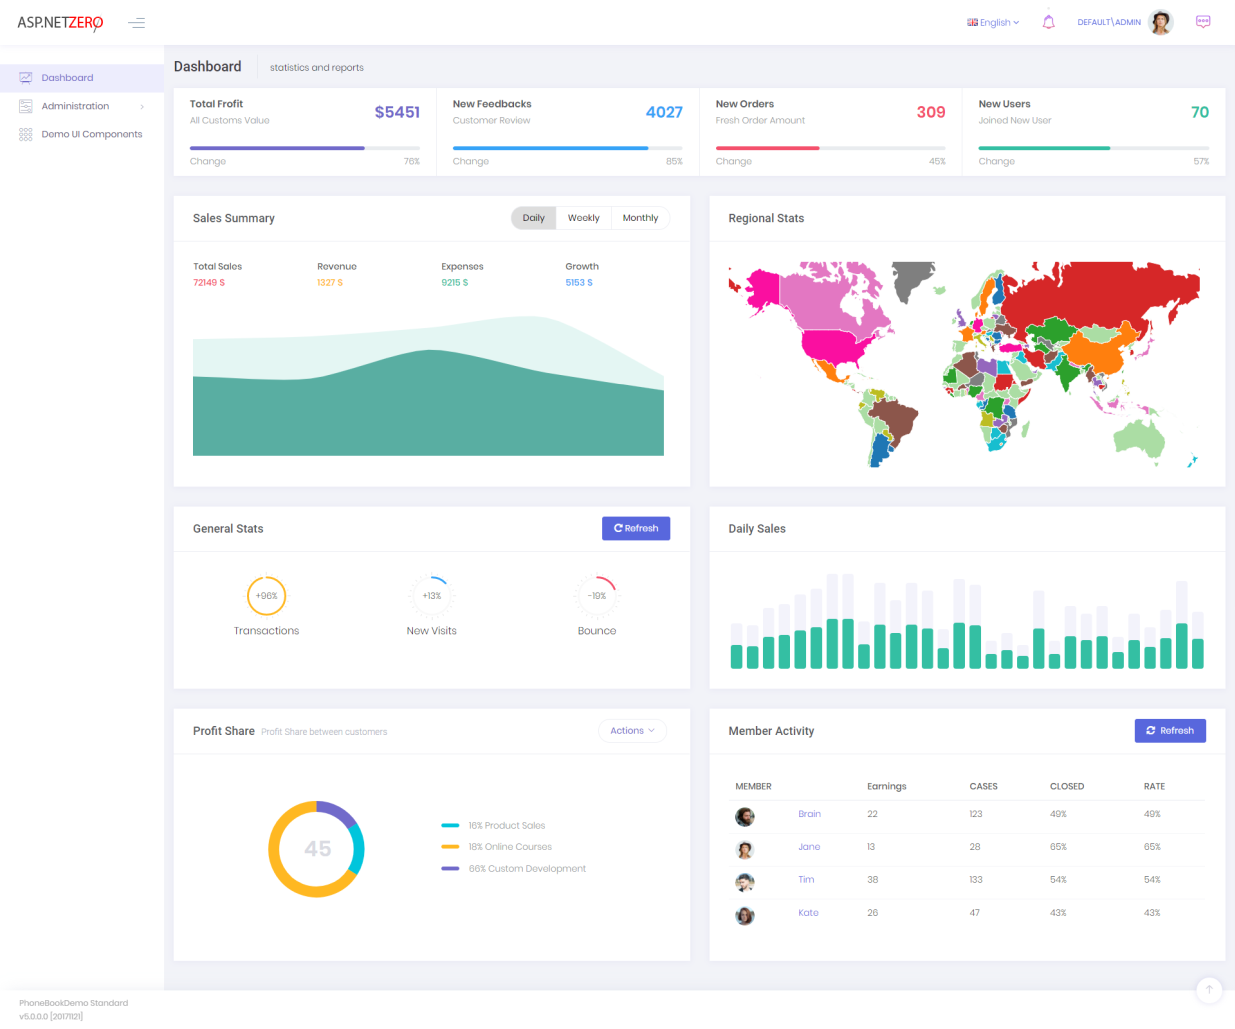
This is the actual application module which is entered by username and password. You will mostly work on this application to add your business requirements. A screenshot from the application:
Folder structure of the source code is like that:
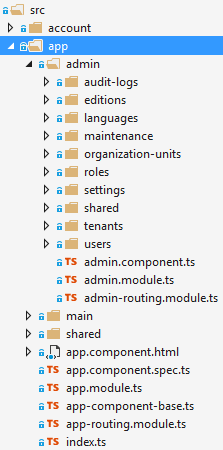
It consists of 3 sub modules as described before. app.component is the root component for all views.
Menu and Layout files located under shared folder:
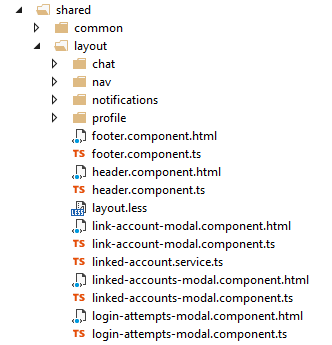
Main menu is defined and rendered in side-bar.component. You can add new menu items here. You generally relate a menu item to an Angular route. Angular routes are defined in several modules:
If you're not developing a multi-tenant application, you can skip this section.
Most SaaS (multi-tenant) applications have editions (packages) those have different features. Thus, they can provide different price and feature options to thier tenants (customers). Editions page (available in host login) is used to manage application's editions:

Editions are used to group feature values and assign to tenants. When we click Actions/Edit for an edition, we can see it's poperties:
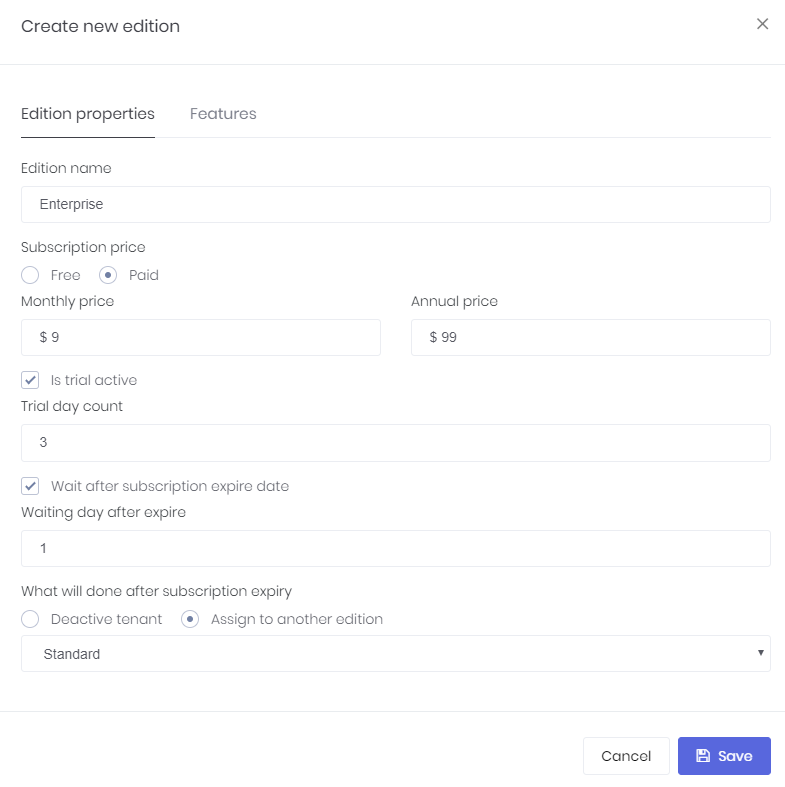
An edition can be free or paid. If it's a paid edition then you should enter monthly and annual prices. You can allow tenants to use trial version of this edition for a specified days. Then you can determine an expire strategy: How many days to allow a tenant to use the application after subscription expires. And finally, you can deactivate tenant or assign to a free edition if they don't extend their subscription.
Features tab is used to determing features available for the edition:
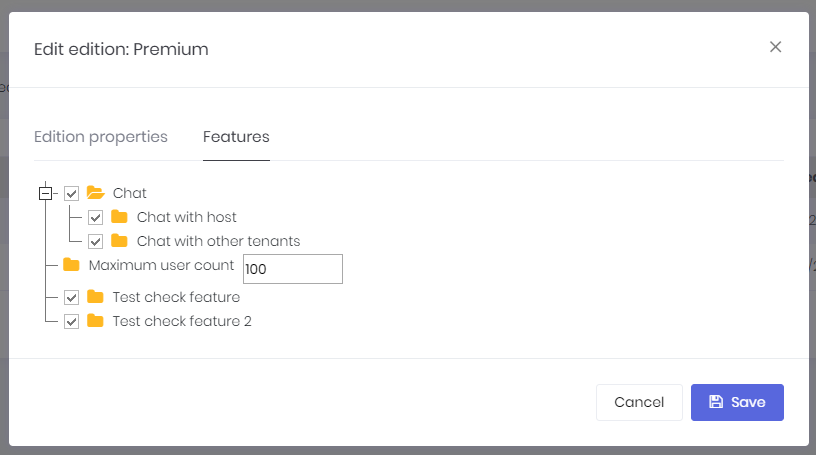
See feature management and edition management documents for more information.
If you're not developing a multi-tenant application, you can skip this section.
If this is a multi-tenant application and you logged in as a host user, then tenants page is shown:

A tenant is represented by Tenant class. Tenant class can be extended by adding new properties. There is an only one tenant, named Default as initial. Tenancy Name (code name, which can be used as subdomain) is the unique name of a tenant. A tenant can be active or passive. If it's passive, no user of this tenant can login to the application.
When we click the "Create New Tenant" button, a dialog is shown:
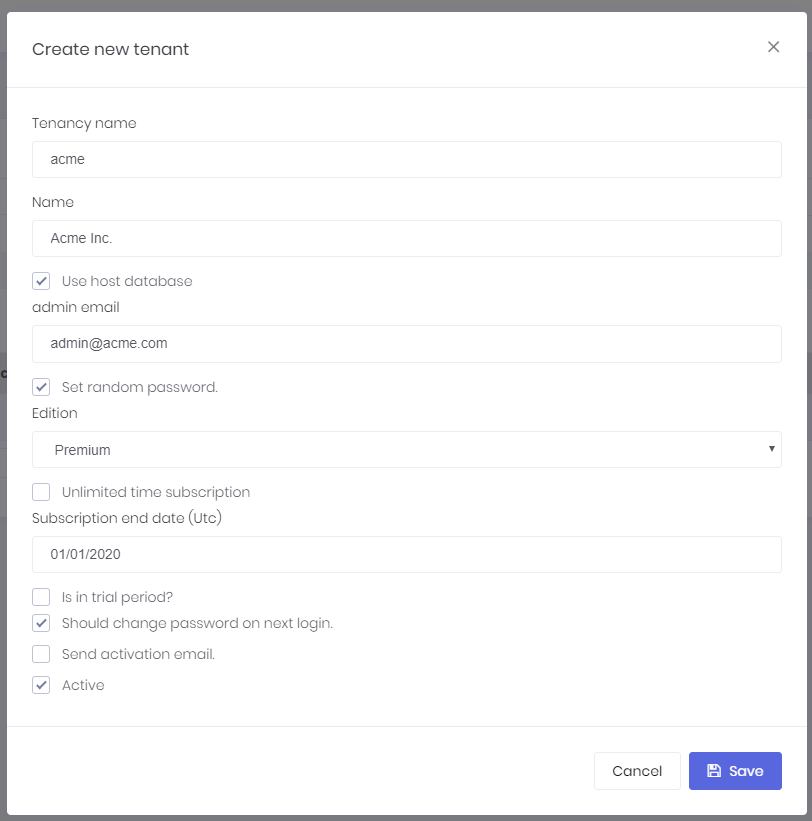
Tenancy name should be unique and can not contain spaces or other special chars since it may be used as subdomain name (like tenancyname.mydomain.com). Name can be anything. Admin email is used as email address of the admin user of new tenant. Admin user is automatically created with the tenant. We can set a random password for admin and send activation email. When user first logins, they should change the password. We can uncheck this to enter a known password.
When we create a new tenant, we should select/create a database to store new tenant's data. We can select 'Use host database' to store tenant data in host database (can be used for single database approach) or we can specify a connection string to create/use a dedicated database for new tenant. ASP.NET Zero supports hybrid approach. That means you can use host database for some tenants and create dedicated databases for some other tenants. Even you can group some tenants in a separated database.
Once you assign an edition to the tenant, you can select an expiration date (see edition management section to know what happens after subscription expiration).
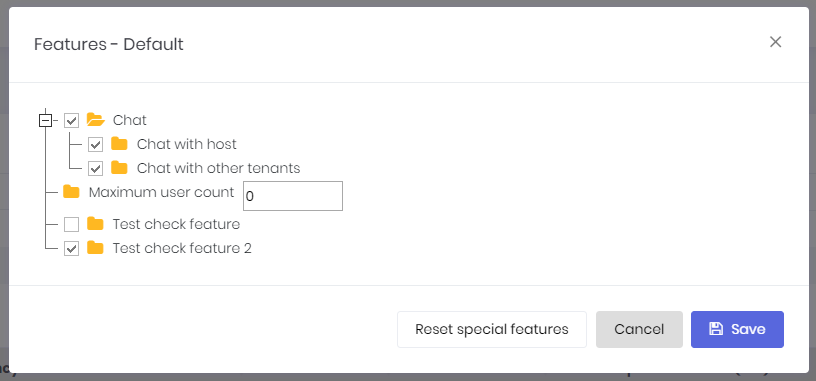
An edition can be assigned to a tenant (while creating or editing). Tenant will inherit all features of the assigned edition, but we can also override features and values for a tenant. Click actions/change features for a tenant to customize it's features:
As a host user, we may want to perform operations in behalf of a tenant. In this case, we can click the "Login as this tenant" button in the actions. When we click it, we see a modal to select a user of the tenant. We can select any user and perform operations allowed that user. See User Impersonation section in this document for more information.
A multi-tenant application generally uses subdomain to identify current tenant. tenant1.mydomain.com, tenant2.mydomain.com and so on. ASP.NET Zero automatically identify and get tenant name from subdomain. See application configuration section.
Host dashboard is used to show some statistics about tenants, editions and income:
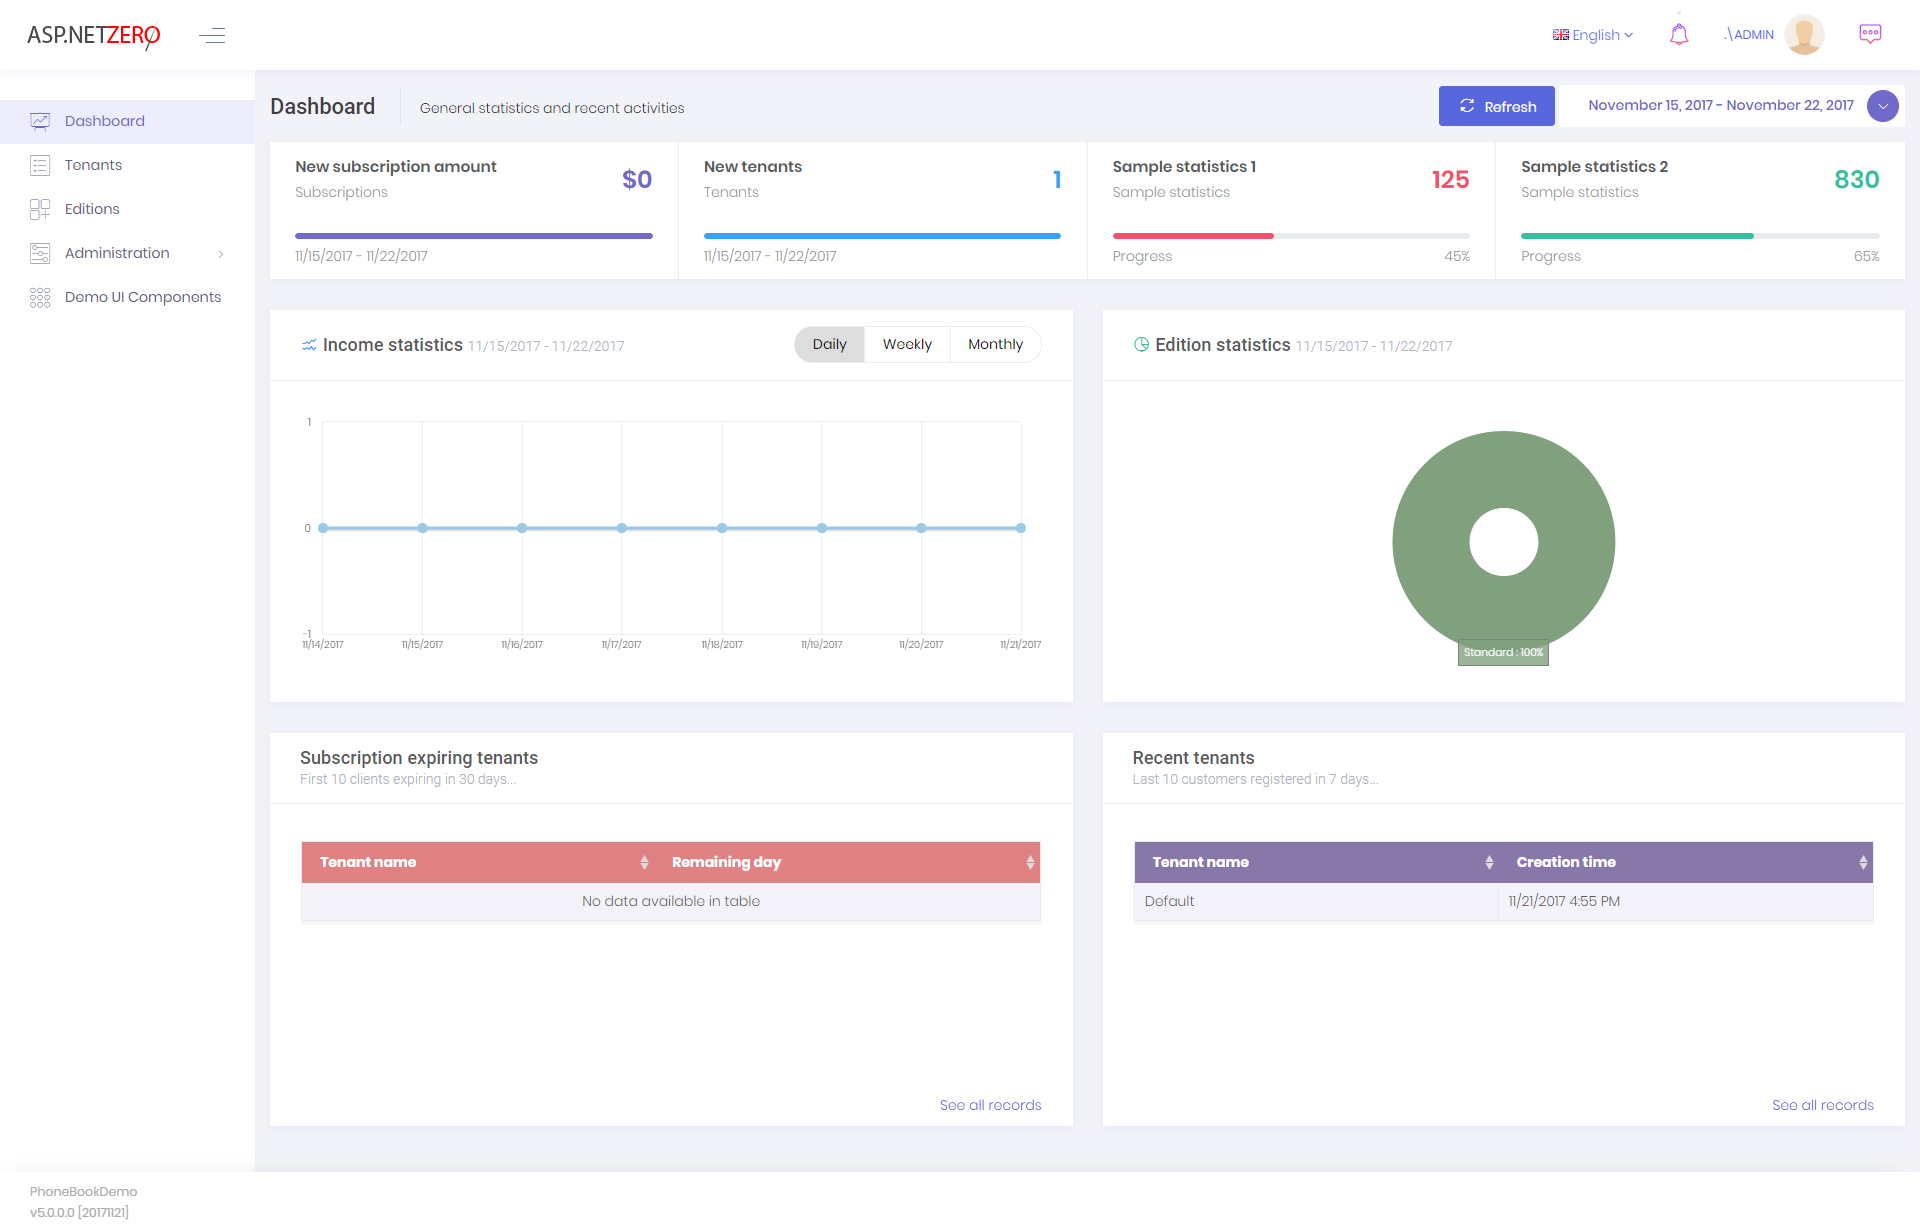
This is a fully implemented dashboard except two sample statistics (sample statistics 1 & 2) those are placeholders for your own statistics.
Organization units (OU) are used to hierarchically group user and entities. Then you can get user or entities based on their OUs. When we click Administration/Organization units, we enter the related page:

Here, we can manage OUs (create, edit, delele, move) and members (add/remove).
In the left OU tree, we can right click to an OU (or left click to arrow at the right) to open context menu for OU operations. We can also add new members with the upper right button of members area.
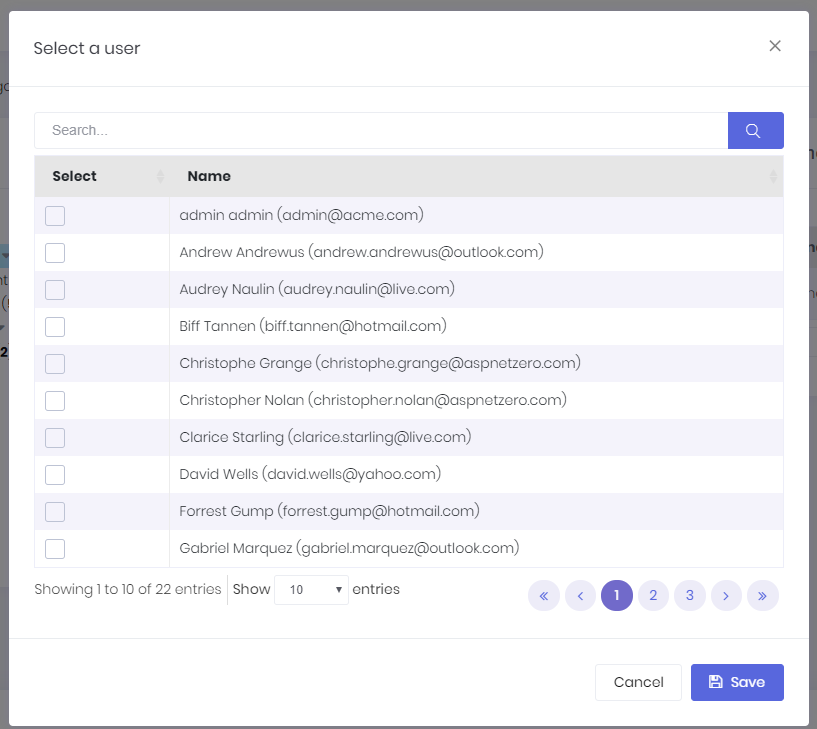
This is actually a generic lookup modal and can be used to select any type of entity (see app/shared/common/lookup/common-lookup-modal.component).
See organization unit management document for more information.
When we click Administration/Roles menu, we enter to the role management page:
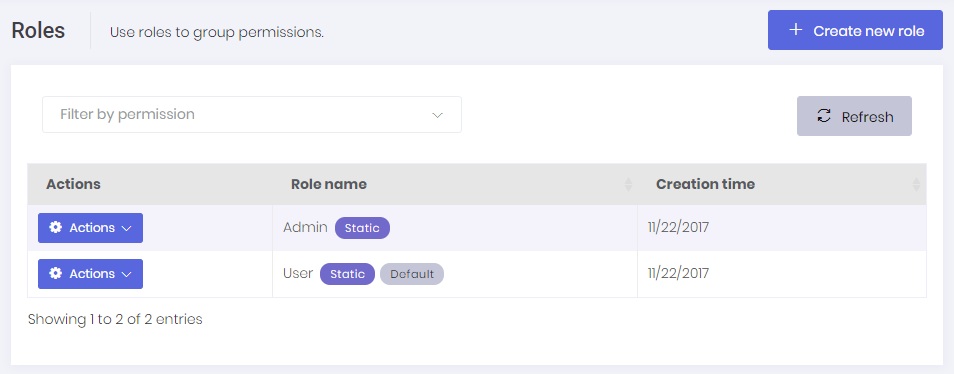
Roles are used to group permissions. When a user has a role, then they will have all permissions of that role.
A role is represented by the Role class. Role class can be extended by adding new properties.
Roles can be dynamic or static:
One or more roles can be set as default. Default roles are assigned to new added/registered users as default. This is not a development time property and can be set or changed after deployment.
In startup project, we have static admin role for host (for multi-tenant apps). Also, we have static admin and user roles for tenants. Admin roles have all permissions granted by default. User role is the default role for new users and has no permission by default. These can be changed easily in the server side.
Since roles are used to group permissions, we can set permissions of a role while creating or editing as shown below:
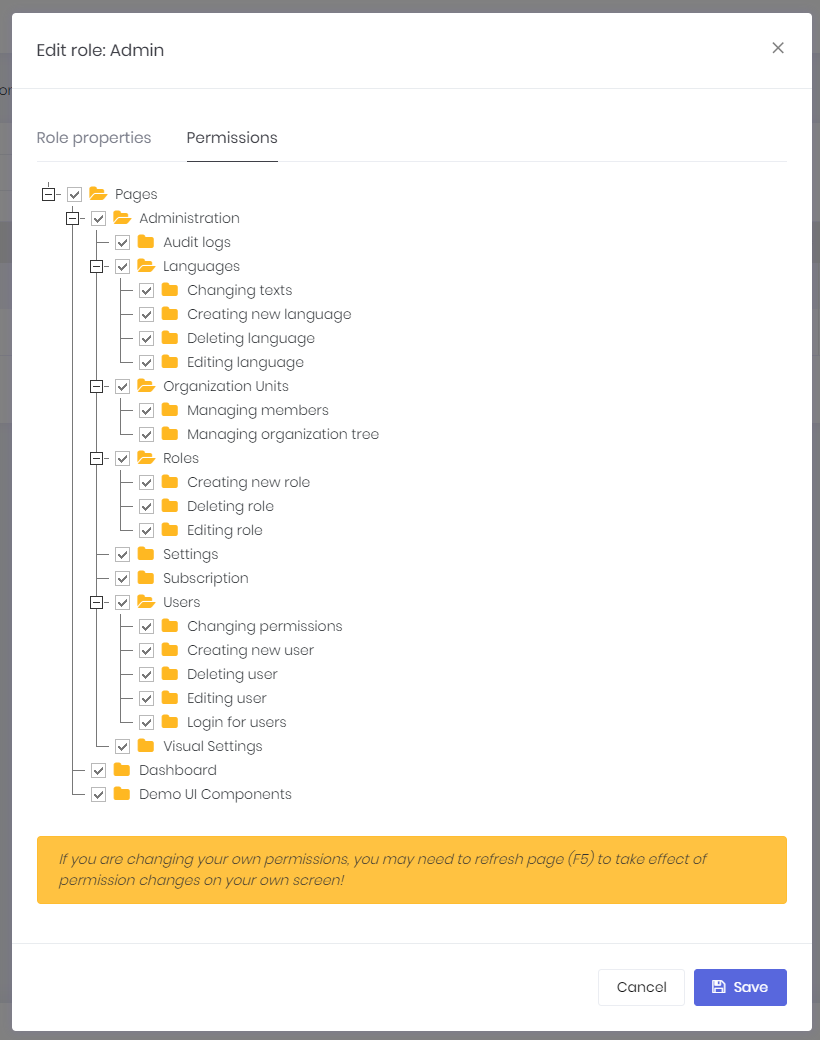
(not all permissions shown in the figure above)
Every tenant has it's own roles and any change in roles for a tenant does not effect other tenants. Also, host has also it's own isolated roles.
When we click Administration/Users menu, we enter to the user management page:
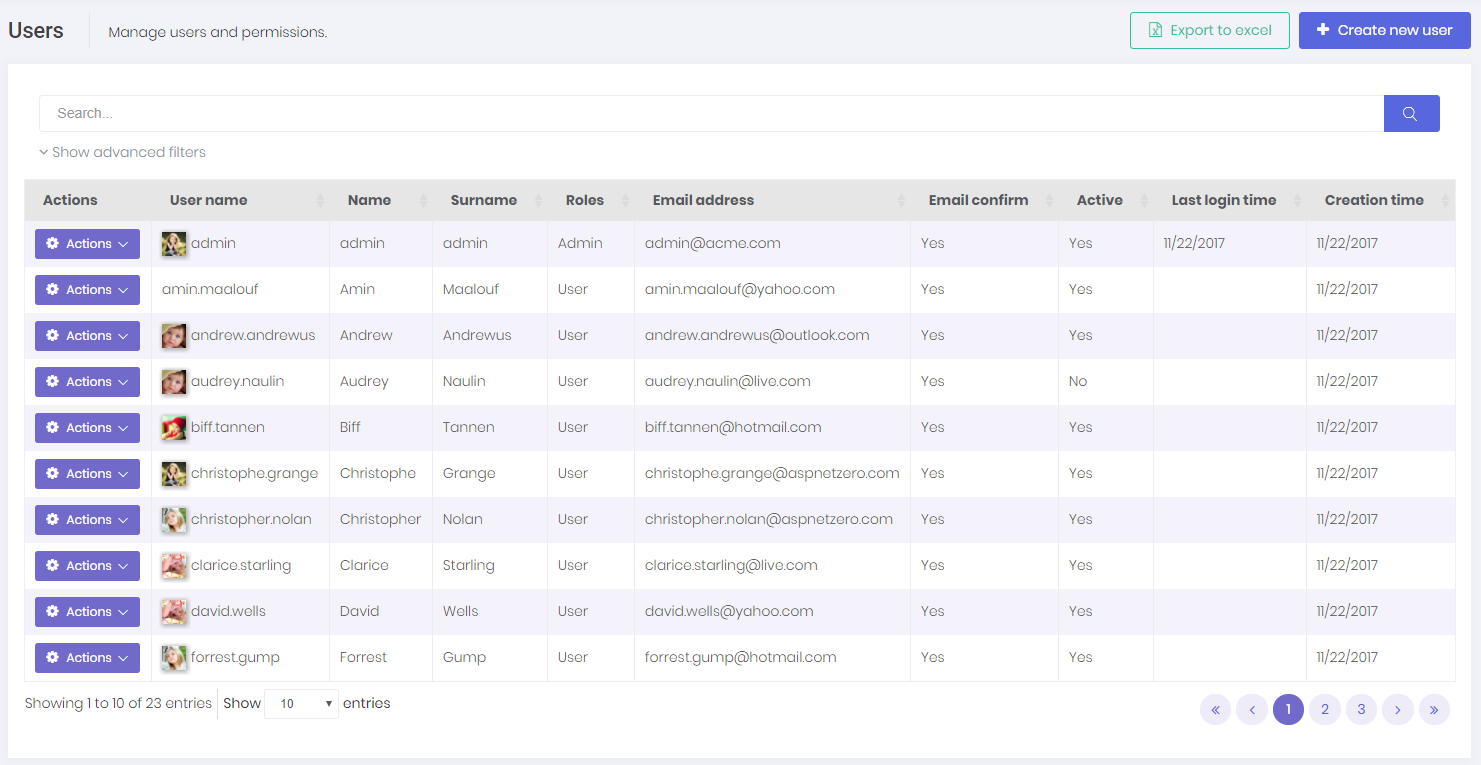
Users are people who can login to the application and perform some operations based on their permissions.
A user can have zero or more roles. If a user has more than one role, he inherits union of permissions of all these roles. Also, we can set user-specific permission. A user specific permission setting overrides role settings for this permission. A screenshot of user permission dialog:
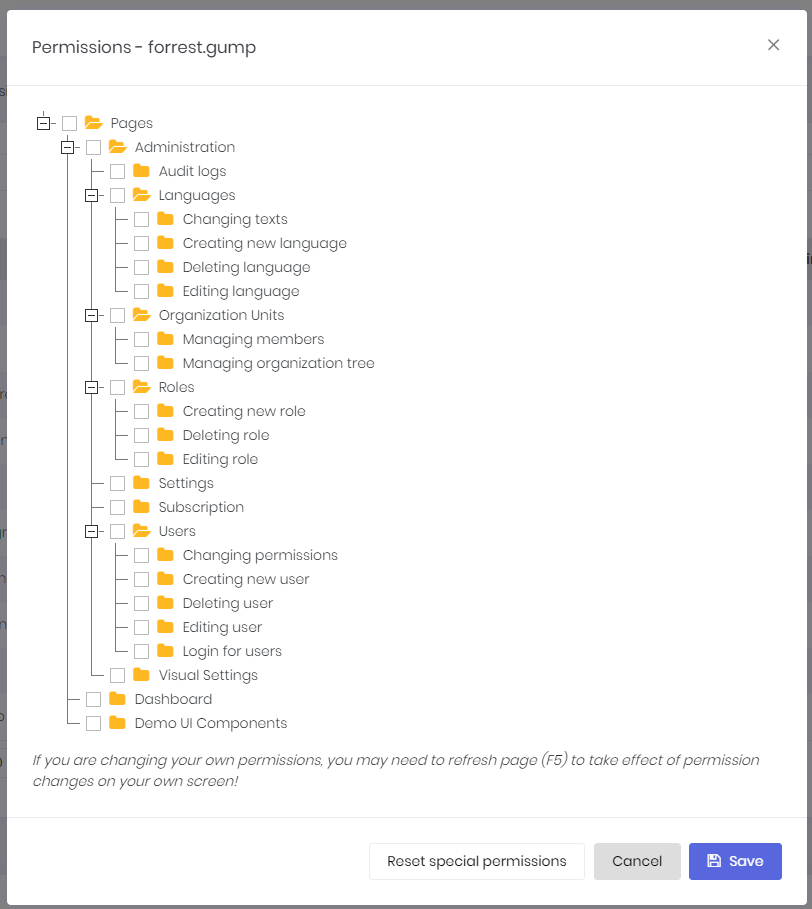
(not all permissions shown in the figure above)
A dialog is used to create/edit a user:
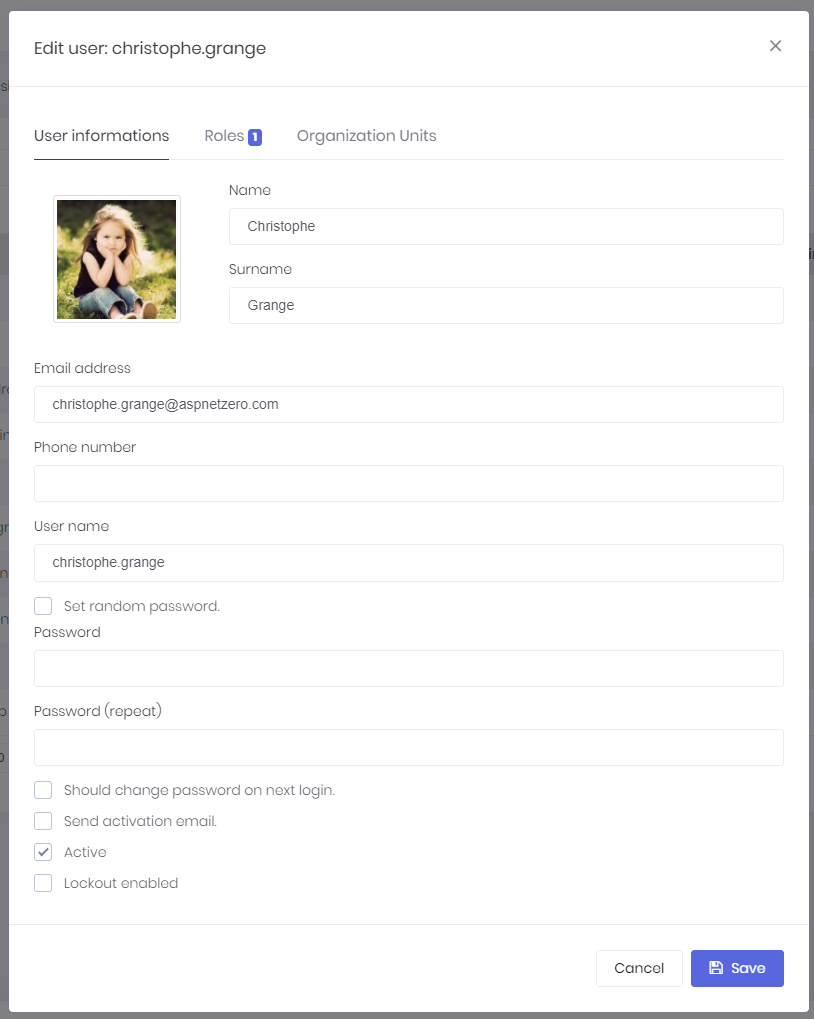
We can change user's password, make her active/passive and so on... A user can have a profile picture. It can be changed by the user (See User Menu section). Admin user can not be deleted as a business rule. If you don't want to use admin, just make it inactive.
As admin (or any allowed user), we may want to login as a user and perform operations in behalf of that user, without knowing his password. When we click "Login as this user" icon in the actions of a user, we are automatically redirected and logged in as this user. This is called as "user impersonation". When we impersonate a user, a "back to my account" option is added to the user profile menu:
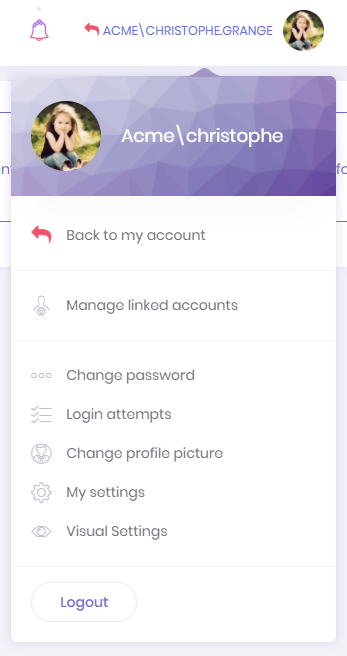
In an impersonated account, we can only perform operations allowed to that user. That means, everything exactly works as same as this user logged in himself. The only difference is shown in audit logs which indicates that operations are performed by somebody else. Notice that; Also a red 'back' icon shown near to the user name to indicate that you are in an impersonated account.
Language management page is used to manage (add/edit/delete) application languages and change localized texts:
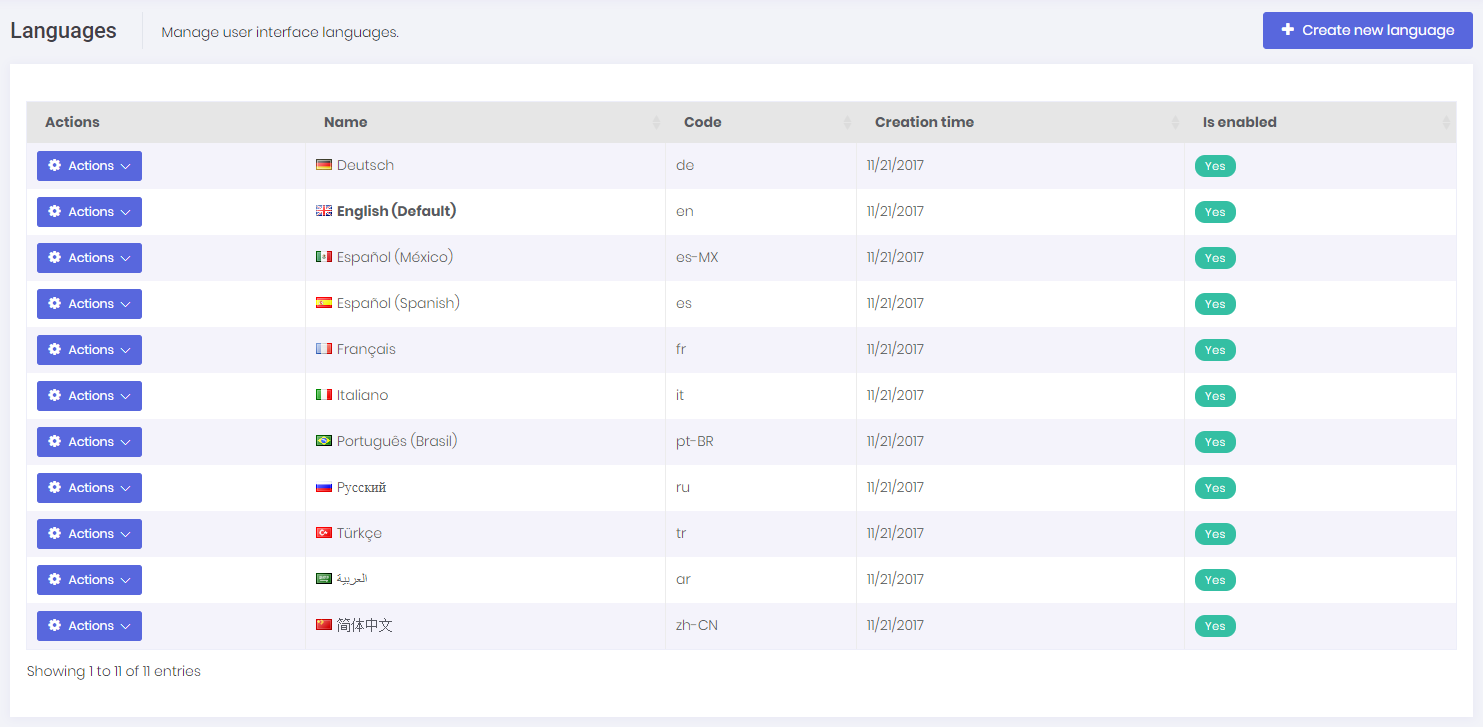
We can create new language, edit/delete an existing language and set a language as default. Note that; tenants can not edit/delete default languages, but host users can do.
When we click to Change text for any language, we are redirected to a new view to edit language texts:
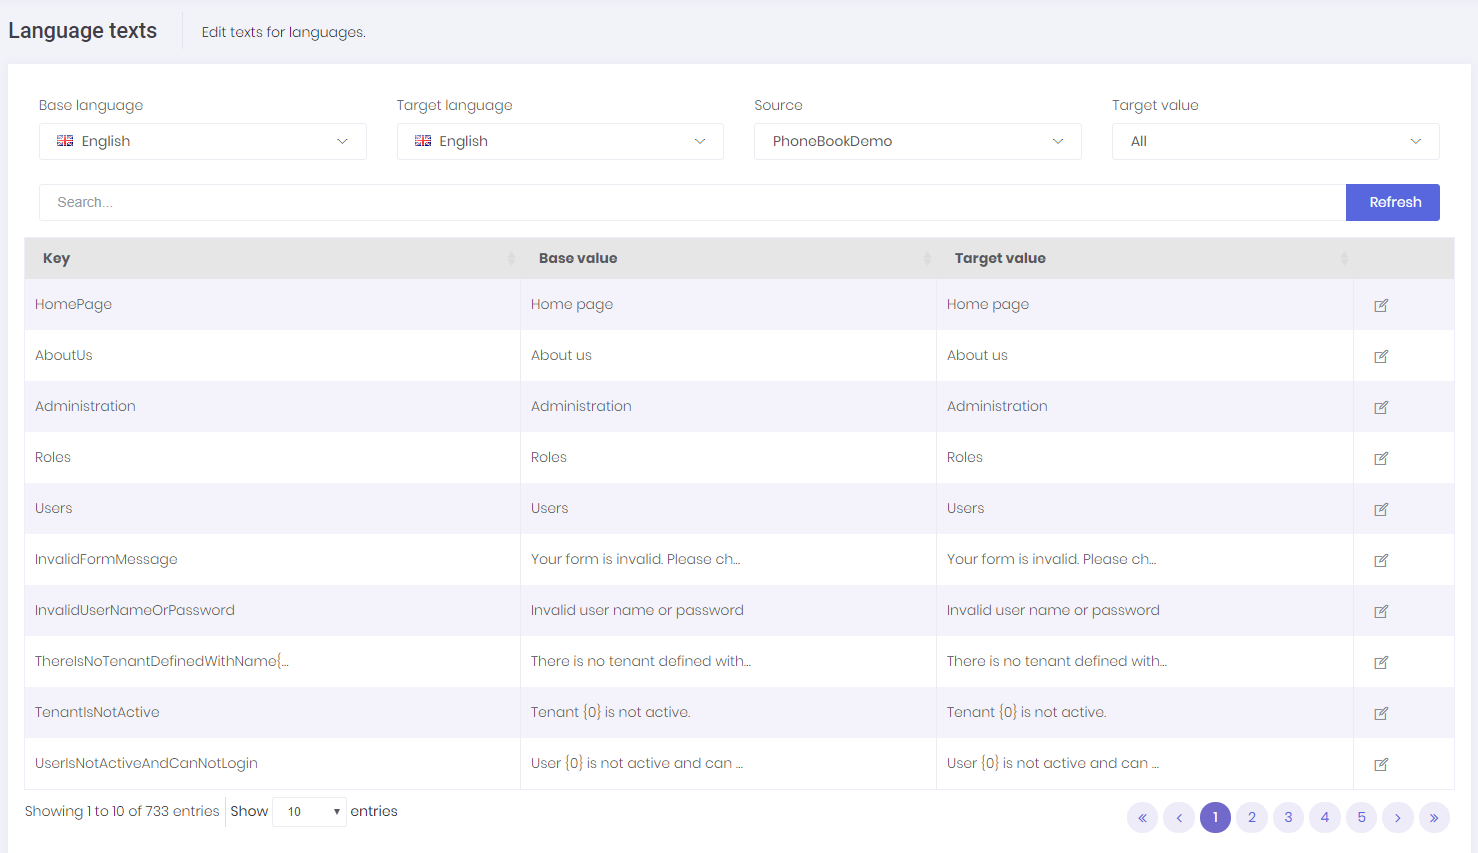
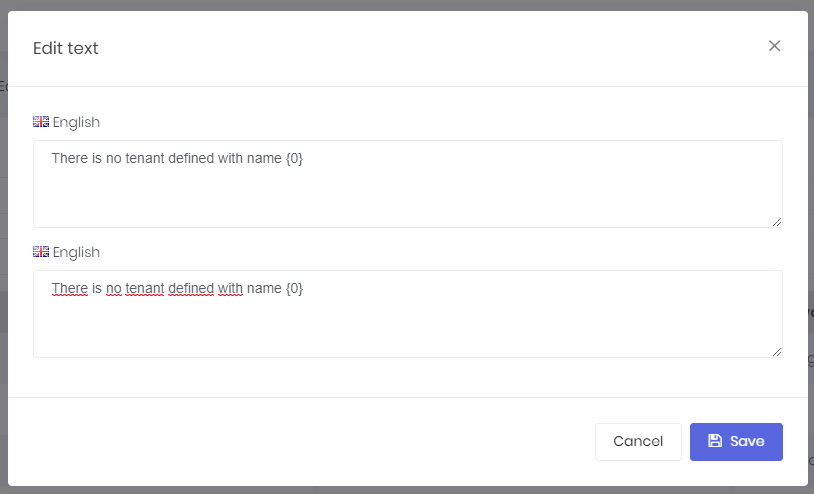
We can select any language as a base (reference) and change target language's texts. Base language is just to help the translation progress. Since there maybe different localization sources, we select the source to translate. When we click the edit icon, we can see the edit modal for the selected text:
Host users (if allowed) can edit languages and localized texts. These languages will be default for all tenants for a multi-tenant application. Tenants inherit languages and localized texts and can override localized texts or can add new languages.
See language management and localization documents for more information.
In audit logs page, we can see all user interactions with the application:
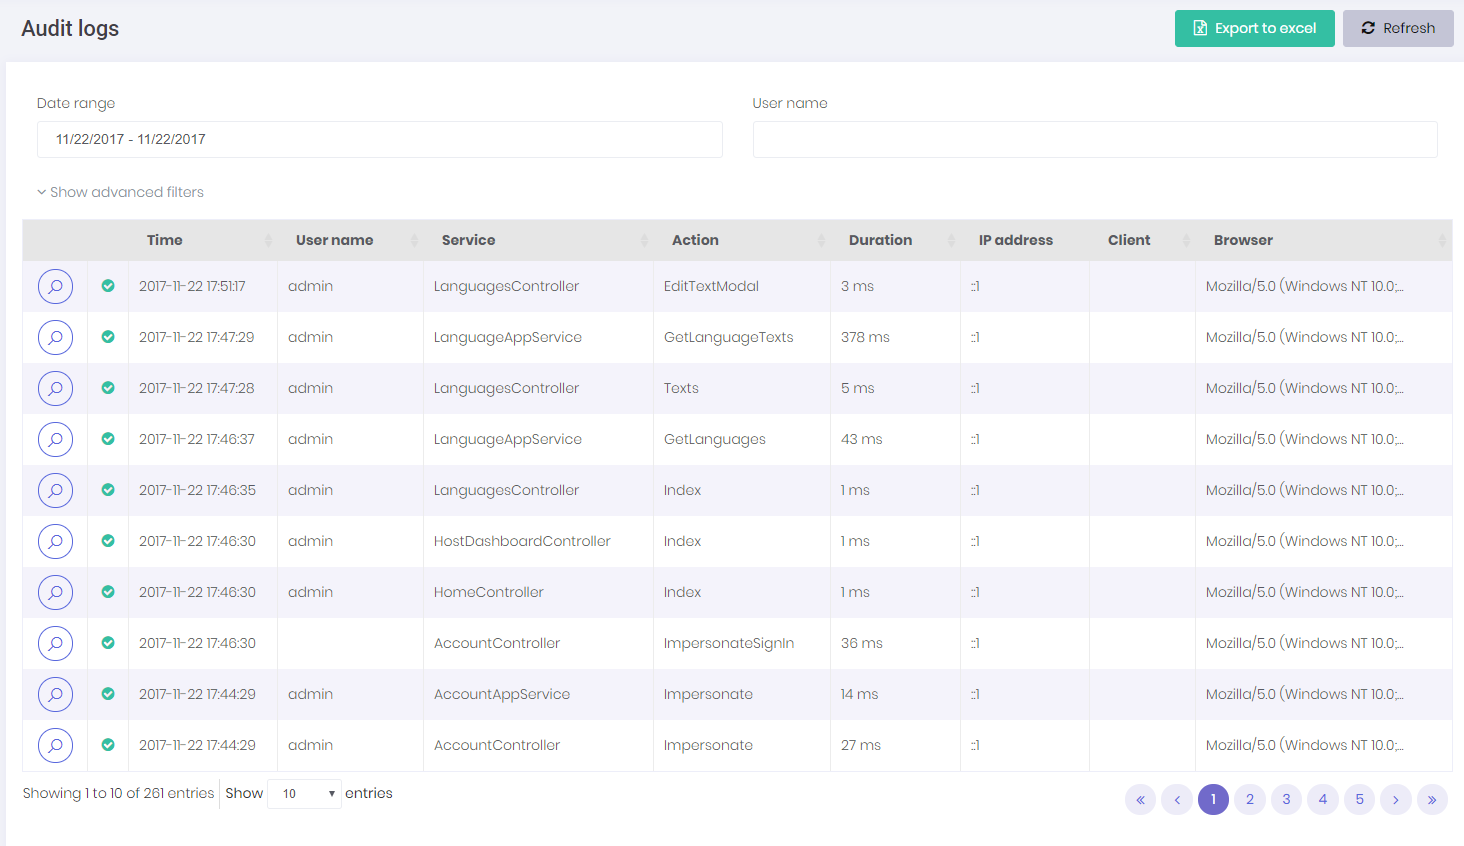
All application service methods and MVC controller actions are automatically logged and can be viewed here. See audit logs documentation to learn how to configure it. When we click the magnifier icon, we can see all details an audit log:
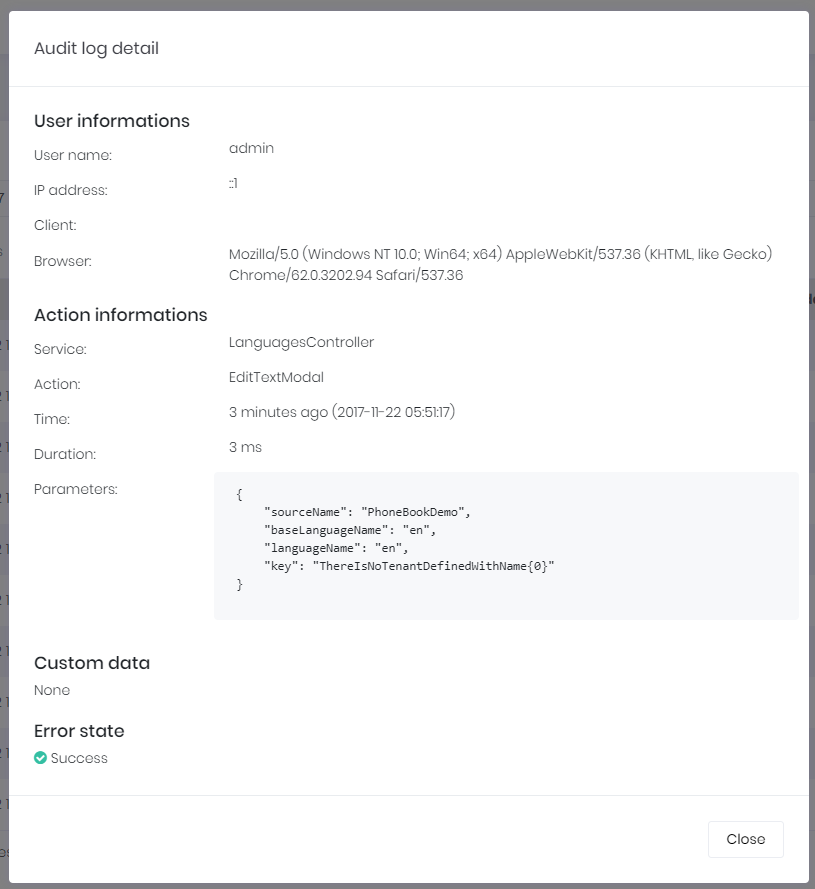
Audit log report is provided by AuditLogAppService class.
Tenants can manage (show, extend or upgrade) their edition/plan subscriptions using this page:
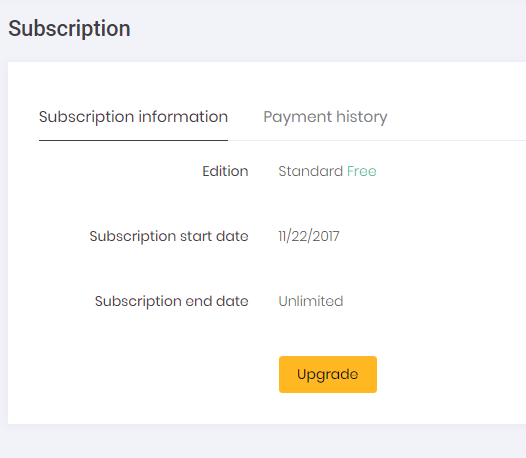
All payment records for extending/upgrading current licenses are kept in the system. These records can be seen on "Payment History" tab on subscription page.

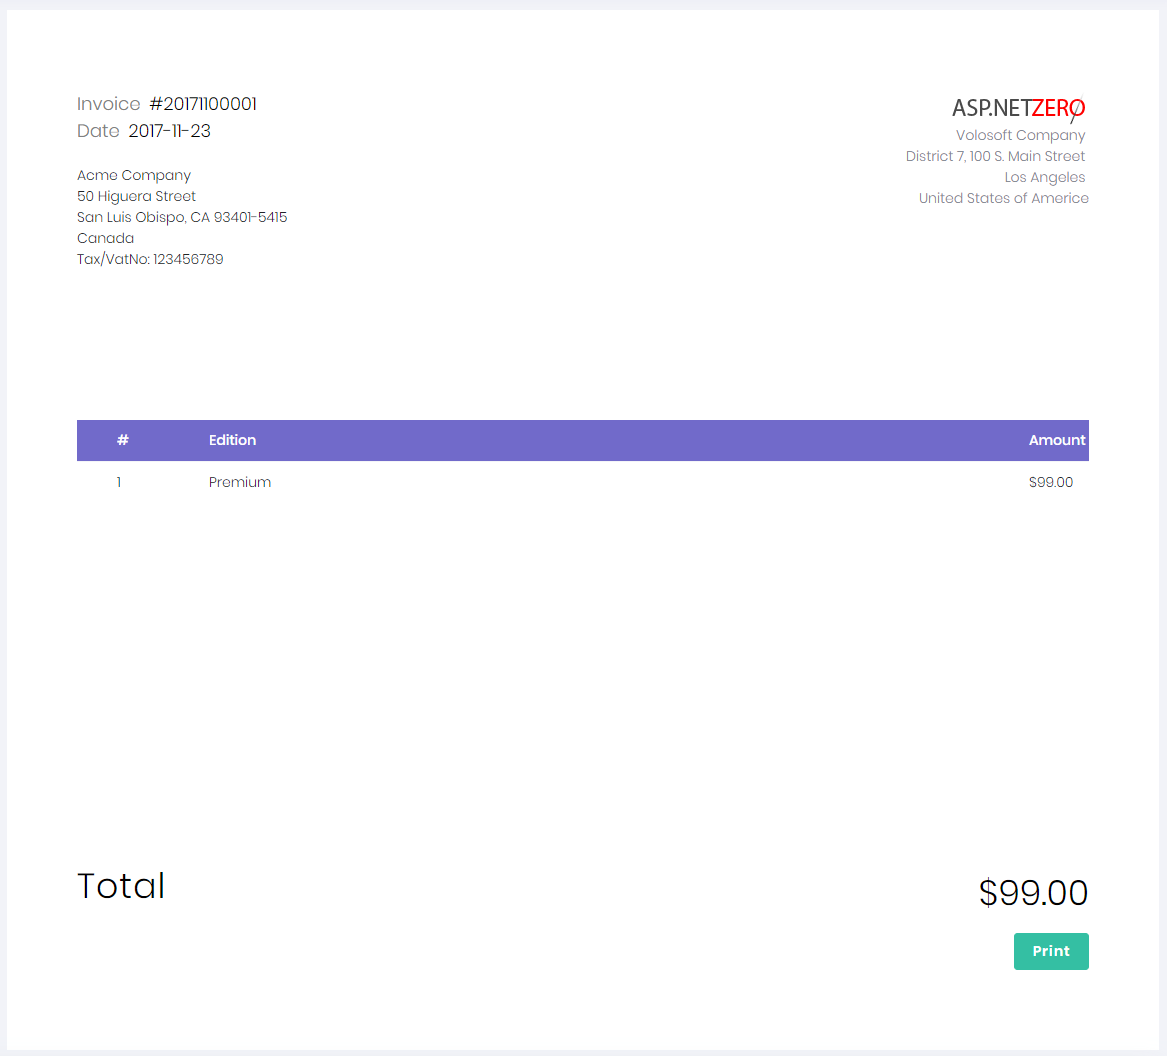
Tenants can also create & print invoices for these payments by clicking the "Show Invoice" button. System will automatically generate an invoice number and show the generated invoice. In order to use this function, both Host & Tenant must set invoice informations on host setting/tenant setting page.
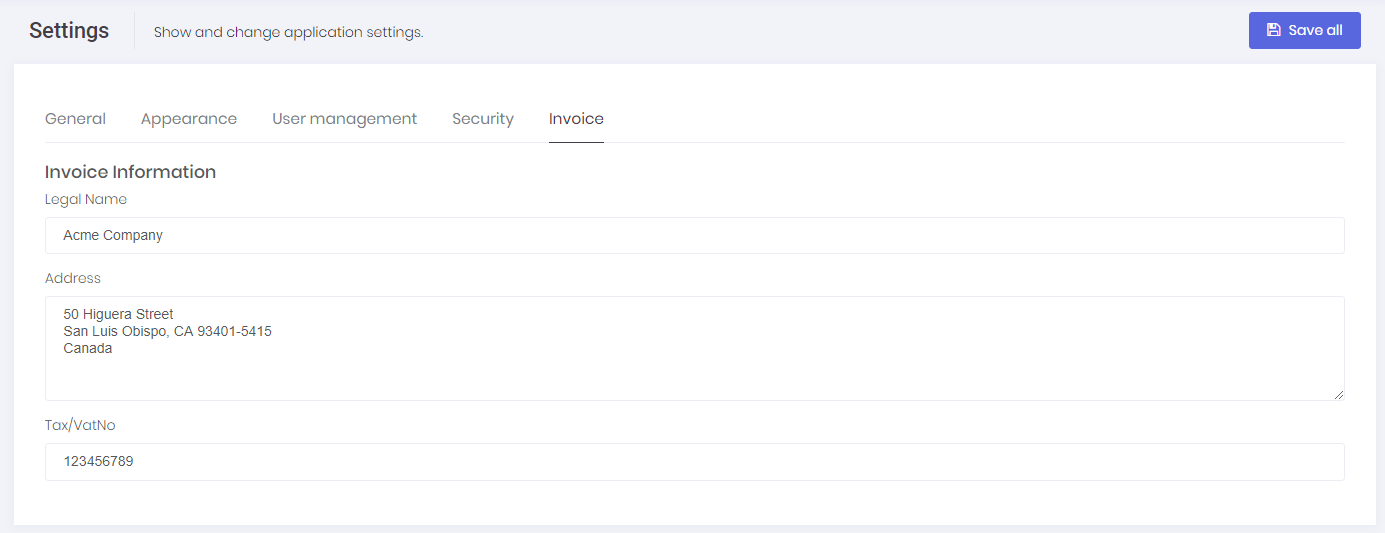
After all, invoices for payments related to subscription can be generated. You can see a sample invoice below:
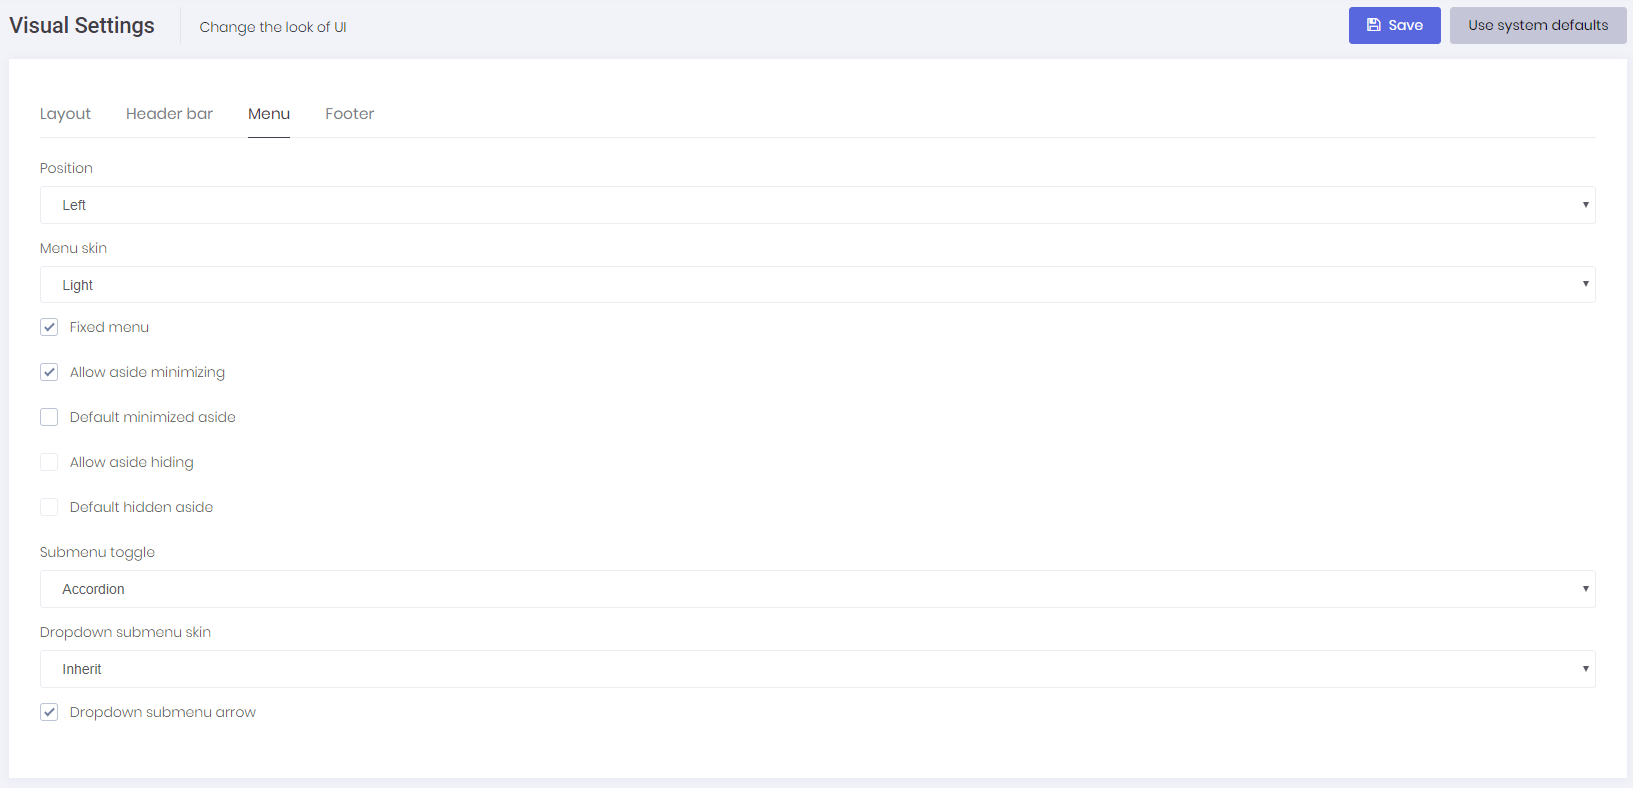
ASP.NET Zero's look of UI can be modified in visual settings page. This page is used to modify look of UI both for system and personal user accounts. If a user doesn't have permission to see this page, then user will see an item named "Visual Settings" in his personal menu.
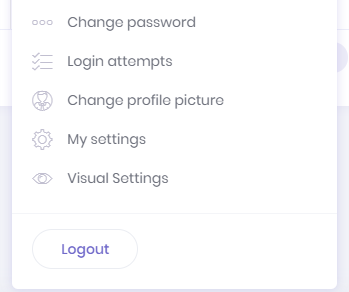
Users who have permission to see this page will see the same item in the application menu.
In this page, users can change visual settings for Layout, Header, Menu and Footer of the application.
Host settings page is used to configure some system settings:

Timezone is an important setting in this page. AspNet Zero can work in multiple zones. Each user can see dates and times in their own time zone. Timezone setting in this page allows you to set default time zone for the application including all tenants and users. Tenants and users can change time zone in their own settings. Timezone setting is available only if you are using UTC clock. See documentation to switch to UTC.
Security tab in host settings page contains password complexity settings. Host can define system wide password complexity settings in this tab. Each tenant can override this setting in tenant settings page.
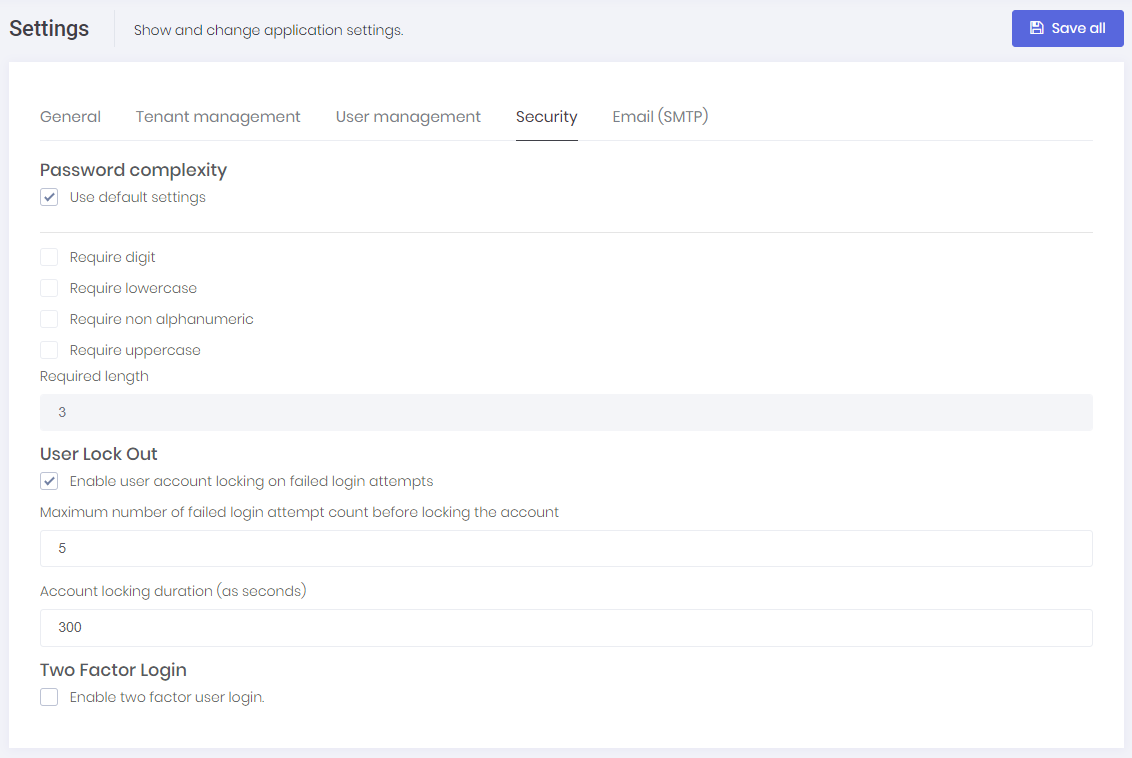
In a multi-tenant application, tenant settings are shown as below:
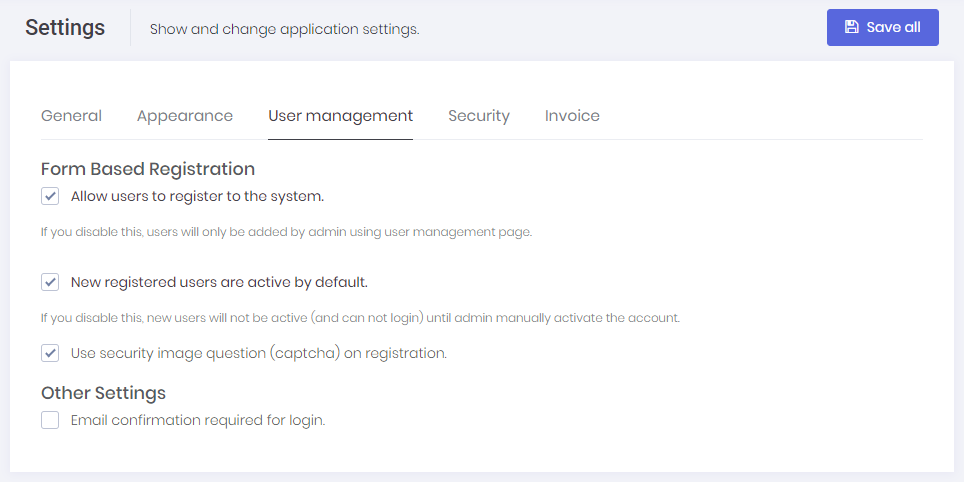
If we disable multi-tenancy, some host settings are also shown in this page (since there is no host setting page). Tenants can also define password complexity settings for their users or they can use password complexity settings defined by host user.
LDAP (Active Directory) Authentication is disabled by default. To make it work, we should disable multi-tenancy since LDAP auth is not used in a multi-tenant system normally. See server side to enable LDAP. Once we enable, we can see LDAP settings section in the settings page:
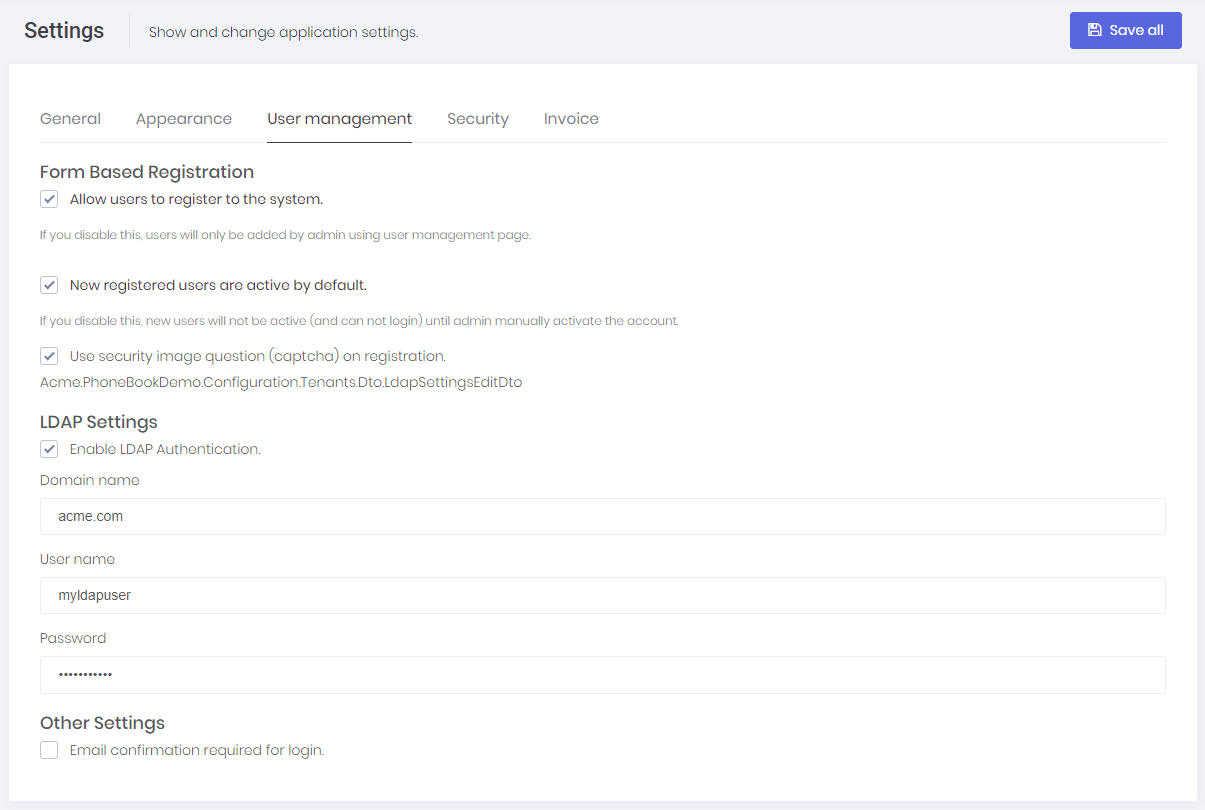
We can check "Enable LDAP Authentication" to enable it. If the server works in domain and application runs with a domain user or local system, then generally even no need to set Domain name, user and password. You can logout and then login with your domain user name and password. If not, you should set these credentials.
.Net Core Compability
LDAP Authentication is not supportted by .net core yet. Thus, it's designed to be conditional. If you are using .Net Framework (4.6+) then it will be available, otherwise it will be disabled.
Maintenance page is available to host side for multi tenant applications (for single tenant applications it's shown in tenant side) and shown as below:
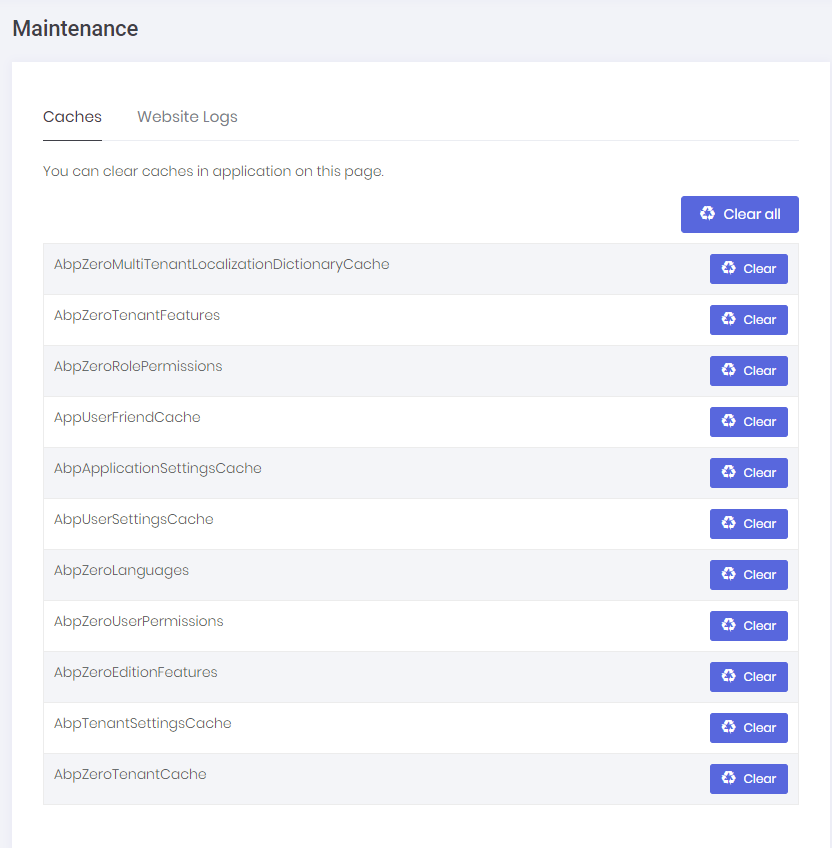
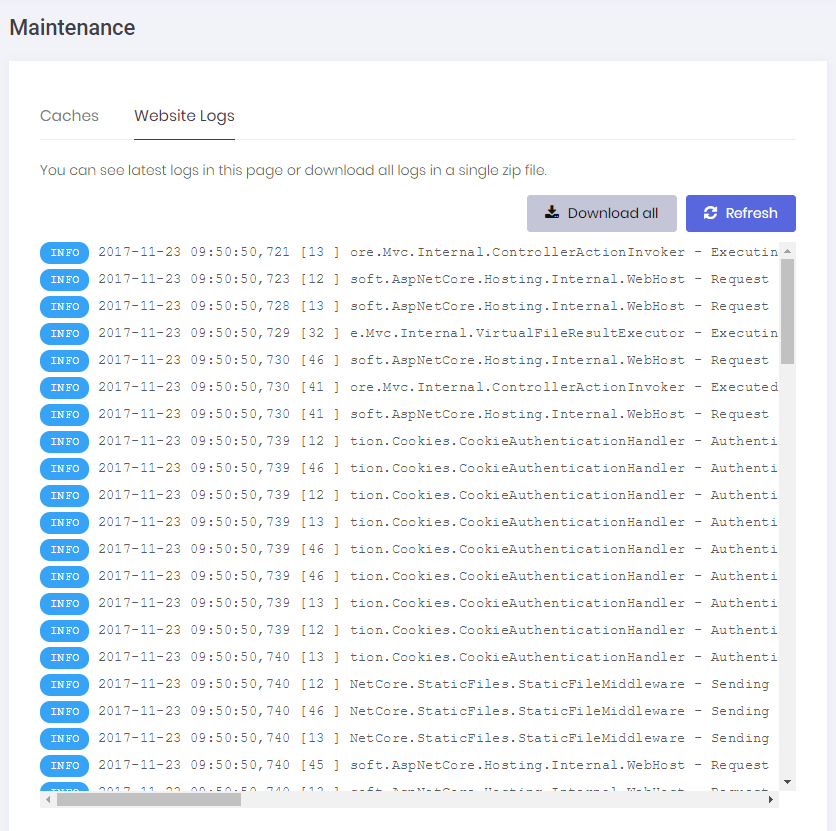
In the Caches tab, we can clear some or all caches. Clearing caches may be needed if you manually change database and want to refresh application cache. Website Logs tab is used to see and download logs:
ASP.NET Zero startup project also includes a sample dashboard. It's just for demo purposes, you can make it as a start point for your actual dashboard. It's implemented with app/main/dashboard.component in main.module.

Client gets all data from server, server generates random data.
Notification icon is located next to the language selection button. The number in the red circle shows unread notification count.
![]()
User can see 3 recent notifications by clicking this icon.
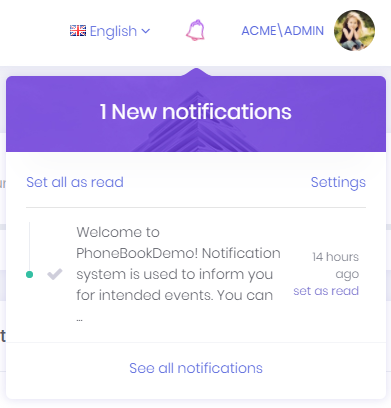
User can marks all notifications as read by clicking the "Set all as read" link or can mark a single notification by clicking the "set as read" link next to each notification.
Notifications are sent real-time using SignalR. In addition, a desktop push notification is shown when a notification is received.
"Settings" link opens notification settings dialog.
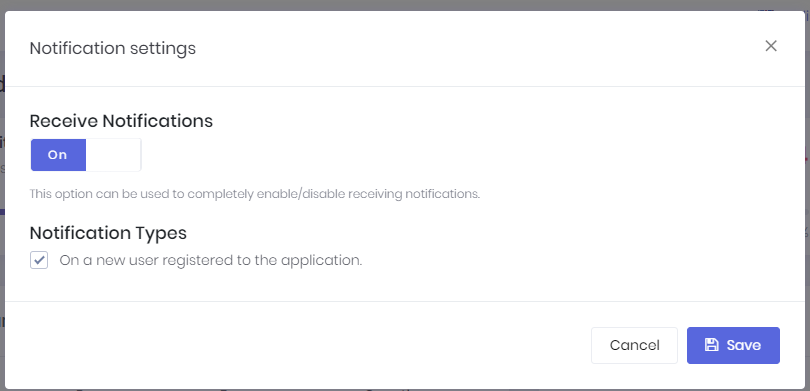
In this dialog there is a global setting for user to enable/disable receiving notifications. If this setting is enabled, then user can enable/disable each notification individually.
You can also define your custom notifications in the server side. See notifications documentation for detailed information.
All notifications of the user are listed in this page.

.Net Core Compability
Since SignalR is not ready yet for .net core, real time notifications will not work if you select .net core as your base framework.
Chat icon is located next to user's profile image on top right corner of the page. The number in the red circle shows total unread chat message count.
![]()
When user clicks this icon, chat panel appears on the right of page. This panel contains friends of user and list of blocked users.
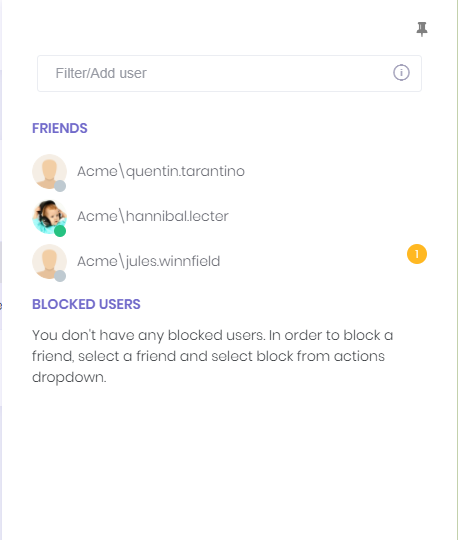
User can add new friends by writing the username into username textbox above friend list. If "Chat with other tenants" feature is enabled for tenant, users of other tenants can be added as a friend by writing [tenancy name]\[user name] (ex: Default\admin). If "Chat with host users" feature is enabled, host users can be added as friend by writing .\[user name] in the same textbox.
While online friends/users have a green circle on their profile image, offline friends/users have a gray circle.
User can pin or unpin the chat panel by clicking the pin icon on top right corner of the chat panel. Application tries to remember last state of chat panel and restores it when user login to application.
When a friend/user is selected, conversation panel is opened.
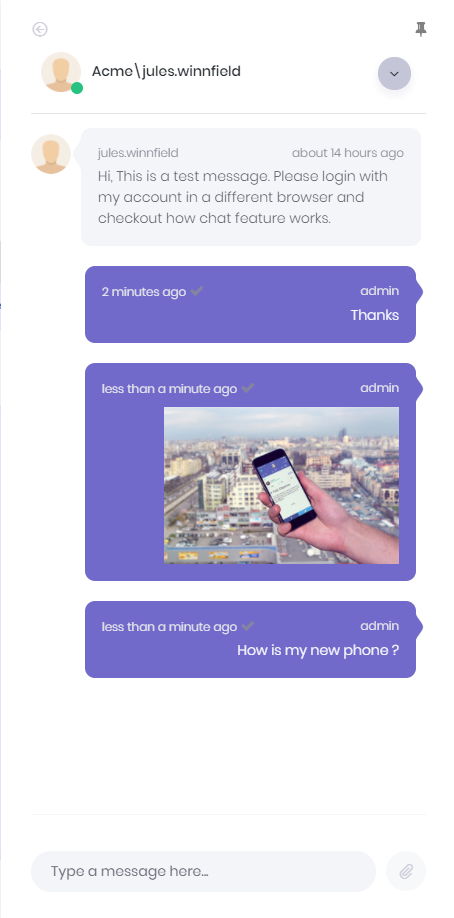
Chat system also allows sending images, files and link of current page to friends
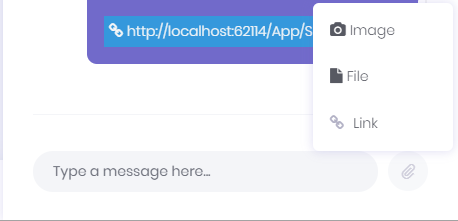
User can block or unblock friend/user in this area. There is a wrench icon right of the selected user's username. This icon opens an action menu and this menu contains block user or unblock user actions according to user's block status.
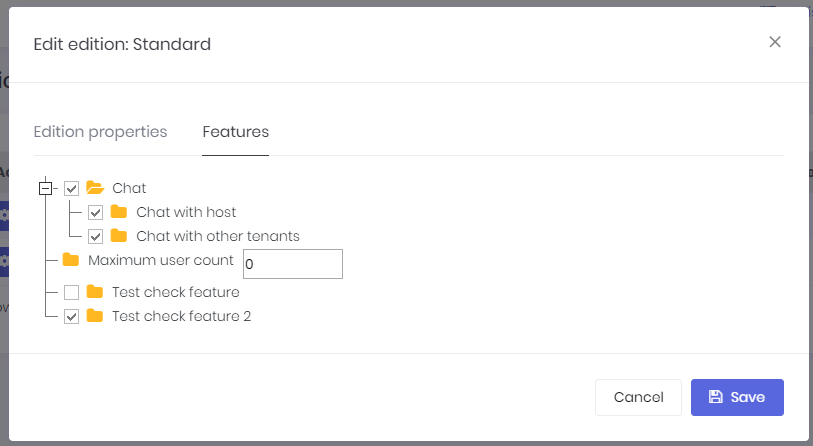
There are three chat features in the system. These are "Chat", "Chat with host", "Chat with other tenants". These features can be enabled/disabled per edition/tenant. By using these features host can enable/disable chat with other tenant's users or host users.
.Net Core Compability
Since SignalR is not ready yet for .net core, chat feature will not work if you select .net core as your base framework.
A user can click his name at top right corner to open user menu:
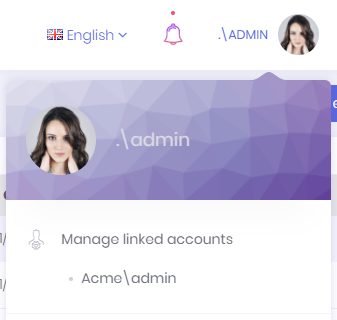
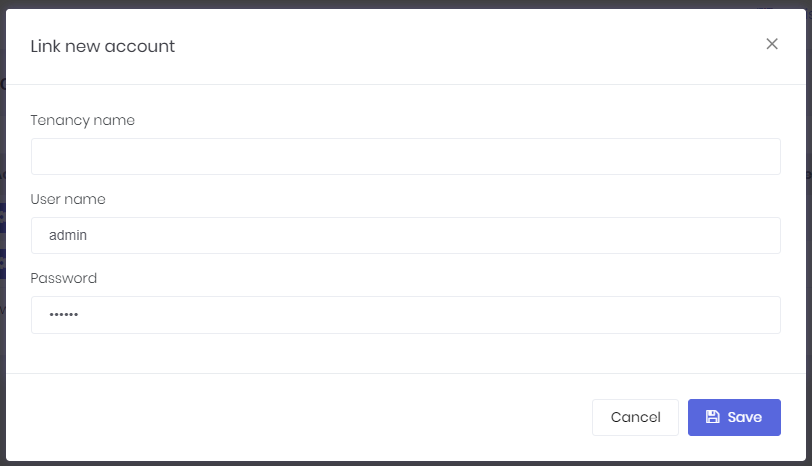
Linked accounts are used to link multiple accounts to each other. In this way, a user can easily navigate through his accounts using this feature.
User can link new accounts or delete already linked accounts by clicking the "Manage accounts" link.
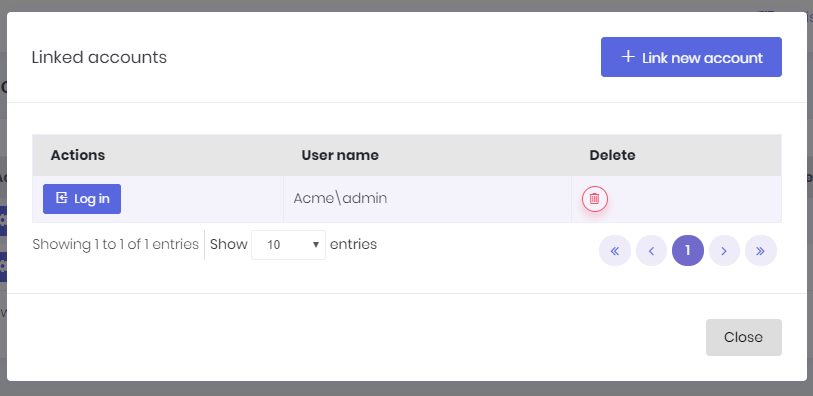
In order to link a new account, user must enter login credentials of related account.
My settings is used to change user profile settings:
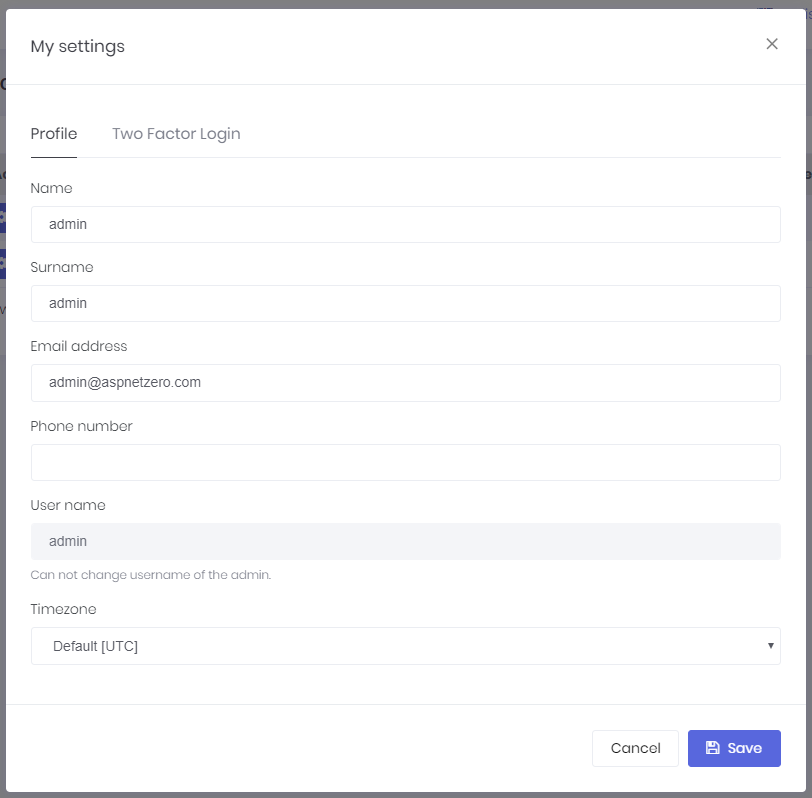
As shown here, admin user name can not be changed. It's considered a special user name since it's used in database migration seed. Other users can change their usernames.
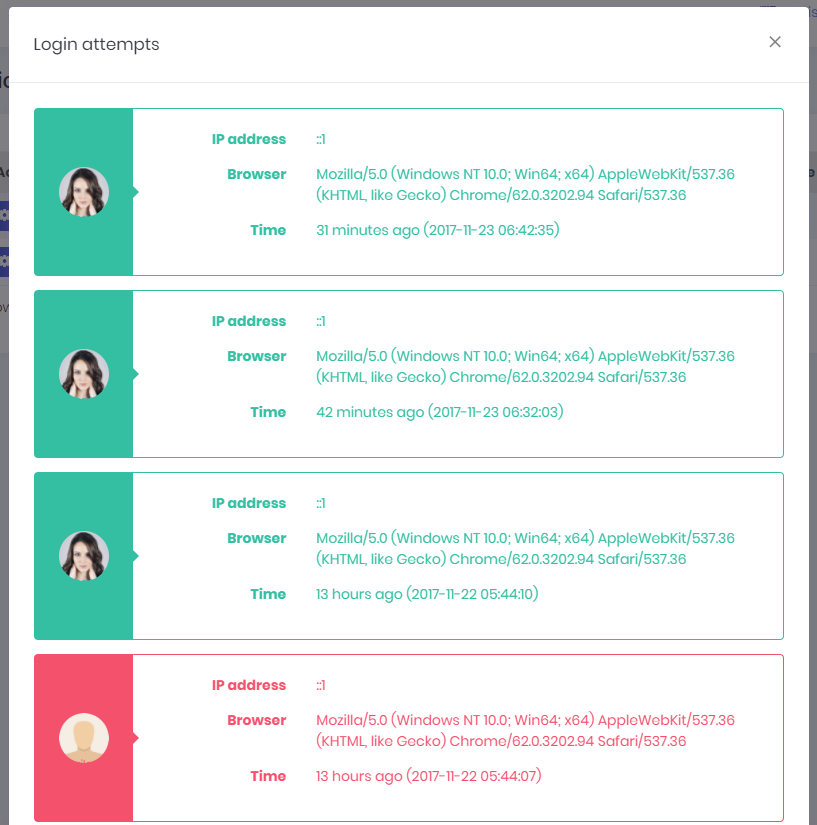
All login attempts (success of failed) are logged in the application. A user can see last login attempts for his/her account.
A user can change own profile picture. Currently, jpg/jpeg, gif and png files are supported, you can extend it.
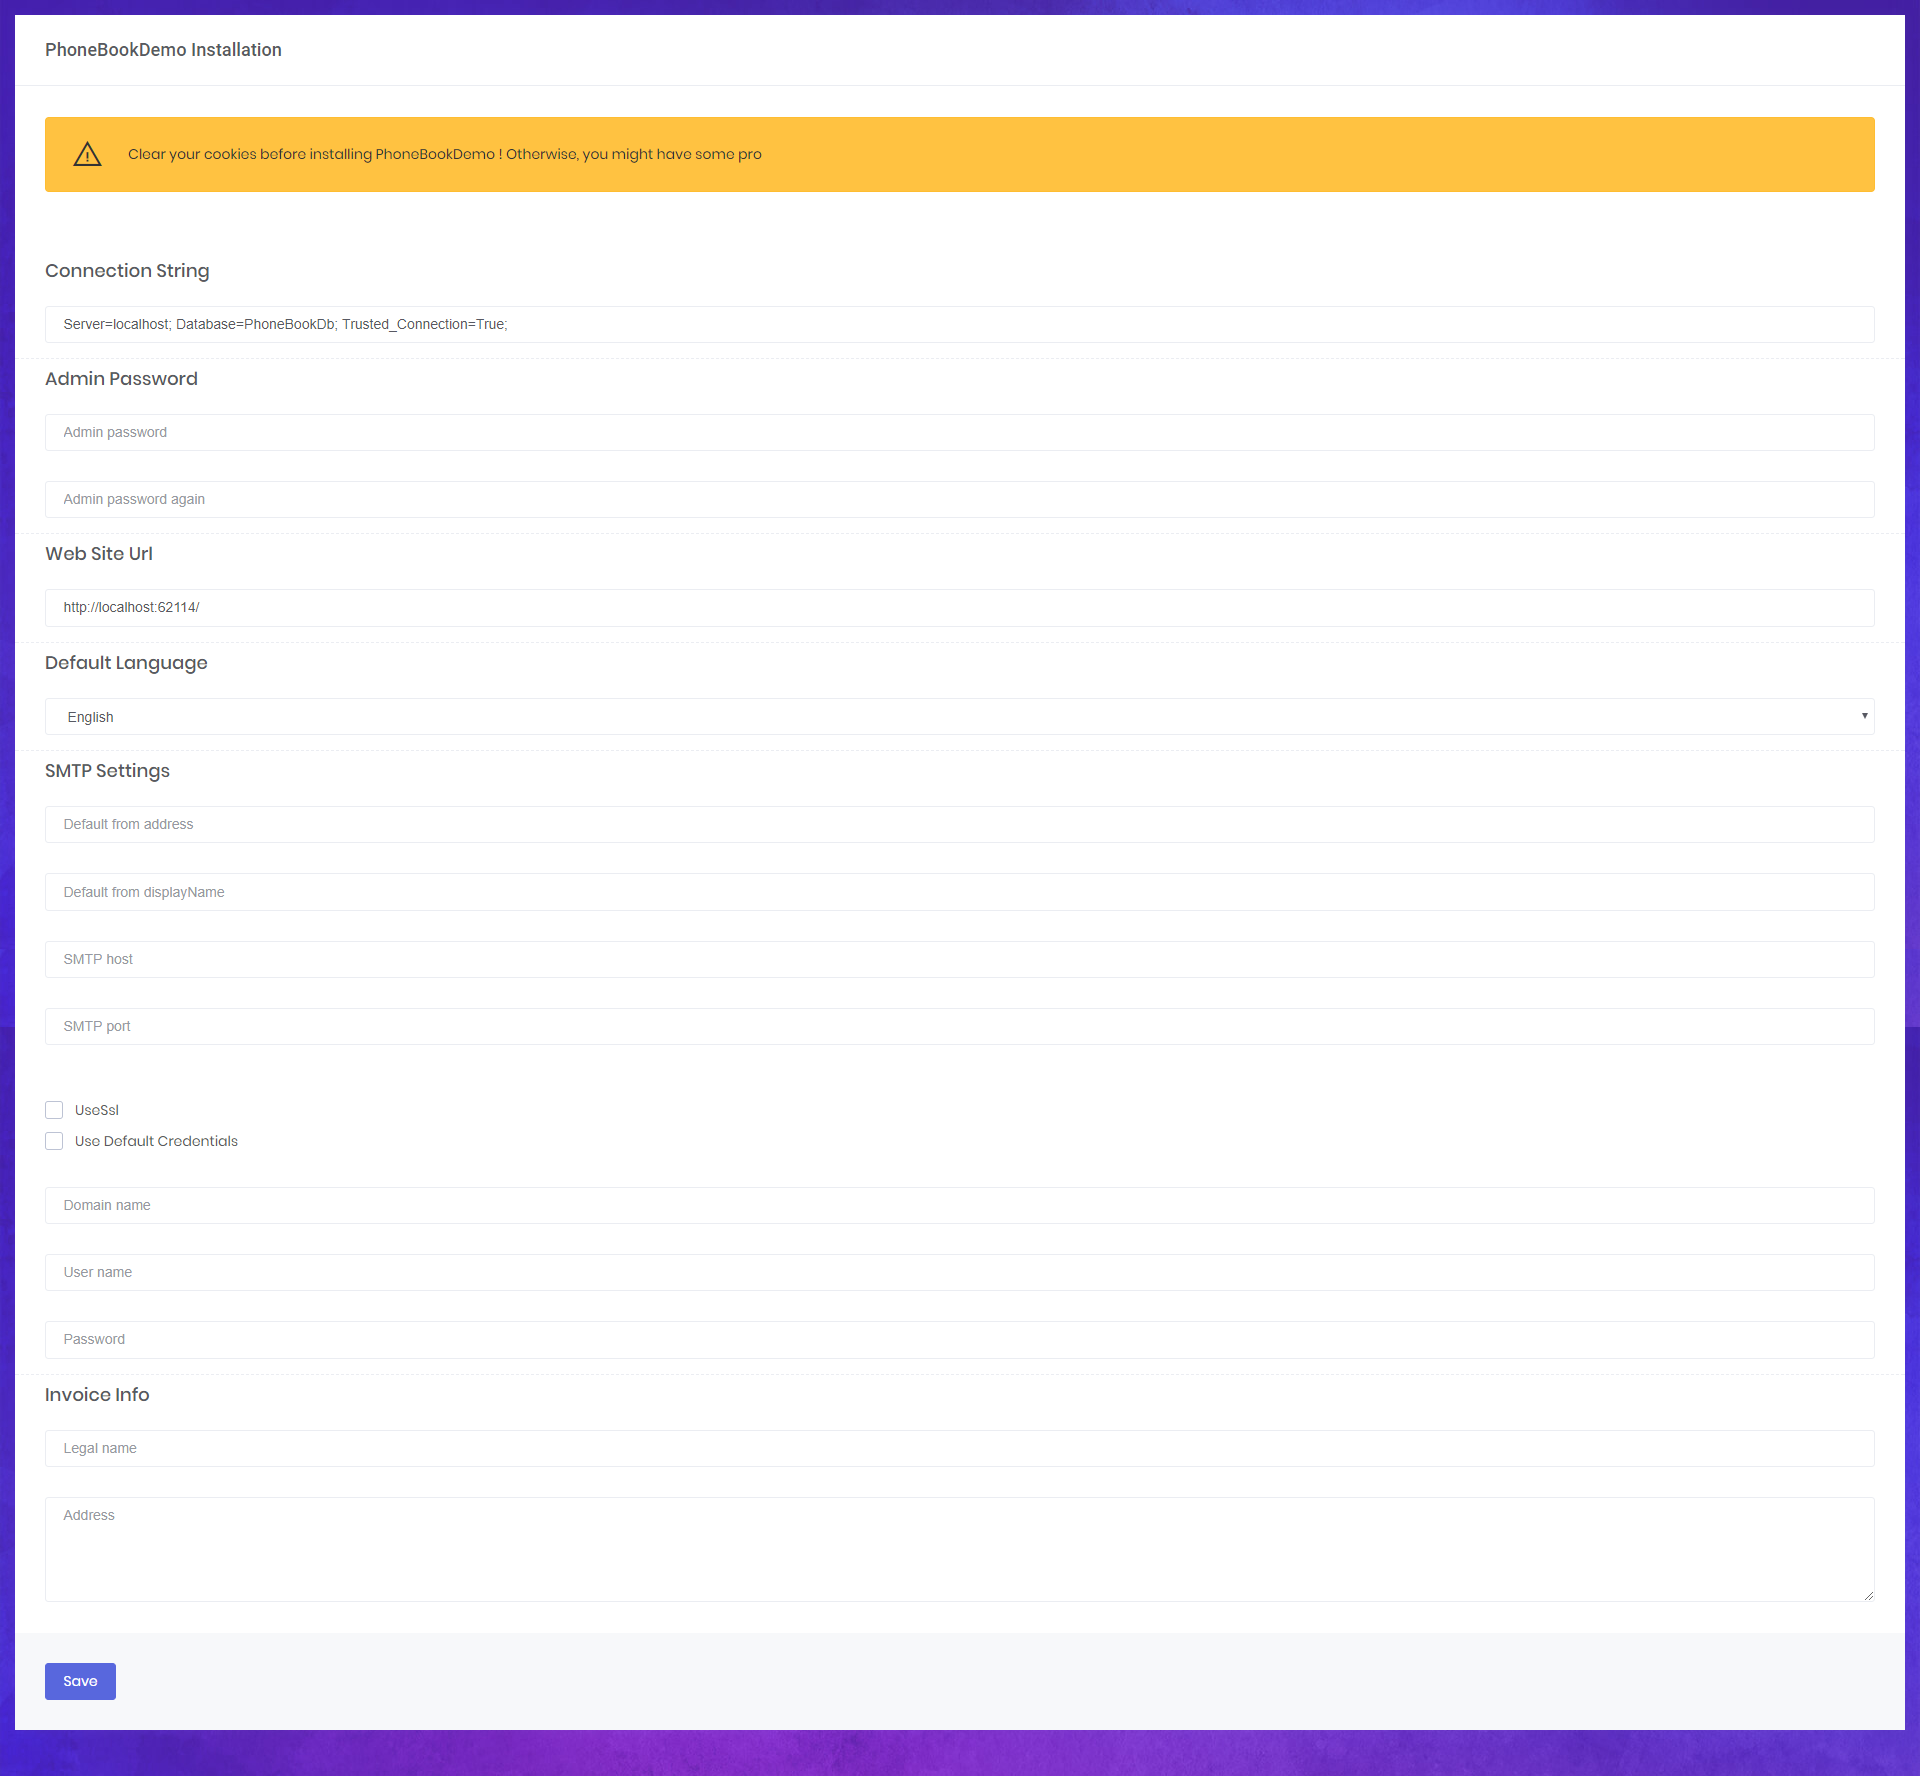
ASP.NET Zero application can be set-up using install page. This page is developed to create initial database, apply migrations and configure the application according to user's input on this page. Setup page can be accessed via http://yourwebsite.com/app/admin/install.
ASP.NET Zero solution supports both yarn and npm to obtain front end library dependencies (like angular and bootstrap). We suggest to use yarn because npm has some problems, yarn solves those problems and it is compatible with npm as well. You can easily add, update or remove packages on yarn's command line interface.
ASP.NET Zero uses angular-cli for the development and deployment. It's properly configured for angular-cli and already working. To run the application, open command line and type "npm start" command (or "npm run hmr" to enable hot module replacement feature). Once it's compiled and ready, you can go to http://localhost:4200 to open the application in your browser. See angular-cli official web site for more.
Since all communication to server made via AJAX requests, we are using a client side javascript layer to call server API. It's automatically generated by nswag tool using swagger. ASP.NET Zero solution is properly configured for nswag. When you change your server side services, all you need to do is to run nswag/refresh.bat file (or run the command inside it for a non-Windows OS) while server side (.Host project) is running.
Generated code is located in shared/service-proxies/service-proxies.ts file. You should not make manual change in this file since it will be overritten on the next code generation.
Refreshing Service Proxies
While Nswag automatically generate proxy files, it does not refresh service-proxies.module.ts. If you add a new service, you should manually add it to this file as like others.
If you inherit your components from AppComponentBase class, you can get many commonly used services as pre-injected (like localization, permission checker, feature checker, ui notify/message, settings and so on...). For example; you can just use l(...) function In views and this.l(...) function in component classes for localization. See pre-built components for example usages.
ASP.NET Zero User Interface is completely localized. ASP.NET Zero uses dynamic, database based, per-tenant localization.
XML files are used as base translation for desired languages (defined in the server side):
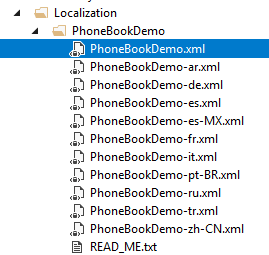
PhoneBook will be your ProjectName. You can add more XML files by copying one XML file and translate to desired language. See valid culture codes.
When you are adding a new localizable text, add it to the XML file of the default language then use in your application (Also, add translated values to corresponding XML files). No need to add it to database migration code since value in the XML file will be used as default. See server side documentation for more.
See localization and language management documentations for more information on localization.
ASP.NET Zero uses ABP's exception handling system. Thus, you don't need to handle & care about exceptions in most time. All server side exceptions are gracefuly handled and an appropriate message is shown to the user.
You can inject and use PermissionCheckerService to check user permissions. It's pre injected for AppComponentBase (permission field) and also you can use shortcut isGranted function. Permissions are defined in server side. See authorization documentation for more.
You can inject and use FeatureCheckerService to check tenant features. It's pre injected for AppComponentBase (feature field). Features are defined in server side. See feature management documentation for more.
You can inject and use SettingService to check settings. It's pre injected for AppComponentBase (setting field). Settings are defined in server side. See setting management documentation for more.
SignalR is properly configured and integrated to the startup project. Real time notification and chat systems use it. You can also direcly use SignalR in your applications.
Notice that; As the time being, SignalR has not been released for ASP.NET Core yet. We integrated OWIN to ASP.NET Core pipeline in order to use SignalR in the application.
See SignalR integration document for more information.
.Net Core Compability
Since SignalR is not ready yet for .net core, SignalR integration is disabled if you select .net core as your base framework.
ASP.NET Zero Angular UI uses the server side via token based authentication. Any application can authenticate and use any functionality in the application as API. For instance, you can create a mobile application consumes the same API. In this section, we'll demonstrate usage of the API from Postman (a Google Chrome extension).
We suggest you to disable two factor authentication for the user which will be used for remote authentication. Otherwise, two factor authentication flow should be implemented by the client. You can check account module source code to understand the flow. We assume that you have disabled two factor authentication for the admin user of default tenant since we will use it in this sample.
Following headers should be configured for all requests (Abp.TenantId is Id of the default tenant. This is not required for single tenant applications or if you want to work with host users):

Then we can send username and password as a POST request to http://localhost:22742/api/TokenAuth/Authenticate
In the returning response, accessToken will be used to authorize for the API.
After authenticate and get the access token, we can use it to call any authorized actions. All services are available to be used remotely. For example, we can use the User service to get a list of users:
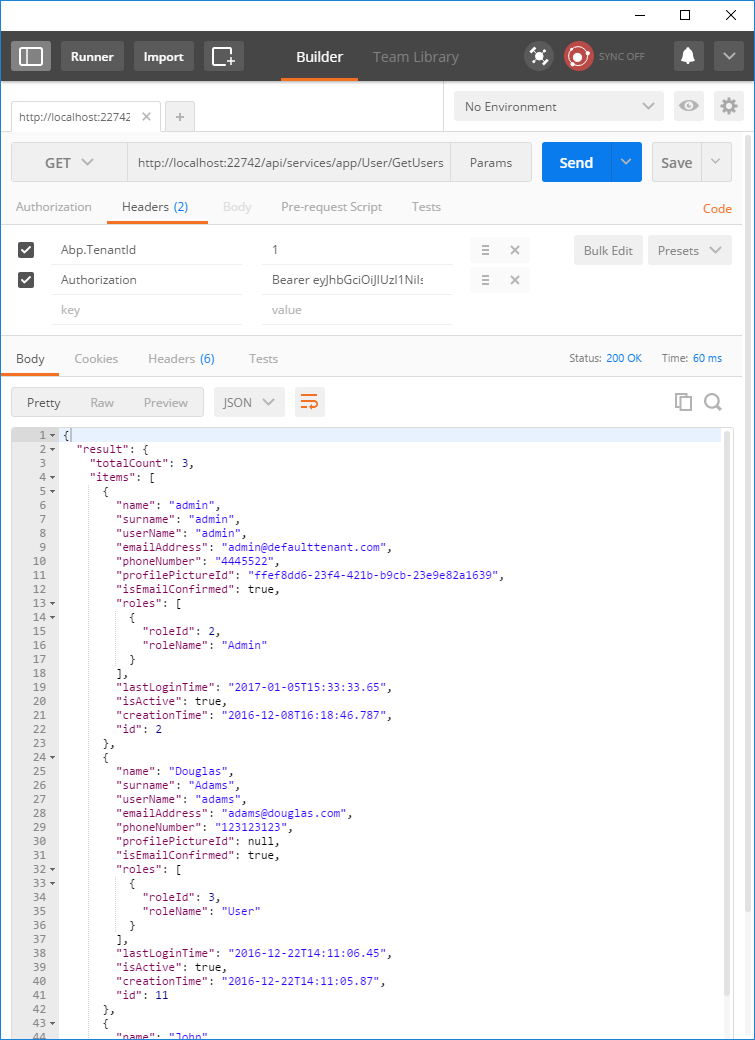
We sent a GET request to http://localhost:22742/api/services/app/User/GetUsers and added Authorization to the header as "Bearer <accessToken>". Returning JSON contains the list of users.
Swagger UI is integrated to ASP.NET Zero by default. You can browse swagger ui from http://localhost:22742/swagger/ui/ URL. Notice that this is server side URL of the application. In this page (which is the default page of server side API application) you can see all available API:
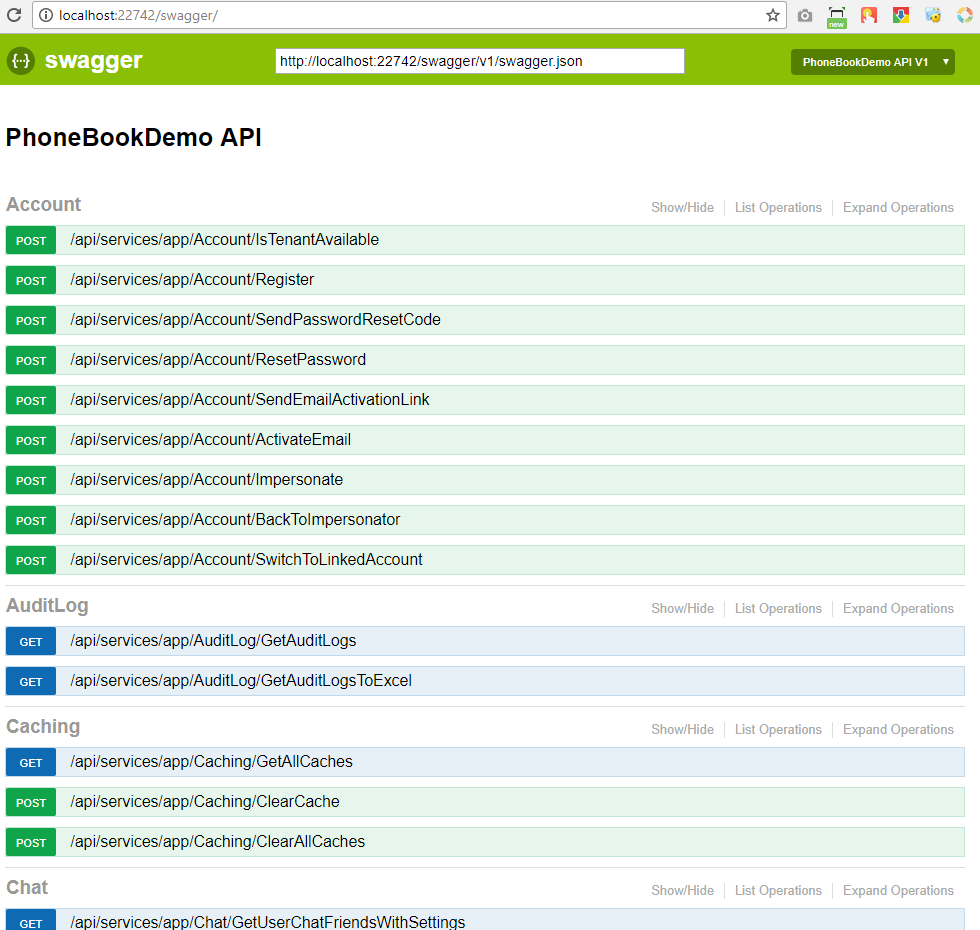
About Deployment
If you have merged Angular UI project into ASP.NET Core project then you only need to publish your .Host project.
Email Settings
If you don't configure email settings, some functions may not work (Like new tenant registration).
We are using angular-cli for development & deployment. Angular CLI has it's own build command that can be used to build your application:
ng build -prod
This command uses dist folder as output. Just remember to change assets/appconfig.json file with your own configuration.
Angular CLI uses AOT (Ahead of Time) Compilation by default. You can add --no-aot parameter to ng build command to disable it. But we recommend AOT since it has significiant performance gain.
After ng build command, dist folder contains all necessary files to create a web site under IIS. One important thing is that; Angular uses client side routing. If you refresh a page (F5) then IIS will handle the request and naturally can not find the requested path and returns a HTTP 404 error. We should configure IIS to redirect all requests to the index.html page (or, to the root path).
ASP.NET Zero Angular UI contains a web.config file. You can copy it to the web site's root folder to overcome the problem described above.
Many open source frameworks and libraries are used to build ASP.NET Zero project. Here, a list of all libraries: