` inside the return statement of the `AuthenticationScreen` component:
```tsx
Welcome
{!loggedIn ? (
{
onClickAuthenticate(event, "login")
}
}
>
Login
):
(
)}
```
Import `IonButton` by adding it to the import for other Ionic components in our app:
```typescript
import { IonContent, IonHeader, IonPage, IonTitle, IonToolbar, IonButton } from '@ionic/react';
```
Finally, add the `
` component to the Home component:
```typescript
const Home: React.FC = () => {
return (
Blank
Blank
);
};
```
### Step 5: Start Authentication
Here, we'll implement an `authenticate()` method inside the `AuthenticationScreen` component we created in the previous step.
To do this, first, add the following code just before the return statement of the `AuthenticationScreen()` component:
```typescript
const authenticate = useCallback(async (page: string) => {
try {
if (isPlatformWeb()) {
authgearWeb.startAuthentication({
redirectURI: REDIRECT_URI_WEB_AUTHENTICATE,
page: page,
});
} else {
const result = await authgearCapacitor.authenticate({
redirectURI: REDIRECT_URI_CAPACITOR,
page: page,
});
}
} catch (e) {
console.error("Authentication error:", e);
}
}, []);
```
Calling this `authenticate()` method will initialize an authentication flow. The `page` parameter can be used to specify whether to start the authentication flow on the `login` page or `signup` page.
Finally, implement a `onClickAuthenticate()` method that will call `authenticate` when the Login button is pressed:
```typescript
const onClickAuthenticate = useCallback(
(e: MouseEvent
, page: string) => {
e.preventDefault();
e.stopPropagation();
authenticate(page);
},
[authenticate]
);
```
Import `MouseEvent`:
```typescript
import type { MouseEvent } from "react";
```
#### Checkpoint
At this point, the complete code for **Home.tsx** should look like this:
```typescript
import {
IonContent,
IonHeader,
IonPage,
IonTitle,
IonToolbar,
IonButton,
} from "@ionic/react";
import React, { useState, useEffect, useCallback, useMemo } from "react";
import { Capacitor } from "@capacitor/core";
import type { MouseEvent } from "react";
import authgearWeb, {
SessionState,
WebContainer,
SessionStateChangeReason,
} from "@authgear/web";
import authgearCapacitor, {
CapacitorContainer,
Page,
} from "@authgear/capacitor";
import "./Home.css";
const CLIENT_ID = ";
const ENDPOINT = "";
const REDIRECT_URI_WEB_AUTHENTICATE = "http://localhost:8100/oauth-redirect";
const REDIRECT_URI_CAPACITOR = "com.authgear.example.capacitor://host/path";
function isPlatformWeb(): boolean {
return Capacitor.getPlatform() === "web";
}
function AuthenticationScreen() {
const [sessionState, setSessionState] = useState(() => {
if (isPlatformWeb()) {
return authgearWeb.sessionState;
}
return authgearCapacitor.sessionState;
});
const loggedIn = sessionState === "AUTHENTICATED";
const delegate = useMemo(() => {
const d = {
onSessionStateChange: (
container: WebContainer | CapacitorContainer,
_reason: SessionStateChangeReason
) => {
setSessionState(container.sessionState);
},
};
return d;
}, [setSessionState]);
useEffect(() => {
if (isPlatformWeb()) {
authgearWeb.delegate = delegate;
} else {
authgearCapacitor.delegate = delegate;
}
return () => {
if (isPlatformWeb()) {
authgearWeb.delegate = undefined;
} else {
authgearCapacitor.delegate = undefined;
}
};
}, [delegate]);
const configure = useCallback(async () => {
try {
if (isPlatformWeb()) {
await authgearWeb.configure({
clientID: CLIENT_ID,
endpoint: ENDPOINT,
sessionType: "refresh_token",
isSSOEnabled: false,
});
} else {
await authgearCapacitor.configure({
clientID: CLIENT_ID,
endpoint: ENDPOINT,
});
}
await postConfigure();
} catch (e) {
console.error("Authgear Configuration error:", e);
}
}, [CLIENT_ID, ENDPOINT]);
const postConfigure = useCallback(async () => {
const sessionState = isPlatformWeb()
? authgearWeb.sessionState
: authgearCapacitor.sessionState;
// if user has an existing session, call SDK fetchUserInfo method to get the user's info and refresh access token when necessary
if (sessionState === "AUTHENTICATED") {
if (isPlatformWeb()) {
await authgearWeb.fetchUserInfo();
} else {
await authgearCapacitor.fetchUserInfo();
}
}
}, []);
useEffect(() => {
configure();
}, []);
const authenticate = useCallback(async (page: string) => {
try {
if (isPlatformWeb()) {
authgearWeb.startAuthentication({
redirectURI: REDIRECT_URI_WEB_AUTHENTICATE,
page: page,
});
} else {
const result = await authgearCapacitor.authenticate({
redirectURI: REDIRECT_URI_CAPACITOR,
page: page,
});
}
} catch (e) {
console.error("Authentication error:", e);
}
}, []);
const onClickAuthenticate = useCallback(
(e: MouseEvent, page: string) => {
e.preventDefault();
e.stopPropagation();
authenticate(page);
},
[authenticate]
);
return (
<>
Welcome
{!loggedIn ? (
{
onClickAuthenticate(event, "login");
}}
>
Login
) : (
)}
);
}
const Home: React.FC = () => {
return (
Blank
Blank
);
};
export default Home;
```
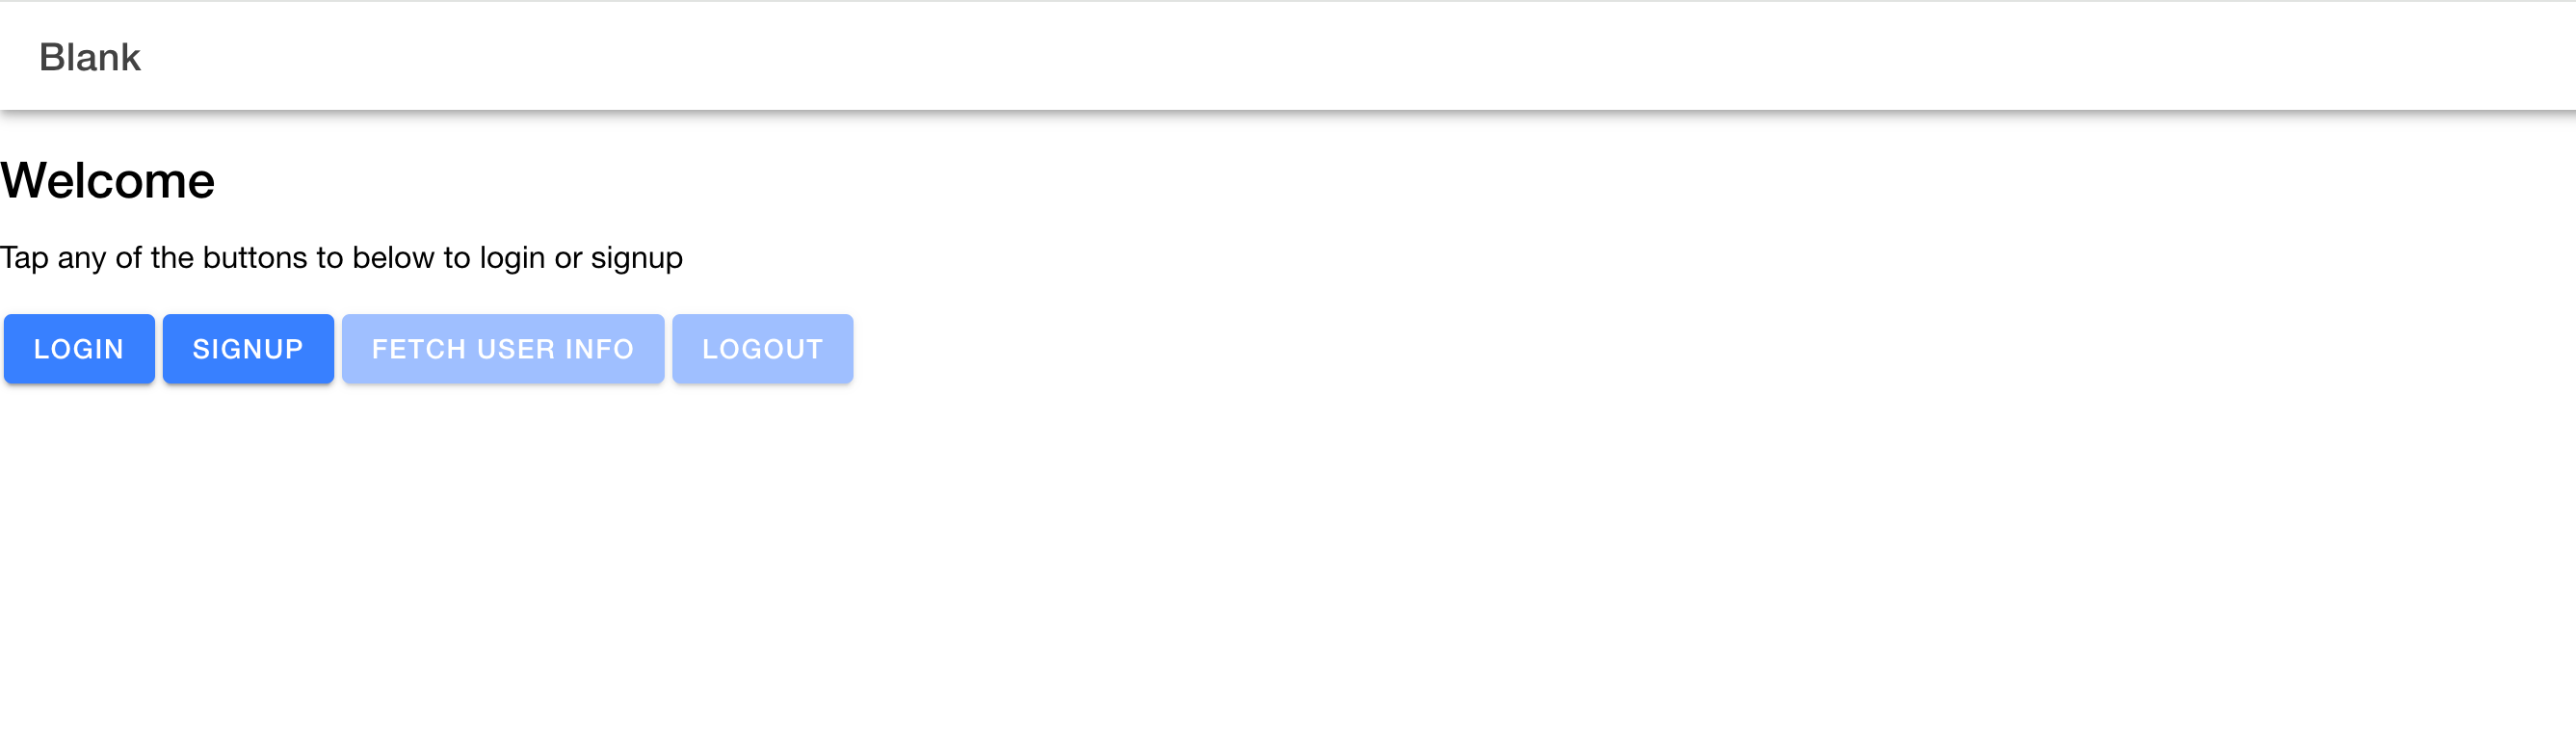
Save your work and run the command to serve your project on the web or [build it for iOS or Android](ionic-sdk.md#step-10-deploy-app-to-mobile).
You should be able to see the Authentication UI after you click on the Login button. However, you can't complete the authentication flow because we're yet to handle the redirect.
### Step 6: Handle Redirect in App
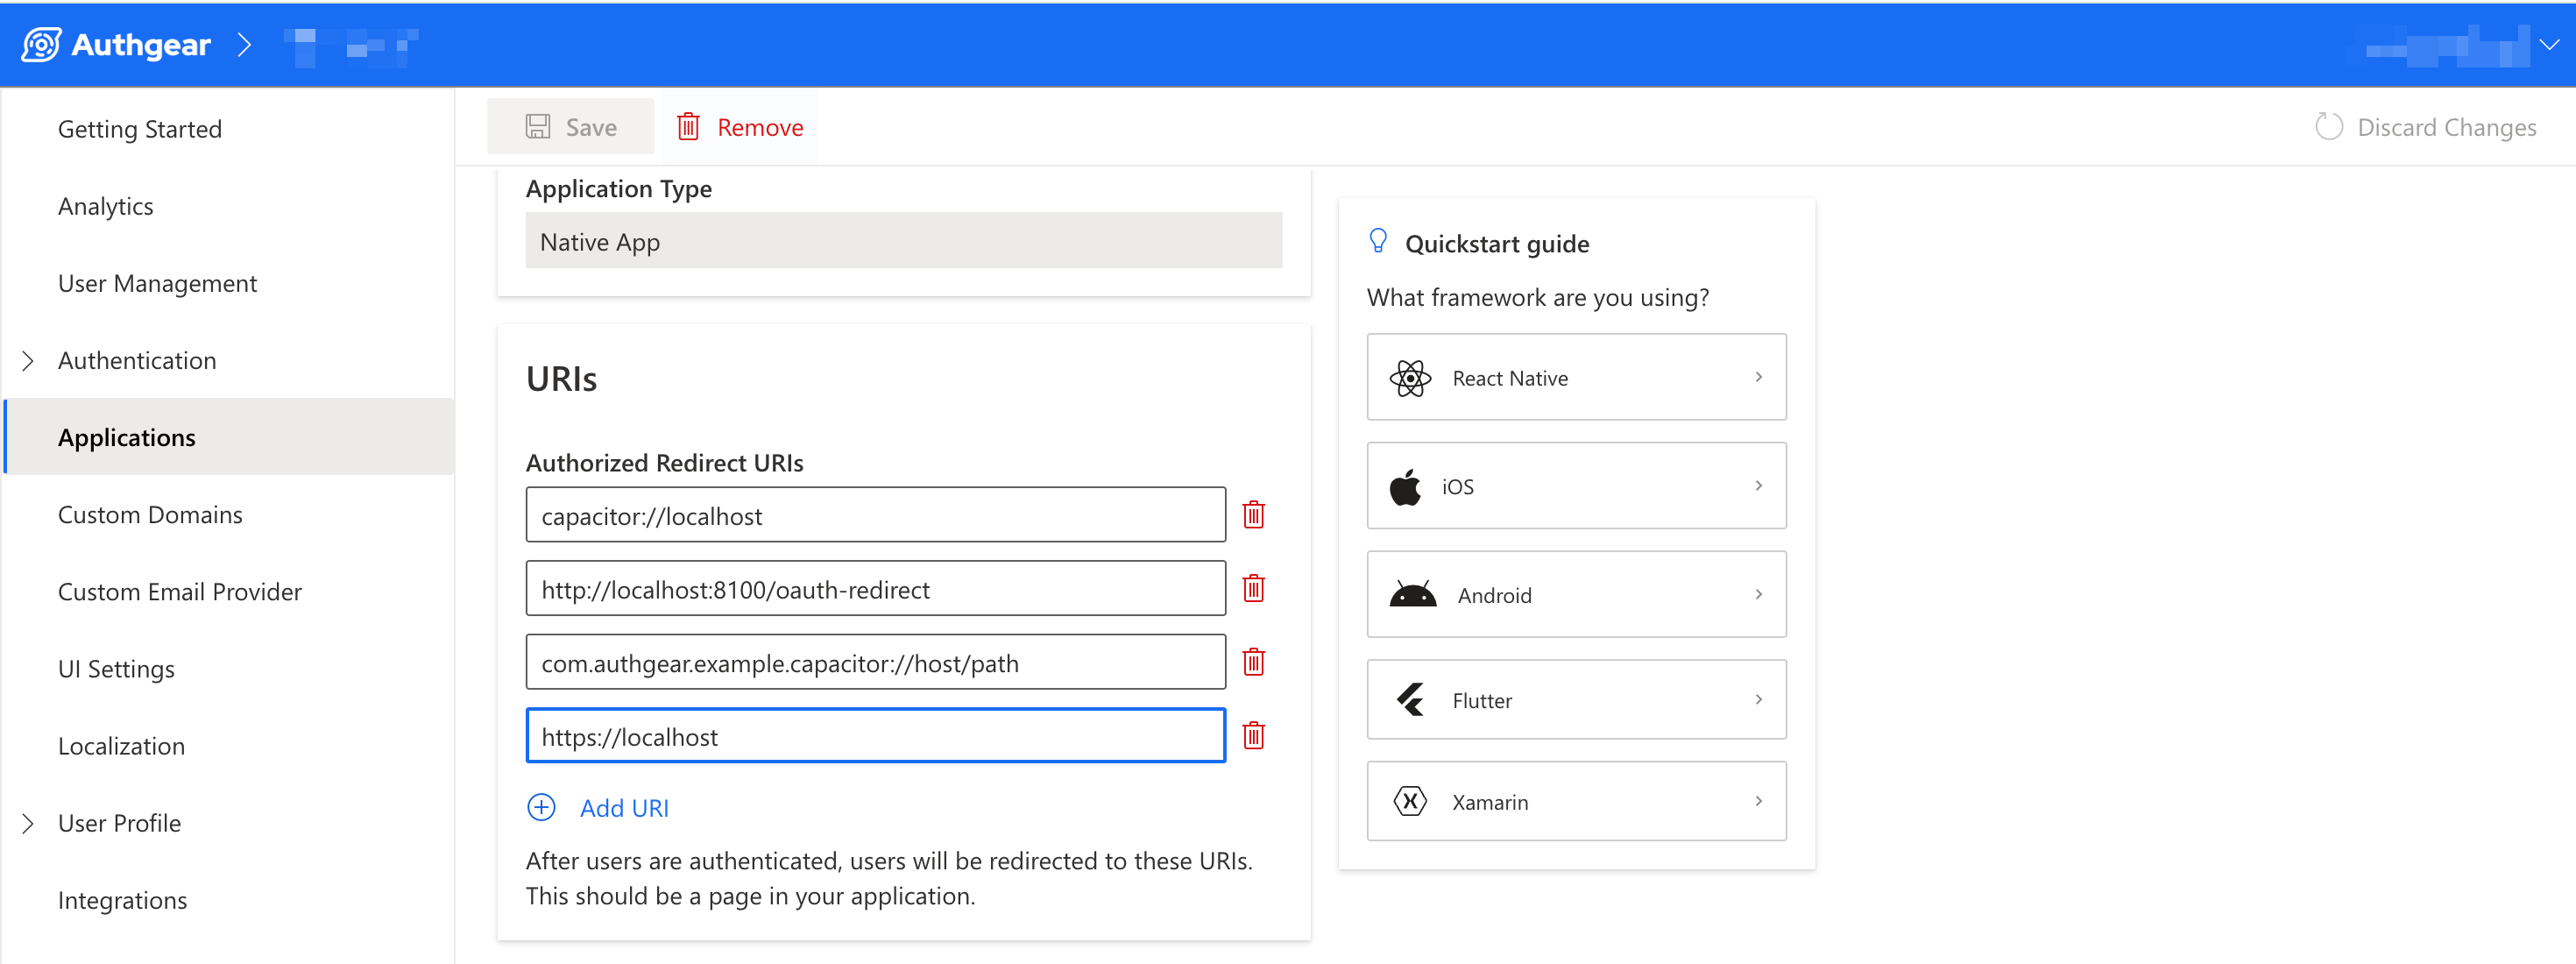
At the end of an authentication flow, your users will be redirected to the URL you specified in `redirectURI`. In this step, we'll set up the routes and code to process redirects to the URIs.
To handle redirect on web, create a new file **OAuthRedirect.tsx** in **src/pages/** and add the following code to it:
```typescript
import { useCallback, useEffect } from "react";
import authgearWeb from "@authgear/web";
import { useIonRouter } from "@ionic/react";
export default function OAuthRedirect() {
const router = useIonRouter();
const finishAuthentication = useCallback(async () => {
const CLIENT_ID = "";
const ENDPOINT = "";
try {
await authgearWeb.configure({
clientID: CLIENT_ID,
endpoint: ENDPOINT,
sessionType: "refresh_token",
});
await authgearWeb.finishAuthentication();
router.push("/", "root", "replace");
} catch (e) {
console.error(e);
}
}, [router]);
useEffect(() => {
finishAuthentication();
}, [finishAuthentication]);
return (
Finishing authentication. Open the inspector to see if there is any error.
);
}
```
Change the values for `CLIENT_ID` and `ENDPOINT` in the above code to the correct value from your Authgear application configuration page.
Now open **src/App.tsx** and create a new route for `OAuthRedirect` using the following code:
```typescriptreact
```
Remember to import `OAuthRedirect` in **App.tsx:**
```typescript
import OAuthRedirect from './pages/OAuthRedirect';
```
To handle redirect in the Android project, add the following code to **android/app/src/main/AndroidManifest.xml**:
```xml
```
At this point, if you build your project and run it, you should be able to login successfully.
### Step 7: Implement Logout
To implement Logout, we'll add a Logout button, an onClick handler, and a method that will call the logout() method of the Authgear SDK.
Add a Logout button to `AuthenticationScreen` component just below `Welcome user
`:
```tsx
Logout
```
Next, add a `logout()` method to `AuthenticationScreen` component:
```typescript
const logout = useCallback(async () => {
try {
if (isPlatformWeb()) {
await authgearWeb.logout({
redirectURI: window.location.origin + "/",
});
} else {
await authgearCapacitor.logout();
}
} catch (e) {
console.error("Logout error:", e);
}
}, []);
```
Finally, implement the onClick method in `AuthenticationScreen` :
```typescript
const onClickLogout = useCallback(
(e: MouseEvent) => {
e.preventDefault();
e.stopPropagation();
logout();
},
[logout]
);
```
### Step 8: Get UserInfo
The Authgear SDK offers a `fetchUserInfo()` method that can return details such as User ID, email, phone number, and so on about the current user. In this step, we'll demonstrate how to call `fetchUserInfo` in our app.
First, add a **Fetch User Info** button to your `AuthenticationScreen` component just below the Logout button:
```tsx
Fetch User Info
```
Next, add a `fetchUserInfo()` method to the `AuthenticationScreen` component:
```typescript
const fetchUserInfo = useCallback(async () => {
try {
const authgear = isPlatformWeb() ? authgearWeb : authgearCapacitor;
const userInfo = await authgear.fetchUserInfo();
alert(JSON.stringify(userInfo, null, 2)); // Keep for demonstration, but consider a better way to display info
} catch (e) {
console.error("FetchUserInfo error:", e);
}
}, []);
```
Finally, add the method that will handle click on the **Fetch User Info** button:
```typescript
const onClickFetchUserInfo = useCallback(
(e: MouseEvent) => {
e.preventDefault();
e.stopPropagation();
fetchUserInfo();
},
[fetchUserInfo]
);
```
### Step 9: Open User Settings Screen
Authgear provides a default User Settings page where your users can view details about their profile and change details or security settings like their password.
To allow users to open the settings page from your app, first add a **User Settings** button to you r `AuthenticationScreen` component just below the **Fetch User Info** button:
```tsx
User Settings
```
Now add an `openUserSettings()` method in `AuthenticationScreen` component:
```typescript
const openUserSettings = useCallback(async () => {
try {
if (isPlatformWeb()) {
authgearWeb.open(Page.Settings);
} else {
authgearCapacitor.open(Page.Settings);
}
} catch (e) {
console.error("Error:", e)
}
}, []);
```
Finally, implement the onClick method for the **User Settings** button:
```typescript
const onClickUserSettings = useCallback(
(e: MouseEvent) => {
e.preventDefault();
e.stopPropagation();
openUserSettings();
},
[logout]
);
```
### Step 10: Deploy app to mobile
To deploy your app to a mobile device (for example Android) run the following commands:
First build your project by running:
```sh
npm run build
```
Then sync the changes to the mobile project using this command:
```sh
npx cap sync
```
You can run the project by opening the `android` project folder in Android Studio or `ios` folder in Xcode.
You can quickly open the project in Android Studio using the following command:
```sh
npx cap open android
```
Or run the following command to open your project in Xcode for iOS:
```sh
npx cap open ios
```
Once your project builds successfully, you can try the Login, Signup, Fetch User Info, and Logout buttons.
## Conclusion
Authgear Capacitor SDK makes it easier to use Authgear in your Ionic application. It provides many helpful methods and interfaces for interacting with the Authgear service from your Ionic application. To learn more about the SDK check [the SDK Reference](https://authgear.github.io/authgear-sdk-js/docs/capacitor/). Also, check out the complete repo for the Authgear Ionic SDK example app [here](https://github.com/authgear/authgear-sdk-js/tree/master/example/capacitor).