[](https://cursor.com/en/install-mcp?name=aws-knowledge-mcp&config=eyJ1cmwiOiJodHRwczovL2tub3dsZWRnZS1tY3AuZ2xvYmFsLmFwaS5hd3MifQ==)
[](https://vscode.dev/redirect/mcp/install?name=aws-knowledge-mcp&config=%7B%22type%22%3A%22http%22%2C%22url%22%3A%22https%3A%2F%2Fknowledge-mcp.global.api.aws%22%7D) | | [AWS Documentation MCP Server](src/aws-documentation-mcp-server) | Get latest AWS docs and API references | [](https://kiro.dev/launch/mcp/add?name=awslabs.aws-documentation-mcp-server&config=%7B%22command%22%3A%22uvx%22%2C%22args%22%3A%5B%22awslabs.aws-documentation-mcp-server%40latest%22%5D%2C%22env%22%3A%7B%22FASTMCP_LOG_LEVEL%22%3A%22ERROR%22%2C%22AWS_DOCUMENTATION_PARTITION%22%3A%22aws%22%7D%7D)
[](https://cursor.com/en/install-mcp?name=awslabs.aws-documentation-mcp-server&config=eyJjb21tYW5kIjoidXZ4IGF3c2xhYnMuYXdzLWRvY3VtZW50YXRpb24tbWNwLXNlcnZlckBsYXRlc3QiLCJlbnYiOnsiRkFTVE1DUF9MT0dfTEVWRUwiOiJFUlJPUiIsIkFXU19ET0NVTUVOVEFUSU9OX1BBUlRJVElPTiI6ImF3cyJ9LCJkaXNhYmxlZCI6ZmFsc2UsImF1dG9BcHByb3ZlIjpbXX0%3D)
[](https://insiders.vscode.dev/redirect/mcp/install?name=AWS%20Documentation%20MCP%20Server&config=%7B%22command%22%3A%22uvx%22%2C%22args%22%3A%5B%22awslabs.aws-documentation-mcp-server%40latest%22%5D%2C%22env%22%3A%7B%22FASTMCP_LOG_LEVEL%22%3A%22ERROR%22%2C%22AWS_DOCUMENTATION_PARTITION%22%3A%22aws%22%7D%2C%22disabled%22%3Afalse%2C%22autoApprove%22%3A%5B%5D%7D) | ### 🏗️ Infrastructure & Deployment Build, deploy, and manage cloud infrastructure with Infrastructure as Code best practices. | Server Name | Description | Install | |-------------|-------------|---------| | [AWS IaC MCP Server](src/aws-iac-mcp-server) | Complete Infrastructure as Code toolkit with CloudFormation documentation access, CDK best practices guidance, construct examples, security validation, and deployment troubleshooting | [](https://kiro.dev/launch/mcp/add?name=awslabs.aws-iac-mcp-server&config=%7B%22command%22%3A%22uvx%22%2C%22args%22%3A%5B%22awslabs.aws-iac-mcp-server%40latest%22%5D%2C%22env%22%3A%7B%22AWS_PROFILE%22%3A%22your-aws-profile%22%2C%22FASTMCP_LOG_LEVEL%22%3A%22ERROR%22%7D%7D)
[](https://cursor.com/en/install-mcp?name=awslabs.aws-iac-mcp-server&config=eyJjb21tYW5kIjoidXZ4IGF3c2xhYnMuYXdzLWlhYy1tY3Atc2VydmVyQGxhdGVzdCIsImVudiI6eyJBV1NfUFJPRklMRSI6InlvdXItYXdzLXByb2ZpbGUiLCJGQVNUTUNQX0xPR19MRVZFTCI6IkVSUk9SIn0sImRpc2FibGVkIjpmYWxzZSwiYXV0b0FwcHJvdmUiOltdfQ==IiwiZW52Ijp7IkFXU19QUk9GSUxFIjoieW91ci1hd3MtcHJvZmlsZSIsIkZBU1RNQ1BfTE9HX0xFVkVMIjoiRVJST1IifSwiZGlzYWJsZWQiOmZhbHNlLCJhdXRvQXBwcm92ZSI6W119)
[](https://insiders.vscode.dev/redirect/mcp/install?name=AWS%20IaC%20MCP%20Server&config=%7B%22command%22%3A%22uvx%22%2C%22args%22%3A%5B%22awslabs.aws-iac-mcp-server%40latest%22%5D%2C%22env%22%3A%7B%22AWS_PROFILE%22%3A%22your-aws-profile%22%2C%22FASTMCP_LOG_LEVEL%22%3A%22ERROR%22%7D%2C%22disabled%22%3Afalse%2C%22autoApprove%22%3A%5B%5D%7D) | | [AWS Cloud Control API MCP Server](src/ccapi-mcp-server) | Direct AWS resource management with security scanning and best practices | [](https://kiro.dev/launch/mcp/add?name=awslabs.ccapi-mcp-server&config=%7B%22command%22%3A%22uvx%22%2C%22args%22%3A%5B%22awslabs.ccapi-mcp-server%40latest%22%5D%2C%22env%22%3A%7B%22AWS_PROFILE%22%3A%22your-aws-profile%22%2C%22AWS_REGION%22%3A%22us-east-1%22%2C%22FASTMCP_LOG_LEVEL%22%3A%22ERROR%22%7D%7D)
[](https://cursor.com/en/install-mcp?name=awslabs.ccapi-mcp-server&config=eyJjb21tYW5kIjoidXZ4IGF3c2xhYnMuY2NhcGktbWNwLXNlcnZlckBsYXRlc3QiLCJlbnYiOnsiQVdTX1BST0ZJTEUiOiJ5b3VyLWF3cy1wcm9maWxlIiwiQVdTX1JFR0lPTiI6InVzLWVhc3QtMSIsIkZBU1RNQ1BfTE9HX0xFVkVMIjoiRVJST1IifSwiZGlzYWJsZWQiOmZhbHNlLCJhdXRvQXBwcm92ZSI6W119)
[](https://insiders.vscode.dev/redirect/mcp/install?name=AWS%20Cloud%20Control%20API%20MCP%20Server&config=%7B%22command%22%3A%22uvx%22%2C%22args%22%3A%5B%22awslabs.ccapi-mcp-server%40latest%22%5D%2C%22env%22%3A%7B%22AWS_PROFILE%22%3A%22your-aws-profile%22%2C%22AWS_REGION%22%3A%22us-east-1%22%2C%22FASTMCP_LOG_LEVEL%22%3A%22ERROR%22%7D%2C%22disabled%22%3Afalse%2C%22autoApprove%22%3A%5B%5D%7D) | | [AWS CDK MCP Server](src/cdk-mcp-server) ⚠️ **DEPRECATED** | AWS CDK development with security compliance and best practices (Use [AWS IaC MCP Server](src/aws-iac-mcp-server) instead) | [](https://kiro.dev/launch/mcp/add?name=awslabs.cdk-mcp-server&config=%7B%22command%22%3A%22uvx%22%2C%22args%22%3A%5B%22awslabs.cdk-mcp-server%40latest%22%5D%2C%22env%22%3A%7B%22FASTMCP_LOG_LEVEL%22%3A%22ERROR%22%7D%7D)
[](https://cursor.com/en/install-mcp?name=awslabs.cdk-mcp-server&config=eyJjb21tYW5kIjoidXZ4IGF3c2xhYnMuY2RrLW1jcC1zZXJ2ZXJAbGF0ZXN0IiwiZW52Ijp7IkZBU1RNQ1BfTE9HX0xFVkVMIjoiRVJST1IifSwiZGlzYWJsZWQiOmZhbHNlLCJhdXRvQXBwcm92ZSI6W119)
[](https://insiders.vscode.dev/redirect/mcp/install?name=CDK%20MCP%20Server&config=%7B%22command%22%3A%22uvx%22%2C%22args%22%3A%5B%22awslabs.cdk-mcp-server%40latest%22%5D%2C%22env%22%3A%7B%22FASTMCP_LOG_LEVEL%22%3A%22ERROR%22%7D%2C%22disabled%22%3Afalse%2C%22autoApprove%22%3A%5B%5D%7D) | | [AWS Terraform MCP Server](src/terraform-mcp-server) | Terraform workflows with integrated security scanning | [](https://kiro.dev/launch/mcp/add?name=awslabs.terraform-mcp-server&config=%7B%22command%22%3A%22uvx%22%2C%22args%22%3A%5B%22awslabs.terraform-mcp-server%40latest%22%5D%2C%22env%22%3A%7B%22FASTMCP_LOG_LEVEL%22%3A%22ERROR%22%7D%7D)
[](https://cursor.com/en/install-mcp?name=awslabs.terraform-mcp-server&config=eyJjb21tYW5kIjoidXZ4IGF3c2xhYnMudGVycmFmb3JtLW1jcC1zZXJ2ZXJAbGF0ZXN0IiwiZW52Ijp7IkZBU1RNQ1BfTE9HX0xFVkVMIjoiRVJST1IifSwiZGlzYWJsZWQiOmZhbHNlLCJhdXRvQXBwcm92ZSI6W119)
[](https://insiders.vscode.dev/redirect/mcp/install?name=Terraform%20MCP%20Server&config=%7B%22command%22%3A%22uvx%22%2C%22args%22%3A%5B%22awslabs.terraform-mcp-server%40latest%22%5D%2C%22env%22%3A%7B%22FASTMCP_LOG_LEVEL%22%3A%22ERROR%22%7D%2C%22disabled%22%3Afalse%2C%22autoApprove%22%3A%5B%5D%7D) | | [AWS CloudFormation MCP Server](src/cfn-mcp-server) | Direct CloudFormation resource management via Cloud Control API | [](https://kiro.dev/launch/mcp/add?name=awslabs.cfn-mcp-server&config=%7B%22command%22%3A%22uvx%22%2C%22args%22%3A%5B%22awslabs.cfn-mcp-server%40latest%22%5D%2C%22env%22%3A%7B%22AWS_PROFILE%22%3A%22your-named-profile%22%7D%7D)
[](https://cursor.com/en/install-mcp?name=awslabs.cfn-mcp-server&config=eyJjb21tYW5kIjoidXZ4IGF3c2xhYnMuY2ZuLW1jcC1zZXJ2ZXJAbGF0ZXN0IiwiZW52Ijp7IkFXU19QUk9GSUxFIjoieW91ci1uYW1lZC1wcm9maWxlIn0sImRpc2FibGVkIjpmYWxzZSwiYXV0b0FwcHJvdmUiOltdfQ%3D%3D)
[](https://insiders.vscode.dev/redirect/mcp/install?name=CloudFormation%20MCP%20Server&config=%7B%22command%22%3A%22uvx%22%2C%22args%22%3A%5B%22awslabs.cfn-mcp-server%40latest%22%5D%2C%22env%22%3A%7B%22AWS_PROFILE%22%3A%22your-named-profile%22%7D%2C%22disabled%22%3Afalse%2C%22autoApprove%22%3A%5B%5D%7D) | #### Container Platforms | Server Name | Description | Install | |-------------|-------------|---------| | [Amazon EKS MCP Server](src/eks-mcp-server) | Kubernetes cluster management and application deployment | [](https://kiro.dev/launch/mcp/add?name=awslabs.eks-mcp-server&config=%7B%22command%22%3A%22uvx%22%2C%22args%22%3A%5B%22awslabs.eks-mcp-server%40latest%22%2C%22--allow-write%22%2C%22--allow-sensitive-data-access%22%5D%2C%22env%22%3A%7B%22FASTMCP_LOG_LEVEL%22%3A%22ERROR%22%7D%7D)
[](https://cursor.com/en/install-mcp?name=awslabs.eks-mcp-server&config=eyJhdXRvQXBwcm92ZSI6W10sImRpc2FibGVkIjpmYWxzZSwiY29tbWFuZCI6InV2eCBhd3NsYWJzLmVrcy1tY3Atc2VydmVyQGxhdGVzdCAtLWFsbG93LXdyaXRlIC0tYWxsb3ctc2Vuc2l0aXZlLWRhdGEtYWNjZXNzIiwiZW52Ijp7IkZBU1RNQ1BfTE9HX0xFVkVMIjoiRVJST1IifSwidHJhbnNwb3J0VHlwZSI6InN0ZGlvIn0%3D)
[](https://insiders.vscode.dev/redirect/mcp/install?name=EKS%20MCP%20Server&config=%7B%22autoApprove%22%3A%5B%5D%2C%22disabled%22%3Afalse%2C%22command%22%3A%22uvx%22%2C%22args%22%3A%5B%22awslabs.eks-mcp-server%40latest%22%2C%22--allow-write%22%2C%22--allow-sensitive-data-access%22%5D%2C%22env%22%3A%7B%22FASTMCP_LOG_LEVEL%22%3A%22ERROR%22%7D%2C%22transportType%22%3A%22stdio%22%7D) | | [Amazon ECS MCP Server](src/ecs-mcp-server) | Container orchestration and ECS application deployment | [](https://kiro.dev/launch/mcp/add?name=awslabs.ecs-mcp-server&config=%7B%22command%22%3A%22uvx%22%2C%22args%22%3A%5B%22--from%22%2C%22awslabs-ecs-mcp-server%22%2C%22ecs-mcp-server%22%5D%2C%22env%22%3A%7B%22AWS_PROFILE%22%3A%22your-aws-profile%22%2C%22AWS_REGION%22%3A%22your-aws-region%22%2C%22FASTMCP_LOG_LEVEL%22%3A%22ERROR%22%2C%22FASTMCP_LOG_FILE%22%3A%22/path/to/ecs-mcp-server.log%22%2C%22ALLOW_WRITE%22%3A%22false%22%2C%22ALLOW_SENSITIVE_DATA%22%3A%22false%22%7D%7D)
[](https://cursor.com/en/install-mcp?name=awslabs.ecs-mcp-server&config=eyJjb21tYW5kIjoidXZ4IC0tZnJvbSBhd3NsYWJzLWVjcy1tY3Atc2VydmVyIGVjcy1tY3Atc2VydmVyIiwiZW52Ijp7IkFXU19QUk9GSUxFIjoieW91ci1hd3MtcHJvZmlsZSIsIkFXU19SRUdJT04iOiJ5b3VyLWF3cy1yZWdpb24iLCJGQVNUTUNQX0xPR19MRVZFTCI6IkVSUk9SIiwiRkFTVE1DUF9MT0dfRklMRSI6Ii9wYXRoL3RvL2Vjcy1tY3Atc2VydmVyLmxvZyIsIkFMTE9XX1dSSVRFIjoiZmFsc2UiLCJBTExPV19TRU5TSVRJVkVfREFUQSI6ImZhbHNlIn19)
[](https://insiders.vscode.dev/redirect/mcp/install?name=ECS%20MCP%20Server&config=%7B%22command%22%3A%22uvx%22%2C%22args%22%3A%5B%22--from%22%2C%22awslabs-ecs-mcp-server%22%2C%22ecs-mcp-server%22%5D%2C%22env%22%3A%7B%22AWS_PROFILE%22%3A%22your-aws-profile%22%2C%22AWS_REGION%22%3A%22your-aws-region%22%2C%22FASTMCP_LOG_LEVEL%22%3A%22ERROR%22%2C%22FASTMCP_LOG_FILE%22%3A%22%2Fpath%2Fto%2Fecs-mcp-server.log%22%2C%22ALLOW_WRITE%22%3A%22false%22%2C%22ALLOW_SENSITIVE_DATA%22%3A%22false%22%7D%7D) | | [Finch MCP Server](src/finch-mcp-server) | Local container building with ECR integration | [](https://kiro.dev/launch/mcp/add?name=awslabs.finch-mcp-server&config=%7B%22command%22%3A%22uvx%22%2C%22args%22%3A%5B%22awslabs.finch-mcp-server%40latest%22%5D%2C%22env%22%3A%7B%22AWS_PROFILE%22%3A%22default%22%2C%22AWS_REGION%22%3A%22us-west-2%22%2C%22FASTMCP_LOG_LEVEL%22%3A%22INFO%22%7D%7D)
[](https://cursor.com/en/install-mcp?name=awslabs.finch-mcp-server&config=eyJjb21tYW5kIjoidXZ4IGF3c2xhYnMuZmluY2gtbWNwLXNlcnZlckBsYXRlc3QiLCJlbnYiOnsiQVdTX1BST0ZJTEUiOiJkZWZhdWx0IiwiQVdTX1JFR0lPTiI6InVzLXdlc3QtMiIsIkZBU1RNQ1BfTE9HX0xFVkVMIjoiSU5GTyJ9LCJ0cmFuc3BvcnRUeXBlIjoic3RkaW8iLCJkaXNhYmxlZCI6ZmFsc2UsImF1dG9BcHByb3ZlIjpbXX0%3D)
[](https://insiders.vscode.dev/redirect/mcp/install?name=Finch%20MCP%20Server&config=%7B%22command%22%3A%22uvx%22%2C%22args%22%3A%5B%22awslabs.finch-mcp-server%40latest%22%5D%2C%22env%22%3A%7B%22AWS_PROFILE%22%3A%22default%22%2C%22AWS_REGION%22%3A%22us-west-2%22%2C%22FASTMCP_LOG_LEVEL%22%3A%22INFO%22%7D%2C%22transportType%22%3A%22stdio%22%2C%22disabled%22%3Afalse%2C%22autoApprove%22%3A%5B%5D%7D) | #### Serverless & Functions | Server Name | Description | Install | |-------------|-------------|---------| | [AWS Serverless MCP Server](src/aws-serverless-mcp-server) | Complete serverless application lifecycle with SAM CLI | [](https://kiro.dev/launch/mcp/add?name=awslabs.aws-serverless-mcp-server&config=%7B%22command%22%3A%22uvx%22%2C%22args%22%3A%5B%22awslabs.aws-serverless-mcp-server%40latest%22%2C%22--allow-write%22%2C%22--allow-sensitive-data-access%22%5D%2C%22env%22%3A%7B%22AWS_PROFILE%22%3A%22your-aws-profile%22%2C%22AWS_REGION%22%3A%22us-east-1%22%7D%7D)
[](https://cursor.com/en/install-mcp?name=awslabs.aws-serverless-mcp-server&config=eyJjb21tYW5kIjoidXZ4IGF3c2xhYnMuYXdzLXNlcnZlcmxlc3MtbWNwLXNlcnZlckBsYXRlc3QgLS1hbGxvdy13cml0ZSAtLWFsbG93LXNlbnNpdGl2ZS1kYXRhLWFjY2VzcyIsImVudiI6eyJBV1NfUFJPRklMRSI6InlvdXItYXdzLXByb2ZpbGUiLCJBV1NfUkVHSU9OIjoidXMtZWFzdC0xIn0sImRpc2FibGVkIjpmYWxzZSwiYXV0b0FwcHJvdmUiOltdfQ%3D%3D)
[](https://insiders.vscode.dev/redirect/mcp/install?name=AWS%20Serverless%20MCP%20Server&config=%7B%22command%22%3A%22uvx%22%2C%22args%22%3A%5B%22awslabs.aws-serverless-mcp-server%40latest%22%2C%22--allow-write%22%2C%22--allow-sensitive-data-access%22%5D%2C%22env%22%3A%7B%22AWS_PROFILE%22%3A%22your-aws-profile%22%2C%22AWS_REGION%22%3A%22us-east-1%22%7D%2C%22disabled%22%3Afalse%2C%22autoApprove%22%3A%5B%5D%7D) | | [AWS Lambda Tool MCP Server](src/lambda-tool-mcp-server) | Execute Lambda functions as AI tools for private resource access | [](https://kiro.dev/launch/mcp/add?name=awslabs.lambda-tool-mcp-server&config=%7B%22command%22%3A%22uvx%22%2C%22args%22%3A%5B%22awslabs.lambda-tool-mcp-server%40latest%22%5D%2C%22env%22%3A%7B%22AWS_PROFILE%22%3A%22your-aws-profile%22%2C%22AWS_REGION%22%3A%22us-east-1%22%2C%22FUNCTION_PREFIX%22%3A%22your-function-prefix%22%2C%22FUNCTION_LIST%22%3A%22your-first-function%2C%20your-second-function%22%2C%22FUNCTION_TAG_KEY%22%3A%22your-tag-key%22%2C%22FUNCTION_TAG_VALUE%22%3A%22your-tag-value%22%2C%22FUNCTION_INPUT_SCHEMA_ARN_TAG_KEY%22%3A%22your-function-tag-for-input-schema%22%7D%7D)
[](https://cursor.com/en/install-mcp?name=awslabs.lambda-tool-mcp-server&config=eyJjb21tYW5kIjoidXZ4IGF3c2xhYnMubGFtYmRhLXRvb2wtbWNwLXNlcnZlckBsYXRlc3QiLCJlbnYiOnsiQVdTX1BST0ZJTEUiOiJ5b3VyLWF3cy1wcm9maWxlIiwiQVdTX1JFR0lPTiI6InVzLWVhc3QtMSIsIkZVTkNUSU9OX1BSRUZJWCI6InlvdXItZnVuY3Rpb24tcHJlZml4IiwiRlVOQ1RJT05fTElTVCI6InlvdXItZmlyc3QtZnVuY3Rpb24sIHlvdXItc2Vjb25kLWZ1bmN0aW9uIiwiRlVOQ1RJT05fVEFHX0tFWSI6InlvdXItdGFnLWtleSIsIkZVTkNUSU9OX1RBR19WQUxVRSI6InlvdXItdGFnLXZhbHVlIiwiRlVOQ1RJT05fSU5QVVRfU0NIRU1BX0FSTl9UQUdfS0VZIjoieW91ci1mdW5jdGlvbi10YWctZm9yLWlucHV0LXNjaGVtYSJ9fQ%3D%3D)
[](https://insiders.vscode.dev/redirect/mcp/install?name=AWS%20Lambda%20Tool%20MCP%20Server&config=%7B%22command%22%3A%22uvx%22%2C%22args%22%3A%5B%22awslabs.lambda-tool-mcp-server%40latest%22%5D%2C%22env%22%3A%7B%22AWS_PROFILE%22%3A%22your-aws-profile%22%2C%22AWS_REGION%22%3A%22us-east-1%22%2C%22FUNCTION_PREFIX%22%3A%22your-function-prefix%22%2C%22FUNCTION_LIST%22%3A%22your-first-function%2C%20your-second-function%22%2C%22FUNCTION_TAG_KEY%22%3A%22your-tag-key%22%2C%22FUNCTION_TAG_VALUE%22%3A%22your-tag-value%22%2C%22FUNCTION_INPUT_SCHEMA_ARN_TAG_KEY%22%3A%22your-function-tag-for-input-schema%22%7D%7D) | #### Support | Server Name | Description | Install | |-------------|-------------|---------| | [AWS Support MCP Server](src/aws-support-mcp-server) | Help users create and manage AWS Support cases | [](https://kiro.dev/launch/mcp/add?name=awslabs_support_mcp_server&config=%7B%22command%22%3A%22uvx%22%2C%22args%22%3A%5B%22-m%22%2C%22awslabs.aws-support-mcp-server%40latest%22%2C%22--debug%22%2C%22--log-file%22%2C%22./logs/mcp_support_server.log%22%5D%2C%22env%22%3A%7B%22AWS_PROFILE%22%3A%22your-aws-profile%22%7D%7D)
[](https://cursor.com/en/install-mcp?name=awslabs_support_mcp_server&config=eyJjb21tYW5kIjoidXZ4IC1tIGF3c2xhYnMuYXdzLXN1cHBvcnQtbWNwLXNlcnZlckBsYXRlc3QgLS1kZWJ1ZyAtLWxvZy1maWxlIC4vbG9ncy9tY3Bfc3VwcG9ydF9zZXJ2ZXIubG9nIiwiZW52Ijp7IkFXU19QUk9GSUxFIjoieW91ci1hd3MtcHJvZmlsZSJ9fQ%3D%3D)
[](https://insiders.vscode.dev/redirect/mcp/install?name=AWS%20Support%20MCP%20Server&config=%7B%22command%22%3A%22uvx%22%2C%22args%22%3A%5B%22-m%22%2C%22awslabs.aws-support-mcp-server%40latest%22%2C%22--debug%22%2C%22--log-file%22%2C%22.%2Flogs%2Fmcp_support_server.log%22%5D%2C%22env%22%3A%7B%22AWS_PROFILE%22%3A%22your-aws-profile%22%7D%7D) | ### 🤖 AI & Machine Learning Enhance AI applications with knowledge retrieval, content generation, and ML capabilities | Server Name | Description | Install | |-------------|-------------|---------| | [Amazon Bedrock Knowledge Bases Retrieval MCP Server ](src/bedrock-kb-retrieval-mcp-server) | Query enterprise knowledge bases with citation support | [](https://kiro.dev/launch/mcp/add?name=awslabs.bedrock-kb-retrieval-mcp-server&config=%7B%22command%22%3A%22uvx%22%2C%22args%22%3A%5B%22awslabs.bedrock-kb-retrieval-mcp-server%40latest%22%5D%2C%22env%22%3A%7B%22AWS_PROFILE%22%3A%22your-profile-name%22%2C%22AWS_REGION%22%3A%22us-east-1%22%2C%22FASTMCP_LOG_LEVEL%22%3A%22ERROR%22%2C%22KB_INCLUSION_TAG_KEY%22%3A%22optional-tag-key-to-filter-kbs%22%2C%22BEDROCK_KB_RERANKING_ENABLED%22%3A%22false%22%7D%7D)
[](https://cursor.com/en/install-mcp?name=awslabs.bedrock-kb-retrieval-mcp-server&config=eyJjb21tYW5kIjoidXZ4IGF3c2xhYnMuYmVkcm9jay1rYi1yZXRyaWV2YWwtbWNwLXNlcnZlckBsYXRlc3QiLCJlbnYiOnsiQVdTX1BST0ZJTEUiOiJ5b3VyLXByb2ZpbGUtbmFtZSIsIkFXU19SRUdJT04iOiJ1cy1lYXN0LTEiLCJGQVNUTUNQX0xPR19MRVZFTCI6IkVSUk9SIiwiS0JfSU5DTFVTSU9OX1RBR19LRVkiOiJvcHRpb25hbC10YWcta2V5LXRvLWZpbHRlci1rYnMiLCJCRURST0NLX0tCX1JFUkFOS0lOR19FTkFCTEVEIjoiZmFsc2UifSwiZGlzYWJsZWQiOmZhbHNlLCJhdXRvQXBwcm92ZSI6W119)
[](https://insiders.vscode.dev/redirect/mcp/install?name=Bedrock%20KB%20Retrieval%20MCP%20Server&config=%7B%22command%22%3A%22uvx%22%2C%22args%22%3A%5B%22awslabs.bedrock-kb-retrieval-mcp-server%40latest%22%5D%2C%22env%22%3A%7B%22AWS_PROFILE%22%3A%22your-profile-name%22%2C%22AWS_REGION%22%3A%22us-east-1%22%2C%22FASTMCP_LOG_LEVEL%22%3A%22ERROR%22%2C%22KB_INCLUSION_TAG_KEY%22%3A%22optional-tag-key-to-filter-kbs%22%2C%22BEDROCK_KB_RERANKING_ENABLED%22%3A%22false%22%7D%2C%22disabled%22%3Afalse%2C%22autoApprove%22%3A%5B%5D%7D) | | [Amazon Kendra Index MCP Server](src/amazon-kendra-index-mcp-server) | Enterprise search and RAG enhancement | [](https://kiro.dev/launch/mcp/add?name=awslabs.amazon-kendra-index-mcp-server&config=%7B%22command%22%3A%22uvx%22%2C%22args%22%3A%5B%22awslabs.amazon-kendra-index-mcp-server%40latest%22%5D%2C%22env%22%3A%7B%22AWS_REGION%22%3A%22us-east-1%22%2C%22KEND_INDEX_ID%22%3A%22your-kendra-index-id%22%2C%22KEND_ROLE_ARN%22%3A%22your-kendra-role-arn%22%2C%22FASTMCP_LOG_LEVEL%22%3A%22ERROR%22%7D%7D)
[](https://cursor.com/en/install-mcp?name=awslabs.amazon-kendra-index-mcp-server&config=eyJjb21tYW5kIjoidXZ4IGF3c2xhYnMuYW1hem9uLWtlbmRyYS1pbmRleC1tY3Atc2VydmVyQGxhdGVzdCIsImVudiI6eyJBV1NfUkVHSU9OIjoidXMtZWFzdC0xIiwiS0VORF9JTkRFWF9JRCI6InlvdXIta2VuZHJhLWluZGV4LWlkIiwiS0VORF9ST0xFX0FSTiI6InlvdXIta2VuZHJhLXJvbGUtYXJuIiwiRkFTVE1DUF9MT0dfTEVWRUwiOiJFUlJPUiJ9LCJkaXNhYmxlZCI6ZmFsc2UsImF1dG9BcHByb3ZlIjpbXX0%3D)
[](https://insiders.vscode.dev/redirect/mcp/install?name=Amazon%20Kendra%20Index%20MCP%20Server&config=%7B%22command%22%3A%22uvx%22%2C%22args%22%3A%5B%22awslabs.amazon-kendra-index-mcp-server%40latest%22%5D%2C%22env%22%3A%7B%22AWS_REGION%22%3A%22us-east-1%22%2C%22KEND_INDEX_ID%22%3A%22your-kendra-index-id%22%2C%22KEND_ROLE_ARN%22%3A%22your-kendra-role-arn%22%2C%22FASTMCP_LOG_LEVEL%22%3A%22ERROR%22%7D%2C%22disabled%22%3Afalse%2C%22autoApprove%22%3A%5B%5D%7D) | | [Amazon Q Business MCP Server](src/amazon-qbusiness-anonymous-mcp-server) | AI assistant for your ingested content with anonymous access | [](https://kiro.dev/launch/mcp/add?name=awslabs.amazon-qbusiness-anonymous-mcp-server&config=%7B%22command%22%3A%22uvx%22%2C%22args%22%3A%5B%22awslabs.amazon-qbusiness-anonymous-mcp-server%40latest%22%5D%2C%22env%22%3A%7B%22QBUSINESS_APP_ID%22%3A%22your-qbusiness-app-id%22%2C%22QBUSINESS_USER_ID%22%3A%22your-user-id%22%2C%22AWS_PROFILE%22%3A%22your-aws-profile%22%2C%22AWS_REGION%22%3A%22us-east-1%22%2C%22FASTMCP_LOG_LEVEL%22%3A%22ERROR%22%7D%7D)
[](https://cursor.com/en/install-mcp?name=awslabs.amazon-qbusiness-anonymous-mcp-server&config=eyJjb21tYW5kIjoidXZ4IGF3c2xhYnMuYW1hem9uLXFidXNpbmVzcy1hbm9ueW1vdXMtbWNwLXNlcnZlckBsYXRlc3QiLCJlbnYiOnsiUUJVU0lORVNTX0FQUF9JRCI6InlvdXItcWJ1c2luZXNzLWFwcC1pZCIsIlFCVVNJTkVTU19VU0VSX0lEIjoieW91ci11c2VyLWlkIiwiQVdTX1BST0ZJTEUiOiJ5b3VyLWF3cy1wcm9maWxlIiwiQVdTX1JFR0lPTiI6InVzLWVhc3QtMSIsIkZBU1RNQ1BfTE9HX0xFVkVMIjoiRVJST1IifSwiZGlzYWJsZWQiOmZhbHNlLCJhdXRvQXBwcm92ZSI6W119)
[](https://insiders.vscode.dev/redirect/mcp/install?name=Amazon%20Q%20Business%20Anonymous%20MCP%20Server&config=%7B%22command%22%3A%22uvx%22%2C%22args%22%3A%5B%22awslabs.amazon-qbusiness-anonymous-mcp-server%40latest%22%5D%2C%22env%22%3A%7B%22QBUSINESS_APP_ID%22%3A%22your-qbusiness-app-id%22%2C%22QBUSINESS_USER_ID%22%3A%22your-user-id%22%2C%22AWS_PROFILE%22%3A%22your-aws-profile%22%2C%22AWS_REGION%22%3A%22us-east-1%22%2C%22FASTMCP_LOG_LEVEL%22%3A%22ERROR%22%7D%2C%22disabled%22%3Afalse%2C%22autoApprove%22%3A%5B%5D%7D) | | [Amazon Q Index MCP Server](src/amazon-qindex-mcp-server) | Data accessors to search through enterprise's Q index | [](https://kiro.dev/launch/mcp/add?name=awslabs.amazon-qindex-mcp-server&config=%7B%22command%22%3A%22uvx%22%2C%22args%22%3A%5B%22awslabs.amazon-qindex-mcp-server%40latest%22%5D%2C%22env%22%3A%7B%22AWS_REGION%22%3A%22us-east-1%22%2C%22QINDEX_ID%22%3A%22your-qindex-id%22%2C%22FASTMCP_LOG_LEVEL%22%3A%22ERROR%22%7D%7D)
[](https://cursor.com/en/install-mcp?name=awslabs.amazon-qindex-mcp-server&config=eyJjb21tYW5kIjoidXZ4IGF3c2xhYnMuYW1hem9uLXFpbmRleC1tY3Atc2VydmVyQGxhdGVzdCIsImVudiI6eyJBV1NfUkVHSU9OIjoidXMtZWFzdC0xIiwiUUlOREVYX0lEIjoieW91ci1xaW5kZXgtaWQiLCJGQVNUTUNQX0xPR19MRVZFTCI6IkVSUk9SIn0sImRpc2FibGVkIjpmYWxzZSwiYXV0b0FwcHJvdmUiOltdfQ%3D%3D)
[](https://insiders.vscode.dev/redirect/mcp/install?name=Amazon%20Q%20Index%20MCP%20Server&config=%7B%22command%22%3A%22uvx%22%2C%22args%22%3A%5B%22awslabs.amazon-qindex-mcp-server%40latest%22%5D%2C%22env%22%3A%7B%22AWS_REGION%22%3A%22us-east-1%22%2C%22QINDEX_ID%22%3A%22your-qindex-id%22%2C%22FASTMCP_LOG_LEVEL%22%3A%22ERROR%22%7D%2C%22disabled%22%3Afalse%2C%22autoApprove%22%3A%5B%5D%7D) | | [Nova Canvas MCP Server](src/nova-canvas-mcp-server) | AI image generation using Amazon Nova Canvas | [](https://kiro.dev/launch/mcp/add?name=awslabs.nova-canvas-mcp-server&config=%7B%22command%22%3A%22uvx%22%2C%22args%22%3A%5B%22awslabs.nova-canvas-mcp-server%40latest%22%5D%2C%22env%22%3A%7B%22AWS_PROFILE%22%3A%22your-aws-profile%22%2C%22AWS_REGION%22%3A%22us-east-1%22%2C%22FASTMCP_LOG_LEVEL%22%3A%22ERROR%22%7D%7D)
[](https://cursor.com/en/install-mcp?name=awslabs.nova-canvas-mcp-server&config=eyJjb21tYW5kIjoidXZ4IGF3c2xhYnMubm92YS1jYW52YXMtbWNwLXNlcnZlckBsYXRlc3QiLCJlbnYiOnsiQVdTX1BST0ZJTEUiOiJ5b3VyLWF3cy1wcm9maWxlIiwiQVdTX1JFR0lPTiI6InVzLWVhc3QtMSIsIkZBU1RNQ1BfTE9HX0xFVkVMIjoiRVJST1IifSwiZGlzYWJsZWQiOmZhbHNlLCJhdXRvQXBwcm92ZSI6W119)
[](https://insiders.vscode.dev/redirect/mcp/install?name=Nova%20Canvas%20MCP%20Server&config=%7B%22command%22%3A%22uvx%22%2C%22args%22%3A%5B%22awslabs.nova-canvas-mcp-server%40latest%22%5D%2C%22env%22%3A%7B%22AWS_PROFILE%22%3A%22your-aws-profile%22%2C%22AWS_REGION%22%3A%22us-east-1%22%2C%22FASTMCP_LOG_LEVEL%22%3A%22ERROR%22%7D%2C%22disabled%22%3Afalse%2C%22autoApprove%22%3A%5B%5D%7D) | | [AWS Bedrock Data Automation MCP Server](src/aws-bedrock-data-automation-mcp-server) | Analyze documents, images, videos, and audio files | [](https://kiro.dev/launch/mcp/add?name=bedrock-data-automation-mcp-server&config=%7B%22command%22%3A%22uvx%22%2C%22args%22%3A%5B%22awslabs.aws-bedrock-data-automation-mcp-server%40latest%22%5D%2C%22env%22%3A%7B%22AWS_PROFILE%22%3A%22your-aws-profile%22%2C%22AWS_REGION%22%3A%22us-east-1%22%2C%22AWS_BUCKET_NAME%22%3A%22your-s3-bucket-name%22%2C%22BASE_DIR%22%3A%22/path/to/base/directory%22%2C%22FASTMCP_LOG_LEVEL%22%3A%22ERROR%22%7D%7D)
[](https://cursor.com/en/install-mcp?name=bedrock-data-automation-mcp-server&config=eyJjb21tYW5kIjoidXZ4IGF3c2xhYnMuYXdzLWJlZHJvY2stZGF0YS1hdXRvbWF0aW9uLW1jcC1zZXJ2ZXJAbGF0ZXN0IiwiZW52Ijp7IkFXU19QUk9GSUxFIjoieW91ci1hd3MtcHJvZmlsZSIsIkFXU19SRUdJT04iOiJ1cy1lYXN0LTEiLCJBV1NfQlVDS0VUX05BTUUiOiJ5b3VyLXMzLWJ1Y2tldC1uYW1lIiwiQkFTRV9ESVIiOiIvcGF0aC90by9iYXNlL2RpcmVjdG9yeSIsIkZBU1RNQ1BfTE9HX0xFVkVMIjoiRVJST1IifSwiZGlzYWJsZWQiOmZhbHNlLCJhdXRvQXBwcm92ZSI6W119)
[](https://insiders.vscode.dev/redirect/mcp/install?name=Bedrock%20Data%20Automation%20MCP%20Server&config=%7B%22command%22%3A%22uvx%22%2C%22args%22%3A%5B%22awslabs.aws-bedrock-data-automation-mcp-server%40latest%22%5D%2C%22env%22%3A%7B%22AWS_PROFILE%22%3A%22your-aws-profile%22%2C%22AWS_REGION%22%3A%22us-east-1%22%2C%22AWS_BUCKET_NAME%22%3A%22your-s3-bucket-name%22%2C%22BASE_DIR%22%3A%22%2Fpath%2Fto%2Fbase%2Fdirectory%22%2C%22FASTMCP_LOG_LEVEL%22%3A%22ERROR%22%7D%2C%22disabled%22%3Afalse%2C%22autoApprove%22%3A%5B%5D%7D) | | [AWS Bedrock Custom Model Import MCP Server](src/aws-bedrock-custom-model-import-mcp-server) | Manage custom models in Bedrock for on-demand inference | [](https://kiro.dev/launch/mcp/add?name=aws-bedrock-custom-model-import-mcp-server&config=%7B%22command%22%3A%22uvx%22%2C%22args%22%3A%5B%22awslabs.aws-bedrock-custom-model-import-mcp-server%40latest%22%5D%2C%22env%22%3A%7B%22AWS_PROFILE%22%3A%22your-aws-profile%22%2C%22AWS_REGION%22%3A%22us-east-1%22%2C%22BEDROCK_MODEL_IMPORT_S3_BUCKET%22%3A%22your-s3-bucket-name%22%2C%22FASTMCP_LOG_LEVEL%22%3A%22ERROR%22%7D%7D)
[](https://cursor.com/en/install-mcp?name=aws-bedrock-custom-model-import-mcp-server&config=eyJjb21tYW5kIjoidXZ4IGF3c2xhYnMuYXdzLWJlZHJvY2stY3VzdG9tLW1vZGVsLWltcG9ydC1tY3Atc2VydmVyQGxhdGVzdCIsImVudiI6eyJBV1NfUFJPRklMRSI6InlvdXItYXdzLXByb2ZpbGUiLCJBV1NfUkVHSU9OIjoidXMtZWFzdC0xIiwiQkVEUk9DS19NT0RFTF9JTVBPUlRfUzNfQlVDS0VUIjoieW91ci1zMy1idWNrZXQtbmFtZSIsIkZBU1RNQ1BfTE9HX0xFVkVMIjoiRVJST1IifSwiZGlzYWJsZWQiOmZhbHNlLCJhdXRvQXBwcm92ZSI6W119)
[](https://insiders.vscode.dev/redirect/mcp/install?name=AWS%20Bedrock%20Custom%20Model%20Import%20MCP%20Server&config=%7B%22command%22%3A%22uvx%22%2C%22args%22%3A%5B%22awslabs.aws-bedrock-custom-model-import-mcp-server%40latest%22%5D%2C%22env%22%3A%7B%22AWS_PROFILE%22%3A%22your-aws-profile%22%2C%22AWS_REGION%22%3A%22us-east-1%22%2C%22BEDROCK_MODEL_IMPORT_S3_BUCKET%22%3A%22your-s3-bucket-name%22%2C%22FASTMCP_LOG_LEVEL%22%3A%22ERROR%22%7D%2C%22disabled%22%3Afalse%2C%22autoApprove%22%3A%5B%5D%7D) | | [AWS Bedrock AgentCore MCP Server](src/amazon-bedrock-agentcore-mcp-server) | Provides comprehensive documentation access on AgentCore platform services, APIs, and best practices | [](https://kiro.dev/launch/mcp/add?name=awslabs.amazon-bedrock-agentcore-mcp-server&config=%7B%22command%22%3A%22uvx%22%2C%22args%22%3A%5B%22awslabs.amazon-bedrock-agentcore-mcp-server%40latest%22%5D%2C%22env%22%3A%7B%22FASTMCP_LOG_LEVEL%22%3A%22ERROR%22%7D%7D)
[](https://cursor.com/en/install-mcp?name=awslabs.amazon-bedrock-agentcore-mcp-server&config=eyJjb21tYW5kIjoidXZ4IGF3c2xhYnMuYW1hem9uLWJlZHJvY2stYWdlbnRjb3JlLW1jcC1zZXJ2ZXJAbGF0ZXN0IiwiZW52Ijp7IkZBU1RNQ1BfTE9HX0xFVkVMIjoiRVJST1IifSwiZGlzYWJsZWQiOmZhbHNlLCJhdXRvQXBwcm92ZSI6W119)
[](https://insiders.vscode.dev/redirect/mcp/install?name=AWS%20Bedrock%20AgentCore%20MCP%20Server&config=%7B%22command%22%3A%22uvx%22%2C%22args%22%3A%5B%22awslabs.amazon-bedrock-agentcore-mcp-server%40latest%22%5D%2C%22env%22%3A%7B%22FASTMCP_LOG_LEVEL%22%3A%22ERROR%22%7D%2C%22disabled%22%3Afalse%2C%22autoApprove%22%3A%5B%5D%7D) | | [Amazon SageMaker AI MCP Server](src/sagemaker-ai-mcp-server) | SageMaker AI resource management and model development | [](https://kiro.dev/launch/mcp/add?name=awslabs.sagemaker-ai-mcp-server&config=%7B%22command%22%3A%22uvx%22%2C%22args%22%3A%5B%22awslabs.sagemaker-ai-mcp-server%40latest%22%2C%22--allow-write%22%2C%22--allow-sensitive-data-access%22%5D%2C%22env%22%3A%7B%22FASTMCP_LOG_LEVEL%22%3A%22ERROR%22%7D%7D)
[](https://cursor.com/en/install-mcp?name=awslabs.sagemaker-ai-mcp-server&config=eyJhdXRvQXBwcm92ZSI6W10sImRpc2FibGVkIjpmYWxzZSwiY29tbWFuZCI6InV2eCBhd3NsYWJzLnNhZ2VtYWtlci1haS1tY3Atc2VydmVyQGxhdGVzdCAtLWFsbG93LXdyaXRlIC0tYWxsb3ctc2Vuc2l0aXZlLWRhdGEtYWNjZXNzIiwiZW52Ijp7IkZBU1RNQ1BfTE9HX0xFVkVMIjoiRVJST1IifSwidHJhbnNwb3J0VHlwZSI6InN0ZGlvIn0%3D)
[](https://insiders.vscode.dev/redirect/mcp/install?name=SageMaker%20AI%20MCP%20Server&config=%7B%22autoApprove%22%3A%5B%5D%2C%22disabled%22%3Afalse%2C%22command%22%3A%22uvx%22%2C%22args%22%3A%5B%22awslabs.sagemaker-ai-mcp-server%40latest%22%2C%22--allow-write%22%2C%22--allow-sensitive-data-access%22%5D%2C%22env%22%3A%7B%22FASTMCP_LOG_LEVEL%22%3A%22ERROR%22%7D%2C%22transportType%22%3A%22stdio%22%7D) | ### 📊 Data & Analytics Work with databases, caching systems, and data processing workflows. #### SQL & NoSQL Databases | Server Name | Description | Install | |-------------|-------------|---------| | [Amazon DynamoDB MCP Server](src/dynamodb-mcp-server) | DynamoDB expert design guidance and data modeling assistance | [](https://kiro.dev/launch/mcp/add?name=awslabs.dynamodb-mcp-server&config=%7B%22command%22%3A%22uvx%22%2C%22args%22%3A%5B%22awslabs.dynamodb-mcp-server%40latest%22%5D%2C%22env%22%3A%7B%22DDB-MCP-READONLY%22%3A%22true%22%2C%22AWS_PROFILE%22%3A%22default%22%2C%22AWS_REGION%22%3A%22us-west-2%22%2C%22FASTMCP_LOG_LEVEL%22%3A%22ERROR%22%7D%7D)
[](https://cursor.com/en/install-mcp?name=awslabs.dynamodb-mcp-server&config=eyJjb21tYW5kIjoidXZ4IGF3c2xhYnMuZHluYW1vZGItbWNwLXNlcnZlckBsYXRlc3QiLCJlbnYiOnsiRERCLU1DUC1SRUFET05MWSI6InRydWUiLCJBV1NfUFJPRklMRSI6ImRlZmF1bHQiLCJBV1NfUkVHSU9OIjoidXMtd2VzdC0yIiwiRkFTVE1DUF9MT0dfTEVWRUwiOiJFUlJPUiJ9LCJkaXNhYmxlZCI6ZmFsc2UsImF1dG9BcHByb3ZlIjpbXX0%3D)
[](https://insiders.vscode.dev/redirect/mcp/install?name=DynamoDB%20MCP%20Server&config=%7B%22command%22%3A%22uvx%22%2C%22args%22%3A%5B%22awslabs.dynamodb-mcp-server%40latest%22%5D%2C%22env%22%3A%7B%22DDB-MCP-READONLY%22%3A%22true%22%2C%22AWS_PROFILE%22%3A%22default%22%2C%22AWS_REGION%22%3A%22us-west-2%22%2C%22FASTMCP_LOG_LEVEL%22%3A%22ERROR%22%7D%2C%22disabled%22%3Afalse%2C%22autoApprove%22%3A%5B%5D%7D) | | [Amazon Aurora PostgreSQL MCP Server](src/postgres-mcp-server) | PostgreSQL database operations via RDS Data API | [](https://kiro.dev/launch/mcp/add?name=awslabs.postgres-mcp-server&config=%7B%22command%22%3A%22uvx%22%2C%22args%22%3A%5B%22awslabs.postgres-mcp-server%40latest%22%2C%22--connection-string%22%2C%22postgresql%3A//%5Busername%5D%3A%5Bpassword%5D%40%5Bhost%5D%3A%5Bport%5D/%5Bdatabase%5D%22%5D%2C%22env%22%3A%7B%22FASTMCP_LOG_LEVEL%22%3A%22ERROR%22%7D%7D)
[](https://cursor.com/en/install-mcp?name=awslabs.postgres-mcp-server&config=eyJjb21tYW5kIjoidXZ4IGF3c2xhYnMucG9zdGdyZXMtbWNwLXNlcnZlckBsYXRlc3QgLS1jb25uZWN0aW9uLXN0cmluZyBwb3N0Z3Jlc3FsOi8vW3VzZXJuYW1lXTpbcGFzc3dvcmRdQFtob3N0XTpbcG9ydF0vW2RhdGFiYXNlXSIsImVudiI6eyJGQVNUTUNQX0xPR19MRVZFTCI6IkVSUk9SIn0sImRpc2FibGVkIjpmYWxzZSwiYXV0b0FwcHJvdmUiOltdLCJ0cmFuc3BvcnRUeXBlIjoic3RkaW8iLCJhdXRvU3RhcnQiOnRydWV9)
[](https://insiders.vscode.dev/redirect/mcp/install?name=PostgreSQL%20MCP%20Server&config=%7B%22command%22%3A%22uvx%22%2C%22args%22%3A%5B%22awslabs.postgres-mcp-server%40latest%22%2C%22--connection-string%22%2C%22postgresql%3A%2F%2F%5Busername%5D%3A%5Bpassword%5D%40%5Bhost%5D%3A%5Bport%5D%2F%5Bdatabase%5D%22%5D%2C%22env%22%3A%7B%22FASTMCP_LOG_LEVEL%22%3A%22ERROR%22%7D%2C%22disabled%22%3Afalse%2C%22autoApprove%22%3A%5B%5D%2C%22transportType%22%3A%22stdio%22%2C%22autoStart%22%3Atrue%7D) | | [Amazon Aurora MySQL MCP Server](src/mysql-mcp-server) | MySQL database operations via RDS Data API | [](https://kiro.dev/launch/mcp/add?name=awslabs.mysql-mcp-server&config=%7B%22command%22%3A%22uvx%22%2C%22args%22%3A%5B%22awslabs.mysql-mcp-server%40latest%22%2C%22--resource_arn%22%2C%22%5Byour%22%2C%22data%5D%22%2C%22--secret_arn%22%2C%22%5Byour%22%2C%22data%5D%22%2C%22--database%22%2C%22%5Byour%22%2C%22data%5D%22%2C%22--region%22%2C%22%5Byour%22%2C%22data%5D%22%2C%22--readonly%22%2C%22True%22%5D%2C%22env%22%3A%7B%22AWS_PROFILE%22%3A%22your-aws-profile%22%2C%22AWS_REGION%22%3A%22us-east-1%22%2C%22FASTMCP_LOG_LEVEL%22%3A%22ERROR%22%7D%7D)
[](https://cursor.com/en/install-mcp?name=awslabs.mysql-mcp-server&config=eyJjb21tYW5kIjoidXZ4IGF3c2xhYnMubXlzcWwtbWNwLXNlcnZlckBsYXRlc3QgLS1yZXNvdXJjZV9hcm4gW3lvdXIgZGF0YV0gLS1zZWNyZXRfYXJuIFt5b3VyIGRhdGFdIC0tZGF0YWJhc2UgW3lvdXIgZGF0YV0gLS1yZWdpb24gW3lvdXIgZGF0YV0gLS1yZWFkb25seSBUcnVlIiwiZW52Ijp7IkFXU19QUk9GSUxFIjoieW91ci1hd3MtcHJvZmlsZSIsIkFXU19SRUdJT04iOiJ1cy1lYXN0LTEiLCJGQVNUTUNQX0xPR19MRVZFTCI6IkVSUk9SIn0sImRpc2FibGVkIjpmYWxzZSwiYXV0b0FwcHJvdmUiOltdfQ%3D%3D)
[](https://insiders.vscode.dev/redirect/mcp/install?name=MySQL%20MCP%20Server&config=%7B%22command%22%3A%22uvx%22%2C%22args%22%3A%5B%22awslabs.mysql-mcp-server%40latest%22%2C%22--resource_arn%22%2C%22%5Byour%20data%5D%22%2C%22--secret_arn%22%2C%22%5Byour%20data%5D%22%2C%22--database%22%2C%22%5Byour%20data%5D%22%2C%22--region%22%2C%22%5Byour%20data%5D%22%2C%22--readonly%22%2C%22True%22%5D%2C%22env%22%3A%7B%22AWS_PROFILE%22%3A%22your-aws-profile%22%2C%22AWS_REGION%22%3A%22us-east-1%22%2C%22FASTMCP_LOG_LEVEL%22%3A%22ERROR%22%7D%2C%22disabled%22%3Afalse%2C%22autoApprove%22%3A%5B%5D%7D) | | [Amazon Aurora DSQL MCP Server](src/aurora-dsql-mcp-server) | Distributed SQL with PostgreSQL compatibility | [](https://kiro.dev/launch/mcp/add?name=awslabs.aurora-dsql-mcp-server&config=%7B%22command%22%3A%22uvx%22%2C%22args%22%3A%5B%22awslabs.aurora-dsql-mcp-server%40latest%22%2C%22--cluster_endpoint%22%2C%22%5Byour%22%2C%22dsql%22%2C%22cluster%22%2C%22endpoint%5D%22%2C%22--region%22%2C%22%5Byour%22%2C%22dsql%22%2C%22cluster%22%2C%22region%2C%22%2C%22e.g.%22%2C%22us-east-1%5D%22%2C%22--database_user%22%2C%22%5Byour%22%2C%22dsql%22%2C%22username%5D%22%2C%22--profile%22%2C%22default%22%5D%2C%22env%22%3A%7B%22FASTMCP_LOG_LEVEL%22%3A%22ERROR%22%7D%7D)
[](https://cursor.com/en/install-mcp?name=awslabs.aurora-dsql-mcp-server&config=eyJjb21tYW5kIjoidXZ4IGF3c2xhYnMuYXVyb3JhLWRzcWwtbWNwLXNlcnZlckBsYXRlc3QgLS1jbHVzdGVyX2VuZHBvaW50IFt5b3VyIGRzcWwgY2x1c3RlciBlbmRwb2ludF0gLS1yZWdpb24gW3lvdXIgZHNxbCBjbHVzdGVyIHJlZ2lvbiwgZS5nLiB1cy1lYXN0LTFdIC0tZGF0YWJhc2VfdXNlciBbeW91ciBkc3FsIHVzZXJuYW1lXSAtLXByb2ZpbGUgZGVmYXVsdCIsImVudiI6eyJGQVNUTUNQX0xPR19MRVZFTCI6IkVSUk9SIn0sImRpc2FibGVkIjpmYWxzZSwiYXV0b0FwcHJvdmUiOltdfQ%3D%3D)
[](https://insiders.vscode.dev/redirect/mcp/install?name=Aurora%20DSQL%20MCP%20Server&config=%7B%22command%22%3A%22uvx%22%2C%22args%22%3A%5B%22awslabs.aurora-dsql-mcp-server%40latest%22%2C%22--cluster_endpoint%22%2C%22%5Byour%20dsql%20cluster%20endpoint%5D%22%2C%22--region%22%2C%22%5Byour%20dsql%20cluster%20region%2C%20e.g.%20us-east-1%5D%22%2C%22--database_user%22%2C%22%5Byour%20dsql%20username%5D%22%2C%22--profile%22%2C%22default%22%5D%2C%22env%22%3A%7B%22FASTMCP_LOG_LEVEL%22%3A%22ERROR%22%7D%2C%22disabled%22%3Afalse%2C%22autoApprove%22%3A%5B%5D%7D) | | [Amazon DocumentDB MCP Server](src/documentdb-mcp-server) | MongoDB-compatible document database operations | [](https://kiro.dev/launch/mcp/add?name=awslabs.documentdb-mcp-server&config=%7B%22command%22%3A%22uvx%22%2C%22args%22%3A%5B%22awslabs.documentdb-mcp-serve%40latest%22%5D%2C%22env%22%3A%7B%22FASTMCP_LOG_LEVEL%22%3A%22ERROR%22%2C%22AWS_PROFILE%22%3A%22your-aws-profile%22%7D%7D)
[](https://cursor.com/en/install-mcp?name=awslabs.documentdb-mcp-server&config=eyJjb21tYW5kIjoidXZ4IGF3c2xhYnMuZG9jdW1lbnRkYi1tY3Atc2VydmVAbGF0ZXN0IiwiZW52Ijp7IkZBU1RNQ1BfTE9HX0xFVkVMIjoiRVJST1IiLCJBV1NfUFJPRklMRSI6InlvdXItYXdzLXByb2ZpbGUifSwiZGlzYWJsZWQiOmZhbHNlLCJhdXRvQXBwcm92ZSI6W119)
[](https://insiders.vscode.dev/redirect/mcp/install?name=DocumentDB%20MCP%20Server&config=%7B%22command%22%3A%22uvx%22%2C%22args%22%3A%5B%22awslabs.documentdb-mcp-server%40latest%22%5D%2C%22env%22%3A%7B%22FASTMCP_LOG_LEVEL%22%3A%22ERROR%22%2C%22AWS_PROFILE%22%3A%22your-aws-profile%22%7D%2C%22disabled%22%3Afalse%2C%22autoApprove%22%3A%5B%5D%7D) | | [Amazon Neptune MCP Server](src/amazon-neptune-mcp-server) | Graph database queries with openCypher and Gremlin | [](https://kiro.dev/launch/mcp/add?name=awslabs.amazon-neptune-mcp-server&config=%7B%22command%22%3A%22uvx%22%2C%22args%22%3A%5B%22awslabs.amazon-neptune-mcp-server%40latest%22%5D%2C%22env%22%3A%7B%22NEPTUNE_ENDPOINT%22%3A%22https%3A//your-neptune-cluster-id.region.neptune.amazonaws.com%3A8182%22%2C%22AWS_PROFILE%22%3A%22your-aws-profile%22%2C%22AWS_REGION%22%3A%22us-east-1%22%2C%22FASTMCP_LOG_LEVEL%22%3A%22ERROR%22%7D%7D)
[](https://cursor.com/en/install-mcp?name=awslabs.amazon-neptune-mcp-server&config=eyJjb21tYW5kIjoidXZ4IGF3c2xhYnMuYW1hem9uLW5lcHR1bmUtbWNwLXNlcnZlckBsYXRlc3QiLCJlbnYiOnsiTkVQVFVORV9FTkRQT0lOVCI6Imh0dHBzOi8veW91ci1uZXB0dW5lLWNsdXN0ZXItaWQucmVnaW9uLm5lcHR1bmUuYW1hem9uYXdzLmNvbTo4MTgyIiwiQVdTX1BST0ZJTEUiOiJ5b3VyLWF3cy1wcm9maWxlIiwiQVdTX1JFR0lPTiI6InVzLWVhc3QtMSIsIkZBU1RNQ1BfTE9HX0xFVkVMIjoiRVJST1IifSwiZGlzYWJsZWQiOmZhbHNlLCJhdXRvQXBwcm92ZSI6W119)
[](https://insiders.vscode.dev/redirect/mcp/install?name=Amazon%20Neptune%20MCP%20Server&config=%7B%22command%22%3A%22uvx%22%2C%22args%22%3A%5B%22awslabs.amazon-neptune-mcp-server%40latest%22%5D%2C%22env%22%3A%7B%22NEPTUNE_ENDPOINT%22%3A%22https%3A%2F%2Fyour-neptune-cluster-id.region.neptune.amazonaws.com%3A8182%22%2C%22AWS_PROFILE%22%3A%22your-aws-profile%22%2C%22AWS_REGION%22%3A%22us-east-1%22%2C%22FASTMCP_LOG_LEVEL%22%3A%22ERROR%22%7D%2C%22disabled%22%3Afalse%2C%22autoApprove%22%3A%5B%5D%7D) | | [Amazon Keyspaces MCP Server](src/amazon-keyspaces-mcp-server) | Apache Cassandra-compatible operations | [](https://kiro.dev/launch/mcp/add?name=awslabs.amazon-keyspaces-mcp-server&config=%7B%22command%22%3A%22uvx%22%2C%22args%22%3A%5B%22awslabs.amazon-keyspaces-mcp-server%40latest%22%5D%2C%22env%22%3A%7B%22AWS_PROFILE%22%3A%22your-aws-profile%22%2C%22AWS_REGION%22%3A%22us-east-1%22%2C%22FASTMCP_LOG_LEVEL%22%3A%22ERROR%22%7D%7D)
[](https://cursor.com/en/install-mcp?name=awslabs.amazon-keyspaces-mcp-server&config=eyJjb21tYW5kIjoidXZ4IGF3c2xhYnMuYW1hem9uLWtleXNwYWNlcy1tY3Atc2VydmVyQGxhdGVzdCIsImVudiI6eyJBV1NfUFJPRklMRSI6InlvdXItYXdzLXByb2ZpbGUiLCJBV1NfUkVHSU9OIjoidXMtZWFzdC0xIiwiRkFTVE1DUF9MT0dfTEVWRUwiOiJFUlJPUiJ9LCJkaXNhYmxlZCI6ZmFsc2UsImF1dG9BcHByb3ZlIjpbXX0%3D)
[](https://insiders.vscode.dev/redirect/mcp/install?name=Amazon%20Keyspaces%20MCP%20Server&config=%7B%22command%22%3A%22uvx%22%2C%22args%22%3A%5B%22awslabs.amazon-keyspaces-mcp-server%40latest%22%5D%2C%22env%22%3A%7B%22AWS_PROFILE%22%3A%22your-aws-profile%22%2C%22AWS_REGION%22%3A%22us-east-1%22%2C%22FASTMCP_LOG_LEVEL%22%3A%22ERROR%22%7D%2C%22disabled%22%3Afalse%2C%22autoApprove%22%3A%5B%5D%7D) | | [Amazon Timestream for InfluxDB MCP Server](src/timestream-for-influxdb-mcp-server) | Time-series database operations and InfluxDB compatibility | [](https://kiro.dev/launch/mcp/add?name=awslabs.timestream-for-influxdb-mcp-server&config=%7B%22command%22%3A%22uvx%22%2C%22args%22%3A%5B%22awslabs.timestream-for-influxdb-mcp-server%40latest%22%5D%2C%22env%22%3A%7B%22AWS_PROFILE%22%3A%22your-aws-profile%22%2C%22AWS_REGION%22%3A%22us-east-1%22%2C%22FASTMCP_LOG_LEVEL%22%3A%22ERROR%22%7D%7D)
[](https://cursor.com/en/install-mcp?name=awslabs.timestream-for-influxdb-mcp-server&config=eyJjb21tYW5kIjoidXZ4IGF3c2xhYnMudGltZXN0cmVhbS1mb3ItaW5mbHV4ZGItbWNwLXNlcnZlckBsYXRlc3QiLCJlbnYiOnsiQVdTX1BST0ZJTEUiOiJ5b3VyLWF3cy1wcm9maWxlIiwiQVdTX1JFR0lPTiI6InVzLWVhc3QtMSIsIkZBU1RNQ1BfTE9HX0xFVkVMIjoiRVJST1IifSwiZGlzYWJsZWQiOmZhbHNlLCJhdXRvQXBwcm92ZSI6W119)
[](https://insiders.vscode.dev/redirect/mcp/install?name=Timestream%20for%20InfluxDB%20MCP%20Server&config=%7B%22command%22%3A%22uvx%22%2C%22args%22%3A%5B%22awslabs.timestream-for-influxdb-mcp-server%40latest%22%5D%2C%22env%22%3A%7B%22AWS_PROFILE%22%3A%22your-aws-profile%22%2C%22AWS_REGION%22%3A%22us-east-1%22%2C%22FASTMCP_LOG_LEVEL%22%3A%22ERROR%22%7D%2C%22disabled%22%3Afalse%2C%22autoApprove%22%3A%5B%5D%7D) | | [Amazon MSK MCP Server](src/aws-msk-mcp-server) | Managed Kafka cluster operations and streaming | [](https://kiro.dev/launch/mcp/add?name=awslabs.aws-msk-mcp-server&config=%7B%22command%22%3A%22uvx%22%2C%22args%22%3A%5B%22awslabs.aws-msk-mcp-server%40latest%22%2C%22--allow-writes%22%5D%2C%22env%22%3A%7B%22FASTMCP_LOG_LEVEL%22%3A%22ERROR%22%7D%7D)
[](https://cursor.com/en/install-mcp?name=awslabs.aws-msk-mcp-server&config=JTdCJTIyY29tbWFuZCUyMiUzQSUyMnV2eCUyMGF3c2xhYnMuYXdzLW1zay1tY3Atc2VydmVyJTQwbGF0ZXN0JTIwLS1hbGxvdy13cml0ZXMlMjIlMkMlMjJlbnYlMjIlM0ElN0IlMjJGQVNUTUNQX0xPR19MRVZFTCUyMiUzQSUyMkVSUk9SJTIyJTdEJTJDJTIyZGlzYWJsZWQlMjIlM0FmYWxzZSUyQyUyMmF1dG9BcHByb3ZlJTIyJTNBJTVCJTVEJTdE)
[](https://insiders.vscode.dev/redirect/mcp/install?name=AWS%20MSK%20MCP%20Server&config=%7B%22command%22%3A%22uvx%22%2C%22args%22%3A%5B%22awslabs.aws-msk-mcp-server%40latest%22%2C%22--allow-writes%22%5D%2C%22env%22%3A%7B%22FASTMCP_LOG_LEVEL%22%3A%22ERROR%22%7D%2C%22disabled%22%3Afalse%2C%22autoApprove%22%3A%5B%5D%7D) | | [AWS S3 Tables MCP Server](src/s3-tables-mcp-server) | Manage S3 Tables for optimized analytics | [](https://kiro.dev/launch/mcp/add?name=awslabs.s3-tables-mcp-server&config=%7B%22command%22%3A%22uvx%22%2C%22args%22%3A%5B%22awslabs.s3-tables-mcp-server%40latest%22%5D%2C%22env%22%3A%7B%22AWS_PROFILE%22%3A%22your-aws-profile%22%2C%22AWS_REGION%22%3A%22us-east-1%22%7D%7D)
[](https://cursor.com/en/install-mcp?name=awslabs.s3-tables-mcp-server&config=eyJjb21tYW5kIjoidXZ4IGF3c2xhYnMuczMtdGFibGVzLW1jcC1zZXJ2ZXJAbGF0ZXN0IiwiZW52Ijp7IkFXU19QUk9GSUxFIjoieW91ci1hd3MtcHJvZmlsZSIsIkFXU19SRUdJT04iOiJ1cy1lYXN0LTEifX0%3D)
[](https://insiders.vscode.dev/redirect/mcp/install?name=S3%20Tables%20MCP%20Server&config=%7B%22command%22%3A%22uvx%22%2C%22args%22%3A%5B%22awslabs.s3-tables-mcp-server%40latest%22%5D%2C%22env%22%3A%7B%22AWS_PROFILE%22%3A%22your-aws-profile%22%2C%22AWS_REGION%22%3A%22us-east-1%22%7D%7D) | | [Amazon Redshift MCP Server](src/redshift-mcp-server) | Data warehouse operations and analytics queries | [](https://kiro.dev/launch/mcp/add?name=awslabs.redshift-mcp-server&config=%7B%22command%22%3A%22uvx%22%2C%22args%22%3A%5B%22awslabs.redshift-mcp-server%40latest%22%5D%2C%22env%22%3A%7B%22AWS_PROFILE%22%3A%22default%22%2C%22AWS_REGION%22%3A%22us-east-1%22%2C%22FASTMCP_LOG_LEVEL%22%3A%22INFO%22%7D%7D)
[](https://cursor.com/en/install-mcp?name=awslabs.redshift-mcp-server&config=eyJjb21tYW5kIjoidXZ4IGF3c2xhYnMucmVkc2hpZnQtbWNwLXNlcnZlckBsYXRlc3QiLCJlbnYiOnsiQVdTX1BST0ZJTEUiOiJkZWZhdWx0IiwiQVdTX1JFR0lPTiI6InVzLWVhc3QtMSIsIkZBU1RNQ1BfTE9HX0xFVkVMIjoiSU5GTyJ9LCJkaXNhYmxlZCI6ZmFsc2UsImF1dG9BcHByb3ZlIjpbXX0%3D)
[](https://insiders.vscode.dev/redirect/mcp/install?name=Redshift%20MCP%20Server&config=%7B%22command%22%3A%22uvx%22%2C%22args%22%3A%5B%22awslabs.redshift-mcp-server%40latest%22%5D%2C%22env%22%3A%7B%22AWS_PROFILE%22%3A%22default%22%2C%22AWS_REGION%22%3A%22us-east-1%22%2C%22FASTMCP_LOG_LEVEL%22%3A%22INFO%22%7D%2C%22disabled%22%3Afalse%2C%22autoApprove%22%3A%5B%5D%7D) | | [AWS IoT SiteWise MCP Server](src/aws-iot-sitewise-mcp-server) | Industrial IoT asset management, data ingestion, and analytics | [](https://kiro.dev/launch/mcp/add?name=awslabs.aws-iot-sitewise-mcp-server&config=%7B%22command%22%3A%22uvx%22%2C%22args%22%3A%5B%22awslabs.aws-iot-sitewise-mcp-server%40latest%22%5D%2C%22env%22%3A%7B%22AWS_PROFILE%22%3A%22your-aws-profile%22%2C%22AWS_REGION%22%3A%22us-east-1%22%2C%22FASTMCP_LOG_LEVEL%22%3A%22ERROR%22%7D%7D)
[](https://cursor.com/en/install-mcp?name=awslabs.aws-iot-sitewise-mcp-server&config=eyJjb21tYW5kIjoidXZ4IGF3c2xhYnMuYXdzLWlvdC1zaXRld2lzZS1tY3Atc2VydmVyQGxhdGVzdCIsImVudiI6eyJBV1NfUFJPRklMRSI6InlvdXItYXdzLXByb2ZpbGUiLCJBV1NfUkVHSU9OIjoidXMtZWFzdC0xIiwiRkFTVE1DUF9MT0dfTEVWRUwiOiJFUlJPUiJ9LCJkaXNhYmxlZCI6ZmFsc2UsImF1dG9BcHByb3ZlIjpbXX0%3D)
[](https://insiders.vscode.dev/redirect/mcp/install?name=AWS%20IoT%20SiteWise%20MCP%20Server&config=%7B%22command%22%3A%22uvx%22%2C%22args%22%3A%5B%22awslabs.aws-iot-sitewise-mcp-server%40latest%22%5D%2C%22env%22%3A%7B%22AWS_PROFILE%22%3A%22your-aws-profile%22%2C%22AWS_REGION%22%3A%22us-east-1%22%2C%22FASTMCP_LOG_LEVEL%22%3A%22ERROR%22%7D%2C%22disabled%22%3Afalse%2C%22autoApprove%22%3A%5B%5D%7D) | ##### Search & Analytics - **[Amazon OpenSearch MCP Server](https://github.com/opensearch-project/opensearch-mcp-server-py)** - OpenSearch powered search, Analytics, and Observability #### Backend API Providers | Server Name | Description | Install | |-------------|-------------|---------| | [AWS AppSync MCP Server](src/aws-appsync-mcp-server) | Manage and Interact with application backends powered by AWS AppSync | [](https://kiro.dev/launch/mcp/add?name=awslabs.aws-appsync-mcp-server&config=%7B%22command%22%3A%22uvx%22%2C%22args%22%3A%5B%22awslabs.aws-appsync-mcp-server%40latest%22%2C%22--allow-write%22%5D%2C%22env%22%3A%7B%22AWS_PROFILE%22%3A%22default%22%2C%22AWS_REGION%22%3A%22us-east-1%22%2C%22FASTMCP_LOG_LEVEL%22%3A%22ERROR%22%7D%7D)
[](https://cursor.com/en/install-mcp?name=awslabs.aws-appsync-mcp-server&config=eyJjb21tYW5kIjoidXZ4IGF3c2xhYnMuYXdzLWFwcHN5bmMtbWNwLXNlcnZlckBsYXRlc3QgLS1hbGxvdy13cml0ZSIsImVudiI6eyJBV1NfUFJPRklMRSI6ImRlZmF1bHQiLCJBV1NfUkVHSU9OIjoidXMtZWFzdC0xIiwiRkFTVE1DUF9MT0dfTEVWRUwiOiJFUlJPUiJ9LCJkaXNhYmxlZCI6ZmFsc2UsImF1dG9BcHByb3ZlIjpbXX0=)
[](https://insiders.vscode.dev/redirect/mcp/install?name=AWS%20AppSync%20MCP%20Server&config=%7B%22command%22%3A%22uvx%22%2C%22args%22%3A%5B%22awslabs.aws-appsync-mcp-server%40latest%22%2C%20%22--allow-write%22%5D%2C%22env%22%3A%7B%22AWS_PROFILE%22%3A%22default%22%2C%22AWS_REGION%22%3A%22us-east-1%22%2C%22FASTMCP_LOG_LEVEL%22%3A%22ERROR%22%7D%2C%22disabled%22%3Afalse%2C%22autoApprove%22%3A%5B%5D%7D) | #### Caching & Performance | Server Name | Description | Install | |-------------|-------------|---------| | [Amazon ElastiCache MCP Server](src/elasticache-mcp-server) | Complete ElastiCache control plane operations | [](https://kiro.dev/launch/mcp/add?name=awslabs.elasticache-mcp-server&config=%7B%22command%22%3A%22uvx%22%2C%22args%22%3A%5B%22awslabs.elasticache-mcp-server%40latest%22%5D%2C%22env%22%3A%7B%22AWS_PROFILE%22%3A%22default%22%2C%22AWS_REGION%22%3A%22us-west-2%22%2C%22FASTMCP_LOG_LEVEL%22%3A%22ERROR%22%7D%7D)
[](https://cursor.com/en/install-mcp?name=awslabs.elasticache-mcp-server&config=eyJjb21tYW5kIjoidXZ4IGF3c2xhYnMuZWxhc3RpY2FjaGUtbWNwLXNlcnZlckBsYXRlc3QiLCJlbnYiOnsiQVdTX1BST0ZJTEUiOiJkZWZhdWx0IiwiQVdTX1JFR0lPTiI6InVzLXdlc3QtMiIsIkZBU1RNQ1BfTE9HX0xFVkVMIjoiRVJST1IifSwiZGlzYWJsZWQiOmZhbHNlLCJhdXRvQXBwcm92ZSI6W119)
[](https://insiders.vscode.dev/redirect/mcp/install?name=ElastiCache%20MCP%20Server&config=%7B%22command%22%3A%22uvx%22%2C%22args%22%3A%5B%22awslabs.elasticache-mcp-server%40latest%22%5D%2C%22env%22%3A%7B%22AWS_PROFILE%22%3A%22default%22%2C%22AWS_REGION%22%3A%22us-west-2%22%2C%22FASTMCP_LOG_LEVEL%22%3A%22ERROR%22%7D%2C%22disabled%22%3Afalse%2C%22autoApprove%22%3A%5B%5D%7D) | | [Amazon ElastiCache / MemoryDB for Valkey MCP Server](src/valkey-mcp-server) | Advanced data structures and caching with Valkey | [](https://kiro.dev/launch/mcp/add?name=awslabs.valkey-mcp-server&config=%7B%22command%22%3A%22uvx%22%2C%22args%22%3A%5B%22awslabs.valkey-mcp-server%40latest%22%5D%2C%22env%22%3A%7B%22VALKEY_HOST%22%3A%22127.0.0.1%22%2C%22VALKEY_PORT%22%3A%226379%22%2C%22FASTMCP_LOG_LEVEL%22%3A%22ERROR%22%7D%7D)
[](https://cursor.com/en/install-mcp?name=awslabs.valkey-mcp-server&config=eyJjb21tYW5kIjoidXZ4IGF3c2xhYnMudmFsa2V5LW1jcC1zZXJ2ZXJAbGF0ZXN0IiwiZW52Ijp7IlZBTEtFWV9IT1NUIjoiMTI3LjAuMC4xIiwiVkFMS0VZX1BPUlQiOiI2Mzc5IiwiRkFTVE1DUF9MT0dfTEVWRUwiOiJFUlJPUiJ9LCJhdXRvQXBwcm92ZSI6W10sImRpc2FibGVkIjpmYWxzZX0%3D)
[](https://insiders.vscode.dev/redirect/mcp/install?name=Valkey%20MCP%20Server&config=%7B%22command%22%3A%22uvx%22%2C%22args%22%3A%5B%22awslabs.valkey-mcp-server%40latest%22%5D%2C%22env%22%3A%7B%22VALKEY_HOST%22%3A%22127.0.0.1%22%2C%22VALKEY_PORT%22%3A%226379%22%2C%22FASTMCP_LOG_LEVEL%22%3A%22ERROR%22%7D%2C%22autoApprove%22%3A%5B%5D%2C%22disabled%22%3Afalse%7D) | | [Amazon ElastiCache for Memcached MCP Server](src/memcached-mcp-server) | High-speed caching with Memcached protocol | [](https://kiro.dev/launch/mcp/add?name=awslabs.memcached-mcp-server&config=%7B%22command%22%3A%22uvx%22%2C%22args%22%3A%5B%22awslabs.memcached-mcp-server%40latest%22%5D%2C%22env%22%3A%7B%22FASTMCP_LOG_LEVEL%22%3A%22ERROR%22%2C%22MEMCACHED_HOST%22%3A%22your-memcached-host%22%2C%22MEMCACHED_PORT%22%3A%2211211%22%7D%7D)
[](https://cursor.com/en/install-mcp?name=awslabs.memcached-mcp-server&config=eyJjb21tYW5kIjoidXZ4IGF3c2xhYnMubWVtY2FjaGVkLW1jcC1zZXJ2ZXJAbGF0ZXN0IiwiZW52Ijp7IkZBU1RNQ1BfTE9HX0xFVkVMIjoiRVJST1IiLCJNRU1DQUNIRURfSE9TVCI6InlvdXItbWVtY2FjaGVkLWhvc3QiLCJNRU1DQUNIRURfUE9SVCI6IjExMjExIn0sImRpc2FibGVkIjpmYWxzZSwiYXV0b0FwcHJvdmUiOltdfQ%3D%3D)
[](https://insiders.vscode.dev/redirect/mcp/install?name=Memcached%20MCP%20Server&config=%7B%22command%22%3A%22uvx%22%2C%22args%22%3A%5B%22awslabs.memcached-mcp-server%40latest%22%5D%2C%22env%22%3A%7B%22FASTMCP_LOG_LEVEL%22%3A%22ERROR%22%2C%22MEMCACHED_HOST%22%3A%22your-memcached-host%22%2C%22MEMCACHED_PORT%22%3A%2211211%22%7D%2C%22disabled%22%3Afalse%2C%22autoApprove%22%3A%5B%5D%7D) | ### 🛠️ Developer Tools & Support Accelerate development with code analysis, documentation, and testing utilities. | Server Name | Description | Install | |-------------|-------------|---------| | [AWS IAM MCP Server](src/iam-mcp-server) | Comprehensive IAM user, role, group, and policy management with security best practices | [](https://kiro.dev/launch/mcp/add?name=awslabs.iam-mcp-server&config=%7B%22command%22%3A%22uvx%22%2C%22args%22%3A%5B%22awslabs.iam-mcp-server%40latest%22%5D%2C%22env%22%3A%7B%22AWS_PROFILE%22%3A%22your-aws-profile%22%2C%22AWS_REGION%22%3A%22us-east-1%22%2C%22FASTMCP_LOG_LEVEL%22%3A%22ERROR%22%7D%7D)
[](https://cursor.com/en/install-mcp?name=awslabs.iam-mcp-server&config=eyJjb21tYW5kIjoidXZ4IiwiYXJncyI6WyJhd3NsYWJzLmlhbS1tY3Atc2VydmVyQGxhdGVzdCJdLCJlbnYiOnsiQVdTX1BST0ZJTEUiOiJ5b3VyLWF3cy1wcm9maWxlIiwiQVdTX1JFR0lPTiI6InVzLWVhc3QtMSIsIkZBU1RNQ1BfTE9HX0xFVkVMIjoiRVJST1IifX0%3D)
[](https://insiders.vscode.dev/redirect/mcp/install?name=AWS%20IAM%20MCP%20Server&config=%7B%22command%22%3A%22uvx%22%2C%22args%22%3A%5B%22awslabs.iam-mcp-server%40latest%22%5D%2C%22env%22%3A%7B%22AWS_PROFILE%22%3A%22your-aws-profile%22%2C%22AWS_REGION%22%3A%22us-east-1%22%2C%22FASTMCP_LOG_LEVEL%22%3A%22ERROR%22%7D%7D) | | [Git Repo Research MCP Server](src/git-repo-research-mcp-server) | Semantic code search and repository analysis | [](https://kiro.dev/launch/mcp/add?name=awslabs.git-repo-research-mcp-server&config=%7B%22command%22%3A%22uvx%22%2C%22args%22%3A%5B%22awslabs.git-repo-research-mcp-server%40latest%22%5D%2C%22env%22%3A%7B%22AWS_PROFILE%22%3A%22your-profile-name%22%2C%22AWS_REGION%22%3A%22us-west-2%22%2C%22FASTMCP_LOG_LEVEL%22%3A%22ERROR%22%2C%22GITHUB_TOKEN%22%3A%22your-github-token%22%7D%7D)
[](https://cursor.com/en/install-mcp?name=awslabs.git-repo-research-mcp-server&config=eyJjb21tYW5kIjoidXZ4IGF3c2xhYnMuZ2l0LXJlcG8tcmVzZWFyY2gtbWNwLXNlcnZlckBsYXRlc3QiLCJlbnYiOnsiQVdTX1BST0ZJTEUiOiJ5b3VyLXByb2ZpbGUtbmFtZSIsIkFXU19SRUdJT04iOiJ1cy13ZXN0LTIiLCJGQVNUTUNQX0xPR19MRVZFTCI6IkVSUk9SIiwiR0lUSFVCX1RPS0VOIjoieW91ci1naXRodWItdG9rZW4ifSwiZGlzYWJsZWQiOmZhbHNlLCJhdXRvQXBwcm92ZSI6W119)
[](https://insiders.vscode.dev/redirect/mcp/install?name=Git%20Repo%20Research%20MCP%20Server&config=%7B%22command%22%3A%22uvx%22%2C%22args%22%3A%5B%22awslabs.git-repo-research-mcp-server%40latest%22%5D%2C%22env%22%3A%7B%22AWS_PROFILE%22%3A%22your-profile-name%22%2C%22AWS_REGION%22%3A%22us-west-2%22%2C%22FASTMCP_LOG_LEVEL%22%3A%22ERROR%22%2C%22GITHUB_TOKEN%22%3A%22your-github-token%22%7D%2C%22disabled%22%3Afalse%2C%22autoApprove%22%3A%5B%5D%7D) | | [Code Documentation Generator MCP Server](src/code-doc-gen-mcp-server) | ⚠️ **DEPRECATED** - Automated documentation from code analysis | [](https://kiro.dev/launch/mcp/add?name=awslabs.code-doc-gen-mcp-server&config=%7B%22command%22%3A%22uvx%22%2C%22args%22%3A%5B%22awslabs.code-doc-gen-mcp-server%40latest%22%5D%2C%22env%22%3A%7B%22FASTMCP_LOG_LEVEL%22%3A%22ERROR%22%7D%7D)
[](https://cursor.com/en/install-mcp?name=awslabs.code-doc-gen-mcp-server&config=eyJjb21tYW5kIjoidXZ4IGF3c2xhYnMuY29kZS1kb2MtZ2VuLW1jcC1zZXJ2ZXJAbGF0ZXN0IiwiZW52Ijp7IkZBU1RNQ1BfTE9HX0xFVkVMIjoiRVJST1IifSwiZGlzYWJsZWQiOmZhbHNlLCJhdXRvQXBwcm92ZSI6W119)
[](https://insiders.vscode.dev/redirect/mcp/install?name=Code%20Documentation%20Generator%20MCP%20Server&config=%7B%22command%22%3A%22uvx%22%2C%22args%22%3A%5B%22awslabs.code-doc-gen-mcp-server%40latest%22%5D%2C%22env%22%3A%7B%22FASTMCP_LOG_LEVEL%22%3A%22ERROR%22%7D%2C%22disabled%22%3Afalse%2C%22autoApprove%22%3A%5B%5D%7D) | | [AWS Diagram MCP Server](src/aws-diagram-mcp-server) | Generate architecture diagrams and technical illustrations | [](https://kiro.dev/launch/mcp/add?name=awslabs.aws-diagram-mcp-server&config=%7B%22command%22%3A%22uvx%22%2C%22args%22%3A%5B%22awslabs.aws-diagram-mcp-server%22%5D%2C%22env%22%3A%7B%22FASTMCP_LOG_LEVEL%22%3A%22ERROR%22%7D%7D)
[](https://cursor.com/en/install-mcp?name=awslabs.aws-diagram-mcp-server&config=eyJjb21tYW5kIjoidXZ4IGF3c2xhYnMuYXdzLWRpYWdyYW0tbWNwLXNlcnZlciIsImVudiI6eyJGQVNUTUNQX0xPR19MRVZFTCI6IkVSUk9SIn0sImF1dG9BcHByb3ZlIjpbXSwiZGlzYWJsZWQiOmZhbHNlfQ%3D%3D)
[](https://insiders.vscode.dev/redirect/mcp/install?name=AWS%20Diagram%20MCP%20Server&config=%7B%22command%22%3A%22uvx%22%2C%22args%22%3A%5B%22awslabs.aws-diagram-mcp-server%22%5D%2C%22env%22%3A%7B%22FASTMCP_LOG_LEVEL%22%3A%22ERROR%22%7D%2C%22autoApprove%22%3A%5B%5D%2C%22disabled%22%3Afalse%7D) | | [Frontend MCP Server](src/frontend-mcp-server) | React and modern web development guidance | [](https://kiro.dev/launch/mcp/add?name=awslabs.frontend-mcp-server&config=%7B%22command%22%3A%22uvx%22%2C%22args%22%3A%5B%22awslabs.frontend-mcp-server%40latest%22%5D%2C%22env%22%3A%7B%22FASTMCP_LOG_LEVEL%22%3A%22ERROR%22%7D%7D)
[](https://cursor.com/en/install-mcp?name=awslabs.frontend-mcp-server&config=eyJjb21tYW5kIjoidXZ4IGF3c2xhYnMuZnJvbnRlbmQtbWNwLXNlcnZlckBsYXRlc3QiLCJlbnYiOnsiRkFTVE1DUF9MT0dfTEVWRUwiOiJFUlJPUiJ9LCJkaXNhYmxlZCI6ZmFsc2UsImF1dG9BcHByb3ZlIjpbXX0%3D)
[](https://insiders.vscode.dev/redirect/mcp/install?name=Frontend%20MCP%20Server&config=%7B%22command%22%3A%22uvx%22%2C%22args%22%3A%5B%22awslabs.frontend-mcp-server%40latest%22%5D%2C%22env%22%3A%7B%22FASTMCP_LOG_LEVEL%22%3A%22ERROR%22%7D%2C%22disabled%22%3Afalse%2C%22autoApprove%22%3A%5B%5D%7D) | | [Synthetic Data MCP Server](src/syntheticdata-mcp-server) | Generate realistic test data for development and ML | [](https://kiro.dev/launch/mcp/add?name=awslabs.syntheticdata-mcp-server&config=%7B%22command%22%3A%22uvx%22%2C%22args%22%3A%5B%22awslabs.syntheticdata-mcp-server%22%5D%2C%22env%22%3A%7B%22FASTMCP_LOG_LEVEL%22%3A%22ERROR%22%2C%22AWS_PROFILE%22%3A%22your-aws-profile%22%2C%22AWS_REGION%22%3A%22us-east-1%22%7D%7D)
[](https://cursor.com/en/install-mcp?name=awslabs.syntheticdata-mcp-server&config=eyJjb21tYW5kIjoidXZ4IGF3c2xhYnMuc3ludGhldGljZGF0YS1tY3Atc2VydmVyIiwiZW52Ijp7IkZBU1RNQ1BfTE9HX0xFVkVMIjoiRVJST1IiLCJBV1NfUFJPRklMRSI6InlvdXItYXdzLXByb2ZpbGUiLCJBV1NfUkVHSU9OIjoidXMtZWFzdC0xIn0sImF1dG9BcHByb3ZlIjpbXSwiZGlzYWJsZWQiOmZhbHNlfQ%3D%3D)
[](https://insiders.vscode.dev/redirect/mcp/install?name=Synthetic%20Data%20MCP%20Server&config=%7B%22command%22%3A%22uvx%22%2C%22args%22%3A%5B%22awslabs.syntheticdata-mcp-server%22%5D%2C%22env%22%3A%7B%22FASTMCP_LOG_LEVEL%22%3A%22ERROR%22%2C%22AWS_PROFILE%22%3A%22your-aws-profile%22%2C%22AWS_REGION%22%3A%22us-east-1%22%7D%2C%22autoApprove%22%3A%5B%5D%2C%22disabled%22%3Afalse%7D) | | [OpenAPI MCP Server](src/openapi-mcp-server) | Dynamic API integration through OpenAPI specifications | [](https://kiro.dev/launch/mcp/add?name=awslabs.openapi-mcp-server&config=%7B%22command%22%3A%22uvx%22%2C%22args%22%3A%5B%22awslabs.openapi-mcp-server%40latest%22%5D%2C%22env%22%3A%7B%22API_NAME%22%3A%22your-api-name%22%2C%22API_BASE_URL%22%3A%22https%3A//api.example.com%22%2C%22API_SPEC_URL%22%3A%22https%3A//api.example.com/openapi.json%22%2C%22LOG_LEVEL%22%3A%22ERROR%22%2C%22ENABLE_PROMETHEUS%22%3A%22false%22%2C%22ENABLE_OPERATION_PROMPTS%22%3A%22true%22%2C%22UVICORN_TIMEOUT_GRACEFUL_SHUTDOWN%22%3A%225.0%22%2C%22UVICORN_GRACEFUL_SHUTDOWN%22%3A%22true%22%7D%7D)
[](https://cursor.com/en/install-mcp?name=awslabs.openapi-mcp-server&config=eyJjb21tYW5kIjoidXZ4IGF3c2xhYnMub3BlbmFwaS1tY3Atc2VydmVyQGxhdGVzdCIsImVudiI6eyJBUElfTkFNRSI6InlvdXItYXBpLW5hbWUiLCJBUElfQkFTRV9VUkwiOiJodHRwczovL2FwaS5leGFtcGxlLmNvbSIsIkFQSV9TUEVDX1VSTCI6Imh0dHBzOi8vYXBpLmV4YW1wbGUuY29tL29wZW5hcGkuanNvbiIsIkxPR19MRVZFTCI6IkVSUk9SIiwiRU5BQkxFX1BST01FVEhFVVMiOiJmYWxzZSIsIkVOQUJMRV9PUEVSQVRJT05fUFJPTVBUUyI6InRydWUiLCJVVklDT1JOX1RJTUVPVVRfR1JBQ0VGVUxfU0hVVERPV04iOiI1LjAiLCJVVklDT1JOX0dSQUNFRlVMX1NIVVRET1dOIjoidHJ1ZSJ9LCJkaXNhYmxlZCI6ZmFsc2UsImF1dG9BcHByb3ZlIjpbXX0%3D)
[](https://insiders.vscode.dev/redirect/mcp/install?name=OpenAPI%20MCP%20Server&config=%7B%22command%22%3A%22uvx%22%2C%22args%22%3A%5B%22awslabs.openapi-mcp-server%40latest%22%5D%2C%22env%22%3A%7B%22API_NAME%22%3A%22your-api-name%22%2C%22API_BASE_URL%22%3A%22https%3A%2F%2Fapi.example.com%22%2C%22API_SPEC_URL%22%3A%22https%3A%2F%2Fapi.example.com%2Fopenapi.json%22%2C%22LOG_LEVEL%22%3A%22ERROR%22%2C%22ENABLE_PROMETHEUS%22%3A%22false%22%2C%22ENABLE_OPERATION_PROMPTS%22%3A%22true%22%2C%22UVICORN_TIMEOUT_GRACEFUL_SHUTDOWN%22%3A%225.0%22%2C%22UVICORN_GRACEFUL_SHUTDOWN%22%3A%22true%22%7D%2C%22disabled%22%3Afalse%2C%22autoApprove%22%3A%5B%5D%7D) | ### 📡 Integration & Messaging Connect systems with messaging, workflows, and location services. | Server Name | Description | Install | |-------------|-------------|---------| | [Amazon SNS / SQS MCP Server](src/amazon-sns-sqs-mcp-server) | Event-driven messaging and queue management | [](https://kiro.dev/launch/mcp/add?name=awslabs.amazon-sns-sqs-mcp-server&config=%7B%22command%22%3A%22uvx%22%2C%22args%22%3A%5B%22awslabs.amazon-sns-sqs-mcp-server%40latest%22%5D%2C%22env%22%3A%7B%22AWS_PROFILE%22%3A%22your-aws-profile%22%2C%22AWS_REGION%22%3A%22us-east-1%22%7D%7D)
[](https://cursor.com/en/install-mcp?name=awslabs.amazon-sns-sqs-mcp-server&config=eyJjb21tYW5kIjoidXZ4IGF3c2xhYnMuYW1hem9uLXNucy1zcXMtbWNwLXNlcnZlckBsYXRlc3QiLCJlbnYiOnsiQVdTX1BST0ZJTEUiOiJ5b3VyLWF3cy1wcm9maWxlIiwiQVdTX1JFR0lPTiI6InVzLWVhc3QtMSJ9fQ%3D%3D)
[](https://insiders.vscode.dev/redirect/mcp/install?name=Amazon%20SNS%2FSQS%20MCP%20Server&config=%7B%22command%22%3A%22uvx%22%2C%22args%22%3A%5B%22awslabs.amazon-sns-sqs-mcp-server%40latest%22%5D%2C%22env%22%3A%7B%22AWS_PROFILE%22%3A%22your-aws-profile%22%2C%22AWS_REGION%22%3A%22us-east-1%22%7D%7D) | | [Amazon MQ MCP Server](src/amazon-mq-mcp-server) | Message broker management for RabbitMQ and ActiveMQ | [](https://kiro.dev/launch/mcp/add?name=awslabs.amazon-mq-mcp-server&config=%7B%22command%22%3A%22uvx%22%2C%22args%22%3A%5B%22awslabs.amazon-mq-mcp-server%40latest%22%5D%2C%22env%22%3A%7B%22AWS_PROFILE%22%3A%22your-aws-profile%22%2C%22AWS_REGION%22%3A%22us-east-1%22%2C%22FASTMCP_LOG_LEVEL%22%3A%22ERROR%22%7D%7D)
[](https://cursor.com/en/install-mcp?name=awslabs.amazon-mq-mcp-server&config=eyJjb21tYW5kIjoidXZ4IGF3c2xhYnMuYW1hem9uLW1xLW1jcC1zZXJ2ZXJAbGF0ZXN0IiwiZW52Ijp7IkFXU19QUk9GSUxFIjoieW91ci1hd3MtcHJvZmlsZSIsIkFXU19SRUdJT04iOiJ1cy1lYXN0LTEiLCJGQVNUTUNQX0xPR19MRVZFTCI6IkVSUk9SIn0sImRpc2FibGVkIjpmYWxzZSwiYXV0b0FwcHJvdmUiOltdfQ%3D%3D)
[](https://insiders.vscode.dev/redirect/mcp/install?name=Amazon%20MQ%20MCP%20Server&config=%7B%22command%22%3A%22uvx%22%2C%22args%22%3A%5B%22awslabs.amazon-mq-mcp-server%40latest%22%5D%2C%22env%22%3A%7B%22AWS_PROFILE%22%3A%22your-aws-profile%22%2C%22AWS_REGION%22%3A%22us-east-1%22%2C%22FASTMCP_LOG_LEVEL%22%3A%22ERROR%22%7D%2C%22disabled%22%3Afalse%2C%22autoApprove%22%3A%5B%5D%7D) | | [AWS MSK MCP Server](src/aws-msk-mcp-server) | Managed Kafka cluster operations and streaming | [](https://kiro.dev/launch/mcp/add?name=awslabs.aws-msk-mcp-server&config=%7B%22command%22%3A%22uvx%22%2C%22args%22%3A%5B%22awslabs.aws-msk-mcp-server%40latest%22%2C%22--allow-writes%22%5D%2C%22env%22%3A%7B%22FASTMCP_LOG_LEVEL%22%3A%22ERROR%22%7D%7D)
[](https://cursor.com/en/install-mcp?name=awslabs.aws-msk-mcp-server&config=JTdCJTIyY29tbWFuZCUyMiUzQSUyMnV2eCUyMGF3c2xhYnMuYXdzLW1zay1tY3Atc2VydmVyJTQwbGF0ZXN0JTIwLS1hbGxvdy13cml0ZXMlMjIlMkMlMjJlbnYlMjIlM0ElN0IlMjJGQVNUTUNQX0xPR19MRVZFTCUyMiUzQSUyMkVSUk9SJTIyJTdEJTJDJTIyZGlzYWJsZWQlMjIlM0FmYWxzZSUyQyUyMmF1dG9BcHByb3ZlJTIyJTNBJTVCJTVEJTdE)
[](https://insiders.vscode.dev/redirect/mcp/install?name=AWS%20MSK%20MCP%20Server&config=%7B%22command%22%3A%22uvx%22%2C%22args%22%3A%5B%22awslabs.aws-msk-mcp-server%40latest%22%2C%22--allow-writes%22%5D%2C%22env%22%3A%7B%22FASTMCP_LOG_LEVEL%22%3A%22ERROR%22%7D%2C%22disabled%22%3Afalse%2C%22autoApprove%22%3A%5B%5D%7D) | | [AWS Step Functions Tool MCP Server](src/stepfunctions-tool-mcp-server) | Execute complex workflows and business processes | [](https://kiro.dev/launch/mcp/add?name=awslabs.stepfunctions-tool-mcp-server&config=%7B%22command%22%3A%22uvx%22%2C%22args%22%3A%5B%22awslabs.stepfunctions-tool-mcp-server%40latest%22%5D%2C%22env%22%3A%7B%22AWS_PROFILE%22%3A%22your-aws-profile%22%2C%22AWS_REGION%22%3A%22us-east-1%22%2C%22STATE_MACHINE_PREFIX%22%3A%22your-state-machine-prefix%22%2C%22STATE_MACHINE_LIST%22%3A%22your-first-state-machine%2C%20your-second-state-machine%22%2C%22STATE_MACHINE_TAG_KEY%22%3A%22your-tag-key%22%2C%22STATE_MACHINE_TAG_VALUE%22%3A%22your-tag-value%22%2C%22STATE_MACHINE_INPUT_SCHEMA_ARN_TAG_KEY%22%3A%22your-state-machine-tag-for-input-schema%22%7D%7D)
[](https://cursor.com/en/install-mcp?name=awslabs.stepfunctions-tool-mcp-server&config=eyJjb21tYW5kIjoidXZ4IGF3c2xhYnMuc3RlcGZ1bmN0aW9ucy10b29sLW1jcC1zZXJ2ZXJAbGF0ZXN0IiwiZW52Ijp7IkFXU19QUk9GSUxFIjoieW91ci1hd3MtcHJvZmlsZSIsIkFXU19SRUdJT04iOiJ1cy1lYXN0LTEiLCJTVEFURV9NQUNISU5FX1BSRUZJWCI6InlvdXItc3RhdGUtbWFjaGluZS1wcmVmaXgiLCJTVEFURV9NQUNISU5FX0xJU1QiOiJ5b3VyLWZpcnN0LXN0YXRlLW1hY2hpbmUsIHlvdXItc2Vjb25kLXN0YXRlLW1hY2hpbmUiLCJTVEFURV9NQUNISU5FX1RBR19LRVkiOiJ5b3VyLXRhZy1rZXkiLCJTVEFURV9NQUNISU5FX1RBR19WQUxVRSI6InlvdXItdGFnLXZhbHVlIiwiU1RBVEVfTUFDSElORV9JTlBVVF9TQ0hFTUFfQVJOX1RBR19LRVkiOiJ5b3VyLXN0YXRlLW1hY2hpbmUtdGFnLWZvci1pbnB1dC1zY2hlbWEifX0%3D)
[](https://insiders.vscode.dev/redirect/mcp/install?name=Step%20Functions%20Tool%20MCP%20Server&config=%7B%22command%22%3A%22uvx%22%2C%22args%22%3A%5B%22awslabs.stepfunctions-tool-mcp-server%40latest%22%5D%2C%22env%22%3A%7B%22AWS_PROFILE%22%3A%22your-aws-profile%22%2C%22AWS_REGION%22%3A%22us-east-1%22%2C%22STATE_MACHINE_PREFIX%22%3A%22your-state-machine-prefix%22%2C%22STATE_MACHINE_LIST%22%3A%22your-first-state-machine%2C%20your-second-state-machine%22%2C%22STATE_MACHINE_TAG_KEY%22%3A%22your-tag-key%22%2C%22STATE_MACHINE_TAG_VALUE%22%3A%22your-tag-value%22%2C%22STATE_MACHINE_INPUT_SCHEMA_ARN_TAG_KEY%22%3A%22your-state-machine-tag-for-input-schema%22%7D%2C%22disabled%22%3Afalse%2C%22autoApprove%22%3A%5B%5D%7D) | | [Amazon Location Service MCP Server](src/aws-location-mcp-server) | Place search, geocoding, and route optimization | [](https://kiro.dev/launch/mcp/add?name=awslabs.aws-location-mcp-server&config=%7B%22command%22%3A%22uvx%22%2C%22args%22%3A%5B%22awslabs.aws-location-mcp-server%40latest%22%5D%2C%22env%22%3A%7B%22AWS_PROFILE%22%3A%22your-aws-profile%22%2C%22AWS_REGION%22%3A%22us-east-1%22%2C%22FASTMCP_LOG_LEVEL%22%3A%22ERROR%22%7D%7D)
[](https://cursor.com/en/install-mcp?name=awslabs.aws-location-mcp-server&config=eyJjb21tYW5kIjoidXZ4IGF3c2xhYnMuYXdzLWxvY2F0aW9uLW1jcC1zZXJ2ZXJAbGF0ZXN0IiwiZW52Ijp7IkFXU19QUk9GSUxFIjoieW91ci1hd3MtcHJvZmlsZSIsIkFXU19SRUdJT04iOiJ1cy1lYXN0LTEiLCJGQVNUTUNQX0xPR19MRVZFTCI6IkVSUk9SIn0sImRpc2FibGVkIjpmYWxzZSwiYXV0b0FwcHJvdmUiOltdfQ%3D%3D)
[](https://insiders.vscode.dev/redirect/mcp/install?name=AWS%20Location%20MCP%20Server&config=%7B%22command%22%3A%22uvx%22%2C%22args%22%3A%5B%22awslabs.aws-location-mcp-server%40latest%22%5D%2C%22env%22%3A%7B%22AWS_PROFILE%22%3A%22your-aws-profile%22%2C%22AWS_REGION%22%3A%22us-east-1%22%2C%22FASTMCP_LOG_LEVEL%22%3A%22ERROR%22%7D%2C%22disabled%22%3Afalse%2C%22autoApprove%22%3A%5B%5D%7D) | | [OpenAPI MCP Server](src/openapi-mcp-server) | Dynamic API integration through OpenAPI specifications | [](https://kiro.dev/launch/mcp/add?name=awslabs.openapi-mcp-server&config=%7B%22command%22%3A%22uvx%22%2C%22args%22%3A%5B%22awslabs.openapi-mcp-server%40latest%22%5D%2C%22env%22%3A%7B%22API_NAME%22%3A%22your-api-name%22%2C%22API_BASE_URL%22%3A%22https%3A//api.example.com%22%2C%22API_SPEC_URL%22%3A%22https%3A//api.example.com/openapi.json%22%2C%22LOG_LEVEL%22%3A%22ERROR%22%2C%22ENABLE_PROMETHEUS%22%3A%22false%22%2C%22ENABLE_OPERATION_PROMPTS%22%3A%22true%22%2C%22UVICORN_TIMEOUT_GRACEFUL_SHUTDOWN%22%3A%225.0%22%2C%22UVICORN_GRACEFUL_SHUTDOWN%22%3A%22true%22%7D%7D)
[](https://cursor.com/en/install-mcp?name=awslabs.openapi-mcp-server&config=eyJjb21tYW5kIjoidXZ4IGF3c2xhYnMub3BlbmFwaS1tY3Atc2VydmVyQGxhdGVzdCIsImVudiI6eyJBUElfTkFNRSI6InlvdXItYXBpLW5hbWUiLCJBUElfQkFTRV9VUkwiOiJodHRwczovL2FwaS5leGFtcGxlLmNvbSIsIkFQSV9TUEVDX1VSTCI6Imh0dHBzOi8vYXBpLmV4YW1wbGUuY29tL29wZW5hcGkuanNvbiIsIkxPR19MRVZFTCI6IkVSUk9SIiwiRU5BQkxFX1BST01FVEhFVVMiOiJmYWxzZSIsIkVOQUJMRV9PUEVSQVRJT05fUFJPTVBUUyI6InRydWUiLCJVVklDT1JOX1RJTUVPVVRfR1JBQ0VGVUxfU0hVVERPV04iOiI1LjAiLCJVVklDT1JOX0dSQUNFRlVMX1NIVVRET1dOIjoidHJ1ZSJ9LCJkaXNhYmxlZCI6ZmFsc2UsImF1dG9BcHByb3ZlIjpbXX0%3D)
[](https://insiders.vscode.dev/redirect/mcp/install?name=OpenAPI%20MCP%20Server&config=%7B%22command%22%3A%22uvx%22%2C%22args%22%3A%5B%22awslabs.openapi-mcp-server%40latest%22%5D%2C%22env%22%3A%7B%22API_NAME%22%3A%22your-api-name%22%2C%22API_BASE_URL%22%3A%22https%3A%2F%2Fapi.example.com%22%2C%22API_SPEC_URL%22%3A%22https%3A%2F%2Fapi.example.com%2Fopenapi.json%22%2C%22LOG_LEVEL%22%3A%22ERROR%22%2C%22ENABLE_PROMETHEUS%22%3A%22false%22%2C%22ENABLE_OPERATION_PROMPTS%22%3A%22true%22%2C%22UVICORN_TIMEOUT_GRACEFUL_SHUTDOWN%22%3A%225.0%22%2C%22UVICORN_GRACEFUL_SHUTDOWN%22%3A%22true%22%7D%2C%22disabled%22%3Afalse%2C%22autoApprove%22%3A%5B%5D%7D) | ### 💰 Cost & Operations Monitor, optimize, and manage your AWS infrastructure and costs. | Server Name | Description | Install | |-------------|-------------|---------| | [AWS Pricing MCP Server](src/aws-pricing-mcp-server) | AWS service pricing and cost estimates | [](https://kiro.dev/launch/mcp/add?name=awslabs.aws-pricing-mcp-server&config=%7B%22command%22%3A%22uvx%22%2C%22args%22%3A%5B%22awslabs.aws-pricing-mcp-server%40latest%22%5D%2C%22env%22%3A%7B%22FASTMCP_LOG_LEVEL%22%3A%22ERROR%22%2C%22AWS_PROFILE%22%3A%22your-aws-profile%22%2C%22AWS_REGION%22%3A%22us-east-1%22%7D%7D)
[](https://cursor.com/en/install-mcp?name=awslabs.aws-pricing-mcp-server&config=ewogICAgImNvbW1hbmQiOiAidXZ4IGF3c2xhYnMuYXdzLXByaWNpbmctbWNwLXNlcnZlckBsYXRlc3QiLAogICAgImVudiI6IHsKICAgICAgIkZBU1RNQ1BfTE9HX0xFVkVMIjogIkVSUk9SIiwKICAgICAgIkFXU19QUk9GSUxFIjogInlvdXItYXdzLXByb2ZpbGUiLAogICAgICAiQVdTX1JFR0lPTiI6ICJ1cy1lYXN0LTEiCiAgICB9LAogICAgImRpc2FibGVkIjogZmFsc2UsCiAgICAiYXV0b0FwcHJvdmUiOiBbXQogIH0K)
[](https://insiders.vscode.dev/redirect/mcp/install?name=AWS%20Pricing%20MCP%20Server&config=%7B%22command%22%3A%22uvx%22%2C%22args%22%3A%5B%22awslabs.aws-pricing-mcp-server%40latest%22%5D%2C%22env%22%3A%7B%22FASTMCP_LOG_LEVEL%22%3A%22ERROR%22%2C%22AWS_PROFILE%22%3A%22your-aws-profile%22%2C%22AWS_REGION%22%3A%22us-east-1%22%7D%2C%22disabled%22%3Afalse%2C%22autoApprove%22%3A%5B%5D%7D) | | [AWS Cost Explorer MCP Server](src/cost-explorer-mcp-server) | Detailed cost analysis and reporting | [](https://kiro.dev/launch/mcp/add?name=awslabs.cost-explorer-mcp-server&config=%7B%22command%22%3A%22uvx%22%2C%22args%22%3A%5B%22awslabs.cost-explorer-mcp-server%40latest%22%5D%2C%22env%22%3A%7B%22AWS_PROFILE%22%3A%22your-aws-profile%22%2C%22AWS_REGION%22%3A%22us-east-1%22%2C%22FASTMCP_LOG_LEVEL%22%3A%22ERROR%22%7D%7D)
[](https://cursor.com/en/install-mcp?name=awslabs.cost-explorer-mcp-server&config=eyJjb21tYW5kIjoidXZ4IGF3c2xhYnMuY29zdC1leHBsb3Jlci1tY3Atc2VydmVyQGxhdGVzdCIsImVudiI6eyJBV1NfUFJPRklMRSI6InlvdXItYXdzLXByb2ZpbGUiLCJBV1NfUkVHSU9OIjoidXMtZWFzdC0xIiwiRkFTVE1DUF9MT0dfTEVWRUwiOiJFUlJPUiJ9LCJkaXNhYmxlZCI6ZmFsc2UsImF1dG9BcHByb3ZlIjpbXX0%3D)
[](https://insiders.vscode.dev/redirect/mcp/install?name=Cost%20Explorer%20MCP%20Server&config=%7B%22command%22%3A%22uvx%22%2C%22args%22%3A%5B%22awslabs.cost-explorer-mcp-server%40latest%22%5D%2C%22env%22%3A%7B%22AWS_PROFILE%22%3A%22your-aws-profile%22%2C%22AWS_REGION%22%3A%22us-east-1%22%2C%22FASTMCP_LOG_LEVEL%22%3A%22ERROR%22%7D%2C%22disabled%22%3Afalse%2C%22autoApprove%22%3A%5B%5D%7D) | | [Amazon CloudWatch MCP Server](src/cloudwatch-mcp-server) | Metrics, Alarms, and Logs analysis and operational troubleshooting | [](https://kiro.dev/launch/mcp/add?name=awslabs.cloudwatch-mcp-server&config=%7B%22command%22%3A%22uvx%22%2C%22args%22%3A%5B%22awslabs.cloudwatch-mcp-server%40latest%22%5D%2C%22env%22%3A%7B%22AWS_PROFILE%22%3A%22%5BThe%20AWS%20Profile%20Name%20to%20use%20for%20AWS%20access%5D%22%2C%22FASTMCP_LOG_LEVEL%22%3A%22ERROR%22%7D%7D)
[](https://cursor.com/en/install-mcp?name=awslabs.cloudwatch-mcp-server&config=ewogICAgImF1dG9BcHByb3ZlIjogW10sCiAgICAiZGlzYWJsZWQiOiBmYWxzZSwKICAgICJjb21tYW5kIjogInV2eCBhd3NsYWJzLmNsb3Vkd2F0Y2gtbWNwLXNlcnZlckBsYXRlc3QiLAogICAgImVudiI6IHsKICAgICAgIkFXU19QUk9GSUxFIjogIltUaGUgQVdTIFByb2ZpbGUgTmFtZSB0byB1c2UgZm9yIEFXUyBhY2Nlc3NdIiwKICAgICAgIkZBU1RNQ1BfTE9HX0xFVkVMIjogIkVSUk9SIgogICAgfSwKICAgICJ0cmFuc3BvcnRUeXBlIjogInN0ZGlvIgp9)
[](https://insiders.vscode.dev/redirect/mcp/install?name=CloudWatch%20MCP%20Server&config=%7B%22autoApprove%22%3A%5B%5D%2C%22disabled%22%3Afalse%2C%22command%22%3A%22uvx%22%2C%22args%22%3A%5B%22awslabs.cloudwatch-mcp-server%40latest%22%5D%2C%22env%22%3A%7B%22AWS_PROFILE%22%3A%22%5BThe%20AWS%20Profile%20Name%20to%20use%20for%20AWS%20access%5D%22%2C%22FASTMCP_LOG_LEVEL%22%3A%22ERROR%22%7D%2C%22transportType%22%3A%22stdio%22%7D) | | [AWS Managed Prometheus MCP Server](src/prometheus-mcp-server) | Prometheus-compatible operations | [](https://kiro.dev/launch/mcp/add?name=awslabs.prometheus-mcp-server&config=%7B%22command%22%3A%22uvx%22%2C%22args%22%3A%5B%22awslabs.prometheus-mcp-server%40latest%22%2C%22--url%22%2C%22https%3A//aps-workspaces.us-east-1.amazonaws.com/workspaces/ws-%3CWorkspace%22%2C%22ID%3E%22%2C%22--region%22%2C%22%3CYour%22%2C%22AWS%22%2C%22Region%3E%22%2C%22--profile%22%2C%22%3CYour%22%2C%22CLI%22%2C%22Profile%22%2C%22%5Bdefault%5D%22%2C%22if%22%2C%22no%22%2C%22profile%22%2C%22is%22%2C%22used%3E%22%5D%2C%22env%22%3A%7B%22FASTMCP_LOG_LEVEL%22%3A%22DEBUG%22%2C%22AWS_PROFILE%22%3A%22%3CYour%20CLI%20Profile%20%5Bdefault%5D%20if%20no%20profile%20is%20used%3E%22%7D%7D)
[](https://cursor.com/en/install-mcp?name=awslabs.prometheus-mcp-server&config=eyJjb21tYW5kIjoidXZ4IGF3c2xhYnMucHJvbWV0aGV1cy1tY3Atc2VydmVyQGxhdGVzdCAtLXVybCBodHRwczovL2Fwcy13b3Jrc3BhY2VzLnVzLWVhc3QtMS5hbWF6b25hd3MuY29tL3dvcmtzcGFjZXMvd3MtPFdvcmtzcGFjZSBJRD4gLS1yZWdpb24gPFlvdXIgQVdTIFJlZ2lvbj4gLS1wcm9maWxlIDxZb3VyIENMSSBQcm9maWxlIFtkZWZhdWx0XSBpZiBubyBwcm9maWxlIGlzIHVzZWQ%2BIiwiZW52Ijp7IkZBU1RNQ1BfTE9HX0xFVkVMIjoiREVCVUciLCJBV1NfUFJPRklMRSI6IjxZb3VyIENMSSBQcm9maWxlIFtkZWZhdWx0XSBpZiBubyBwcm9maWxlIGlzIHVzZWQ%2BIn19)
[](https://insiders.vscode.dev/redirect/mcp/install?name=Prometheus%20MCP%20Server&config=%7B%22command%22%3A%22uvx%22%2C%22args%22%3A%5B%22awslabs.prometheus-mcp-server%40latest%22%2C%22--url%22%2C%22https%3A%2F%2Faps-workspaces.us-east-1.amazonaws.com%2Fworkspaces%2Fws-%3CWorkspace%20ID%3E%22%2C%22--region%22%2C%22%3CYour%20AWS%20Region%3E%22%2C%22--profile%22%2C%22%3CYour%20CLI%20Profile%20%5Bdefault%5D%20if%20no%20profile%20is%20used%3E%22%5D%2C%22env%22%3A%7B%22FASTMCP_LOG_LEVEL%22%3A%22DEBUG%22%2C%22AWS_PROFILE%22%3A%22%3CYour%20CLI%20Profile%20%5Bdefault%5D%20if%20no%20profile%20is%20used%3E%22%7D%7D) | | [AWS Billing and Cost Management MCP Server](src/billing-cost-management-mcp-server/) | Billing and cost management | [](https://kiro.dev/launch/mcp/add?name=awslabs.billing-cost-management-mcp-server&config=%7B%22command%22%3A%22uvx%22%2C%22args%22%3A%5B%22awslabs.billing-cost-management-mcp-server%40latest%22%5D%2C%22env%22%3A%7B%22FASTMCP_LOG_LEVEL%22%3A%22ERROR%22%2C%22AWS_PROFILE%22%3A%22your-aws-profile%22%2C%22AWS_REGION%22%3A%22us-east-1%22%7D%7D)
[](https://cursor.com/en/install-mcp?name=awslabs.billing-cost-management-mcp-server&config=ewogICAgImNvbW1hbmQiOiAidXZ4IGF3c2xhYnMuYmlsbGluZy1jb3N0LW1hbmFnZW1lbnQtbWNwLXNlcnZlckBsYXRlc3QiLAogICAgImVudiI6IHsKICAgICAgIkZBU1RNQ1BfTE9HX0xFVkVMIjogIkVSUk9SIiwKICAgICAgIkFXU19QUk9GSUxFIjogInlvdXItYXdzLXByb2ZpbGUiLAogICAgICAiQVdTX1JFR0lPTiI6ICJ1cy1lYXN0LTEiCiAgICB9LAogICAgImRpc2FibGVkIjogZmFsc2UsCiAgICAiYXV0b0FwcHJvdmUiOiBbXQogIH0K)
[](https://insiders.vscode.dev/redirect/mcp/install?name=AWS%20Billing%20and%20Cost%20Management%20MCP%20Server&config=%7B%22command%22%3A%22uvx%22%2C%22args%22%3A%5B%22awslabs.billing-cost-management-mcp-server%40latest%22%5D%2C%22env%22%3A%7B%22FASTMCP_LOG_LEVEL%22%3A%22ERROR%22%2C%22AWS_PROFILE%22%3A%22your-aws-profile%22%2C%22AWS_REGION%22%3A%22us-east-1%22%7D%2C%22disabled%22%3Afalse%2C%22autoApprove%22%3A%5B%5D%7D) | ### 🧬 Healthcare & Lifesciences Interact with AWS HealthAI services. | Server Name | Description | Install | |-------------|-------------|---------| | [AWS HealthOmics MCP Server](src/aws-healthomics-mcp-server) | Generate, run, debug and optimize lifescience workflows | [](https://kiro.dev/launch/mcp/add?name=awslabs.aws-healthomics-mcp-server&config=%7B%22command%22%3A%22uvx%22%2C%22args%22%3A%5B%22awslabs.aws-healthomics-mcp-server%40latest%22%5D%2C%22env%22%3A%7B%22AWS_REGION%22%3A%22us-east-1%22%2C%22AWS_PROFILE%22%3A%22your-profile%22%2C%22FASTMCP_LOG_LEVEL%22%3A%22WARNING%22%7D%7D)
[](https://cursor.com/en/install-mcp?name=awslabs.aws-healthomics-mcp-server&config=eyJjb21tYW5kIjoidXZ4IGF3c2xhYnMuYXdzLWhlYWx0aG9taWNzLW1jcC1zZXJ2ZXJAbGF0ZXN0IiwiZW52Ijp7IkFXU19SRUdJT04iOiJ1cy1lYXN0LTEiLCJBV1NfUFJPRklMRSI6InlvdXItcHJvZmlsZSIsIkZBU1RNQ1BfTE9HX0xFVkVMIjoiV0FSTklORyJ9fQ%3D%3D)
[](https://insiders.vscode.dev/redirect/mcp/install?name=AWS%20HealthOmics%20MCP%20Server&config=%7B%22command%22%3A%22uvx%22%2C%22args%22%3A%5B%22awslabs.aws-healthomics-mcp-server%40latest%22%5D%2C%22env%22%3A%7B%22AWS_REGION%22%3A%22us-east-1%22%2C%22AWS_PROFILE%22%3A%22your-profile%22%2C%22FASTMCP_LOG_LEVEL%22%3A%22WARNING%22%7D%7D) | | [AWS HealthLake MCP Server](src/healthlake-mcp-server) | Create, manage, search, and optimize FHIR healthcare data workflows with comprehensive AWS HealthLake integration, featuring automated resource discovery, advanced search capabilities, patient record management, and seamless import/export operations. | [](https://kiro.dev/launch/mcp/add?name=awslabs.healthlake-mcp-server&config=%7B%22command%22%3A%22uvx%22%2C%22args%22%3A%5B%22awslabs.healthlake-mcp-server%40latest%22%5D%2C%22env%22%3A%7B%22AWS_REGION%22%3A%22us-east-1%22%2C%22AWS_PROFILE%22%3A%22your-profile%22%2C%22FASTMCP_LOG_LEVEL%22%3A%22WARNING%22%7D%7D)
[](https://cursor.com/en/install-mcp?name=awslabs.healthlake-mcp-server&config=eyJjb21tYW5kIjoidXZ4IGF3c2xhYnMuaGVhbHRobGFrZS1tY3Atc2VydmVyQGxhdGVzdCIsImVudiI6eyJBV1NfUkVHSU9OIjoidXMtZWFzdC0xIiwiQVdTX1BST0ZJTEUiOiJ5b3VyLXByb2ZpbGUiLCJGQVNUTUNQX0xPR19MRVZFTCI6IldBUk5JTkcifX0%3D)
[](https://insiders.vscode.dev/redirect/mcp/install?name=HealthLake%20MCP%20Server&config=%7B%22command%22%3A%22uvx%22%2C%22args%22%3A%5B%22awslabs.healthlake-mcp-server%40latest%22%5D%2C%22env%22%3A%7B%22AWS_REGION%22%3A%22us-east-1%22%2C%22AWS_PROFILE%22%3A%22your-profile%22%2C%22FASTMCP_LOG_LEVEL%22%3A%22WARNING%22%7D%7D) | --- --- ### Browse by How You're Working #### 👨💻 Vibe Coding & Development *AI coding assistants like Kiro, Cline, Cursor, and Claude Code helping you build faster* **Workshop**: Check out the [Vibe Coding with AWS MCP Servers](https://github.com/aws-solutions-library-samples/guidance-for-vibe-coding-with-aws-mcp-servers) workshop for hands-on guidance and examples. ##### Core Development Workflow | Server Name | Description | Install | |-------------|-------------|---------| | [AWS API MCP Server](src/aws-api-mcp-server) | Start here for general AWS interactions! Comprehensive AWS API support with command validation, security controls, and access to all AWS services. Perfect for managing infrastructure, exploring resources, and executing AWS operations through natural language. | [](https://kiro.dev/launch/mcp/add?name=awslabs.aws-api-mcp-server&config=%7B%22command%22%3A%22uvx%22%2C%22args%22%3A%5B%22awslabs.aws-api-mcp-server%40latest%22%5D%2C%22env%22%3A%7B%22AWS_REGION%22%3A%22us-east-1%22%7D%7D)
[](https://cursor.com/en/install-mcp?name=awslabs.aws-api-mcp-server&config=eyJjb21tYW5kIjoidXZ4IGF3c2xhYnMuYXdzLWFwaS1tY3Atc2VydmVyQGxhdGVzdCIsImVudiI6eyJBV1NfUkVHSU9OIjoidXMtZWFzdC0xIn0sImRpc2FibGVkIjpmYWxzZSwiYXV0b0FwcHJvdmUiOltdfQ%3D%3D)
[](https://insiders.vscode.dev/redirect/mcp/install?name=AWS%20API%20MCP%20Server&config=%7B%22command%22%3A%22uvx%22%2C%22args%22%3A%5B%22awslabs.aws-api-mcp-server%40latest%22%5D%2C%22env%22%3A%7B%22AWS_REGION%22%3A%22us-east-1%22%7D%2C%22type%22%3A%22stdio%22%7D) | | [Core MCP Server](src/core-mcp-server) | Start here: intelligent planning and MCP server orchestration | [](https://kiro.dev/launch/mcp/add?name=awslabs.core-mcp-server&config=%7B%22command%22%3A%22uvx%22%2C%22args%22%3A%5B%22awslabs.core-mcp-server%40latest%22%5D%2C%22env%22%3A%7B%22FASTMCP_LOG_LEVEL%22%3A%22ERROR%22%7D%7D)
[](https://cursor.com/en/install-mcp?name=awslabs.core-mcp-server&config=eyJjb21tYW5kIjoidXZ4IGF3c2xhYnMuY29yZS1tY3Atc2VydmVyQGxhdGVzdCIsImVudiI6eyJGQVNUTUNQX0xPR19MRVZFTCI6IkVSUk9SIn0sImF1dG9BcHByb3ZlIjpbXSwiZGlzYWJsZWQiOmZhbHNlfQ%3D%3D)
[](https://insiders.vscode.dev/redirect/mcp/install?name=Core%20MCP%20Server&config=%7B%22command%22%3A%22uvx%22%2C%22args%22%3A%5B%22awslabs.core-mcp-server%40latest%22%5D%2C%22env%22%3A%7B%22FASTMCP_LOG_LEVEL%22%3A%22ERROR%22%7D%2C%22autoApprove%22%3A%5B%5D%2C%22disabled%22%3Afalse%7D) | | [AWS Knowledge MCP Server](src/aws-knowledge-mcp-server) | A remote, fully-managed MCP server hosted by AWS that provides access to the latest AWS docs, API references, What's New Posts, Getting Started information, Builder Center, Blog posts, Architectural references, and Well-Architected guidance. | [](https://kiro.dev/launch/mcp/add?name=aws-knowledge-mcp&config=%7B%22url%22%3A%22https%3A//knowledge-mcp.global.api.aws%22%7D)
[](https://cursor.com/en/install-mcp?name=aws-knowledge-mcp&config=eyJ1cmwiOiJodHRwczovL2tub3dsZWRnZS1tY3AuZ2xvYmFsLmFwaS5hd3MifQ==)
[](https://vscode.dev/redirect/mcp/install?name=aws-knowledge-mcp&config=%7B%22type%22%3A%22http%22%2C%22url%22%3A%22https%3A%2F%2Fknowledge-mcp.global.api.aws%22%7D) | | [AWS Documentation MCP Server](src/aws-documentation-mcp-server) | Get latest AWS docs and API references | [](https://kiro.dev/launch/mcp/add?name=awslabs.aws-documentation-mcp-server&config=%7B%22command%22%3A%22uvx%22%2C%22args%22%3A%5B%22awslabs.aws-documentation-mcp-server%40latest%22%5D%2C%22env%22%3A%7B%22FASTMCP_LOG_LEVEL%22%3A%22ERROR%22%2C%22AWS_DOCUMENTATION_PARTITION%22%3A%22aws%22%7D%7D)
[](https://cursor.com/en/install-mcp?name=awslabs.aws-documentation-mcp-server&config=eyJjb21tYW5kIjoidXZ4IGF3c2xhYnMuYXdzLWRvY3VtZW50YXRpb24tbWNwLXNlcnZlckBsYXRlc3QiLCJlbnYiOnsiRkFTVE1DUF9MT0dfTEVWRUwiOiJFUlJPUiIsIkFXU19ET0NVTUVOVEFUSU9OX1BBUlRJVElPTiI6ImF3cyJ9LCJkaXNhYmxlZCI6ZmFsc2UsImF1dG9BcHByb3ZlIjpbXX0%3D)
[](https://insiders.vscode.dev/redirect/mcp/install?name=AWS%20Documentation%20MCP%20Server&config=%7B%22command%22%3A%22uvx%22%2C%22args%22%3A%5B%22awslabs.aws-documentation-mcp-server%40latest%22%5D%2C%22env%22%3A%7B%22FASTMCP_LOG_LEVEL%22%3A%22ERROR%22%2C%22AWS_DOCUMENTATION_PARTITION%22%3A%22aws%22%7D%2C%22disabled%22%3Afalse%2C%22autoApprove%22%3A%5B%5D%7D) | | [Git Repo Research MCP Server](src/git-repo-research-mcp-server) | Semantic search through codebases and repositories | [](https://kiro.dev/launch/mcp/add?name=awslabs.git-repo-research-mcp-server&config=%7B%22command%22%3A%22uvx%22%2C%22args%22%3A%5B%22awslabs.git-repo-research-mcp-server%40latest%22%5D%2C%22env%22%3A%7B%22AWS_PROFILE%22%3A%22your-profile-name%22%2C%22AWS_REGION%22%3A%22us-west-2%22%2C%22FASTMCP_LOG_LEVEL%22%3A%22ERROR%22%2C%22GITHUB_TOKEN%22%3A%22your-github-token%22%7D%7D)
[](https://cursor.com/en/install-mcp?name=awslabs.git-repo-research-mcp-server&config=eyJjb21tYW5kIjoidXZ4IGF3c2xhYnMuZ2l0LXJlcG8tcmVzZWFyY2gtbWNwLXNlcnZlckBsYXRlc3QiLCJlbnYiOnsiQVdTX1BST0ZJTEUiOiJ5b3VyLXByb2ZpbGUtbmFtZSIsIkFXU19SRUdJT04iOiJ1cy13ZXN0LTIiLCJGQVNUTUNQX0xPR19MRVZFTCI6IkVSUk9SIiwiR0lUSFVCX1RPS0VOIjoieW91ci1naXRodWItdG9rZW4ifSwiZGlzYWJsZWQiOmZhbHNlLCJhdXRvQXBwcm92ZSI6W119)
[](https://insiders.vscode.dev/redirect/mcp/install?name=Git%20Repo%20Research%20MCP%20Server&config=%7B%22command%22%3A%22uvx%22%2C%22args%22%3A%5B%22awslabs.git-repo-research-mcp-server%40latest%22%5D%2C%22env%22%3A%7B%22AWS_PROFILE%22%3A%22your-profile-name%22%2C%22AWS_REGION%22%3A%22us-west-2%22%2C%22FASTMCP_LOG_LEVEL%22%3A%22ERROR%22%2C%22GITHUB_TOKEN%22%3A%22your-github-token%22%7D%2C%22disabled%22%3Afalse%2C%22autoApprove%22%3A%5B%5D%7D) | ##### Infrastructure as Code | Server Name | Description | Install | |-------------|-------------|---------| | [AWS IaC MCP Server](src/aws-iac-mcp-server) | Complete Infrastructure as Code toolkit with CloudFormation documentation access, CDK best practices guidance, construct examples, security validation, and deployment troubleshooting | [](https://kiro.dev/launch/mcp/add?name=awslabs.aws-iac-mcp-server&config=%7B%22command%22%3A%22uvx%22%2C%22args%22%3A%5B%22awslabs.aws-iac-mcp-server%40latest%22%5D%2C%22env%22%3A%7B%22AWS_PROFILE%22%3A%22your-aws-profile%22%2C%22FASTMCP_LOG_LEVEL%22%3A%22ERROR%22%7D%7D)
[](https://cursor.com/en/install-mcp?name=awslabs.aws-iac-mcp-server&config=eyJjb21tYW5kIjoidXZ4IGF3c2xhYnMuYXdzLWlhYy1tY3Atc2VydmVyQGxhdGVzdCIsImVudiI6eyJBV1NfUFJPRklMRSI6InlvdXItYXdzLXByb2ZpbGUiLCJGQVNUTUNQX0xPR19MRVZFTCI6IkVSUk9SIn0sImRpc2FibGVkIjpmYWxzZSwiYXV0b0FwcHJvdmUiOltdfQ==IiwiZW52Ijp7IkFXU19QUk9GSUxFIjoieW91ci1hd3MtcHJvZmlsZSIsIkZBU1RNQ1BfTE9HX0xFVkVMIjoiRVJST1IifSwiZGlzYWJsZWQiOmZhbHNlLCJhdXRvQXBwcm92ZSI6W119)
[](https://insiders.vscode.dev/redirect/mcp/install?name=AWS%20IaC%20MCP%20Server&config=%7B%22command%22%3A%22uvx%22%2C%22args%22%3A%5B%22awslabs.aws-iac-mcp-server%40latest%22%5D%2C%22env%22%3A%7B%22AWS_PROFILE%22%3A%22your-aws-profile%22%2C%22FASTMCP_LOG_LEVEL%22%3A%22ERROR%22%7D%2C%22disabled%22%3Afalse%2C%22autoApprove%22%3A%5B%5D%7D) | | [AWS CDK MCP Server](src/cdk-mcp-server) ⚠️ **DEPRECATED** | CDK development with security best practices and compliance (Use [AWS IaC MCP Server](src/aws-iac-mcp-server) instead) | [](https://kiro.dev/launch/mcp/add?name=awslabs.cdk-mcp-server&config=%7B%22command%22%3A%22uvx%22%2C%22args%22%3A%5B%22awslabs.cdk-mcp-server%40latest%22%5D%2C%22env%22%3A%7B%22FASTMCP_LOG_LEVEL%22%3A%22ERROR%22%7D%7D)
[](https://cursor.com/en/install-mcp?name=awslabs.cdk-mcp-server&config=eyJjb21tYW5kIjoidXZ4IGF3c2xhYnMuY2RrLW1jcC1zZXJ2ZXJAbGF0ZXN0IiwiZW52Ijp7IkZBU1RNQ1BfTE9HX0xFVkVMIjoiRVJST1IifSwiZGlzYWJsZWQiOmZhbHNlLCJhdXRvQXBwcm92ZSI6W119)
[](https://insiders.vscode.dev/redirect/mcp/install?name=CDK%20MCP%20Server&config=%7B%22command%22%3A%22uvx%22%2C%22args%22%3A%5B%22awslabs.cdk-mcp-server%40latest%22%5D%2C%22env%22%3A%7B%22FASTMCP_LOG_LEVEL%22%3A%22ERROR%22%7D%2C%22disabled%22%3Afalse%2C%22autoApprove%22%3A%5B%5D%7D) | | [AWS Terraform MCP Server](src/terraform-mcp-server) | Terraform with integrated security scanning and best practices | [](https://kiro.dev/launch/mcp/add?name=awslabs.terraform-mcp-server&config=%7B%22command%22%3A%22uvx%22%2C%22args%22%3A%5B%22awslabs.terraform-mcp-server%40latest%22%5D%2C%22env%22%3A%7B%22FASTMCP_LOG_LEVEL%22%3A%22ERROR%22%7D%7D)
[](https://cursor.com/en/install-mcp?name=awslabs.terraform-mcp-server&config=eyJjb21tYW5kIjoidXZ4IGF3c2xhYnMudGVycmFmb3JtLW1jcC1zZXJ2ZXJAbGF0ZXN0IiwiZW52Ijp7IkZBU1RNQ1BfTE9HX0xFVkVMIjoiRVJST1IifSwiZGlzYWJsZWQiOmZhbHNlLCJhdXRvQXBwcm92ZSI6W119)
[](https://insiders.vscode.dev/redirect/mcp/install?name=Terraform%20MCP%20Server&config=%7B%22command%22%3A%22uvx%22%2C%22args%22%3A%5B%22awslabs.terraform-mcp-server%40latest%22%5D%2C%22env%22%3A%7B%22FASTMCP_LOG_LEVEL%22%3A%22ERROR%22%7D%2C%22disabled%22%3Afalse%2C%22autoApprove%22%3A%5B%5D%7D) | | [AWS CloudFormation MCP Server](src/cfn-mcp-server) | Direct AWS resource management through Cloud Control API | [](https://kiro.dev/launch/mcp/add?name=awslabs.cfn-mcp-server&config=%7B%22command%22%3A%22uvx%22%2C%22args%22%3A%5B%22awslabs.cfn-mcp-server%40latest%22%5D%2C%22env%22%3A%7B%22AWS_PROFILE%22%3A%22your-named-profile%22%7D%7D)
[](https://cursor.com/en/install-mcp?name=awslabs.cfn-mcp-server&config=eyJjb21tYW5kIjoidXZ4IGF3c2xhYnMuY2ZuLW1jcC1zZXJ2ZXJAbGF0ZXN0IiwiZW52Ijp7IkFXU19QUk9GSUxFIjoieW91ci1uYW1lZC1wcm9maWxlIn0sImRpc2FibGVkIjpmYWxzZSwiYXV0b0FwcHJvdmUiOltdfQ%3D%3D)
[](https://insiders.vscode.dev/redirect/mcp/install?name=CloudFormation%20MCP%20Server&config=%7B%22command%22%3A%22uvx%22%2C%22args%22%3A%5B%22awslabs.cfn-mcp-server%40latest%22%5D%2C%22env%22%3A%7B%22AWS_PROFILE%22%3A%22your-named-profile%22%7D%2C%22disabled%22%3Afalse%2C%22autoApprove%22%3A%5B%5D%7D) | | [AWS Cloud Control API MCP Server](src/ccapi-mcp-server) | Direct AWS resource management with security scanning and best practices | [](https://kiro.dev/launch/mcp/add?name=awslabs.ccapi-mcp-server&config=%7B%22command%22%3A%22uvx%22%2C%22args%22%3A%5B%22awslabs.ccapi-mcp-server%40latest%22%5D%2C%22env%22%3A%7B%22AWS_PROFILE%22%3A%22your-aws-profile%22%2C%22AWS_REGION%22%3A%22us-east-1%22%2C%22FASTMCP_LOG_LEVEL%22%3A%22ERROR%22%7D%7D)
[](https://cursor.com/en/install-mcp?name=awslabs.ccapi-mcp-server&config=eyJjb21tYW5kIjoidXZ4IGF3c2xhYnMuY2NhcGktbWNwLXNlcnZlckBsYXRlc3QiLCJlbnYiOnsiQVdTX1BST0ZJTEUiOiJ5b3VyLWF3cy1wcm9maWxlIiwiQVdTX1JFR0lPTiI6InVzLWVhc3QtMSIsIkZBU1RNQ1BfTE9HX0xFVkVMIjoiRVJST1IifSwiZGlzYWJsZWQiOmZhbHNlLCJhdXRvQXBwcm92ZSI6W119)
[](https://insiders.vscode.dev/redirect/mcp/install?name=AWS%20Cloud%20Control%20API%20MCP%20Server&config=%7B%22command%22%3A%22uvx%22%2C%22args%22%3A%5B%22awslabs.ccapi-mcp-server%40latest%22%5D%2C%22env%22%3A%7B%22AWS_PROFILE%22%3A%22your-aws-profile%22%2C%22AWS_REGION%22%3A%22us-east-1%22%2C%22FASTMCP_LOG_LEVEL%22%3A%22ERROR%22%7D%2C%22disabled%22%3Afalse%2C%22autoApprove%22%3A%5B%5D%7D) | ##### Application Development | Server Name | Description | Install | |-------------|-------------|---------| | [Frontend MCP Server](src/frontend-mcp-server) | React and modern web development patterns with AWS integration | [](https://kiro.dev/launch/mcp/add?name=awslabs.frontend-mcp-server&config=%7B%22command%22%3A%22uvx%22%2C%22args%22%3A%5B%22awslabs.frontend-mcp-server%40latest%22%5D%2C%22env%22%3A%7B%22FASTMCP_LOG_LEVEL%22%3A%22ERROR%22%7D%7D)
[](https://cursor.com/en/install-mcp?name=awslabs.frontend-mcp-server&config=eyJjb21tYW5kIjoidXZ4IGF3c2xhYnMuZnJvbnRlbmQtbWNwLXNlcnZlckBsYXRlc3QiLCJlbnYiOnsiRkFTVE1DUF9MT0dfTEVWRUwiOiJFUlJPUiJ9LCJkaXNhYmxlZCI6ZmFsc2UsImF1dG9BcHByb3ZlIjpbXX0%3D)
[](https://insiders.vscode.dev/redirect/mcp/install?name=Frontend%20MCP%20Server&config=%7B%22command%22%3A%22uvx%22%2C%22args%22%3A%5B%22awslabs.frontend-mcp-server%40latest%22%5D%2C%22env%22%3A%7B%22FASTMCP_LOG_LEVEL%22%3A%22ERROR%22%7D%2C%22disabled%22%3Afalse%2C%22autoApprove%22%3A%5B%5D%7D) | | [AWS Diagram MCP Server](src/aws-diagram-mcp-server) | Generate architecture diagrams as you design | [](https://kiro.dev/launch/mcp/add?name=awslabs.aws-diagram-mcp-server&config=%7B%22command%22%3A%22uvx%22%2C%22args%22%3A%5B%22awslabs.aws-diagram-mcp-server%22%5D%2C%22env%22%3A%7B%22FASTMCP_LOG_LEVEL%22%3A%22ERROR%22%7D%7D)
[](https://cursor.com/en/install-mcp?name=awslabs.aws-diagram-mcp-server&config=eyJjb21tYW5kIjoidXZ4IGF3c2xhYnMuYXdzLWRpYWdyYW0tbWNwLXNlcnZlciIsImVudiI6eyJGQVNUTUNQX0xPR19MRVZFTCI6IkVSUk9SIn0sImF1dG9BcHByb3ZlIjpbXSwiZGlzYWJsZWQiOmZhbHNlfQ%3D%3D)
[](https://insiders.vscode.dev/redirect/mcp/install?name=AWS%20Diagram%20MCP%20Server&config=%7B%22command%22%3A%22uvx%22%2C%22args%22%3A%5B%22awslabs.aws-diagram-mcp-server%22%5D%2C%22env%22%3A%7B%22FASTMCP_LOG_LEVEL%22%3A%22ERROR%22%7D%2C%22autoApprove%22%3A%5B%5D%2C%22disabled%22%3Afalse%7D) | | [Code Documentation Generation MCP Server](src/code-doc-gen-mcp-server) | ⚠️ **DEPRECATED** - Auto-generate docs from your codebase | [](https://kiro.dev/launch/mcp/add?name=awslabs.code-doc-gen-mcp-server&config=%7B%22command%22%3A%22uvx%22%2C%22args%22%3A%5B%22awslabs.code-doc-gen-mcp-server%40latest%22%5D%2C%22env%22%3A%7B%22FASTMCP_LOG_LEVEL%22%3A%22ERROR%22%7D%7D)
[](https://cursor.com/en/install-mcp?name=awslabs.code-doc-gen-mcp-server&config=eyJjb21tYW5kIjoidXZ4IGF3c2xhYnMuY29kZS1kb2MtZ2VuLW1jcC1zZXJ2ZXJAbGF0ZXN0IiwiZW52Ijp7IkZBU1RNQ1BfTE9HX0xFVkVMIjoiRVJST1IifSwiZGlzYWJsZWQiOmZhbHNlLCJhdXRvQXBwcm92ZSI6W119)
[](https://insiders.vscode.dev/redirect/mcp/install?name=Code%20Documentation%20Generator%20MCP%20Server&config=%7B%22command%22%3A%22uvx%22%2C%22args%22%3A%5B%22awslabs.code-doc-gen-mcp-server%40latest%22%5D%2C%22env%22%3A%7B%22FASTMCP_LOG_LEVEL%22%3A%22ERROR%22%7D%2C%22disabled%22%3Afalse%2C%22autoApprove%22%3A%5B%5D%7D) | | [OpenAPI MCP Server](src/openapi-mcp-server) | Dynamic API integration through OpenAPI specifications | [](https://kiro.dev/launch/mcp/add?name=awslabs.openapi-mcp-server&config=%7B%22command%22%3A%22uvx%22%2C%22args%22%3A%5B%22awslabs.openapi-mcp-server%40latest%22%5D%2C%22env%22%3A%7B%22API_NAME%22%3A%22your-api-name%22%2C%22API_BASE_URL%22%3A%22https%3A//api.example.com%22%2C%22API_SPEC_URL%22%3A%22https%3A//api.example.com/openapi.json%22%2C%22LOG_LEVEL%22%3A%22ERROR%22%2C%22ENABLE_PROMETHEUS%22%3A%22false%22%2C%22ENABLE_OPERATION_PROMPTS%22%3A%22true%22%2C%22UVICORN_TIMEOUT_GRACEFUL_SHUTDOWN%22%3A%225.0%22%2C%22UVICORN_GRACEFUL_SHUTDOWN%22%3A%22true%22%7D%7D)
[](https://cursor.com/en/install-mcp?name=awslabs.openapi-mcp-server&config=eyJjb21tYW5kIjoidXZ4IGF3c2xhYnMub3BlbmFwaS1tY3Atc2VydmVyQGxhdGVzdCIsImVudiI6eyJBUElfTkFNRSI6InlvdXItYXBpLW5hbWUiLCJBUElfQkFTRV9VUkwiOiJodHRwczovL2FwaS5leGFtcGxlLmNvbSIsIkFQSV9TUEVDX1VSTCI6Imh0dHBzOi8vYXBpLmV4YW1wbGUuY29tL29wZW5hcGkuanNvbiIsIkxPR19MRVZFTCI6IkVSUk9SIiwiRU5BQkxFX1BST01FVEhFVVMiOiJmYWxzZSIsIkVOQUJMRV9PUEVSQVRJT05fUFJPTVBUUyI6InRydWUiLCJVVklDT1JOX1RJTUVPVVRfR1JBQ0VGVUxfU0hVVERPV04iOiI1LjAiLCJVVklDT1JOX0dSQUNFRlVMX1NIVVRET1dOIjoidHJ1ZSJ9LCJkaXNhYmxlZCI6ZmFsc2UsImF1dG9BcHByb3ZlIjpbXX0%3D)
[](https://insiders.vscode.dev/redirect/mcp/install?name=OpenAPI%20MCP%20Server&config=%7B%22command%22%3A%22uvx%22%2C%22args%22%3A%5B%22awslabs.openapi-mcp-server%40latest%22%5D%2C%22env%22%3A%7B%22API_NAME%22%3A%22your-api-name%22%2C%22API_BASE_URL%22%3A%22https%3A%2F%2Fapi.example.com%22%2C%22API_SPEC_URL%22%3A%22https%3A%2F%2Fapi.example.com%2Fopenapi.json%22%2C%22LOG_LEVEL%22%3A%22ERROR%22%2C%22ENABLE_PROMETHEUS%22%3A%22false%22%2C%22ENABLE_OPERATION_PROMPTS%22%3A%22true%22%2C%22UVICORN_TIMEOUT_GRACEFUL_SHUTDOWN%22%3A%225.0%22%2C%22UVICORN_GRACEFUL_SHUTDOWN%22%3A%22true%22%7D%2C%22disabled%22%3Afalse%2C%22autoApprove%22%3A%5B%5D%7D) | ##### Container & Serverless Development | Server Name | Description | Install | |-------------|-------------|---------| | [Amazon SageMaker AI MCP Server](src/sagemaker-ai-mcp-server) | SageMaker AI resource management and model development | [](https://kiro.dev/launch/mcp/add?name=awslabs.sagemaker-ai-mcp-server&config=%7B%22command%22%3A%22uvx%22%2C%22args%22%3A%5B%22awslabs.sagemaker-ai-mcp-server%40latest%22%2C%22--allow-write%22%2C%22--allow-sensitive-data-access%22%5D%2C%22env%22%3A%7B%22FASTMCP_LOG_LEVEL%22%3A%22ERROR%22%7D%7D)
[](https://cursor.com/en/install-mcp?name=awslabs.sagemaker-ai-mcp-server&config=eyJhdXRvQXBwcm92ZSI6W10sImRpc2FibGVkIjpmYWxzZSwiY29tbWFuZCI6InV2eCBhd3NsYWJzLnNhZ2VtYWtlci1haS1tY3Atc2VydmVyQGxhdGVzdCAtLWFsbG93LXdyaXRlIC0tYWxsb3ctc2Vuc2l0aXZlLWRhdGEtYWNjZXNzIiwiZW52Ijp7IkZBU1RNQ1BfTE9HX0xFVkVMIjoiRVJST1IifSwidHJhbnNwb3J0VHlwZSI6InN0ZGlvIn0%3D)
[](https://insiders.vscode.dev/redirect/mcp/install?name=SageMaker%20AI%20MCP%20Server&config=%7B%22autoApprove%22%3A%5B%5D%2C%22disabled%22%3Afalse%2C%22command%22%3A%22uvx%22%2C%22args%22%3A%5B%22awslabs.sagemaker-ai-mcp-server%40latest%22%2C%22--allow-write%22%2C%22--allow-sensitive-data-access%22%5D%2C%22env%22%3A%7B%22FASTMCP_LOG_LEVEL%22%3A%22ERROR%22%7D%2C%22transportType%22%3A%22stdio%22%7D) | | [Amazon EKS MCP Server](src/eks-mcp-server) | Kubernetes cluster management and app deployment | [](https://kiro.dev/launch/mcp/add?name=awslabs.eks-mcp-server&config=%7B%22command%22%3A%22uvx%22%2C%22args%22%3A%5B%22awslabs.eks-mcp-server%40latest%22%2C%22--allow-write%22%2C%22--allow-sensitive-data-access%22%5D%2C%22env%22%3A%7B%22FASTMCP_LOG_LEVEL%22%3A%22ERROR%22%7D%7D)
[](https://cursor.com/en/install-mcp?name=awslabs.eks-mcp-server&config=eyJhdXRvQXBwcm92ZSI6W10sImRpc2FibGVkIjpmYWxzZSwiY29tbWFuZCI6InV2eCBhd3NsYWJzLmVrcy1tY3Atc2VydmVyQGxhdGVzdCAtLWFsbG93LXdyaXRlIC0tYWxsb3ctc2Vuc2l0aXZlLWRhdGEtYWNjZXNzIiwiZW52Ijp7IkZBU1RNQ1BfTE9HX0xFVkVMIjoiRVJST1IifSwidHJhbnNwb3J0VHlwZSI6InN0ZGlvIn0%3D)
[](https://insiders.vscode.dev/redirect/mcp/install?name=EKS%20MCP%20Server&config=%7B%22autoApprove%22%3A%5B%5D%2C%22disabled%22%3Afalse%2C%22command%22%3A%22uvx%22%2C%22args%22%3A%5B%22awslabs.eks-mcp-server%40latest%22%2C%22--allow-write%22%2C%22--allow-sensitive-data-access%22%5D%2C%22env%22%3A%7B%22FASTMCP_LOG_LEVEL%22%3A%22ERROR%22%7D%2C%22transportType%22%3A%22stdio%22%7D) | | [Amazon ECS MCP Server](src/ecs-mcp-server) | Containerize and deploy applications to ECS | [](https://kiro.dev/launch/mcp/add?name=awslabs.ecs-mcp-server&config=%7B%22command%22%3A%22uvx%22%2C%22args%22%3A%5B%22--from%22%2C%22awslabs-ecs-mcp-server%22%2C%22ecs-mcp-server%22%5D%2C%22env%22%3A%7B%22AWS_PROFILE%22%3A%22your-aws-profile%22%2C%22AWS_REGION%22%3A%22your-aws-region%22%2C%22FASTMCP_LOG_LEVEL%22%3A%22ERROR%22%2C%22FASTMCP_LOG_FILE%22%3A%22/path/to/ecs-mcp-server.log%22%2C%22ALLOW_WRITE%22%3A%22false%22%2C%22ALLOW_SENSITIVE_DATA%22%3A%22false%22%7D%7D)
[](https://cursor.com/en/install-mcp?name=awslabs.ecs-mcp-server&config=eyJjb21tYW5kIjoidXZ4IC0tZnJvbSBhd3NsYWJzLWVjcy1tY3Atc2VydmVyIGVjcy1tY3Atc2VydmVyIiwiZW52Ijp7IkFXU19QUk9GSUxFIjoieW91ci1hd3MtcHJvZmlsZSIsIkFXU19SRUdJT04iOiJ5b3VyLWF3cy1yZWdpb24iLCJGQVNUTUNQX0xPR19MRVZFTCI6IkVSUk9SIiwiRkFTVE1DUF9MT0dfRklMRSI6Ii9wYXRoL3RvL2Vjcy1tY3Atc2VydmVyLmxvZyIsIkFMTE9XX1dSSVRFIjoiZmFsc2UiLCJBTExPV19TRU5TSVRJVkVfREFUQSI6ImZhbHNlIn19)
[](https://insiders.vscode.dev/redirect/mcp/install?name=ECS%20MCP%20Server&config=%7B%22command%22%3A%22uvx%22%2C%22args%22%3A%5B%22--from%22%2C%22awslabs-ecs-mcp-server%22%2C%22ecs-mcp-server%22%5D%2C%22env%22%3A%7B%22AWS_PROFILE%22%3A%22your-aws-profile%22%2C%22AWS_REGION%22%3A%22your-aws-region%22%2C%22FASTMCP_LOG_LEVEL%22%3A%22ERROR%22%2C%22FASTMCP_LOG_FILE%22%3A%22%2Fpath%2Fto%2Fecs-mcp-server.log%22%2C%22ALLOW_WRITE%22%3A%22false%22%2C%22ALLOW_SENSITIVE_DATA%22%3A%22false%22%7D%7D) | | [Finch MCP Server](src/finch-mcp-server) | Local container building with ECR push | [](https://kiro.dev/launch/mcp/add?name=awslabs.finch-mcp-server&config=%7B%22command%22%3A%22uvx%22%2C%22args%22%3A%5B%22awslabs.finch-mcp-server%40latest%22%5D%2C%22env%22%3A%7B%22AWS_PROFILE%22%3A%22default%22%2C%22AWS_REGION%22%3A%22us-west-2%22%2C%22FASTMCP_LOG_LEVEL%22%3A%22INFO%22%7D%7D)
[](https://cursor.com/en/install-mcp?name=awslabs.finch-mcp-server&config=eyJjb21tYW5kIjoidXZ4IGF3c2xhYnMuZmluY2gtbWNwLXNlcnZlckBsYXRlc3QiLCJlbnYiOnsiQVdTX1BST0ZJTEUiOiJkZWZhdWx0IiwiQVdTX1JFR0lPTiI6InVzLXdlc3QtMiIsIkZBU1RNQ1BfTE9HX0xFVkVMIjoiSU5GTyJ9LCJ0cmFuc3BvcnRUeXBlIjoic3RkaW8iLCJkaXNhYmxlZCI6ZmFsc2UsImF1dG9BcHByb3ZlIjpbXX0%3D)
[](https://insiders.vscode.dev/redirect/mcp/install?name=Finch%20MCP%20Server&config=%7B%22command%22%3A%22uvx%22%2C%22args%22%3A%5B%22awslabs.finch-mcp-server%40latest%22%5D%2C%22env%22%3A%7B%22AWS_PROFILE%22%3A%22default%22%2C%22AWS_REGION%22%3A%22us-west-2%22%2C%22FASTMCP_LOG_LEVEL%22%3A%22INFO%22%7D%2C%22transportType%22%3A%22stdio%22%2C%22disabled%22%3Afalse%2C%22autoApprove%22%3A%5B%5D%7D) | | [AWS Serverless MCP Server](src/aws-serverless-mcp-server) | Full serverless app lifecycle with SAM CLI | [](https://kiro.dev/launch/mcp/add?name=awslabs.aws-serverless-mcp-server&config=%7B%22command%22%3A%22uvx%22%2C%22args%22%3A%5B%22awslabs.aws-serverless-mcp-server%40latest%22%2C%22--allow-write%22%2C%22--allow-sensitive-data-access%22%5D%2C%22env%22%3A%7B%22AWS_PROFILE%22%3A%22your-aws-profile%22%2C%22AWS_REGION%22%3A%22us-east-1%22%7D%7D)
[](https://cursor.com/en/install-mcp?name=awslabs.aws-serverless-mcp-server&config=eyJjb21tYW5kIjoidXZ4IGF3c2xhYnMuYXdzLXNlcnZlcmxlc3MtbWNwLXNlcnZlckBsYXRlc3QgLS1hbGxvdy13cml0ZSAtLWFsbG93LXNlbnNpdGl2ZS1kYXRhLWFjY2VzcyIsImVudiI6eyJBV1NfUFJPRklMRSI6InlvdXItYXdzLXByb2ZpbGUiLCJBV1NfUkVHSU9OIjoidXMtZWFzdC0xIn0sImRpc2FibGVkIjpmYWxzZSwiYXV0b0FwcHJvdmUiOltdfQ%3D%3D)
[](https://insiders.vscode.dev/redirect/mcp/install?name=AWS%20Serverless%20MCP%20Server&config=%7B%22command%22%3A%22uvx%22%2C%22args%22%3A%5B%22awslabs.aws-serverless-mcp-server%40latest%22%2C%22--allow-write%22%2C%22--allow-sensitive-data-access%22%5D%2C%22env%22%3A%7B%22AWS_PROFILE%22%3A%22your-aws-profile%22%2C%22AWS_REGION%22%3A%22us-east-1%22%7D%2C%22disabled%22%3Afalse%2C%22autoApprove%22%3A%5B%5D%7D) | ##### Testing & Data | Server Name | Description | Install | |-------------|-------------|---------| | [Synthetic Data MCP Server](src/syntheticdata-mcp-server) | Generate realistic test data for development and ML | [](https://kiro.dev/launch/mcp/add?name=awslabs.syntheticdata-mcp-server&config=%7B%22command%22%3A%22uvx%22%2C%22args%22%3A%5B%22awslabs.syntheticdata-mcp-server%22%5D%2C%22env%22%3A%7B%22FASTMCP_LOG_LEVEL%22%3A%22ERROR%22%2C%22AWS_PROFILE%22%3A%22your-aws-profile%22%2C%22AWS_REGION%22%3A%22us-east-1%22%7D%7D)
[](https://cursor.com/en/install-mcp?name=awslabs.syntheticdata-mcp-server&config=eyJjb21tYW5kIjoidXZ4IGF3c2xhYnMuc3ludGhldGljZGF0YS1tY3Atc2VydmVyIiwiZW52Ijp7IkZBU1RNQ1BfTE9HX0xFVkVMIjoiRVJST1IiLCJBV1NfUFJPRklMRSI6InlvdXItYXdzLXByb2ZpbGUiLCJBV1NfUkVHSU9OIjoidXMtZWFzdC0xIn0sImF1dG9BcHByb3ZlIjpbXSwiZGlzYWJsZWQiOmZhbHNlfQ%3D%3D)
[](https://insiders.vscode.dev/redirect/mcp/install?name=Synthetic%20Data%20MCP%20Server&config=%7B%22command%22%3A%22uvx%22%2C%22args%22%3A%5B%22awslabs.syntheticdata-mcp-server%22%5D%2C%22env%22%3A%7B%22FASTMCP_LOG_LEVEL%22%3A%22ERROR%22%2C%22AWS_PROFILE%22%3A%22your-aws-profile%22%2C%22AWS_REGION%22%3A%22us-east-1%22%7D%2C%22autoApprove%22%3A%5B%5D%2C%22disabled%22%3Afalse%7D) | ##### Lifesciences Workflow Development | Server Name | Description | Install | |-------------|-------------|---------| | [AWS HealthOmics MCP Server](src/aws-healthomics-mcp-server) | Generate, run, debug and optimize lifescience workflows | [](https://kiro.dev/launch/mcp/add?name=awslabs.aws-healthomics-mcp-server&config=%7B%22command%22%3A%22uvx%22%2C%22args%22%3A%5B%22awslabs.aws-healthomics-mcp-server%40latest%22%5D%2C%22env%22%3A%7B%22AWS_REGION%22%3A%22us-east-1%22%2C%22AWS_PROFILE%22%3A%22your-profile%22%2C%22FASTMCP_LOG_LEVEL%22%3A%22WARNING%22%7D%7D)
[](https://cursor.com/en/install-mcp?name=awslabs.aws-healthomics-mcp-server&config=eyJjb21tYW5kIjoidXZ4IGF3c2xhYnMuYXdzLWhlYWx0aG9taWNzLW1jcC1zZXJ2ZXJAbGF0ZXN0IiwiZW52Ijp7IkFXU19SRUdJT04iOiJ1cy1lYXN0LTEiLCJBV1NfUFJPRklMRSI6InlvdXItcHJvZmlsZSIsIkZBU1RNQ1BfTE9HX0xFVkVMIjoiV0FSTklORyJ9fQ%3D%3D)
[](https://insiders.vscode.dev/redirect/mcp/install?name=AWS%20HealthOmics%20MCP%20Server&config=%7B%22command%22%3A%22uvx%22%2C%22args%22%3A%5B%22awslabs.aws-healthomics-mcp-server%40latest%22%5D%2C%22env%22%3A%7B%22AWS_REGION%22%3A%22us-east-1%22%2C%22AWS_PROFILE%22%3A%22your-profile%22%2C%22FASTMCP_LOG_LEVEL%22%3A%22WARNING%22%7D%7D) | ##### Healthcare Data Management | Server Name | Description | Install | |-------------|-------------|---------| | [AWS HealthLake MCP Server](src/healthlake-mcp-server) | Create, manage, search, and optimize FHIR healthcare data workflows with comprehensive AWS HealthLake integration, featuring automated resource discovery, advanced search capabilities, patient record management, and seamless import/export operations. | [](https://kiro.dev/launch/mcp/add?name=awslabs.healthlake-mcp-server&config=%7B%22command%22%3A%22uvx%22%2C%22args%22%3A%5B%22awslabs.healthlake-mcp-server%40latest%22%5D%2C%22env%22%3A%7B%22AWS_REGION%22%3A%22us-east-1%22%2C%22AWS_PROFILE%22%3A%22your-profile%22%2C%22FASTMCP_LOG_LEVEL%22%3A%22WARNING%22%7D%7D)
[](https://cursor.com/en/install-mcp?name=awslabs.healthlake-mcp-server&config=eyJjb21tYW5kIjoidXZ4IGF3c2xhYnMuaGVhbHRobGFrZS1tY3Atc2VydmVyQGxhdGVzdCIsImVudiI6eyJBV1NfUkVHSU9OIjoidXMtZWFzdC0xIiwiQVdTX1BST0ZJTEUiOiJ5b3VyLXByb2ZpbGUiLCJGQVNUTUNQX0xPR19MRVZFTCI6IldBUk5JTkcifX0%3D)
[](https://insiders.vscode.dev/redirect/mcp/install?name=HealthLake%20MCP%20Server&config=%7B%22command%22%3A%22uvx%22%2C%22args%22%3A%5B%22awslabs.healthlake-mcp-server%40latest%22%5D%2C%22env%22%3A%7B%22AWS_REGION%22%3A%22us-east-1%22%2C%22AWS_PROFILE%22%3A%22your-profile%22%2C%22FASTMCP_LOG_LEVEL%22%3A%22WARNING%22%7D%7D) | #### 💬 Conversational Assistants *Customer-facing chatbots, business agents, and interactive Q&A systems* ##### Knowledge & Search | Server Name | Description | Install | |-------------|-------------|---------| | [Amazon Bedrock Knowledge Bases Retrieval MCP Server](src/bedrock-kb-retrieval-mcp-server) | Query enterprise knowledge bases with citation support | [](https://kiro.dev/launch/mcp/add?name=awslabs.bedrock-kb-retrieval-mcp-server&config=%7B%22command%22%3A%22uvx%22%2C%22args%22%3A%5B%22awslabs.bedrock-kb-retrieval-mcp-server%40latest%22%5D%2C%22env%22%3A%7B%22AWS_PROFILE%22%3A%22your-profile-name%22%2C%22AWS_REGION%22%3A%22us-east-1%22%2C%22FASTMCP_LOG_LEVEL%22%3A%22ERROR%22%2C%22KB_INCLUSION_TAG_KEY%22%3A%22optional-tag-key-to-filter-kbs%22%2C%22BEDROCK_KB_RERANKING_ENABLED%22%3A%22false%22%7D%7D)
[](https://cursor.com/en/install-mcp?name=awslabs.bedrock-kb-retrieval-mcp-server&config=eyJjb21tYW5kIjoidXZ4IGF3c2xhYnMuYmVkcm9jay1rYi1yZXRyaWV2YWwtbWNwLXNlcnZlckBsYXRlc3QiLCJlbnYiOnsiQVdTX1BST0ZJTEUiOiJ5b3VyLXByb2ZpbGUtbmFtZSIsIkFXU19SRUdJT04iOiJ1cy1lYXN0LTEiLCJGQVNUTUNQX0xPR19MRVZFTCI6IkVSUk9SIiwiS0JfSU5DTFVTSU9OX1RBR19LRVkiOiJvcHRpb25hbC10YWcta2V5LXRvLWZpbHRlci1rYnMiLCJCRURST0NLX0tCX1JFUkFOS0lOR19FTkFCTEVEIjoiZmFsc2UifSwiZGlzYWJsZWQiOmZhbHNlLCJhdXRvQXBwcm92ZSI6W119)
[](https://insiders.vscode.dev/redirect/mcp/install?name=Bedrock%20KB%20Retrieval%20MCP%20Server&config=%7B%22command%22%3A%22uvx%22%2C%22args%22%3A%5B%22awslabs.bedrock-kb-retrieval-mcp-server%40latest%22%5D%2C%22env%22%3A%7B%22AWS_PROFILE%22%3A%22your-profile-name%22%2C%22AWS_REGION%22%3A%22us-east-1%22%2C%22FASTMCP_LOG_LEVEL%22%3A%22ERROR%22%2C%22KB_INCLUSION_TAG_KEY%22%3A%22optional-tag-key-to-filter-kbs%22%2C%22BEDROCK_KB_RERANKING_ENABLED%22%3A%22false%22%7D%2C%22disabled%22%3Afalse%2C%22autoApprove%22%3A%5B%5D%7D) | | [Amazon Kendra Index MCP Server](src/amazon-kendra-index-mcp-server) | Enterprise search and RAG enhancement | [](https://kiro.dev/launch/mcp/add?name=awslabs.amazon-kendra-index-mcp-server&config=%7B%22command%22%3A%22uvx%22%2C%22args%22%3A%5B%22awslabs.amazon-kendra-index-mcp-server%40latest%22%5D%2C%22env%22%3A%7B%22AWS_REGION%22%3A%22us-east-1%22%2C%22KEND_INDEX_ID%22%3A%22your-kendra-index-id%22%2C%22KEND_ROLE_ARN%22%3A%22your-kendra-role-arn%22%2C%22FASTMCP_LOG_LEVEL%22%3A%22ERROR%22%7D%7D)
[](https://cursor.com/en/install-mcp?name=awslabs.amazon-kendra-index-mcp-server&config=eyJjb21tYW5kIjoidXZ4IGF3c2xhYnMuYW1hem9uLWtlbmRyYS1pbmRleC1tY3Atc2VydmVyQGxhdGVzdCIsImVudiI6eyJBV1NfUkVHSU9OIjoidXMtZWFzdC0xIiwiS0VORF9JTkRFWF9JRCI6InlvdXIta2VuZHJhLWluZGV4LWlkIiwiS0VORF9ST0xFX0FSTiI6InlvdXIta2VuZHJhLXJvbGUtYXJuIiwiRkFTVE1DUF9MT0dfTEVWRUwiOiJFUlJPUiJ9LCJkaXNhYmxlZCI6ZmFsc2UsImF1dG9BcHByb3ZlIjpbXX0%3D)
[](https://insiders.vscode.dev/redirect/mcp/install?name=Amazon%20Kendra%20Index%20MCP%20Server&config=%7B%22command%22%3A%22uvx%22%2C%22args%22%3A%5B%22awslabs.amazon-kendra-index-mcp-server%40latest%22%5D%2C%22env%22%3A%7B%22AWS_REGION%22%3A%22us-east-1%22%2C%22KEND_INDEX_ID%22%3A%22your-kendra-index-id%22%2C%22KEND_ROLE_ARN%22%3A%22your-kendra-role-arn%22%2C%22FASTMCP_LOG_LEVEL%22%3A%22ERROR%22%7D%2C%22disabled%22%3Afalse%2C%22autoApprove%22%3A%5B%5D%7D) | | [Amazon Q Business MCP Server](src/amazon-qbusiness-anonymous-mcp-server) | AI assistant for your ingested content with anonymous access | [](https://kiro.dev/launch/mcp/add?name=awslabs.amazon-qbusiness-anonymous-mcp-server&config=%7B%22command%22%3A%22uvx%22%2C%22args%22%3A%5B%22awslabs.amazon-qbusiness-anonymous-mcp-server%40latest%22%5D%2C%22env%22%3A%7B%22QBUSINESS_APP_ID%22%3A%22your-qbusiness-app-id%22%2C%22QBUSINESS_USER_ID%22%3A%22your-user-id%22%2C%22AWS_PROFILE%22%3A%22your-aws-profile%22%2C%22AWS_REGION%22%3A%22us-east-1%22%2C%22FASTMCP_LOG_LEVEL%22%3A%22ERROR%22%7D%7D)
[](https://cursor.com/en/install-mcp?name=awslabs.amazon-qbusiness-anonymous-mcp-server&config=eyJjb21tYW5kIjoidXZ4IGF3c2xhYnMuYW1hem9uLXFidXNpbmVzcy1hbm9ueW1vdXMtbWNwLXNlcnZlckBsYXRlc3QiLCJlbnYiOnsiUUJVU0lORVNTX0FQUF9JRCI6InlvdXItcWJ1c2luZXNzLWFwcC1pZCIsIlFCVVNJTkVTU19VU0VSX0lEIjoieW91ci11c2VyLWlkIiwiQVdTX1BST0ZJTEUiOiJ5b3VyLWF3cy1wcm9maWxlIiwiQVdTX1JFR0lPTiI6InVzLWVhc3QtMSIsIkZBU1RNQ1BfTE9HX0xFVkVMIjoiRVJST1IifSwiZGlzYWJsZWQiOmZhbHNlLCJhdXRvQXBwcm92ZSI6W119)
[](https://insiders.vscode.dev/redirect/mcp/install?name=Amazon%20Q%20Business%20Anonymous%20MCP%20Server&config=%7B%22command%22%3A%22uvx%22%2C%22args%22%3A%5B%22awslabs.amazon-qbusiness-anonymous-mcp-server%40latest%22%5D%2C%22env%22%3A%7B%22QBUSINESS_APP_ID%22%3A%22your-qbusiness-app-id%22%2C%22QBUSINESS_USER_ID%22%3A%22your-user-id%22%2C%22AWS_PROFILE%22%3A%22your-aws-profile%22%2C%22AWS_REGION%22%3A%22us-east-1%22%2C%22FASTMCP_LOG_LEVEL%22%3A%22ERROR%22%7D%2C%22disabled%22%3Afalse%2C%22autoApprove%22%3A%5B%5D%7D) | | [Amazon Q Index MCP Server](src/amazon-qindex-mcp-server) | Data accessors to search through enterprise's Q index | [](https://kiro.dev/launch/mcp/add?name=awslabs.amazon-qindex-mcp-server&config=%7B%22command%22%3A%22uvx%22%2C%22args%22%3A%5B%22awslabs.amazon-qindex-mcp-server%40latest%22%5D%2C%22env%22%3A%7B%22AWS_REGION%22%3A%22us-east-1%22%2C%22QINDEX_ID%22%3A%22your-qindex-id%22%2C%22FASTMCP_LOG_LEVEL%22%3A%22ERROR%22%7D%7D)
[](https://cursor.com/en/install-mcp?name=awslabs.amazon-qindex-mcp-server&config=eyJjb21tYW5kIjoidXZ4IGF3c2xhYnMuYW1hem9uLXFpbmRleC1tY3Atc2VydmVyQGxhdGVzdCIsImVudiI6eyJBV1NfUkVHSU9OIjoidXMtZWFzdC0xIiwiUUlOREVYX0lEIjoieW91ci1xaW5kZXgtaWQiLCJGQVNUTUNQX0xPR19MRVZFTCI6IkVSUk9SIn0sImRpc2FibGVkIjpmYWxzZSwiYXV0b0FwcHJvdmUiOltdfQ%3D%3D)
[](https://insiders.vscode.dev/redirect/mcp/install?name=Amazon%20Q%20Index%20MCP%20Server&config=%7B%22command%22%3A%22uvx%22%2C%22args%22%3A%5B%22awslabs.amazon-qindex-mcp-server%40latest%22%5D%2C%22env%22%3A%7B%22AWS_REGION%22%3A%22us-east-1%22%2C%22QINDEX_ID%22%3A%22your-qindex-id%22%2C%22FASTMCP_LOG_LEVEL%22%3A%22ERROR%22%7D%2C%22disabled%22%3Afalse%2C%22autoApprove%22%3A%5B%5D%7D) | | [AWS Documentation MCP Server](src/aws-documentation-mcp-server) | Get latest AWS docs and API references | [](https://kiro.dev/launch/mcp/add?name=awslabs.aws-documentation-mcp-server&config=%7B%22command%22%3A%22uvx%22%2C%22args%22%3A%5B%22awslabs.aws-documentation-mcp-server%40latest%22%5D%2C%22env%22%3A%7B%22FASTMCP_LOG_LEVEL%22%3A%22ERROR%22%2C%22AWS_DOCUMENTATION_PARTITION%22%3A%22aws%22%7D%7D)
[](https://cursor.com/en/install-mcp?name=awslabs.aws-documentation-mcp-server&config=eyJjb21tYW5kIjoidXZ4IGF3c2xhYnMuYXdzLWRvY3VtZW50YXRpb24tbWNwLXNlcnZlckBsYXRlc3QiLCJlbnYiOnsiRkFTVE1DUF9MT0dfTEVWRUwiOiJFUlJPUiIsIkFXU19ET0NVTUVOVEFUSU9OX1BBUlRJVElPTiI6ImF3cyJ9LCJkaXNhYmxlZCI6ZmFsc2UsImF1dG9BcHByb3ZlIjpbXX0%3D)
[](https://insiders.vscode.dev/redirect/mcp/install?name=AWS%20Documentation%20MCP%20Server&config=%7B%22command%22%3A%22uvx%22%2C%22args%22%3A%5B%22awslabs.aws-documentation-mcp-server%40latest%22%5D%2C%22env%22%3A%7B%22FASTMCP_LOG_LEVEL%22%3A%22ERROR%22%2C%22AWS_DOCUMENTATION_PARTITION%22%3A%22aws%22%7D%2C%22disabled%22%3Afalse%2C%22autoApprove%22%3A%5B%5D%7D) | ##### Content Processing & Generation | Server Name | Description | Install | |-------------|-------------|---------| | [Document Loader MCP Server](src/document-loader-mcp-server) | Parse and extract content from PDF, DOCX, XLSX, PPTX, and image files | [](https://kiro.dev/launch/mcp/add?name=awslabs.document-loader-mcp-server&config=%7B%22command%22%3A%22uvx%22%2C%22args%22%3A%5B%22awslabs.document-loader-mcp-server%40latest%22%5D%2C%22env%22%3A%7B%22FASTMCP_LOG_LEVEL%22%3A%22ERROR%22%7D%7D)
[](https://cursor.com/en/install-mcp?name=awslabs.document-loader-mcp-server&config=eyJjb21tYW5kIjoidXZ4IiwiYXJncyI6WyJhd3NsYWJzLmRvY3VtZW50LWxvYWRlci1tY3Atc2VydmVyQGxhdGVzdCJdLCJlbnYiOnsiRkFTVE1DUF9MT0dfTEVWRUwiOiJFUlJPUiJ9LCJkaXNhYmxlZCI6ZmFsc2UsImF1dG9BcHByb3ZlIjpbXX0%3D)
[](https://insiders.vscode.dev/redirect/mcp/install?name=Document%20Loader%20MCP%20Server&config=%7B%22command%22%3A%22uvx%22%2C%22args%22%3A%5B%22awslabs.document-loader-mcp-server%40latest%22%5D%2C%22env%22%3A%7B%22FASTMCP_LOG_LEVEL%22%3A%22ERROR%22%7D%2C%22disabled%22%3Afalse%2C%22autoApprove%22%3A%5B%5D%7D) | | [Amazon Nova Canvas MCP Server](src/nova-canvas-mcp-server) | Generate images from text descriptions and color palettes | [](https://kiro.dev/launch/mcp/add?name=awslabs.nova-canvas-mcp-server&config=%7B%22command%22%3A%22uvx%22%2C%22args%22%3A%5B%22awslabs.nova-canvas-mcp-server%40latest%22%5D%2C%22env%22%3A%7B%22AWS_PROFILE%22%3A%22your-aws-profile%22%2C%22AWS_REGION%22%3A%22us-east-1%22%2C%22FASTMCP_LOG_LEVEL%22%3A%22ERROR%22%7D%7D)
[](https://cursor.com/en/install-mcp?name=awslabs.nova-canvas-mcp-server&config=eyJjb21tYW5kIjoidXZ4IGF3c2xhYnMubm92YS1jYW52YXMtbWNwLXNlcnZlckBsYXRlc3QiLCJlbnYiOnsiQVdTX1BST0ZJTEUiOiJ5b3VyLWF3cy1wcm9maWxlIiwiQVdTX1JFR0lPTiI6InVzLWVhc3QtMSIsIkZBU1RNQ1BfTE9HX0xFVkVMIjoiRVJST1IifSwiZGlzYWJsZWQiOmZhbHNlLCJhdXRvQXBwcm92ZSI6W119)
[](https://insiders.vscode.dev/redirect/mcp/install?name=Nova%20Canvas%20MCP%20Server&config=%7B%22command%22%3A%22uvx%22%2C%22args%22%3A%5B%22awslabs.nova-canvas-mcp-server%40latest%22%5D%2C%22env%22%3A%7B%22AWS_PROFILE%22%3A%22your-aws-profile%22%2C%22AWS_REGION%22%3A%22us-east-1%22%2C%22FASTMCP_LOG_LEVEL%22%3A%22ERROR%22%7D%2C%22disabled%22%3Afalse%2C%22autoApprove%22%3A%5B%5D%7D) | | [Amazon Bedrock Data Automation MCP Server](src/aws-bedrock-data-automation-mcp-server) | Analyze uploaded documents, images, and media | [](https://kiro.dev/launch/mcp/add?name=bedrock-data-automation-mcp-server&config=%7B%22command%22%3A%22uvx%22%2C%22args%22%3A%5B%22awslabs.aws-bedrock-data-automation-mcp-server%40latest%22%5D%2C%22env%22%3A%7B%22AWS_PROFILE%22%3A%22your-aws-profile%22%2C%22AWS_REGION%22%3A%22us-east-1%22%2C%22AWS_BUCKET_NAME%22%3A%22your-s3-bucket-name%22%2C%22BASE_DIR%22%3A%22/path/to/base/directory%22%2C%22FASTMCP_LOG_LEVEL%22%3A%22ERROR%22%7D%7D)
[](https://cursor.com/en/install-mcp?name=bedrock-data-automation-mcp-server&config=eyJjb21tYW5kIjoidXZ4IGF3c2xhYnMuYXdzLWJlZHJvY2stZGF0YS1hdXRvbWF0aW9uLW1jcC1zZXJ2ZXJAbGF0ZXN0IiwiZW52Ijp7IkFXU19QUk9GSUxFIjoieW91ci1hd3MtcHJvZmlsZSIsIkFXU19SRUdJT04iOiJ1cy1lYXN0LTEiLCJBV1NfQlVDS0VUX05BTUUiOiJ5b3VyLXMzLWJ1Y2tldC1uYW1lIiwiQkFTRV9ESVIiOiIvcGF0aC90by9iYXNlL2RpcmVjdG9yeSIsIkZBU1RNQ1BfTE9HX0xFVkVMIjoiRVJST1IifSwiZGlzYWJsZWQiOmZhbHNlLCJhdXRvQXBwcm92ZSI6W119)
[](https://insiders.vscode.dev/redirect/mcp/install?name=Bedrock%20Data%20Automation%20MCP%20Server&config=%7B%22command%22%3A%22uvx%22%2C%22args%22%3A%5B%22awslabs.aws-bedrock-data-automation-mcp-server%40latest%22%5D%2C%22env%22%3A%7B%22AWS_PROFILE%22%3A%22your-aws-profile%22%2C%22AWS_REGION%22%3A%22us-east-1%22%2C%22AWS_BUCKET_NAME%22%3A%22your-s3-bucket-name%22%2C%22BASE_DIR%22%3A%22%2Fpath%2Fto%2Fbase%2Fdirectory%22%2C%22FASTMCP_LOG_LEVEL%22%3A%22ERROR%22%7D%2C%22disabled%22%3Afalse%2C%22autoApprove%22%3A%5B%5D%7D) | ##### Business Services | Server Name | Description | Install | |-------------|-------------|---------| | [Amazon Location Service MCP Server](src/aws-location-mcp-server) | Location search, geocoding, and business hours | [](https://kiro.dev/launch/mcp/add?name=awslabs.aws-location-mcp-server&config=%7B%22command%22%3A%22uvx%22%2C%22args%22%3A%5B%22awslabs.aws-location-mcp-server%40latest%22%5D%2C%22env%22%3A%7B%22AWS_PROFILE%22%3A%22your-aws-profile%22%2C%22AWS_REGION%22%3A%22us-east-1%22%2C%22FASTMCP_LOG_LEVEL%22%3A%22ERROR%22%7D%7D)
[](https://cursor.com/en/install-mcp?name=awslabs.aws-location-mcp-server&config=eyJjb21tYW5kIjoidXZ4IGF3c2xhYnMuYXdzLWxvY2F0aW9uLW1jcC1zZXJ2ZXJAbGF0ZXN0IiwiZW52Ijp7IkFXU19QUk9GSUxFIjoieW91ci1hd3MtcHJvZmlsZSIsIkFXU19SRUdJT04iOiJ1cy1lYXN0LTEiLCJGQVNUTUNQX0xPR19MRVZFTCI6IkVSUk9SIn0sImRpc2FibGVkIjpmYWxzZSwiYXV0b0FwcHJvdmUiOltdfQ%3D%3D)
[](https://insiders.vscode.dev/redirect/mcp/install?name=AWS%20Location%20MCP%20Server&config=%7B%22command%22%3A%22uvx%22%2C%22args%22%3A%5B%22awslabs.aws-location-mcp-server%40latest%22%5D%2C%22env%22%3A%7B%22AWS_PROFILE%22%3A%22your-aws-profile%22%2C%22AWS_REGION%22%3A%22us-east-1%22%2C%22FASTMCP_LOG_LEVEL%22%3A%22ERROR%22%7D%2C%22disabled%22%3Afalse%2C%22autoApprove%22%3A%5B%5D%7D) | | [AWS Pricing MCP Server](src/aws-pricing-mcp-server) | AWS service pricing and cost estimates | [](https://kiro.dev/launch/mcp/add?name=awslabs.aws-pricing-mcp-server&config=%7B%22command%22%3A%22uvx%22%2C%22args%22%3A%5B%22awslabs.aws-pricing-mcp-server%40latest%22%5D%2C%22env%22%3A%7B%22FASTMCP_LOG_LEVEL%22%3A%22ERROR%22%2C%22AWS_PROFILE%22%3A%22your-aws-profile%22%2C%22AWS_REGION%22%3A%22us-east-1%22%7D%7D)
[](https://cursor.com/en/install-mcp?name=awslabs.aws-pricing-mcp-server&config=ewogICAgImNvbW1hbmQiOiAidXZ4IGF3c2xhYnMuYXdzLXByaWNpbmctbWNwLXNlcnZlckBsYXRlc3QiLAogICAgImVudiI6IHsKICAgICAgIkZBU1RNQ1BfTE9HX0xFVkVMIjogIkVSUk9SIiwKICAgICAgIkFXU19QUk9GSUxFIjogInlvdXItYXdzLXByb2ZpbGUiLAogICAgICAiQVdTX1JFR0lPTiI6ICJ1cy1lYXN0LTEiCiAgICB9LAogICAgImRpc2FibGVkIjogZmFsc2UsCiAgICAiYXV0b0FwcHJvdmUiOiBbXQogIH0K)
[](https://insiders.vscode.dev/redirect/mcp/install?name=AWS%20Pricing%20MCP%20Server&config=%7B%22command%22%3A%22uvx%22%2C%22args%22%3A%5B%22awslabs.aws-pricing-mcp-server%40latest%22%5D%2C%22env%22%3A%7B%22FASTMCP_LOG_LEVEL%22%3A%22ERROR%22%2C%22AWS_PROFILE%22%3A%22your-aws-profile%22%2C%22AWS_REGION%22%3A%22us-east-1%22%7D%2C%22disabled%22%3Afalse%2C%22autoApprove%22%3A%5B%5D%7D) | | [AWS Cost Explorer MCP Server](src/cost-explorer-mcp-server) | Detailed cost analysis and spend reports | [](https://kiro.dev/launch/mcp/add?name=awslabs.cost-explorer-mcp-server&config=%7B%22command%22%3A%22uvx%22%2C%22args%22%3A%5B%22awslabs.cost-explorer-mcp-server%40latest%22%5D%2C%22env%22%3A%7B%22AWS_PROFILE%22%3A%22your-aws-profile%22%2C%22AWS_REGION%22%3A%22us-east-1%22%2C%22FASTMCP_LOG_LEVEL%22%3A%22ERROR%22%7D%7D)
[](https://cursor.com/en/install-mcp?name=awslabs.cost-explorer-mcp-server&config=eyJjb21tYW5kIjoidXZ4IGF3c2xhYnMuY29zdC1leHBsb3Jlci1tY3Atc2VydmVyQGxhdGVzdCIsImVudiI6eyJBV1NfUFJPRklMRSI6InlvdXItYXdzLXByb2ZpbGUiLCJBV1NfUkVHSU9OIjoidXMtZWFzdC0xIiwiRkFTVE1DUF9MT0dfTEVWRUwiOiJFUlJPUiJ9LCJkaXNhYmxlZCI6ZmFsc2UsImF1dG9BcHByb3ZlIjpbXX0%3D)
[](https://insiders.vscode.dev/redirect/mcp/install?name=Cost%20Explorer%20MCP%20Server&config=%7B%22command%22%3A%22uvx%22%2C%22args%22%3A%5B%22awslabs.cost-explorer-mcp-server%40latest%22%5D%2C%22env%22%3A%7B%22AWS_PROFILE%22%3A%22your-aws-profile%22%2C%22AWS_REGION%22%3A%22us-east-1%22%2C%22FASTMCP_LOG_LEVEL%22%3A%22ERROR%22%7D%2C%22disabled%22%3Afalse%2C%22autoApprove%22%3A%5B%5D%7D) | #### 🤖 Autonomous Background Agents *Headless automation, ETL pipelines, and operational systems* ##### Data Operations & ETL | Server Name | Description | Install | |-------------|-------------|---------| | [AWS Data Processing MCP Server](src/aws-dataprocessing-mcp-server) | Comprehensive data processing tools and real-time pipeline visibility across AWS Glue and Amazon EMR-EC2 | [](https://kiro.dev/launch/mcp/add?name=awslabs.aws-dataprocessing-mcp-server&config=%7B%22command%22%3A%22uvx%22%2C%22args%22%3A%5B%22awslabs.aws-dataprocessing-mcp-server%40latest%22%5D%2C%22env%22%3A%7B%22AWS_PROFILE%22%3A%22your-aws-profile%22%2C%22AWS_REGION%22%3A%22us-east-1%22%2C%22FASTMCP_LOG_LEVEL%22%3A%22ERROR%22%7D%7D)
[](https://cursor.com/en/install-mcp?name=awslabs.aws-dataprocessing-mcp-server&config=eyJjb21tYW5kIjoidXZ4IGF3c2xhYnMuYXdzLWRhdGFwcm9jZXNzaW5nLW1jcC1zZXJ2ZXJAbGF0ZXN0IiwiZW52Ijp7IkFXU19QUk9GSUxFIjoieW91ci1hd3MtcHJvZmlsZSIsIkFXU19SRUdJT04iOiJ1cy1lYXN0LTEiLCJGQVNUTUNQX0xPR19MRVZFTCI6IkVSUk9SIn0sImRpc2FibGVkIjpmYWxzZSwiYXV0b0FwcHJvdmUiOltdfQ%3D%3D)
[](https://insiders.vscode.dev/redirect/mcp/install?name=AWS%20Data%20Processing%20MCP%20Server&config=%7B%22command%22%3A%22uvx%22%2C%22args%22%3A%5B%22awslabs.aws-dataprocessing-mcp-server%40latest%22%5D%2C%22env%22%3A%7B%22AWS_PROFILE%22%3A%22your-aws-profile%22%2C%22AWS_REGION%22%3A%22us-east-1%22%2C%22FASTMCP_LOG_LEVEL%22%3A%22ERROR%22%7D%2C%22disabled%22%3Afalse%2C%22autoApprove%22%3A%5B%5D%7D) | | [Amazon DynamoDB MCP Server](src/dynamodb-mcp-server) | Complete DynamoDB operations and table management | [](https://kiro.dev/launch/mcp/add?name=awslabs.dynamodb-mcp-server&config=%7B%22command%22%3A%22uvx%22%2C%22args%22%3A%5B%22awslabs.dynamodb-mcp-server%40latest%22%5D%2C%22env%22%3A%7B%22DDB-MCP-READONLY%22%3A%22true%22%2C%22AWS_PROFILE%22%3A%22default%22%2C%22AWS_REGION%22%3A%22us-west-2%22%2C%22FASTMCP_LOG_LEVEL%22%3A%22ERROR%22%7D%7D)
[](https://cursor.com/en/install-mcp?name=awslabs.dynamodb-mcp-server&config=eyJjb21tYW5kIjoidXZ4IGF3c2xhYnMuZHluYW1vZGItbWNwLXNlcnZlckBsYXRlc3QiLCJlbnYiOnsiRERCLU1DUC1SRUFET05MWSI6InRydWUiLCJBV1NfUFJPRklMRSI6ImRlZmF1bHQiLCJBV1NfUkVHSU9OIjoidXMtd2VzdC0yIiwiRkFTVE1DUF9MT0dfTEVWRUwiOiJFUlJPUiJ9LCJkaXNhYmxlZCI6ZmFsc2UsImF1dG9BcHByb3ZlIjpbXX0%3D)
[](https://insiders.vscode.dev/redirect/mcp/install?name=DynamoDB%20MCP%20Server&config=%7B%22command%22%3A%22uvx%22%2C%22args%22%3A%5B%22awslabs.dynamodb-mcp-server%40latest%22%5D%2C%22env%22%3A%7B%22DDB-MCP-READONLY%22%3A%22true%22%2C%22AWS_PROFILE%22%3A%22default%22%2C%22AWS_REGION%22%3A%22us-west-2%22%2C%22FASTMCP_LOG_LEVEL%22%3A%22ERROR%22%7D%2C%22disabled%22%3Afalse%2C%22autoApprove%22%3A%5B%5D%7D) | | [Amazon Aurora PostgreSQL MCP Server](src/postgres-mcp-server) | PostgreSQL database operations via RDS Data API | [](https://kiro.dev/launch/mcp/add?name=awslabs.postgres-mcp-server&config=%7B%22command%22%3A%22uvx%22%2C%22args%22%3A%5B%22awslabs.postgres-mcp-server%40latest%22%2C%22--connection-string%22%2C%22postgresql%3A//%5Busername%5D%3A%5Bpassword%5D%40%5Bhost%5D%3A%5Bport%5D/%5Bdatabase%5D%22%5D%2C%22env%22%3A%7B%22FASTMCP_LOG_LEVEL%22%3A%22ERROR%22%7D%7D)
[](https://cursor.com/en/install-mcp?name=awslabs.postgres-mcp-server&config=eyJjb21tYW5kIjoidXZ4IGF3c2xhYnMucG9zdGdyZXMtbWNwLXNlcnZlckBsYXRlc3QgLS1jb25uZWN0aW9uLXN0cmluZyBwb3N0Z3Jlc3FsOi8vW3VzZXJuYW1lXTpbcGFzc3dvcmRdQFtob3N0XTpbcG9ydF0vW2RhdGFiYXNlXSIsImVudiI6eyJGQVNUTUNQX0xPR19MRVZFTCI6IkVSUk9SIn0sImRpc2FibGVkIjpmYWxzZSwiYXV0b0FwcHJvdmUiOltdLCJ0cmFuc3BvcnRUeXBlIjoic3RkaW8iLCJhdXRvU3RhcnQiOnRydWV9)
[](https://insiders.vscode.dev/redirect/mcp/install?name=PostgreSQL%20MCP%20Server&config=%7B%22command%22%3A%22uvx%22%2C%22args%22%3A%5B%22awslabs.postgres-mcp-server%40latest%22%2C%22--connection-string%22%2C%22postgresql%3A%2F%2F%5Busername%5D%3A%5Bpassword%5D%40%5Bhost%5D%3A%5Bport%5D%2F%5Bdatabase%5D%22%5D%2C%22env%22%3A%7B%22FASTMCP_LOG_LEVEL%22%3A%22ERROR%22%7D%2C%22disabled%22%3Afalse%2C%22autoApprove%22%3A%5B%5D%2C%22transportType%22%3A%22stdio%22%2C%22autoStart%22%3Atrue%7D) | | [Amazon Aurora MySQL MCP Server](src/mysql-mcp-server) | MySQL database operations via RDS Data API | [](https://kiro.dev/launch/mcp/add?name=awslabs.mysql-mcp-server&config=%7B%22command%22%3A%22uvx%22%2C%22args%22%3A%5B%22awslabs.mysql-mcp-server%40latest%22%2C%22--resource_arn%22%2C%22%5Byour%22%2C%22data%5D%22%2C%22--secret_arn%22%2C%22%5Byour%22%2C%22data%5D%22%2C%22--database%22%2C%22%5Byour%22%2C%22data%5D%22%2C%22--region%22%2C%22%5Byour%22%2C%22data%5D%22%2C%22--readonly%22%2C%22True%22%5D%2C%22env%22%3A%7B%22AWS_PROFILE%22%3A%22your-aws-profile%22%2C%22AWS_REGION%22%3A%22us-east-1%22%2C%22FASTMCP_LOG_LEVEL%22%3A%22ERROR%22%7D%7D)
[](https://cursor.com/en/install-mcp?name=awslabs.mysql-mcp-server&config=eyJjb21tYW5kIjoidXZ4IGF3c2xhYnMubXlzcWwtbWNwLXNlcnZlckBsYXRlc3QgLS1yZXNvdXJjZV9hcm4gW3lvdXIgZGF0YV0gLS1zZWNyZXRfYXJuIFt5b3VyIGRhdGFdIC0tZGF0YWJhc2UgW3lvdXIgZGF0YV0gLS1yZWdpb24gW3lvdXIgZGF0YV0gLS1yZWFkb25seSBUcnVlIiwiZW52Ijp7IkFXU19QUk9GSUxFIjoieW91ci1hd3MtcHJvZmlsZSIsIkFXU19SRUdJT04iOiJ1cy1lYXN0LTEiLCJGQVNUTUNQX0xPR19MRVZFTCI6IkVSUk9SIn0sImRpc2FibGVkIjpmYWxzZSwiYXV0b0FwcHJvdmUiOltdfQ%3D%3D)
[](https://insiders.vscode.dev/redirect/mcp/install?name=MySQL%20MCP%20Server&config=%7B%22command%22%3A%22uvx%22%2C%22args%22%3A%5B%22awslabs.mysql-mcp-server%40latest%22%2C%22--resource_arn%22%2C%22%5Byour%20data%5D%22%2C%22--secret_arn%22%2C%22%5Byour%20data%5D%22%2C%22--database%22%2C%22%5Byour%20data%5D%22%2C%22--region%22%2C%22%5Byour%20data%5D%22%2C%22--readonly%22%2C%22True%22%5D%2C%22env%22%3A%7B%22AWS_PROFILE%22%3A%22your-aws-profile%22%2C%22AWS_REGION%22%3A%22us-east-1%22%2C%22FASTMCP_LOG_LEVEL%22%3A%22ERROR%22%7D%2C%22disabled%22%3Afalse%2C%22autoApprove%22%3A%5B%5D%7D) | | [Amazon Aurora DSQL MCP Server](src/aurora-dsql-mcp-server) | Distributed SQL with PostgreSQL compatibility | [](https://kiro.dev/launch/mcp/add?name=awslabs.aurora-dsql-mcp-server&config=%7B%22command%22%3A%22uvx%22%2C%22args%22%3A%5B%22awslabs.aurora-dsql-mcp-server%40latest%22%2C%22--cluster_endpoint%22%2C%22%5Byour%22%2C%22dsql%22%2C%22cluster%22%2C%22endpoint%5D%22%2C%22--region%22%2C%22%5Byour%22%2C%22dsql%22%2C%22cluster%22%2C%22region%2C%22%2C%22e.g.%22%2C%22us-east-1%5D%22%2C%22--database_user%22%2C%22%5Byour%22%2C%22dsql%22%2C%22username%5D%22%2C%22--profile%22%2C%22default%22%5D%2C%22env%22%3A%7B%22FASTMCP_LOG_LEVEL%22%3A%22ERROR%22%7D%7D)
[](https://cursor.com/en/install-mcp?name=awslabs.aurora-dsql-mcp-server&config=eyJjb21tYW5kIjoidXZ4IGF3c2xhYnMuYXVyb3JhLWRzcWwtbWNwLXNlcnZlckBsYXRlc3QgLS1jbHVzdGVyX2VuZHBvaW50IFt5b3VyIGRzcWwgY2x1c3RlciBlbmRwb2ludF0gLS1yZWdpb24gW3lvdXIgZHNxbCBjbHVzdGVyIHJlZ2lvbiwgZS5nLiB1cy1lYXN0LTFdIC0tZGF0YWJhc2VfdXNlciBbeW91ciBkc3FsIHVzZXJuYW1lXSAtLXByb2ZpbGUgZGVmYXVsdCIsImVudiI6eyJGQVNUTUNQX0xPR19MRVZFTCI6IkVSUk9SIn0sImRpc2FibGVkIjpmYWxzZSwiYXV0b0FwcHJvdmUiOltdfQ%3D%3D)
[](https://insiders.vscode.dev/redirect/mcp/install?name=Aurora%20DSQL%20MCP%20Server&config=%7B%22command%22%3A%22uvx%22%2C%22args%22%3A%5B%22awslabs.aurora-dsql-mcp-server%40latest%22%2C%22--cluster_endpoint%22%2C%22%5Byour%20dsql%20cluster%20endpoint%5D%22%2C%22--region%22%2C%22%5Byour%20dsql%20cluster%20region%2C%20e.g.%20us-east-1%5D%22%2C%22--database_user%22%2C%22%5Byour%20dsql%20username%5D%22%2C%22--profile%22%2C%22default%22%5D%2C%22env%22%3A%7B%22FASTMCP_LOG_LEVEL%22%3A%22ERROR%22%7D%2C%22disabled%22%3Afalse%2C%22autoApprove%22%3A%5B%5D%7D) | | [Amazon DocumentDB MCP Server](src/documentdb-mcp-server) | MongoDB-compatible document database operations | [](https://kiro.dev/launch/mcp/add?name=awslabs.documentdb-mcp-server&config=%7B%22command%22%3A%22uvx%22%2C%22args%22%3A%5B%22awslabs.documentdb-mcp-serve%40latest%22%5D%2C%22env%22%3A%7B%22FASTMCP_LOG_LEVEL%22%3A%22ERROR%22%2C%22AWS_PROFILE%22%3A%22your-aws-profile%22%7D%7D)
[](https://cursor.com/en/install-mcp?name=awslabs.documentdb-mcp-server&config=eyJjb21tYW5kIjoidXZ4IGF3c2xhYnMuZG9jdW1lbnRkYi1tY3Atc2VydmVAbGF0ZXN0IiwiZW52Ijp7IkZBU1RNQ1BfTE9HX0xFVkVMIjoiRVJST1IiLCJBV1NfUFJPRklMRSI6InlvdXItYXdzLXByb2ZpbGUifSwiZGlzYWJsZWQiOmZhbHNlLCJhdXRvQXBwcm92ZSI6W119)
[](https://insiders.vscode.dev/redirect/mcp/install?name=DocumentDB%20MCP%20Server&config=%7B%22command%22%3A%22uvx%22%2C%22args%22%3A%5B%22awslabs.documentdb-mcp-server%40latest%22%5D%2C%22env%22%3A%7B%22FASTMCP_LOG_LEVEL%22%3A%22ERROR%22%2C%22AWS_PROFILE%22%3A%22your-aws-profile%22%7D%2C%22disabled%22%3Afalse%2C%22autoApprove%22%3A%5B%5D%7D) | | [Amazon Neptune MCP Server](src/amazon-neptune-mcp-server) | Graph database queries with openCypher and Gremlin | [](https://kiro.dev/launch/mcp/add?name=awslabs.amazon-neptune-mcp-server&config=%7B%22command%22%3A%22uvx%22%2C%22args%22%3A%5B%22awslabs.amazon-neptune-mcp-server%40latest%22%5D%2C%22env%22%3A%7B%22NEPTUNE_ENDPOINT%22%3A%22https%3A//your-neptune-cluster-id.region.neptune.amazonaws.com%3A8182%22%2C%22AWS_PROFILE%22%3A%22your-aws-profile%22%2C%22AWS_REGION%22%3A%22us-east-1%22%2C%22FASTMCP_LOG_LEVEL%22%3A%22ERROR%22%7D%7D)
[](https://cursor.com/en/install-mcp?name=awslabs.amazon-neptune-mcp-server&config=eyJjb21tYW5kIjoidXZ4IGF3c2xhYnMuYW1hem9uLW5lcHR1bmUtbWNwLXNlcnZlckBsYXRlc3QiLCJlbnYiOnsiTkVQVFVORV9FTkRQT0lOVCI6Imh0dHBzOi8veW91ci1uZXB0dW5lLWNsdXN0ZXItaWQucmVnaW9uLm5lcHR1bmUuYW1hem9uYXdzLmNvbTo4MTgyIiwiQVdTX1BST0ZJTEUiOiJ5b3VyLWF3cy1wcm9maWxlIiwiQVdTX1JFR0lPTiI6InVzLWVhc3QtMSIsIkZBU1RNQ1BfTE9HX0xFVkVMIjoiRVJST1IifSwiZGlzYWJsZWQiOmZhbHNlLCJhdXRvQXBwcm92ZSI6W119)
[](https://insiders.vscode.dev/redirect/mcp/install?name=Amazon%20Neptune%20MCP%20Server&config=%7B%22command%22%3A%22uvx%22%2C%22args%22%3A%5B%22awslabs.amazon-neptune-mcp-server%40latest%22%5D%2C%22env%22%3A%7B%22NEPTUNE_ENDPOINT%22%3A%22https%3A%2F%2Fyour-neptune-cluster-id.region.neptune.amazonaws.com%3A8182%22%2C%22AWS_PROFILE%22%3A%22your-aws-profile%22%2C%22AWS_REGION%22%3A%22us-east-1%22%2C%22FASTMCP_LOG_LEVEL%22%3A%22ERROR%22%7D%2C%22disabled%22%3Afalse%2C%22autoApprove%22%3A%5B%5D%7D) | | [Amazon Keyspaces MCP Server](src/amazon-keyspaces-mcp-server) | Apache Cassandra-compatible operations | [](https://kiro.dev/launch/mcp/add?name=awslabs.amazon-keyspaces-mcp-server&config=%7B%22command%22%3A%22uvx%22%2C%22args%22%3A%5B%22awslabs.amazon-keyspaces-mcp-server%40latest%22%5D%2C%22env%22%3A%7B%22AWS_PROFILE%22%3A%22your-aws-profile%22%2C%22AWS_REGION%22%3A%22us-east-1%22%2C%22FASTMCP_LOG_LEVEL%22%3A%22ERROR%22%7D%7D)
[](https://cursor.com/en/install-mcp?name=awslabs.amazon-keyspaces-mcp-server&config=eyJjb21tYW5kIjoidXZ4IGF3c2xhYnMuYW1hem9uLWtleXNwYWNlcy1tY3Atc2VydmVyQGxhdGVzdCIsImVudiI6eyJBV1NfUFJPRklMRSI6InlvdXItYXdzLXByb2ZpbGUiLCJBV1NfUkVHSU9OIjoidXMtZWFzdC0xIiwiRkFTVE1DUF9MT0dfTEVWRUwiOiJFUlJPUiJ9LCJkaXNhYmxlZCI6ZmFsc2UsImF1dG9BcHByb3ZlIjpbXX0%3D)
[](https://insiders.vscode.dev/redirect/mcp/install?name=Amazon%20Keyspaces%20MCP%20Server&config=%7B%22command%22%3A%22uvx%22%2C%22args%22%3A%5B%22awslabs.amazon-keyspaces-mcp-server%40latest%22%5D%2C%22env%22%3A%7B%22AWS_PROFILE%22%3A%22your-aws-profile%22%2C%22AWS_REGION%22%3A%22us-east-1%22%2C%22FASTMCP_LOG_LEVEL%22%3A%22ERROR%22%7D%2C%22disabled%22%3Afalse%2C%22autoApprove%22%3A%5B%5D%7D) | | [Amazon Timestream for InfluxDB MCP Server](src/timestream-for-influxdb-mcp-server) | Time-series database operations and InfluxDB compatibility | [](https://kiro.dev/launch/mcp/add?name=awslabs.timestream-for-influxdb-mcp-server&config=%7B%22command%22%3A%22uvx%22%2C%22args%22%3A%5B%22awslabs.timestream-for-influxdb-mcp-server%40latest%22%5D%2C%22env%22%3A%7B%22AWS_PROFILE%22%3A%22your-aws-profile%22%2C%22AWS_REGION%22%3A%22us-east-1%22%2C%22FASTMCP_LOG_LEVEL%22%3A%22ERROR%22%7D%7D)
[](https://cursor.com/en/install-mcp?name=awslabs.timestream-for-influxdb-mcp-server&config=eyJjb21tYW5kIjoidXZ4IGF3c2xhYnMudGltZXN0cmVhbS1mb3ItaW5mbHV4ZGItbWNwLXNlcnZlckBsYXRlc3QiLCJlbnYiOnsiQVdTX1BST0ZJTEUiOiJ5b3VyLWF3cy1wcm9maWxlIiwiQVdTX1JFR0lPTiI6InVzLWVhc3QtMSIsIkZBU1RNQ1BfTE9HX0xFVkVMIjoiRVJST1IifSwiZGlzYWJsZWQiOmZhbHNlLCJhdXRvQXBwcm92ZSI6W119)
[](https://insiders.vscode.dev/redirect/mcp/install?name=Timestream%20for%20InfluxDB%20MCP%20Server&config=%7B%22command%22%3A%22uvx%22%2C%22args%22%3A%5B%22awslabs.timestream-for-influxdb-mcp-server%40latest%22%5D%2C%22env%22%3A%7B%22AWS_PROFILE%22%3A%22your-aws-profile%22%2C%22AWS_REGION%22%3A%22us-east-1%22%2C%22FASTMCP_LOG_LEVEL%22%3A%22ERROR%22%7D%2C%22disabled%22%3Afalse%2C%22autoApprove%22%3A%5B%5D%7D) | | [Amazon MSK MCP Server](src/aws-msk-mcp-server) | Managed Kafka cluster operations and streaming | [](https://kiro.dev/launch/mcp/add?name=awslabs.aws-msk-mcp-server&config=%7B%22command%22%3A%22uvx%22%2C%22args%22%3A%5B%22awslabs.aws-msk-mcp-server%40latest%22%2C%22--allow-writes%22%5D%2C%22env%22%3A%7B%22FASTMCP_LOG_LEVEL%22%3A%22ERROR%22%7D%7D)
[](https://cursor.com/en/install-mcp?name=awslabs.aws-msk-mcp-server&config=JTdCJTIyY29tbWFuZCUyMiUzQSUyMnV2eCUyMGF3c2xhYnMuYXdzLW1zay1tY3Atc2VydmVyJTQwbGF0ZXN0JTIwLS1hbGxvdy13cml0ZXMlMjIlMkMlMjJlbnYlMjIlM0ElN0IlMjJGQVNUTUNQX0xPR19MRVZFTCUyMiUzQSUyMkVSUk9SJTIyJTdEJTJDJTIyZGlzYWJsZWQlMjIlM0FmYWxzZSUyQyUyMmF1dG9BcHByb3ZlJTIyJTNBJTVCJTVEJTdE)
[](https://insiders.vscode.dev/redirect/mcp/install?name=AWS%20MSK%20MCP%20Server&config=%7B%22command%22%3A%22uvx%22%2C%22args%22%3A%5B%22awslabs.aws-msk-mcp-server%40latest%22%2C%22--allow-writes%22%5D%2C%22env%22%3A%7B%22FASTMCP_LOG_LEVEL%22%3A%22ERROR%22%7D%2C%22disabled%22%3Afalse%2C%22autoApprove%22%3A%5B%5D%7D) | ##### Caching & Performance | Server Name | Description | Install | |-------------|-------------|---------| | [Amazon ElastiCache / MemoryDB for Valkey MCP Server](src/valkey-mcp-server) | Advanced data structures and caching with Valkey | [](https://kiro.dev/launch/mcp/add?name=awslabs.valkey-mcp-server&config=%7B%22command%22%3A%22uvx%22%2C%22args%22%3A%5B%22awslabs.valkey-mcp-server%40latest%22%5D%2C%22env%22%3A%7B%22VALKEY_HOST%22%3A%22127.0.0.1%22%2C%22VALKEY_PORT%22%3A%226379%22%2C%22FASTMCP_LOG_LEVEL%22%3A%22ERROR%22%7D%7D)
[](https://cursor.com/en/install-mcp?name=awslabs.valkey-mcp-server&config=eyJjb21tYW5kIjoidXZ4IGF3c2xhYnMudmFsa2V5LW1jcC1zZXJ2ZXJAbGF0ZXN0IiwiZW52Ijp7IlZBTEtFWV9IT1NUIjoiMTI3LjAuMC4xIiwiVkFMS0VZX1BPUlQiOiI2Mzc5IiwiRkFTVE1DUF9MT0dfTEVWRUwiOiJFUlJPUiJ9LCJhdXRvQXBwcm92ZSI6W10sImRpc2FibGVkIjpmYWxzZX0%3D)
[](https://insiders.vscode.dev/redirect/mcp/install?name=Valkey%20MCP%20Server&config=%7B%22command%22%3A%22uvx%22%2C%22args%22%3A%5B%22awslabs.valkey-mcp-server%40latest%22%5D%2C%22env%22%3A%7B%22VALKEY_HOST%22%3A%22127.0.0.1%22%2C%22VALKEY_PORT%22%3A%226379%22%2C%22FASTMCP_LOG_LEVEL%22%3A%22ERROR%22%7D%2C%22autoApprove%22%3A%5B%5D%2C%22disabled%22%3Afalse%7D) | | [Amazon ElastiCache for Memcached MCP Server ](src/memcached-mcp-server) | High-speed caching with Memcached protocol | [](https://kiro.dev/launch/mcp/add?name=awslabs.memcached-mcp-server&config=%7B%22command%22%3A%22uvx%22%2C%22args%22%3A%5B%22awslabs.memcached-mcp-server%40latest%22%5D%2C%22env%22%3A%7B%22FASTMCP_LOG_LEVEL%22%3A%22ERROR%22%2C%22MEMCACHED_HOST%22%3A%22your-memcached-host%22%2C%22MEMCACHED_PORT%22%3A%2211211%22%7D%7D)
[](https://cursor.com/en/install-mcp?name=awslabs.memcached-mcp-server&config=eyJjb21tYW5kIjoidXZ4IGF3c2xhYnMubWVtY2FjaGVkLW1jcC1zZXJ2ZXJAbGF0ZXN0IiwiZW52Ijp7IkZBU1RNQ1BfTE9HX0xFVkVMIjoiRVJST1IiLCJNRU1DQUNIRURfSE9TVCI6InlvdXItbWVtY2FjaGVkLWhvc3QiLCJNRU1DQUNIRURfUE9SVCI6IjExMjExIn0sImRpc2FibGVkIjpmYWxzZSwiYXV0b0FwcHJvdmUiOltdfQ%3D%3D)
[](https://insiders.vscode.dev/redirect/mcp/install?name=Memcached%20MCP%20Server&config=%7B%22command%22%3A%22uvx%22%2C%22args%22%3A%5B%22awslabs.memcached-mcp-server%40latest%22%5D%2C%22env%22%3A%7B%22FASTMCP_LOG_LEVEL%22%3A%22ERROR%22%2C%22MEMCACHED_HOST%22%3A%22your-memcached-host%22%2C%22MEMCACHED_PORT%22%3A%2211211%22%7D%2C%22disabled%22%3Afalse%2C%22autoApprove%22%3A%5B%5D%7D) | ##### Workflow & Integration | Server Name | Description | Install | |-------------|-------------|---------| | [AWS Lambda Tool MCP Server](src/lambda-tool-mcp-server) | Execute Lambda functions as AI tools for private resource access | [](https://kiro.dev/launch/mcp/add?name=awslabs.lambda-tool-mcp-server&config=%7B%22command%22%3A%22uvx%22%2C%22args%22%3A%5B%22awslabs.lambda-tool-mcp-server%40latest%22%5D%2C%22env%22%3A%7B%22AWS_PROFILE%22%3A%22your-aws-profile%22%2C%22AWS_REGION%22%3A%22us-east-1%22%2C%22FUNCTION_PREFIX%22%3A%22your-function-prefix%22%2C%22FUNCTION_LIST%22%3A%22your-first-function%2C%20your-second-function%22%2C%22FUNCTION_TAG_KEY%22%3A%22your-tag-key%22%2C%22FUNCTION_TAG_VALUE%22%3A%22your-tag-value%22%2C%22FUNCTION_INPUT_SCHEMA_ARN_TAG_KEY%22%3A%22your-function-tag-for-input-schema%22%7D%7D)
[](https://cursor.com/en/install-mcp?name=awslabs.lambda-tool-mcp-server&config=eyJjb21tYW5kIjoidXZ4IGF3c2xhYnMubGFtYmRhLXRvb2wtbWNwLXNlcnZlckBsYXRlc3QiLCJlbnYiOnsiQVdTX1BST0ZJTEUiOiJ5b3VyLWF3cy1wcm9maWxlIiwiQVdTX1JFR0lPTiI6InVzLWVhc3QtMSIsIkZVTkNUSU9OX1BSRUZJWCI6InlvdXItZnVuY3Rpb24tcHJlZml4IiwiRlVOQ1RJT05fTElTVCI6InlvdXItZmlyc3QtZnVuY3Rpb24sIHlvdXItc2Vjb25kLWZ1bmN0aW9uIiwiRlVOQ1RJT05fVEFHX0tFWSI6InlvdXItdGFnLWtleSIsIkZVTkNUSU9OX1RBR19WQUxVRSI6InlvdXItdGFnLXZhbHVlIiwiRlVOQ1RJT05fSU5QVVRfU0NIRU1BX0FSTl9UQUdfS0VZIjoieW91ci1mdW5jdGlvbi10YWctZm9yLWlucHV0LXNjaGVtYSJ9fQ%3D%3D)
[](https://insiders.vscode.dev/redirect/mcp/install?name=AWS%20Lambda%20Tool%20MCP%20Server&config=%7B%22command%22%3A%22uvx%22%2C%22args%22%3A%5B%22awslabs.lambda-tool-mcp-server%40latest%22%5D%2C%22env%22%3A%7B%22AWS_PROFILE%22%3A%22your-aws-profile%22%2C%22AWS_REGION%22%3A%22us-east-1%22%2C%22FUNCTION_PREFIX%22%3A%22your-function-prefix%22%2C%22FUNCTION_LIST%22%3A%22your-first-function%2C%20your-second-function%22%2C%22FUNCTION_TAG_KEY%22%3A%22your-tag-key%22%2C%22FUNCTION_TAG_VALUE%22%3A%22your-tag-value%22%2C%22FUNCTION_INPUT_SCHEMA_ARN_TAG_KEY%22%3A%22your-function-tag-for-input-schema%22%7D%7D) | | [AWS Step Functions Tool MCP Server](src/stepfunctions-tool-mcp-server) | Execute complex workflows and business processes | [](https://kiro.dev/launch/mcp/add?name=awslabs.stepfunctions-tool-mcp-server&config=%7B%22command%22%3A%22uvx%22%2C%22args%22%3A%5B%22awslabs.stepfunctions-tool-mcp-server%40latest%22%5D%2C%22env%22%3A%7B%22AWS_PROFILE%22%3A%22your-aws-profile%22%2C%22AWS_REGION%22%3A%22us-east-1%22%2C%22STATE_MACHINE_PREFIX%22%3A%22your-state-machine-prefix%22%2C%22STATE_MACHINE_LIST%22%3A%22your-first-state-machine%2C%20your-second-state-machine%22%2C%22STATE_MACHINE_TAG_KEY%22%3A%22your-tag-key%22%2C%22STATE_MACHINE_TAG_VALUE%22%3A%22your-tag-value%22%2C%22STATE_MACHINE_INPUT_SCHEMA_ARN_TAG_KEY%22%3A%22your-state-machine-tag-for-input-schema%22%7D%7D)
[](https://cursor.com/en/install-mcp?name=awslabs.stepfunctions-tool-mcp-server&config=eyJjb21tYW5kIjoidXZ4IGF3c2xhYnMuc3RlcGZ1bmN0aW9ucy10b29sLW1jcC1zZXJ2ZXJAbGF0ZXN0IiwiZW52Ijp7IkFXU19QUk9GSUxFIjoieW91ci1hd3MtcHJvZmlsZSIsIkFXU19SRUdJT04iOiJ1cy1lYXN0LTEiLCJTVEFURV9NQUNISU5FX1BSRUZJWCI6InlvdXItc3RhdGUtbWFjaGluZS1wcmVmaXgiLCJTVEFURV9NQUNISU5FX0xJU1QiOiJ5b3VyLWZpcnN0LXN0YXRlLW1hY2hpbmUsIHlvdXItc2Vjb25kLXN0YXRlLW1hY2hpbmUiLCJTVEFURV9NQUNISU5FX1RBR19LRVkiOiJ5b3VyLXRhZy1rZXkiLCJTVEFURV9NQUNISU5FX1RBR19WQUxVRSI6InlvdXItdGFnLXZhbHVlIiwiU1RBVEVfTUFDSElORV9JTlBVVF9TQ0hFTUFfQVJOX1RBR19LRVkiOiJ5b3VyLXN0YXRlLW1hY2hpbmUtdGFnLWZvci1pbnB1dC1zY2hlbWEifX0%3D)
[](https://insiders.vscode.dev/redirect/mcp/install?name=Step%20Functions%20Tool%20MCP%20Server&config=%7B%22command%22%3A%22uvx%22%2C%22args%22%3A%5B%22awslabs.stepfunctions-tool-mcp-server%40latest%22%5D%2C%22env%22%3A%7B%22AWS_PROFILE%22%3A%22your-aws-profile%22%2C%22AWS_REGION%22%3A%22us-east-1%22%2C%22STATE_MACHINE_PREFIX%22%3A%22your-state-machine-prefix%22%2C%22STATE_MACHINE_LIST%22%3A%22your-first-state-machine%2C%20your-second-state-machine%22%2C%22STATE_MACHINE_TAG_KEY%22%3A%22your-tag-key%22%2C%22STATE_MACHINE_TAG_VALUE%22%3A%22your-tag-value%22%2C%22STATE_MACHINE_INPUT_SCHEMA_ARN_TAG_KEY%22%3A%22your-state-machine-tag-for-input-schema%22%7D%2C%22disabled%22%3Afalse%2C%22autoApprove%22%3A%5B%5D%7D) | | [Amazon SNS/SQS MCP Server](src/amazon-sns-sqs-mcp-server) | Event-driven messaging and queue management | [](https://kiro.dev/launch/mcp/add?name=awslabs.amazon-sns-sqs-mcp-server&config=%7B%22command%22%3A%22uvx%22%2C%22args%22%3A%5B%22awslabs.amazon-sns-sqs-mcp-server%40latest%22%5D%2C%22env%22%3A%7B%22AWS_PROFILE%22%3A%22your-aws-profile%22%2C%22AWS_REGION%22%3A%22us-east-1%22%7D%7D)
[](https://cursor.com/en/install-mcp?name=awslabs.amazon-sns-sqs-mcp-server&config=eyJjb21tYW5kIjoidXZ4IGF3c2xhYnMuYW1hem9uLXNucy1zcXMtbWNwLXNlcnZlckBsYXRlc3QiLCJlbnYiOnsiQVdTX1BST0ZJTEUiOiJ5b3VyLWF3cy1wcm9maWxlIiwiQVdTX1JFR0lPTiI6InVzLWVhc3QtMSJ9fQ%3D%3D)
[](https://insiders.vscode.dev/redirect/mcp/install?name=Amazon%20SNS%2FSQS%20MCP%20Server&config=%7B%22command%22%3A%22uvx%22%2C%22args%22%3A%5B%22awslabs.amazon-sns-sqs-mcp-server%40latest%22%5D%2C%22env%22%3A%7B%22AWS_PROFILE%22%3A%22your-aws-profile%22%2C%22AWS_REGION%22%3A%22us-east-1%22%7D%7D) | | [Amazon MQ MCP Server](src/amazon-mq-mcp-server) | Message broker management for RabbitMQ and ActiveMQ | [](https://kiro.dev/launch/mcp/add?name=awslabs.amazon-mq-mcp-server&config=%7B%22command%22%3A%22uvx%22%2C%22args%22%3A%5B%22awslabs.amazon-mq-mcp-server%40latest%22%5D%2C%22env%22%3A%7B%22AWS_PROFILE%22%3A%22your-aws-profile%22%2C%22AWS_REGION%22%3A%22us-east-1%22%2C%22FASTMCP_LOG_LEVEL%22%3A%22ERROR%22%7D%7D)
[](https://cursor.com/en/install-mcp?name=awslabs.amazon-mq-mcp-server&config=eyJjb21tYW5kIjoidXZ4IGF3c2xhYnMuYW1hem9uLW1xLW1jcC1zZXJ2ZXJAbGF0ZXN0IiwiZW52Ijp7IkFXU19QUk9GSUxFIjoieW91ci1hd3MtcHJvZmlsZSIsIkFXU19SRUdJT04iOiJ1cy1lYXN0LTEiLCJGQVNUTUNQX0xPR19MRVZFTCI6IkVSUk9SIn0sImRpc2FibGVkIjpmYWxzZSwiYXV0b0FwcHJvdmUiOltdfQ%3D%3D)
[](https://insiders.vscode.dev/redirect/mcp/install?name=Amazon%20MQ%20MCP%20Server&config=%7B%22command%22%3A%22uvx%22%2C%22args%22%3A%5B%22awslabs.amazon-mq-mcp-server%40latest%22%5D%2C%22env%22%3A%7B%22AWS_PROFILE%22%3A%22your-aws-profile%22%2C%22AWS_REGION%22%3A%22us-east-1%22%2C%22FASTMCP_LOG_LEVEL%22%3A%22ERROR%22%7D%2C%22disabled%22%3Afalse%2C%22autoApprove%22%3A%5B%5D%7D) | | [AWS MSK MCP Server](src/aws-msk-mcp-server) | Managed Kafka cluster operations and streaming | [](https://kiro.dev/launch/mcp/add?name=awslabs.aws-msk-mcp-server&config=%7B%22command%22%3A%22uvx%22%2C%22args%22%3A%5B%22awslabs.aws-msk-mcp-server%40latest%22%2C%22--allow-writes%22%5D%2C%22env%22%3A%7B%22FASTMCP_LOG_LEVEL%22%3A%22ERROR%22%7D%7D)
[](https://cursor.com/en/install-mcp?name=awslabs.aws-msk-mcp-server&config=JTdCJTIyY29tbWFuZCUyMiUzQSUyMnV2eCUyMGF3c2xhYnMuYXdzLW1zay1tY3Atc2VydmVyJTQwbGF0ZXN0JTIwLS1hbGxvdy13cml0ZXMlMjIlMkMlMjJlbnYlMjIlM0ElN0IlMjJGQVNUTUNQX0xPR19MRVZFTCUyMiUzQSUyMkVSUk9SJTIyJTdEJTJDJTIyZGlzYWJsZWQlMjIlM0FmYWxzZSUyQyUyMmF1dG9BcHByb3ZlJTIyJTNBJTVCJTVEJTdE)
[](https://insiders.vscode.dev/redirect/mcp/install?name=AWS%20MSK%20MCP%20Server&config=%7B%22command%22%3A%22uvx%22%2C%22args%22%3A%5B%22awslabs.aws-msk-mcp-server%40latest%22%2C%22--allow-writes%22%5D%2C%22env%22%3A%7B%22FASTMCP_LOG_LEVEL%22%3A%22ERROR%22%7D%2C%22disabled%22%3Afalse%2C%22autoApprove%22%3A%5B%5D%7D) | ##### Operations & Monitoring | Server Name | Description | Install | |-------------|-------------|---------| | [Amazon CloudWatch MCP Server](src/cloudwatch-mcp-server) | Metrics, Alarms, and Logs analysis and operational troubleshooting | [](https://kiro.dev/launch/mcp/add?name=awslabs.cloudwatch-mcp-server&config=%7B%22command%22%3A%22uvx%22%2C%22args%22%3A%5B%22awslabs.cloudwatch-mcp-server%40latest%22%5D%2C%22env%22%3A%7B%22AWS_PROFILE%22%3A%22%5BThe%20AWS%20Profile%20Name%20to%20use%20for%20AWS%20access%5D%22%2C%22FASTMCP_LOG_LEVEL%22%3A%22ERROR%22%7D%7D)
[](https://cursor.com/en/install-mcp?name=awslabs.cloudwatch-mcp-server&config=ewogICAgImF1dG9BcHByb3ZlIjogW10sCiAgICAiZGlzYWJsZWQiOiBmYWxzZSwKICAgICJjb21tYW5kIjogInV2eCBhd3NsYWJzLmNsb3Vkd2F0Y2gtbWNwLXNlcnZlckBsYXRlc3QiLAogICAgImVudiI6IHsKICAgICAgIkFXU19QUk9GSUxFIjogIltUaGUgQVdTIFByb2ZpbGUgTmFtZSB0byB1c2UgZm9yIEFXUyBhY2Nlc3NdIiwKICAgICAgIkZBU1RNQ1BfTE9HX0xFVkVMIjogIkVSUk9SIgogICAgfSwKICAgICJ0cmFuc3BvcnRUeXBlIjogInN0ZGlvIgp9)
[](https://insiders.vscode.dev/redirect/mcp/install?name=CloudWatch%20MCP%20Server&config=%7B%22autoApprove%22%3A%5B%5D%2C%22disabled%22%3Afalse%2C%22command%22%3A%22uvx%22%2C%22args%22%3A%5B%22awslabs.cloudwatch-mcp-server%40latest%22%5D%2C%22env%22%3A%7B%22AWS_PROFILE%22%3A%22%5BThe%20AWS%20Profile%20Name%20to%20use%20for%20AWS%20access%5D%22%2C%22FASTMCP_LOG_LEVEL%22%3A%22ERROR%22%7D%2C%22transportType%22%3A%22stdio%22%7D) | | [Amazon CloudWatch Application Signals MCP Server](src/cloudwatch-applicationsignals-mcp-server) | Application monitoring and performance insights | [](https://kiro.dev/launch/mcp/add?name=applicationsignals&config=%7B%22command%22%3A%22uvx%22%2C%22args%22%3A%5B%22awslabs.cloudwatch-applicationsignals-mcp-server%40latest%22%5D%2C%22env%22%3A%7B%22AWS_PROFILE%22%3A%22%5BThe%20AWS%20Profile%20Name%20to%20use%20for%20AWS%20access%5D%22%2C%22AWS_REGION%22%3A%22%5BThe%20AWS%20region%20to%20run%20in%5D%22%2C%22FASTMCP_LOG_LEVEL%22%3A%22ERROR%22%7D%7D)
[](https://cursor.com/en/install-mcp?name=applicationsignals&config=eyJhdXRvQXBwcm92ZSI6W10sImRpc2FibGVkIjpmYWxzZSwidGltZW91dCI6NjAsImNvbW1hbmQiOiJ1dnggYXdzbGFicy5jbG91ZHdhdGNoLWFwcGxpY2F0aW9uc2lnbmFscy1tY3Atc2VydmVyQGxhdGVzdCIsImVudiI6eyJBV1NfUFJPRklMRSI6IltUaGUgQVdTIFByb2ZpbGUgTmFtZSB0byB1c2UgZm9yIEFXUyBhY2Nlc3NdIiwiQVdTX1JFR0lPTiI6IltUaGUgQVdTIHJlZ2lvbiB0byBydW4gaW5dIiwiRkFTVE1DUF9MT0dfTEVWRUwiOiJFUlJPUiJ9LCJ0cmFuc3BvcnRUeXBlIjoic3RkaW8ifQ)
[](https://insiders.vscode.dev/redirect/mcp/install?name=applicationsignals&config=%7B%22autoApprove%22%3A%5B%5D%2C%22disabled%22%3Afalse%2C%22timeout%22%3A60%2C%22command%22%3A%22uvx%22%2C%22args%22%3A%5B%22awslabs.cloudwatch-applicationsignals-mcp-server%40latest%22%5D%2C%22env%22%3A%7B%22AWS_PROFILE%22%3A%22%5BThe%20AWS%20Profile%20Name%20to%20use%20for%20AWS%20access%5D%22%2C%22AWS_REGION%22%3A%22%5BThe%20AWS%20region%20to%20run%20in%5D%22%2C%22FASTMCP_LOG_LEVEL%22%3A%22ERROR%22%7D%2C%22transportType%22%3A%22stdio%22%7D) | | [AWS Cost Explorer MCP Server](src/cost-explorer-mcp-server) | Detailed cost analysis and reporting | [](https://kiro.dev/launch/mcp/add?name=awslabs.cost-explorer-mcp-server&config=%7B%22command%22%3A%22uvx%22%2C%22args%22%3A%5B%22awslabs.cost-explorer-mcp-server%40latest%22%5D%2C%22env%22%3A%7B%22AWS_PROFILE%22%3A%22your-aws-profile%22%2C%22AWS_REGION%22%3A%22us-east-1%22%2C%22FASTMCP_LOG_LEVEL%22%3A%22ERROR%22%7D%7D)
[](https://cursor.com/en/install-mcp?name=awslabs.cost-explorer-mcp-server&config=eyJjb21tYW5kIjoidXZ4IGF3c2xhYnMuY29zdC1leHBsb3Jlci1tY3Atc2VydmVyQGxhdGVzdCIsImVudiI6eyJBV1NfUFJPRklMRSI6InlvdXItYXdzLXByb2ZpbGUiLCJBV1NfUkVHSU9OIjoidXMtZWFzdC0xIiwiRkFTVE1DUF9MT0dfTEVWRUwiOiJFUlJPUiJ9LCJkaXNhYmxlZCI6ZmFsc2UsImF1dG9BcHByb3ZlIjpbXX0%3D)
[](https://insiders.vscode.dev/redirect/mcp/install?name=Cost%20Explorer%20MCP%20Server&config=%7B%22command%22%3A%22uvx%22%2C%22args%22%3A%5B%22awslabs.cost-explorer-mcp-server%40latest%22%5D%2C%22env%22%3A%7B%22AWS_PROFILE%22%3A%22your-aws-profile%22%2C%22AWS_REGION%22%3A%22us-east-1%22%2C%22FASTMCP_LOG_LEVEL%22%3A%22ERROR%22%7D%2C%22disabled%22%3Afalse%2C%22autoApprove%22%3A%5B%5D%7D) | | [AWS Managed Prometheus MCP Server](src/prometheus-mcp-server) | Prometheus-compatible operations and monitoring | [](https://kiro.dev/launch/mcp/add?name=awslabs.prometheus-mcp-server&config=%7B%22command%22%3A%22uvx%22%2C%22args%22%3A%5B%22awslabs.prometheus-mcp-server%40latest%22%2C%22--url%22%2C%22https%3A//aps-workspaces.us-east-1.amazonaws.com/workspaces/ws-%3CWorkspace%22%2C%22ID%3E%22%2C%22--region%22%2C%22%3CYour%22%2C%22AWS%22%2C%22Region%3E%22%2C%22--profile%22%2C%22%3CYour%22%2C%22CLI%22%2C%22Profile%22%2C%22%5Bdefault%5D%22%2C%22if%22%2C%22no%22%2C%22profile%22%2C%22is%22%2C%22used%3E%22%5D%2C%22env%22%3A%7B%22FASTMCP_LOG_LEVEL%22%3A%22DEBUG%22%2C%22AWS_PROFILE%22%3A%22%3CYour%20CLI%20Profile%20%5Bdefault%5D%20if%20no%20profile%20is%20used%3E%22%7D%7D)
[](https://cursor.com/en/install-mcp?name=awslabs.prometheus-mcp-server&config=eyJjb21tYW5kIjoidXZ4IGF3c2xhYnMucHJvbWV0aGV1cy1tY3Atc2VydmVyQGxhdGVzdCAtLXVybCBodHRwczovL2Fwcy13b3Jrc3BhY2VzLnVzLWVhc3QtMS5hbWF6b25hd3MuY29tL3dvcmtzcGFjZXMvd3MtPFdvcmtzcGFjZSBJRD4gLS1yZWdpb24gPFlvdXIgQVdTIFJlZ2lvbj4gLS1wcm9maWxlIDxZb3VyIENMSSBQcm9maWxlIFtkZWZhdWx0XSBpZiBubyBwcm9maWxlIGlzIHVzZWQ%2BIiwiZW52Ijp7IkZBU1RNQ1BfTE9HX0xFVkVMIjoiREVCVUciLCJBV1NfUFJPRklMRSI6IjxZb3VyIENMSSBQcm9maWxlIFtkZWZhdWx0XSBpZiBubyBwcm9maWxlIGlzIHVzZWQ%2BIn19)
[](https://insiders.vscode.dev/redirect/mcp/install?name=Prometheus%20MCP%20Server&config=%7B%22command%22%3A%22uvx%22%2C%22args%22%3A%5B%22awslabs.prometheus-mcp-server%40latest%22%2C%22--url%22%2C%22https%3A%2F%2Faps-workspaces.us-east-1.amazonaws.com%2Fworkspaces%2Fws-%3CWorkspace%20ID%3E%22%2C%22--region%22%2C%22%3CYour%20AWS%20Region%3E%22%2C%22--profile%22%2C%22%3CYour%20CLI%20Profile%20%5Bdefault%5D%20if%20no%20profile%20is%20used%3E%22%5D%2C%22env%22%3A%7B%22FASTMCP_LOG_LEVEL%22%3A%22DEBUG%22%2C%22AWS_PROFILE%22%3A%22%3CYour%20CLI%20Profile%20%5Bdefault%5D%20if%20no%20profile%20is%20used%3E%22%7D%7D) | | [AWS Well-Architected Security Assessment Tool MCP Server](src/well-architected-security-mcp-server) | Assess AWS environments against the Well-Architected Framework Security Pillar | [](https://kiro.dev/launch/mcp/add?name=awslabs.well-architected-security-mcp-server&config=%7B%22command%22%3A%22uvx%22%2C%22args%22%3A%5B%22awslabs.well-architected-security-mcp-server%40latest%22%5D%2C%22env%22%3A%7B%22AWS_PROFILE%22%3A%22your-aws-profile%22%2C%22AWS_REGION%22%3A%22us-east-1%22%2C%22FASTMCP_LOG_LEVEL%22%3A%22ERROR%22%7D%7D)
[](https://cursor.com/en/install-mcp?name=awslabs.well-architected-security-mcp-server&config=eyJjb21tYW5kIjoidXZ4IGF3c2xhYnMud2VsbC1hcmNoaXRlY3RlZC1zZWN1cml0eS1tY3Atc2VydmVyQGxhdGVzdCIsImVudiI6eyJBV1NfUFJPRklMRSI6InlvdXItYXdzLXByb2ZpbGUiLCJBV1NfUkVHSU9OIjoidXMtZWFzdC0xIiwiRkFTVE1DUF9MT0dfTEVWRUwiOiJFUlJPUiJ9LCJkaXNhYmxlZCI6ZmFsc2UsImF1dG9BcHByb3ZlIjpbXX0K)
[](https://insiders.vscode.dev/redirect/mcp/install?name=AWS%20Well-Architected%20Security%20Assessment%20Tool%20MCP%20Server&config=%7B%22command%22%3A%22uvx%22%2C%22args%22%3A%5B%22awslabs.well-architected-security-mcp-server%40latest%22%5D%2C%22env%22%3A%7B%22AWS_PROFILE%22%3A%22your-aws-profile%22%2C%22AWS_REGION%22%3A%22us-east-1%22%2C%22FASTMCP_LOG_LEVEL%22%3A%22ERROR%22%7D%2C%22disabled%22%3Afalse%2C%22autoApprove%22%3A%5B%5D%7D) | | [AWS CloudTrail MCP Server](src/cloudtrail-mcp-server/) | CloudTrail events querying and analysis | [](https://kiro.dev/launch/mcp/add?name=awslabs.cloudtrail-mcp-server&config=%7B%22command%22%3A%22docker%22%2C%22args%22%3A%5B%22run%22%2C%22--rm%22%2C%22--interactive%22%2C%22-e%20AWS_PROFILE%3D%5BThe%20AWS%20Profile%20Name%5D%22%2C%22awslabs/cloudtrail-mcp-server%3Alatest%22%5D%2C%22env%22%3A%7B%7D%7D)
[](https://www.cursor.com/install-mcp?name=awslabs.cloudtrail-mcp-server&config=ewogICAgICAgICJjb21tYW5kIjogImRvY2tlciIsCiAgICAgICAgImFyZ3MiOiBbCiAgICAgICAgICAicnVuIiwKICAgICAgICAgICItLXJtIiwKICAgICAgICAgICItLWludGVyYWN0aXZlIiwKICAgICAgICAgICItZSBBV1NfUFJPRklMRT1bVGhlIEFXUyBQcm9maWxlIE5hbWVdIiwKICAgICAgICAgICJhd3NsYWJzL2Nsb3VkdHJhaWwtbWNwLXNlcnZlcjpsYXRlc3QiCiAgICAgICAgXSwKICAgICAgICAiZW52Ijoge30sCiAgICAgICAgImRpc2FibGVkIjogZmFsc2UsCiAgICAgICAgImF1dG9BcHByb3ZlIjogW10KfQ==)
[](https://insiders.vscode.dev/redirect/mcp/install?name=CloudTrail%20MCP%20Server&config=%7B%22autoApprove%22%3A%5B%5D%2C%22disabled%22%3Afalse%2C%22command%22%3A%22uvx%22%2C%22args%22%3A%5B%22awslabs.cloudtrail-mcp-server%40latest%22%5D%2C%22env%22%3A%7B%22AWS_PROFILE%22%3A%22%5BThe%20AWS%20Profile%20Name%20to%20use%20for%20AWS%20access%5D%22%2C%22FASTMCP_LOG_LEVEL%22%3A%22ERROR%22%7D%2C%22transportType%22%3A%22stdio%22%7D) | ## MCP AWS Lambda Handler Module A Python library for creating serverless HTTP handlers for the Model Context Protocol (MCP) using AWS Lambda. This module provides a flexible framework for building MCP HTTP endpoints with pluggable session management, including built-in DynamoDB support. **Features:** - Easy serverless MCP HTTP handler creation using AWS Lambda - Pluggable session management system - Built-in DynamoDB session backend support - Customizable authentication and authorization - Example implementations and tests See [`src/mcp-lambda-handler/README.md`](src/mcp-lambda-handler/README.md) for full usage, installation, and development instructions. ## When to use Local vs Remote MCP Servers? AWS MCP servers can be run either locally on your development machine or remotely on the cloud. Here's when to use each approach: ### Local MCP Servers - **Development & Testing**: Perfect for local development, testing, and debugging - **Offline Work**: Continue working when internet connectivity is limited - **Data Privacy**: Keep sensitive data and credentials on your local machine - **Low Latency**: Minimal network overhead for faster response times - **Resource Control**: Direct control over server resources and configuration ### Remote MCP Servers - **Team Collaboration**: Share consistent server configurations across your team - **Resource Intensive Tasks**: Offload heavy processing to dedicated cloud resources - **Always Available**: Access your MCP servers from anywhere, any device - **Automatic Updates**: Get the latest features and security patches automatically - **Scalability**: Easily handle varying workloads without local resource constraints > **Note**: Some MCP servers, like AWS Knowledge MCP, are provided as fully managed services by AWS. These AWS-managed remote servers require no setup or infrastructure management on your part - just connect and start using them. ## Use Cases for the Servers For example, you can use the **AWS Documentation MCP Server** to help your AI assistant research and generate up-to-date code for any AWS service, like Amazon Bedrock Inline agents. Alternatively, you could use the **CDK MCP Server** or the **Terraform MCP Server** to have your AI assistant create infrastructure-as-code implementations that use the latest APIs and follow AWS best practices. With the **AWS Pricing MCP Server**, you could ask "What would be the estimated monthly cost for this CDK project before I deploy it?" or "Can you help me understand the potential AWS service expenses for this infrastructure design?" and receive detailed cost estimations and budget planning insights. The **Valkey MCP Server** enables natural language interaction with Valkey data stores, allowing AI assistants to efficiently manage data operations through a simple conversational interface. ## Installation and Setup Each server has specific installation instructions with one-click installs for Kiro, Cursor, and VSCode. Generally, you can: 1. Install `uv` from [Astral](https://docs.astral.sh/uv/getting-started/installation/) 2. Install Python using `uv python install 3.10` 3. Configure AWS credentials with access to required services 4. Add the server to your MCP client configuration Example configuration for Kiro MCP settings (`~/.kiro/settings/mcp.json`): ### For macOS/Linux ```json { "mcpServers": { "awslabs.core-mcp-server": { "command": "uvx", "args": [ "awslabs.core-mcp-server@latest" ], "env": { "FASTMCP_LOG_LEVEL": "ERROR" } } } } ``` See individual server READMEs for specific requirements and configuration options. ### For Windows When configuring MCP servers on Windows, you'll need to use a slightly different configuration format: ```json { "mcpServers": { "awslabs.core-mcp-server": { "disabled": false, "timeout": 60, "type": "stdio", "command": "uv", "args": [ "tool", "run", "--from", "awslabs.core-mcp-server@latest", "awslabs.core-mcp-server.exe" ], "env": { "FASTMCP_LOG_LEVEL": "ERROR" } } } } ``` If you have problems with MCP configuration or want to check if the appropriate parameters are in place, you can try the following: ```shell # Run MCP server manually with timeout 15s $ timeout 15s uv tool run
Install in Kiro
See the [Kiro IDE documentation](https://kiro.dev/docs/mcp/configuration/) or the [Kiro CLI documentation](https://kiro.dev/docs/cli/mcp/configuration/) for details. In the Kiro IDE: 1. Navigate `Kiro` > `MCP Servers` 2. Add a new MCP server by clicking the `+ Add` button. 3. Paste the configuration given below. For global configuration, edit `~/.kiro/settings/mcp.json`. For project-specific configuration, edit `.kiro/settings/mcp.json` in your project directory. #### `~/.kiro/settings/mcp.json` For macOS/Linux: ```json { "mcpServers": { "awslabs.core-mcp-server": { "command": "uvx", "args": ["awslabs.core-mcp-server@latest"], "env": { "FASTMCP_LOG_LEVEL": "ERROR" } } } } ``` For Windows: ```json { "mcpServers": { "awslabs.core-mcp-server": { "disabled": false, "timeout": 60, "type": "stdio", "command": "uv", "args": [ "tool", "run", "--from", "awslabs.core-mcp-server@latest", "awslabs.core-mcp-server.exe" ], "env": { "FASTMCP_LOG_LEVEL": "ERROR" } } } } ```Getting Started with Cline and Amazon Bedrock
**IMPORTANT:** Following these instructions may incur costs and are subject to the [Amazon Bedrock Pricing](https://aws.amazon.com/bedrock/pricing/). You are responsible for any associated costs. In addition to selecting the desired model in the Cline settings, ensure you have your selected model (e.g. `anthropic.claude-3-7-sonnet`) also enabled in Amazon Bedrock. For more information on this, see [these AWS docs](https://docs.aws.amazon.com/bedrock/latest/userguide/model-access-modify.html) on enabling model access to Amazon Bedrock Foundation Models (FMs). 1. Follow the steps above in the **Installation and Setup** section to install `uv` from [Astral](https://docs.astral.sh/uv/getting-started/installation/), install Python, and configure AWS credentials with the required services. 2. If using Visual Studio Code, install the [Cline VS Code Extension](https://marketplace.visualstudio.com/items?itemName=saoudrizwan.claude-dev) (or equivalent extension for your preferred IDE). Once installed, click the extension to open it. When prompted, select the tier that you wish. In this case, we will be using Amazon Bedrock, so the free tier of Cline is fine as we will be sending requests using the Amazon Bedrock API instead of the Cline API.
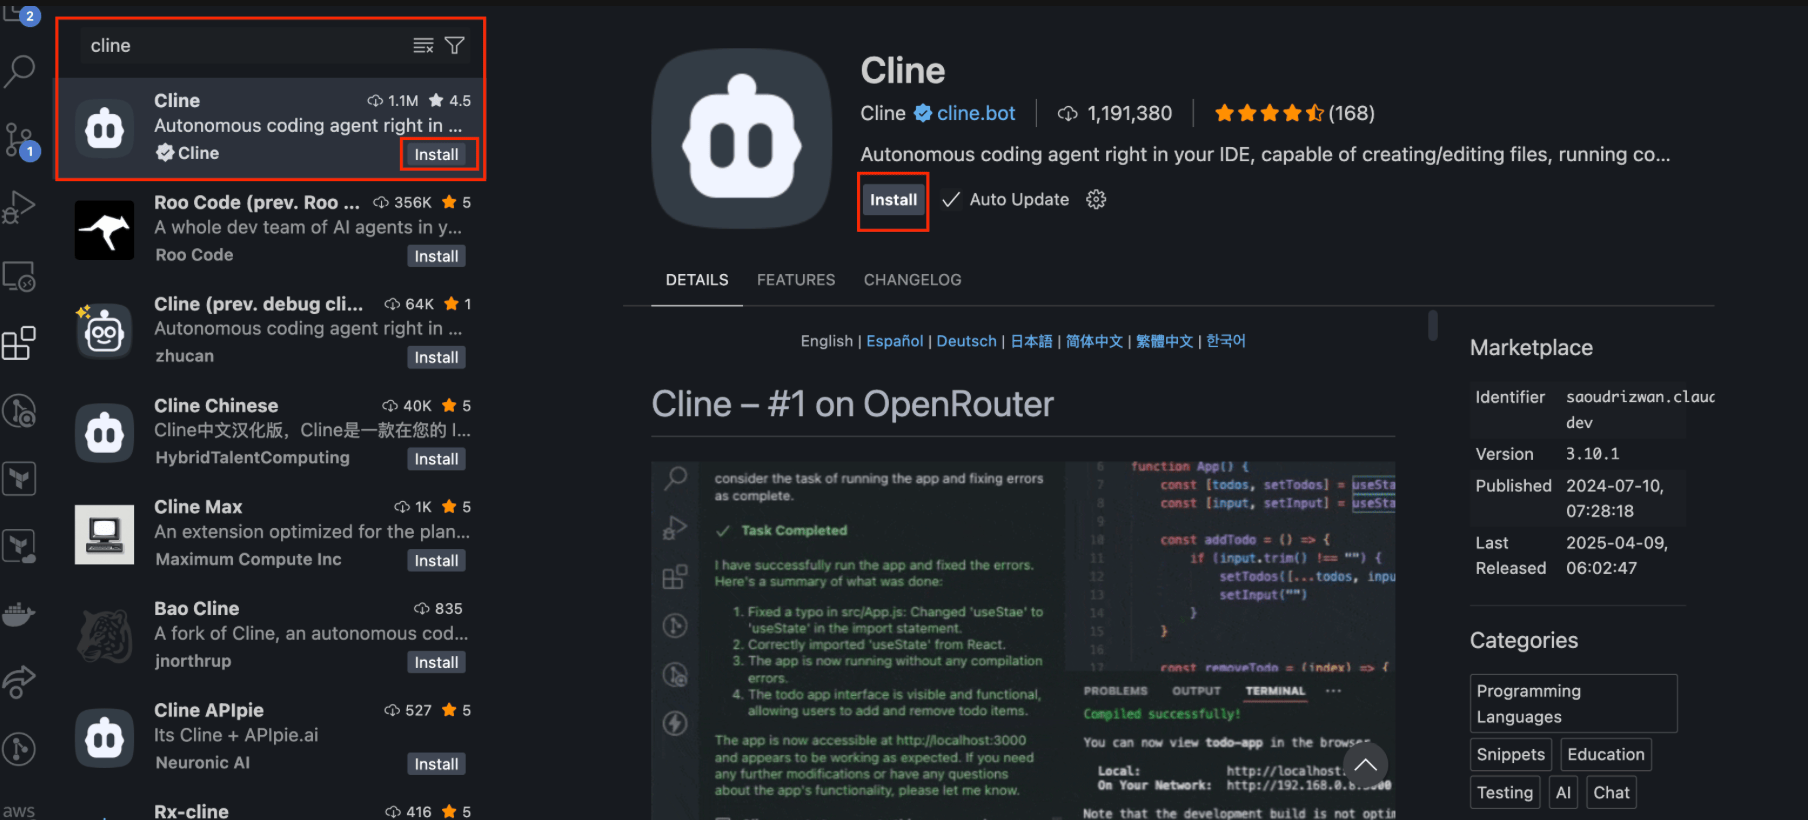
3. Select the **MCP Servers** button.
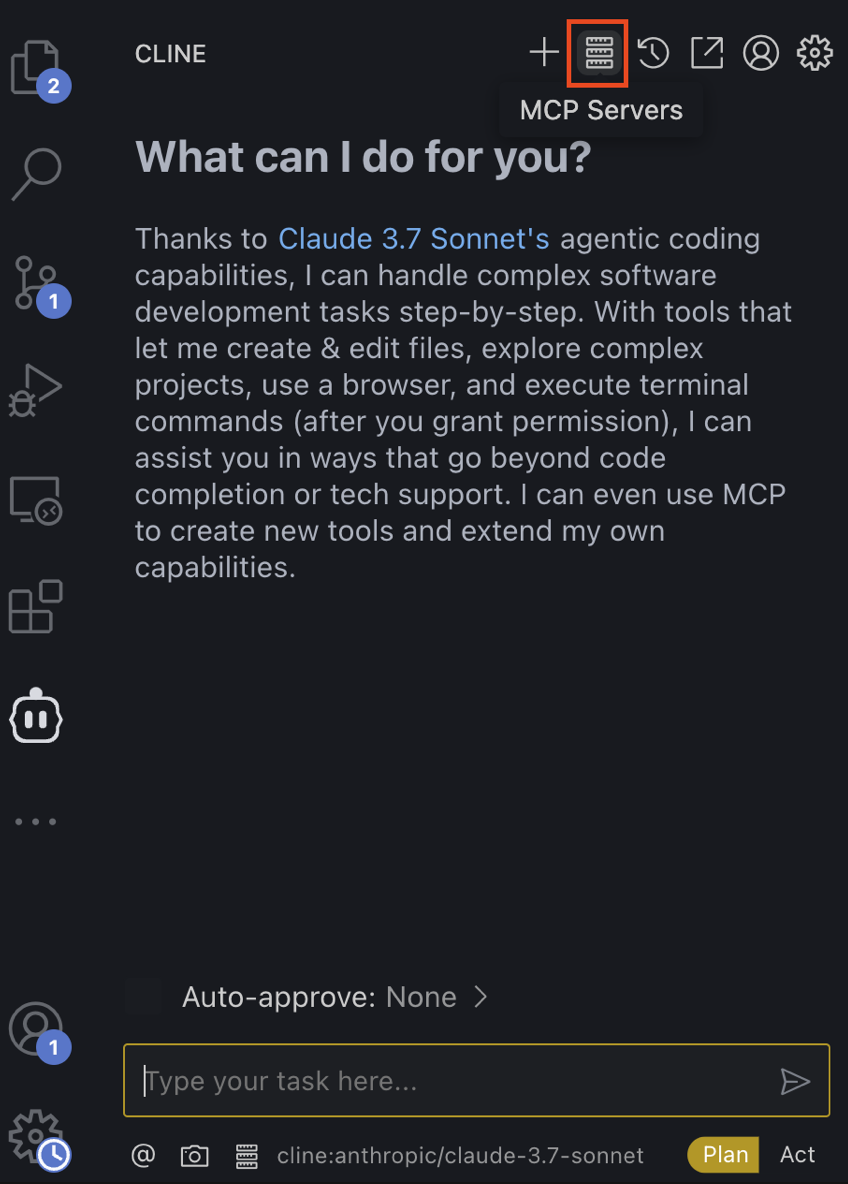
4. Select the **Installed** tab, then click **Configure MCP Servers** to open the `cline_mcp_settings.json` file.
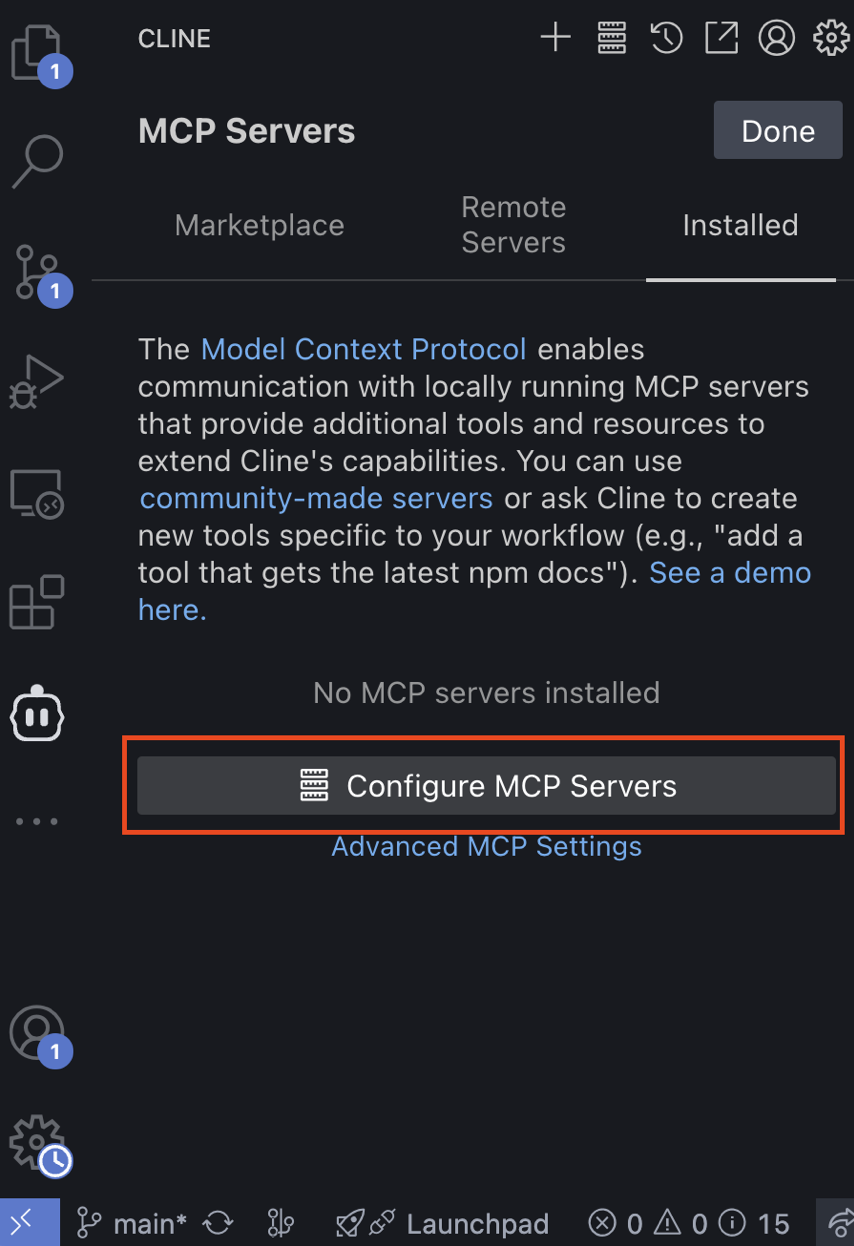
5. In the `cline_mcp_settings.json` file, add your desired MCP servers in the `mcpServers` object. See the following example that will use some of the current AWS MCP servers that are available in this repository. Ensure you save the file to install the MCP servers. #### `cline_mcp_settings.json` For macOS/Linux: ```json { "mcpServers": { "awslabs.core-mcp-server": { "command": "uvx", "args": ["awslabs.core-mcp-server@latest"], "env": { "FASTMCP_LOG_LEVEL": "ERROR", "MCP_SETTINGS_PATH": "path to your mcp settings file" } } } } ``` For Windows: ```json { "mcpServers": { "awslabs.core-mcp-server": { "disabled": false, "timeout": 60, "type": "stdio", "command": "uv", "args": [ "tool", "run", "--from", "awslabs.core-mcp-server@latest", "awslabs.core-mcp-server.exe" ], "env": { "FASTMCP_LOG_LEVEL": "ERROR", "MCP_SETTINGS_PATH": "path to your mcp settings file" } } } } ``` 6. Once installed, you should see a list of your MCP Servers under the MCP Server Installed tab, and they should have a green slider to show that they are enabled. See the following for an example with two of the possible AWS MCP Servers. Click **Done** when finished. You should now see the Cline chat interface.
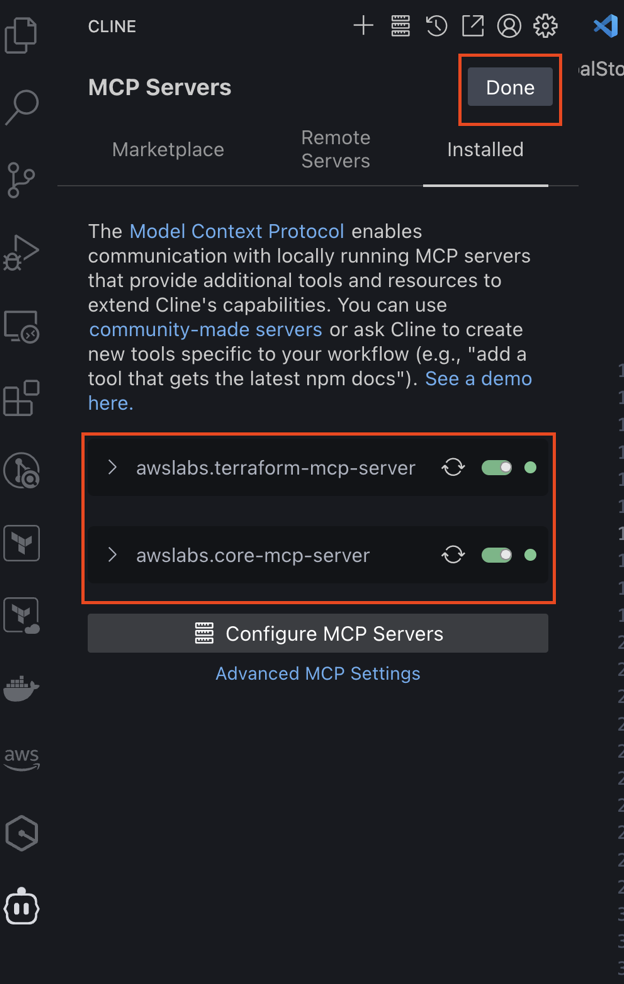
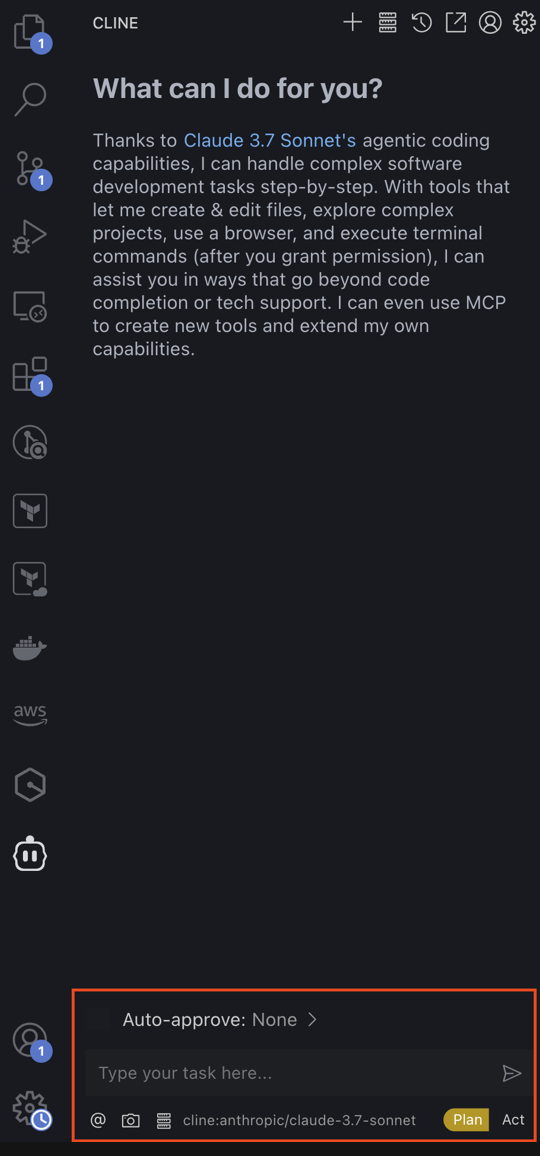
7. By default, Cline will be set as the API provider, which has limits for the free tier. Next, let's update the API provider to be AWS Bedrock, so we can use the LLMs through Bedrock, which would have billing go through your connected AWS account. 8. Click the settings gear to open up the Cline settings. Then under **API Provider**, switch this from `Cline` to `AWS Bedrock` and select `AWS Profile` for the authentication type. As a note, the `AWS Credentials` option works as well, however it uses a static credentials (Access Key ID and Secret Access Key) instead of temporary credentials that are automatically redistributed when the token expires, so the temporary credentials with an AWS Profile is the more secure and recommended method.
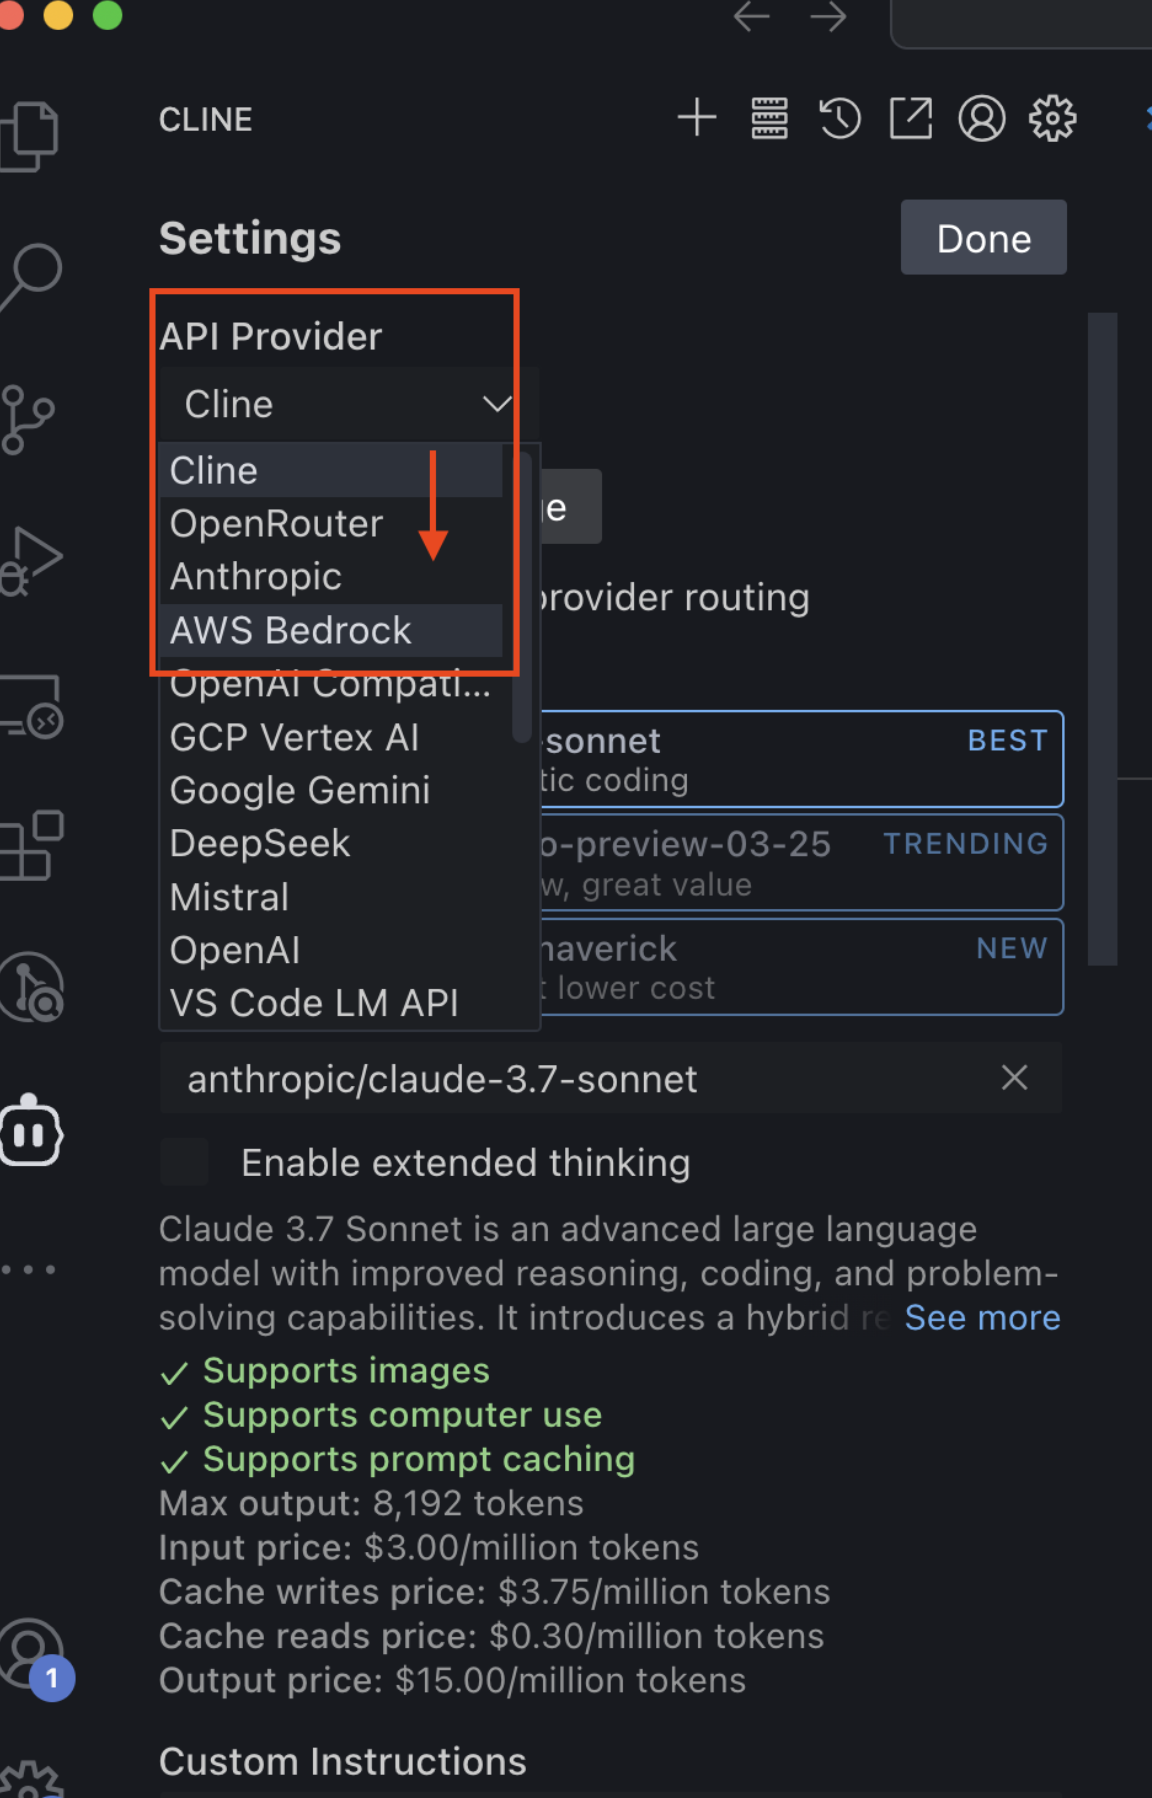
9. Fill out the configuration based on the existing AWS Profile you wish to use, select the desired AWS Region, and enable cross-region inference.
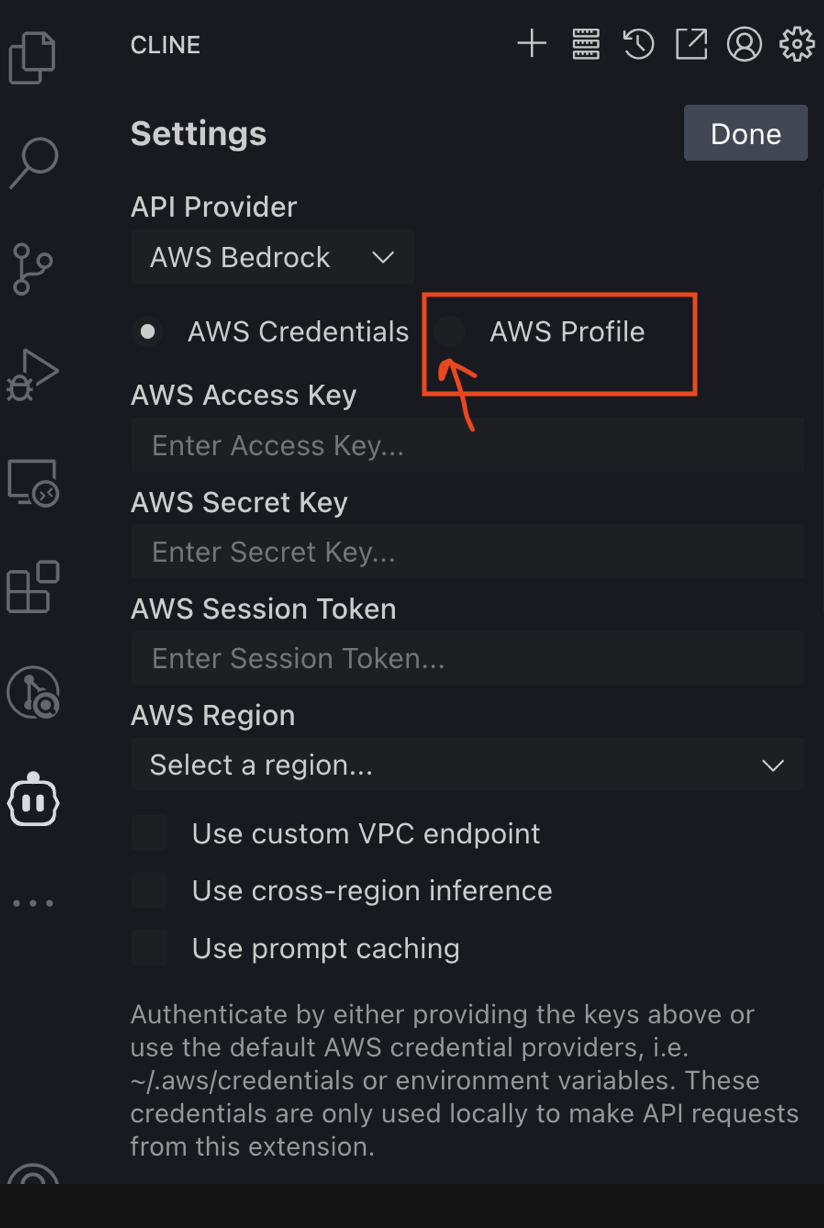
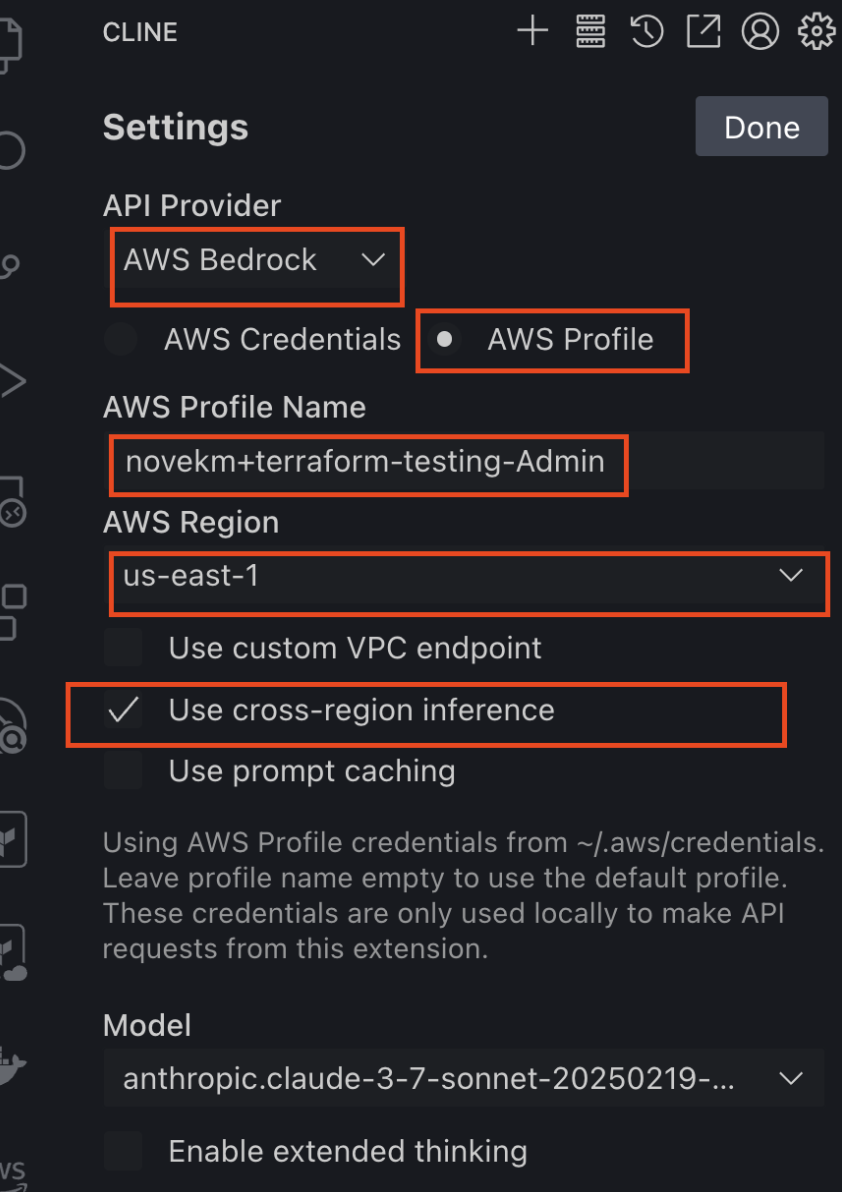
10. Next, scroll down on the settings page until you reach the text box that says Custom Instructions. Paste in the following snippet to ensure the `mcp-core` server is used as the starting point for every prompt: ``` For every new project, always look at your MCP servers and use mcp-core as the starting point every time. Also after a task completion include the list of MCP servers used in the operation. ```
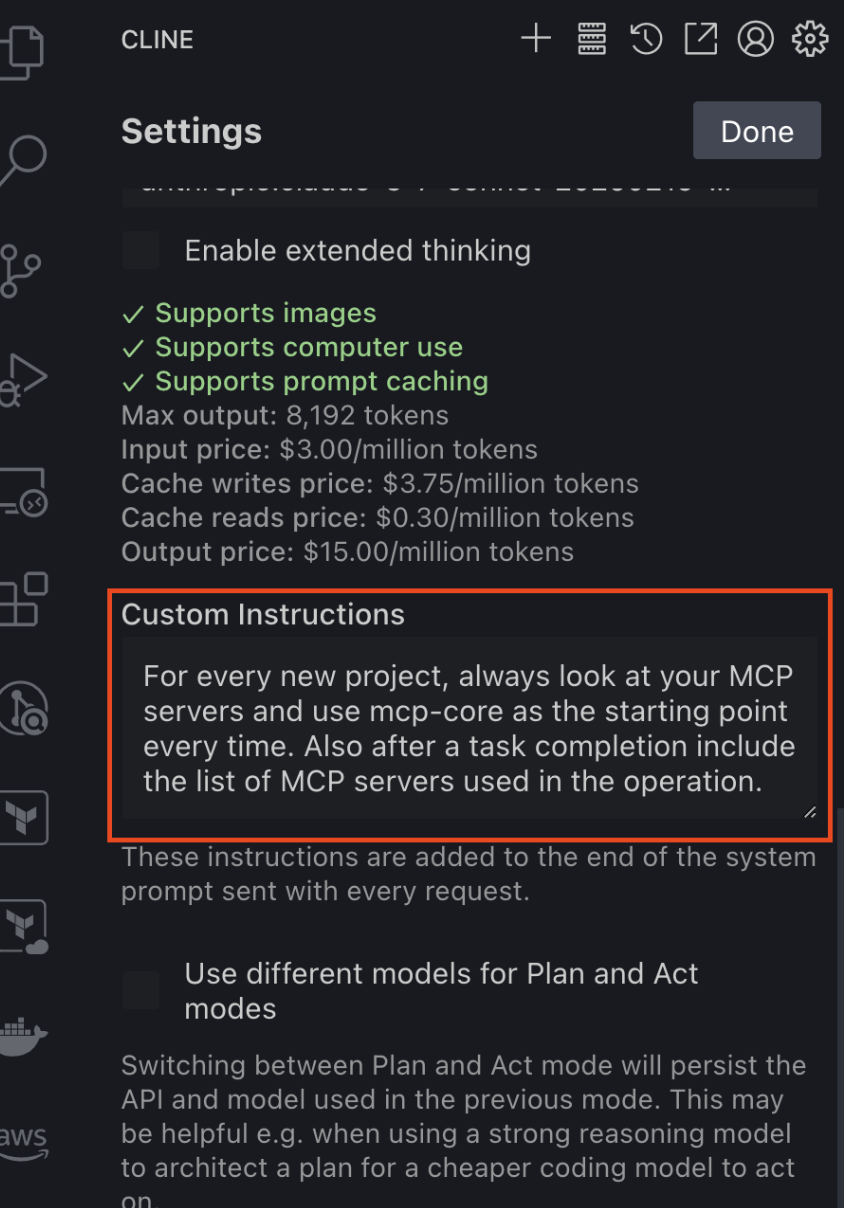
11. Once the custom prompt is pasted in, click **Done** to return to the chat interface. 12. Now you can begin asking questions and testing out the functionality of your installed AWS MCP Servers. The default option in the chat interface is is `Plan` which will provide the output for you to take manual action on (e.g. providing you a sample configuration that you copy and paste into a file). However, you can optionally toggle this to `Act` which will allow Cline to act on your behalf (e.g. searching for content using a web browser, cloning a repository, executing code, etc). You can optionally toggle on the "Auto-approve" section to avoid having to click to approve the suggestions, however we recommend leaving this off during testing, especially if you have the Act toggle selected. **Note:** For the best results, please prompt Cline to use the desired AWS MCP Server you wish to use. For example, `Using the Terraform MCP Server, do...`