## Web Server Manager


[](https://github.com/axetroy/wsm/actions)
[](https://hub.docker.com/r/axetroy/wsm-backend/builds)
[](https://hub.docker.com/r/axetroy/wsm-backend/builds)
[](https://coveralls.io/github/axetroy/wsm?branch=master)
[](https://goreportcard.com/report/github.com/axetroy/wsm)

[](https://github.com/axetroy/wsm/actions)
[](https://hub.docker.com/r/axetroy/wsm-frontend/builds)
[](https://hub.docker.com/r/axetroy/wsm-frontend/builds)
[](https://deepscan.io/dashboard#view=project&tid=6484&pid=8581&bid=105883)
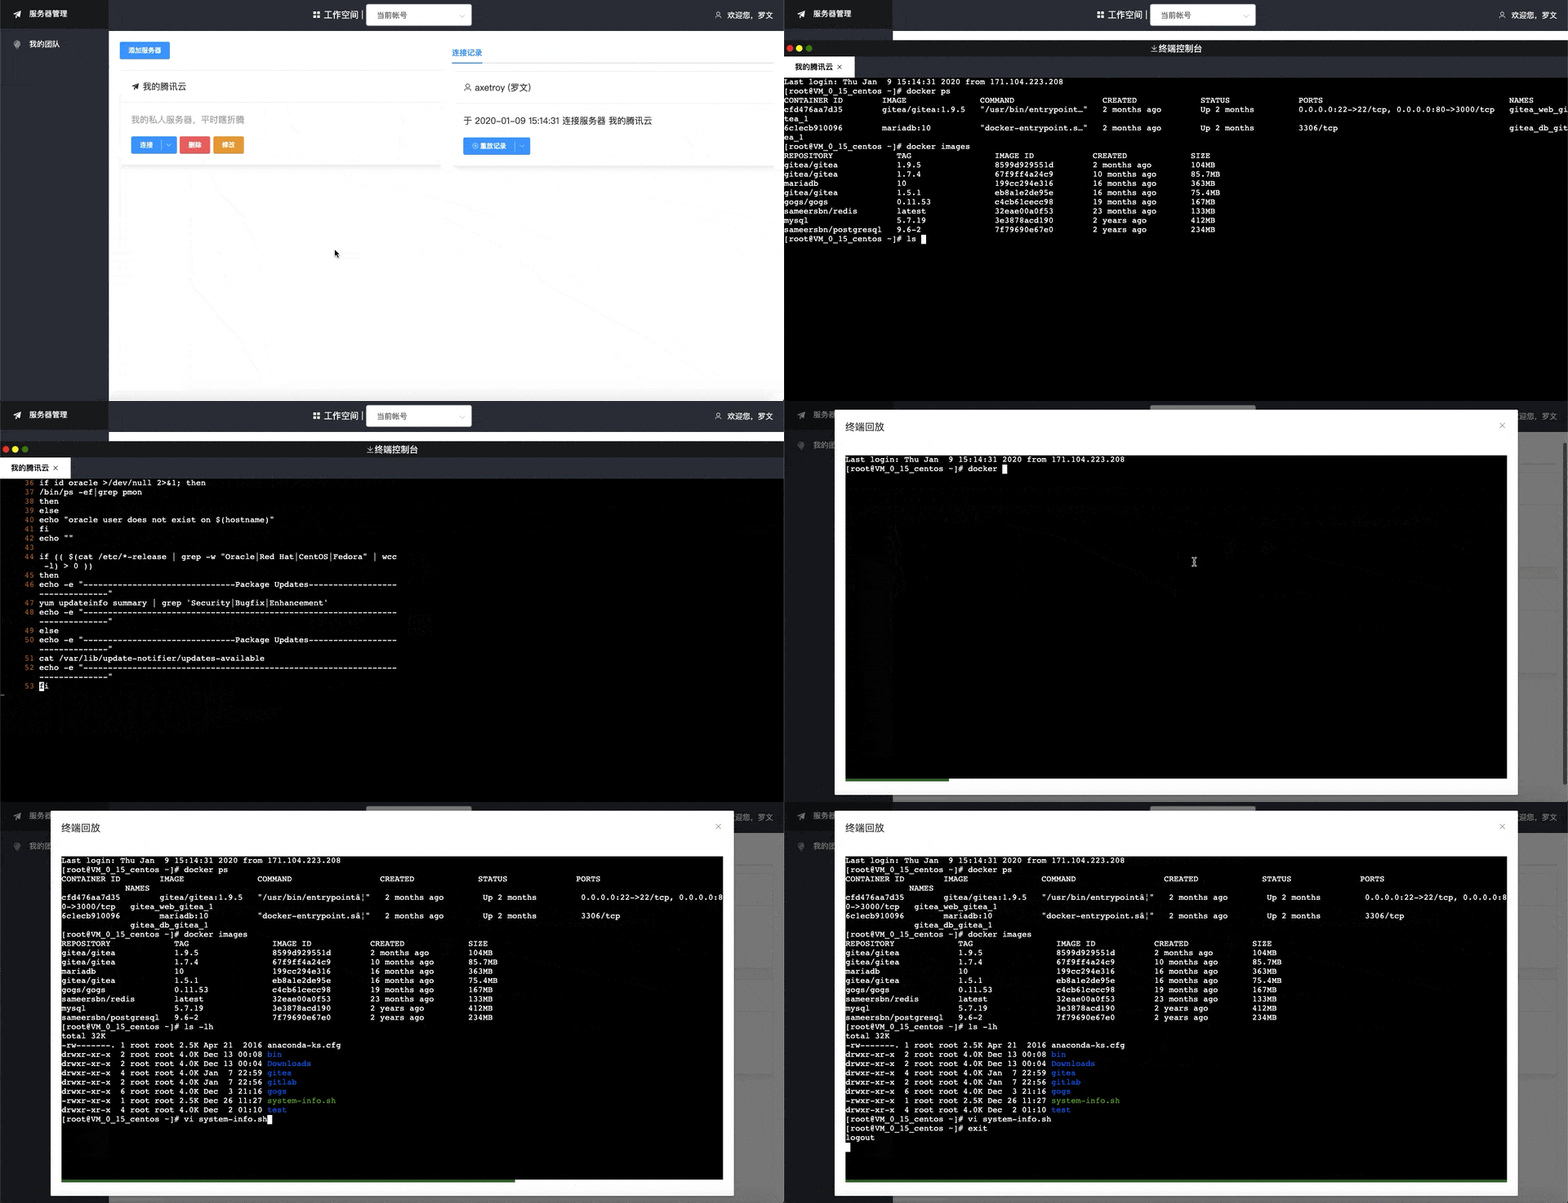
通过 Web 来管理远端服务器
创建团队,邀请你的小伙伴加入,管理你的服务器
成员无需关心服务器的地址/帐号/密码/密钥等敏感信息,即可连接服务器进行操作
你在终端的每一步操作,都会被完整地记录下来,并且支持回放功能。**有内鬼,终止交易**
特性
- [x] 用户无需 密码/私钥 即可连接服务器
- [x] Web 登录终端
- [x] 支持打开多个终端
- [x] 支持团队管理终端,可分配不同的角色到不同的团队
- [x] 操作记录回放,每一次连接终端,都会记录完整的操作,支持回放
- [ ] TODO: 镜像终端。用户连接终端后,管理员可镜像终端,实时查看
- [ ] TODO: 分享一次性终端,可以匿名连接,终端断开不能在链接
- [x] 支持 Docker 一键部署
使用技术 Golang + Node.js + Nuxt.js 构建,前后端分离
如何本地开发
首先确保你已安装
- Golang v1.13.x
- Node.js v12.x.x
- Docker
- Docker Compose
1. 克隆项目
```shell
$ git clone https://github.com/axetroy/wsm.git $GOPATH/src/github.com/axetroy/wsm
$ cd $GOPATH/src/github.com/axetroy/wsm
```
2. 启动数据库依赖(Postgres/Redis)
```shell
$ cd ./docker
$ docker-compose up
```
3. 启动后端 API
```shell
$ go run cmd/user/main.go start
```
4. 启动前端页面
```shell
$ cd ./frontend
$ yarn
$ npm run dev
```
到这里就已经启动完毕,打开浏览器 `http://localhosst:3000`
如何部署
部署分为两部分
- 数据库
- 前端 + 后端
### 数据库
使用 docker-compose 部署数据库
```yaml
version: "3"
services:
# 数据库
pg:
image: postgres:9.6.16-alpine
restart: always
volumes:
- "./volumes/pg:/var/lib/postgresql/data"
ports:
- 54321:5432 # 本机端口:容器端口
environment:
- POSTGRES_USER=terminal # 用户名
- POSTGRES_PASSWORD=terminal # 数据库密码
- POSTGRES_DB=terminal # 数据库名
# 缓存
redis:
image: redis:5.0.7-alpine
restart: always
ports:
- 6379:6379
volumes:
- "./volumes/redis:/data"
environment:
- REDIS_PASSWORD=password
command: ["redis-server", "--requirepass", "password"]
```
### 前端 + 后端
部署应用程序,使用 `Nginx` + `前端镜像` + `后端镜像` 进行部署
需要使用 [nginx.conf](nginx.conf) 文件和 [docker-compose.yml](docker-compose.yml) 文件
```yaml
version: "3"
services:
# 网关
nginx:
image: nginx:1.17.7-alpine
restart: always
volumes:
- ./nginx.conf:/etc/nginx/nginx.conf
- ./logs/nginx:/var/log/nginx
ports:
- 8000:80 # 宿主端口:容器端口
links:
- frontend
- backend
# 前端
frontend:
image: axetroy/wsm-frontend:latest
restart: always
links:
- backend
environment:
- API_HOST=http://192.168.1.29:9000 # 请求接口的域名, 请自行更改
# 后端接口
backend:
image: axetroy/wsm-backend:latest
restart: always
ports:
- 9000:80
environment:
# 更多环境变量配置请查看 .env 文件
- DB_HOST=192.168.1.29 # 要连接的数据库 IP,请自行更改
- DB_PORT=54321 # 要连接的数据库端口
```
后端接口部分全部由环境变量进行配置,可用的配置选项参考 [.env](.env)
许可协议
[Apache License 2.0](LICENSE)