## How do I configure the refresh frequency?
### Configure the service (recommanded solution)
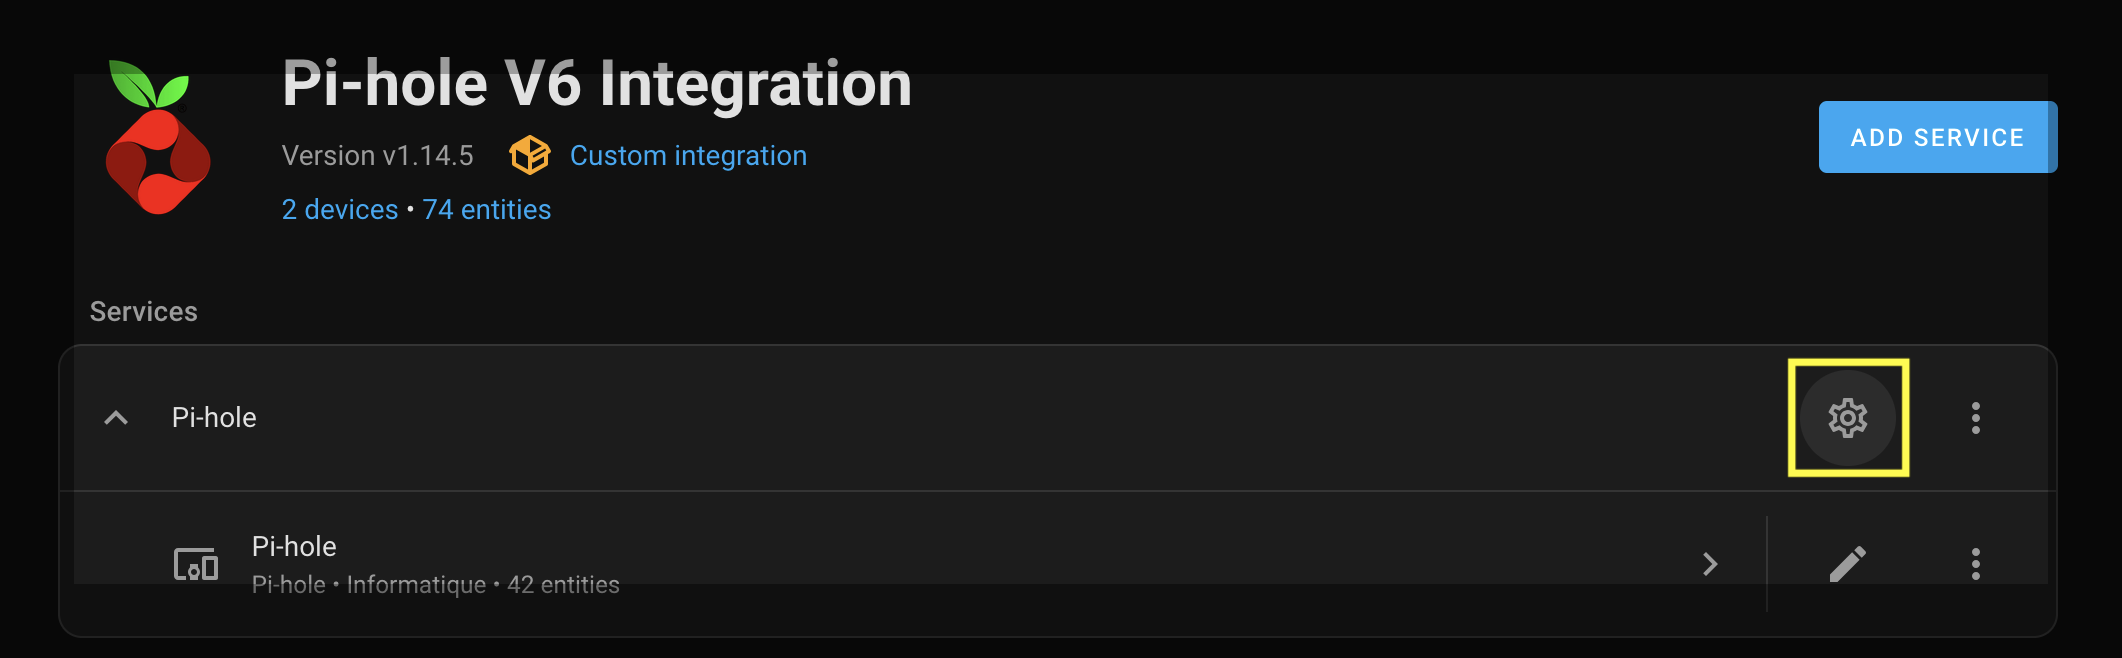
On the Pi-hole V6 Integration page (_/config/integrations/integration/pi_hole_v6_), configure your service.
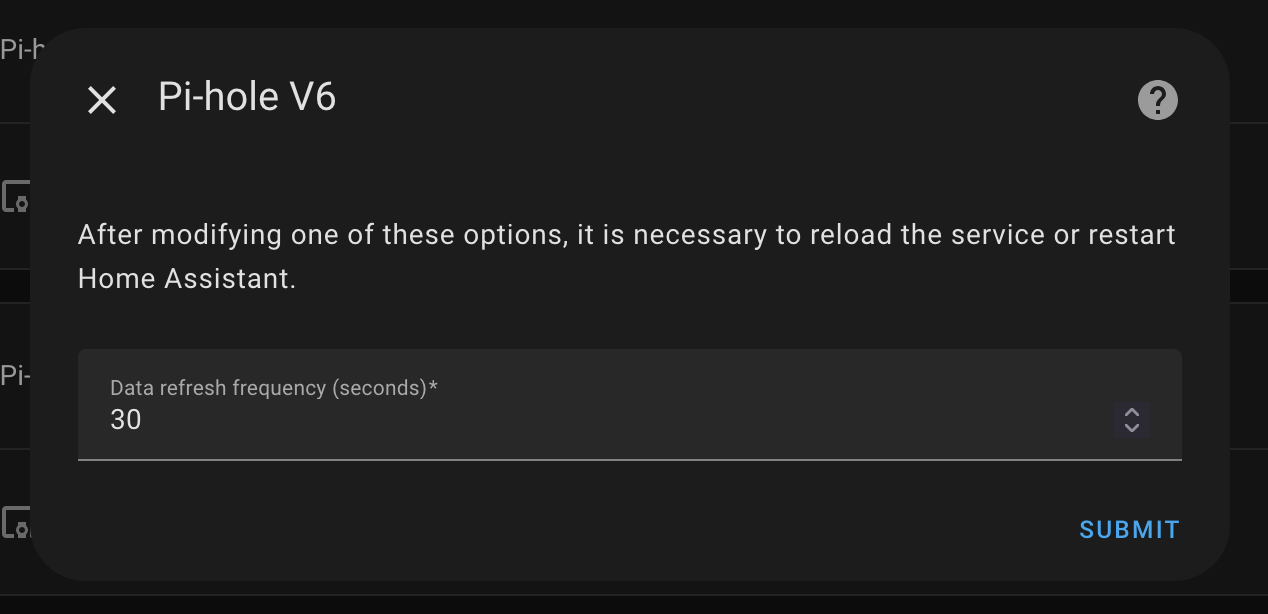
 In the pop-up window, enter the desired `Data refresh rate` value in seconds.
 ### Deactivate the default refresh (alternative solution)
In the integration page, you have to deactivate the automatic polling for the `Pi-hole V6` Integration.
#### 1. Open the system options
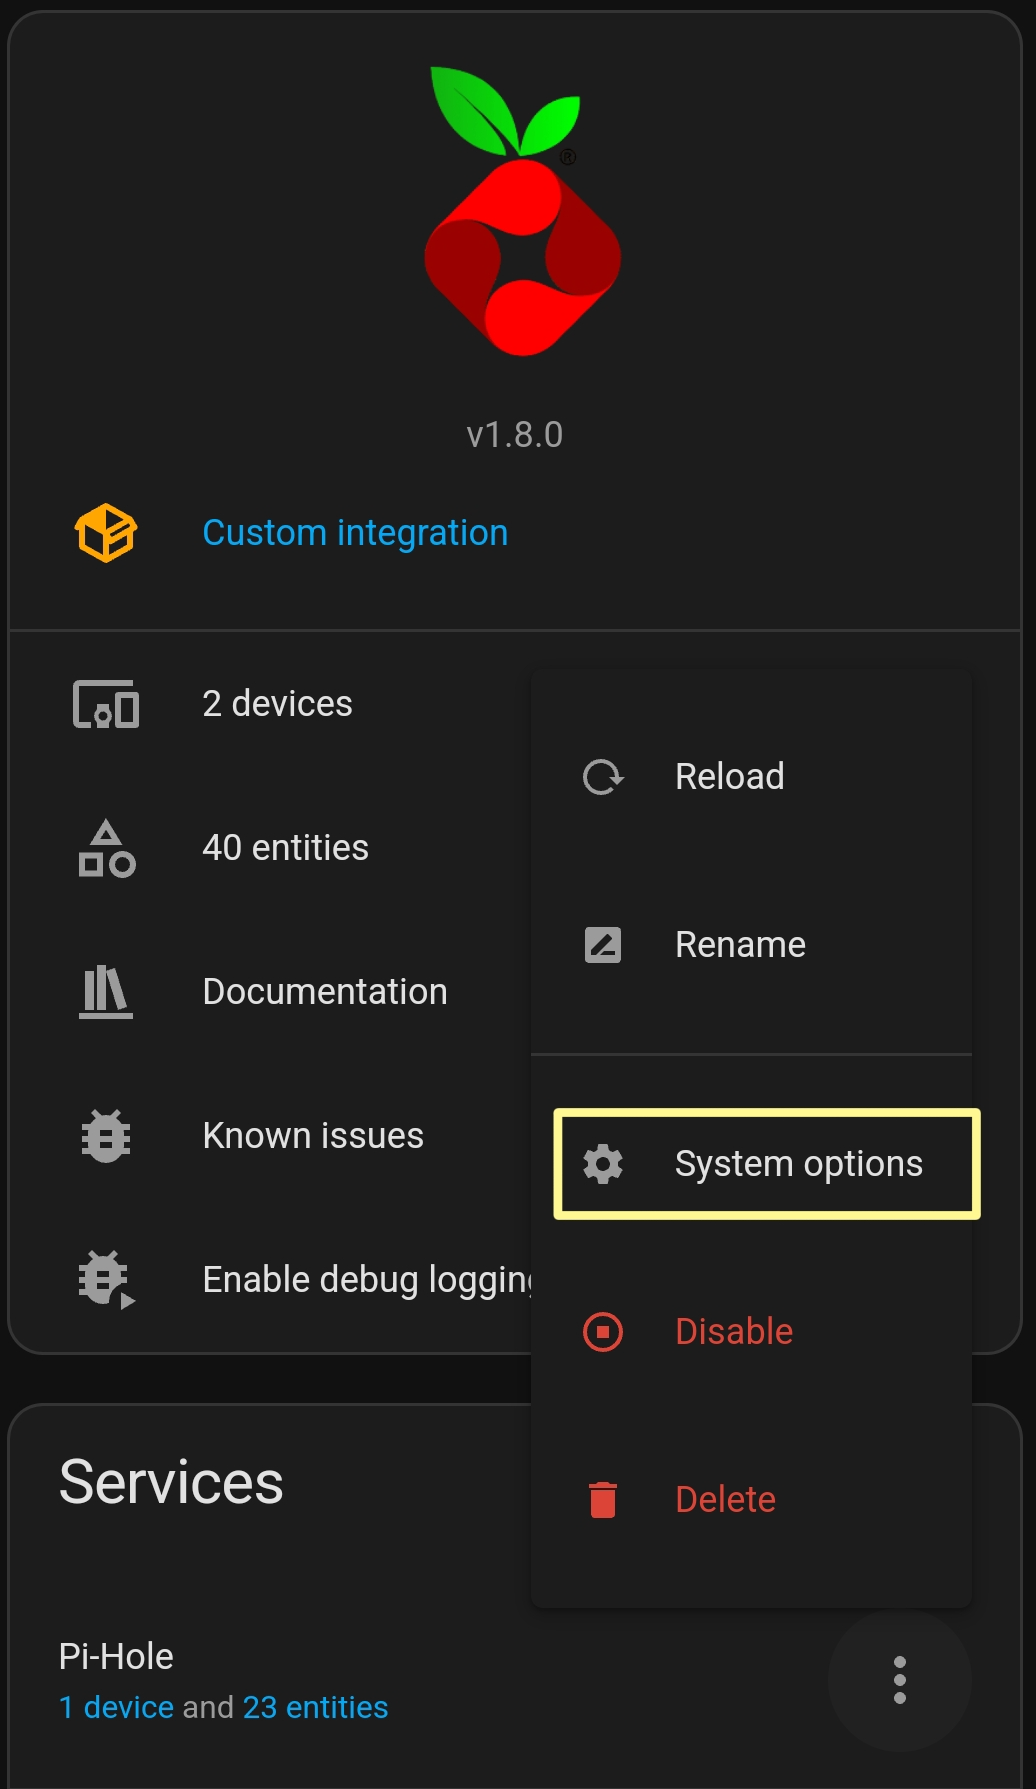
Click on the `System options` to open the options.
### Deactivate the default refresh (alternative solution)
In the integration page, you have to deactivate the automatic polling for the `Pi-hole V6` Integration.
#### 1. Open the system options
Click on the `System options` to open the options.
 #### 2. Deactivate the automatic polling
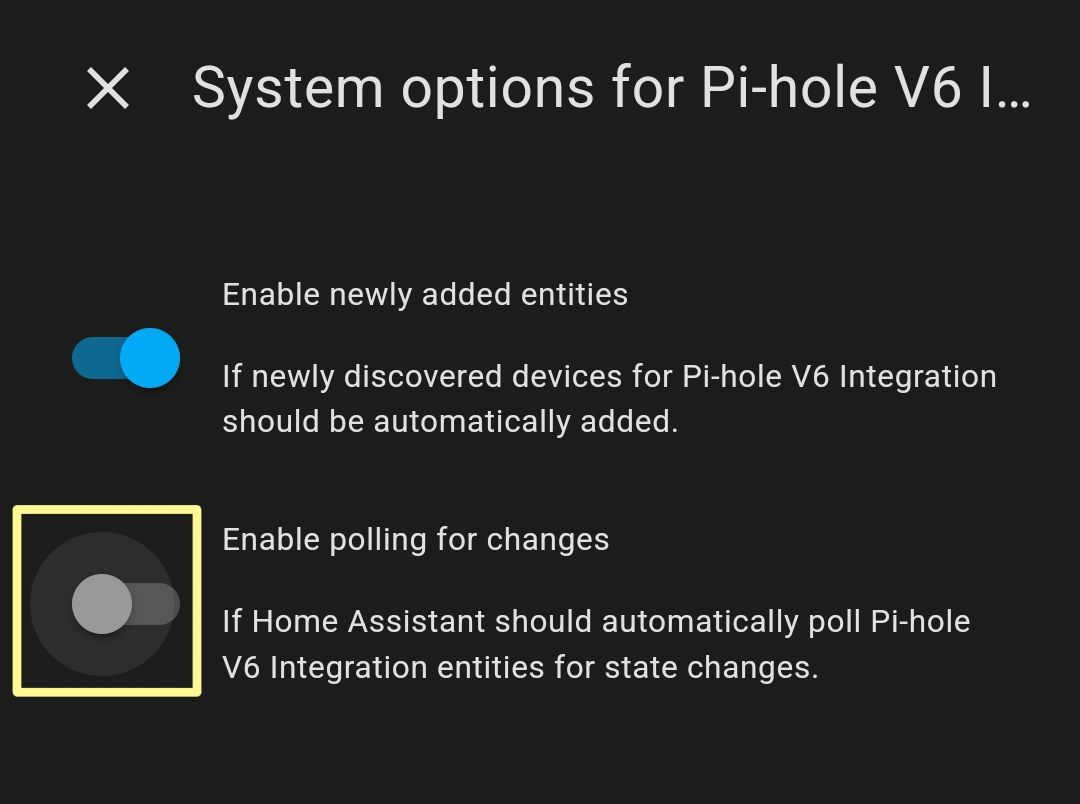
Uncheck the option `Enable polling for changes` to deactivate the automatic polling.
#### 2. Deactivate the automatic polling
Uncheck the option `Enable polling for changes` to deactivate the automatic polling.
 ### Create an Automation
#### 1. Access Settings
Open your Home Assistant interface. Click on the `Settings` icon.
#### 2. Navigate to Automations & Scenes
In the settings menu, select `Automations & Scenes`.
#### 3. Create a New Automation
Click on `Create automation` to start a new automation.
Select `Create new automation` to begin the creation process.
#### 4. Access the YAML Editor
Once in the new automation, click on the `three dots` on the right side of the screen.
Select `Edit in YAML` to open the YAML editor.
#### 5. Write the YAML Code
In the YAML editor, you can now write the code to configure the refresh of your integration. Here is a basic example:
```yaml
alias: Force Pi-hole Refresh
description: "Refresh Pi-hole every minute"
triggers:
- trigger: time_pattern
minutes: /1
hours: "*"
conditions: []
actions:
- action: homeassistant.update_entity
metadata: {}
data:
entity_id:
- binary_sensor.pi_hole_status
mode: single
```
You can define the wanted frequency.
#### 6. Save and Test
After writing the code, `save` the automation then test the automation to ensure it works as expected.
### Create an Automation
#### 1. Access Settings
Open your Home Assistant interface. Click on the `Settings` icon.
#### 2. Navigate to Automations & Scenes
In the settings menu, select `Automations & Scenes`.
#### 3. Create a New Automation
Click on `Create automation` to start a new automation.
Select `Create new automation` to begin the creation process.
#### 4. Access the YAML Editor
Once in the new automation, click on the `three dots` on the right side of the screen.
Select `Edit in YAML` to open the YAML editor.
#### 5. Write the YAML Code
In the YAML editor, you can now write the code to configure the refresh of your integration. Here is a basic example:
```yaml
alias: Force Pi-hole Refresh
description: "Refresh Pi-hole every minute"
triggers:
- trigger: time_pattern
minutes: /1
hours: "*"
conditions: []
actions:
- action: homeassistant.update_entity
metadata: {}
data:
entity_id:
- binary_sensor.pi_hole_status
mode: single
```
You can define the wanted frequency.
#### 6. Save and Test
After writing the code, `save` the automation then test the automation to ensure it works as expected.