# PrintSpy
   
A self-hosted dashboard for monitoring multiple 3D printers — OctoPrint and PrusaLink — from a single web interface.
This was built for my own personal use and the way I want to interact with my printers, as well as an ongoing experiment in agentic coding.
> **Still Under Development** — expect rough edges, breaking changes, and evolving APIs. Feedback and contributions welcome.
## What it does
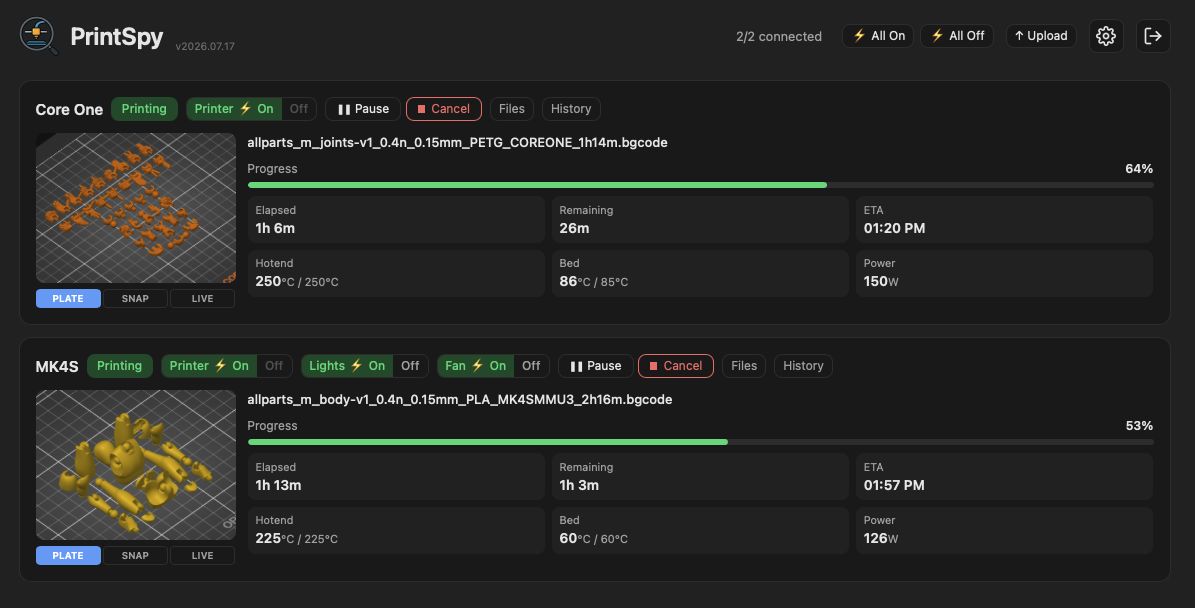
Each printer gets a row in the dashboard: webcam/snapshot, progress/ETA, temps, and smart plug power state/control. Updates push live via SSE. Everything's configured through the settings page — no config files, no restart needed.
## Screenshots
File Manager & Print History
## Supported platforms
- **PrusaLink** — supported, but only tested on MK4S and Core One
- **OctoPrint** — technically supported, but nothing to test against at this point
Plugin architecture — new platforms should be straightforward to add.
## Features
### Core (both platforms)
- Real-time dashboard updates via SSE, no manual refresh
- Print control — pause, resume, cancel
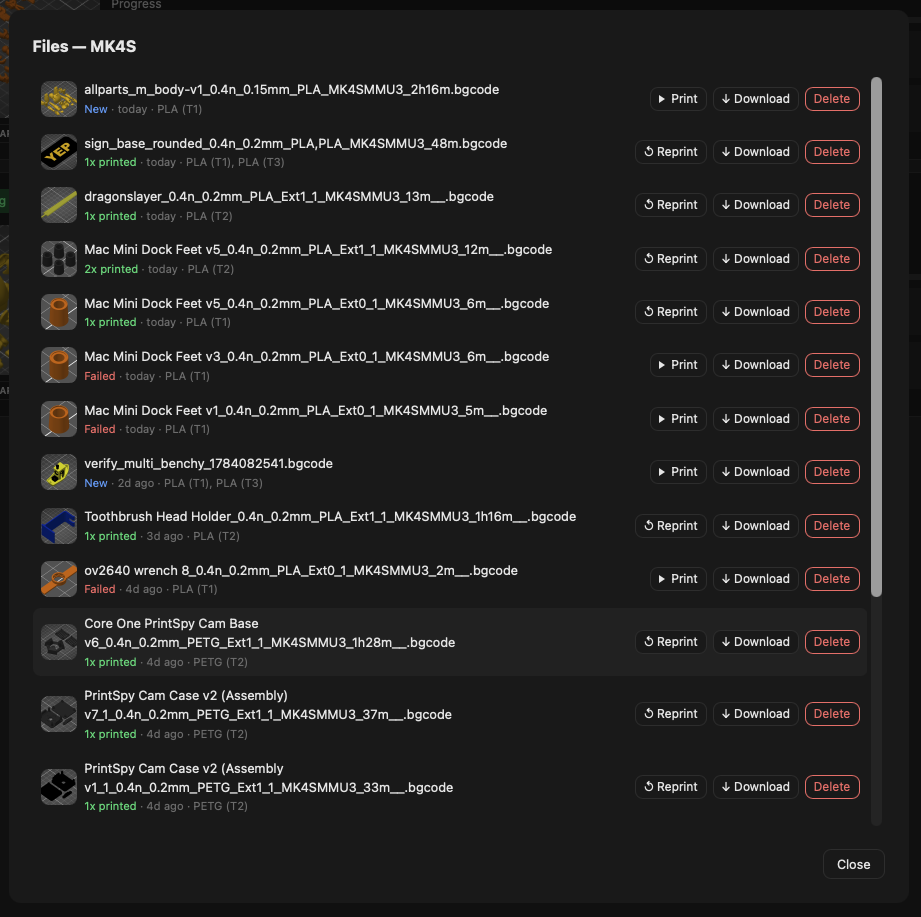
- File Manager per printer — browse every file on its storage, one-click reprint, download, or delete, thumbnail and material/tool previews for every file (native on OctoPrint, cached from the file's own metadata on PrusaLink)
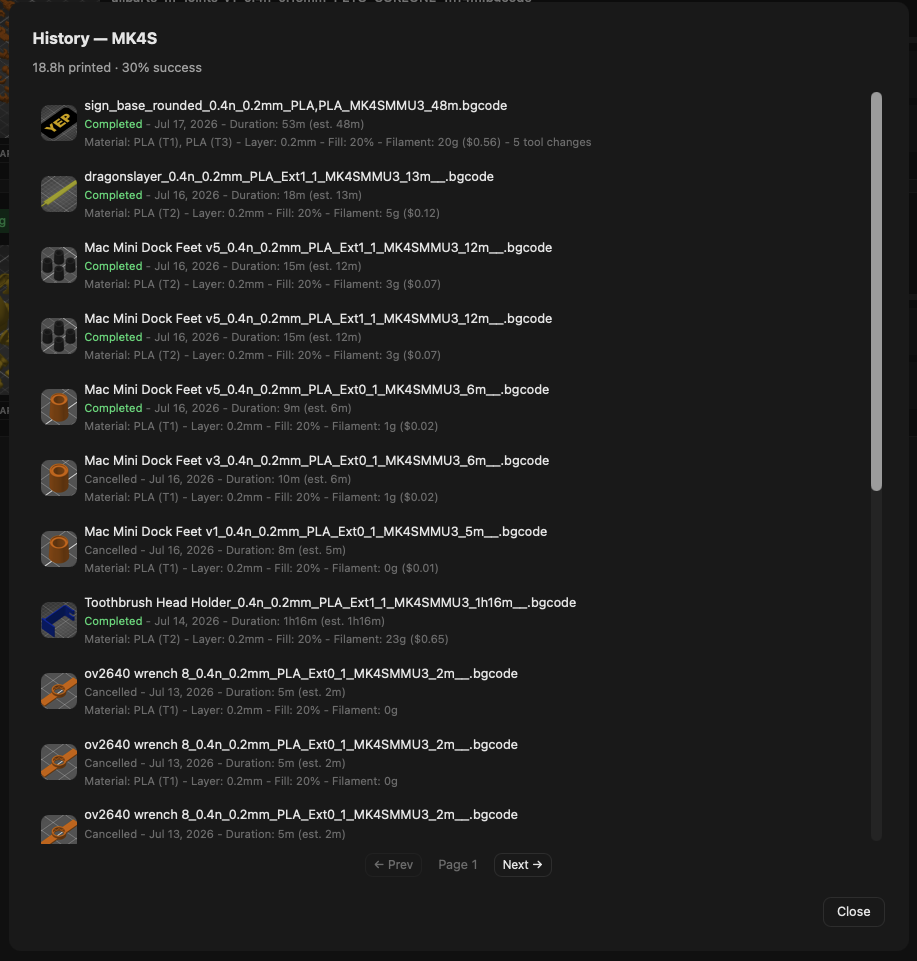
- Print history per printer, with configurable retention (days, 0 = keep forever) and real thumbnails per entry
- Pushover notifications — print started/checkpoints/complete/failed/error, each independently configurable: priority, sound, image source (camera/thumbnail/none), and custom title/message templates
- Smart plug power control via a directly-configured Tasmota device, independent of any platform plugin, assignable to any printer — HTTP-direct (default) or MQTT (push-based, opt-in per plug)
- Auto-off after idle timeout and thermal runaway protection (second layer on top of firmware protection) for printers with an assigned smart plug
- Camera feed via [printspy-cam](https://github.com/ccmpbll/printspy-cam) (ESP32-CAM firmware), assignable to any printer — snapshot/live/plate-thumbnail toggle buttons under each card's image, with an optional global setting to hide the whole section for a printer while it's unreachable
- Multi-user login with per-account passwords, no roles/tiers
- Config backup/restore as YAML
- Printer reordering, optional free-text "model" field, dark mode, responsive layout
### OctoPrint
- Auto-detects camera stack (MJPEG or camera-streamer), printer name, and installed plugins
- Native smart plug power control + energy monitoring, auto-detected via the Tasmota or PSU Control plugin
- Layer progress display (needs the DisplayLayerProgress plugin)
- Live webcam streaming, with a snapshot/live toggle
### PrusaLink
- Snapshot only — no live stream from the printer's own camera (assign a printspy-cam for a live feed)
- No native power control over the API — use a directly-configured smart plug instead
- Keepalive ping — keeps idle printers' wifi up; paused while the printer is off
- File upload from the dashboard, with an optional "print immediately"
- PrusaLink printers with an assigned smart plug are polled only once a minute while offline with every plug off
- Slicer print-host target — point PrusaSlicer/OrcaSlicer's "Send to printer" (PrusaLink mode) at PrintSpy, pinned to one specific printer; "Upload" relays automatically once the printer's online, "Upload and Print" also powers it on first if it's off — no manual step either way
- Print history enriched with real per-print metadata — material, filament used/cost, layer height, duration vs. estimate, and per-tool breakdown for multi-material prints — parsed directly from the file's own slicer metadata, since none of this is exposed over PrusaLink's API
## Quick start
```bash
docker run -d \
--name printspy \
-p 8080:8080 \
-v printspy-data:/data \
ccmpbll/printspy:latest
```
Open `http://:8080` — first run prompts you to create a login. Once in, click the settings gear and add your first printer. You'll need the printer's URL and OctoPrint API key or Prusalink user/pass.
### Docker Compose
```yaml
services:
printspy:
image: ccmpbll/printspy:latest
ports:
- "8080:8080"
volumes:
- printspy-data:/data
restart: unless-stopped
volumes:
printspy-data:
```
## Configuration
All printer management is done through the web UI — open the settings page to add, edit, reorder, and remove printers. No config files needed.
### Login
First run redirects to a setup page to create the first account. Add or remove additional users from Settings → Users. No roles or permission tiers — every account has full access.
### Smart plugs
OctoPrint printers with the Tasmota or PSU Control plugin installed get power control automatically — nothing to configure. For everything else (PrusaLink or an OctoPrint printer without the plugin), add a Tasmota device directly under Settings → Smart Plugs and assign it to a printer. Plugs are managed independently of printers, so deleting a printer unassigns its plug instead of deleting it.
Each plug can use either connection mode:
- **Direct HTTP** (default) — polled over the network on each printer's own poll interval, no extra setup
- **MQTT** — push-based via a broker instead of polling; configure the broker under Settings → MQTT Broker (host:port, optional TLS/username/password), then set the plug's mode to MQTT and enter its Tasmota topic
Both modes can be mixed freely across plugs.
### Cameras
Any printer type can get a webcam feed by assigning a [printspy-cam](https://github.com/ccmpbll/printspy-cam) device under Settings → Cameras — useful for PrusaLink, which has no webcam support of its own. Assigning a camera overrides whatever webcam a printer's own plugin would otherwise show. Cameras are managed independently of printers, so deleting a printer unassigns its camera instead of deleting it.
### Slicer print targets
Create a target under Settings → Slicer print targets, pinned to one printer. In PrusaSlicer or OrcaSlicer, add a physical printer using the **PrusaLink** host type and set:
- **Host:** the URL shown on the target, `http://:/ingest/
 PrintSpy
   
A self-hosted dashboard for monitoring multiple 3D printers — OctoPrint and PrusaLink — from a single web interface.
This was built for my own personal use and the way I want to interact with my printers, as well as an ongoing experiment in agentic coding.
> **Still Under Development** — expect rough edges, breaking changes, and evolving APIs. Feedback and contributions welcome.
## What it does
Each printer gets a row in the dashboard: webcam/snapshot, progress/ETA, temps, and smart plug power state/control. Updates push live via SSE. Everything's configured through the settings page — no config files, no restart needed.
## Screenshots
