Email Body
The process of customizing the main body of each message is the same as the customizing the header or footer. The only difference is that there are many templates, listed in alphabetical order. You can use the templates as they are, or customize the most important messages first, such as messages related to customer accounts, and customer activities. For a complete list, see the Email Template Reference at the end of this section.
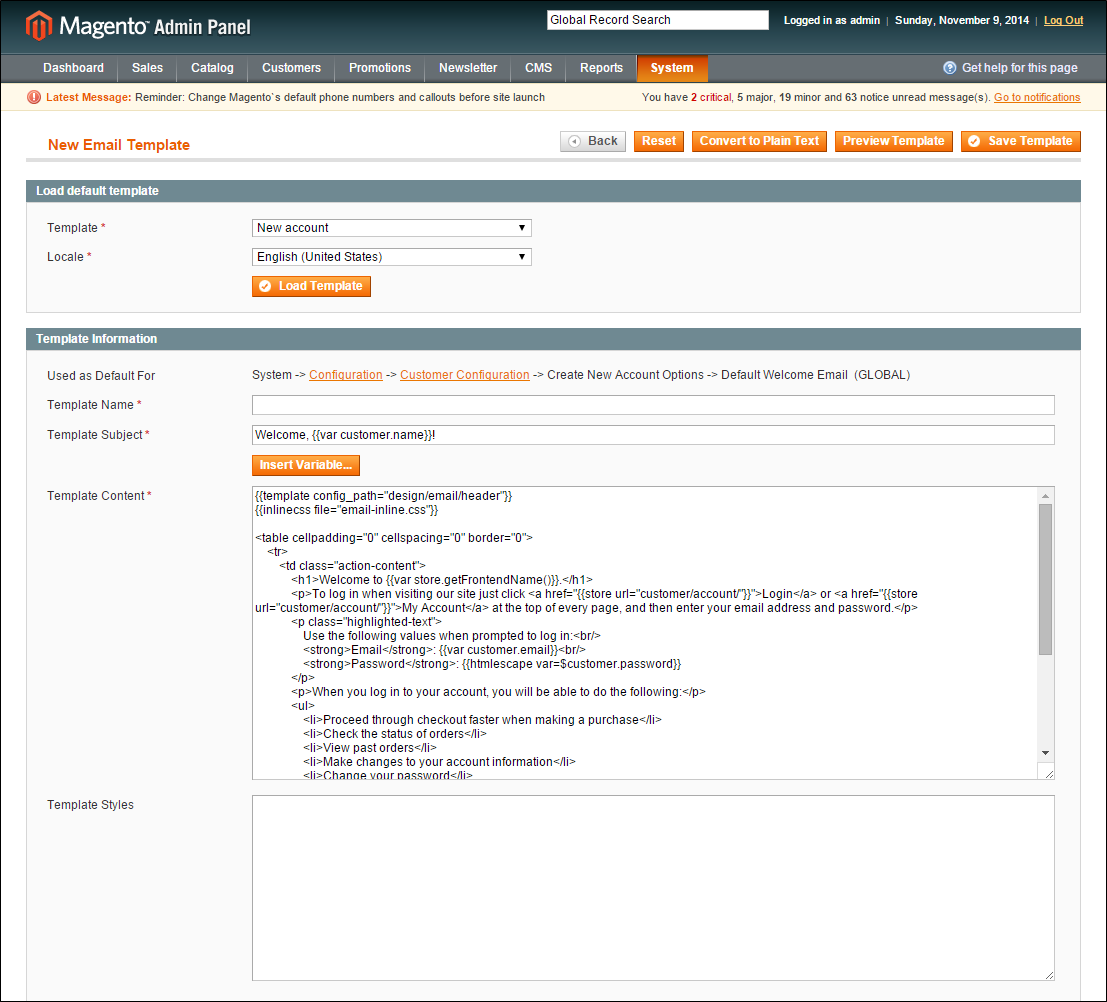
| 1. | On the Admin menu, select System > Transactional Emails. |
| 2. | Click the Add New Template button. |
| 3. | In the Template list, select a default template from the list of predefined templates. |
| 4. | If necessary, set the Locale to the store language. |
| 5. | Click the Load Template button. |
The path to the configuration settings for each default template appears at the top of the Template Information section. You can click this link later when you are ready to update the configuration with the name of the new template.
| 1. | In the Template Information section, do the following: |
| a. | Enter a Template Name for the new email template. |
| b. | In the Template Subject field, type the text that you want to appear in the Subject line of the message. |
| c. | For a better view of the content and variables in the message, click the Convert to Plain Text button. When prompted to confirm, click OK. |
| d. | To restore the HTML, click the Return HTML Version button. |
| e. | Edit the Template Content as needed. |
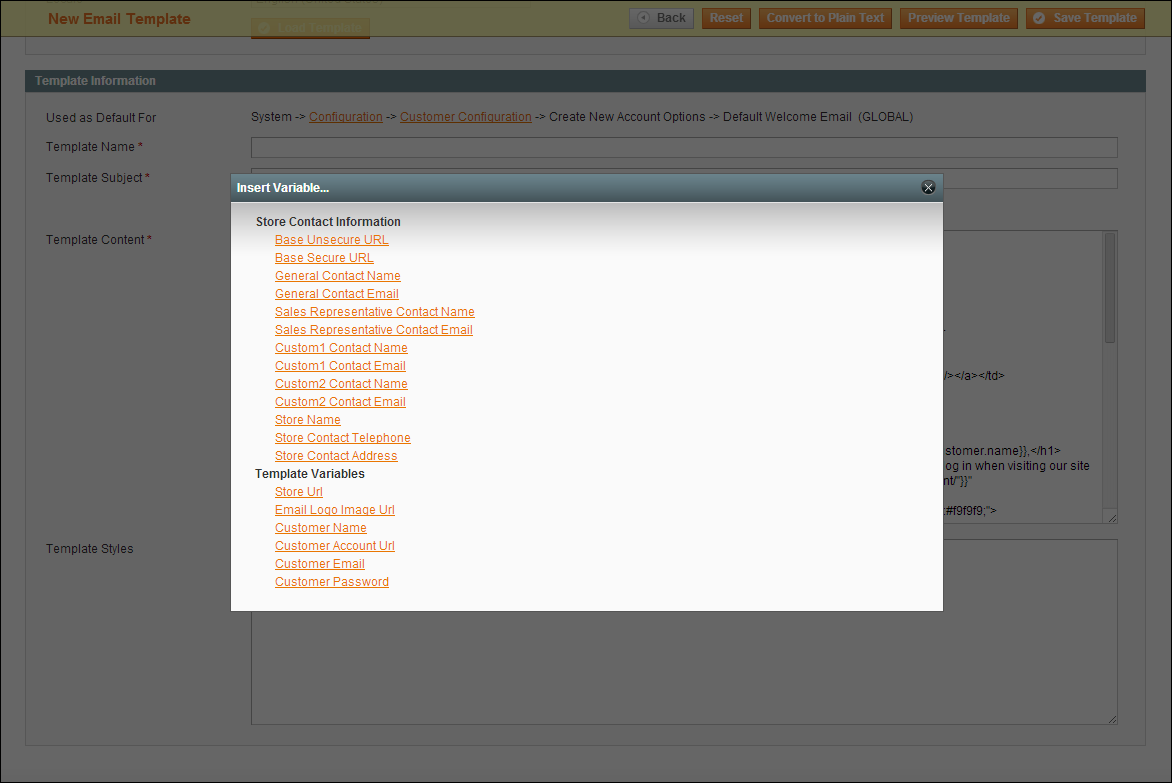
| 2. | (Optional) To insert a variable, do the following: |
| a. | Position the cursor in the text where you want the variable to appear. |
| b. | Click the Insert Variable button. |
The list includes the standard Store Contact Information variables, and an additional list of variables that are specific to the template.
| c. | In the list of available variables, click the variable you want to insert into the template. |
When a variable is selected, the markup tag that is associated with the variable is inserted at the cursor position in the code.
| 3. | When complete, click the Save Template button. |
| 4. | Make sure to Preview the template code, and verify that the template is customer-ready. |
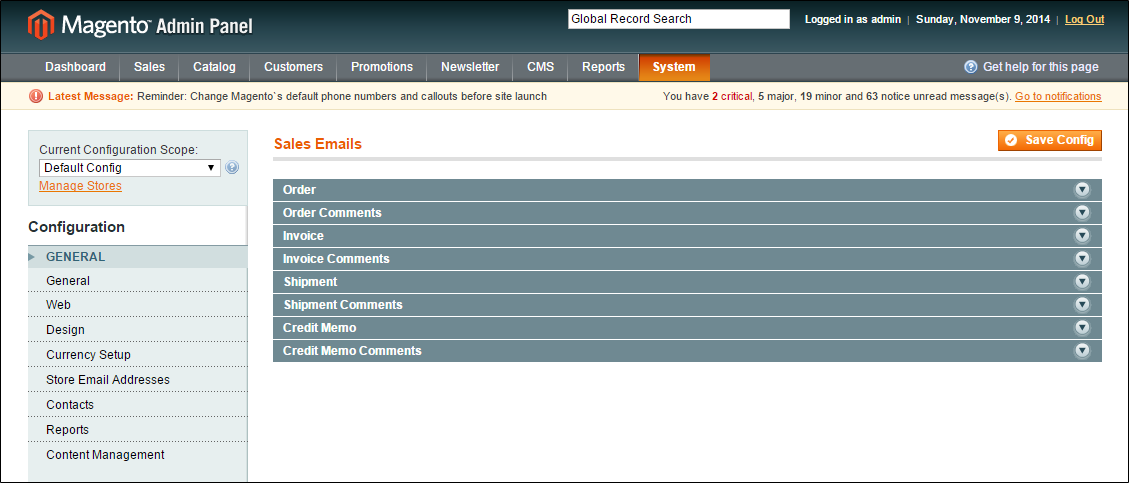
Before the template can be used, the configuration must be updated with the name of the new template. Do one of the following:
- Click the link at the top of the Template Information section to jump to the configuration settings for the template.
- On the Admin menu, select System > Configuration. Then in the panel on the left, under Sales, select Sales Emails.
| 5. | Update the email template information as needed. |
| 6. | When complete, click the Save Config button. |


