# AdminForth - powerfull Agent-first Typescript admin panel framework


 [](http://tluma.ai/ask-ai/devforth/adminforth)
* [Try live demo](https://demo.adminforth.dev/)
* [YouTube video: build agentic admin panel in a minutes](https://www.youtube.com/watch?v=4tB8uzY__uk)
* [Hello world in 5 minutes](https://adminforth.dev/docs/tutorial/gettingStarted) with AdminForth
* [Tutorial](https://adminforth.dev/docs/tutorial/Customization/branding/)
[](http://tluma.ai/ask-ai/devforth/adminforth)
* [Try live demo](https://demo.adminforth.dev/)
* [YouTube video: build agentic admin panel in a minutes](https://www.youtube.com/watch?v=4tB8uzY__uk)
* [Hello world in 5 minutes](https://adminforth.dev/docs/tutorial/gettingStarted) with AdminForth
* [Tutorial](https://adminforth.dev/docs/tutorial/Customization/branding/)
Why AdminForth:
* Init AdminForth project with `npx adminforth create-app` and pass your database URL, import the tables you wish to see in admin using `npx adminforth resource`, and get fully functional UI for your data (filter, create, edit, remove)
* Modern look and simple Tailwind-ish ability to adjust it
* Supports Postgres, MySQL, Mongo, SQLite, Clickhouse
* Define Vue components to change look of various parts of admin using `npx adminforth component` (edit data cells, edit fields, add something above the table, inject something to header or sidebar, add custom page with charts or custom components)
* Build-in Components library (AdminForth AFCL) with premade easy-to-use build-blocks which follow your theme
* Define express APIs and call them from your components and pages
* Use various modern back-office-must-have plugins like audit log, files/image upload, TOTP 2FA, I18N, Copilot-style AI writing and image generation and many more
* AdminForth is always free and open-source (no paid versions, no cloud subscriptions sh*t)
## Project initialisation
AdminForth supports Node.js 22.12+, 24, and 26. Node.js 20 and 21 are no longer supported. We recommend Node.js 24 LTS for production.
AdminForth supports two setup paths:
### Path 1: Existing database
Use this path when you already have a database and your own schema or migrations. Provide your database URL with `--db`, or enter it when the CLI asks `Please specify the database URL to use`.
```bash
npx adminforth create-app --app-name myadmin --db "postgresql://user:password@localhost:5432/dbname"
cd myadmin
```
When you provide your own database URL, AdminForth connects to your database but does not create Prisma schema or migrations for it. The generated project README includes the SQL or schema notes needed to add the required `adminuser` table with your own migration tool.
After project creation, generate AdminForth resource files from your existing tables:
```bash
npx adminforth resource
```
### Path 2: New database
Use this path when you want AdminForth to scaffold a standalone app with a new local SQLite database. Omit `--db`, or accept the default `sqlite://.db.sqlite` value in the interactive prompt:
```bash
npx adminforth create-app --app-name myadmin
cd myadmin
pnpm makemigration --name init && pnpm migrate:local
pnpm dev
```
For the new database path, the CLI can scaffold Prisma files and migration scripts for the default `sqlite://.db.sqlite` database. Please follow [getting started](https://adminforth.dev/docs/tutorial/gettingStarted/) for the full guide.
# For AdminForth developers
> Follow this section only if you want to make changes to the AdminForth framework or develop a plugin.
The most convenient way to add new features or fixes is to use `dev-demo`. It imports the repository source code and plugins, so you can edit them and see changes on the fly.
## Requirements
- **Node.js 22.12+, 24, or 26** (Node.js 20 and 21 are not supported)
- **Docker**
- **pnpm**
- **Taskfile**
To run dev demo:
```sh
cd dev-demo
pnpm setup-dev-demo
pnpm migrate:all
pnpm start
```
## Adding columns to a database in dev-demo
Open `./migrations` folder. There is prisma migration folder for the sqlite, postgres and mysql and `clickhouse_migrations` folder for the clickhouse:
### Migrations for the MySQL, SQLite and Postgres
To make migration add to the .prisma file in folder with database you need and add new tables or columns. Then run:
```
pnpm makemigration:sqlite -- --name init
```
and
```
pnpm migrate:sqlite
```
to apply migration
> use :sqlite, :mysql or :postgres for you case
### Migrations for the clickhouse
In order to make migration for the clickhouse, go to the `./migrations/clickhouse_migrations` folder and add migration file to the folder.
Then run
```
pnpm migrate:clickhouse
```
to apply the migration.
## Testing CLI commands during development
Make sure you have not `adminforth` globally installed. If you have it, remove it:
```sh
pnpm uninstall -g adminforth
```
Then, in the root of the project, run once:
```
cd adminforth/adminforth
pnpm build
pnpm link
```
Then, go to testing app, e.g. created with CLI, and use next command:
```
npx -g adminforth
```
This will always run latest version of adminforth package.
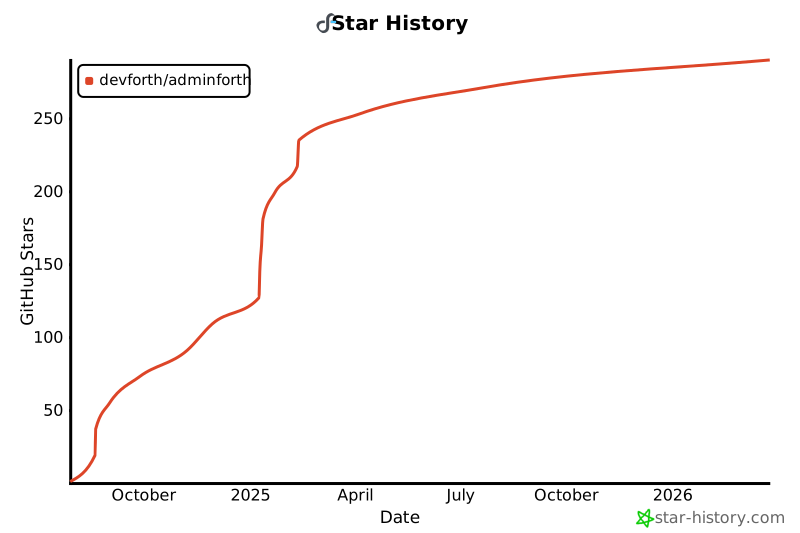
## Star History
[](https://www.star-history.com/#devforth/adminforth&type=date&legend=top-left)