SimUtil
A terminal UI for launching Android Emulators / iOS Simulators
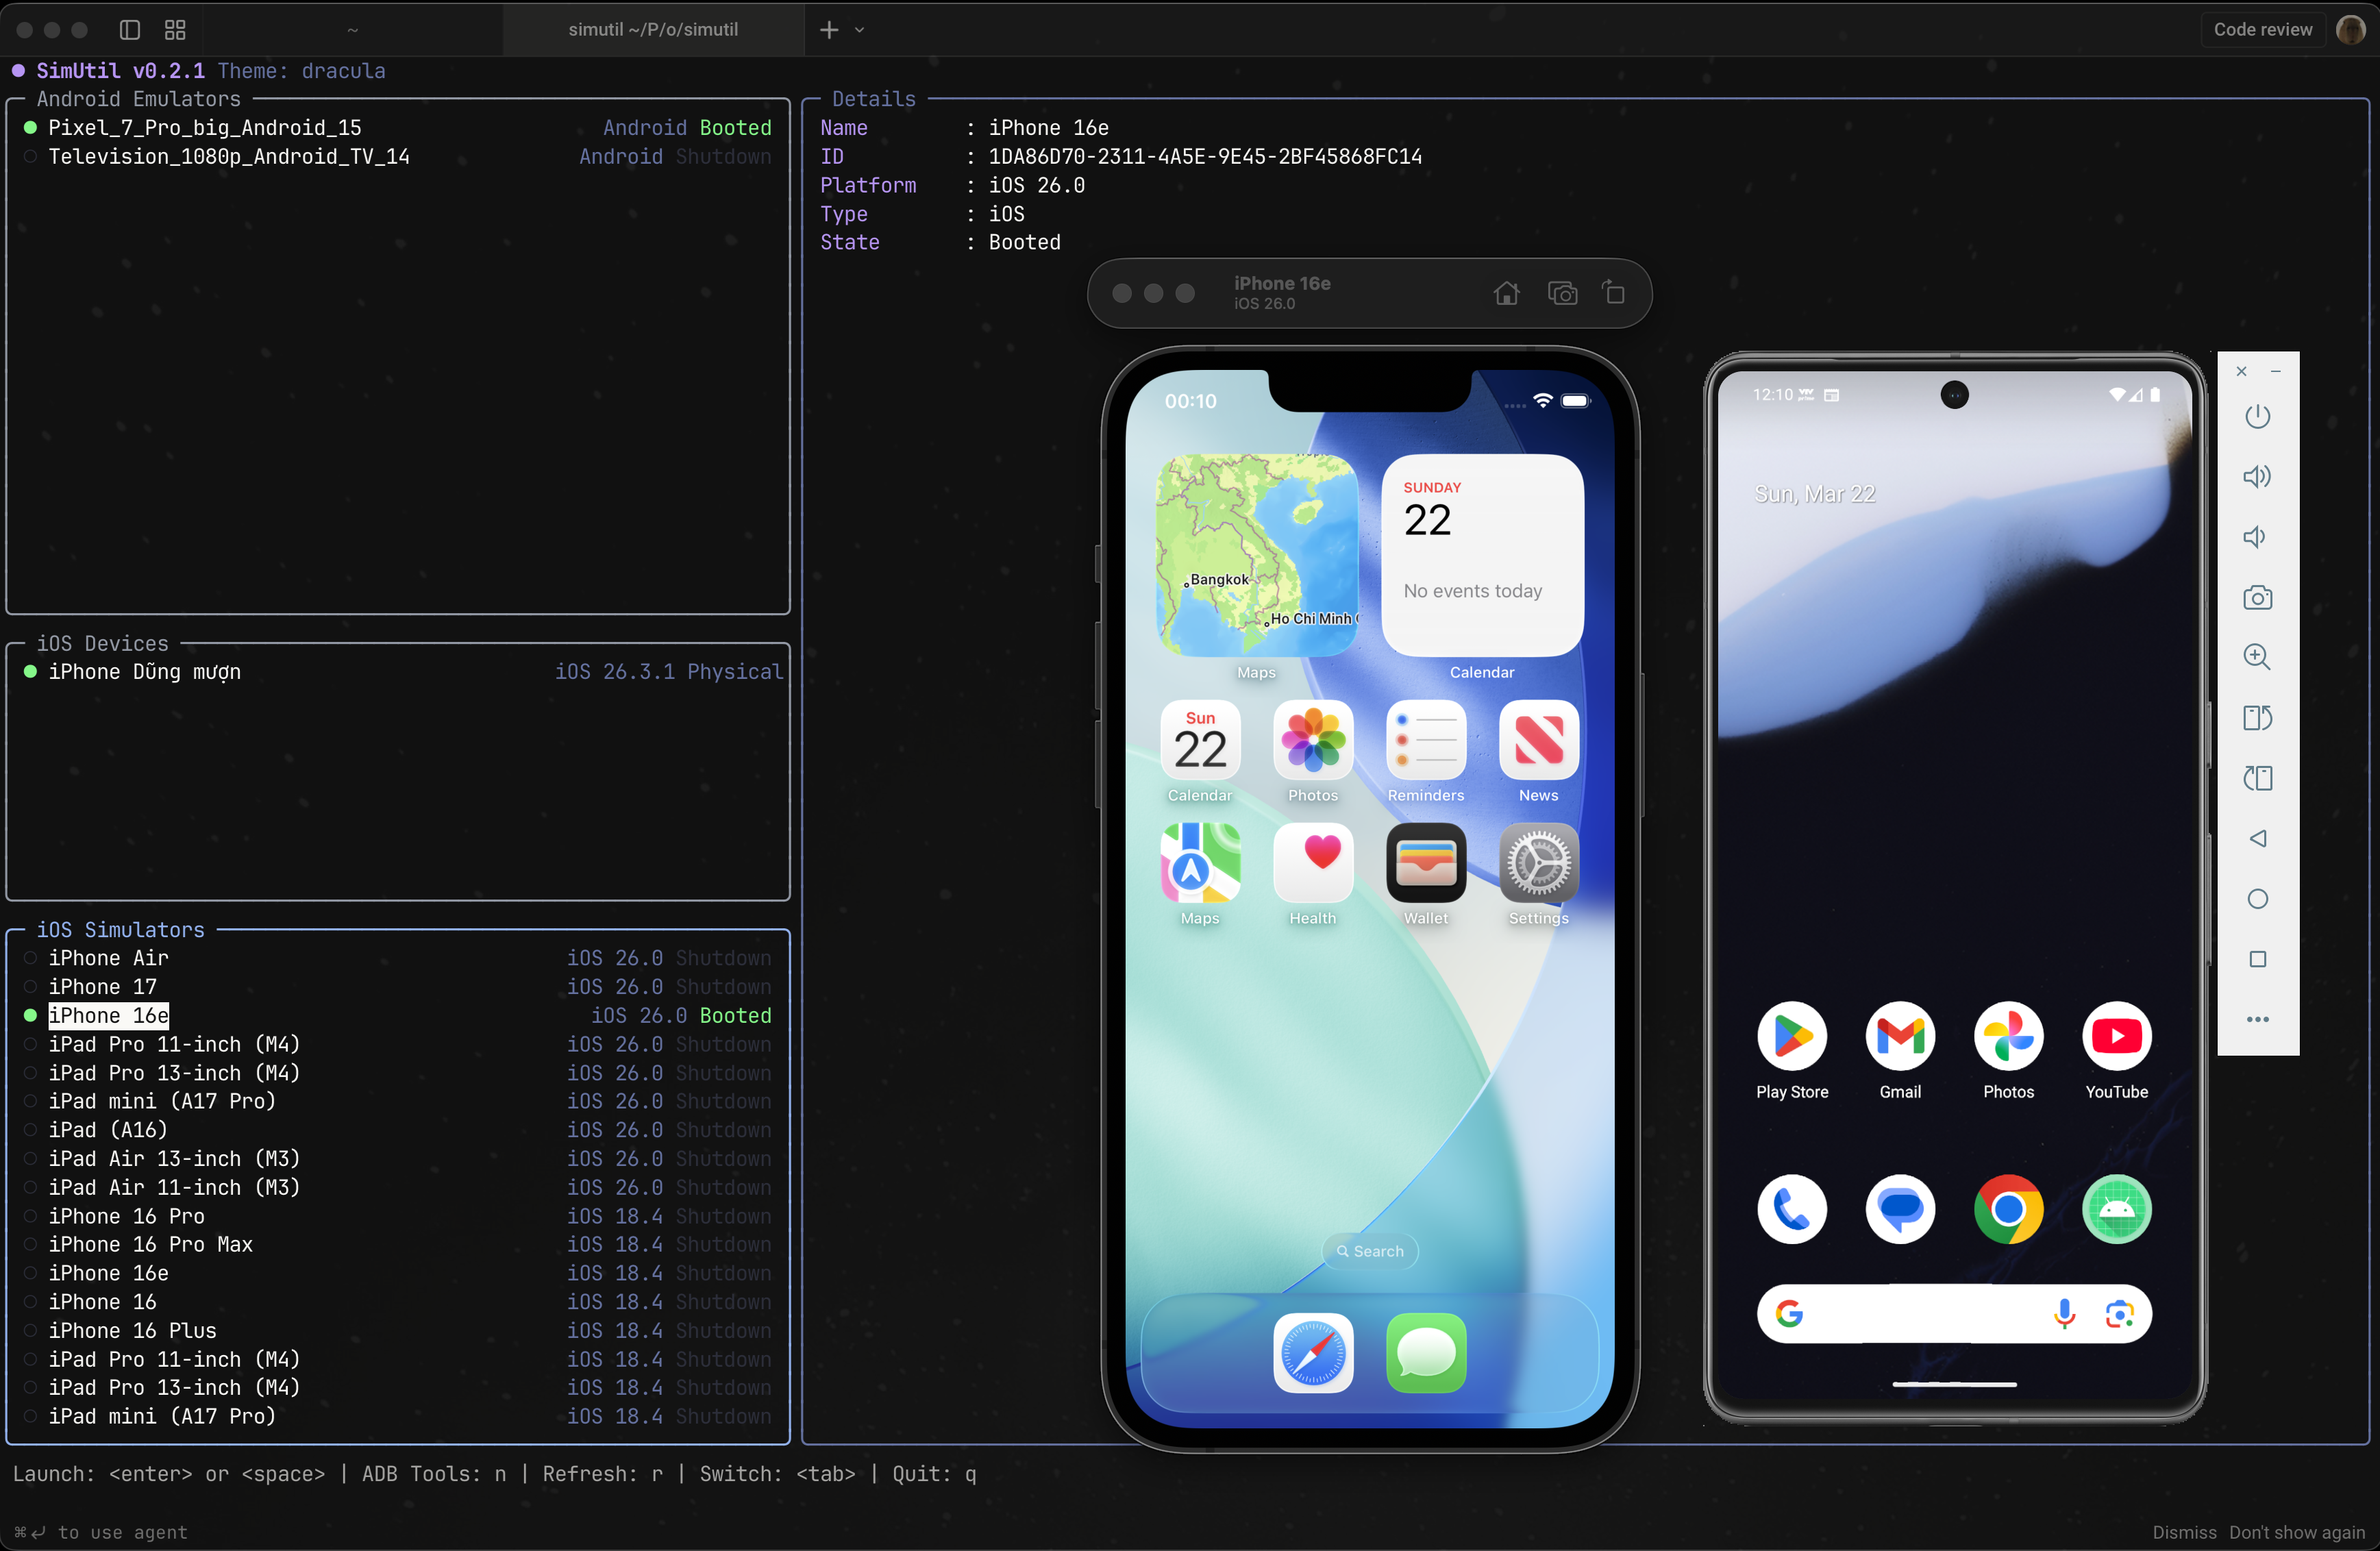
Launch, connect, manage your devices and more — all from the terminal


Browse your available emulators and simulators side-by-side, launch with custom options and connect to physical devices wirelessly.
Simutil is written with [Nocterm](https://nocterm.dev/), a terminal UI framework for Dart with similar syntax to Flutter.
## Features
- **One-Key Launch** — Start any device with `Enter`, no need to open Android Studio or Xcode
- **Android Launch Options** — Provide launch option for Android Emulators: Normal, Cold Boot, No Audio, or Cold Boot + No Audio,...
- **Shutdown device** — Shutdown simulators/emulators.
- **Logcat** — View logcat output of Android emulators / devices, support filtering.
- **ADB Tools Built-in** — Connect to physical Android devices wirelessly:
- Connect via IP address
- Pair with 6-digit code (Android 11+)
- QR code pairing (Android 11+)
## Installation
### Binary Install
```bash
curl -fsSL https://raw.githubusercontent.com/dungngminh/simutil/main/install.sh | bash
```
### Binary Install (Windows PowerShell)
```powershell
powershell -ExecutionPolicy Bypass -Command "iwr -useb https://raw.githubusercontent.com/dungngminh/simutil/main/install.ps1 | iex"
```
### Using Homebrew (macOS/Linux)
```bash
brew tap dungngminh/simutil
brew install simutil
```
### From pub.dev
```bash
dart pub global activate simutil
```
### From source
```bash
git clone https://github.com/dungngminh/simutil.git
cd simutil
dart pub get
dart pub global activate --source path .
```
Then run:
```bash
simutil
```
## Supported platforms
- [x] macOS
- [x] Linux
- [x] Windows
## Contributing
```bash
git clone https://github.com/dungngminh/simutil.git
cd simutil
dart pub get
dart run bin/simutil.dart # Run locally
dart --enable-vm-service bin/simutil.dart # Run with hot reload
```
1. Fork this repository
2. Create a branch and make your changes
3. Open a Pull Request
## License
MIT — see [LICENSE](LICENSE)