**Table of Contents** *generated with [DocToc](https://github.com/thlorenz/doctoc)*
- [Ember初探--Tutorial](#ember%E5%88%9D%E6%8E%A2--tutorial)
- [创建新的应用](#%E5%88%9B%E5%BB%BA%E6%96%B0%E7%9A%84%E5%BA%94%E7%94%A8)
- [初始化应用](#%E5%88%9D%E5%A7%8B%E5%8C%96%E5%BA%94%E7%94%A8)
- [目录结构](#%E7%9B%AE%E5%BD%95%E7%BB%93%E6%9E%84)
- [start server](#start-server)
- [测试先行](#%E6%B5%8B%E8%AF%95%E5%85%88%E8%A1%8C)
- [Routes & Templates](#routes--templates)
- [新建about路由](#%E6%96%B0%E5%BB%BAabout%E8%B7%AF%E7%94%B1)
- [新建contact路由](#%E6%96%B0%E5%BB%BAcontact%E8%B7%AF%E7%94%B1)
- [使用`{{link-to}}`编写导航](#%E4%BD%BF%E7%94%A8link-to%E7%BC%96%E5%86%99%E5%AF%BC%E8%88%AA)
- [增加首页](#%E5%A2%9E%E5%8A%A0%E9%A6%96%E9%A1%B5)
- [各页面使用通用的导航栏](#%E5%90%84%E9%A1%B5%E9%9D%A2%E4%BD%BF%E7%94%A8%E9%80%9A%E7%94%A8%E7%9A%84%E5%AF%BC%E8%88%AA%E6%A0%8F)
- [Model](#model)
- [安装附加插件](#%E5%AE%89%E8%A3%85%E9%99%84%E5%8A%A0%E6%8F%92%E4%BB%B6)
- [ember-cli-tutorial-style](#ember-cli-tutorial-style)
- [ember-cli-mirage](#ember-cli-mirage)
- [使用Ember Data](#%E4%BD%BF%E7%94%A8ember-data)
- [更新Model Hook(route handler)](#%E6%9B%B4%E6%96%B0model-hookroute-handler)
- [建立简单的组件](#%E5%BB%BA%E7%AB%8B%E7%AE%80%E5%8D%95%E7%9A%84%E7%BB%84%E4%BB%B6)
- [组件的组成](#%E7%BB%84%E4%BB%B6%E7%9A%84%E7%BB%84%E6%88%90)
- [放大/缩小图片](#%E6%94%BE%E5%A4%A7%E7%BC%A9%E5%B0%8F%E5%9B%BE%E7%89%87)
- [建立Handlebars Helper](#%E5%BB%BA%E7%AB%8Bhandlebars-helper)
- [建立复杂组件](#%E5%BB%BA%E7%AB%8B%E5%A4%8D%E6%9D%82%E7%BB%84%E4%BB%B6)
- [Services and Utilities](#services-and-utilities)
- [部署](#%E9%83%A8%E7%BD%B2)
## Ember初探--Tutorial
### 创建新的应用
ember cli, ember命令行,都为ember项目提供了良好的项目结构,以及很多开发工具和附加的插件,因此使得使用ember的开发者们可以更加专心致力于App的开发而不是搭建项目的结构。
#### 初始化应用
```bash
# 新建一个名为super-rentals的项目,我们将在应用里浏览并查找租房信息
$ ember new super-rentals
```
#### 目录结构
```bash
# 基本的项目结构
|--app # models, components, routes, templates, styles...
|--bower_components
|--config # containers environment.js
|--dist # output files
|--node_modules
|--public # assets such as images & fonts
|--tests
|--tmp # ember cli temporary files
|--vendor # third-party dependencies
bower.json
ember-cli-build.js
package.json
README.md
testem.js
```
值得一提的是,ember cli默认使用es6语法
#### start server
```bash
$ ember server
# $ ember s
```
然后访问[ember tutorial](http://localhost:4200)
### 测试先行
首先我们思考一下App的功能:
- 列出可用的租房信息
- 要有能够到达公司介绍页面的链接
- 要有能够到达联系我们页面的链接
- 根据城市来筛选租房信息的列表
它的最终形态应该这样:
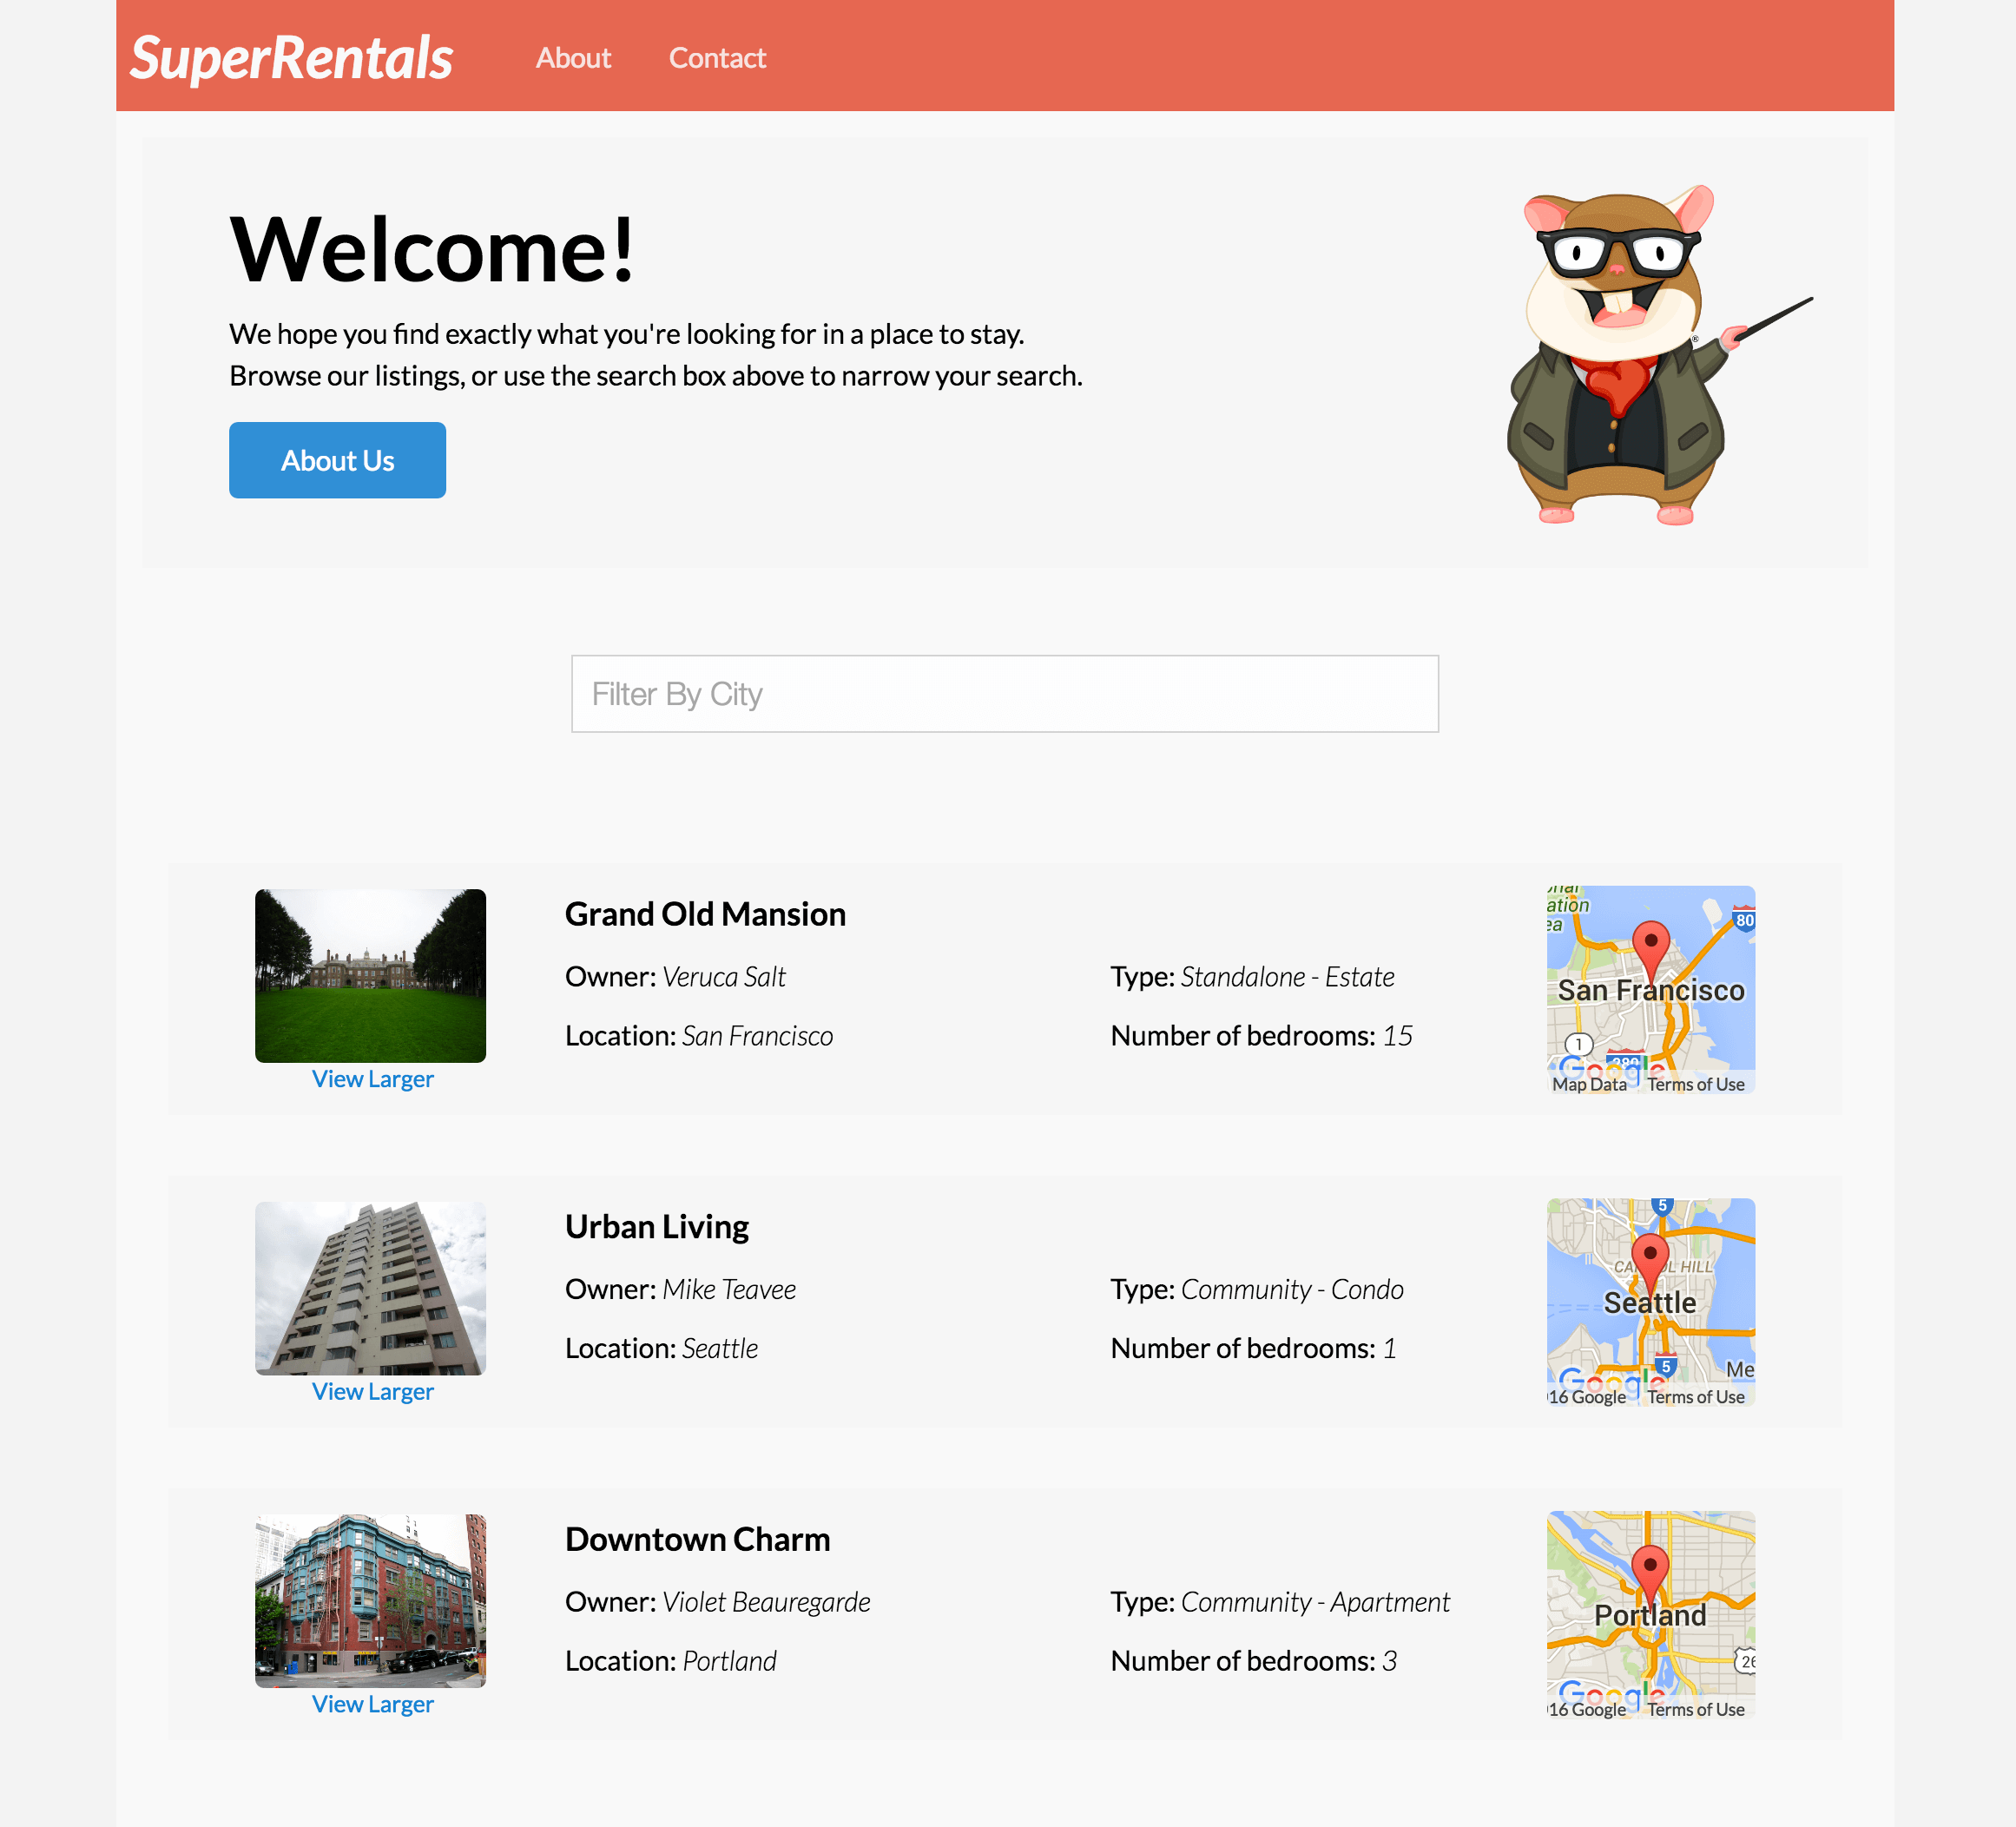
我们把这些目标叫作`ember验收测试`,它用来保障我们的App在完工之后能够正常工作。
首先,新建一个测试文件:
```bash
$ ember g acceptance-test list-rentals
# output
# installing acceptance-test
# create tests/acceptance/list-rentals-test.js
```
之后我们修改`/tests/acceptance/list-rentals-test.js`文件:
```javascript
import { test } from 'qunit';
import moduleForAcceptance from 'super-rentals/tests/helpers/module-for-acceptance';
moduleForAcceptance('Acceptance | list-rentals');
test('should list available rentals.', function (assert) {
});
test('should link to information about the company.', function (assert) {
});
test('should link to contact information.', function (assert) {
});
test('should filter the list of rentals by city.', function (assert) {
});
```
测试毫无疑问会爆掉。ember为我们提供了测试方法来模拟访问页面、表单填充、等待页面渲染等行为,因此我们应该更详细的写下测试:
```javascript
// 测试页面访问
test('should list available rentals.', function (assert) {
visit('/');
// andThen 方法会等到之前的执行完毕之后再执行
andThen(function () {
assert.equal(find('.listing').length, 3, 'should see 3 listings');
});
});
```
```javascript
test('should link to information about the company.', function (assert) {
visit('/');
click('a:contains("About")');
andThen(function () {
assert.equal(currentURL(), '/about', 'should navigate to about');
});
});
test('should link to contact information', function (assert) {
visit('/');
// 运用click模拟点击操作
click('a:contains("Contact")');
andThen(function () {
assert.equal(currentURL(), '/contact', 'should navigate to contact');
});
});
```
```javascript
// 最后来测试列表筛选功能
test('should filter the list of rentals by city.', function (assert) {
visit('/');
// fillIn模拟input的填充
// keyEvent模拟键盘事件
fillIn('.list-filter input', 'seattle');
keyEvent('.list-filter input', 'keyup', 69);
andThen(function () {
assert.equal(find('.listing').length, 1, 'should show 1 listing');
assert.equal(find('.listing .location:contains("Seattle")').length, 1, 'should contain 1 listing with location Seattle');
});
});
```
### Routes & Templates
#### 新建about路由
```bash
$ ember generate route about
# $ ember g route about
# 它会新增about路由,以及对应的route handler
# 并创建about模板,和对应的测试
# installing route
# create app/routes/about.js
# create app/templates/about.hbs
# updating router
# add route about
# installing route-test
# create tests/unit/routes/about-test.js
```
```javascript
// app/router.js
import Ember from 'ember';
import config from './config/environment';
const Router = Ember.Router.extend({
location: config.locationType,
rootURL: config.rootURL
});
Router.map(function() {
// 新增about
this.route('about');
});
export default Router;
```
在默认情况下,about路由指向`app/routes/about.js`route handler,并加载`app/templates/about.hbs`模板。来给模板里填充点东西:
```html
About Super Rentals
The Super Rentals website is a delightful project created to explore Ember.
By building a property rental site, we can simultaneously imagine traveling
AND building Ember applications.
```
#### 新建contact路由
```bash
$ ember g route contact
```
生成的文件结构和about一样。接着编写hbs
```html
Contact Us
Super Rentals Representatives would love to help you
choose a destination or answer
any questions you may have.
Super Rentals HQ
1212 Test Address Avenue
Testington, OR 97233
+1 (503) 555-1212
superrentalsrep@emberjs.com
```
#### 使用`{{link-to}}`编写导航
ember拥有`{{link-to}}`这个内置的方法来构建不同路由的导航。
```html
About Super Rentals
The Super Rentals website is a delightful project created to explore Ember.
By building a property rental site, we can simultaneously imagine traveling
AND building Ember applications.
{{#link-to 'contact' class="button"}}
Get Started!
{{/link-to}}
```
这是页面是这样的:

同样的,我们给contact页面也加上路由:
```html
Contact Us
Super Rentals Representatives would love to help you
choose a destination or answer
any questions you may have.
Super Rentals HQ
1212 Test Address Avenue
Testington, OR 97233
+1 (503) 555-1212
superrentalsrep@emberjs.com
{{#link-to 'about' class="button"}}
About
{{/link-to}}
```
#### 增加首页
```bash
$ ember g route index
# installing route
# create app/routes/index.js
# create app/templates/index.hbs
# installing route-test
# create tests/unit/routes/index-test.js
```
```html
Welcome!
We hope you find exactly what you're looking for in a place to stay.
Browse our listings, or use the search box above to narrow your search.
{{#link-to 'about' class="button"}}
About Us
{{/link-to}}
```
#### 各页面使用通用的导航栏
为了能在不同的页面中渲染出一样的结构和样式,我们需要创建一个`application`模板
```bash
$ ember g template application
# installing template
# create app/templates/application.hbs
```
当`application.hbs`创建好之后,每个页面都会渲染它:
```html
```
> 需要注意的是,`{{outlet}}`是各页面将对应route handler渲染的template组合进`application`的位置。
### Model
接下来,我们要在首页增加一个列表,为此,需要一个租房信息的model来储存数据。但一步一步来嘛,我们先hard-code写一个JavaScript Object进去:
```javascript
// app/routes/index.js
// 在index的route handler中写入加数据
import Ember from 'ember';
let rentals = [{
id: 1,
title: 'Grand Old Mansion',
owner: 'Veruca Salt',
city: 'San Francisco',
type: 'Estate',
bedrooms: 15,
image: 'https://upload.wikimedia.org/wikipedia/commons/c/cb/Crane_estate_(5).jpg'
}, {
id: 2,
title: 'Urban Living',
owner: 'Mike TV',
city: 'Seattle',
type: 'Condo',
bedrooms: 1,
image: 'https://upload.wikimedia.org/wikipedia/commons/0/0e/Alfonso_13_Highrise_Tegucigalpa.jpg'
}, {
id: 3,
title: 'Downtown Charm',
owner: 'Violet Beauregarde',
city: 'Portland',
type: 'Apartment',
bedrooms: 3,
image: 'https://upload.wikimedia.org/wikipedia/commons/f/f7/Wheeldon_Apartment_Building_-_Portland_Oregon.jpg'
}];
export default Ember.Route.extend({
// model()等效于model: function()
model() {
return rentals;
}
});
```
之后当用户进入`index`页面的时候就会调用model钩子,并返回我们虚构的数据。紧接着,就会把数据渲染在模板上:
```html
{{#each model as |rental|}}
{{rental.title}}
Owner: {{rental.owner}}
Type: {{rental.type}}
Location: {{rental.city}}
Number of bedrooms: {{rental.bedrooms}}
{{/each}}
```
在模板里,我们通过`{{#each}} {{\each}}`进行循环遍历。最终的页面应该长这样:
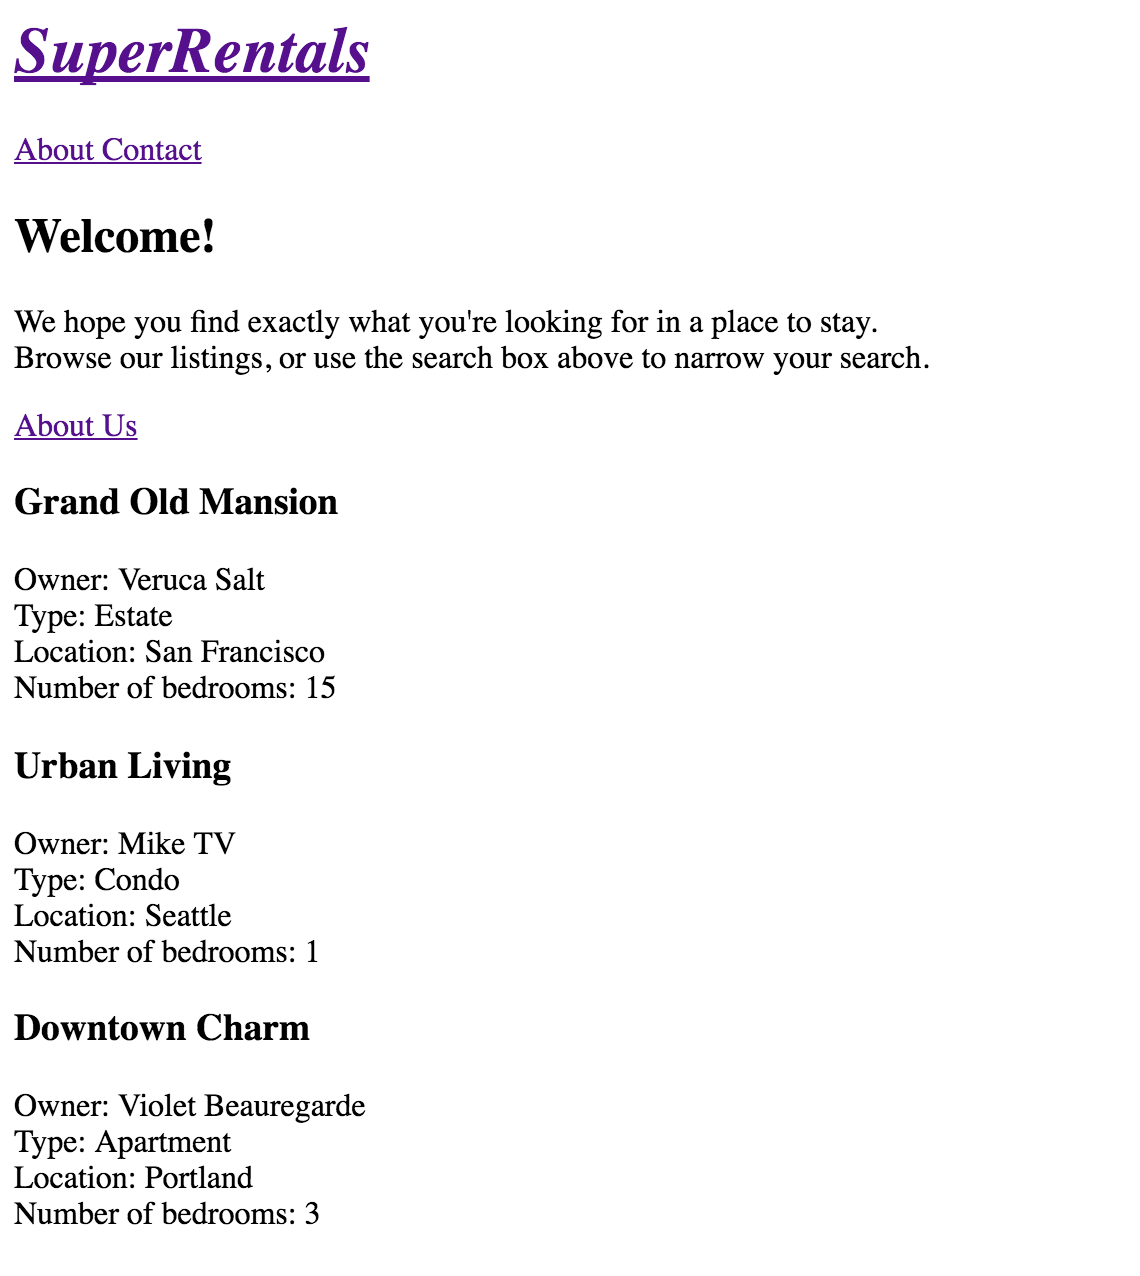
### 安装附加插件
ember提供了非常多的附加插件,你可以在[Ember Observer](https://emberobserver.com/)查阅它们。
在这个项目里我们会使用两个插件:[ember-cli-tutorial-style](https://github.com/toddjordan/ember-cli-tutorial-style)和[ember-cli-mirage](http://www.ember-cli-mirage.com/)
#### ember-cli-tutorial-style
为了避免你写繁琐的CSS代码,继续跟着这个ember教程走,就要安装`ember-cli-tutorial-style`来为这个项目提供CSS样式。
```bash
$ ember install ember-cli-tutorial-style
# 安装完成之后重启ember server
```
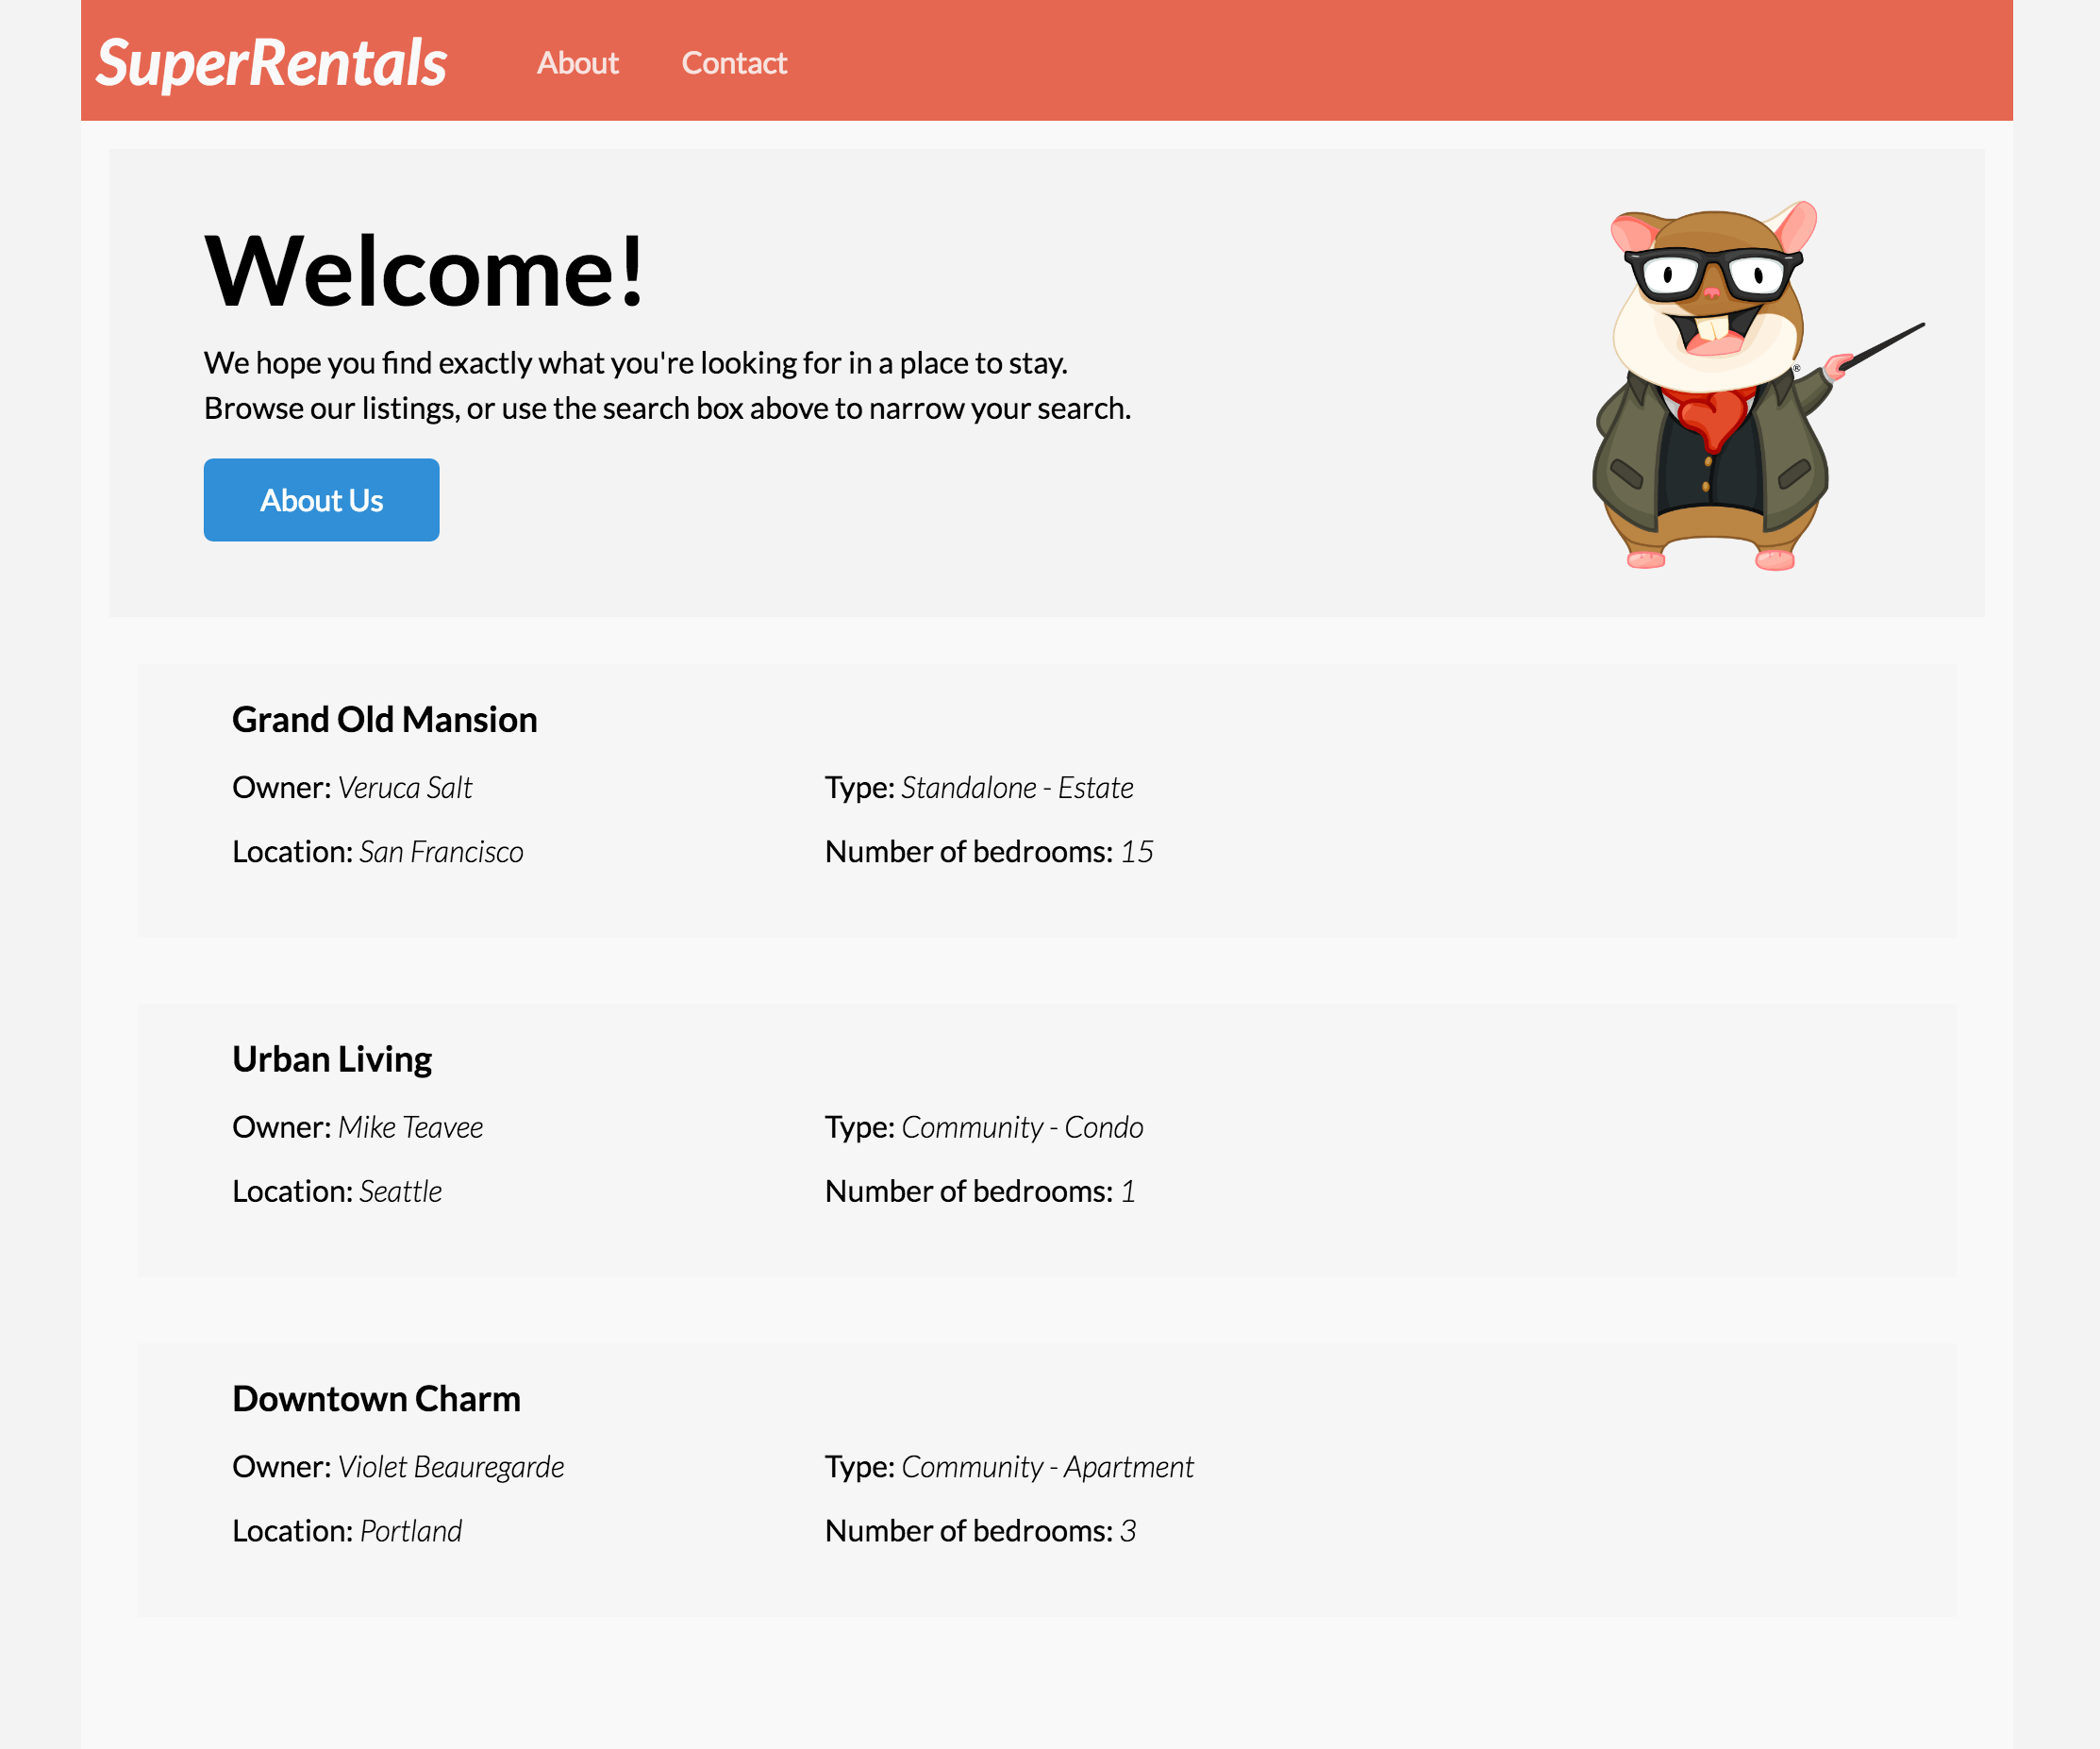
这个插件安装完后生成`vendor/ember-tutorial.css`文件。当ember cli运行时,它会被打包进`vendor.css`文件里,最终被`index.html`页面所引用。
效果如下:
#### ember-cli-mirage
[Mirage](http://www.ember-cli-mirage.com/)是一个[静态HTTP桩库](http://kaverjody.com/chinese-terms-fake-mock-stub-driver-simulator-dummy-double/),常用于ember的验收测试。我们在这里将它作为模拟的数据源。
```bash
$ ember install ember-cli-mirage
# 安装完成之后需要重启ember server
```
```javascript
// 更新/mirage/config.js
export default function() {
this.get('/rentals', function() {
return {
data: [{
type: 'rentals',
id: 1,
attributes: {
title: 'Grand Old Mansion',
owner: 'Veruca Salt',
city: 'San Francisco',
type: 'Estate',
bedrooms: 15,
image: 'https://upload.wikimedia.org/wikipedia/commons/c/cb/Crane_estate_(5).jpg'
}
}, {
type: 'rentals',
id: 2,
attributes: {
title: 'Urban Living',
owner: 'Mike Teavee',
city: 'Seattle',
type: 'Condo',
bedrooms: 1,
image: 'https://upload.wikimedia.org/wikipedia/commons/0/0e/Alfonso_13_Highrise_Tegucigalpa.jpg'
}
}, {
type: 'rentals',
id: 3,
attributes: {
title: 'Downtown Charm',
owner: 'Violet Beauregarde',
city: 'Portland',
type: 'Apartment',
bedrooms: 3,
image: 'https://upload.wikimedia.org/wikipedia/commons/f/f7/Wheeldon_Apartment_Building_-_Portland_Oregon.jpg'
}
}]
};
});
}
```
这样就模拟了当发送GET请求给`/rentals`时,返回的JSON数据。
### 使用Ember Data
到目前为止,这个APP里的数据都是我们hard-code出来的。当应用不断增大时,我们可能会有新的需求,例如增加/更新/删除数据等等。ember提供了一个数据管理库(Ember Data)来处理这个问题。
```bash
# 创建名为rental的ember data model
$ ember g model rental
# installing model
# create app/models/rental.js
# installing model-test
# create tests/unit/models/rental-test.js
```
打开`app/models/rental.js`,发现里面长这样:
```javascript
// app/models/rental.js
import DS from 'ember-data';
export default DS.Model.extend({
});
```
把title, owner, city, type, image, and bedrooms作为支持的属性写进去:
```javascript
// app/models/rental.js
import DS from 'ember-data';
export default DS.Model.extend({
title: DS.attr(),
owner: DS.attr(),
city: DS.attr(),
type: DS.attr(),
image: DS.attr(),
bedrooms: DS.attr()
});
```
#### 更新Model Hook(route handler)
此时已经没必要保留hard-code进index route-handler里的数据了:
```javascript
// app/routes/index.js
import Ember from 'ember';
export default Ember.Route.extend({
model() {
return this.get('store').findAll('rental');
}
});
```
当我们调用`this.get('store').findAll('rental')`的时候,Ember Data会发送一个GET请求到`/rentals`。
当我们在开发环境下使用`Mirage`的时候,获得的数据都是我们自己提供给`Mirage`的。而到了生产环境下,则需要为Ember Data提供后端数据接口。
### 建立简单的组件
当用户访问我们的列表时,可能想要一些可交互的操作来帮助他们更好的浏览和决策。为了高效的达成这个目的,应该建立一个组件把我们的列表独立出去。
```bash
# 新建名为rental-listing的组件
$ ember g component rental-listing
# installing component
# create app/components/rental-listing.js
# create app/templates/components/rental-listing.hbs
# installing component-test
# create tests/integration/components/rental-listing-test.js
```
> 要注意的是。`-`在组件名里必不可缺,它用来方式组件名和HTML元素名发生冲突。因此`rental-listing`这个名字ok而`rental`不行。
下一步,测试先行:
我们期望在组件render的时候没有`wide`这个class名,而点击`.image`的时候则可以切换`wide`class。
```javascript
import { moduleForComponent, test } from 'ember-qunit';
import hbs from 'htmlbars-inline-precompile';
import Ember from 'ember';
moduleForComponent('rental-listing', 'Integration | Component | rental listing', {
integration: true
});
test('should toggle wide class on click', function(assert) {
assert.expect(3);
let stubRental = Ember.Object.create({
image: 'fake.png',
title: 'test-title',
owner: 'test-owner',
type: 'test-type',
city: 'test-city',
bedrooms: 3
});
this.set('rentalObj', stubRental);
this.render(hbs`{{rental-listing rental=rentalObj}}`);
assert.equal(this.$('.image.wide').length, 0, 'initially rendered small');
this.$('.image').click();
assert.equal(this.$('.image.wide').length, 1, 'rendered wide after click');
this.$('.image').click();
assert.equal(this.$('.image.wide').length, 0, 'rendered small after second click');
});
```
> 值得注意的是,在测试中使用了jQuery选择器来获取目标元素。
#### 组件的组成
组件由两部分组成(除去组件对应的测试文件):
- 模板文件来决定组件的样式(`app/templates/components/rental-listing.hbs`)
- js文件来决定组件的行为(`app/components/rental-listing.js`)
我们把之前`app/templates/index.hbs`里的列表元素转移到`app/templates/components/rental-listing.hbs`里,并新增`img`标签:
```html

{{rental.title}}
Owner: {{rental.owner}}
Type: {{rental.type}}
Location: {{rental.city}}
Number of bedrooms: {{rental.bedrooms}}
```
而在`app/templates/index.hbs`文件中,使用一个循环来替代之前的列表:
```html
{{#each model as |rentalUnit|}}
{{rental-listing rental=rentalUnit}}
{{/each}}
```
在`index.hbs`里,通过`rental-listing`这个名词来引用对应的组件,并将数据遍历中的每组数据命名为`rentalUnit`传递给`rental-listing.hbs`组件。
#### 放大/缩小图片
现在我们来处理用户对图片的点击事件。
首先,需要使用`{{#if}}`这个辅助方法来确定是否要把`wide`class名赋给对应的标签:
```html
View Larger
```
其中,`isWide`这个值来源自组件的js文件。鉴于我们期望组件在初次渲染时只是小图,可以在js里把`isWide`赋值为`false`:
```javascript
// app/components/rental-listing.js
import Ember from 'ember';
export default Ember.Component.extend({
isWide: false
});
```
接下来就是事件的绑定。为了让用户可以切换`isWide`的值,我们需要在标签上绑定点击事件:
```html
View Larger
```
```javascript
// app/components/rental-listing.js
import Ember from 'ember';
export default Ember.Component.extend({
isWide: false,
actions: {
toggleImageSize() {
this.toggleProperty('isWide');
}
}
});
```
当点击a标签的时候,会给组件的js文件发送这个action,组件接受这个action,触发对应的事件(`toggleImageSize`),最终调用`toggleProperty`方法切换`isWide`属性。
最终当我们点击图片的时候,效果如图:
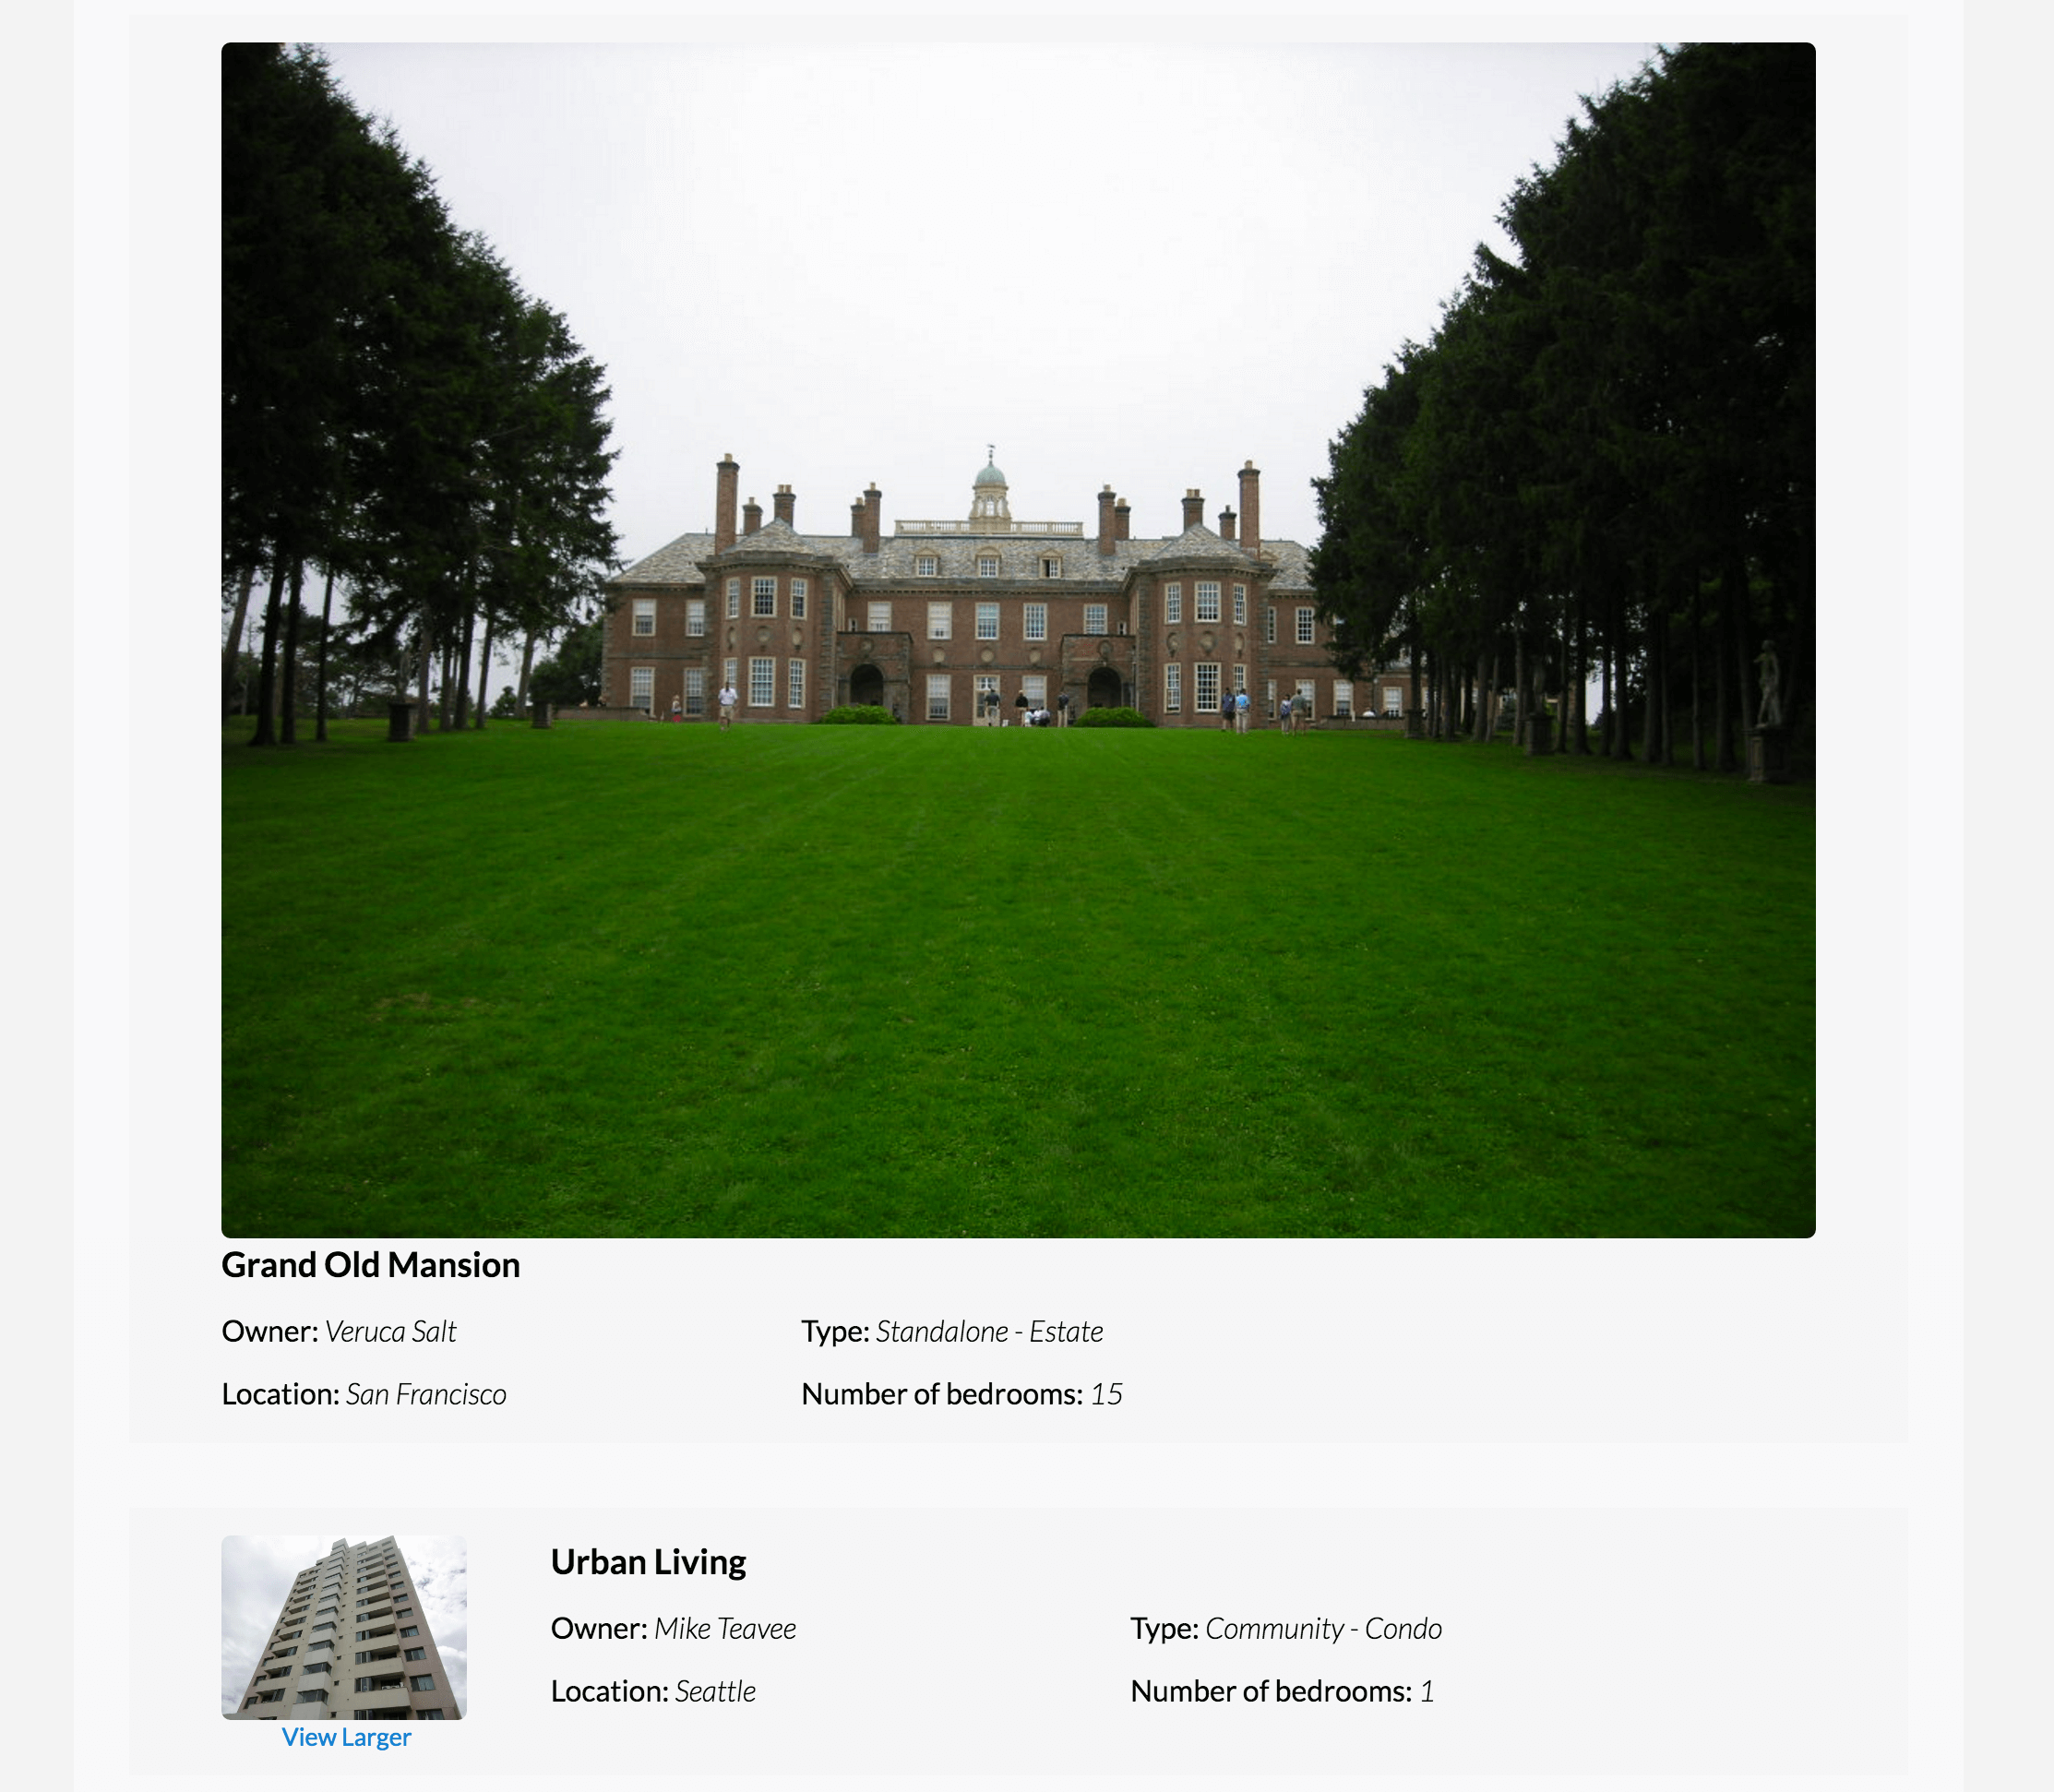
### 建立Handlebars Helper
目前为止,App渲染的数据都是从Ember Data里直接取出的。如果我们的应用增长的很大有很多数据,想要在渲染时改变一些数据的话,就要借助`Handlebars Helper`,在hbs文件中对数据进行修饰。
现在来建立一个Handlebars Helper,帮助用户快速的分辨列表中的各条目是"Standalone"还是"Community"。
```bash
$ ember g helper rental-property-type
# installing helper
# create app/helpers/rental-property-type.js
# installing helper-test
# create tests/unit/helpers/rental-property-type-test.js
```
初始化的helper,从hbs中引用并接受参数,然后返回这个参数。
需要注意的是,`rentalPropertyType`的参数`params`是个Array
```javascript
// app/helpers/rental-property-type.js
import Ember from 'ember';
export function rentalPropertyType(params/*, hash*/) {
return params;
}
export default Ember.Helper.helper(rentalPropertyType);
```
更新`rental-listing.hbs`文件:
```html
Type: {{rental-property-type rental.type}} - {{rental.type}}
```
> `rental-property-type`后可跟多个参数,因此实际传入的参数会被转换为一个Array
然后更新`rental-property-type.js`文件,让它对`rental.type`进行判断,返回不同的值:
```javascript
// app/helpers/rental-property-type.js
import Ember from 'ember';
const communityPropertyTypes = [
'Condo',
'Townhouse',
'Apartment'
];
export function rentalPropertyType([type]/*, hash*/) {
if (communityPropertyTypes.contains(type)) {
return 'Community';
}
return 'Standalone';
}
export default Ember.Helper.helper(rentalPropertyType);
```
因为`Handlebars Helper`会把参数转为Array,所以我们在`rentalPropertyType`中通过`[type]`来获取第一个参数,也就是我们传进去的`rental.type`。
刷新页面,可以看见列表的前两个是Standalone,其他的是Community
### 建立复杂组件
基础功能完成了,我们接下来给App增加筛选功能,为此需要新建一个名为`list-filter`的组件。
```bash
$ ember g component list-filter
# installing component
# create app/components/list-filter.js
# create app/templates/components/list-filter.hbs
# installing component-test
# create tests/integration/components/list-filter-test.js
```
像之前那样,测试先行,以便帮助我们更好的思考自己要做的事情:
- filter component应该能够渲染出一个筛选后的列表
- 当没有筛选的时候它应该渲染全部的列表
- 有的话则渲染根据城市筛选出的列表
在初步测试里,我们只要简单的验证所有的城市都被渲染并可得就可以了。因为使用了Ember Data作为数据储存,我们需要异步的拿取数据,并使用`wait`方法等待所有的异步完成。(异步返回promise):
```javascript
// tests/integration/components/list-filter-test.js
import { moduleForComponent, test } from 'ember-qunit';
import hbs from 'htmlbars-inline-precompile';
import wait from 'ember-test-helpers/wait';
import RSVP from 'rsvp';
moduleForComponent('list-filter', 'Integration | Component | filter listing', {
integration: true
});
const ITEMS = [{city: 'San Francisco'}, {city: 'Portland'}, {city: 'Seattle'}];
const FILTERED_ITEMS = [{city: 'San Francisco'}];
test('should initially load all listings', function (assert) {
// action异步获取数据并返回promise
this.on('filterByCity', (val) => {
if (val === '') {
return RSVP.resolve(ITEMS);
} else {
return RSVP.resolve(FILTERED_ITEMS);
}
});
// 你可以像hbs里那样使用你的组件,来模拟组件的渲染
this.render(hbs`
{{#list-filter filter=(action 'filterByCity') as |results|}}
{{#each results as |item|}}
-
{{item.city}}
{{/each}}
{{/list-filter}}
`);
// wait function会等待所有的promise和xhr请求结束,并返回一个promise
return wait().then(() => {
assert.equal(this.$('.city').length, 3);
assert.equal(this.$('.city').first().text().trim(), 'San Francisco');
});
});
```
下一步,我们要在输入框中输入一些文字,监听键盘keyup事件并调用filter action,而且期待列表被筛选后只有一个条目被render:
```javascript
// tests/integration/components/list-filter-test.js
// 忽略
test('should update with matching listings', function (assert) {
this.on('filterByCity', (val) => {
if (val === '') {
return RSVP.resolve(ITEMS);
} else {
return RSVP.resolve(FILTERED_ITEMS);
}
});
this.render(hbs`
{{#list-filter filter=(action 'filterByCity') as |results|}}
{{#each results as |item|}}
-
{{item.city}}
{{/each}}
{{/list-filter}}
`);
// keyup 事件应该触发列表被筛选的事件
this.$('.list-filter input').val('San').keyup();
return wait().then(() => {
assert.equal(this.$('.city').length, 1);
assert.equal(this.$('.city').text().trim(), 'San Francisco');
});
});
```
之后处理模板。我们在`app/templates/index.hbs`中要像测试里写的那样调用组价:
```html
{{#list-filter
filter=(action 'filterByCity')
as |rentals|}}
{{#each rentals as |rentalUnit|}}
- {{rental-listing rental=rentalUnit}}
{{/each}}
{{/list-filter}}
```
并且在`list-filter.hbs`中增加input:
```html
{{input value=value key-up=(action 'handleFilterEntry') class="light" placeholder="Filter By City"}}
{{yield results}}
```
在这里我们使用了`{{input}}` helper来render一个input,而input的`value`和`key-up`事件都由这个component对应的js提供:
```javascript
// app/components/list-filter.js
import Ember from 'ember';
export default Ember.Component.extend({
classNames: ['list-filter'],
value: '',
init() {
this._super(...arguments);
// 初始化
this.get('filter')('').then((results) => this.set('results', results));
},
actions: {
handleFilterEntry() {
let filterInputValue = this.get('value'); // input的value
let filterAction = this.get('filter'); // 在index.hbs中传入,为filterByCity
// 筛选过后把结果赋值给result
// filter=(action 'filterByCity') as |rentals| 即 result as |rentals|
filterAction(filterInputValue).then((filterResults) => this.set('results', filterResults));
}
}
});
```
现在我们需要一个controller,来运行筛选的方法:
```bash
$ ember g controller index
```
```javascript
// app/controllers/index.js
import Ember from 'ember';
export default Ember.Controller.extend({
actions: {
filterByCity(param) {
if (param !== '') {
return this.get('store').query('rental', { city: param });
} else {
return this.get('store').findAll('rental');
}
}
}
});
```
当用户在搜索框敲入字符的时候,就会调用filterByCity方法。该方法根据传入参数的不同调用不同的查询语句来达到搜索的效果。所以我们还需要修改之前的那个`mirage/config.js`文件:
```javascript
// mirage/config.js
export default function() {
this.get('/rentals', function(db, request) {
let rentals = [{
type: 'rentals',
id: 1,
attributes: {
title: 'Grand Old Mansion',
owner: 'Veruca Salt',
city: 'San Francisco',
type: 'Estate',
bedrooms: 15,
image: 'https://upload.wikimedia.org/wikipedia/commons/c/cb/Crane_estate_(5).jpg'
}
}, {
type: 'rentals',
id: 2,
attributes: {
title: 'Urban Living',
owner: 'Mike Teavee',
city: 'Seattle',
type: 'Condo',
bedrooms: 1,
image: 'https://upload.wikimedia.org/wikipedia/commons/0/0e/Alfonso_13_Highrise_Tegucigalpa.jpg'
}
}, {
type: 'rentals',
id: 3,
attributes: {
title: 'Downtown Charm',
owner: 'Violet Beauregarde',
city: 'Portland',
type: 'Apartment',
bedrooms: 3,
image: 'https://upload.wikimedia.org/wikipedia/commons/f/f7/Wheeldon_Apartment_Building_-_Portland_Oregon.jpg'
}
}];
if(request.queryParams.city !== undefined) {
let filteredRentals = rentals.filter(function(i) {
return i.attributes.city.toLowerCase().indexOf(request.queryParams.city.toLowerCase()) !== -1;
});
return { data: filteredRentals };
} else {
return { data: rentals };
}
});
}
```
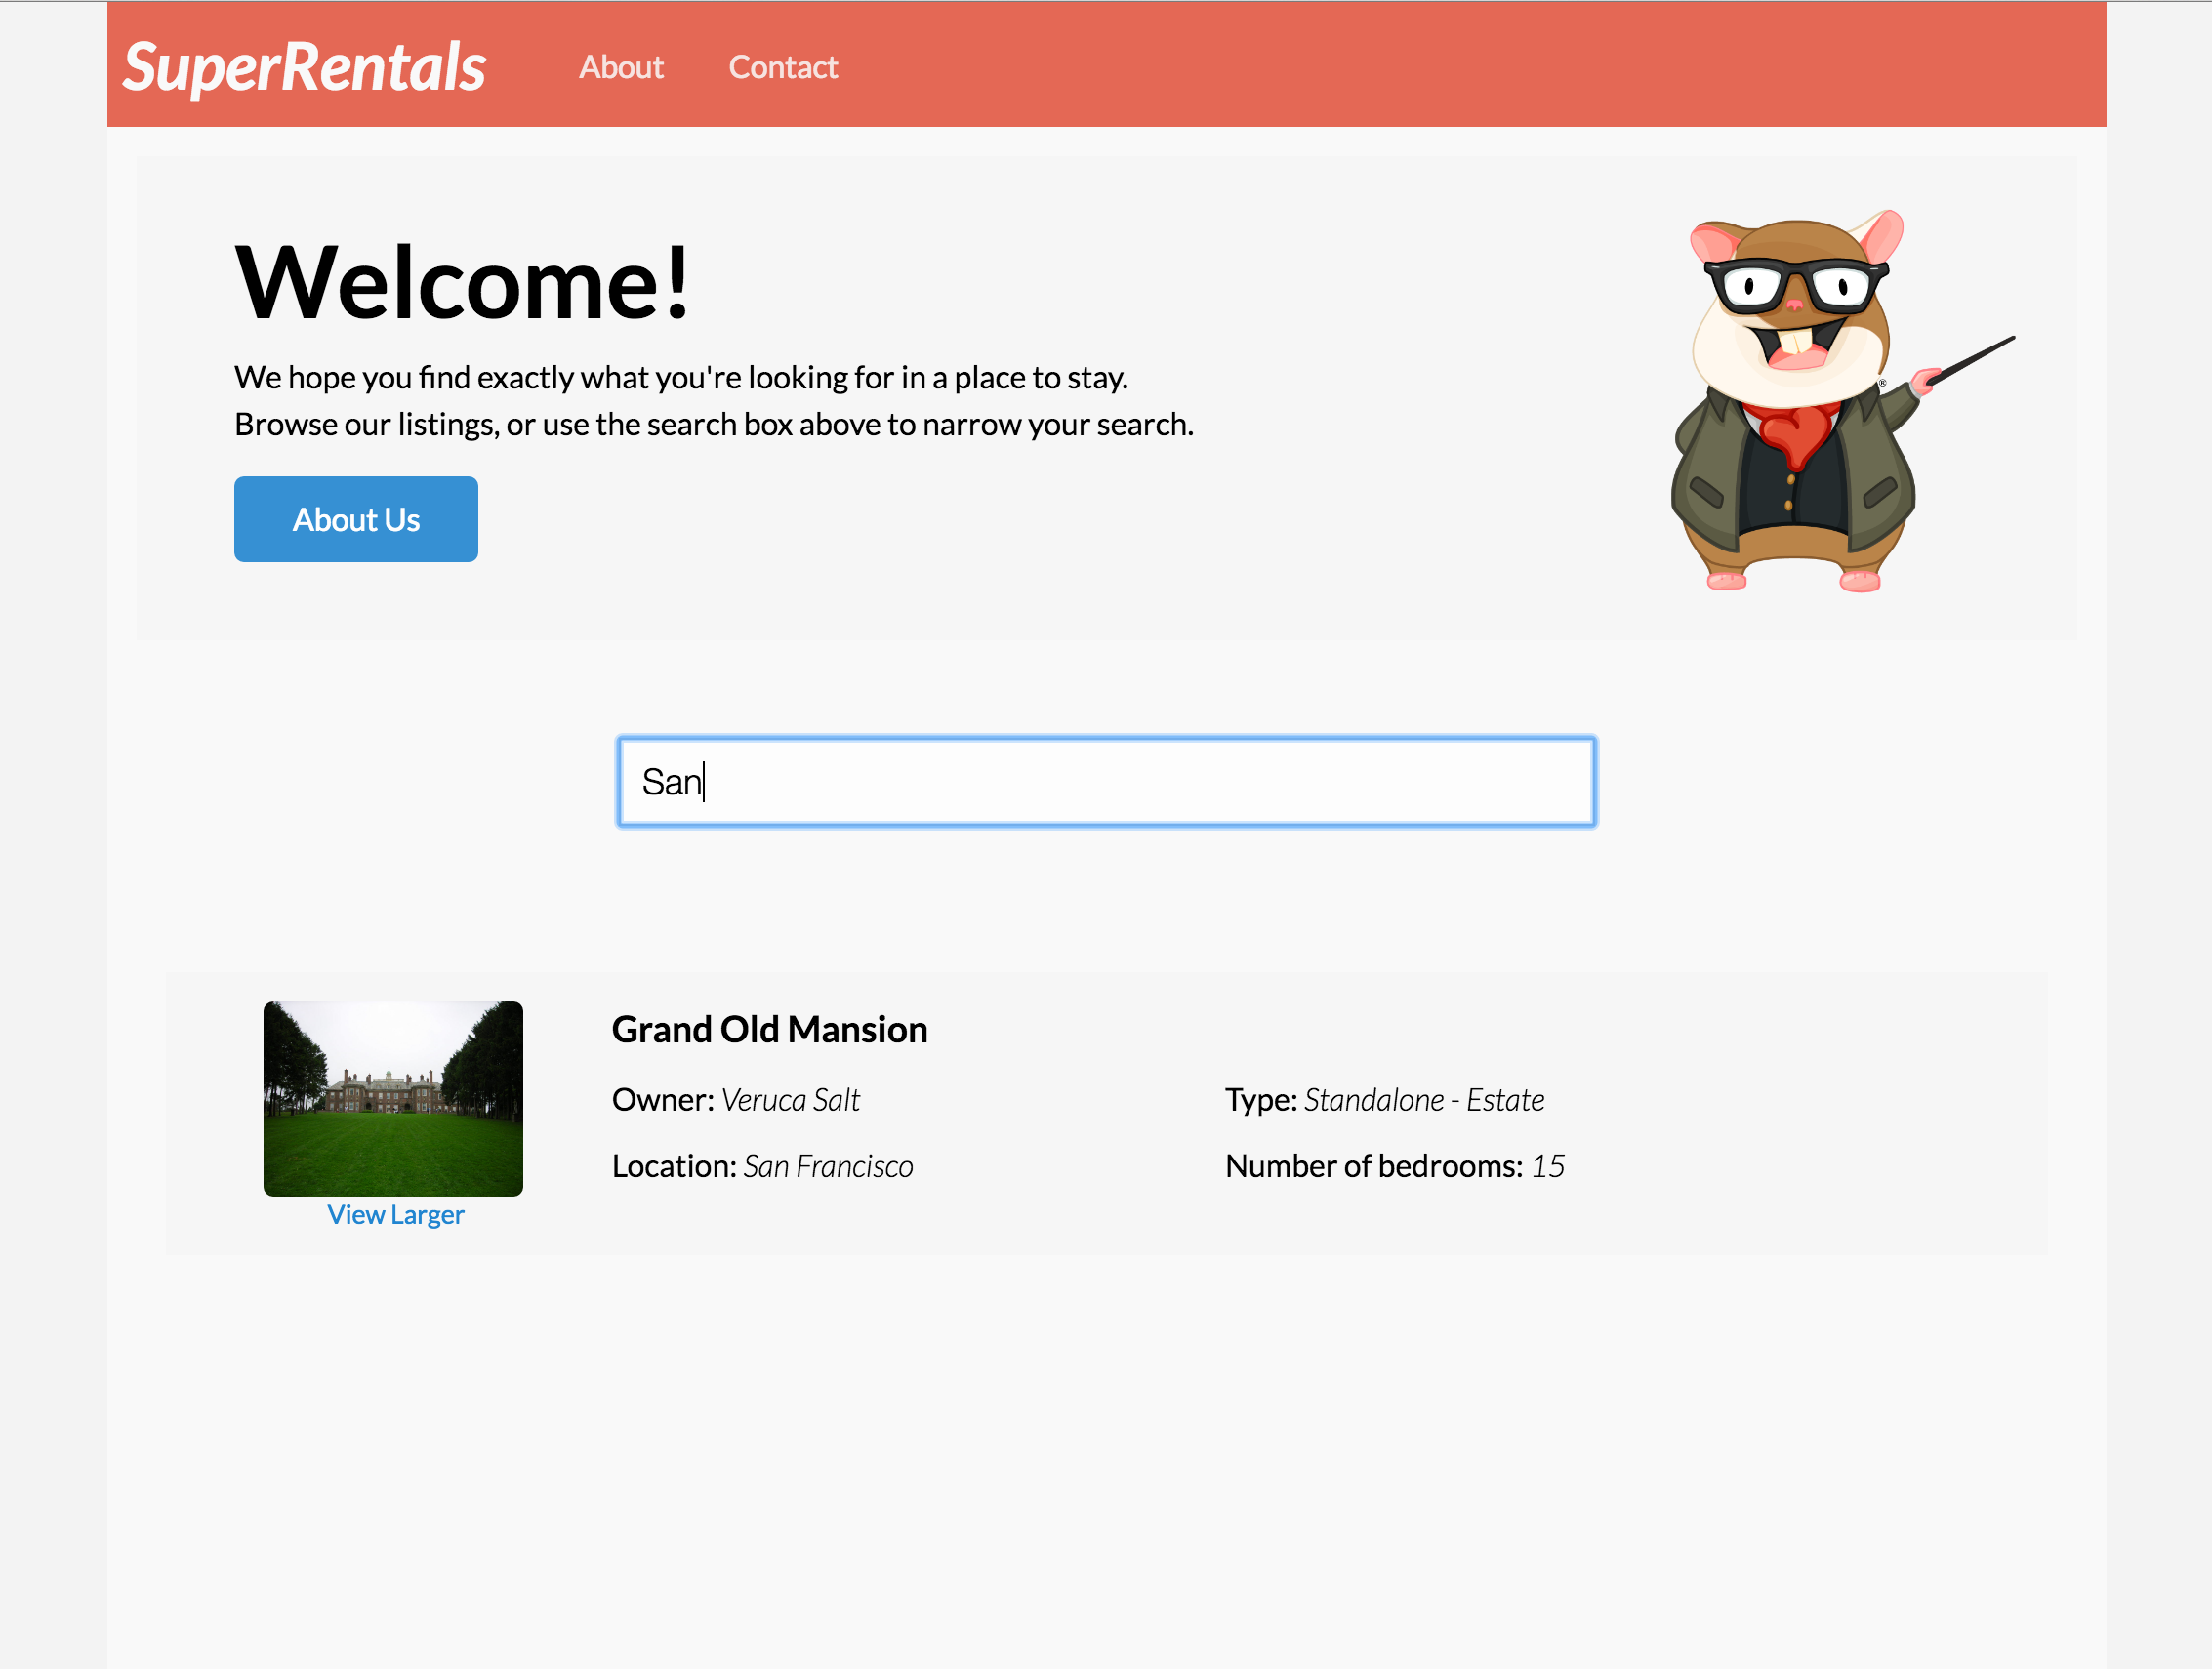
完成以后如下图所示:
### Services and Utilities
### 部署
打包代码:
```bash
$ ember build
# 建议以生产环境运行:
$ ember build --environment=development
```
会将生成好的代码全部打包在`dist/`文件夹下,之后怎么用就是自己的事喽