id: 79sFHo6ONB1S25cTN7emXmOibQ2HNWb2G9X3Xn2x
createdBy: edrys-labs
dateCreated: 21.11.2024
name: Arduino - Blink (BlockDuino)
meta:
logo: >-
https://raw.githubusercontent.com/edrys-labs/lab-arduino-basics/main/media/blockduino.jpg
description: >-
Discover the exciting world of electronics with our Arduino blink tutorial!
This beginner-friendly guide is designed for 5th graders and above,
introducing students to the basics of programming and physical computing
using an Arduino board. Follow step-by-step instructions to create your
first LED blink project, learn to communicate with your computer using
serial input and output, and solve a coding challenge to reinforce your
understanding. Start your journey into the fascinating realm of coding and
electronics today!
selfAssign: true
defaultNumberOfRooms: 0
id: 79sFHo6ONB1S25cTN7emXmOibQ2HNWb2G9X3Xn2x
members:
teacher: []
student: []
modules:
- url: https://edrys-labs.github.io/module-markdown-it/index.html
config:
content: >
### Introduction to Arduino and Physical Computing
**What is Arduino?**
Arduino is a popular open-source platform used for building electronics
projects. It consists of both a physical programmable circuit board (often
referred to as a microcontroller) and a piece of software, or IDE
(Integrated Development Environment), which runs on your computer. You use
this software to write and upload computer code to the physical board.
**What is Physical Computing?**
Physical computing involves designing and building interactive physical
systems through the use of software and hardware that can sense and
respond to the world around them. With Arduino, you can read inputs –
light on a sensor, a finger on a button, or a Twitter message – and turn
it into an output – activating a motor, turning on an LED, publishing
something online. You can tell your board what to do by sending a set of
instructions to the microcontroller on the board.
studentConfig:
content: ''
teacherConfig:
content: >-
## Welcome for Teachers
> This can be used as a base laboratory to create further and more
elaborate labs with [edrys-Lite](https://edrys-labs.github.io).
> You are currently in the Lobby. If there is a station available you can
switch to it and try out the terminal.
> Otherwise, if you are in teacher-mode you can share a lab by clicking
onto `setting` >> `station` and then by clicking the presented link,
> which is the same as the current link, but only with the word `station`
instead of `classroom`.
stationConfig:
content: ''
showInCustom: lobby
width: full
height: huge
- url: https://edrys-labs.github.io/module-blockly-duino-v2/index.html
config:
runCommand: execute
board: arduino_mega
studentConfig: ''
teacherConfig: ''
stationConfig: ''
showInCustom: station
width: full
height: huge
- url: https://edrys-labs.github.io/module-markdown-it/index.html
config:
content: >-
# Arduino Tutorial
## Step 1: Your First Project - The Blinking LED
**Objective**: To make an LED blink on and off every second.
1. **Program Your Arduino**:
- Open your Arduino IDE.
- Modify your Blockduino, so that it looks like the following code:
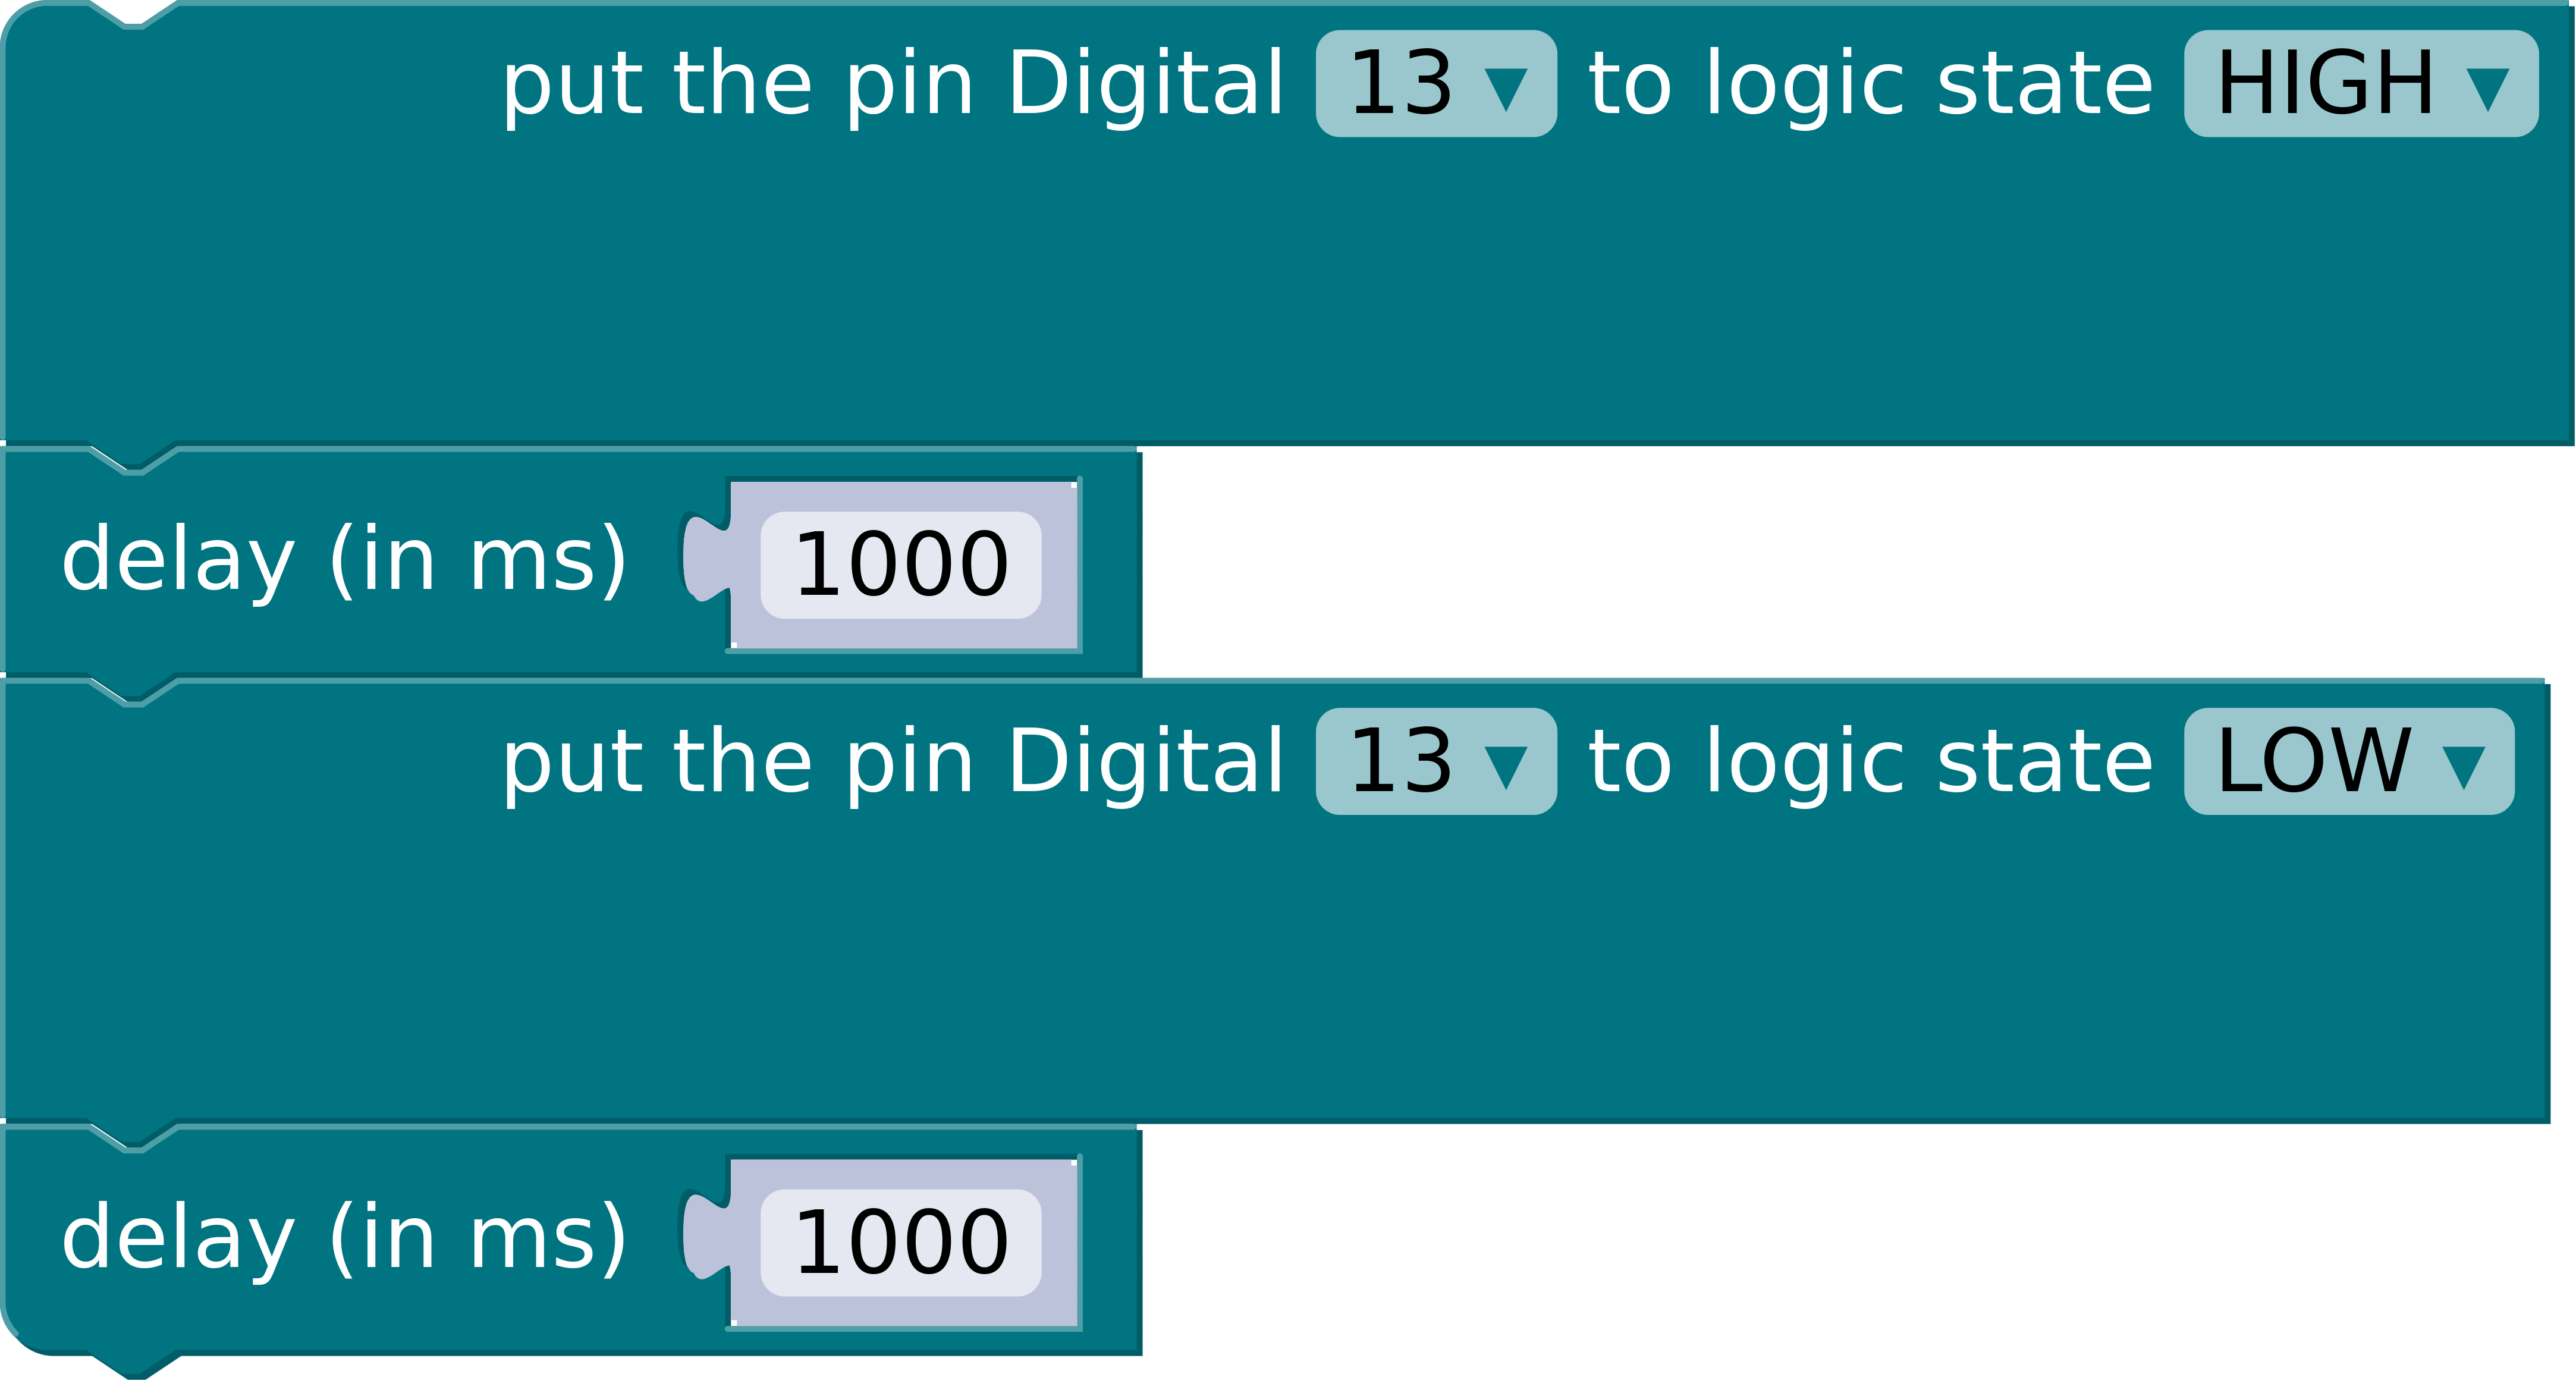
- Click on the "Run Code" button to send your code to the Arduino.
2. **See the Magic**: Once uploaded, the LED on your breadboard should
start blinking.
## Step 2: Adding Serial Communication
**Objective**: To control the LED blinking with a command from your
computer.
1. **Modify Your Code**:
- Add the following to enable serial communication:

2. **Test Your Setup**:
- Open the Serial Monitor in the Arduino IDE.
- Type `1` to turn the LED on and `0` to turn it off.
### Wrap-Up
Congratulations! You have successfully completed the Arduino blink
tutorial, mastered basic serial communication. Now, you're ready to
explore more complex projects and dive deeper into the world of physical
computing!
studentConfig:
content: ''
teacherConfig:
content: ''
stationConfig:
content: >-
## Instructions for Station-Sharing
You are currently responsible for sharing a station of this lab.
You have multiple options to share a or your terminal.
Therefor we use the pyxtermjs - terminal server from:
https://github.com/edrys-labs/module-pyxtermjs
### Using Docker
If you haven't done it so far, install
[docker](https://docs.docker.com/engine/install/).
Or, follow one of the instruction-videos for your system:
Install Docker on LinuxInstall Docker on WindowsInstall Docker on MacOS
Then the only thing that is required is to run the following command:
```bash
docker run -it -p 5000:5000
--device=/dev/ttyACM0:/dev/ttyACM0
edrys-labs/pyxterm-server:latest
```
This will download the pyxtermjs terminal-server from docker-hub and run
it in a secure environment.
### Using Python
You can also share your terminal directly via Python, visit the following
project
https://github.com/edrys-labs/module-pyxtermjs/tree/feat/trzsz
... the easiest way is to perform the following steps:
``` bash
# 1. clone the repository or download the folder manually
git clone https://github.com/edrys-labs/module-pyxtermjs/tree/feat/trzsz
# 2. install all required sources
pip3 install -r requirements.txt
# 3. run the terminal-server
python3 -m pyxtermjs --cors True --command bash --port 5000
```
showInCustom: station
width: full
height: huge
- url: https://edrys-labs.github.io/module-station-stream/index.html
stationConfig:
video: true
audio: false
showInCustom: station
width: half
height: medium
- url: https://module-pyxtermjs.netlify.app/
stationConfig:
server: http://localhost:5000/pty
execute: execute
script: >
echo $CODE | base64 --decode > Blink.ino
arduino-cli sketch new Blink
olddir=$(pwd)
mv Blink.ino Blink
cd Blink
arduino-cli board attach -p /dev/ttyACM0 -b arduino:avr:uno
cd $olddir
arduino-cli compile Blink && arduino-cli upload -p /dev/ttyACM0 Blink &&
arduino-cli monitor -p /dev/ttyACM0
enable:
teacher: true
student: true
showInCustom: station
width: half
height: medium