
ImmiBridge



Back up your Apple Photos library to a folder organized by capture date, or directly to an [Immich](https://immich.app) server. Exports originals (including Live Photo paired videos) and optionally rendered edits.
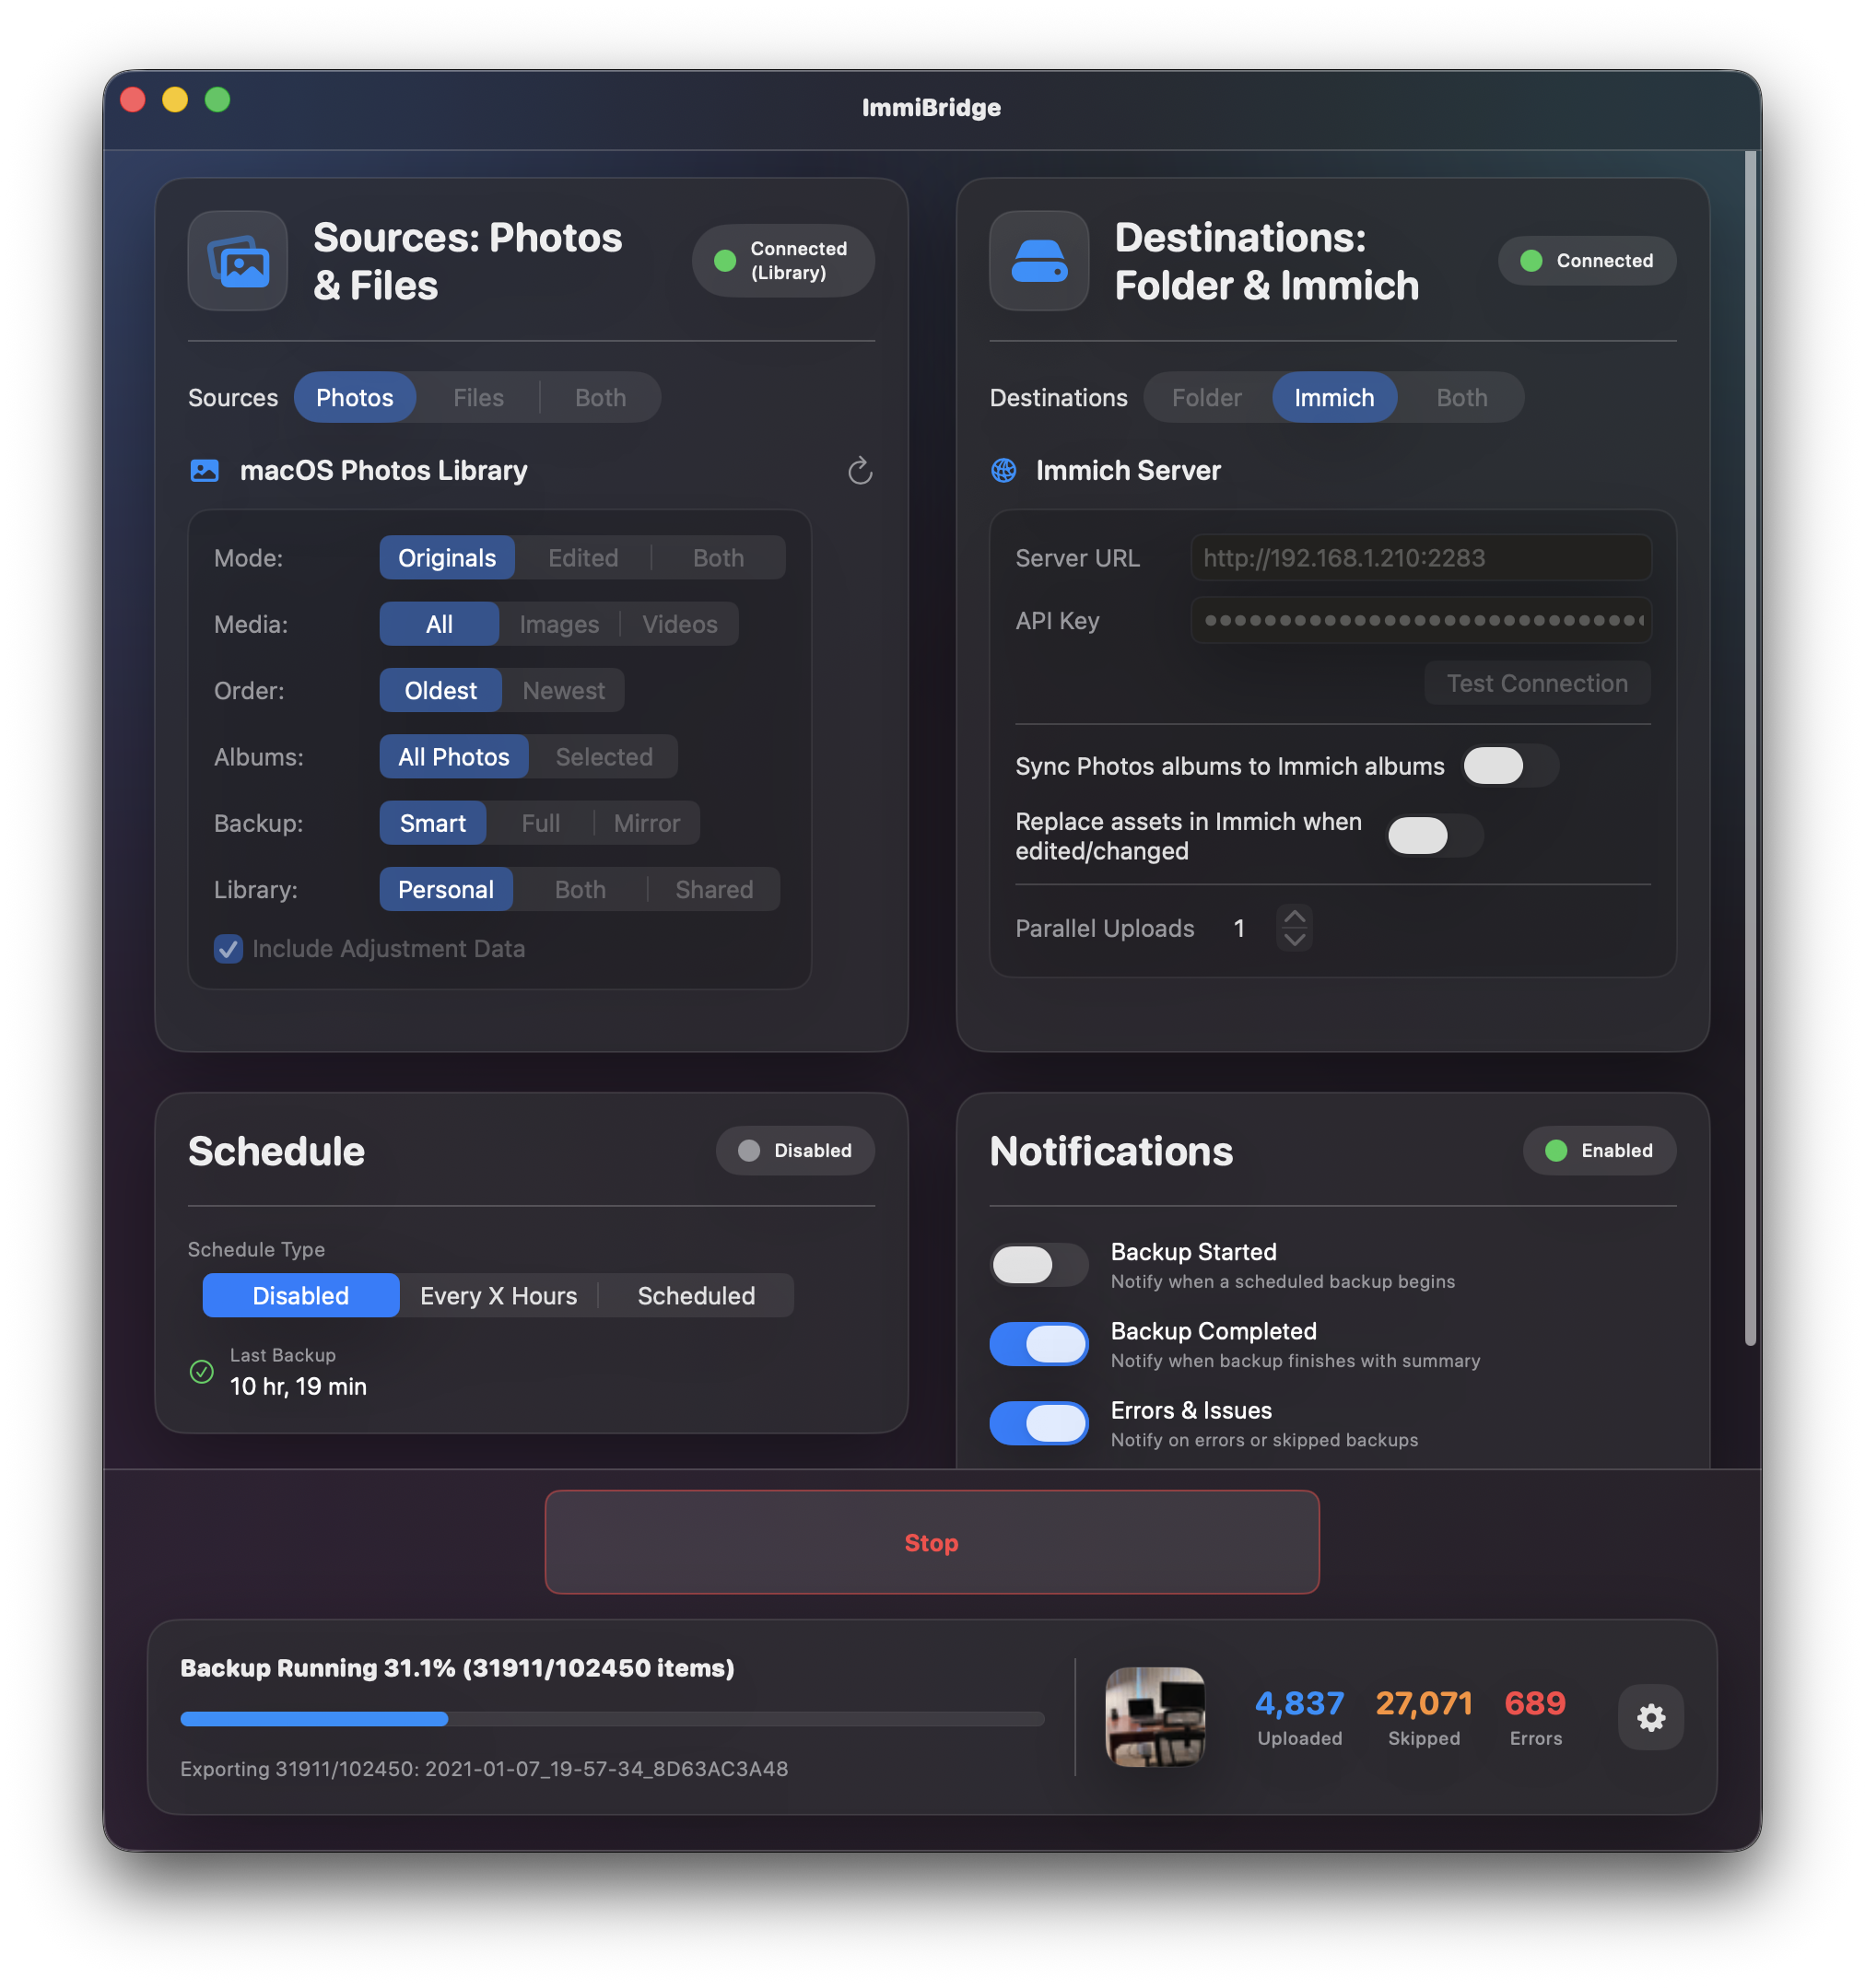
## Features
- Export photos to local folders organized by date
- Upload directly to Immich photo servers
- Incremental, full, or mirror backup modes
- Filter by albums, media type, or date
- Pause and resume backups
- Scheduled automatic backups
- Menu bar integration
- iCloud photo download with progress tracking
- Metadata-only sync (update metadata without re-uploading files)
- Automatic updates via Sparkle
## Installation
### Download (Recommended)
1. Download `ImmiBridge-x.x.x.dmg` from the [Releases](../../releases) page
2. Open the DMG and drag ImmiBridge to your Applications folder
3. Launch ImmiBridge from Applications
4. Grant Photos access when prompted
### Build from Source
See [CONTRIBUTING.md](CONTRIBUTING.md) for detailed build instructions.
**Quick start:**
```bash
# Clone the repository
git clone https://github.com/emerysilb/immibridge.git
cd immibridge
# Open in Xcode
open ImmiBridge/ImmiBridge.xcodeproj
```
### Building Signed Releases
To build a notarized DMG for distribution, you need an Apple Developer ID certificate ($99/year). See [CONTRIBUTING.md](CONTRIBUTING.md#creating-a-signed-release) for details.
## Usage
Launch ImmiBridge and configure:
1. **Source**: Choose Photos library and/or custom folders
2. **Destination**: Local folder and/or Immich server
3. **Options**: Backup mode, filters, scheduling
### Backup Modes
| Mode | Exports | Uses Manifest | Deletes from Destination |
|------|---------|---------------|--------------------------|
| **Smart Incremental** | Only new/changed files | Yes | No |
| **Full** | Everything, every time | No | No |
| **Mirror** | Only new/changed files | Yes | Yes (orphaned files) |
### Immich Integration
To connect to your Immich server:
1. Go to the **Destination** tab
2. Enter your Immich server URL (e.g., `http://192.168.1.100:2283`)
3. Enter your API key (generate one in Immich under User Settings → API Keys)
4. Click **Test Connection**
**Features:**
- Uses SHA1 checksums to avoid duplicate uploads
- Live Photos are uploaded as paired video + still image
- Supports album syncing to Immich
## Permissions
On first run, macOS will prompt for:
- **Photos access**: Required to read your photo library
- **Local network access**: Required if your Immich server is on your local network
If you deny a permission, re-enable it in **System Settings → Privacy & Security**.
## Contributing
Contributions are welcome! See [CONTRIBUTING.md](CONTRIBUTING.md) for guidelines.
## License
MIT License - see [LICENSE](LICENSE) for details.