#  Bit:busy
[](https://lopaka.app/editor/11044/) 
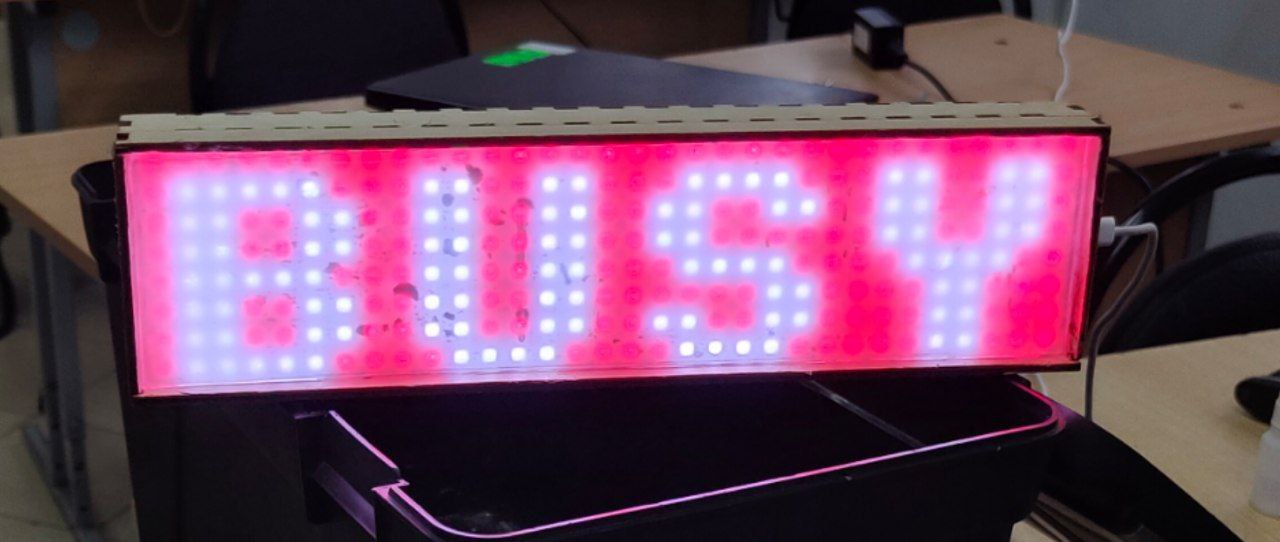
Bitbusy is an LED bar based on an ESP32 microcontroller and WS2812 LEDs that indicates your work status, so your colleagues won't distract you.
### Build and configure
Configure your device in ```src/defines.h```. Then, use ```./build-page.sh``` to build the webpage. Then build and upload the filesystem image in PlatformIO. And only then upload the firmware.
To build the hardware, just connect your LED matrix to a desired port and set it in the defines. You can also use my blueprint from ```blueprint/box.dxf```.
Bit:busy
[](https://lopaka.app/editor/11044/) 
Bitbusy is an LED bar based on an ESP32 microcontroller and WS2812 LEDs that indicates your work status, so your colleagues won't distract you.
### Build and configure
Configure your device in ```src/defines.h```. Then, use ```./build-page.sh``` to build the webpage. Then build and upload the filesystem image in PlatformIO. And only then upload the firmware.
To build the hardware, just connect your LED matrix to a desired port and set it in the defines. You can also use my blueprint from ```blueprint/box.dxf```.
 ### Technologies
Project written in C++ using PlatformIO and Arduino framework. Images and animations made in [lopaka](https://lopaka.app/editor/11044/). Uses ESPAsyncWebServer and ArduinoJSON for web stuff and Adafruit GFX for graphics. Webpage written in Svelte and Typescript.
---
## Complete Build Guide
### Prerequisites
#### Software Requirements
- **PlatformIO Core** (for ESP32 development)
```bash
# Install via pip
pip install platformio
# Or via Homebrew (macOS)
brew install platformio
```
- **Node.js** (v18 or later) and npm
- **Git** (for cloning the repository)
#### Hardware Requirements
- **ESP32 Based board** (Seeed XIAO ESP32C3 recommended)
- **WS2812 LED Matrix** (32x8 pixels)
- **USB-C cable** (for programming and power)
- **Laser cutter or a 3D printer** (optional, for enclosure)
### Step 1: Hardware Assembly
#### Basic Connection
1. Connect the LED matrix to the ESP32:
- **VCC** → **3.3V** (or 5V if your matrix supports it)
- **GND** → **GND**
- **DIN** → **GPIO 2** (configurable in `src/defines.h`)
#### Enclosure (Optional)
- Use the provided blueprint: `blueprint/box.dxf`
- Cut the enclosure parts using a laser cutter
- Mount the ESP32 and LED matrix inside
- Ensure proper ventilation for the ESP32
### Step 2: Software Setup
#### Clone and Configure
```bash
# Clone the repository
git clone
cd bitbusy
# Configure your device settings
# Edit src/defines.h with your WiFi credentials and preferences:
```
**Edit `src/defines.h`:**
```cpp
#define BRIGHTNESS 20 // LED brightness (0-255)
#define PIN 2 // GPIO pin for LED matrix
#define MATRIX_WIDTH 32 // LED matrix width
#define MATRIX_HEIGHT 8 // LED matrix height
#define SSID "YourWiFiName" // Your WiFi network name
#define PASSWORD "YourPassword" // Your WiFi password
#define HOSTNAME "bitbusy" // Device hostname
#define OTA_PASSWORD "bitbusy" // OTA update password
```
### Step 3: Build and Deploy
#### Build the Web Interface
```bash
# Build the Svelte frontend
./build_page.sh
```
#### Upload to ESP32
```bash
# Build and upload the firmware
pio run -e --target upload
# Upload the filesystem (web interface)
pio run -e --target uploadfs
```
### Step 4: First Boot and Configuration
1. **Power on** the ESP32
2. **Connect to WiFi**: The device will automatically connect using your configured credentials
3. **Access the web interface**: Open a browser and navigate to `http://bitbusy.local` or the IP address shown in the serial monitor
### Step 5: Usage
#### Web Interface
- **Binary Mode**: Simple busy/free toggle
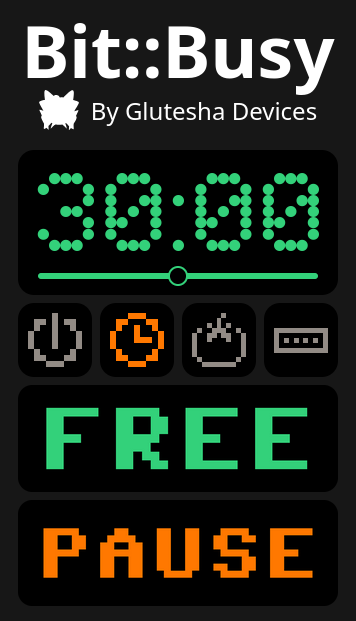
- **Timer Mode**: Set a countdown timer (displays "BUSY" and time left until timer expires)
- **Pomodoro Mode**: Work timer with automatic breaks (timer/5)
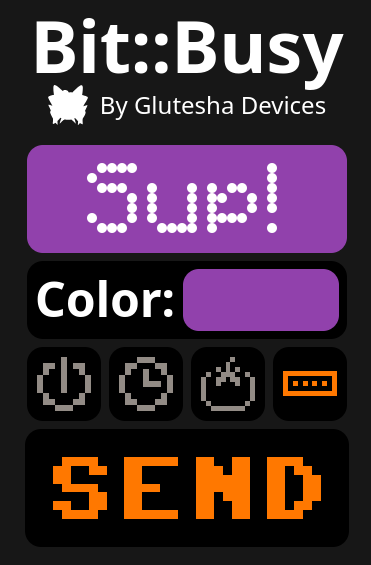
- **Running String**: Custom scrolling text with background color
### Technologies
Project written in C++ using PlatformIO and Arduino framework. Images and animations made in [lopaka](https://lopaka.app/editor/11044/). Uses ESPAsyncWebServer and ArduinoJSON for web stuff and Adafruit GFX for graphics. Webpage written in Svelte and Typescript.
---
## Complete Build Guide
### Prerequisites
#### Software Requirements
- **PlatformIO Core** (for ESP32 development)
```bash
# Install via pip
pip install platformio
# Or via Homebrew (macOS)
brew install platformio
```
- **Node.js** (v18 or later) and npm
- **Git** (for cloning the repository)
#### Hardware Requirements
- **ESP32 Based board** (Seeed XIAO ESP32C3 recommended)
- **WS2812 LED Matrix** (32x8 pixels)
- **USB-C cable** (for programming and power)
- **Laser cutter or a 3D printer** (optional, for enclosure)
### Step 1: Hardware Assembly
#### Basic Connection
1. Connect the LED matrix to the ESP32:
- **VCC** → **3.3V** (or 5V if your matrix supports it)
- **GND** → **GND**
- **DIN** → **GPIO 2** (configurable in `src/defines.h`)
#### Enclosure (Optional)
- Use the provided blueprint: `blueprint/box.dxf`
- Cut the enclosure parts using a laser cutter
- Mount the ESP32 and LED matrix inside
- Ensure proper ventilation for the ESP32
### Step 2: Software Setup
#### Clone and Configure
```bash
# Clone the repository
git clone
cd bitbusy
# Configure your device settings
# Edit src/defines.h with your WiFi credentials and preferences:
```
**Edit `src/defines.h`:**
```cpp
#define BRIGHTNESS 20 // LED brightness (0-255)
#define PIN 2 // GPIO pin for LED matrix
#define MATRIX_WIDTH 32 // LED matrix width
#define MATRIX_HEIGHT 8 // LED matrix height
#define SSID "YourWiFiName" // Your WiFi network name
#define PASSWORD "YourPassword" // Your WiFi password
#define HOSTNAME "bitbusy" // Device hostname
#define OTA_PASSWORD "bitbusy" // OTA update password
```
### Step 3: Build and Deploy
#### Build the Web Interface
```bash
# Build the Svelte frontend
./build_page.sh
```
#### Upload to ESP32
```bash
# Build and upload the firmware
pio run -e --target upload
# Upload the filesystem (web interface)
pio run -e --target uploadfs
```
### Step 4: First Boot and Configuration
1. **Power on** the ESP32
2. **Connect to WiFi**: The device will automatically connect using your configured credentials
3. **Access the web interface**: Open a browser and navigate to `http://bitbusy.local` or the IP address shown in the serial monitor
### Step 5: Usage
#### Web Interface
- **Binary Mode**: Simple busy/free toggle
- **Timer Mode**: Set a countdown timer (displays "BUSY" and time left until timer expires)
- **Pomodoro Mode**: Work timer with automatic breaks (timer/5)
- **Running String**: Custom scrolling text with background color

 #### OTA Updates
The device supports Over-The-Air updates. To update firmware:
```bash
pio run -e --target upload --upload-port
```
You can also change the default OTA password in configuration.
### Troubleshooting
#### Common Issues
1. **LED Matrix Not Working**:
- Check wiring connections
- Verify PIN number in `src/defines.h`
- Ensure proper power supply (3.3V or 5V)
2. **WiFi Connection Issues**:
- Verify SSID and password in `src/defines.h`
- Check WiFi signal strength
- Monitor serial output for connection status
3. **Web Interface Not Loading**:
- Ensure filesystem was uploaded: `pio run --target uploadfs`
- Check if device is connected to WiFi
- Try accessing via IP address instead of hostname
4. **Build Errors**:
- Ensure PlatformIO is properly installed
- Check that all dependencies are installed
- Verify Node.js version (v18+)
#### Development Commands
```bash
# Build firmware only
pio run -e
# Monitor serial output
pio device monitor
# Clean build
pio run -e --target clean
# Build frontend only
cd front/bitbusy && npm run build
```
### Customization
#### Adding New Modes
1. Create new screen functions in `src/screens/screens.cpp`
2. Add state handling in `src/state/state.cpp`
3. Update web interface in `front/bitbusy/src/`
#### Changing LED Matrix Size
1. Update `MATRIX_WIDTH` and `MATRIX_HEIGHT` in `src/defines.h`
2. Adjust screen layouts in `src/screens/screens.cpp`
3. Rebuild and upload
#### Modifying Colors and Animations
- Edit color definitions in `src/colors/colors.h`
- Modify animation patterns in `src/screens/screens.cpp`
- Create custom images using https://lopaka.app
#### OTA Updates
The device supports Over-The-Air updates. To update firmware:
```bash
pio run -e --target upload --upload-port
```
You can also change the default OTA password in configuration.
### Troubleshooting
#### Common Issues
1. **LED Matrix Not Working**:
- Check wiring connections
- Verify PIN number in `src/defines.h`
- Ensure proper power supply (3.3V or 5V)
2. **WiFi Connection Issues**:
- Verify SSID and password in `src/defines.h`
- Check WiFi signal strength
- Monitor serial output for connection status
3. **Web Interface Not Loading**:
- Ensure filesystem was uploaded: `pio run --target uploadfs`
- Check if device is connected to WiFi
- Try accessing via IP address instead of hostname
4. **Build Errors**:
- Ensure PlatformIO is properly installed
- Check that all dependencies are installed
- Verify Node.js version (v18+)
#### Development Commands
```bash
# Build firmware only
pio run -e
# Monitor serial output
pio device monitor
# Clean build
pio run -e --target clean
# Build frontend only
cd front/bitbusy && npm run build
```
### Customization
#### Adding New Modes
1. Create new screen functions in `src/screens/screens.cpp`
2. Add state handling in `src/state/state.cpp`
3. Update web interface in `front/bitbusy/src/`
#### Changing LED Matrix Size
1. Update `MATRIX_WIDTH` and `MATRIX_HEIGHT` in `src/defines.h`
2. Adjust screen layouts in `src/screens/screens.cpp`
3. Rebuild and upload
#### Modifying Colors and Animations
- Edit color definitions in `src/colors/colors.h`
- Modify animation patterns in `src/screens/screens.cpp`
- Create custom images using https://lopaka.app