[](https://arxiv.org/abs/2109.13731) [](https://colab.research.google.com/drive/1HYYUepIsl2aXsdET6P_AmNVXuWP1MCMf?usp=sharing) [](https://badge.fury.io/py/voicefixer) [](https://haoheliu.github.io/demopage-voicefixer)[](https://huggingface.co/spaces/akhaliq/VoiceFixer)
- [:speaking_head: :wrench: VoiceFixer](#speaking_head-wrench-voicefixer)
- [Demo](#demo)
- [Usage](#usage)
- [Command line](#command-line)
- [Desktop App](#desktop-app)
- [Python Examples](#python-examples)
- [Docker](#docker)
- [Others Features](#others-features)
- [Materials](#materials)
- [Change log](#change-log)
# :speaking_head: :wrench: VoiceFixer
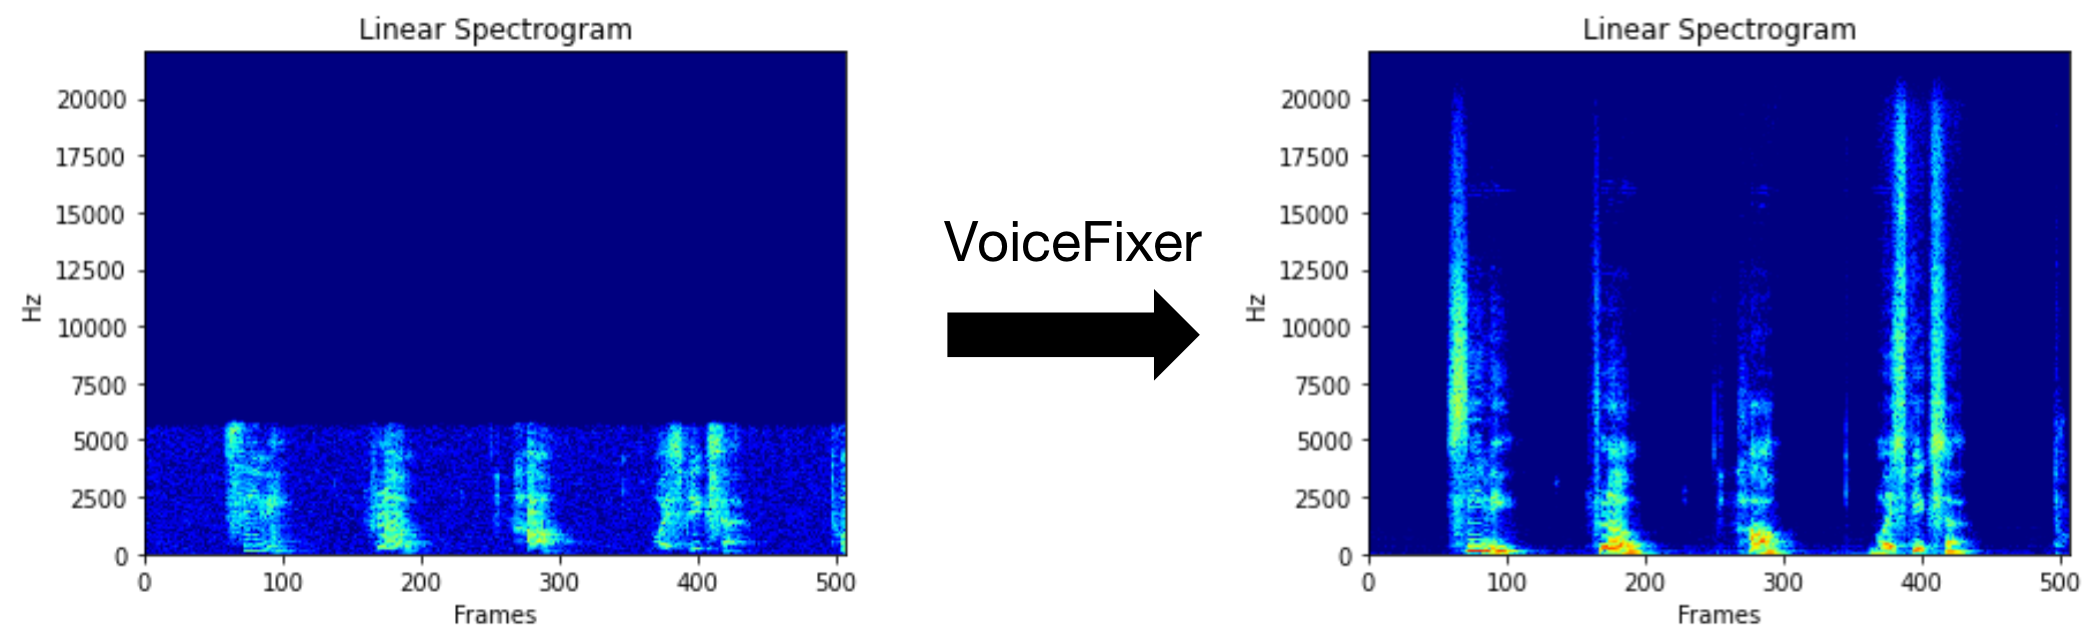
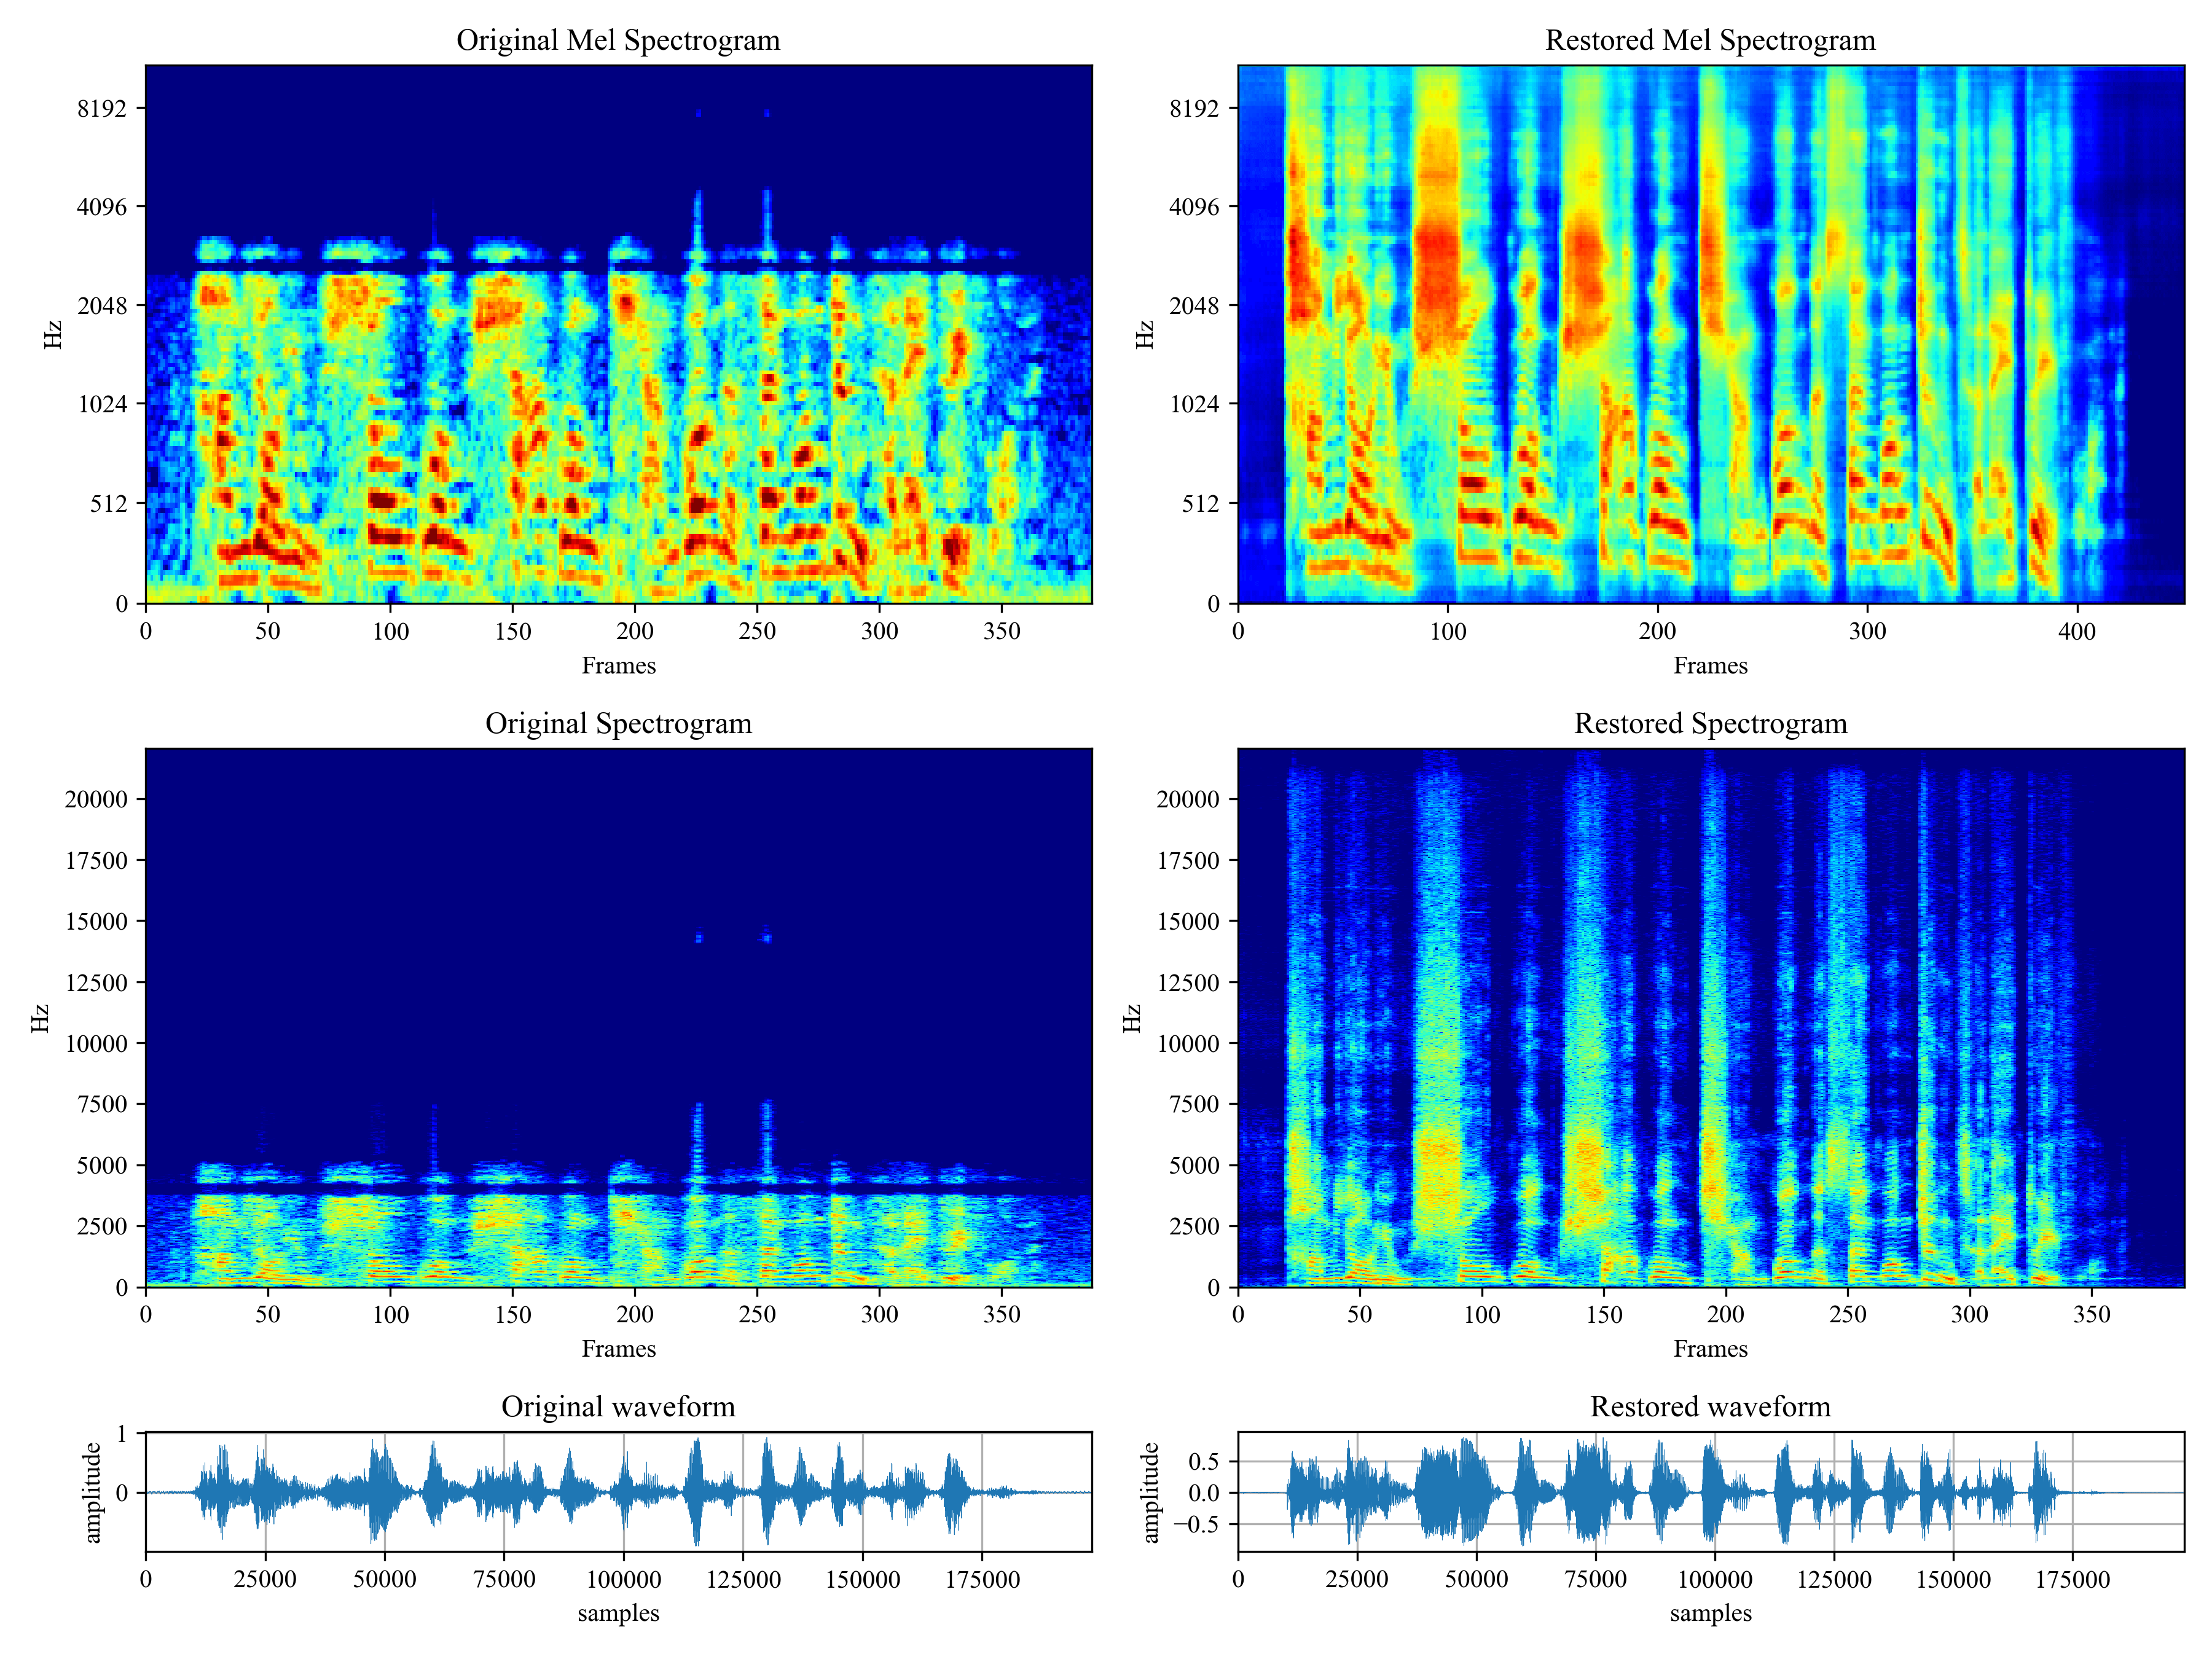
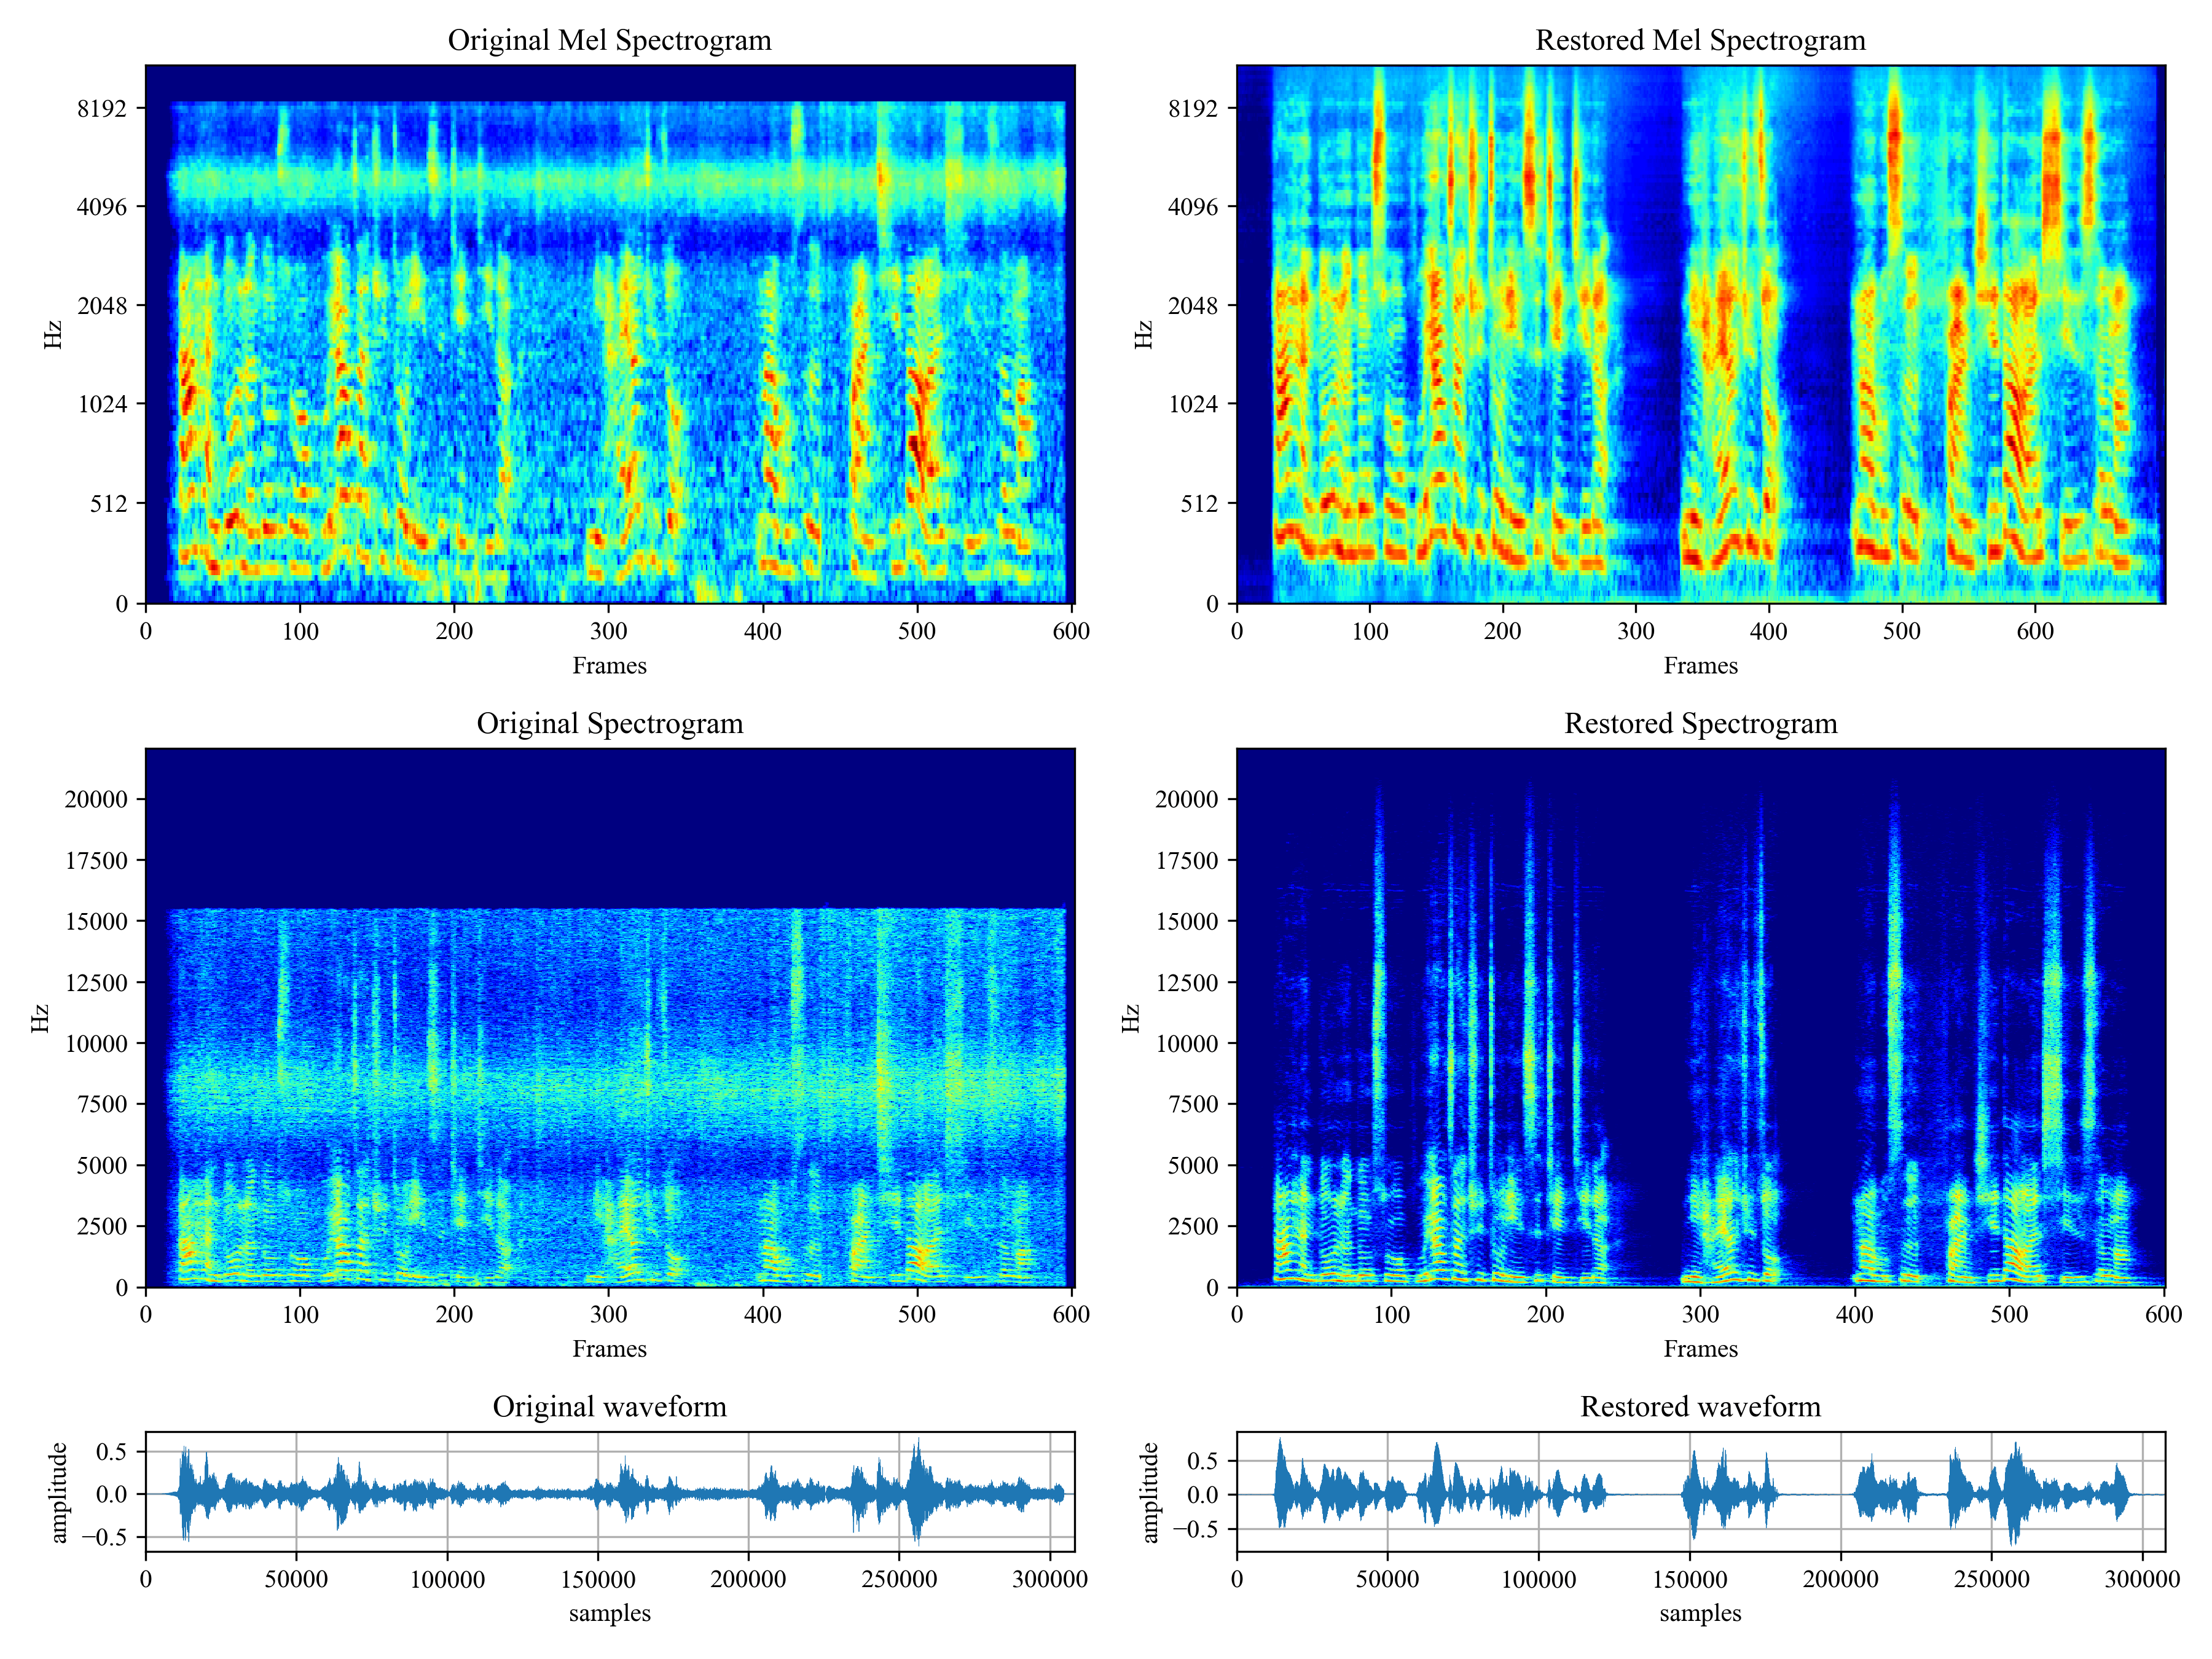
*Voicefixer* aims to restore human speech regardless how serious its degraded. It can handle noise, reveberation, low resolution (2kHz~44.1kHz) and clipping (0.1-1.0 threshold) effect within one model.
This package provides:
- A pretrained *Voicefixer*, which is build based on neural vocoder.
- A pretrained 44.1k universal speaker-independent neural vocoder.
- If you found this repo helpful, please consider citing or [](https://www.buymeacoffee.com/haoheliuP)
```bib
@misc{liu2021voicefixer,
title={VoiceFixer: Toward General Speech Restoration With Neural Vocoder},
author={Haohe Liu and Qiuqiang Kong and Qiao Tian and Yan Zhao and DeLiang Wang and Chuanzeng Huang and Yuxuan Wang},
year={2021},
eprint={2109.13731},
archivePrefix={arXiv},
primaryClass={cs.SD}
}
```
## Demo
Please visit [demo page](https://haoheliu.github.io/demopage-voicefixer/) to view what voicefixer can do.
## Usage
### Run Modes
| Mode | Description |
| ---- | ----------- |
| `0` | Original Model (suggested by default) |
| `1` | Add preprocessing module (remove higher frequency) |
| `2` | Train mode (might work sometimes on seriously degraded real speech) |
| `all` | Run all modes - will output 1 wav file for each supported mode. |
### Command line
First, install voicefixer via pip:
```shell
pip install git+https://github.com/haoheliu/voicefixer.git
```
Process a file:
```shell
# Specify the input .wav file. Output file is outfile.wav.
voicefixer --infile test/utterance/original/original.wav
# Or specify a output path
voicefixer --infile test/utterance/original/original.wav --outfile test/utterance/original/original_processed.wav
```
Process files in a folder:
```shell
voicefixer --infolder /path/to/input --outfolder /path/to/output
```
Change mode (The default mode is 0):
```shell
voicefixer --infile /path/to/input.wav --outfile /path/to/output.wav --mode 1
```
Run all modes:
```shell
# output file saved to `/path/to/output-modeX.wav`.
voicefixer --infile /path/to/input.wav --outfile /path/to/output.wav --mode all
```
Pre-load the weights only without any actual processing:
```shell
voicefixer --weight_prepare
```
For more helper information please run:
```shell
voicefixer -h
```
### Desktop App
[Demo on Youtube](https://www.youtube.com/watch?v=d_j8UKTZ7J8) (Thanks @Justin John)
Install voicefixer via pip:
```shell script
pip install voicefixer
```
You can test audio samples on your desktop by running website (powered by [streamlit](https://streamlit.io/))
1. Clone the repo first.
```shell script
git clone https://github.com/haoheliu/voicefixer.git
cd voicefixer
```
:warning: **For windows users**, please make sure you have installed [WGET](https://eternallybored.org/misc/wget) and added the wget command to the system path (thanks @justinjohn0306).
2. Initialize and start web page.
```shell script
# Run streamlit
streamlit run test/streamlit.py
```
- If you run for the first time: the web page may leave blank for several minutes for downloading models. You can checkout the terminal for downloading progresses.
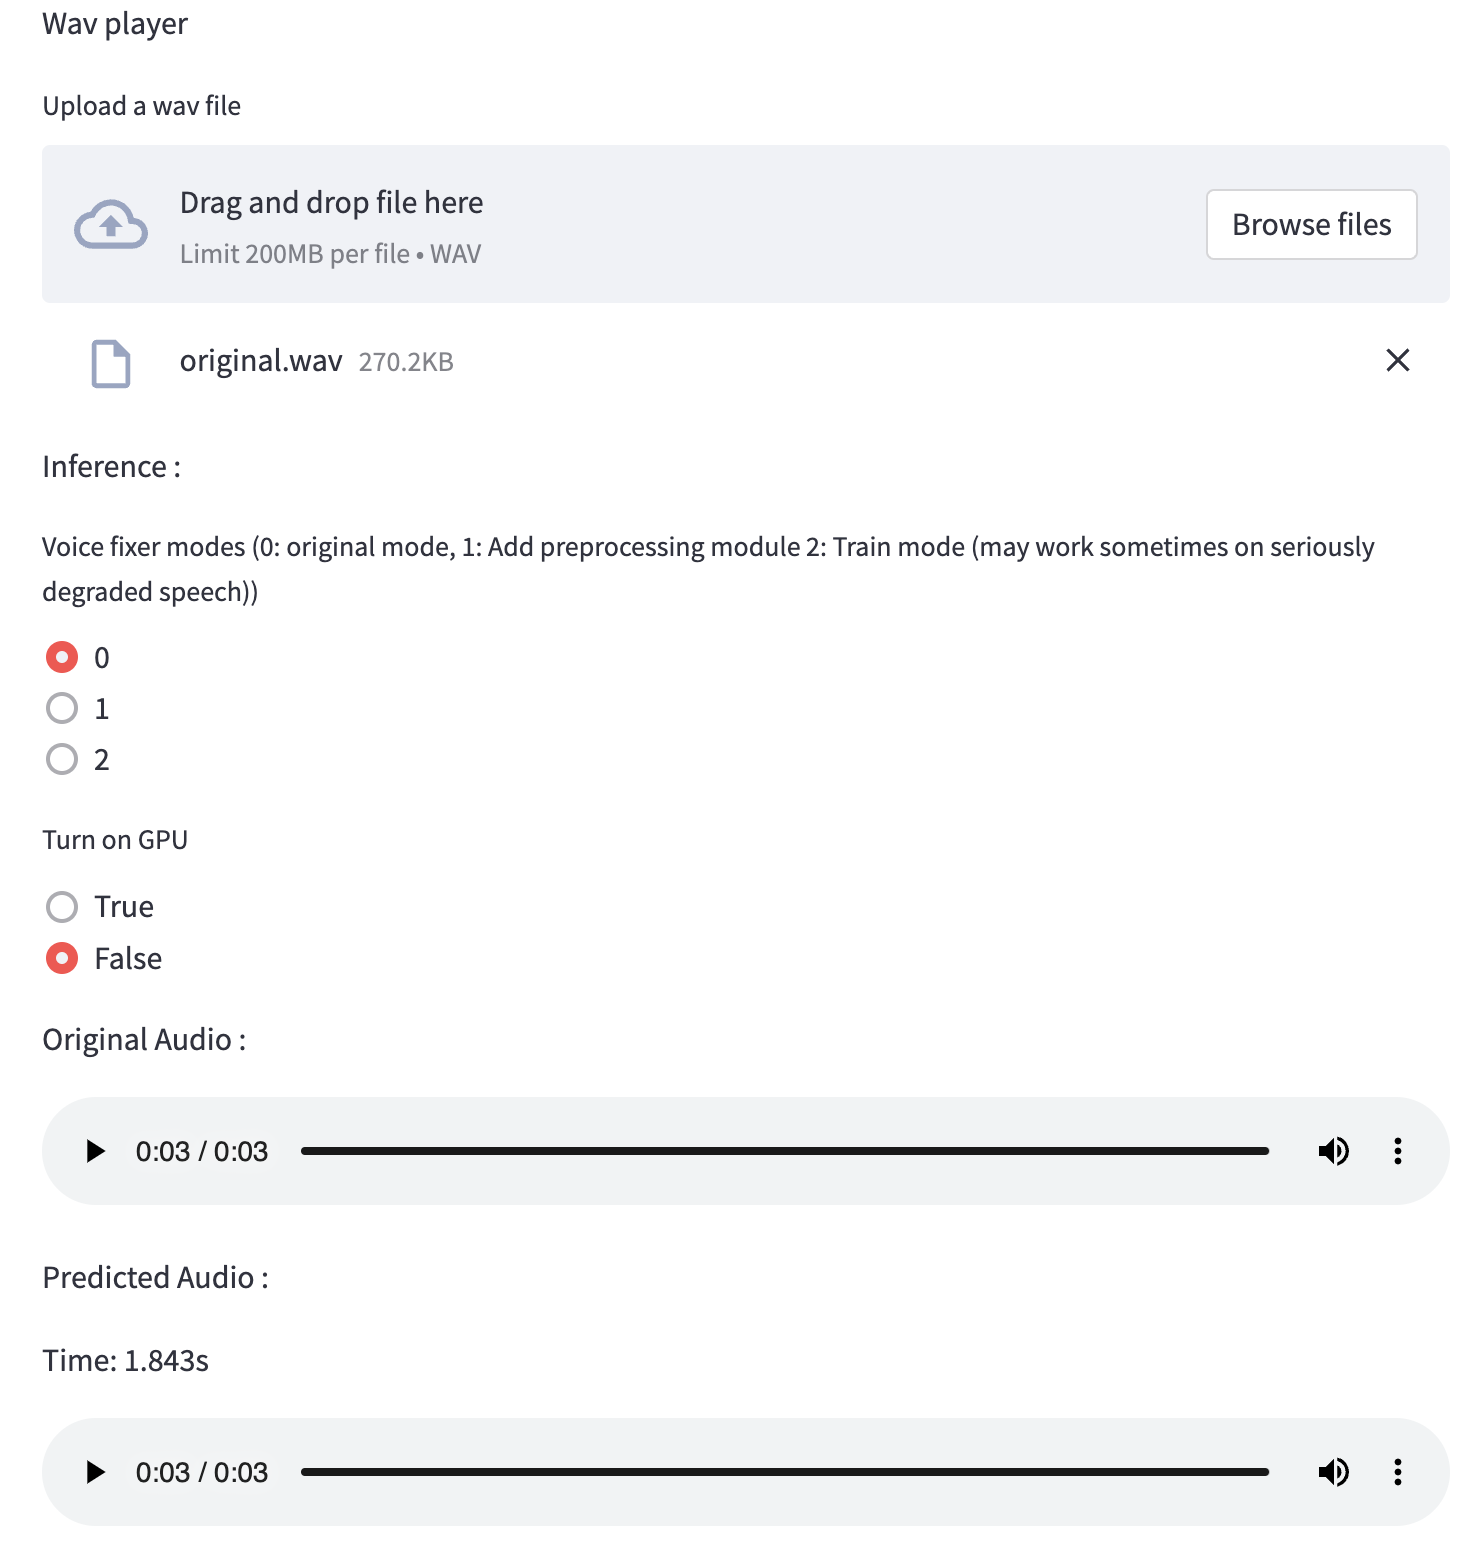
- You can use [this low quality speech file](https://github.com/haoheliu/voicefixer/blob/main/test/utterance/original/original.wav) we provided for a test run. The page after processing will look like the following.
- For users from main land China, if you experience difficulty on downloading checkpoint. You can access them alternatively on [百度网盘](https://pan.baidu.com/s/194ufkUR_PYf1nE1KqkEZjQ) (提取密码: qis6). Please download the two checkpoints inside and place them in the following folder.
- Place **vf.ckpt** inside *~/.cache/voicefixer/analysis_module/checkpoints*. (The "~" represents your home directory)
- Place **model.ckpt-1490000_trimed.pt** inside *~/.cache/voicefixer/synthesis_module/44100*. (The "~" represents your home directory)
### Python Examples
First, install voicefixer via pip:
```shell script
pip install voicefixer
```
Then run the following scripts for a test run:
```shell script
git clone https://github.com/haoheliu/voicefixer.git; cd voicefixer
python3 test/test.py # test script
```
We expect it will give you the following output:
```shell script
Initializing VoiceFixer...
Test voicefixer mode 0, Pass
Test voicefixer mode 1, Pass
Test voicefixer mode 2, Pass
Initializing 44.1kHz speech vocoder...
Test vocoder using groundtruth mel spectrogram...
Pass
```
*test/test.py* mainly contains the test of the following two APIs:
- voicefixer.restore
- vocoder.oracle
```python
...
# TEST VOICEFIXER
## Initialize a voicefixer
print("Initializing VoiceFixer...")
voicefixer = VoiceFixer()
# Mode 0: Original Model (suggested by default)
# Mode 1: Add preprocessing module (remove higher frequency)
# Mode 2: Train mode (might work sometimes on seriously degraded real speech)
for mode in [0,1,2]:
print("Testing mode",mode)
voicefixer.restore(input=os.path.join(git_root,"test/utterance/original/original.flac"), # low quality .wav/.flac file
output=os.path.join(git_root,"test/utterance/output/output_mode_"+str(mode)+".flac"), # save file path
cuda=False, # GPU acceleration
mode=mode)
if(mode != 2):
check("output_mode_"+str(mode)+".flac")
print("Pass")
# TEST VOCODER
## Initialize a vocoder
print("Initializing 44.1kHz speech vocoder...")
vocoder = Vocoder(sample_rate=44100)
### read wave (fpath) -> mel spectrogram -> vocoder -> wave -> save wave (out_path)
print("Test vocoder using groundtruth mel spectrogram...")
vocoder.oracle(fpath=os.path.join(git_root,"test/utterance/original/p360_001_mic1.flac"),
out_path=os.path.join(git_root,"test/utterance/output/oracle.flac"),
cuda=False) # GPU acceleration
...
```
You can clone this repo and try to run test.py inside the *test* folder.
### Docker
> Currently the the Docker image is not published and needs to be built locally, but this way you make sure you're running it with all the expected configuration.
> The generated image size is about 10GB and that is mainly due to the dependencies that consume around 9.8GB on their own.
> However, the layer containing `voicefixer` is the last added layer, making any rebuild if you change sources relatively small (~200MB at a time as the weights get refreshed on image build).
The `Dockerfile` can be viewed [here](Dockerfile).
After cloning the repo:
#### OS Agnostic
```shell
# To build the image
cd voicefixer
docker build -t voicefixer:cpu .
# To run the image
docker run --rm -v "$(pwd)/data:/opt/voicefixer/data" voicefixer:cpu
## Example: docker run --rm -v "$(pwd)/data:/opt/voicefixer/data" voicefixer:cpu --infile data/my-input.wav --outfile data/my-output.mode-all.wav --mode all
```
#### Wrapper script: Linux and MacOS
```bash
# To build the image
cd voicefixer
./docker-build-local.sh
# To run the image
./run.sh
## Example: ./run.sh --infile data/my-input.wav --outfile data/my-output.mode-all.wav --mode all
```
### Others Features
- How to use your own vocoder, like pre-trained HiFi-Gan?
First you need to write a following helper function with your model. Similar to the helper function in this repo: https://github.com/haoheliu/voicefixer/blob/main/voicefixer/vocoder/base.py#L35
```shell script
def convert_mel_to_wav(mel):
"""
:param non normalized mel spectrogram: [batchsize, 1, t-steps, n_mel]
:return: [batchsize, 1, samples]
"""
return wav
```
Then pass this function to *voicefixer.restore*, for example:
```
voicefixer.restore(input="", # input wav file path
output="", # output wav file path
cuda=False, # whether to use gpu acceleration
mode = 0,
your_vocoder_func = convert_mel_to_wav)
```
Note:
- For compatibility, your vocoder should working on 44.1kHz wave with mel frequency bins 128.
- The input mel spectrogram to the helper function should not be normalized by the width of each mel filter.
## Materials
- Voicefixer training: https://github.com/haoheliu/voicefixer_main.git
- Demo page: https://haoheliu.github.io/demopage-voicefixer/
[](https://imgtu.com/i/46dnPO)
[](https://imgtu.com/i/46dMxH)
## Change log
See [CHANGELOG.md](CHANGELOG.md).