# 👨⚕️ Clinic Management System - Made using C#, ASP.net
 [](#)
[](https://www.github.com/harismuneer/Clinic-Management-System-ASP.NET/fork)
[](https://www.github.com/harismuneer/Clinic-Management-System-ASP.NET/issues)
[](#)
A fully featured Clinic Management System having a well designed Database Schema made as a final project for the course "Database Systems CS203" during my 4th Semester at [National University of Computer and Emerging Sciences](http://nu.edu.pk/). Its based on the 3 Tier Architecture.
## Technologies Used:
For Frontend: HTML, CSS, BootStrap, JavaScript
For Backend: C#, ASP.NET
For Database: SQL
### Pre-requisites:
* [Microsoft Visual Studio](https://visualstudio.microsoft.com/vs/community/)
* [Microsoft SQL Server Express](https://www.microsoft.com/en-us/sql-server/sql-server-editions-express)
* [Microsoft SQL Server Management Studio (SSMS)](https://docs.microsoft.com/en-us/sql/ssms/download-sql-server-management-studio-ssms?view=sql-server-2017)
## Interface
Some screenshots of the pages.
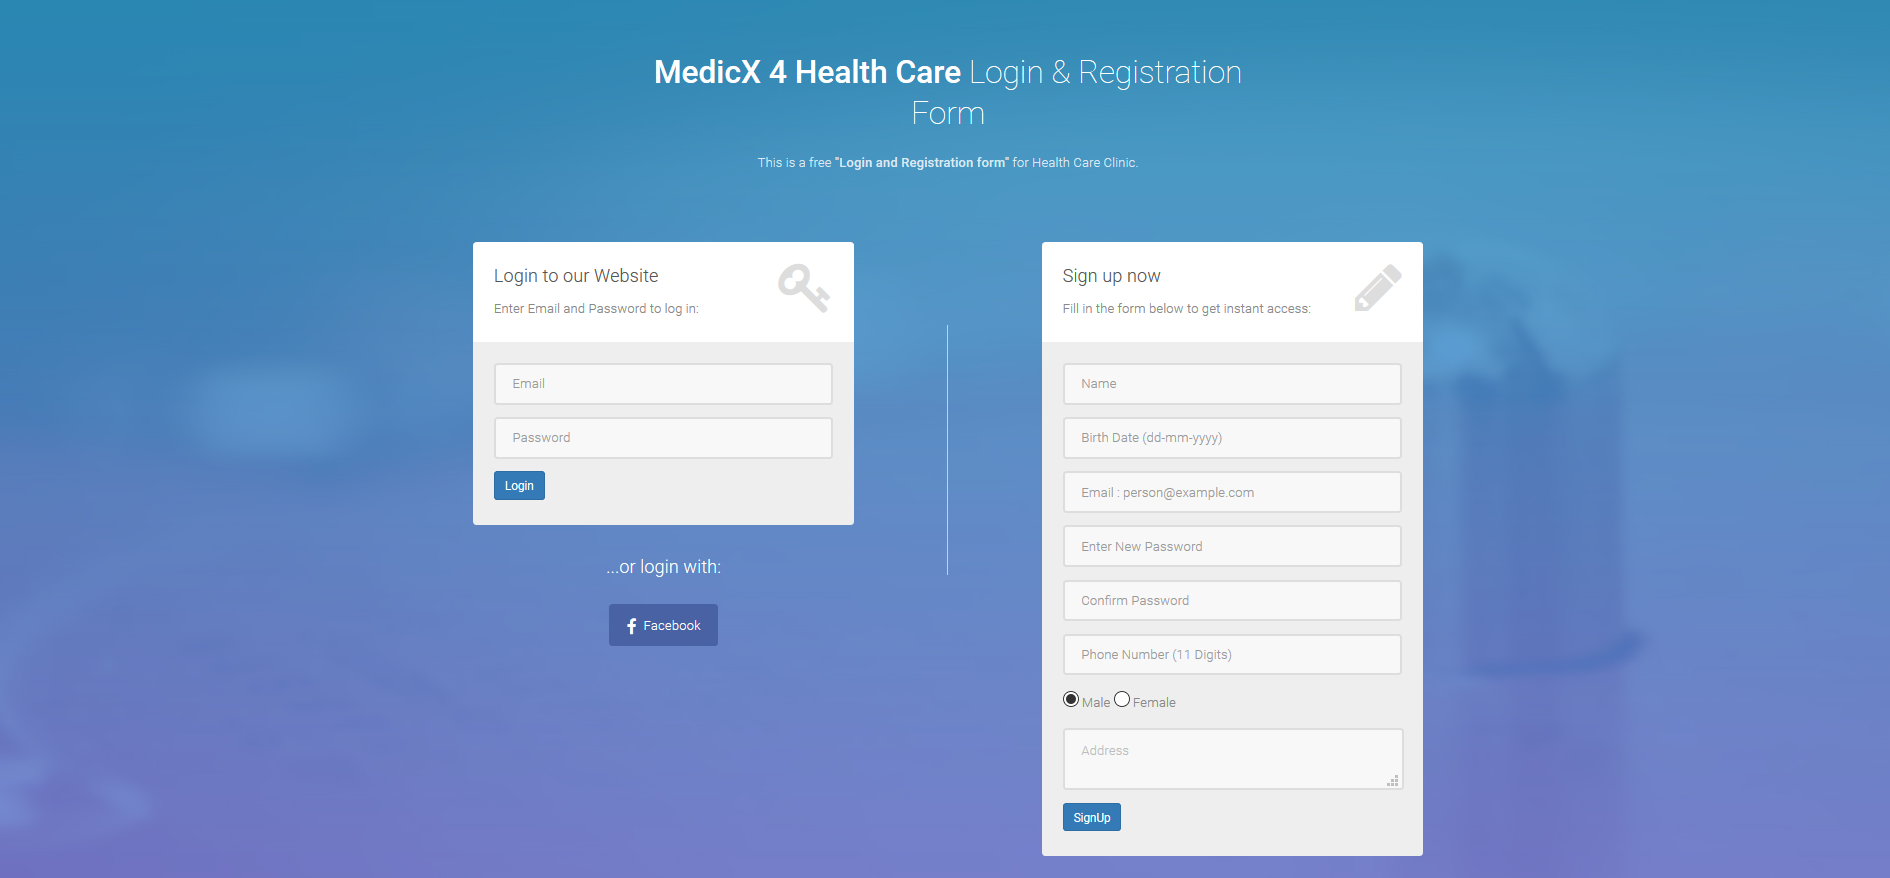
### Signup Page
[](#)
[](https://www.github.com/harismuneer/Clinic-Management-System-ASP.NET/fork)
[](https://www.github.com/harismuneer/Clinic-Management-System-ASP.NET/issues)
[](#)
A fully featured Clinic Management System having a well designed Database Schema made as a final project for the course "Database Systems CS203" during my 4th Semester at [National University of Computer and Emerging Sciences](http://nu.edu.pk/). Its based on the 3 Tier Architecture.
## Technologies Used:
For Frontend: HTML, CSS, BootStrap, JavaScript
For Backend: C#, ASP.NET
For Database: SQL
### Pre-requisites:
* [Microsoft Visual Studio](https://visualstudio.microsoft.com/vs/community/)
* [Microsoft SQL Server Express](https://www.microsoft.com/en-us/sql-server/sql-server-editions-express)
* [Microsoft SQL Server Management Studio (SSMS)](https://docs.microsoft.com/en-us/sql/ssms/download-sql-server-management-studio-ssms?view=sql-server-2017)
## Interface
Some screenshots of the pages.
### Signup Page
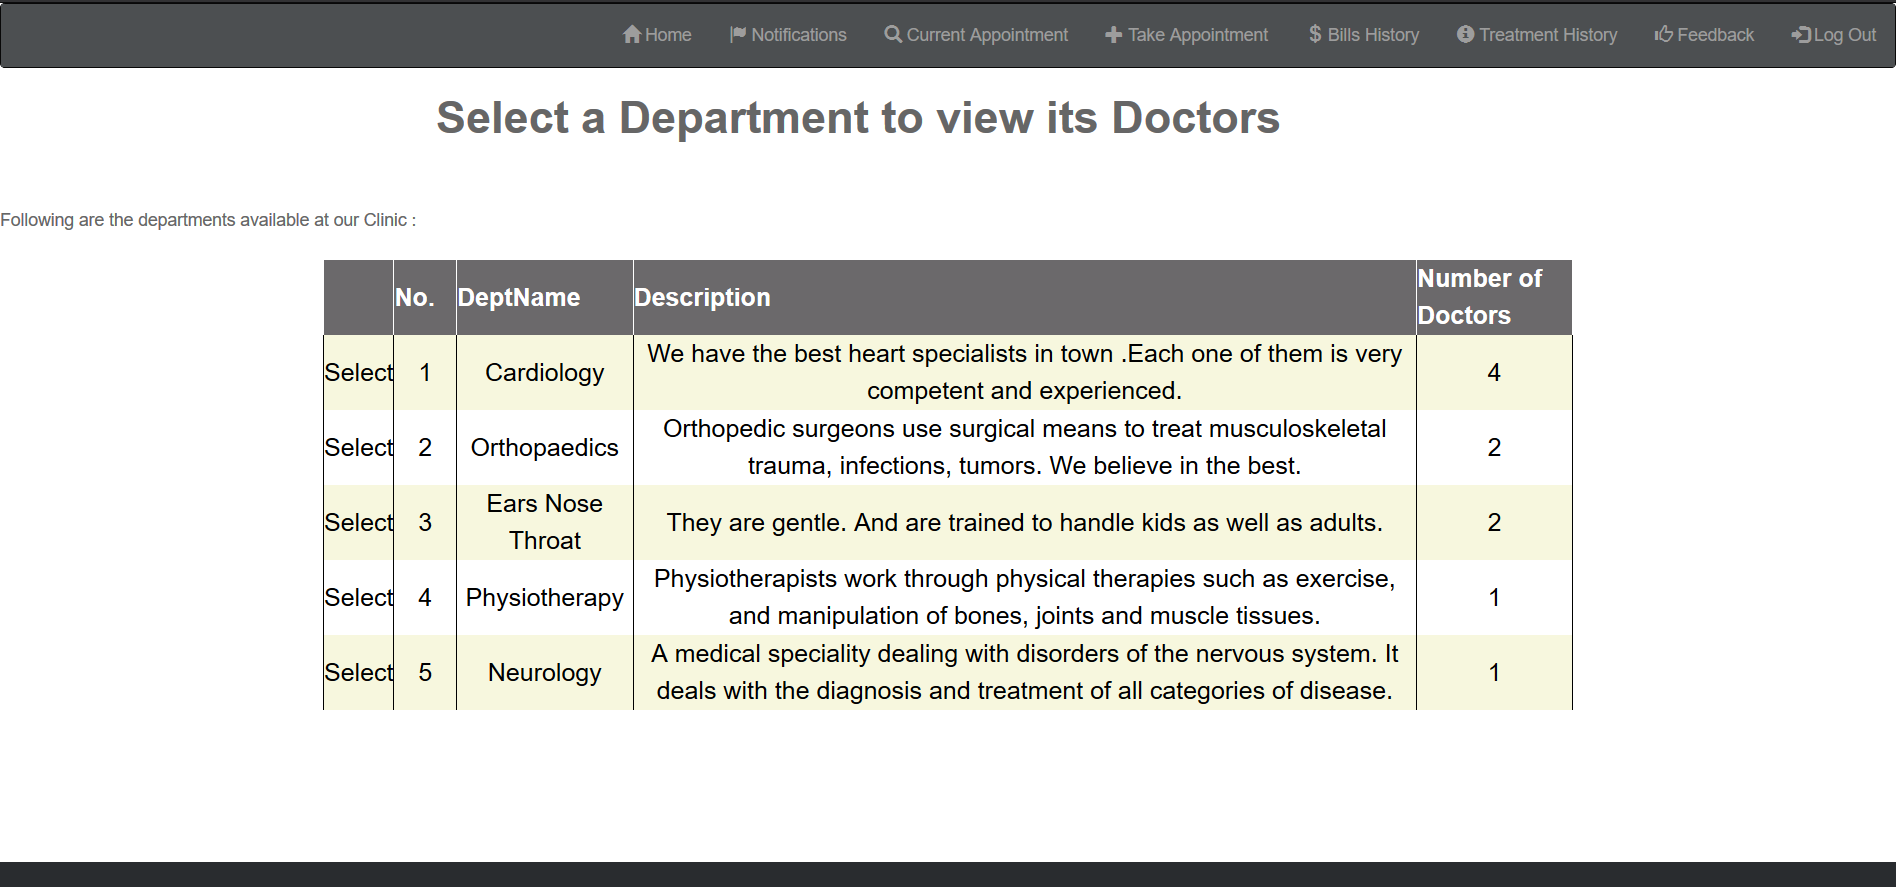
 ### Take Appointment
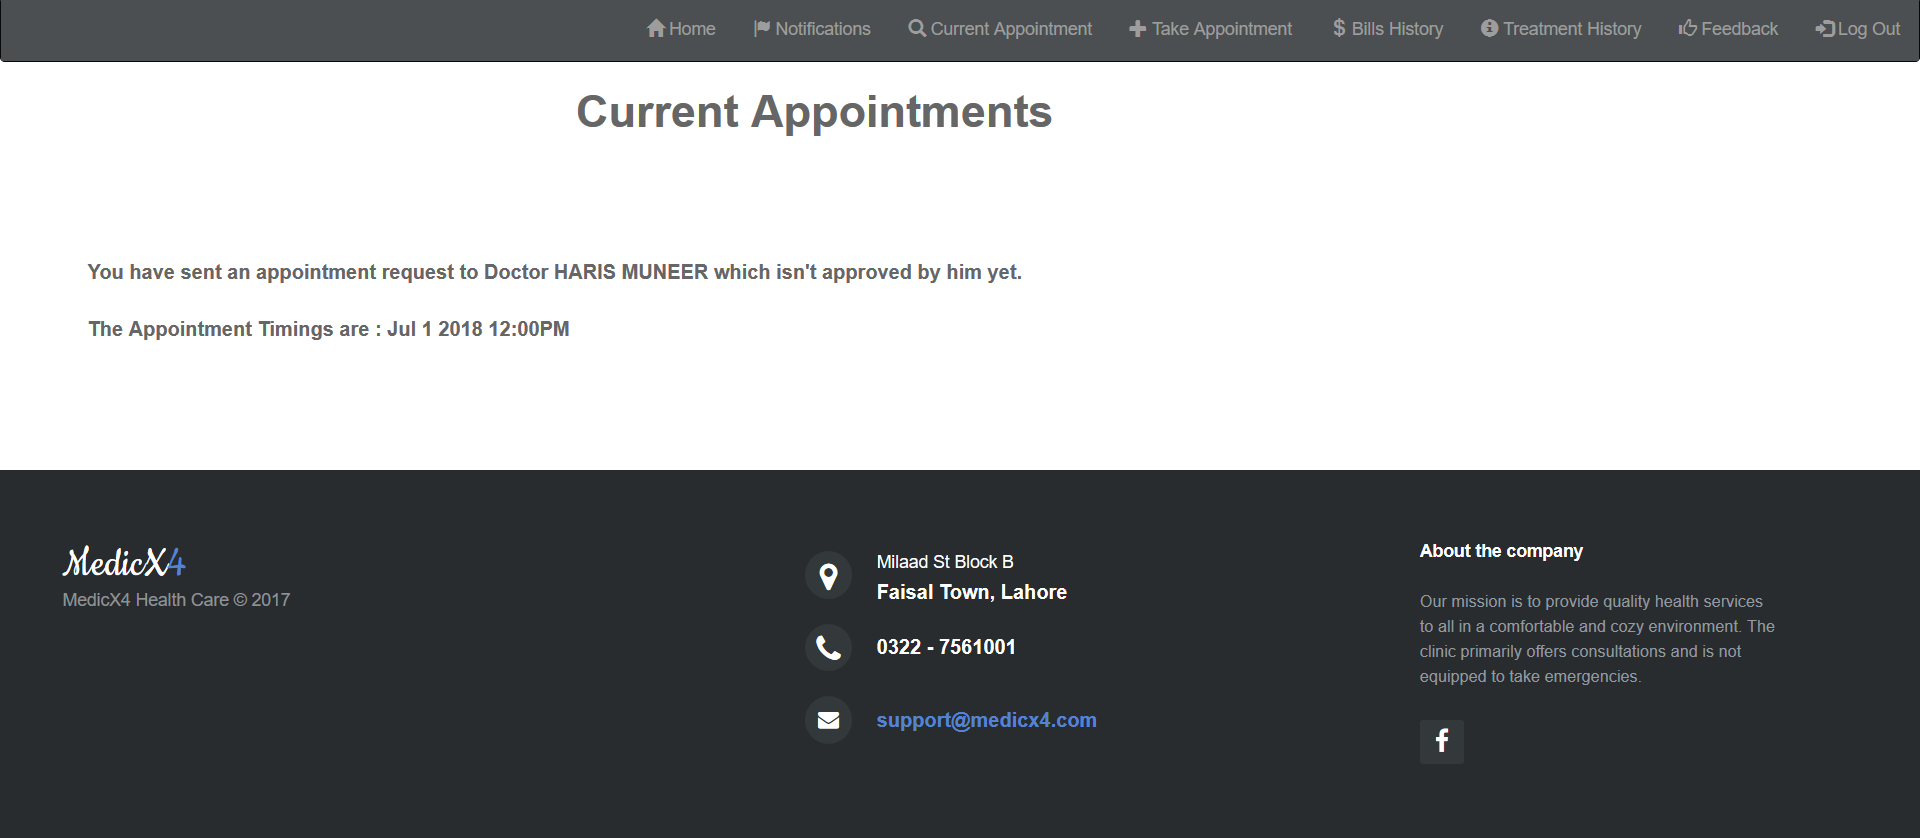
 ### Current Appointments
 ### Search Staff
 ## Functionalities Implemented:
Our project revolves around three major classes of users. Characteristics of each class are listed below
### 1. Patient:
* **1. Patient Home** – Patient can view his profile
* **2. Current Appointment** – Patient can view if he has some pending or approved appointment with a doctor
* **3. Bills History** – Patient can view the bill history of appointments that have been completed
* **4. Treatment History** – Patient can view the treatment history of appointments which have been completed
* **5. Take Appointment** – Patient can view all the departments, and then can select one dept. Then the doctors of that dept are shown. Then patient selects one doctor and the doctor’s profile is then shown along with a ‘take appointment’ button. When the button is clicked, the free slots of that particular doctor are shown. Patient selects a free slot of his choice and then sends request for that free slot to the doctor. The doctor will then approve/reject it.
* **6. Notifications** – In this tab, a notification is shown whenever the doctor accepts/rejects the requested appointment.
* **7. Feedback** – After a appointment is completed, patient can give feedback about that appointment by rating it from 1 – 5
* **8.** A patient can request for only one appointment at a time and will not be allowed to take more than one appointments until the last appointment has been completed.
### 2. Doctor:
* **1. DoctorProfile**: Doctor can see his own profile
* **2. PendingAppointments**: Doctor can see all the pending appointments against his doctor ID.
* **3. TodaysAppointmemts**: the appointments for current day will be shown.The doctor then can select/reject any appointment of that day
* **4. HistoryUpdate**: He can update prescription,disease and progress of patient
* **5. GenerateBill**: He will then generate the bill
* **6. PatientHistory**: Doctor will be able to see the treatment history of all his treated patients.
### 3. Administrator:
* **1. Admin Home**: Admin can view Clinic stats which includes weekly appointments, income of the Clinic. No of registered patients and doctors along with the list of departments
* **2. View Doctors**: Admin can view the list of doctors currently registered along with their departments and other information. Complete profile will be shown when clicked.
* **3. View Patients**: Admin can view the list of patients currently registered along with their phone numbers and ids. Complete profile will be shown when clicked.
* **4. View Other Staff**: Admin can view other staff members along with their designations.
* **5. Search Box**: Admin can search for a specific employ within the company by name
* **6. Add/Remove**: Admin can Add/remove doctors patients and other staff members form the clinic.
## How to Run
1- Install the following:
* [Microsoft Visual Studio](https://visualstudio.microsoft.com/vs/community/)
* [Microsoft SQL Server Express](https://www.microsoft.com/en-us/sql-server/sql-server-editions-express)
* [Microsoft SQL Server Management Studio (SSMS)](https://docs.microsoft.com/en-us/sql/ssms/download-sql-server-management-studio-ssms?view=sql-server-2017)
2- Open SQL Server Management Studio and in the "Connect to Database Engine" window type the following:
```
Servername: .\SQLEXRPESS
Authentication: Windows Authentication
```

3- Now open Schema.sql file in Database Files folder and execute it all. This will create the database and the tables. Afterwards execute the following sql files: Admin.sql, Doctor.sql, Patient.sql, Signup.sql.
4- Now execute the Insertions.sql file in Database Files folder. This will populate the database with some test entries. Moreover, some login emails and passwords of doctors, patients and admin are placed in the Insertions.sql file. You can use them to test the functionalities of the system.
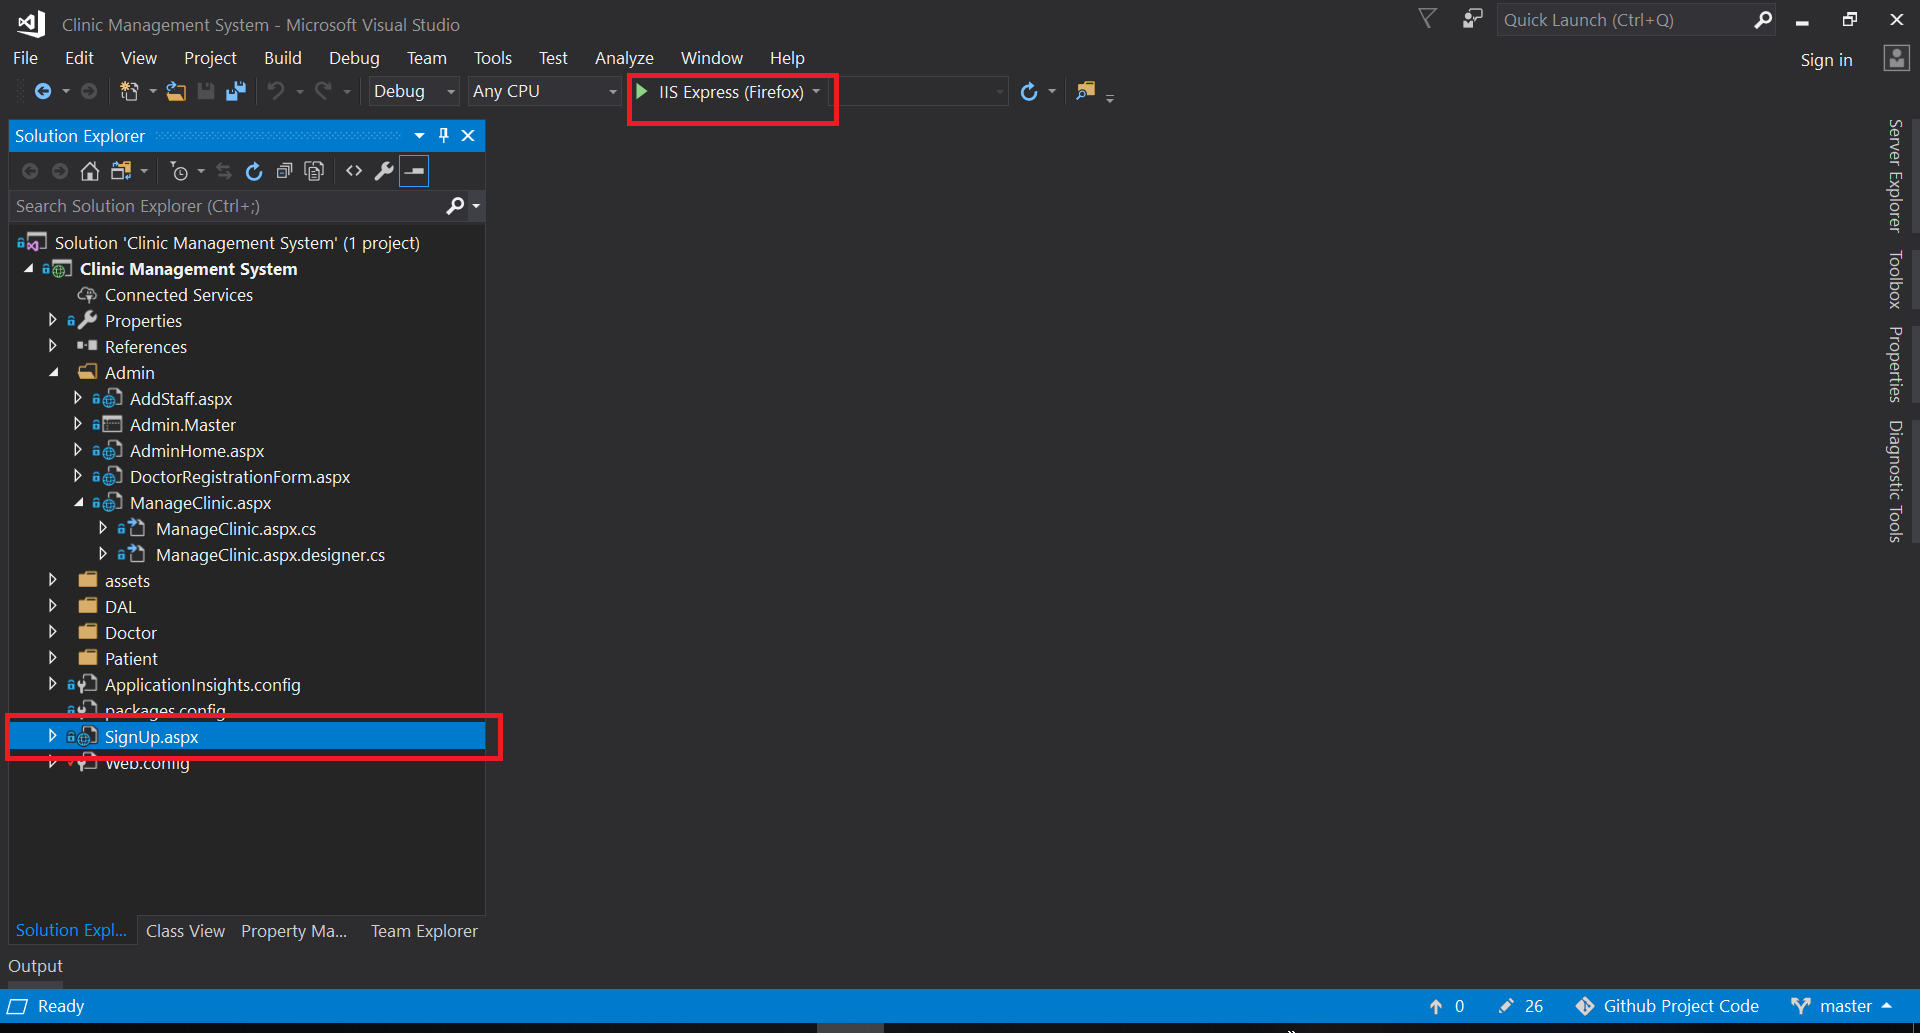
5- Everything is setup now! You can run the Visual Studio Project by opening Clinic Management System.sln and then select the SignUp.aspx page and click run button named IIS Express.

## Contact
You can get in touch with me on my LinkedIn Profile: [](https://www.linkedin.com/in/harismuneer)
You can also follow my GitHub Profile to stay updated about my latest projects: [](https://github.com/harismuneer)
---
If you liked the repo then kindly support it by giving it a star ⭐ and share in your circles so more people can benefit from the effort.
## Contributions Welcome
[](https://www.github.com/harismuneer/Clinic-Management-System-ASP.NET/issues)
If you find any bugs, have suggestions, or face issues:
- Open an Issue in the Issues Tab to discuss them.
- Submit a Pull Request to propose fixes or improvements.
- Review Pull Requests from other contributors to help maintain the project's quality and progress.
This project thrives on community collaboration! Members are encouraged to take the initiative, support one another, and actively engage in all aspects of the project. Whether it’s debugging, fixing issues, or brainstorming new ideas, your contributions are what keep this project moving forward.
With modern AI tools like ChatGPT, solving challenges and contributing effectively is easier than ever. Let’s work together to make this project the best it can be! 🚀
## License
[](../master/LICENSE)
Copyright (c) 2018-present, harismuneer, HassaanElahi, FarhanShoukat, Kashan.Sid


- 🛠️ Product Builder: Agile Product Manager with 5+ years of hands-on experience delivering SaaS solutions across sales, recruiting, AI, social media, and public sector domains. Background in Computer Science, with a proven track record of scaling products from inception to $XXM+ ARR, launching 3 top-ranking tools on Product Hunt, and developing solutions adopted by 250+ B2B clients in 40+ countries.
- 🌟 Open Source Advocate: Passionate about making technology accessible, I’ve developed and open-sourced several software projects for web, mobile, desktop, and AI on my GitHub profile. These projects have been used by thousands of learners worldwide to enhance their skills and knowledge.
- 📫 How to Reach Me: To learn more about my skills and work, visit my LinkedIn profile. For collaboration or inquiries, feel free to reach out via email.
🤝 Follow my journey


 ### Take Appointment
 ### Current Appointments
 ### Search Staff
 ## Functionalities Implemented:
Our project revolves around three major classes of users. Characteristics of each class are listed below
### 1. Patient:
* **1. Patient Home** – Patient can view his profile
* **2. Current Appointment** – Patient can view if he has some pending or approved appointment with a doctor
* **3. Bills History** – Patient can view the bill history of appointments that have been completed
* **4. Treatment History** – Patient can view the treatment history of appointments which have been completed
* **5. Take Appointment** – Patient can view all the departments, and then can select one dept. Then the doctors of that dept are shown. Then patient selects one doctor and the doctor’s profile is then shown along with a ‘take appointment’ button. When the button is clicked, the free slots of that particular doctor are shown. Patient selects a free slot of his choice and then sends request for that free slot to the doctor. The doctor will then approve/reject it.
* **6. Notifications** – In this tab, a notification is shown whenever the doctor accepts/rejects the requested appointment.
* **7. Feedback** – After a appointment is completed, patient can give feedback about that appointment by rating it from 1 – 5
* **8.** A patient can request for only one appointment at a time and will not be allowed to take more than one appointments until the last appointment has been completed.
### 2. Doctor:
* **1. DoctorProfile**: Doctor can see his own profile
* **2. PendingAppointments**: Doctor can see all the pending appointments against his doctor ID.
* **3. TodaysAppointmemts**: the appointments for current day will be shown.The doctor then can select/reject any appointment of that day
* **4. HistoryUpdate**: He can update prescription,disease and progress of patient
* **5. GenerateBill**: He will then generate the bill
* **6. PatientHistory**: Doctor will be able to see the treatment history of all his treated patients.
### 3. Administrator:
* **1. Admin Home**: Admin can view Clinic stats which includes weekly appointments, income of the Clinic. No of registered patients and doctors along with the list of departments
* **2. View Doctors**: Admin can view the list of doctors currently registered along with their departments and other information. Complete profile will be shown when clicked.
* **3. View Patients**: Admin can view the list of patients currently registered along with their phone numbers and ids. Complete profile will be shown when clicked.
* **4. View Other Staff**: Admin can view other staff members along with their designations.
* **5. Search Box**: Admin can search for a specific employ within the company by name
* **6. Add/Remove**: Admin can Add/remove doctors patients and other staff members form the clinic.
## How to Run
1- Install the following:
* [Microsoft Visual Studio](https://visualstudio.microsoft.com/vs/community/)
* [Microsoft SQL Server Express](https://www.microsoft.com/en-us/sql-server/sql-server-editions-express)
* [Microsoft SQL Server Management Studio (SSMS)](https://docs.microsoft.com/en-us/sql/ssms/download-sql-server-management-studio-ssms?view=sql-server-2017)
2- Open SQL Server Management Studio and in the "Connect to Database Engine" window type the following:
```
Servername: .\SQLEXRPESS
Authentication: Windows Authentication
```


