# Contributing
Welcome to the HiveMQ Community!
Glad to see your interest in contributing to MQTT CLI.
Please checkout our [Contribution Guide](https://github.com/hivemq/hivemq-community/blob/master/CONTRIBUTING.adoc) to
make sure your contribution will be accepted by the HiveMQ team.
For information on how the HiveMQ Community is organized and how contributions will be accepted please have a look at
our [HiveMQ Community Repo](https://github.com/hivemq/hivemq-community).
## Prerequisites
We recommend to develop your changes by using [IntelliJ IDEA](https://www.jetbrains.com/idea/).
Therefore, the following guide will focus on creating your changes using IntelliJ.
Furthermore, the following is needed to make your development efforts as smoothly as possible:
- A Java 11 JDK (for example [Azul Zulu JDK](https://www.azul.com/downloads/))
- [Docker](https://www.docker.com/)
## 1. Setup project
- The following steps will setup a triangle workflow, which will enable you to easily create, update and get your
changes into the master branch
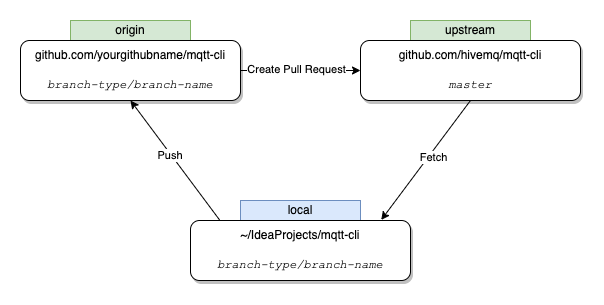
- Fork the repository by clicking "Fork" on the main project page (A fork will be created
under https://github.com/yourgithubname/mqtt-cli.git)

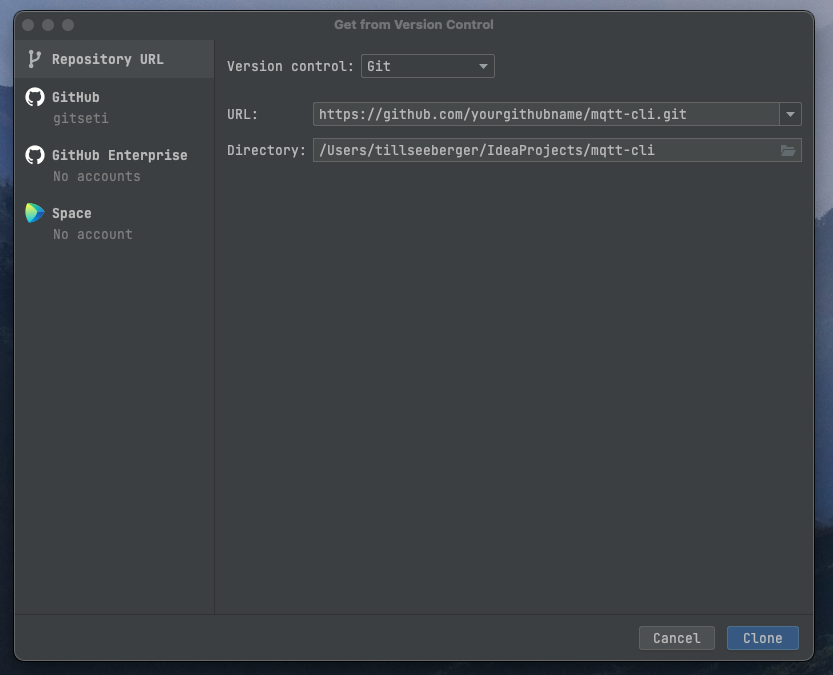
- Clone your fork via IntelliJ by going to File > New > New Project from Version Control OR by using the
command `git clone https://github.com/yourgithubname/mqtt-cli.git`
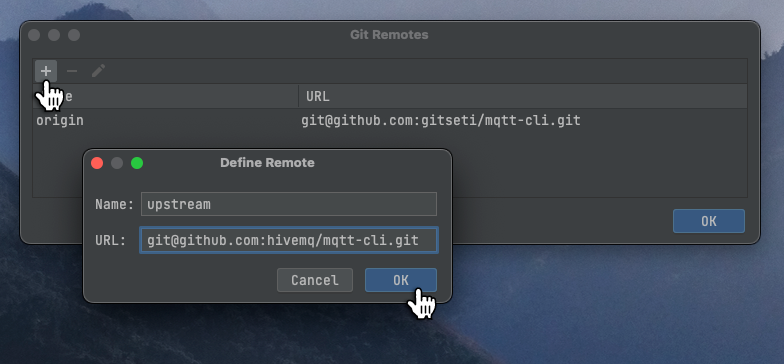
- Complete the triangle workflow setup by adding `https://github.com/hivemq/mqtt-cli.git` as a remote named _upstream_
via IntelliJ by going to Git > Manage Remotes > + OR by using the
command `git remote add upstream https://github.com/hivemq/mqtt-cli.git`
## 2. Create a branch for your changes
- Decide on your branch name:
- Branch types: feature, bugfix, improvement, cleanup (same as the label of a corresponding GitHub Issue)
- Starting with type: `feature/`, `bugfix/`, `improvement/`, `cleanup/`
- \+ task: lower case, spaces replaced with `-`
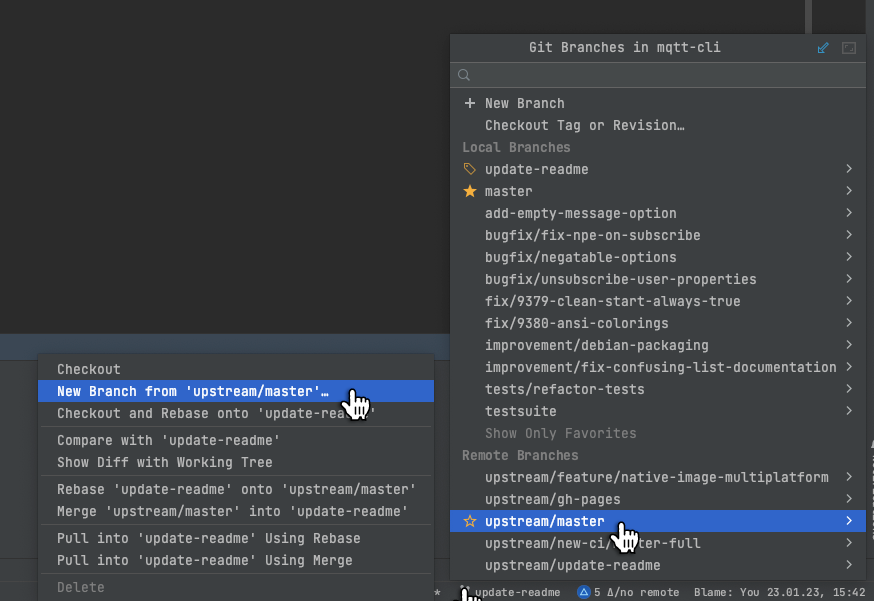
- Create your branch by using IntelliJ's branch functionality at the bottom of the IDE (upstream/master > New Branch
from 'upstream/master') OR by using the command `git checkout -b branch-type/your-branch-name`
## 3. Write your code
- Implement your changes under `src/main/java`
- You can use the existing code as a guide
- The project uses Nullability annotations to avoid NullPointerExceptions: `@NotNull`, `@Nullable`.
Every non-primitive parameter, return type and field should be annotated with one of them.
## 4. Write tests
- There are three types of tests in mqtt-cli:
1. Unit Tests => `src/main/test`
2. Integration Tests => `src/main/integrationTest`
3. System Tests => `src/main/systemTest`
- Your code changes must be unit-tested
- Depending on your changes an integration test should be written
- Depending on your changes or if you are developing a new feature a system test should be written
## 5. Build and test
- See [Building from source](https://hivemq.github.io/mqtt-cli/docs/installation/#building-from-source) for instructions
on how to build mqtt-cli
- Before proceeding to the next step, please make sure that your changes build and all tests succeed
- Tip: After building mqtt-cli you can execute the cli by using the generated jar
file `java -jar build/libs/mqtt-cli-.jar` (you can also just build this jar by using `./gradlew shadowJar`)
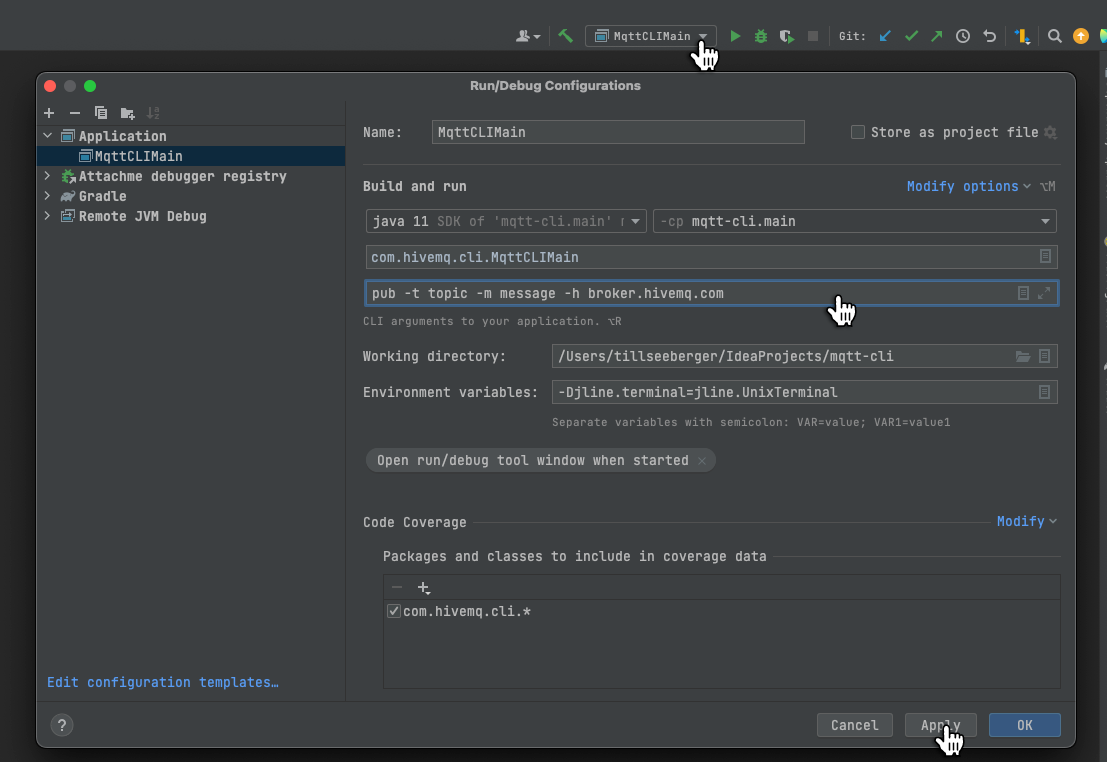
- Tip: To quickly test your changes manually you can directly execute commands from your IDE by going to Run > Edit
Configurations... and adding your cli arguments
## 6. Commit and Push
- Before committing execute `./gradlew licenseFormat` to add license headers to each file
- [Reformat each changed file](https://www.jetbrains.com/help/idea/reformat-and-rearrange-code.html#reformat_file) using
the .editorconfig settings of the project
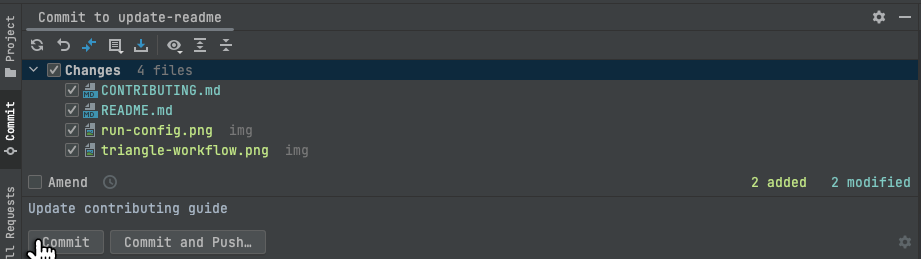
- Commit your changes directly from IntelliJ by pressing `Command` + `K` OR via the
command `git commit -m "your commit mesage"`
- Commits should be as atomic as possible
- Commit messages should describe the changes clearly
- Commit messages should start with a capital letter for consistency
- Commit messages should avoid exceeding the line length limit,
- Instead, use multiple lines, each describing one specific change
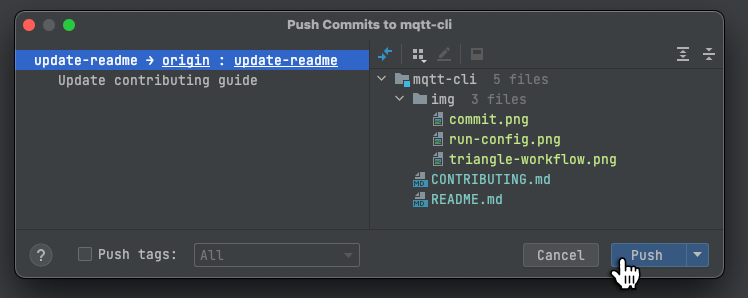
- Push your changes to the remote `origin` by pressing `Command` + `Shift` + `K` OR via the
command `git push origin branch-type/branch-name`
## 7. Create a Pull Request
- By contributing your code, you agree to license your contribution under the terms of the
[Apache License, Version 2.0](https://github.com/hivemq/hivemq-mqtt-client/blob/develop/LICENSE)
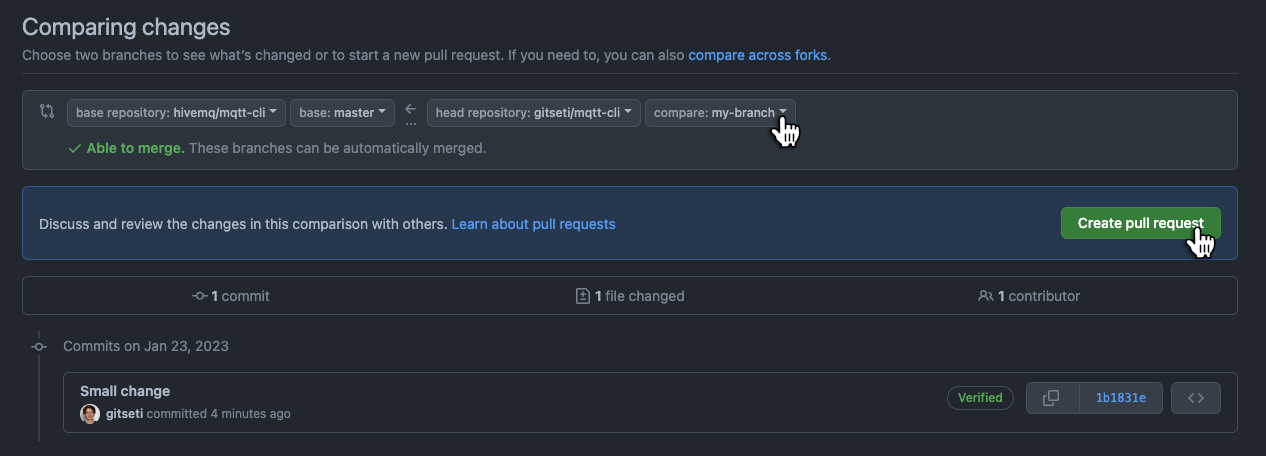
- Go to your GitHub fork under https://github.com/yourgithubname/mqtt-cli.git
- Go to the Pull Requests tab
- Press the New Pull Request button
- Choose your branch and click Create Pull Request
- We will now try to review your submitted code as fast as possible
- Furthermore, our CI will run tests against the changes
- To address requested changes during code review or if you need to address failing CI tests, simply push your changes
to your remote as described above
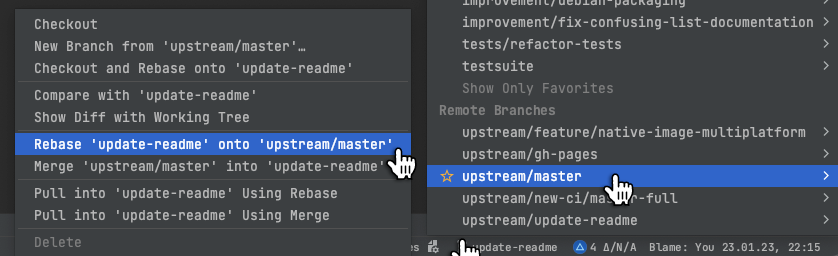
- You may need to rebase your branch if you haven't worked on it for some time - To do so simply go to the Git
branch > upstream master > Rebase 'your-branch' onto 'upstream/master' OR via the
command `git rebase upstream/master`
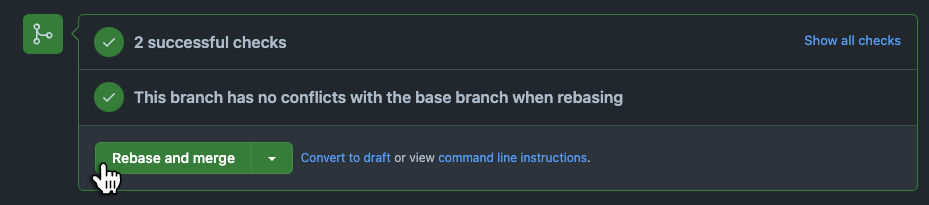
- As soon as the Code Reviewer has approved your Pull Request Merge your PR by clicking Rebase and Merge
## 🚀 Thank you for taking the time to contribute to MQTT CLI! 🚀
We truly appreciate and value your time and work. ❤️