# Blixt Lightning Wallet

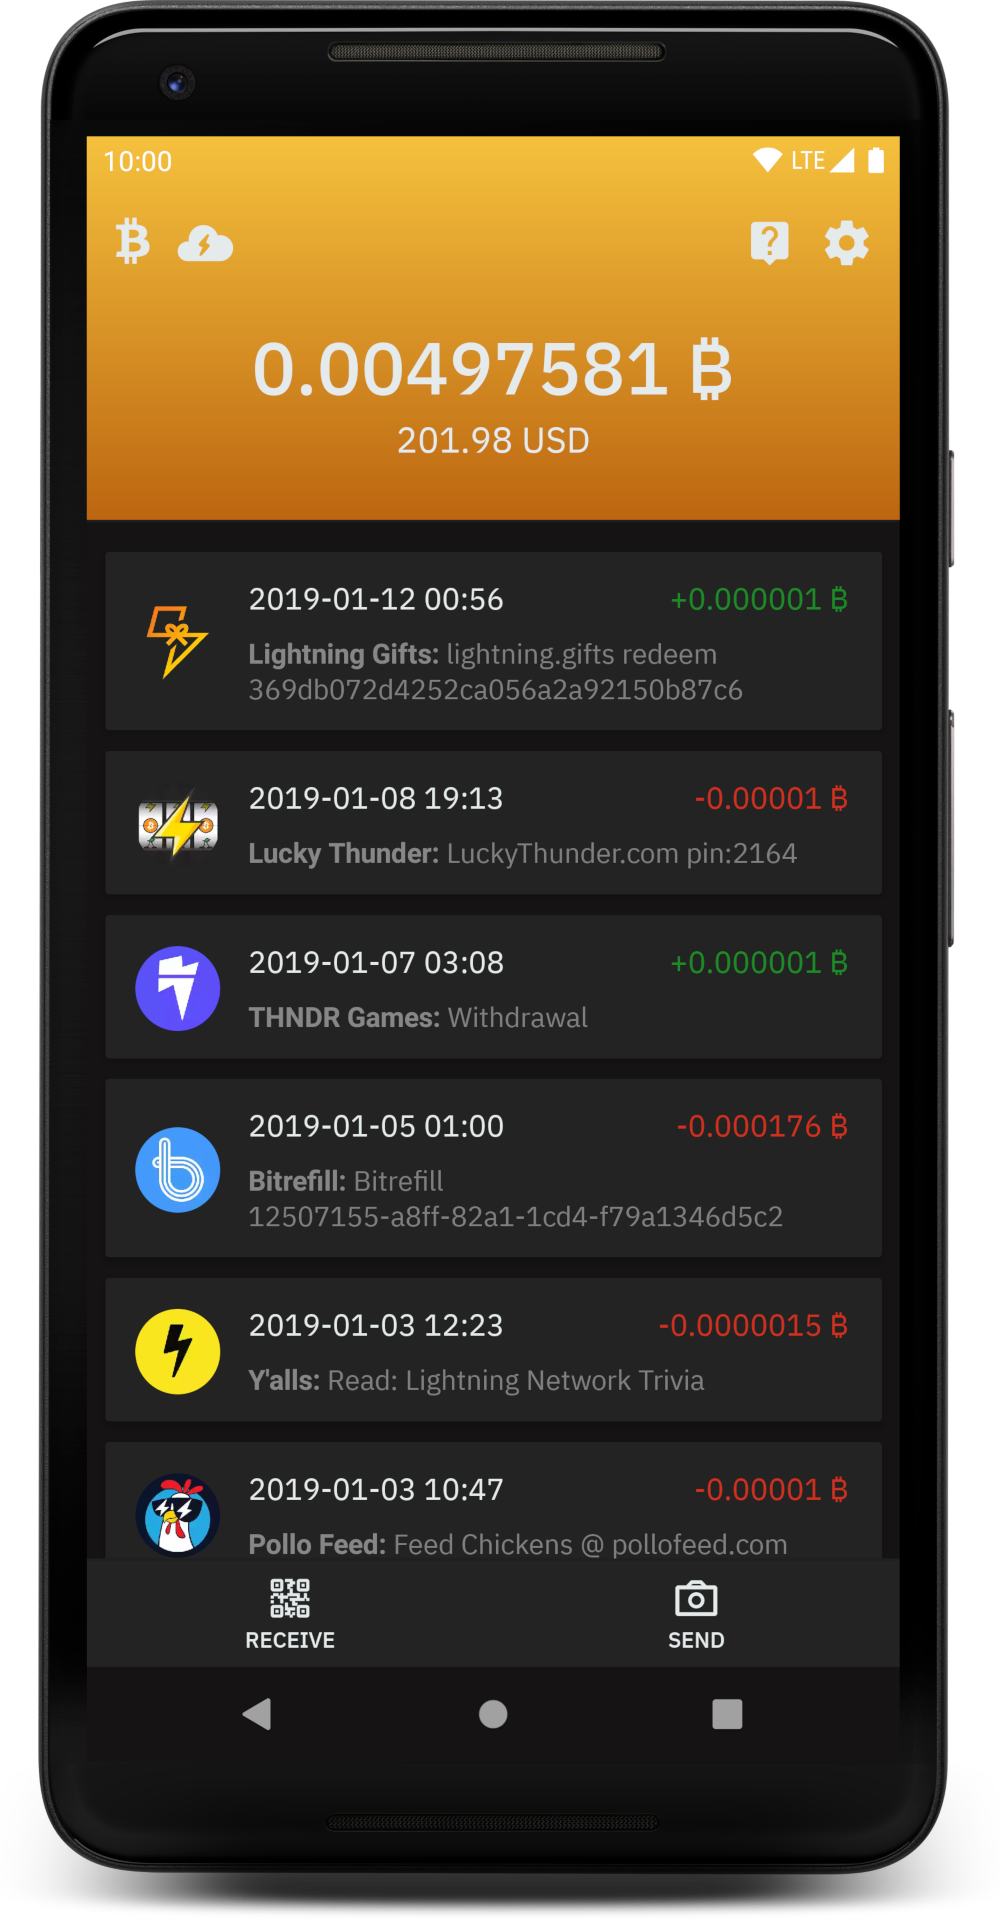
 Blixt Wallet is an open source Lightning Bitcoin Wallet for Android with focus on usability and user experience,
powered by lnd and Neutrino SPV.
Blixt Wallet is an open source Lightning Bitcoin Wallet for Android with focus on usability and user experience,
powered by lnd and Neutrino SPV.
## Features
- [x] Embedded lnd with Neutrino
- [x] Descriptive and clean transaction log
- [x] Receive payments
- [x] Autopilot
- [x] Pincode
- [x] Fingerprint
- [x] Optional Recipient/Sender name that will be displayed on transactions
- [x] Optional "Payer" field for bookkeeping when creating invoice
- [x] Scheduled sync of chain background job
- [x] Local channel backup
- [x] [LNURL](https://github.com/btcontract/lnurl-rfc) support (all sub-protocols: pay, channel, auth and withdraw)
- [x] Channel backup to Google Drive (Android) and iCloud (iOS)
- [x] [WebLN](https://webln.dev/) browser
- [x] Support for [Multi-Part Payments (MPP)](https://lightning.engineering/posts/2020-05-07-mpp/)
- [x] Integrated Tor support
- [x] Sending to Lightning Address
- [ ] Automatically open channels when needed ([LSP](https://github.com/hsjoberg/dunder-lsp))
- [ ] Receiving via Lightning Address by [Lightning Box](https://github.com/hsjoberg/lightning-box)
- [ ] NFC
## Known Bugs
The wallet uses lnd that is young and might have bugs. Check [lnd bug list here](https://github.com/lightningnetwork/lnd/issues?q=is%3Aissue+is%3Aopen+label%3Abug).
## Translation
You can contribute to the project by translating the app via [Transifex](https://explore.transifex.com/blixt-wallet/blixt-wallet/).
## Build Steps
Blixt targets three platforms right now: Web, Android and iOS.
The web target is only used for prototyping and is not a real wallet.
### Web
The easiest way get started is to build the web version, because you only need NodeJS and Bun installed.
The web version is not used as a real wallet and is only for fast prototyping.
It's useful if you want to make design and GUI changes.
- Install [Node](https://nodejs.org) and [Bun](https://bun.com)
- Install libs: `bun install`
- Start the web server: `bun run web`
### Electrobun
The Electrobun target is experimental and should currently be treated as a desktop development target, not a fully supported release target.
- Install [Node](https://nodejs.org) and [Bun](https://bun.com)
- Install libs: `bun install`
- Download the `lnd` binary for your current desktop platform from the [`react-native-turbo-lnd`](https://github.com/hsjoberg/react-native-turbo-lnd/releases) releases page and place the file in project root:
- Windows: `liblnd-windows.zip`
- Linux: `liblnd-linux.zip`
- macOS: `liblnd-macos-dylib.zip`
- Start the app:
- `bun run electrobun:dev:normal`
To build/package:
- Build app bundle only: `bun run electrobun:build:fakelnd` or `bun run electrobun:build:normal`
- Package distributable app: `bun run electrobun:package:fakelnd` or `bun run electrobun:package:normal`
### Android
- Install [Node](https://nodejs.org), [Bun](https://bun.com) and [Android Studio + Android SDK (including NDK)](https://developer.android.com/studio/)
- If needed, install an emulated android device inside Android Studio
- Install libs: `bun install`
To start the application:
- Run: `bun start-metro`
- Run: `bun android:mainnet-debug` or `bun android:testnet-debug`
### Android (Nix)
- Install [Nix](https://github.com/DeterminateSystems/nix-installer)
- Install [Devenv](https://devenv.sh/getting-started/)
- For local development install [Android Studio](https://developer.android.com/studio/) and start a simulator
- For more awesome experience you can also install [direnv](https://devenv.sh/automatic-shell-activation/) and enable automatic shell activation.
```
cd blixt-wallet
# Start the devenv shell (skip this if you installed direnv)
devenv shell
# Setup Android
android-init
# To build unsigned apk.
android-unsigned-apk
## For local development:
# Start metro
bun start
# Start blixt in regtest
bun android:regtest-debug
```
### iOS
To build the iOS version, a computer running macOS is required. You also need an Apple Developer account, although you do not need to be enrolled in the Developer Program.
- Install [Xcode](https://developer.apple.com/xcode/), [Node](https://nodejs.org) and [Bun](https://bun.com)
- Install Node packages: `bun install`
- Install CocoaPods libs: `cd ios && pod install`
- Setup team signing:
- Open `ios/BlixtWallet/BlixtWallet.xcworkspace` with Xcode
- Login with your Apple Developer account if Xcode asks you to
- Click on BlixtWallet in the left column
- Click on the Signing & Capabilities tab
- Choose your Team in the dropdown and choose a new unique Bundle Identifier (cannot be the same as the ones released on the App Store). Do this for every configuration
To start the application:
- Run: `bun start-metro`
- Run: `bun ios:mainnet-debug --device ""` or build from Xcode
### macOS
To build the macOS version, a computer running macOS is required.
- Install [Xcode](https://developer.apple.com/xcode/), [Node](https://nodejs.org) and [Bun](https://bun.com)
- Build lnd for macOS by following the steps in [build-ios-framework.md](build-ios-framework.md)
- Instead of running `make ios`, run `make macos` or `make apple`
- Install Node packages: `bun install`
- Install CocoaPods libs: `cd macos && pod install`
To start the application:
- Run: `bun start-metro`
- Build app from Xcode or run `bun macos:mainnet-debug`
## Commit and Code-Style
Follow the code style of the file you are working in.
For commits, make descriptive and atomic git commits.
## License
MIT