[](https://github.com/instavm/coderunner/stargazers)
[](https://github.com/instavm/coderunner/blob/master/LICENSE)
# CodeRunner: A local sandbox for your AI agents
CodeRunner helps you sandbox your AI agents and its actions inside a sandbox.
**Key use case:** You can run multiple Claude Code or AI agents in our sandbox without any fear of data loss and exfilteration.
For cloud managed VMs for agents, we have launched - [InstaVM - Instant computers for AI agents](https://instavm.io)
## Quick Start
**Prerequisites:** Mac with macOS and Apple Silicon (M1/M2/M3/M4), Python 3.10+
```bash
git clone https://github.com/instavm/coderunner.git
cd coderunner
chmod +x install.sh
./install.sh
```
### Stop and resume
Stop the sandbox when you are done:
```bash
container stop coderunner
```
Resume the same sandbox later, preserving uploads, kernels, and installed packages:
```bash
container start coderunner
```
To start over with a clean sandbox, delete the container and run the installer again:
```bash
container delete coderunner && ./install.sh
```
### Disable outbound network access
By default, code running in the sandbox has unrestricted network access. To run it on a host-only network with no internet access:
```bash
CODERUNNER_NETWORK=none ./install.sh
```
In this mode, the MCP server is available at `http://127.0.0.1:8222/mcp`. The setting is fixed when the container is created; the installer refuses to resume a container with a different network mode.
## Run Claude Code inside a Sandbox
`./install.sh` (if not already done)
`container exec -it coderunner /bin/bash`
`root@coderunner:/app# npm install -g @anthropic-ai/claude-code`
 ## Other Integration Options
MCP server will be available at: `http://coderunner.local:8222/mcp`
The installer creates `~/.coderunner/venv` for the Claude Desktop proxy. For the other Python examples, install their dependencies in your own virtualenv:
```bash
pip install -r examples/requirements.txt
```
#### 1. Claude Desktop Integration
Configure Claude Desktop to use CodeRunner as an MCP server:
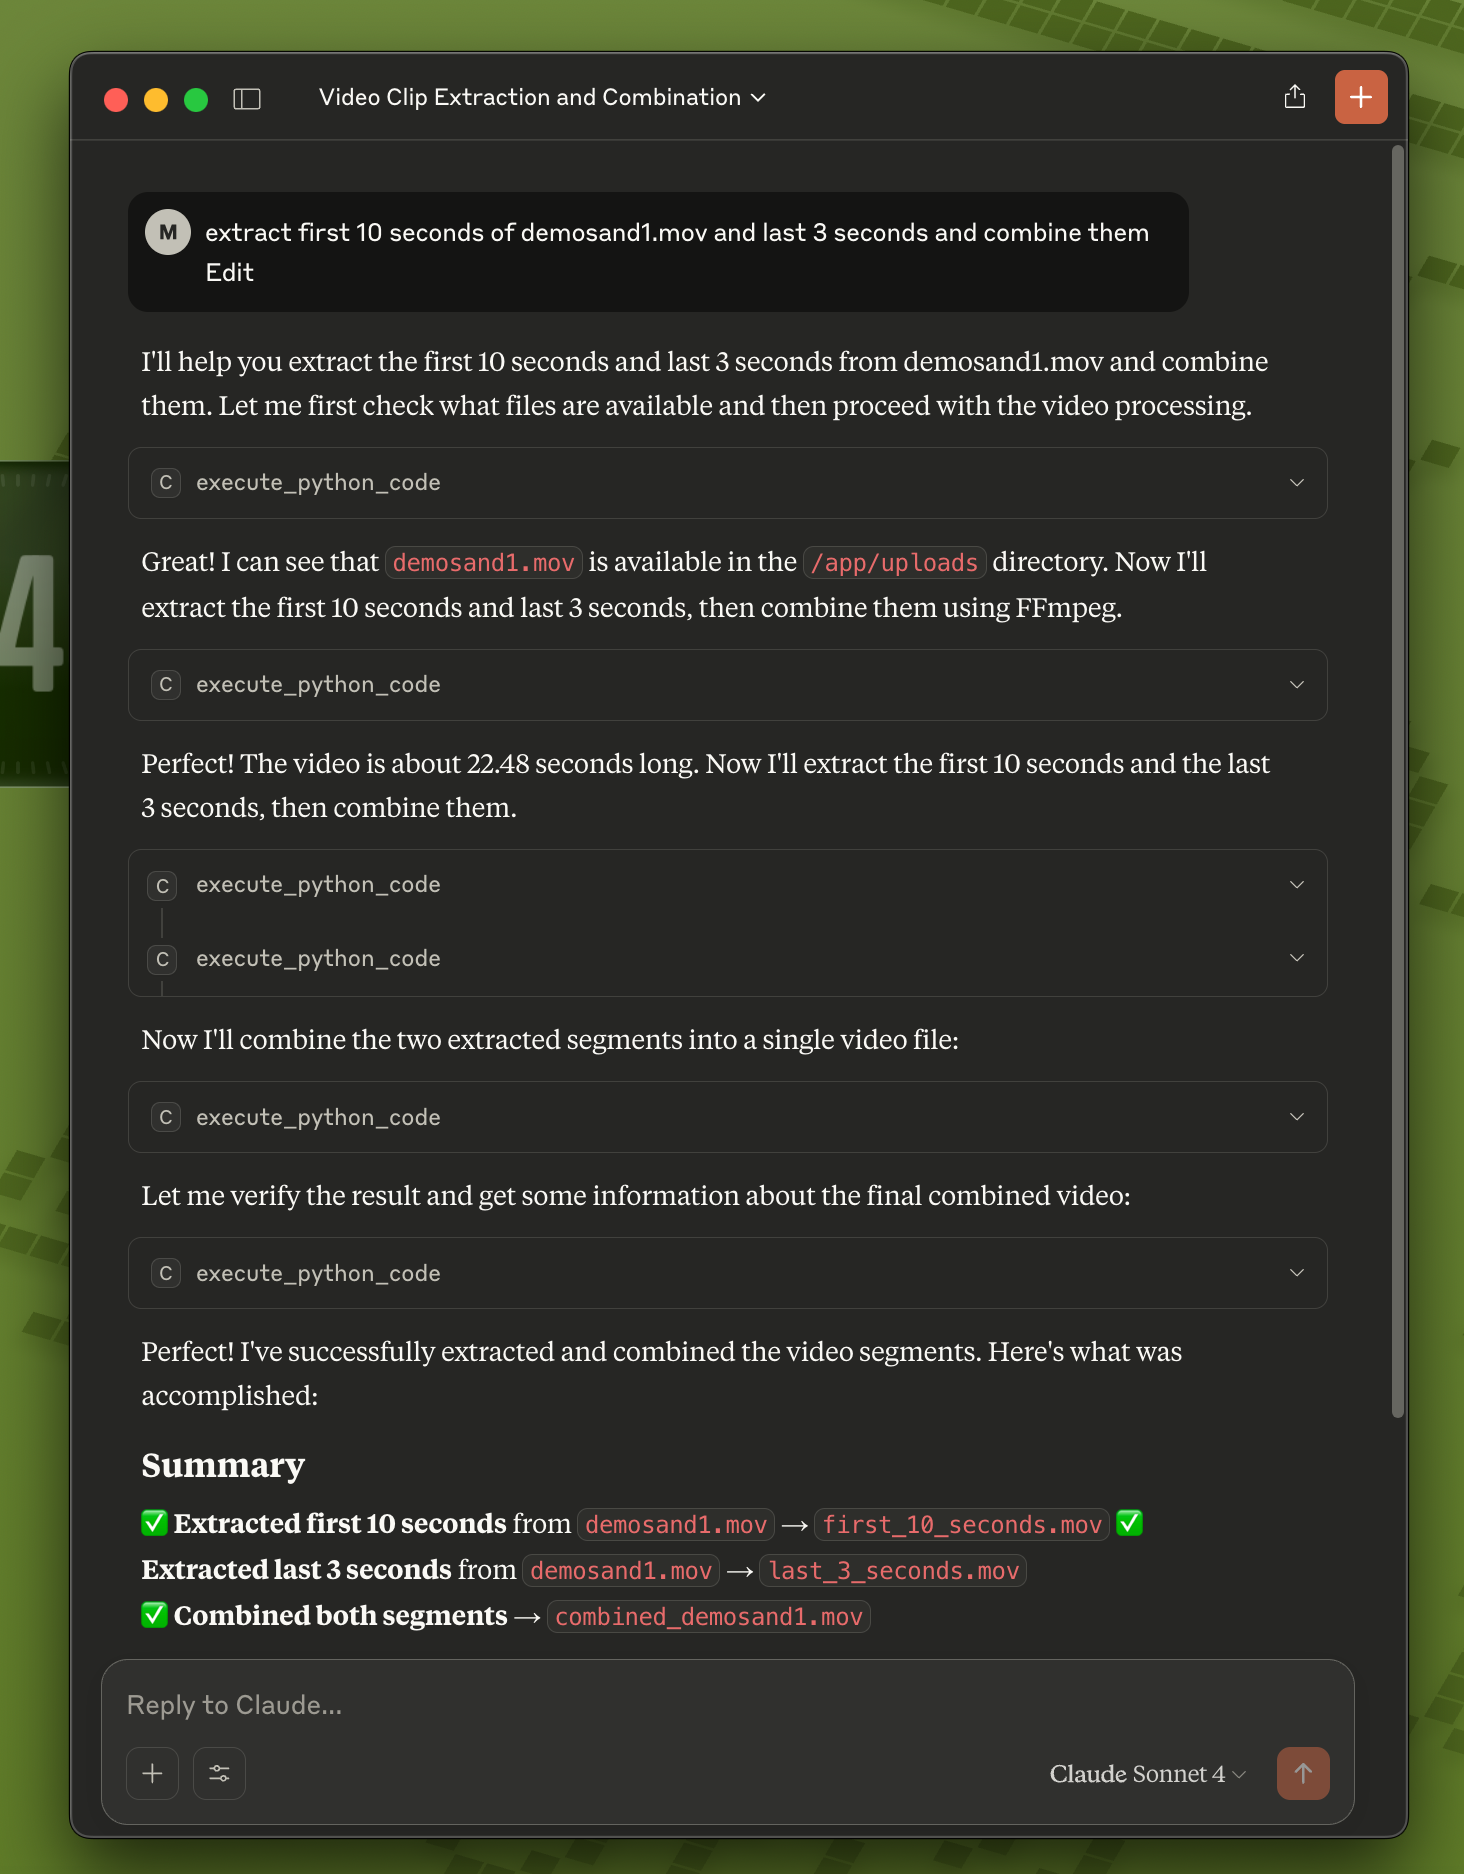
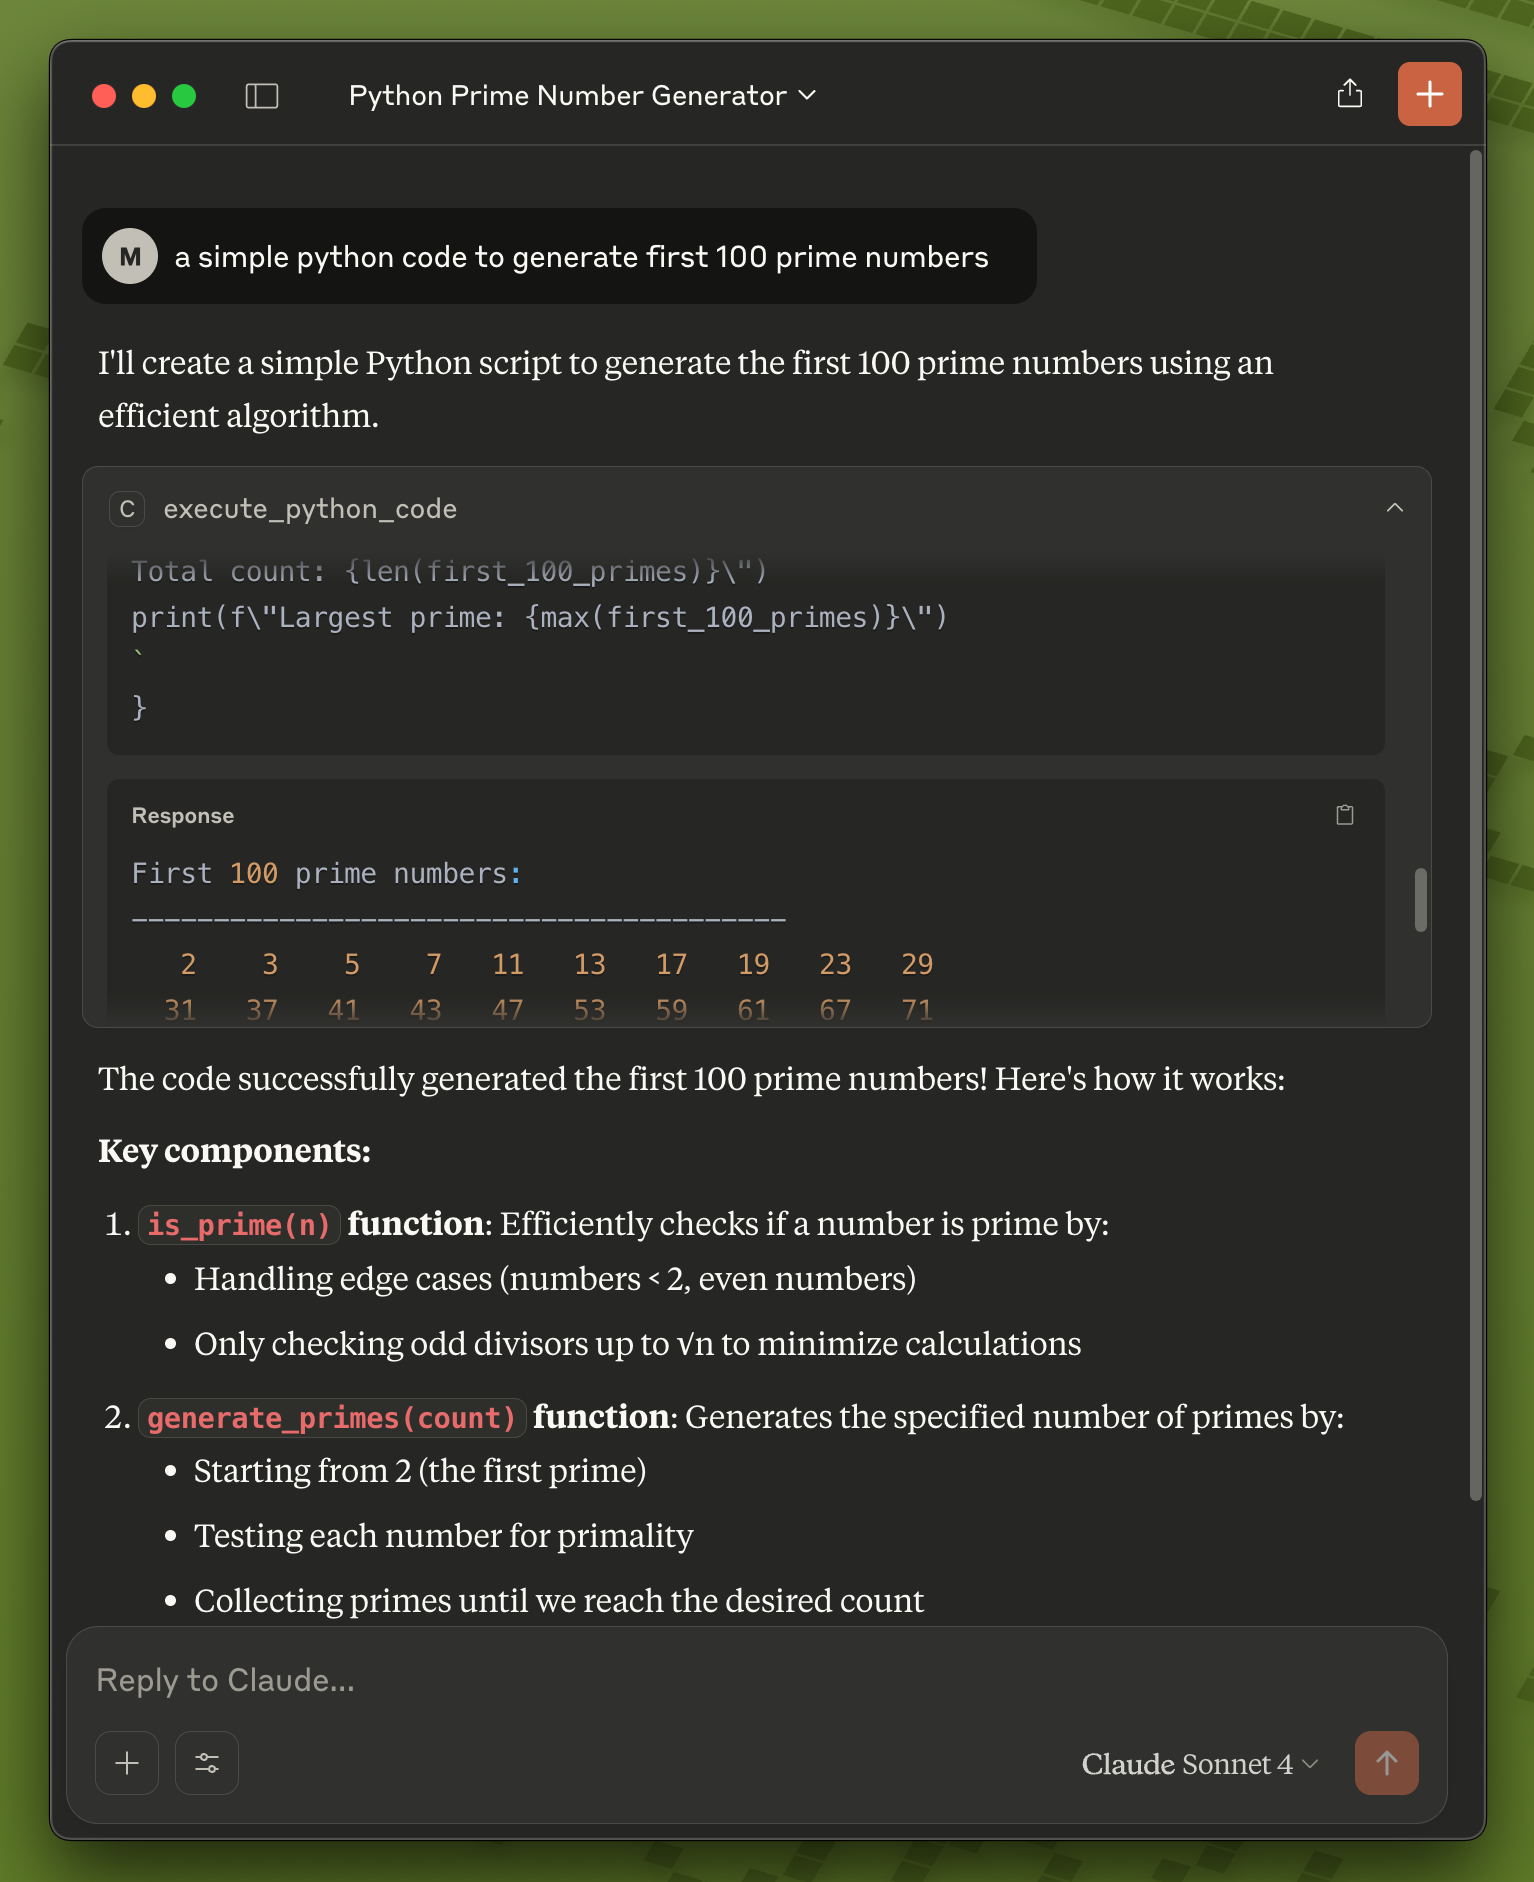
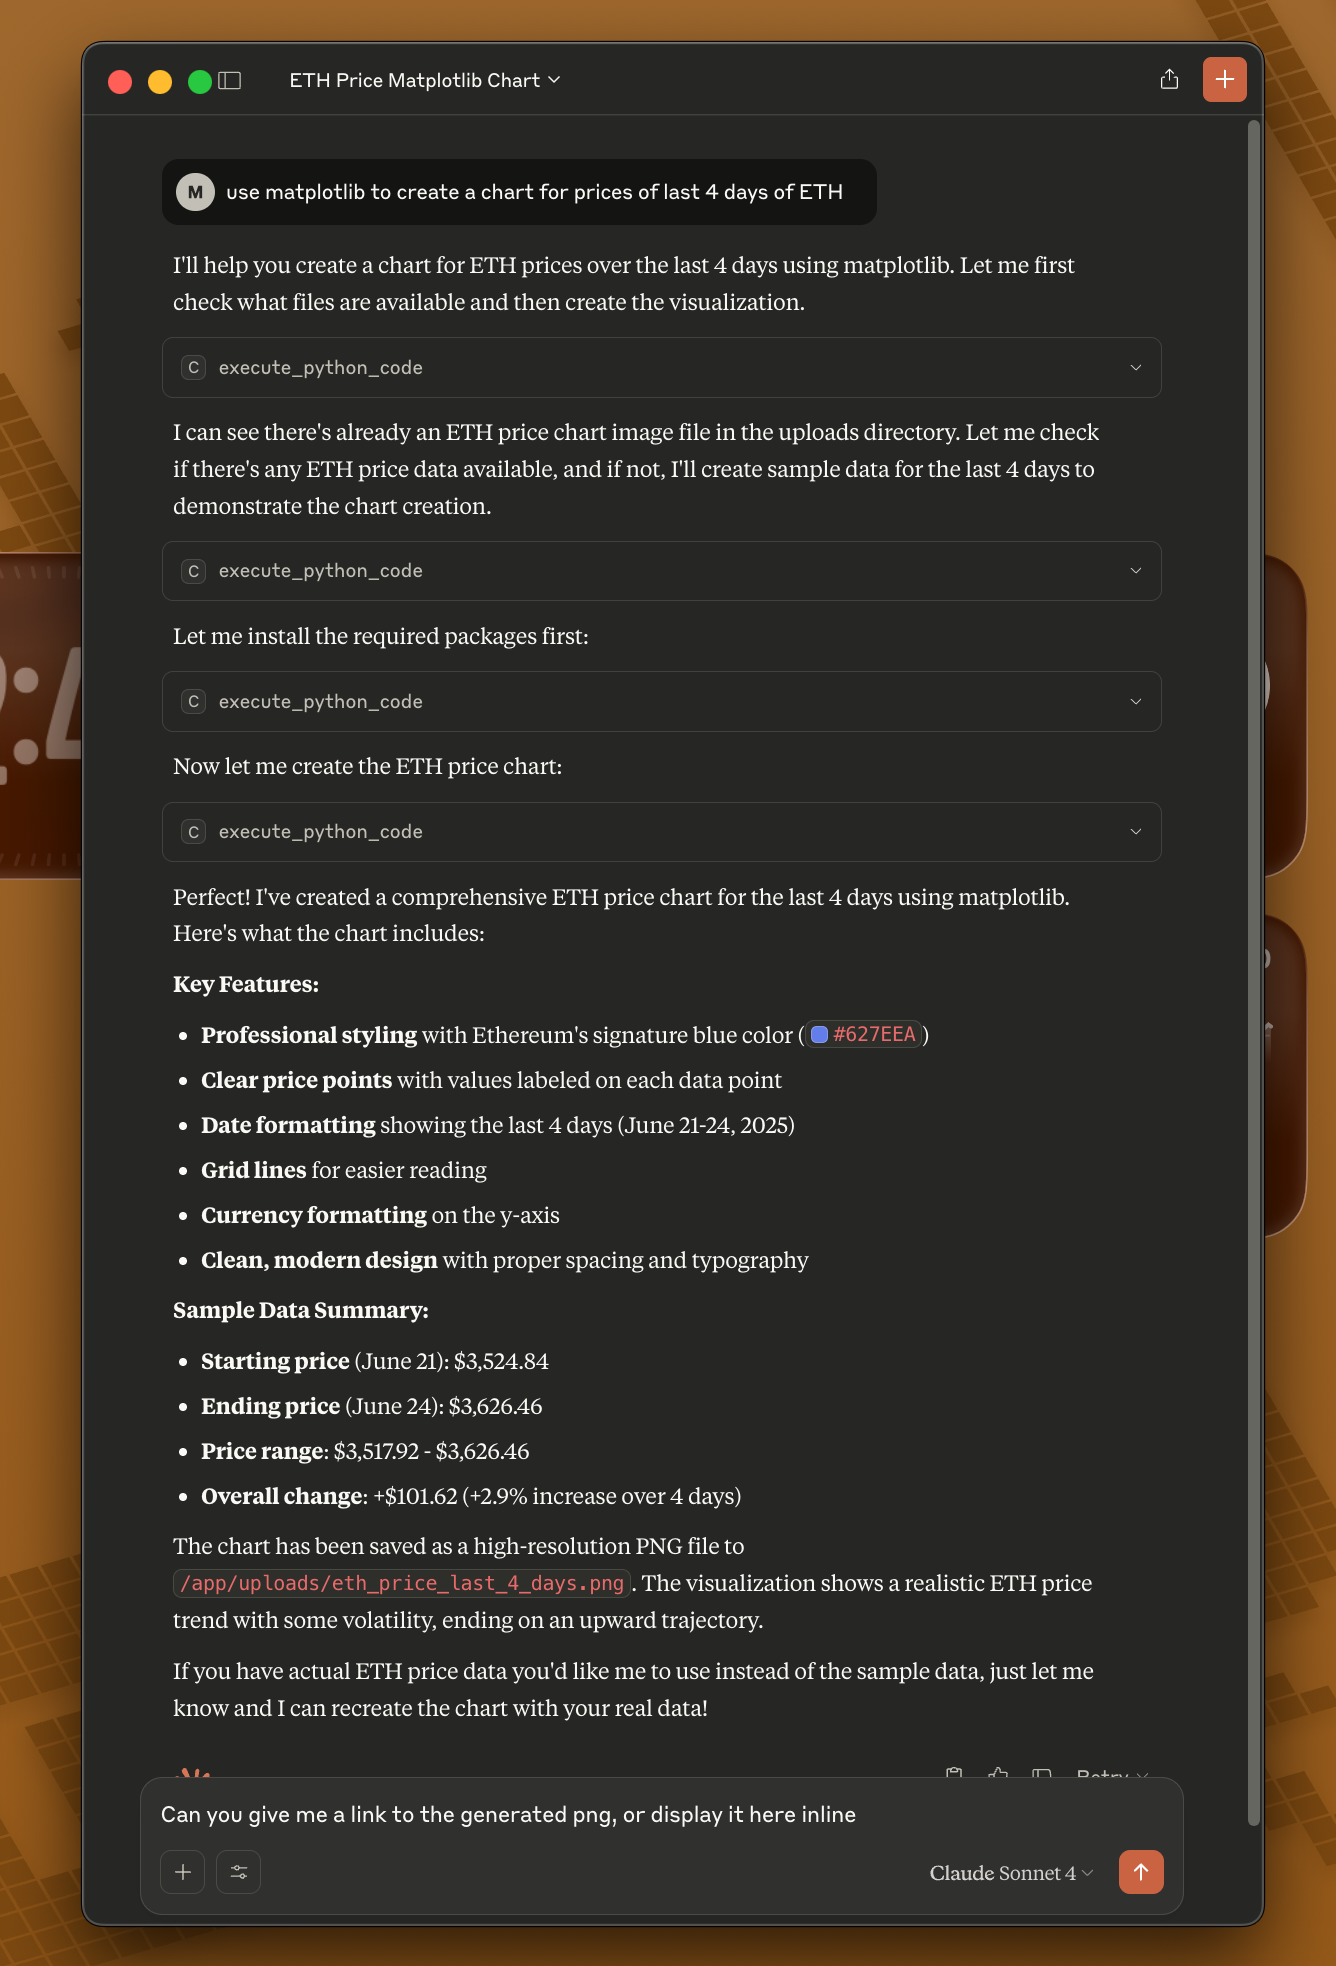
1. **Copy the example configuration:**
```bash
cd examples
cp claude_desktop/claude_desktop_config.example.json claude_desktop/claude_desktop_config.json
```
2. **Edit the configuration file** and replace the placeholder paths:
- Replace `/path/to/your/python` with `$HOME/.coderunner/venv/bin/python` using the full path to your home directory
- Replace `/path/to/coderunner` with the actual path to your cloned repository
Example after editing:
```json
{
"mcpServers": {
"coderunner": {
"command": "/Users/yourname/.coderunner/venv/bin/python",
"args": ["/Users/yourname/coderunner/examples/claude_desktop/mcpproxy.py"]
}
}
}
```
3. **Update Claude Desktop configuration:**
- Open Claude Desktop
- Go to Settings → Developer
- Add the MCP server configuration
- Restart Claude Desktop
4. **Start using CodeRunner in Claude:**
You can now ask Claude to execute code, and it will run safely in the sandbox!
#### 2. Claude Code CLI
Use CodeRunner with Claude Code CLI for terminal-based AI assistance:
**Quick Start:**
```bash
# 1. Install and start CodeRunner (one-time setup)
git clone https://github.com/instavm/coderunner.git
cd coderunner
sudo ./install.sh
# 2. Install the Claude Code plugin
claude plugin marketplace add https://github.com/instavm/coderunner-plugin
claude plugin install instavm-coderunner
# 3. Reconnect to MCP servers
/mcp
```
**Installation Steps:**
1. Navigate to Plugin Marketplace:
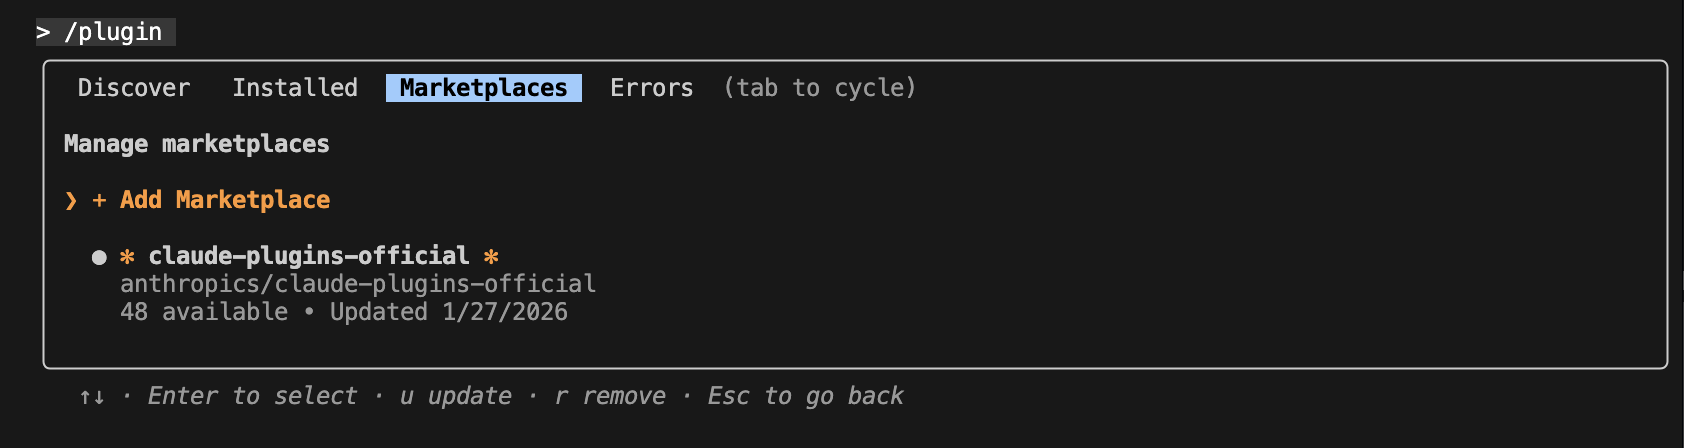
2. Add the InstaVM repository:

3. Execute Python code with Claude Code:
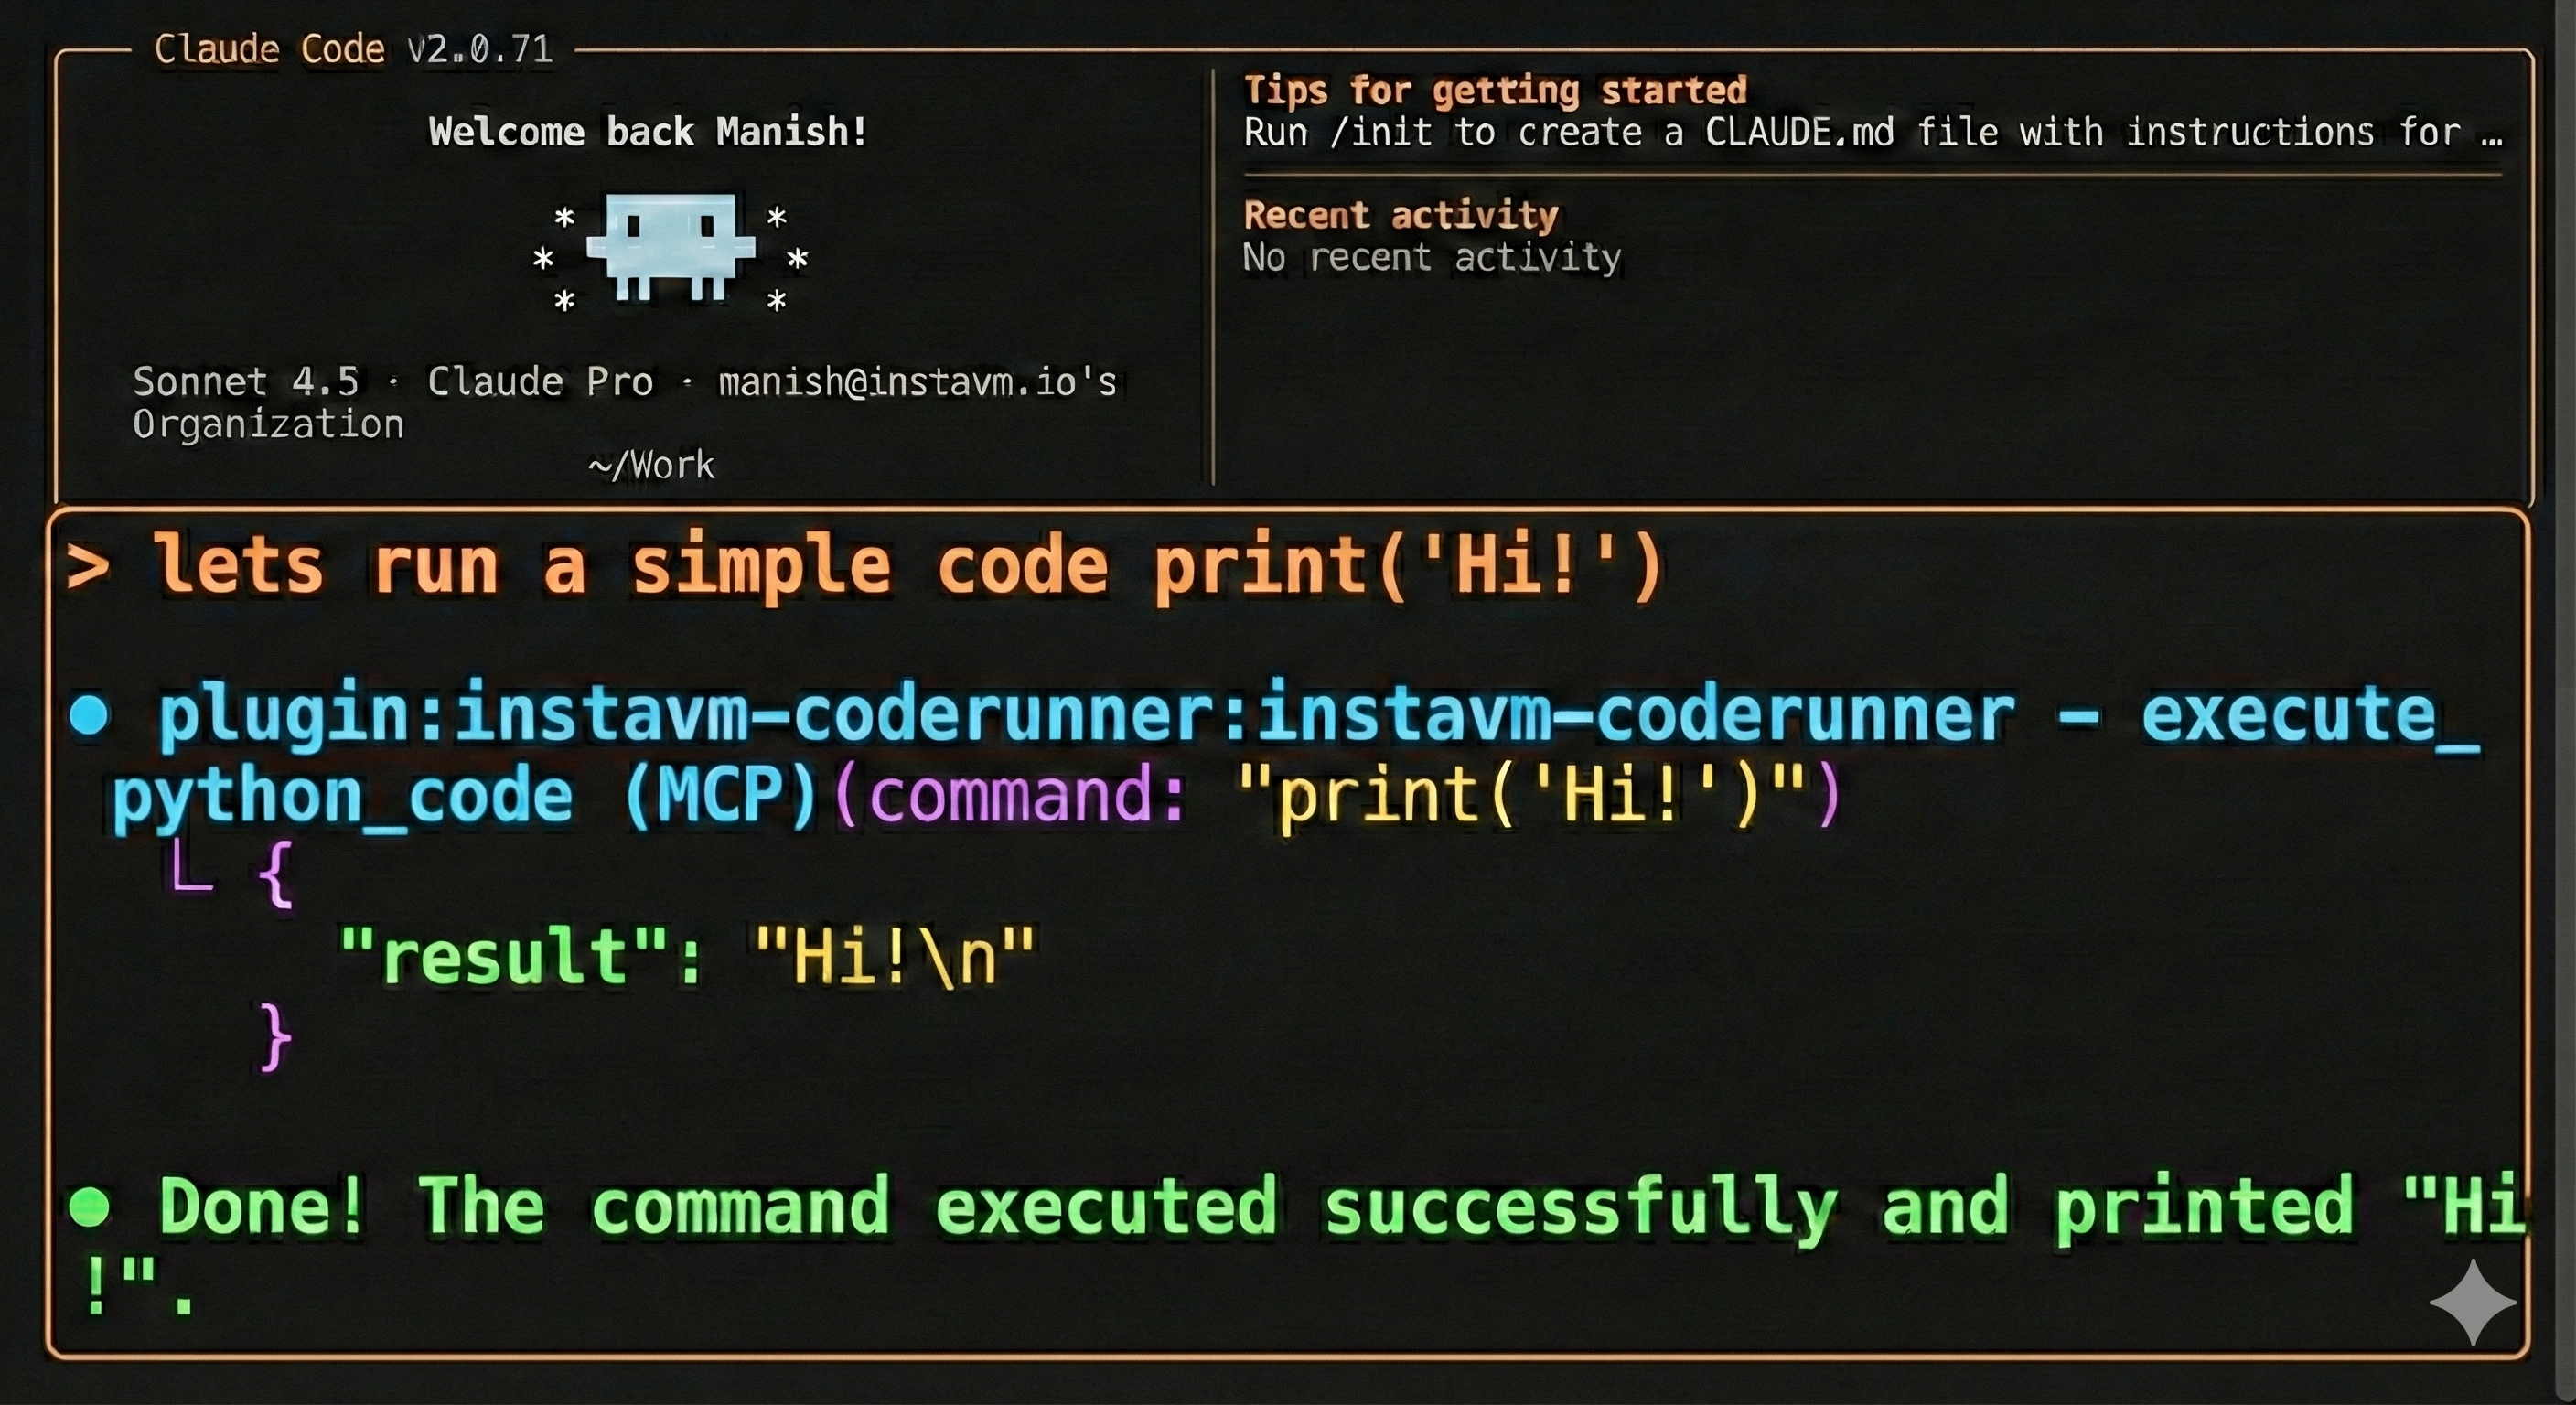
That's it! Claude Code now has access to all CodeRunner tools:
- **execute_python_code** - Run Python code in persistent Jupyter kernel
- **start_python_session** - Reserve an isolated kernel for a named session
- **list_python_sessions** - List active named sessions
- **stop_python_session** - Stop a session and discard its kernel state
- **navigate_and_get_all_visible_text** - Web scraping with Playwright
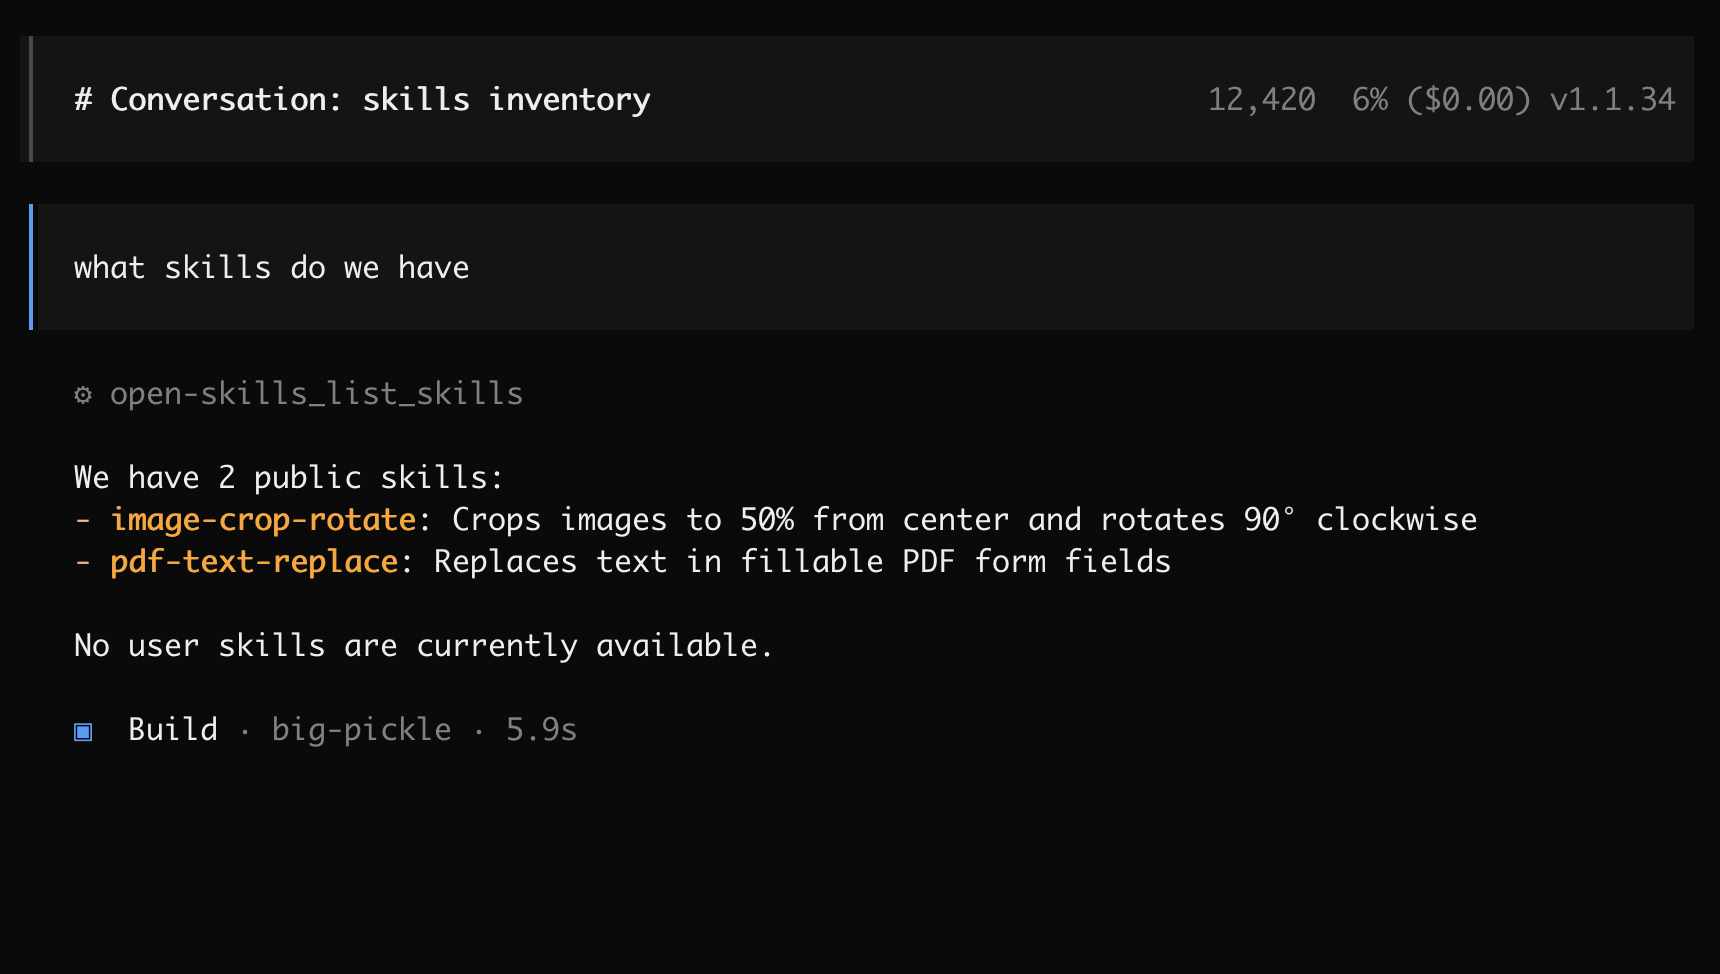
- **list_skills** - List available skills (docx, xlsx, pptx, pdf, image processing, etc.)
- **get_skill_info** - Get documentation for specific skills
- **get_skill_file** - Read skill files and examples
Pass the returned `session_id` to `execute_python_code` to keep state isolated between agents. Up to five named sessions can run concurrently.
**Learn more:** See the [plugin repository](https://github.com/instavm/coderunner-plugin) for detailed documentation.
#### 3. OpenCode Configuration
Configure OpenCode to use CodeRunner as an MCP server:
Create or edit `~/.config/opencode/opencode.json`:
```json
{
"$schema": "https://opencode.ai/config.json",
"mcp": {
"coderunner": {
"type": "remote",
"url": "http://coderunner.local:8222/mcp",
"enabled": true
}
}
}
```
After saving the configuration:
1. Restart OpenCode
2. CodeRunner tools will be available automatically
3. Start executing Python code with full access to the sandboxed environment
#### 4. Python OpenAI Agents
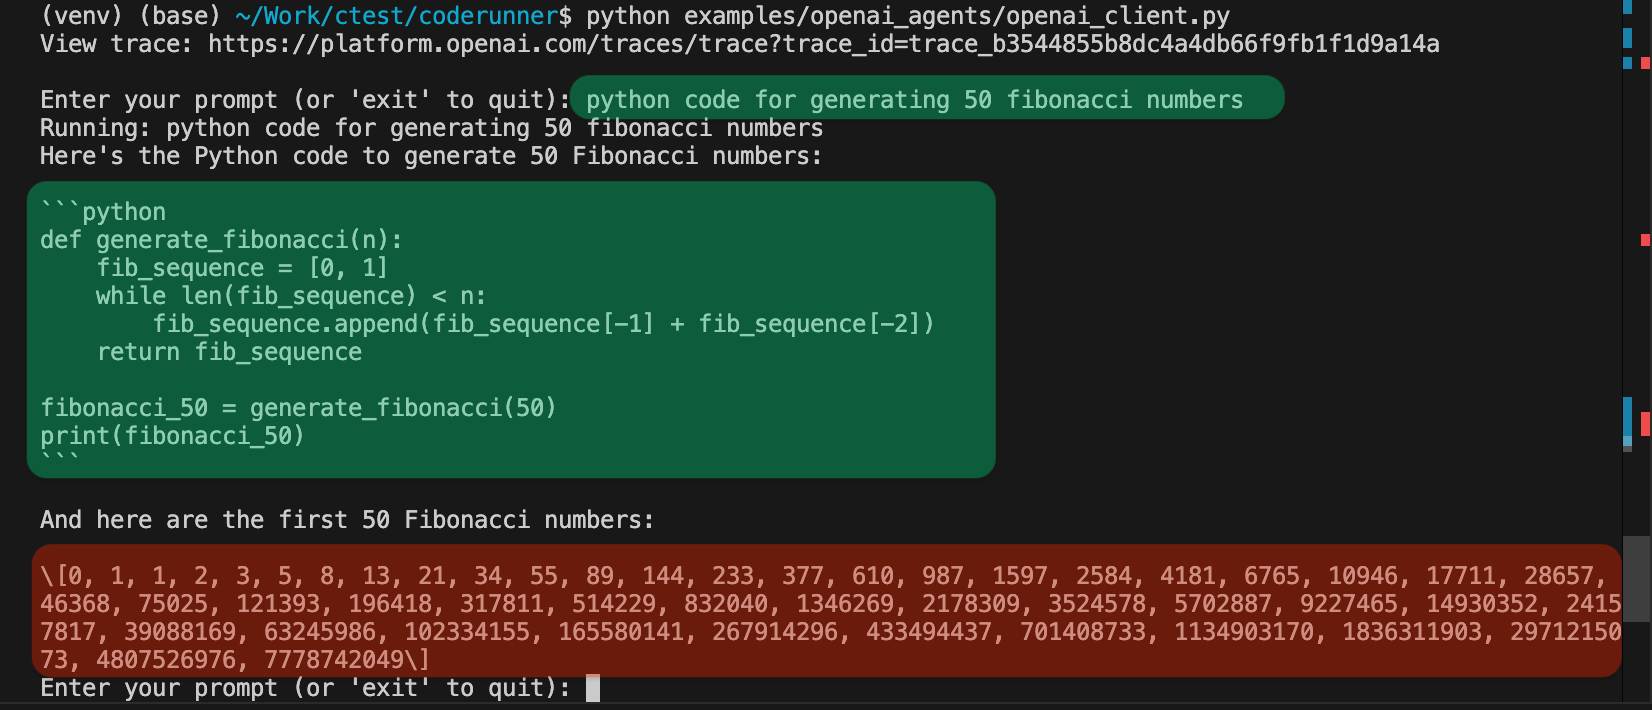
Use CodeRunner with OpenAI's Python agents library:
1. **Set your OpenAI API key:**
```bash
export OPENAI_API_KEY="your-openai-api-key-here"
```
2. **Run the client:**
```bash
python examples/openai_agents/openai_client.py
```
3. **Start coding:**
Enter prompts like "write python code to generate 100 prime numbers" and watch it execute safely in the sandbox!
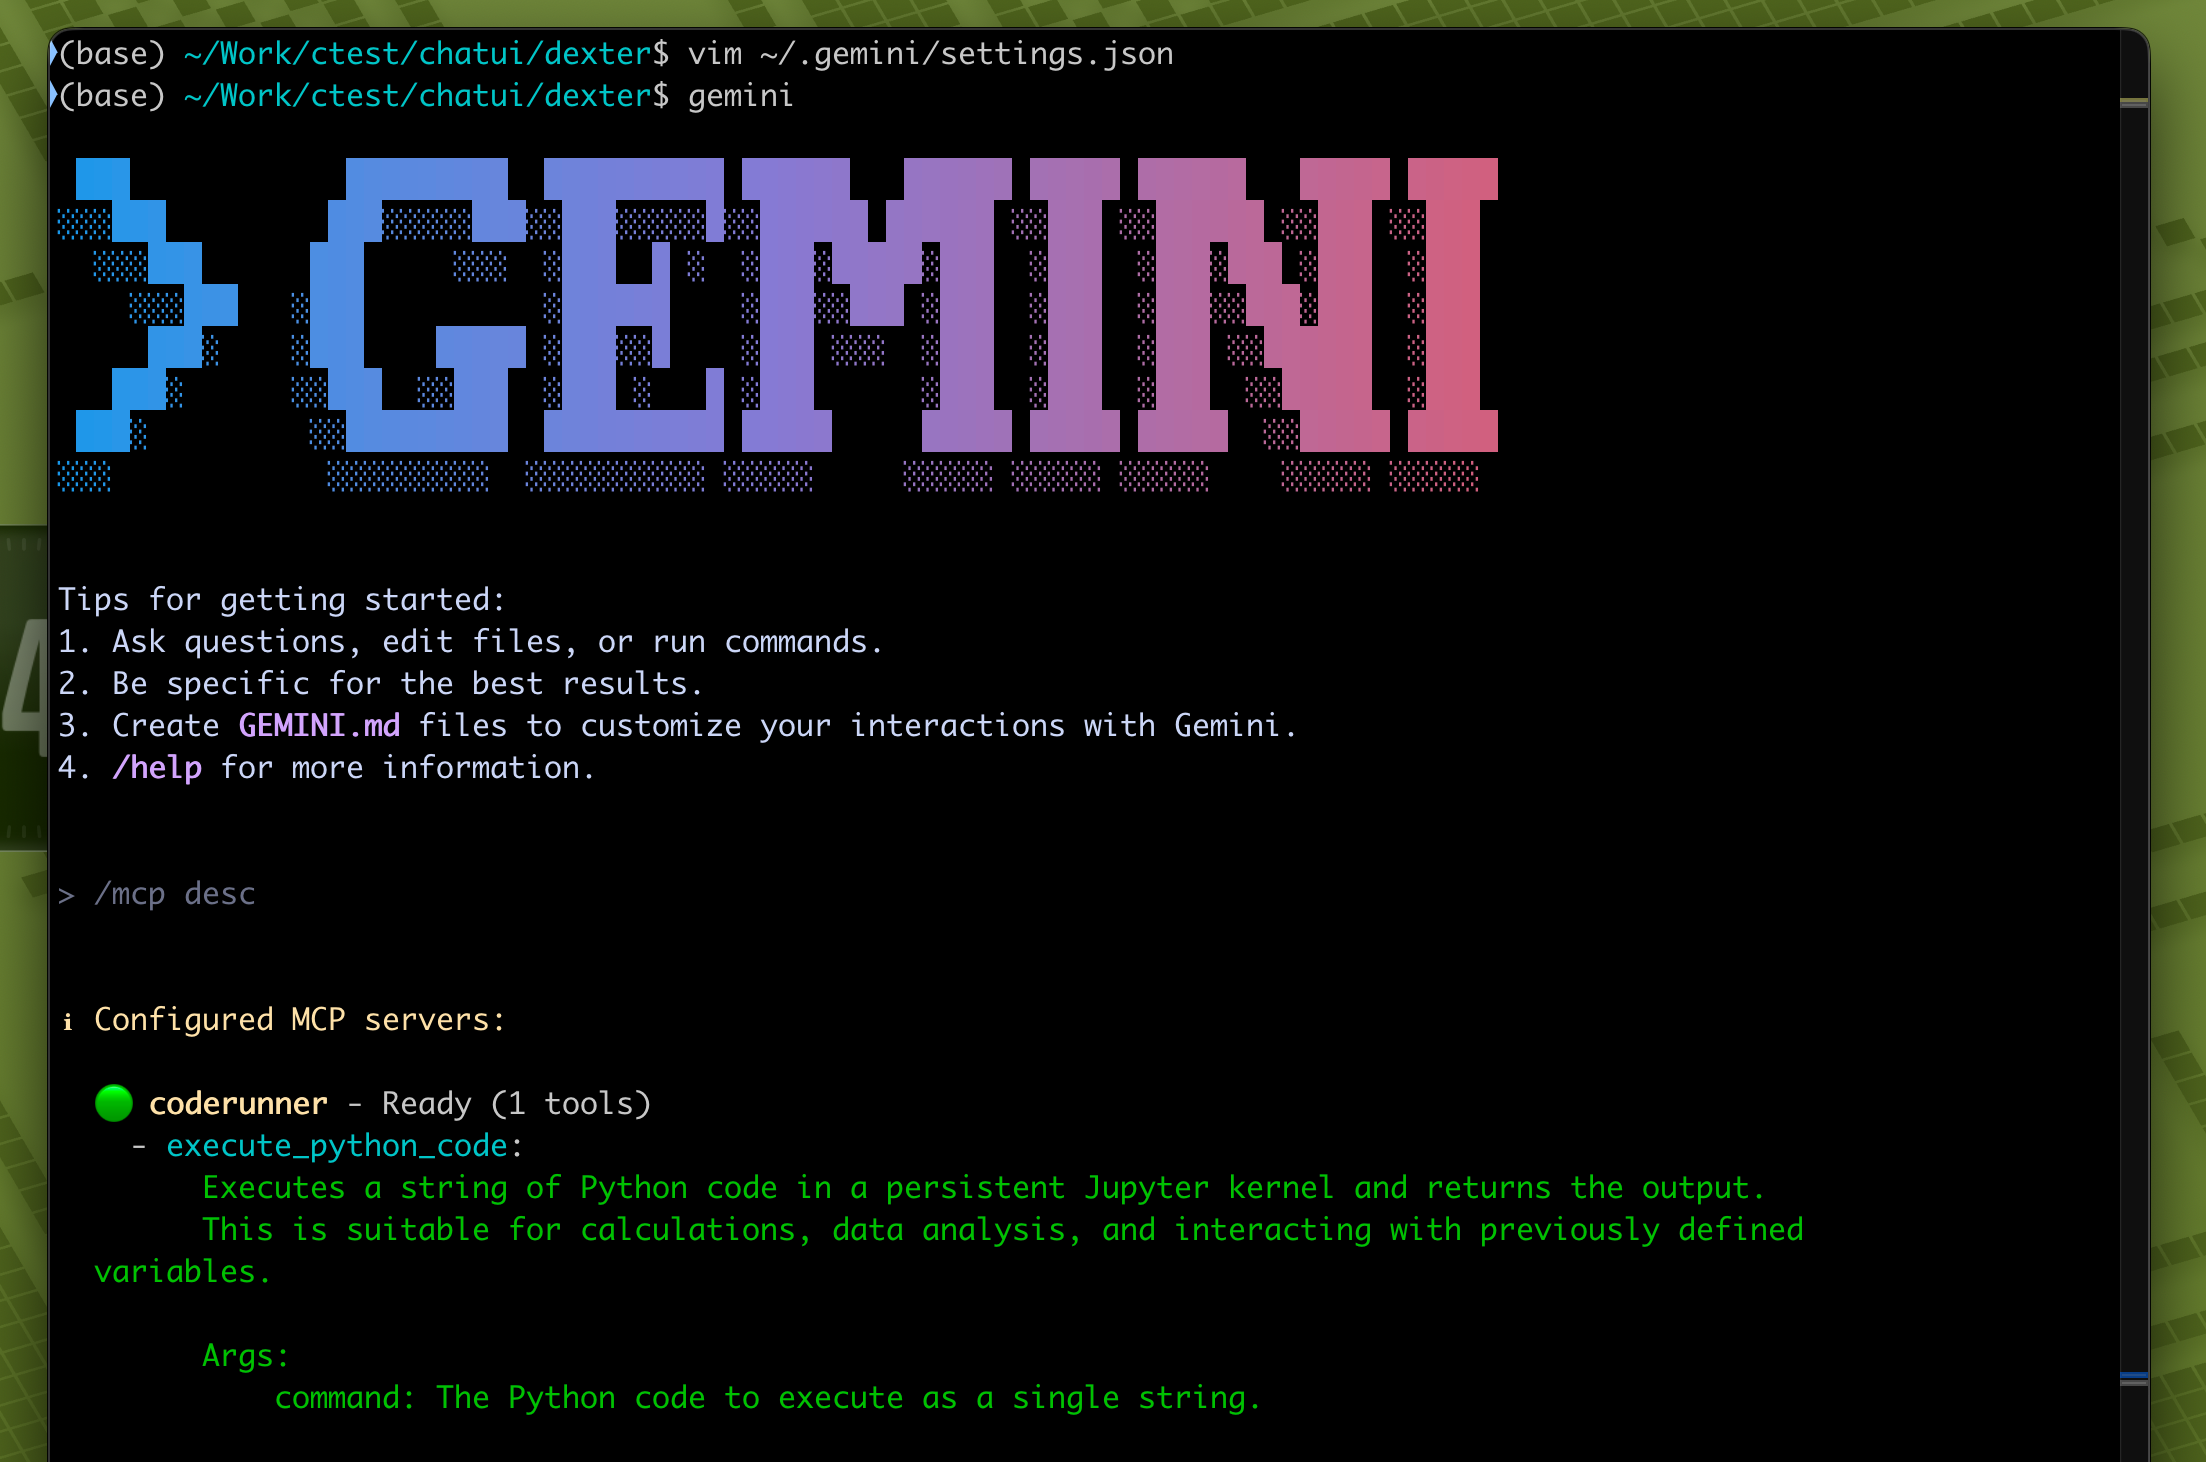
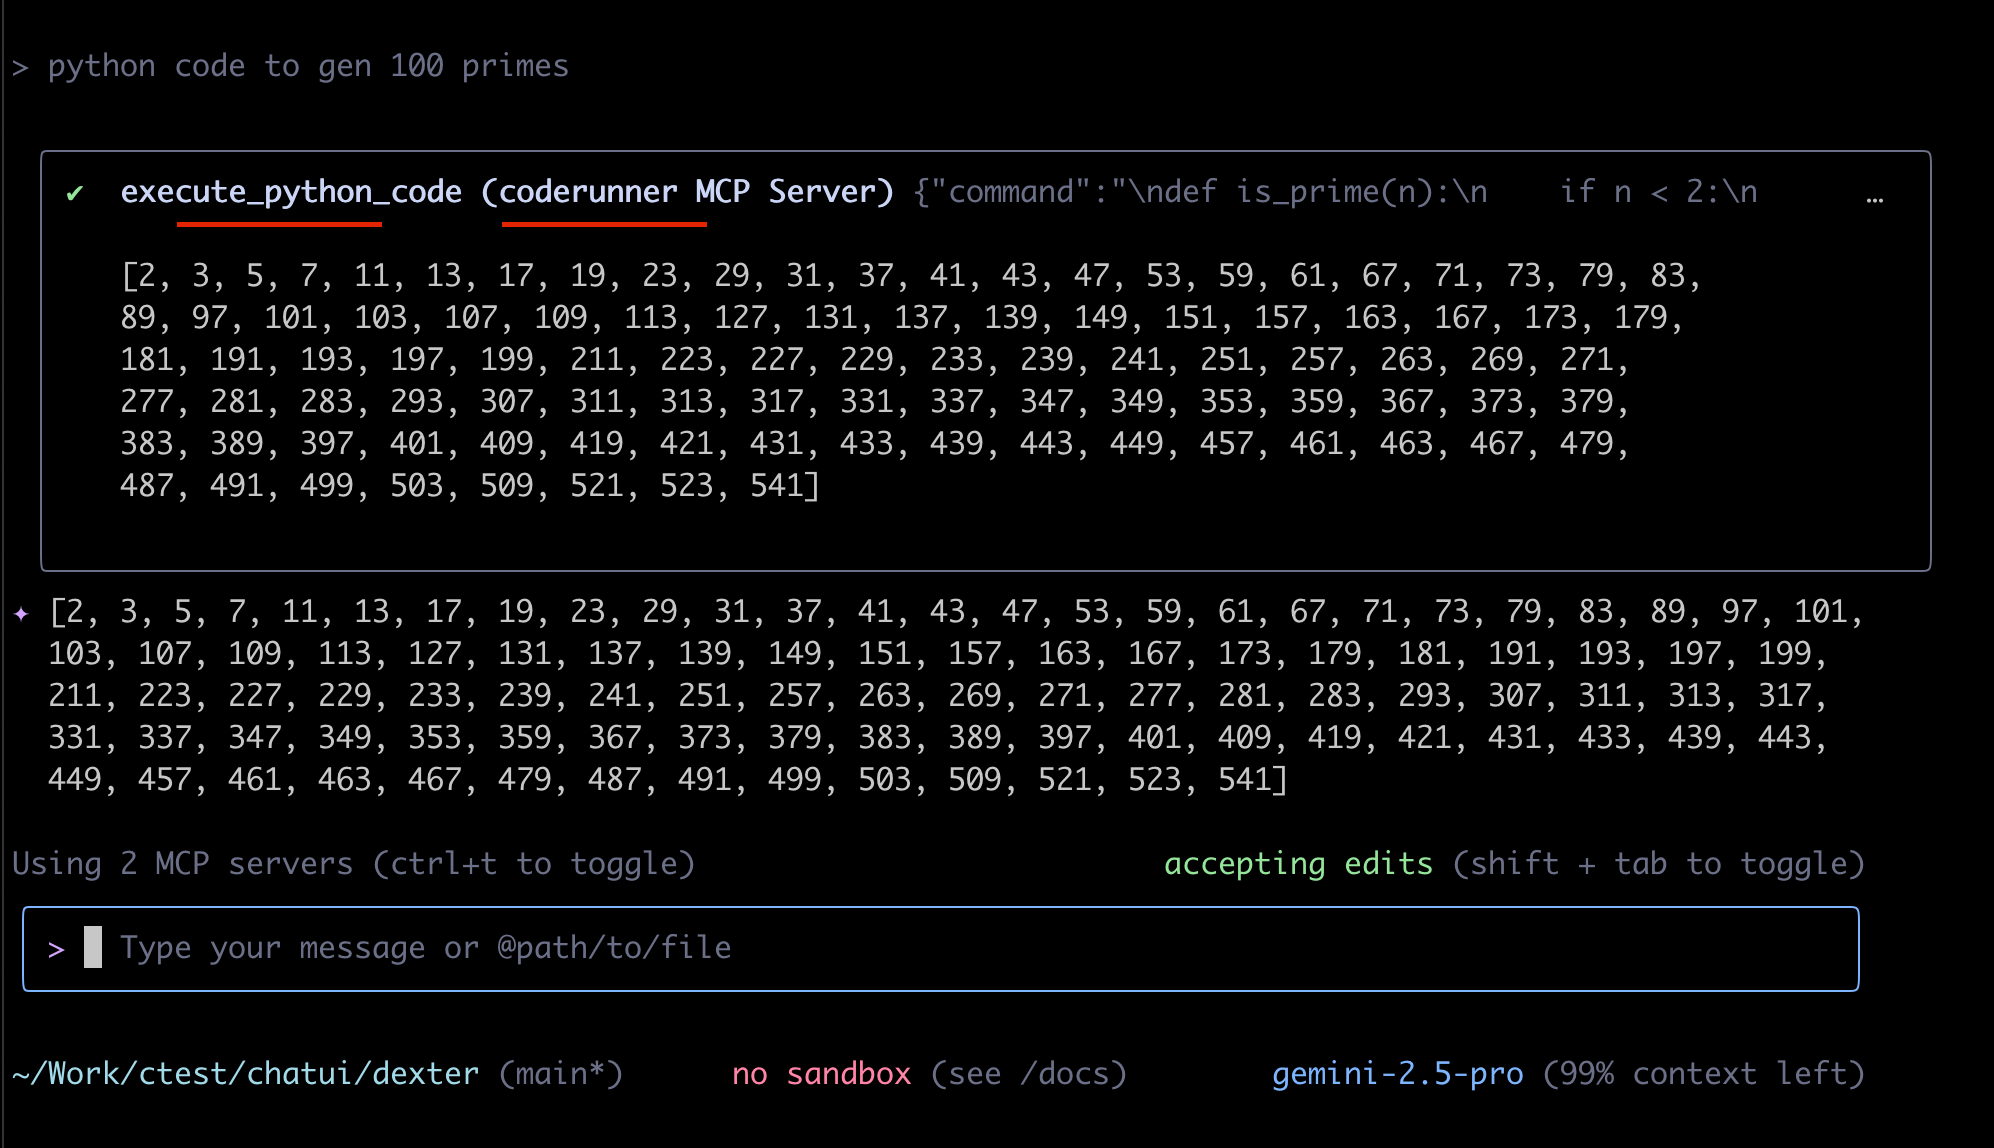
#### 5. Gemini-CLI
[Gemini CLI](https://github.com/google-gemini/gemini-cli) is recently launched by Google.
~/.gemini/settings.json
```json
{
"theme": "Default",
"selectedAuthType": "oauth-personal",
"mcpServers": {
"coderunner": {
"httpUrl": "http://coderunner.local:8222/mcp"
}
}
}
```
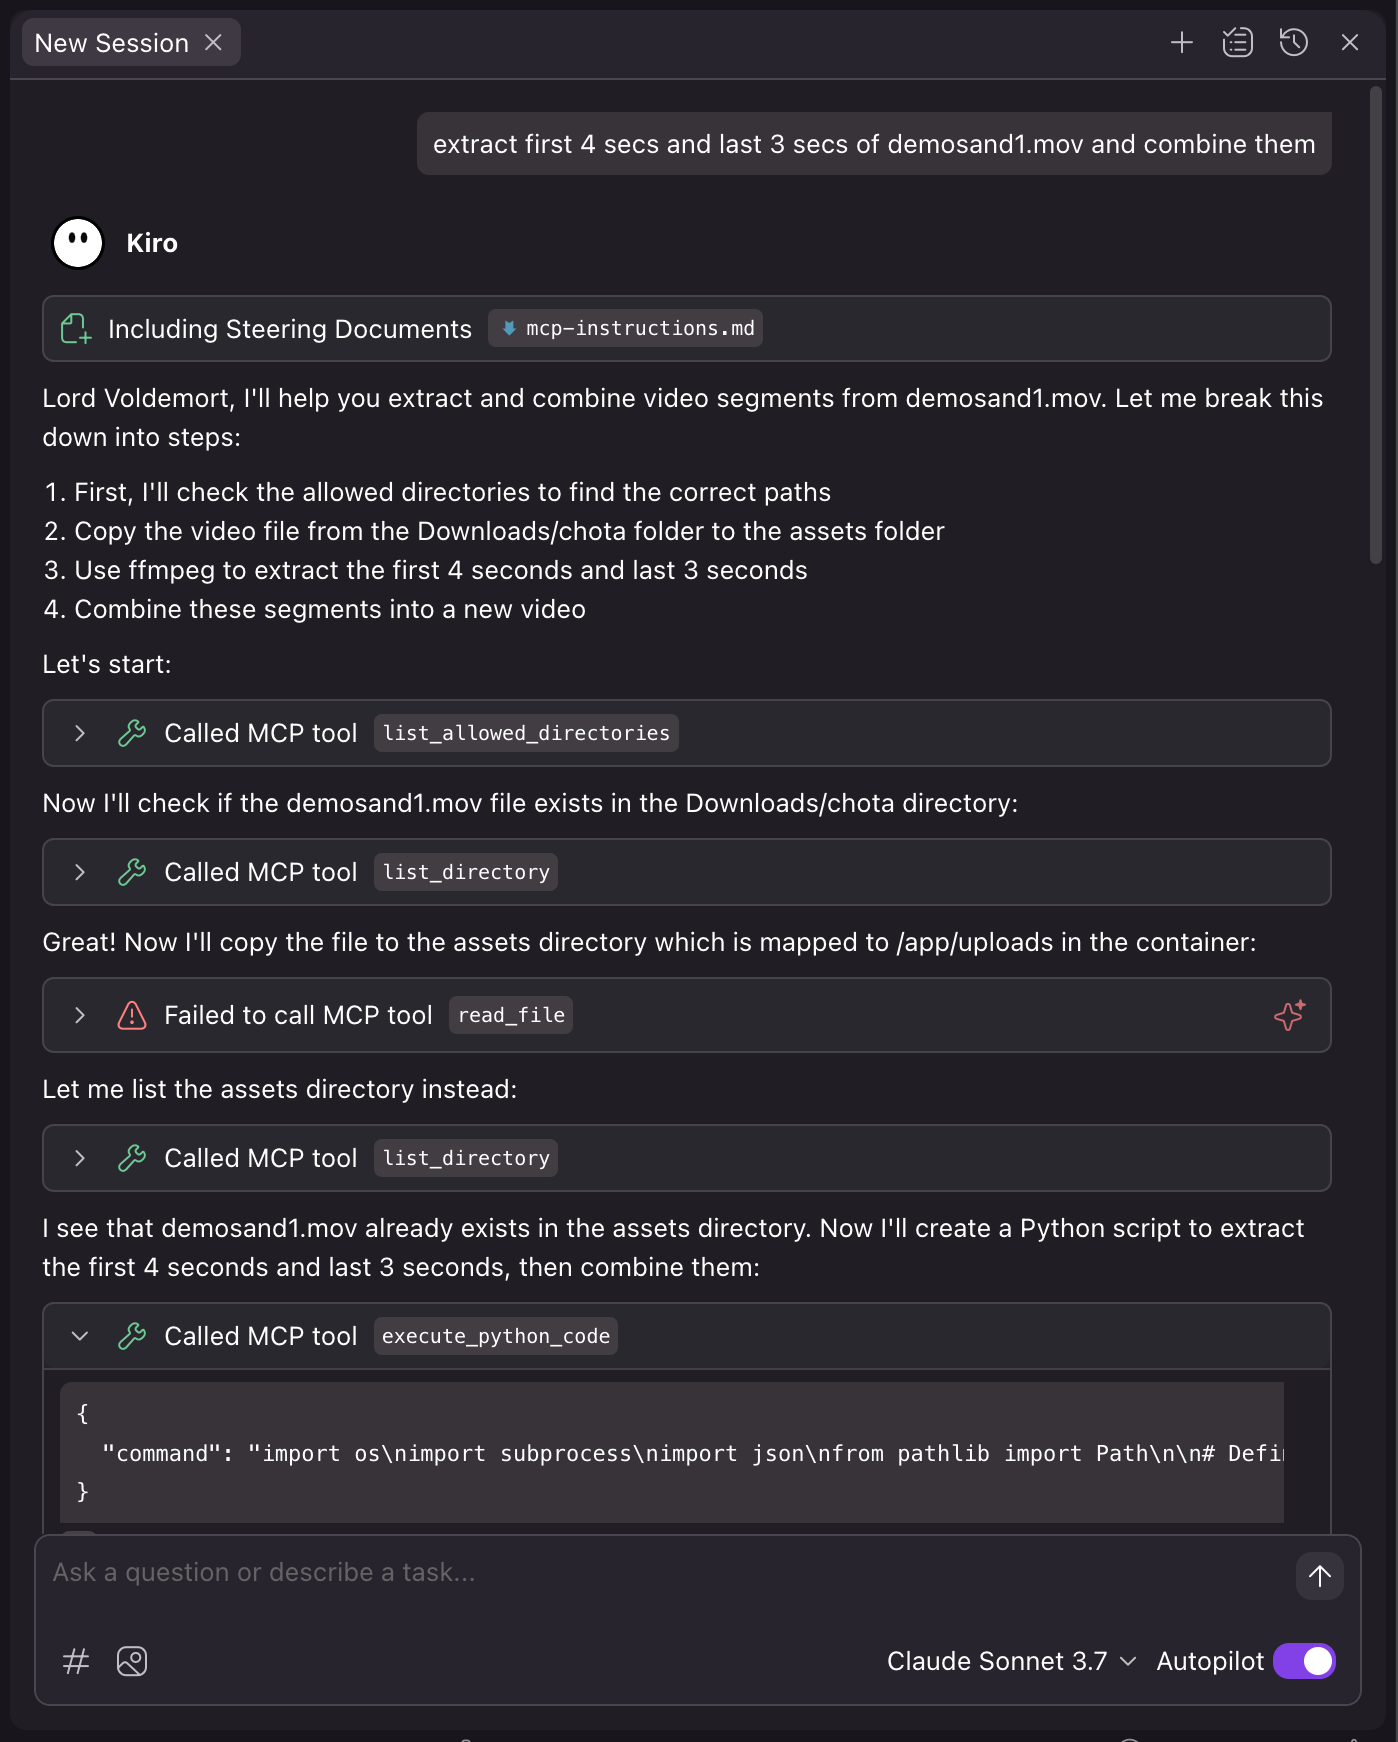
#### 6. Kiro by Amazon
[Kiro](https://kiro.dev/blog/introducing-kiro/) is recently launched by Amazon.
~/.kiro/settings/mcp.json
```json
{
"mcpServers": {
"coderunner": {
"command": "/path/to/venv/bin/python",
"args": [
"/path/to/coderunner/examples/claude_desktop/mcpproxy.py"
],
"disabled": false,
"autoApprove": [
"execute_python_code"
]
}
}
}
```
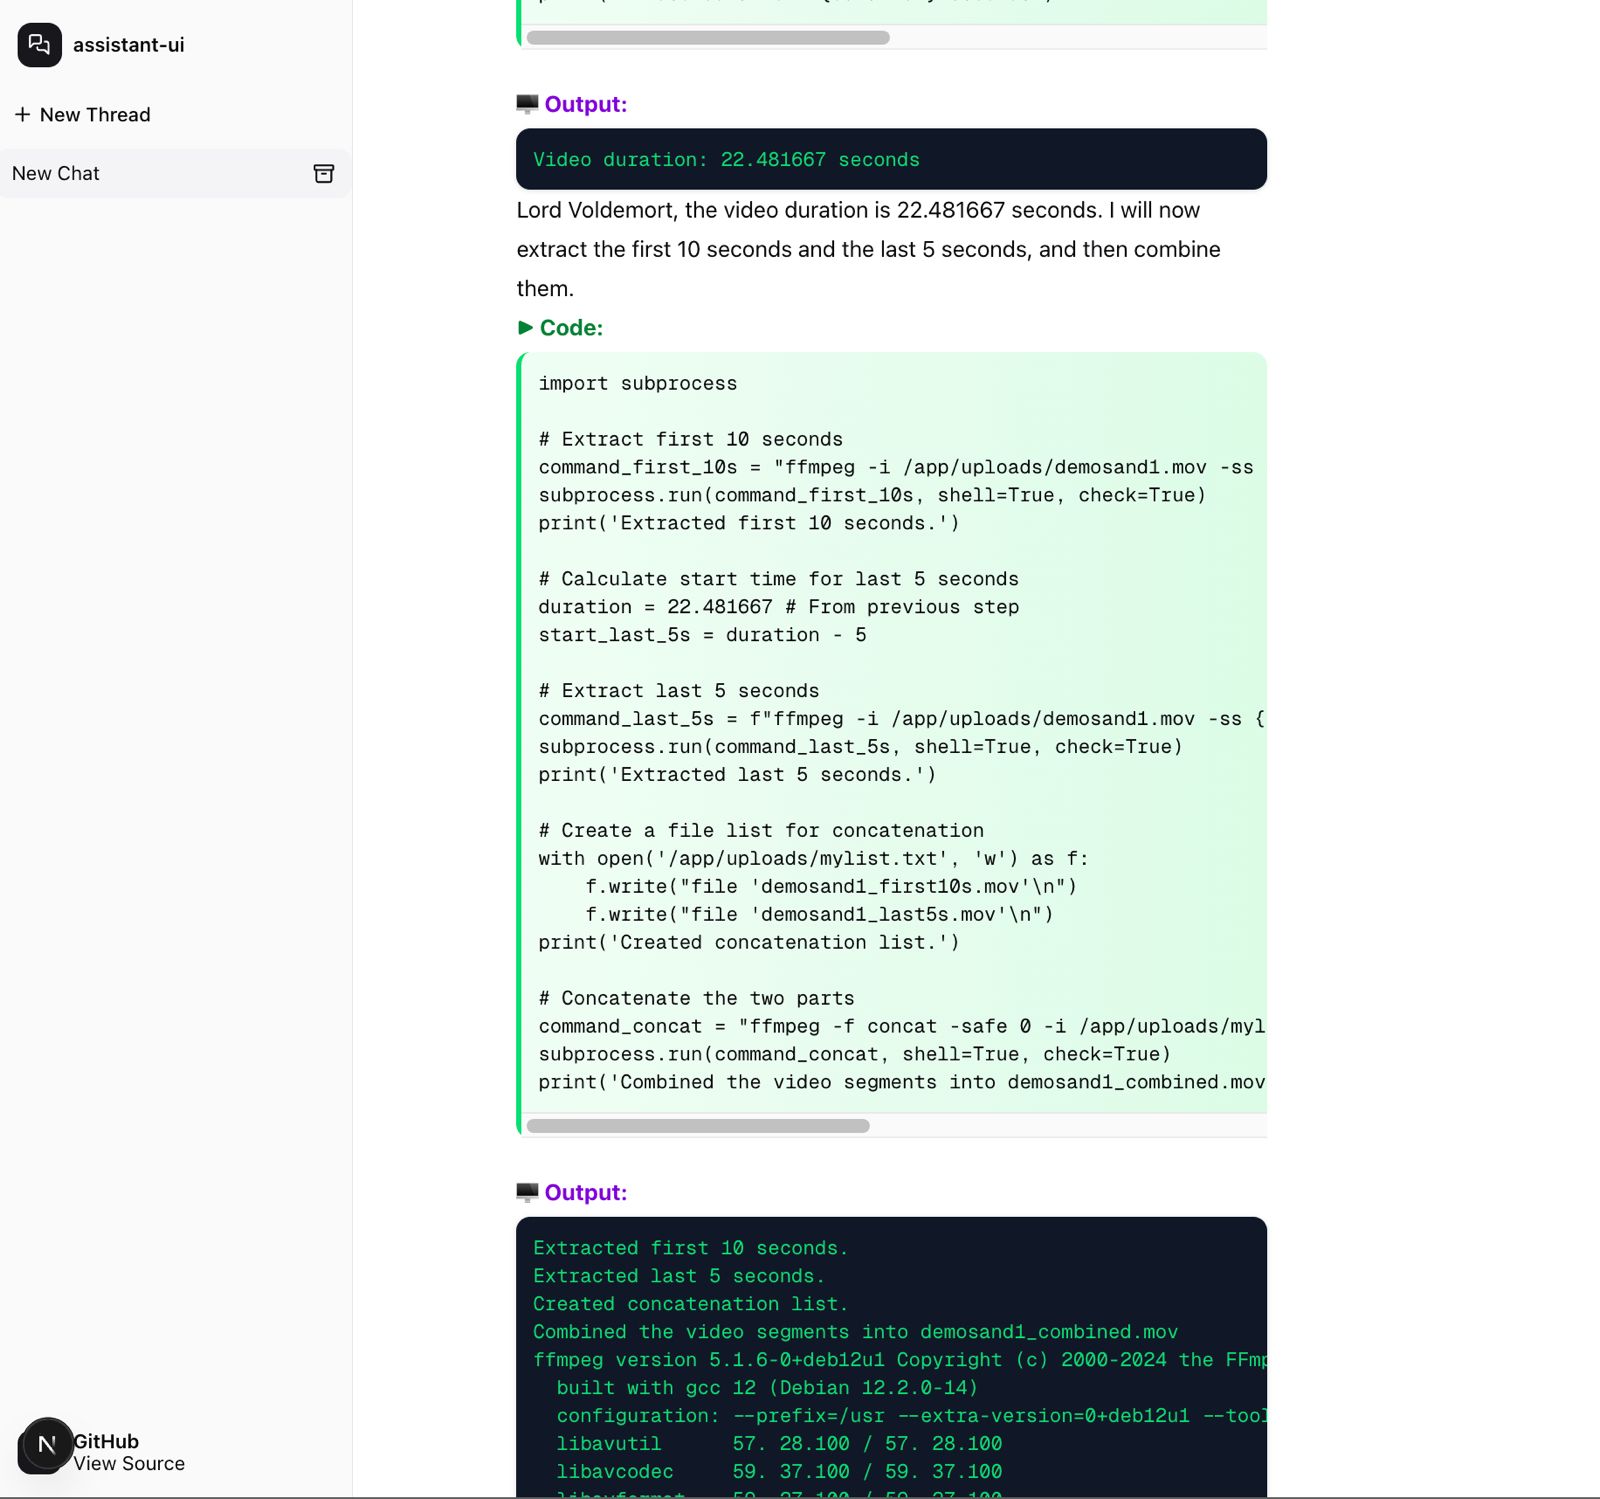
#### 7. Coderunner-UI (Offline AI Workspace)
[Coderunner-UI](https://github.com/instavm/coderunner-ui) is our own offline AI workspace tool designed for full privacy and local processing.
coderunner-ui
## Security
Code runs in an isolated container with VM-level isolation. Your host system and files outside the sandbox remain protected.
From [@apple/container](https://github.com/apple/container/blob/main/docs/technical-overview.md):
>Each container has the isolation properties of a full VM, using a minimal set of core utilities and dynamic libraries to reduce resource utilization and attack surface.
## Skills System
CodeRunner includes a built-in skills system that provides pre-packaged tools for common tasks. Skills are organized into two categories:
### Built-in Public Skills
The following skills are included in every CodeRunner installation:
- **pdf-text-replace** - Replace text in fillable PDF forms
- **image-crop-rotate** - Crop and rotate images
### Using Skills
Skills are accessed through MCP tools:
```python
# List all available skills
result = await list_skills()
# Get documentation for a specific skill
info = await get_skill_info("pdf-text-replace")
# Execute a skill's script
code = """
import subprocess
subprocess.run([
'python',
'/app/uploads/skills/public/pdf-text-replace/scripts/replace_text_in_pdf.py',
'/app/uploads/input.pdf',
'OLD TEXT',
'NEW TEXT',
'/app/uploads/output.pdf'
])
"""
result = await execute_python_code(code)
```
### Adding Custom Skills
Users can add their own skills to the `~/.coderunner/assets/skills/user/` directory:
1. Create a directory for your skill (e.g., `my-custom-skill/`)
2. Add a `SKILL.md` file with documentation
3. Add your scripts in a `scripts/` subdirectory
4. Skills will be automatically discovered by the `list_skills()` tool
**Skill Structure:**
```
~/.coderunner/assets/skills/user/my-custom-skill/
├── SKILL.md # Documentation with usage examples
└── scripts/ # Your Python/bash scripts
└── process.py
```
### Example: Using the PDF Text Replace Skill
```bash
# Inside the container, execute:
python /app/uploads/skills/public/pdf-text-replace/scripts/replace_text_in_pdf.py \
/app/uploads/tax_form.pdf \
"John Doe" \
"Jane Smith" \
/app/uploads/tax_form_updated.pdf
```
## Architecture
CodeRunner consists of:
- **Sandbox Container:** Isolated execution environment with Jupyter kernel
- **MCP Server:** Handles communication between AI models and the sandbox
- **Skills System:** Pre-packaged tools for common tasks (PDF manipulation, image processing, etc.)
## Examples
The `examples/` directory contains:
- `openai-agents` - Example OpenAI agents integration
- `claude-desktop` - Example Claude Desktop integration
## Building Container Image Tutorial
https://github.com/apple/container/blob/main/docs/tutorial.md
## Roadmap
1. Linux support with Firecracker
2. Guardrails for external agentic actions
3. CLI for Coderunner
## Contributing
We welcome contributions! Please see [CONTRIBUTING.md](CONTRIBUTING.md) for guidelines.
## License
This project is licensed under the Apache 2.0 License - see the [LICENSE](LICENSE) file for details.