
|
| You could also click here to watch the demo video. |
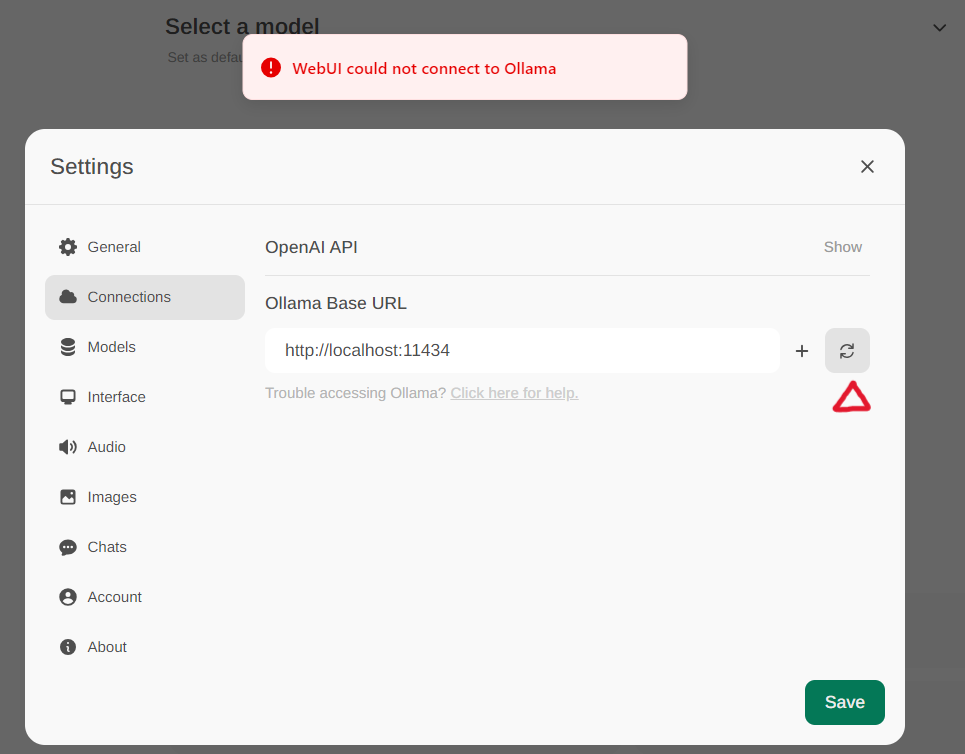
 #### Configure `Ollama` service URL
Access the Ollama settings through **Settings -> Connections** in the menu. By default, the **Ollama Base URL** is preset to https://localhost:11434, as illustrated in the snapshot below. To verify the status of the Ollama service connection, click the **Refresh button** located next to the textbox. If the WebUI is unable to establish a connection with the Ollama server, you will see an error message stating, `WebUI could not connect to Ollama`.
#### Configure `Ollama` service URL
Access the Ollama settings through **Settings -> Connections** in the menu. By default, the **Ollama Base URL** is preset to https://localhost:11434, as illustrated in the snapshot below. To verify the status of the Ollama service connection, click the **Refresh button** located next to the textbox. If the WebUI is unable to establish a connection with the Ollama server, you will see an error message stating, `WebUI could not connect to Ollama`.
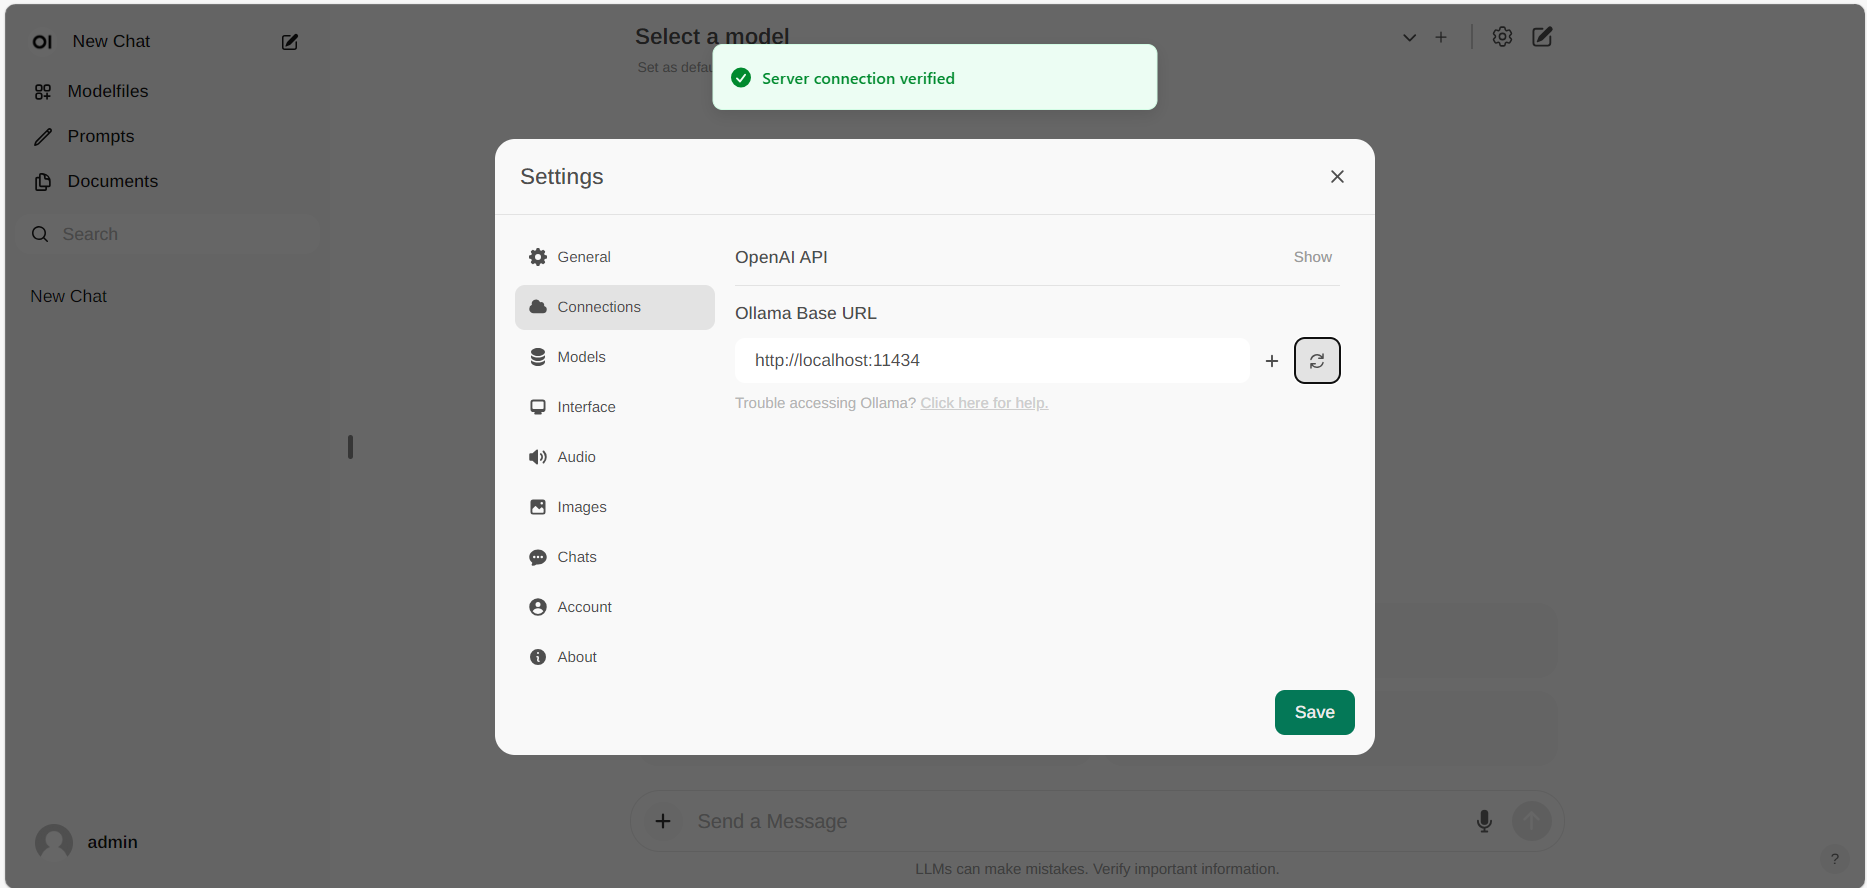
 If the connection is successful, you will see a message stating `Service Connection Verified`, as illustrated below.
 > [!NOTE]
> If you want to use an Ollama server hosted at a different URL, simply update the **Ollama Base URL** to the new URL and press the **Refresh** button to re-confirm the connection to Ollama.
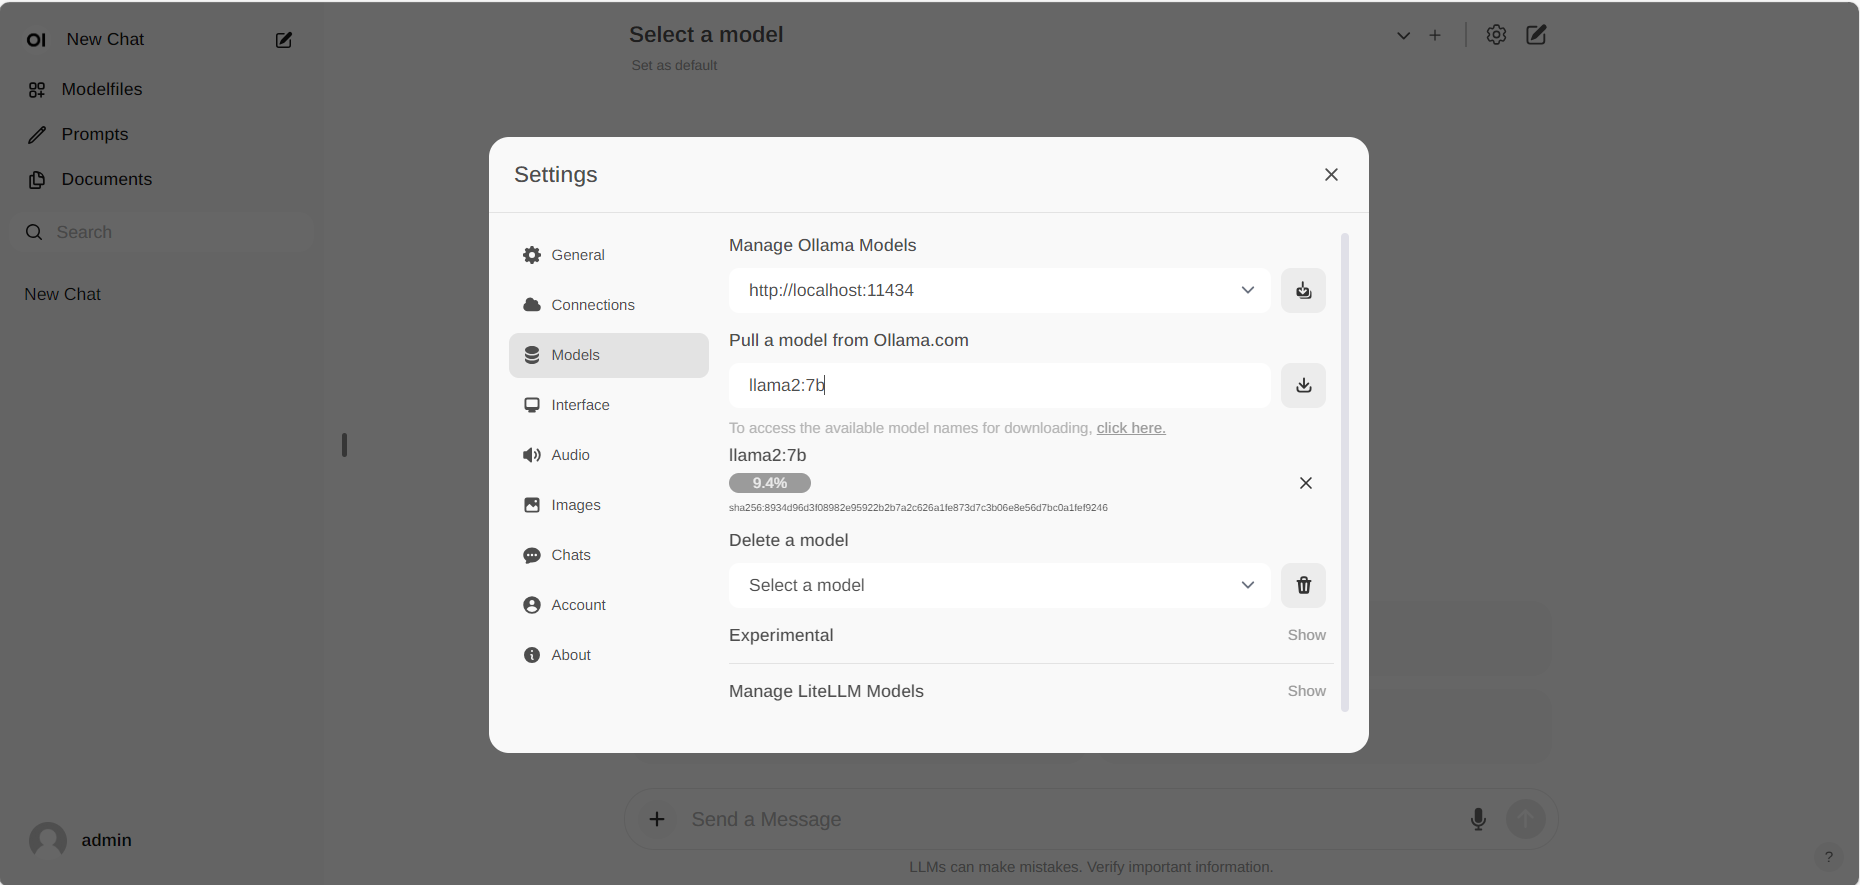
#### Pull Model
Go to **Settings -> Models** in the menu, choose a model under **Pull a model from Ollama.com** using the drop-down menu, and then hit the **Download** button on the right. Ollama will automatically download the selected model for you.
> [!NOTE]
> If you want to use an Ollama server hosted at a different URL, simply update the **Ollama Base URL** to the new URL and press the **Refresh** button to re-confirm the connection to Ollama.
#### Pull Model
Go to **Settings -> Models** in the menu, choose a model under **Pull a model from Ollama.com** using the drop-down menu, and then hit the **Download** button on the right. Ollama will automatically download the selected model for you.
 > [!NOTE]
> On the latest version of Open WebUI, the relative settings have been moved to **Admin Settings -> Connections -> Manage Ollama API Connections -> Manage**.
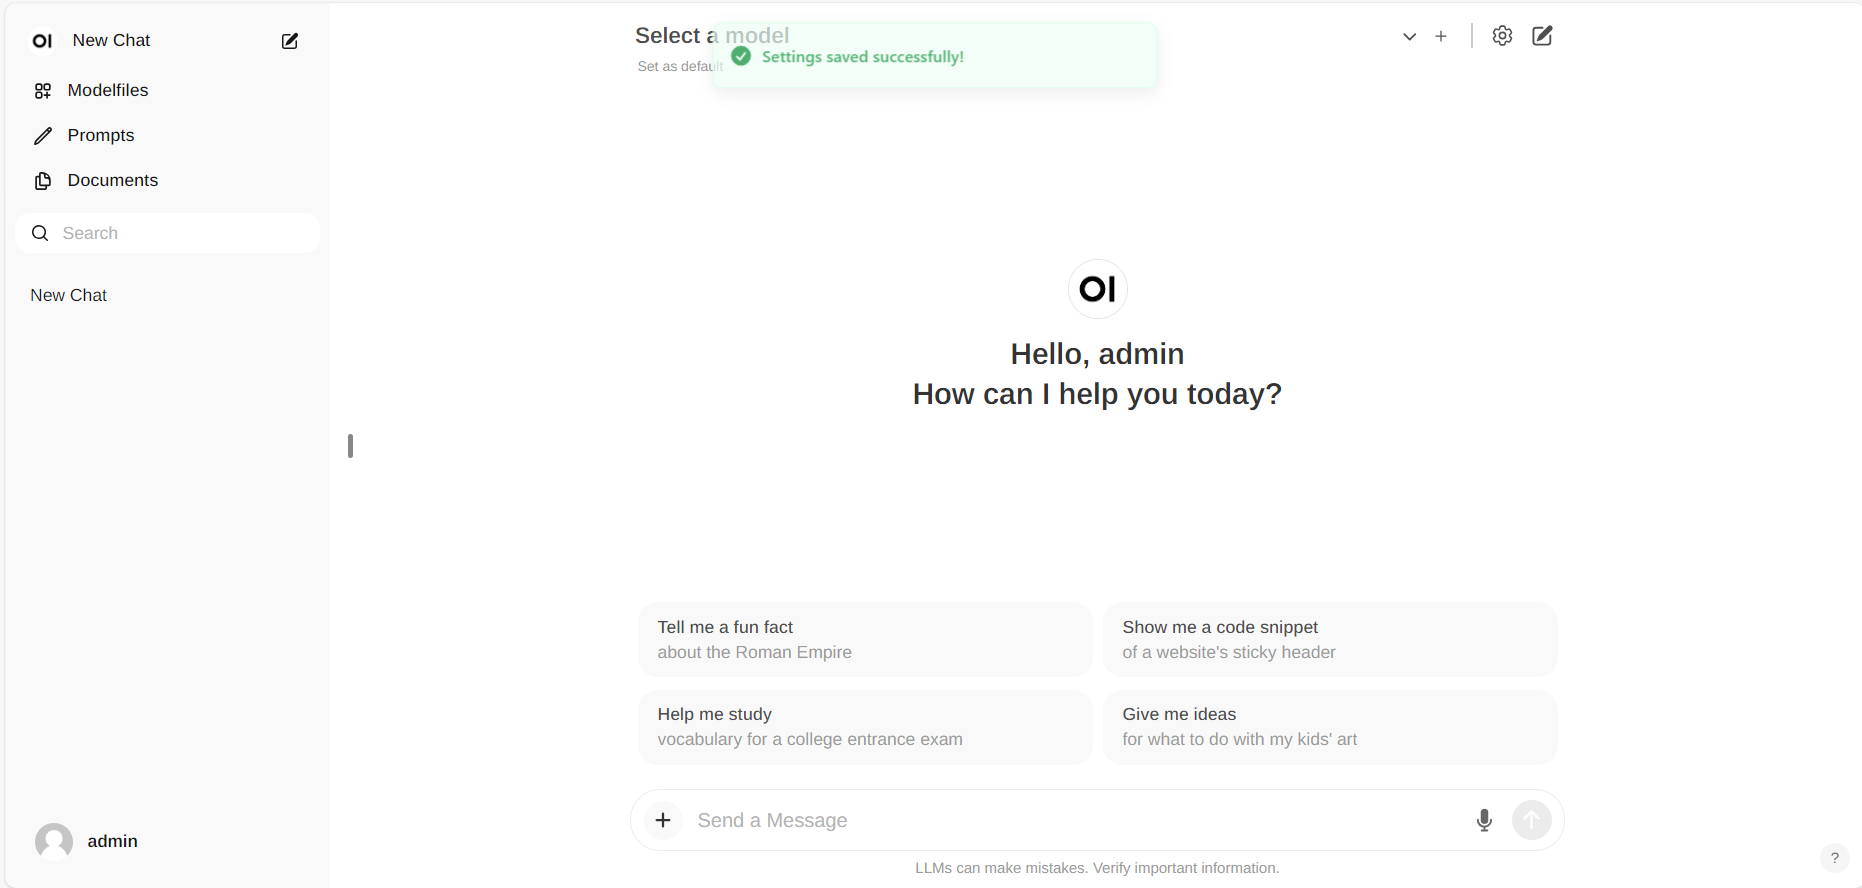
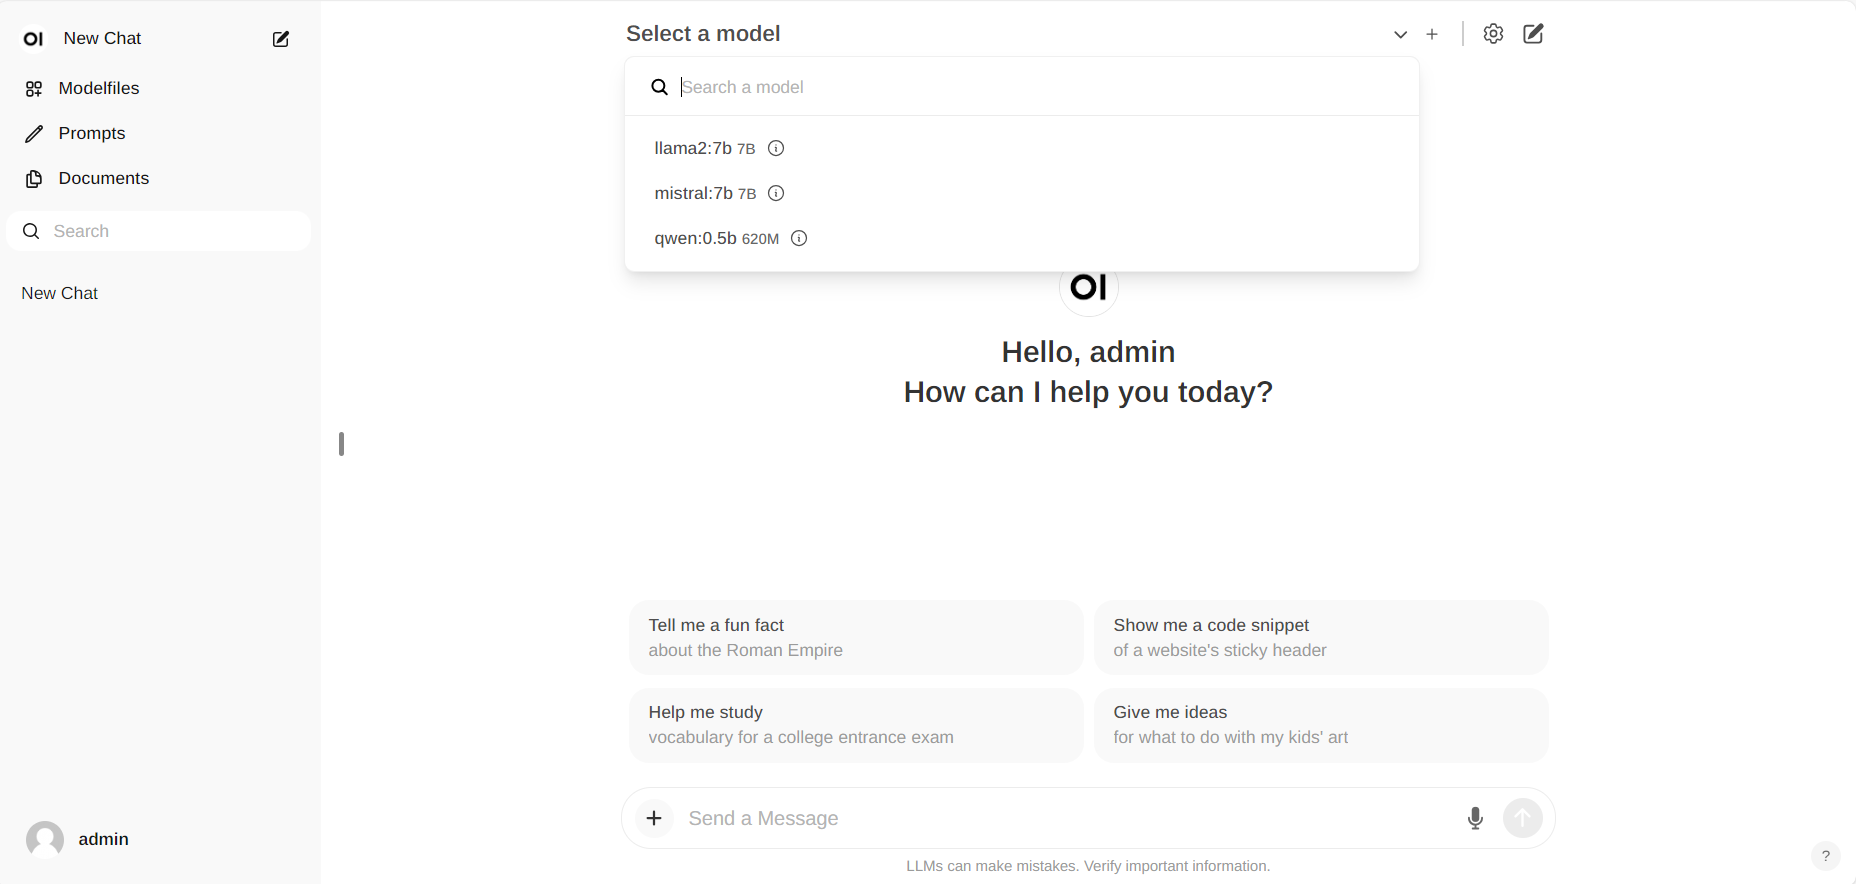
#### Chat with the Model
Start new conversations with **New chat** in the left-side menu.
> [!NOTE]
> You may disable the auto-completion feature by Open WebUI for an improved chat experience. Goto **Admin Settings -> Interface -> Autocomplete Generation** and disable it.
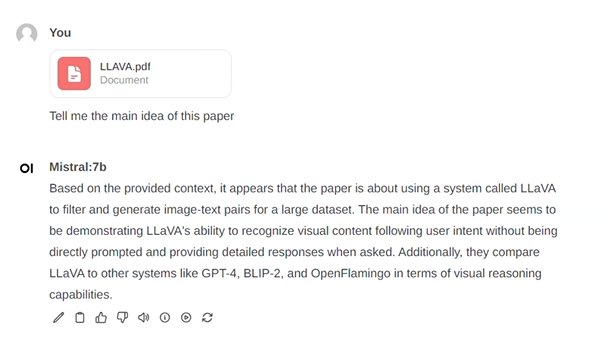
On the right-side, choose a downloaded model from the **Select a model** drop-down menu at the top, input your questions into the **Send a Message** textbox at the bottom, and click the button on the right to get responses.
> [!NOTE]
> On the latest version of Open WebUI, the relative settings have been moved to **Admin Settings -> Connections -> Manage Ollama API Connections -> Manage**.
#### Chat with the Model
Start new conversations with **New chat** in the left-side menu.
> [!NOTE]
> You may disable the auto-completion feature by Open WebUI for an improved chat experience. Goto **Admin Settings -> Interface -> Autocomplete Generation** and disable it.
On the right-side, choose a downloaded model from the **Select a model** drop-down menu at the top, input your questions into the **Send a Message** textbox at the bottom, and click the button on the right to get responses.
 #### Exit Open-Webui
To shut down the open-webui server, use **Ctrl+C** in the terminal where the open-webui server is runing, then close your browser tab.
### 5. Troubleshooting
##### Error `No module named 'torch._C`
When you encounter the error `ModuleNotFoundError: No module named 'torch._C'` after executing `bash start.sh`, you can resolve it by reinstalling PyTorch. First, use `pip uninstall torch` to remove the existing PyTorch installation, and then reinstall it along with its dependencies by running `pip install torch torchvision torchaudio`.
#### Exit Open-Webui
To shut down the open-webui server, use **Ctrl+C** in the terminal where the open-webui server is runing, then close your browser tab.
### 5. Troubleshooting
##### Error `No module named 'torch._C`
When you encounter the error `ModuleNotFoundError: No module named 'torch._C'` after executing `bash start.sh`, you can resolve it by reinstalling PyTorch. First, use `pip uninstall torch` to remove the existing PyTorch installation, and then reinstall it along with its dependencies by running `pip install torch torchvision torchaudio`.