[](https://twitter.com/Kurtosistech)
[](https://github.com/kurtosis-tech/kurtosis/stargazers)
----
What is Kurtosis?
=================
Have you ever tried to build on top of a colleague's work, or contribute to an open source project, just to get stuck on the first steps of spinning up a stack to play with? [Kurtosis](https://www.kurtosis.com) handles the complexity of spinning up ephemeral dev or test stacks so you can focus on developing, not configuring.
Kurtosis is formed of:
- A packaging system for distributing backend stack definitions, which can run on docker or on kubernetes
- A runtime with a per-stack file management system for reproducibly initializing the state of your stack
- A set of tools to enable devs to interact with their stacks, like they do on docker or k8s
Why use Kurtosis?
=========================
Kurtosis is best for:
- Reusing the logic in your stack definitions for all of: local dev, scheduled testing in CI, and ad-hoc larger-scale testing on k8s clusters
- Giving other devs a way to spin up your application, and commonly used variations of it, with one-liners, via Kurtosis' packaging and parameterization systems
- Handling complex setup logic in your backend stack, like passing arbitrary data between services as they start up, and enforcing arbitrary wait conditions
How is Kurtosis different than Docker Compose or Helm?
==========================
Kurtosis operates at a level higher than Docker Compose or Helm, and produces stacks running on either of the underlying engines (the Docker engine, or Kubernetes).
Because of this additional layer of abstraction, we are able to introduce several features to improve the experience of spinning up ephemeral stacks:
- A per-stack file management system that enables portable state initialization for dev or test stacks
- Stack-level parameterizability; users have a powerful and flexible way (beyond messing with env vars) to affect modifications in their stacks
- First-class plug-and-play composability; it's expected for users to import stack definitions into larger stacks, and this experience is optimized
- The ability to get all of the above, but running over _either_ the docker engine or k8s, at your election
`NOTE: we do NOT recommend using Kurtosis to deploy long term production environments at this moment. Any issues/Discords related to production usage will be closed.`
How do I get going?
===================
To see Kurtosis in action, first install it using the instructions [here](https://docs.kurtosis.com/install).
Then, run the [Redis voting app Kurtosis package](https://github.com/kurtosis-tech/awesome-kurtosis/tree/main/redis-voting-app):
```bash
kurtosis run github.com/kurtosis-tech/awesome-kurtosis/redis-voting-app
```
Finally, open the `http` link printed in the last line in your browser.
If you have an issue or feature request, we'd love to hear about it through one of the following:
- Post your question on our [Github Discussions Forum](https://github.com/kurtosis-tech/kurtosis/discussions/new?category=q-a)
- [Asking for help on our Discord server][discord]
- Filing an issue on our [Github](https://github.com/kurtosis-tech/kurtosis/issues/new/choose) (which can also be done via `kurtosis feedback --bug` or `kurtosis feedback --feature`)
- [Messaging us on Twitter][twitter]
### Going further
To try more Kurtosis packages just like this one, check out the [`awesome-kurtosis` repo][awesome-kurtosis]!
To learn about how to write Kurtosis packages, check out our [quickstart][quickstart-reference].
To read about how Kurtosis works, see [our documentation][docs].
To see where we're going with the product, check out the roadmap [here](https://github.com/kurtosis-tech/kurtosis/wiki/Short%E2%80%90term-Roadmap).
Got more questions? Drop them in our [Github Discussions](https://github.com/kurtosis-tech/kurtosis/discussions/new?category=q-a) where we, or other community members, can help answer.
Claude Code Skills
========================
This repository includes [Claude Code](https://claude.ai/download) skills that teach Claude how to work with Kurtosis. Skills are structured prompts in the `skills/` directory that give Claude operational knowledge about building, debugging, deploying, and managing Kurtosis enclaves.
### Available Skills
| Skill | Description |
|-------|-------------|
| `clean` | Clean up enclaves and artifacts |
| `cli-local-build` | Build the CLI from source |
| `cluster-manage` | Manage Kurtosis clusters |
| `context-manage` | Manage Kurtosis contexts |
| `docker-debug` | Debug Docker-based enclaves |
| `docker-local-build` | Build and load Docker images locally |
| `dump` | Dump enclave state for debugging |
| `enclave-inspect` | Inspect running enclaves |
| `engine-manage` | Start, stop, and restart the engine |
| `files-inspect` | Inspect files artifacts |
| `gateway` | Manage the Kurtosis gateway |
| `grafloki` | Query Grafana and Loki observability |
| `import-compose` | Import Docker Compose files |
| `k8s-clean-cluster` | Clean Kurtosis resources from K8s |
| `k8s-debug-pods` | Debug pods on Kubernetes |
| `k8s-dev-deploy` | Build and deploy dev images to K8s |
| `lint` | Lint the codebase |
| `port-forward` | Forward ports from enclaves |
| `portal` | Manage the Kurtosis portal |
| `run-package` | Run Starlark packages |
| `service-manage` | Manage services within enclaves |
| `starlark-dev` | Develop Starlark packages |
### Installing Skills
Skills are auto-discovered by Claude Code when present in a project's `skills/` directory. There are several ways to install them:
#### Option 1: Clone the repository (contributors)
If you're contributing to Kurtosis, skills are already included:
```bash
git clone https://github.com/kurtosis-tech/kurtosis.git
cd kurtosis
```
Claude Code will automatically discover the skills when you open a conversation in this directory.
#### Option 2: Copy skills into your project
Copy the `skills/` directory into any project where you want Claude to have Kurtosis knowledge:
```bash
# From the kurtosis repo, copy skills into your project
cp -r /path/to/kurtosis/skills /path/to/your-project/skills
```
#### Option 3: Symlink from another project
If you want to keep skills in sync with the Kurtosis repo without copying:
```bash
# Symlink the entire skills directory
ln -s /path/to/kurtosis/skills /path/to/your-project/skills
# Or symlink individual skills
mkdir -p /path/to/your-project/skills
ln -s /path/to/kurtosis/skills/run-package /path/to/your-project/skills/run-package
```
#### Option 4: Install globally for all projects
To make Kurtosis skills available across all your Claude Code projects, add them to your global Claude configuration:
```bash
# Copy skills to your global Claude config
cp -r /path/to/kurtosis/skills ~/.claude/skills
```
### Using Skills
Once installed, skills are invoked as slash commands in Claude Code:
```
/clean # Clean up enclaves
/run-package # Run a Starlark package
/docker-debug # Debug Docker containers
/k8s-debug-pods # Debug Kubernetes pods
```
You can also reference skills naturally in conversation — Claude will use the relevant skill context automatically when discussing Kurtosis topics.
Contributing to Kurtosis
========================
Expand to see contribution info
See our [CONTRIBUTING](./CONTRIBUTING.md) file.
Repository Structure
--------------------
This repository is structured as a monorepo, containing the following projects:
- `container-engine-lib`: Library used to abstract away container engine being used by the [enclave][enclave].
- `core`: Container launched inside an [enclave][enclave] to coordinate its state
- `engine`: Container launched to coordinate [enclaves][enclave]
- `api`: Defines the API of the Kurtosis platform (`engine` and `core`)
- `cli`: Produces CLI binary, allowing interaction with the Kurtosis system
- `docs`: Documentation that is published to [docs.kurtosis.com](docs)
- `internal_testsuites`: End to end tests
Dev Dependencies (Nix)
----------------
Install the [Nix package manager](https://nixos.org/download).
```bash
sh <(curl -L https://nixos.org/nix/install)
```
And enable some Nix flags (alternatively you can add `--extra-experimental-features 'nix-command flakes'` every time calling the `nix` command):
```bash
mkdir -p ~/.config/nix
echo "experimental-features = nix-command flakes" >> ~/.config/nix/nix.conf
```
And to bring the environment up, just open a new shell terminal, go to the root folder of the repo and run:
```bash
nix develop
```
This will download all dev deps and setup the environment accordingly.
You can also use the [`direnv`](https://direnv.net/) to automatically load the environment when entering the main folder or using a plugin in your preferred IDE:
- `vscode`: [mkhl.direnv](https://github.com/direnv/direnv-vscode)
- `jet brains`: [Direnv integration](https://plugins.jetbrains.com/plugin/15285-direnv-integration)
Direnv can also be easily installed with Nix (or [HomeBrew](https://formulae.brew.sh/formula/direnv) if you prefer):
```bash
nix-env -f '' -iA direnv
```
Now you just to add the direnv hook to your shell:
```bash
echo 'eval "$(direnv hook bash)"' >> ~/.bashrc
# or for ZSH
echo 'eval "$(direnv hook zsh)"' >> ~/.zshrc
```
Now next time you open a new shell terminal and go to repo's folder you environment will update and load automatically.
Dev Dependencies (Manual install)
----------------
The commands below assume that the env variable BREW_PREFIX contains the brew prefix.
```bash
BREW_PREFIX="$(brew --prefix)"
```
#### Bash (5 or above)
On MacOS:
```bash
# Install modern version of bash, the one that ships on MacOS is too old
brew install bash
# Allow bash as shell
echo "${BREW_PREFIX}/bin/bash" | sudo tee -a /etc/shells
# Optional: make bash your default shell
chsh -s "${BREW_PREFIX}/bin/bash"
```
#### Git
On MacOS:
```bash
# Install modern version of git, the one that ships on MacOS can be too old
brew install git
```
#### Docker
On MacOS:
```bash
brew install docker
```
#### Go (1.23 or above)
On MacOS:
```bash
brew install go@1.23
# Add the Go binary dir to your PATH
PATH="${BREW_PREFIX}/opt/go@1.23/bin:$PATH"
# Add the GOPATH bin dir to your PATH
PATH="${HOME}/go/bin:$PATH"
```
On Ubuntu:
```bash
wget https://go.dev/dl/go1.23.7.linux-amd64.tar.gz
tar -C /usr/local -zxf go1.23.7.linux-amd64.tar.gz
# Add the following to your bashrc or equivalent.
export PATH=$PATH:/usr/local/go/bin
```
#### Goreleaser
On MacOS:
```bash
brew install goreleaser/tap/goreleaser
```
On Ubuntu:
```bash
echo 'deb [trusted=yes] https://repo.goreleaser.com/apt/ /' | sudo tee /etc/apt/sources.list.d/goreleaser.list
sudo apt update
sudo apt install goreleaser
```
#### Node (20.* or above) and Yarn
On MacOS, using `NVM`:
```bash
brew install nvm
mkdir ~/.nvm
nvm install 20.11.0
npm install -g yarn
```
On Ubuntu, using `NVM`:
```bash
curl https://raw.githubusercontent.com/creationix/nvm/master/install.sh | bash
source ~/.bashrc
nvm install 20.11.0
npm install -g yarn
```
#### Rust
On MacOS, Ubuntu:
```bash
curl --proto '=https' --tlsv1.2 -sSf https://sh.rustup.rs | sh
```
#### Go and Typescript protobuf compiler binaries
On MacOS:
```bash
brew install protoc-gen-go
brew install protoc-gen-go-grpc
go install connectrpc.com/connect/cmd/protoc-gen-connect-go@latest
yarn global add ts-protoc-gen
yarn global add grpc-tools
```
On Ubuntu:
```bash
go install google.golang.org/grpc/cmd/protoc-gen-go@latest
go install google.golang.org/grpc/cmd/protoc-gen-go-grpc@latest
go install connectrpc.com/connect/cmd/protoc-gen-connect-go@latest
yarn global add ts-protoc-gen
yarn global add grpc-tools
```
#### OpenAPI generators for Go and Typescript
On MacOS:
```bash
go install github.com/deepmap/oapi-codegen/cmd/oapi-codegen@v1.16.2
yarn global add openapi-typescript@7.0.0-next.5
```
On Ubuntu:
```bash
go install github.com/deepmap/oapi-codegen/cmd/oapi-codegen@v1.16.2
yarn global add openapi-typescript@7.0.0-next.5
```
Build Instructions
------------------
To build the entire project, run:
```bash
./scripts/build.sh
```
**Note:** If you encounter module import errors related to `github.com/kurtosis-tech/kurtosis/kurtosis_version`, you may need to generate the version constants first:
```bash
./scripts/generate-kurtosis-version.sh
```
This script generates the required `kurtosis_version.go` file that contains version constants used throughout the codebase. The file is automatically generated during the build process, but may need to be run manually in some development scenarios.
To only build a specific project, run the script on `./PROJECT/PATH/script/build.sh`, for example:
```bash
./container-engine-lib/scripts/build.sh
./core/scripts/build.sh
./api/scripts/build.sh
./engine/scripts/build.sh
./cli/scripts/build.sh
```
If there are any changes to the Protobuf files in the `api` subdirectory, the Protobuf bindings must be regenerated:
```bash
./api/scripts/regenerate-protobuf-bindings.sh
```
If you are developing Kurtosis over a Podman cluster, run:
```bash
./scripts/build.sh false true # no debug image, use podman
```
This will use the Podman image builder for building images. See documentation in scripts for more details on build options.
Running Dev Version
----------------------
After building the project, run `./cli/cli/scripts/launch-cli.sh` just like you would the kurtosis command. This will launch the latest locally built version of the CLI, which will also start the engine and core containers using their latest built images.
You can verify this by running `./cli/cli/launch-cli.sh engine status` and
```
A Kurtosis engine is running with the following info:
Version: 53d823 <-- or `-dirty` depending on the commit
```
The version will be identical to the version on the latest dev versions of the engine image created - (can verify with `docker images`). Enclaves started by the engine will be started with the same version as the engine.
If you'd like to specify a different core image version than that of the engine, you can do so with the `--api-container-version` flag on `enclave add` (e.g. `./cli/cli/scripts/build.sh enclave add --api-container-version `).
If you are working on multiple dev versions of the engine at a time, you can use `engine restart --version ` to specify exactly what version of the engine to use.
For frequent contributors, we recommend attaching an alias to `kurtosis` and `./cli/cli/scripts/launch-cli.sh`.
```bash
alias kt="kurtosis"
alias dkt="$(pwd)/cli/cli/scripts/launch-cli.sh"
```
If you want tab completion on the recently built CLI, you can alias it to `kurtosis`:
```bash
alias kurtosis="$(pwd)/cli/cli/scripts/launch-cli.sh"
kurtosis enclave add
```
Unit Test Instructions
----------------------
Build scripts also run unit tests as part of the build process.
For all Go modules, run `go test ./...` on the module folder. For example:
```bash
cd cli/cli/
go test ./...
```
E2E Test Instructions
---------------------
Each project's build script also runs the unit tests inside the project. Running `./script/build.sh` will guarantee that all unit tests in the monorepo pass.
To run the end-to-end tests:
1. Make sure Docker is running
```console
$ docker --version
Docker version X.Y.Z
```
2. Make sure Kurtosis Engine is running
```console
$ kurtosis engine status
A Kurtosis engine is running with the following info:
Version: 0.X.Y
```
3. Run `test.sh` script
```console
$ ./internal_testsuites/scripts/test.sh
```
If you are developing the Typescript test, make sure that you have first built `api/typescript`. Any
changes made to the Typescript package within `api/typescript` aren't hot loaded as of 2022-09-29.
Run Debug Instructions (for Golang code so far)
----------------------------------------------
For running CLI with Golang remote debug:
1. Build the CLI dev binary and run the command you want to debug (kurtosis version in this example), this will start the debug server and will wait for a client connection
```bash
cli/cli/scripts/build.sh
source ./scripts/set_kt_alias.sh
ktdebug version
```
2. Open the command's file you want to debug
3. Add the breakpoint in the line where you want to stop the cursor
4. Then choose the "CLI-remote-debug" run configuration in the "run panel"
5. Press the "debug" button
6. Use the debug panel to inspect the variables value and continue with the debug flow
For running CLI with Delve debug client:
1. Build the CLI dev binary and run the command you want to debug (kurtosis version in this example), but first pass "dlv-terminal" as the first argument (this will start the Delve client in the terminal)
```bash
cli/cli/scripts/build.sh
source ./scripts/set_kt_alias.sh
ktdebug dlv-terminal version
```
2. You can add a new breakpoint using the terminal client and the `break` command
```bash
(dlv) break version.run:1
```
3. You can move the cursor to the breakpoint created in the previous step with the `continue` command
```bash
(dlv) continue
```
4. You can see [more Delve commands here][delve-docs]
For running Kurtosis engine with Golang remote debug:
1. Run the main build script with the first argument `debug_mode` as true. This will generate a new Kurtosis engine container image which will contain the `debug` suffix in the name.
```bash
scripts/build.sh true
```
2. Add the breakpoint in the line where you want to stop the cursor
3. Run the engine in debug mode with the `ktdev engine start --debug-mode` or the `ktdev engine restart --debug-mode` commands
```bash
source ./scripts/set_kt_alias.sh
ktdev engine start --debug-mode
```
4. Then choose the "Engine-remote-debug" run configuration in the "run panel"
5. Press the "debug" button
6. Make a call to the engine's server (you can use the Kurtosis CLI or Postman) in order to reach out the breakpoint in the code
7. Use the debug panel to inspect the variables value and continue with the debug flow
8. You can debug the CLI and the Kurtosis engine's server at the same time by running it with `ktdebug` instead of `ktdev` mentioned in a previous step, remember to run both remote debug configurations in the Goland IDE.
```bash
source ./scripts/set_kt_alias.sh
ktdebug engine start
```
Additional steps if you are debugging Kurtosis engine in K8s:
1. Upload the engine's image for debug to the K8s cluster
```bash
# for example:
k3d image load kurtosistech/engine:5ec6eb-dirty-debug
```
2. Run the port-forward script before pressing the debug button in Golang (in another terminal instance) to bind the host's port to the container's debug server port
```bash
scripts/port-forward-engine-debug.sh
```
3. Do not forget to run the Kurtosis gateway after calling the engine's server (in another terminal instance also)
```bash
ktdev gateway
```
For running Kurtosis APIC with Golang remote debug:
1. Run the main build script with the first argument `debug_mode` as true. This will generate a new Kurtosis APIC container image which will contain the `debug` suffix in the name.
```bash
scripts/build.sh true
```
2. Add the breakpoint in the line where you want to stop the cursor.
3. Run the Kurtosis engine in debug more or not depending on if you want to also debug the engine.
```bash
source ./scripts/set_kt_alias.sh
ktdev engine start --debug-mode
OR
ktdev engine start # you will have to build the engine in the regular way `engine/scripts/build.sh` if you choose this version
```
4. Add a new enclave in debug mode with the `enclave add` command and passing the `debug-mode` flag. This will create a new APIC container with the debug server port bounded and waiting for a connection.
IMPORTANT: You can only run one enclave in debug mode so far, if you want to run another one it will fail due the debug port is already in use,
```bash
ktdev enclave add --debug-mode
```
5. Then choose the "APIC-remote-debug" run configuration in the "run panel"
6. Press the "debug" button
7. Find the APIC's GRPC server port in the host machine (you can check it in Docker Desktop or using the Docker CLI, it's the one bounded with the container's 7443 port)
8. Make a call to the APIC's server (you can use the Kurtosis CLI or Postman) in order to reach out the breakpoint in the code
9. Use the debug panel to inspect the variables value and continue with the debug flow
10. You can debug the CLI, the Kurtosis engine's server and the Kurtosis APIC's server at the same time by running it with `ktdebug` instead of `ktdev` mentioned in a previous step, remember to run the three remote debug configurations in the Goland IDE.
```bash
source ./scripts/set_kt_alias.sh
ktdev engine start --debug-mode
ktdebug enclave add
```
Additional steps if you are debugging Kurtosis engine in K8s:
1. Upload the APIC's image for debug to the K8s cluster
```bash
# for example:
k3d image load kurtosistech/core:5ec6eb-dirty-debug
```
2. Run the port-forward script before pressing the debug button in Golang (in another terminal instance) to bind the host's port to the container's debug server port
```bash
scripts/port-forward-apic-debug.sh enclave-name
```
3. Do not forget to run the Kurtosis gateway after calling the APIC's server (in another terminal instance also)
```bash
ktdev gateway
```
Sponsoring Kurtosis
========================
Kurtosis is an open source tool maintained by [MAINTAINERS](./MAINTAINERS.md). If you find Kurtosis useful or use it for work, please consider [supporting the continued development of Kurtosis](https://github.com/sponsors/tedim52). Thank you 🙏
 [](https://twitter.com/Kurtosistech)
[](https://github.com/kurtosis-tech/kurtosis/stargazers)
----
What is Kurtosis?
=================
Have you ever tried to build on top of a colleague's work, or contribute to an open source project, just to get stuck on the first steps of spinning up a stack to play with? [Kurtosis](https://www.kurtosis.com) handles the complexity of spinning up ephemeral dev or test stacks so you can focus on developing, not configuring.
Kurtosis is formed of:
- A packaging system for distributing backend stack definitions, which can run on docker or on kubernetes
- A runtime with a per-stack file management system for reproducibly initializing the state of your stack
- A set of tools to enable devs to interact with their stacks, like they do on docker or k8s
Why use Kurtosis?
=========================
Kurtosis is best for:
- Reusing the logic in your stack definitions for all of: local dev, scheduled testing in CI, and ad-hoc larger-scale testing on k8s clusters
- Giving other devs a way to spin up your application, and commonly used variations of it, with one-liners, via Kurtosis' packaging and parameterization systems
- Handling complex setup logic in your backend stack, like passing arbitrary data between services as they start up, and enforcing arbitrary wait conditions
How is Kurtosis different than Docker Compose or Helm?
==========================
Kurtosis operates at a level higher than Docker Compose or Helm, and produces stacks running on either of the underlying engines (the Docker engine, or Kubernetes).
Because of this additional layer of abstraction, we are able to introduce several features to improve the experience of spinning up ephemeral stacks:
- A per-stack file management system that enables portable state initialization for dev or test stacks
- Stack-level parameterizability; users have a powerful and flexible way (beyond messing with env vars) to affect modifications in their stacks
- First-class plug-and-play composability; it's expected for users to import stack definitions into larger stacks, and this experience is optimized
- The ability to get all of the above, but running over _either_ the docker engine or k8s, at your election
`NOTE: we do NOT recommend using Kurtosis to deploy long term production environments at this moment. Any issues/Discords related to production usage will be closed.`
How do I get going?
===================
To see Kurtosis in action, first install it using the instructions [here](https://docs.kurtosis.com/install).
Then, run the [Redis voting app Kurtosis package](https://github.com/kurtosis-tech/awesome-kurtosis/tree/main/redis-voting-app):
```bash
kurtosis run github.com/kurtosis-tech/awesome-kurtosis/redis-voting-app
```
[](https://twitter.com/Kurtosistech)
[](https://github.com/kurtosis-tech/kurtosis/stargazers)
----
What is Kurtosis?
=================
Have you ever tried to build on top of a colleague's work, or contribute to an open source project, just to get stuck on the first steps of spinning up a stack to play with? [Kurtosis](https://www.kurtosis.com) handles the complexity of spinning up ephemeral dev or test stacks so you can focus on developing, not configuring.
Kurtosis is formed of:
- A packaging system for distributing backend stack definitions, which can run on docker or on kubernetes
- A runtime with a per-stack file management system for reproducibly initializing the state of your stack
- A set of tools to enable devs to interact with their stacks, like they do on docker or k8s
Why use Kurtosis?
=========================
Kurtosis is best for:
- Reusing the logic in your stack definitions for all of: local dev, scheduled testing in CI, and ad-hoc larger-scale testing on k8s clusters
- Giving other devs a way to spin up your application, and commonly used variations of it, with one-liners, via Kurtosis' packaging and parameterization systems
- Handling complex setup logic in your backend stack, like passing arbitrary data between services as they start up, and enforcing arbitrary wait conditions
How is Kurtosis different than Docker Compose or Helm?
==========================
Kurtosis operates at a level higher than Docker Compose or Helm, and produces stacks running on either of the underlying engines (the Docker engine, or Kubernetes).
Because of this additional layer of abstraction, we are able to introduce several features to improve the experience of spinning up ephemeral stacks:
- A per-stack file management system that enables portable state initialization for dev or test stacks
- Stack-level parameterizability; users have a powerful and flexible way (beyond messing with env vars) to affect modifications in their stacks
- First-class plug-and-play composability; it's expected for users to import stack definitions into larger stacks, and this experience is optimized
- The ability to get all of the above, but running over _either_ the docker engine or k8s, at your election
`NOTE: we do NOT recommend using Kurtosis to deploy long term production environments at this moment. Any issues/Discords related to production usage will be closed.`
How do I get going?
===================
To see Kurtosis in action, first install it using the instructions [here](https://docs.kurtosis.com/install).
Then, run the [Redis voting app Kurtosis package](https://github.com/kurtosis-tech/awesome-kurtosis/tree/main/redis-voting-app):
```bash
kurtosis run github.com/kurtosis-tech/awesome-kurtosis/redis-voting-app
```
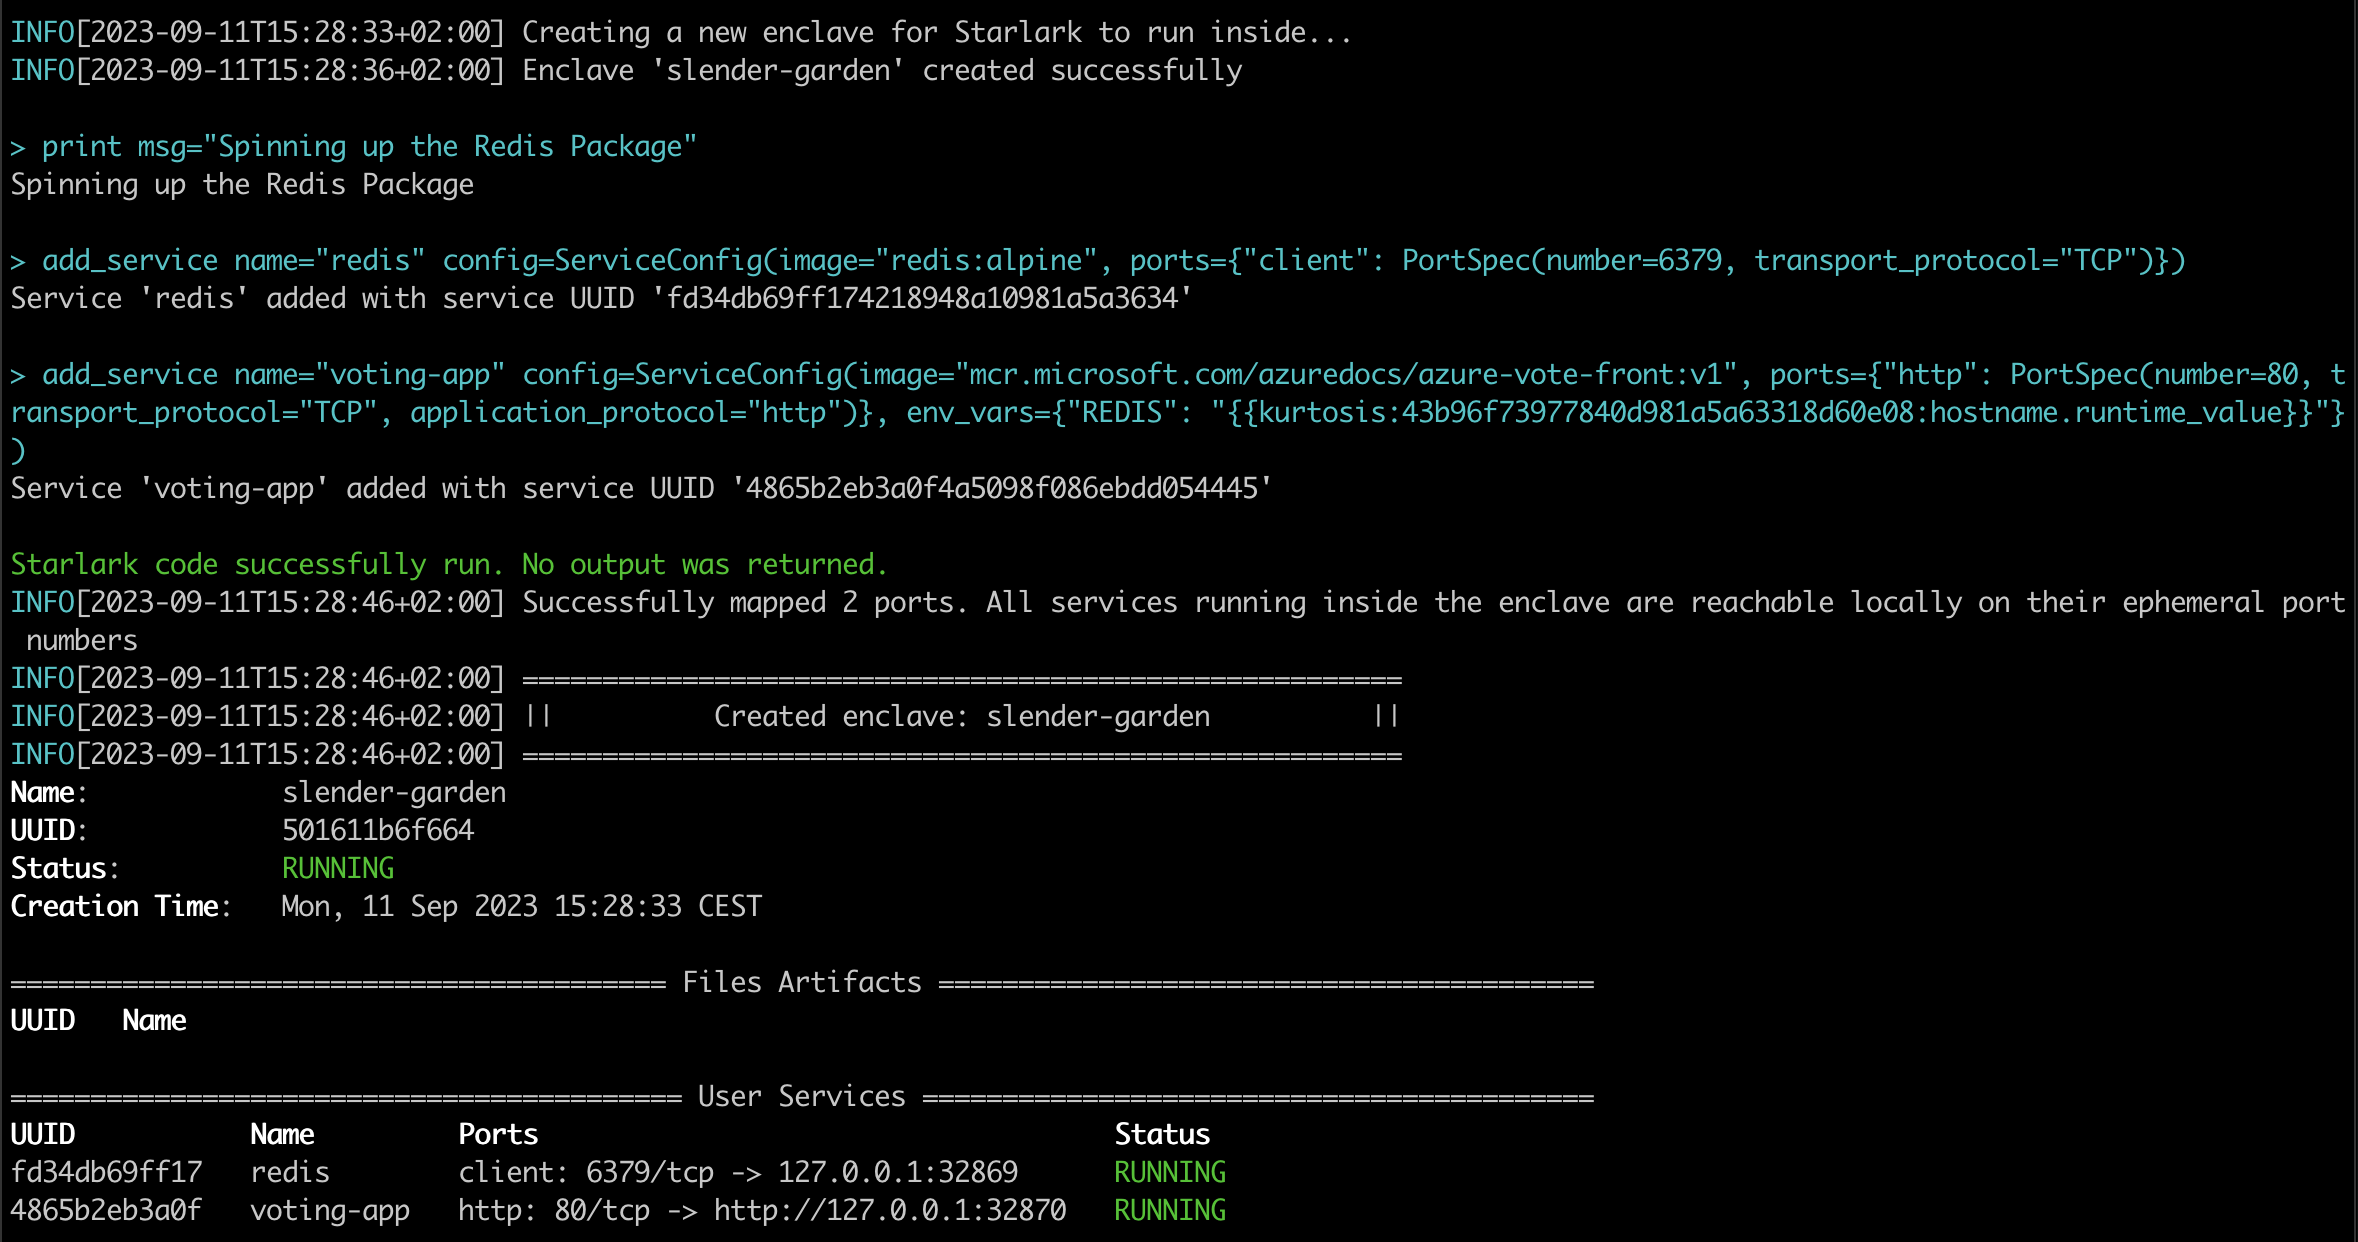 Finally, open the `http` link printed in the last line in your browser.
If you have an issue or feature request, we'd love to hear about it through one of the following:
- Post your question on our [Github Discussions Forum](https://github.com/kurtosis-tech/kurtosis/discussions/new?category=q-a)
- [Asking for help on our Discord server][discord]
- Filing an issue on our [Github](https://github.com/kurtosis-tech/kurtosis/issues/new/choose) (which can also be done via `kurtosis feedback --bug` or `kurtosis feedback --feature`)
- [Messaging us on Twitter][twitter]
### Going further
To try more Kurtosis packages just like this one, check out the [`awesome-kurtosis` repo][awesome-kurtosis]!
To learn about how to write Kurtosis packages, check out our [quickstart][quickstart-reference].
To read about how Kurtosis works, see [our documentation][docs].
To see where we're going with the product, check out the roadmap [here](https://github.com/kurtosis-tech/kurtosis/wiki/Short%E2%80%90term-Roadmap).
Got more questions? Drop them in our [Github Discussions](https://github.com/kurtosis-tech/kurtosis/discussions/new?category=q-a) where we, or other community members, can help answer.
Claude Code Skills
========================
This repository includes [Claude Code](https://claude.ai/download) skills that teach Claude how to work with Kurtosis. Skills are structured prompts in the `skills/` directory that give Claude operational knowledge about building, debugging, deploying, and managing Kurtosis enclaves.
### Available Skills
| Skill | Description |
|-------|-------------|
| `clean` | Clean up enclaves and artifacts |
| `cli-local-build` | Build the CLI from source |
| `cluster-manage` | Manage Kurtosis clusters |
| `context-manage` | Manage Kurtosis contexts |
| `docker-debug` | Debug Docker-based enclaves |
| `docker-local-build` | Build and load Docker images locally |
| `dump` | Dump enclave state for debugging |
| `enclave-inspect` | Inspect running enclaves |
| `engine-manage` | Start, stop, and restart the engine |
| `files-inspect` | Inspect files artifacts |
| `gateway` | Manage the Kurtosis gateway |
| `grafloki` | Query Grafana and Loki observability |
| `import-compose` | Import Docker Compose files |
| `k8s-clean-cluster` | Clean Kurtosis resources from K8s |
| `k8s-debug-pods` | Debug pods on Kubernetes |
| `k8s-dev-deploy` | Build and deploy dev images to K8s |
| `lint` | Lint the codebase |
| `port-forward` | Forward ports from enclaves |
| `portal` | Manage the Kurtosis portal |
| `run-package` | Run Starlark packages |
| `service-manage` | Manage services within enclaves |
| `starlark-dev` | Develop Starlark packages |
### Installing Skills
Skills are auto-discovered by Claude Code when present in a project's `skills/` directory. There are several ways to install them:
#### Option 1: Clone the repository (contributors)
If you're contributing to Kurtosis, skills are already included:
```bash
git clone https://github.com/kurtosis-tech/kurtosis.git
cd kurtosis
```
Claude Code will automatically discover the skills when you open a conversation in this directory.
#### Option 2: Copy skills into your project
Copy the `skills/` directory into any project where you want Claude to have Kurtosis knowledge:
```bash
# From the kurtosis repo, copy skills into your project
cp -r /path/to/kurtosis/skills /path/to/your-project/skills
```
#### Option 3: Symlink from another project
If you want to keep skills in sync with the Kurtosis repo without copying:
```bash
# Symlink the entire skills directory
ln -s /path/to/kurtosis/skills /path/to/your-project/skills
# Or symlink individual skills
mkdir -p /path/to/your-project/skills
ln -s /path/to/kurtosis/skills/run-package /path/to/your-project/skills/run-package
```
#### Option 4: Install globally for all projects
To make Kurtosis skills available across all your Claude Code projects, add them to your global Claude configuration:
```bash
# Copy skills to your global Claude config
cp -r /path/to/kurtosis/skills ~/.claude/skills
```
### Using Skills
Once installed, skills are invoked as slash commands in Claude Code:
```
/clean # Clean up enclaves
/run-package # Run a Starlark package
/docker-debug # Debug Docker containers
/k8s-debug-pods # Debug Kubernetes pods
```
You can also reference skills naturally in conversation — Claude will use the relevant skill context automatically when discussing Kurtosis topics.
Contributing to Kurtosis
========================
Finally, open the `http` link printed in the last line in your browser.
If you have an issue or feature request, we'd love to hear about it through one of the following:
- Post your question on our [Github Discussions Forum](https://github.com/kurtosis-tech/kurtosis/discussions/new?category=q-a)
- [Asking for help on our Discord server][discord]
- Filing an issue on our [Github](https://github.com/kurtosis-tech/kurtosis/issues/new/choose) (which can also be done via `kurtosis feedback --bug` or `kurtosis feedback --feature`)
- [Messaging us on Twitter][twitter]
### Going further
To try more Kurtosis packages just like this one, check out the [`awesome-kurtosis` repo][awesome-kurtosis]!
To learn about how to write Kurtosis packages, check out our [quickstart][quickstart-reference].
To read about how Kurtosis works, see [our documentation][docs].
To see where we're going with the product, check out the roadmap [here](https://github.com/kurtosis-tech/kurtosis/wiki/Short%E2%80%90term-Roadmap).
Got more questions? Drop them in our [Github Discussions](https://github.com/kurtosis-tech/kurtosis/discussions/new?category=q-a) where we, or other community members, can help answer.
Claude Code Skills
========================
This repository includes [Claude Code](https://claude.ai/download) skills that teach Claude how to work with Kurtosis. Skills are structured prompts in the `skills/` directory that give Claude operational knowledge about building, debugging, deploying, and managing Kurtosis enclaves.
### Available Skills
| Skill | Description |
|-------|-------------|
| `clean` | Clean up enclaves and artifacts |
| `cli-local-build` | Build the CLI from source |
| `cluster-manage` | Manage Kurtosis clusters |
| `context-manage` | Manage Kurtosis contexts |
| `docker-debug` | Debug Docker-based enclaves |
| `docker-local-build` | Build and load Docker images locally |
| `dump` | Dump enclave state for debugging |
| `enclave-inspect` | Inspect running enclaves |
| `engine-manage` | Start, stop, and restart the engine |
| `files-inspect` | Inspect files artifacts |
| `gateway` | Manage the Kurtosis gateway |
| `grafloki` | Query Grafana and Loki observability |
| `import-compose` | Import Docker Compose files |
| `k8s-clean-cluster` | Clean Kurtosis resources from K8s |
| `k8s-debug-pods` | Debug pods on Kubernetes |
| `k8s-dev-deploy` | Build and deploy dev images to K8s |
| `lint` | Lint the codebase |
| `port-forward` | Forward ports from enclaves |
| `portal` | Manage the Kurtosis portal |
| `run-package` | Run Starlark packages |
| `service-manage` | Manage services within enclaves |
| `starlark-dev` | Develop Starlark packages |
### Installing Skills
Skills are auto-discovered by Claude Code when present in a project's `skills/` directory. There are several ways to install them:
#### Option 1: Clone the repository (contributors)
If you're contributing to Kurtosis, skills are already included:
```bash
git clone https://github.com/kurtosis-tech/kurtosis.git
cd kurtosis
```
Claude Code will automatically discover the skills when you open a conversation in this directory.
#### Option 2: Copy skills into your project
Copy the `skills/` directory into any project where you want Claude to have Kurtosis knowledge:
```bash
# From the kurtosis repo, copy skills into your project
cp -r /path/to/kurtosis/skills /path/to/your-project/skills
```
#### Option 3: Symlink from another project
If you want to keep skills in sync with the Kurtosis repo without copying:
```bash
# Symlink the entire skills directory
ln -s /path/to/kurtosis/skills /path/to/your-project/skills
# Or symlink individual skills
mkdir -p /path/to/your-project/skills
ln -s /path/to/kurtosis/skills/run-package /path/to/your-project/skills/run-package
```
#### Option 4: Install globally for all projects
To make Kurtosis skills available across all your Claude Code projects, add them to your global Claude configuration:
```bash
# Copy skills to your global Claude config
cp -r /path/to/kurtosis/skills ~/.claude/skills
```
### Using Skills
Once installed, skills are invoked as slash commands in Claude Code:
```
/clean # Clean up enclaves
/run-package # Run a Starlark package
/docker-debug # Debug Docker containers
/k8s-debug-pods # Debug Kubernetes pods
```
You can also reference skills naturally in conversation — Claude will use the relevant skill context automatically when discussing Kurtosis topics.
Contributing to Kurtosis
========================
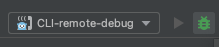
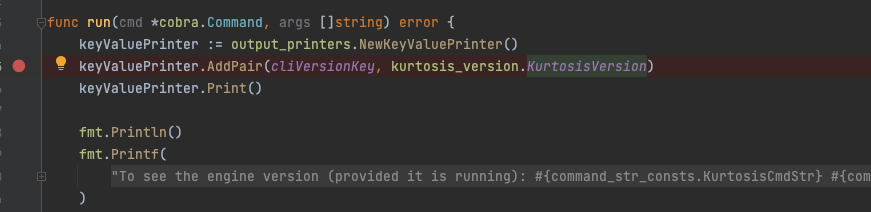 4. Then choose the "CLI-remote-debug" run configuration in the "run panel"
5. Press the "debug" button
4. Then choose the "CLI-remote-debug" run configuration in the "run panel"
5. Press the "debug" button
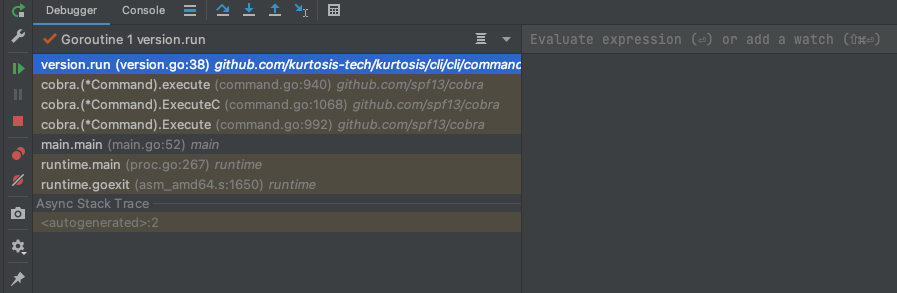
 6. Use the debug panel to inspect the variables value and continue with the debug flow
 For running CLI with Delve debug client:
1. Build the CLI dev binary and run the command you want to debug (kurtosis version in this example), but first pass "dlv-terminal" as the first argument (this will start the Delve client in the terminal)
```bash
cli/cli/scripts/build.sh
source ./scripts/set_kt_alias.sh
ktdebug dlv-terminal version
```
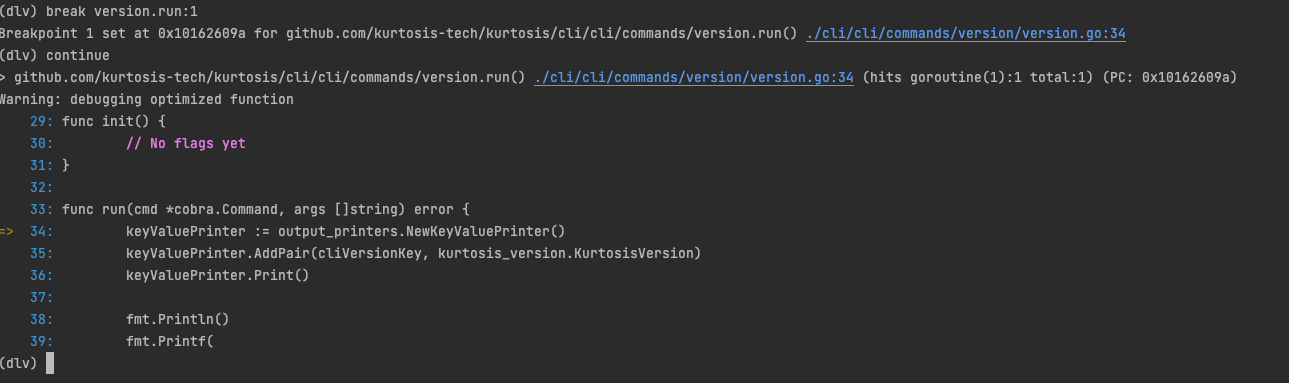
2. You can add a new breakpoint using the terminal client and the `break` command
```bash
(dlv) break version.run:1
```
3. You can move the cursor to the breakpoint created in the previous step with the `continue` command
```bash
(dlv) continue
```
For running CLI with Delve debug client:
1. Build the CLI dev binary and run the command you want to debug (kurtosis version in this example), but first pass "dlv-terminal" as the first argument (this will start the Delve client in the terminal)
```bash
cli/cli/scripts/build.sh
source ./scripts/set_kt_alias.sh
ktdebug dlv-terminal version
```
2. You can add a new breakpoint using the terminal client and the `break` command
```bash
(dlv) break version.run:1
```
3. You can move the cursor to the breakpoint created in the previous step with the `continue` command
```bash
(dlv) continue
```
 4. You can see [more Delve commands here][delve-docs]
For running Kurtosis engine with Golang remote debug:
1. Run the main build script with the first argument `debug_mode` as true. This will generate a new Kurtosis engine container image which will contain the `debug` suffix in the name.
```bash
scripts/build.sh true
```
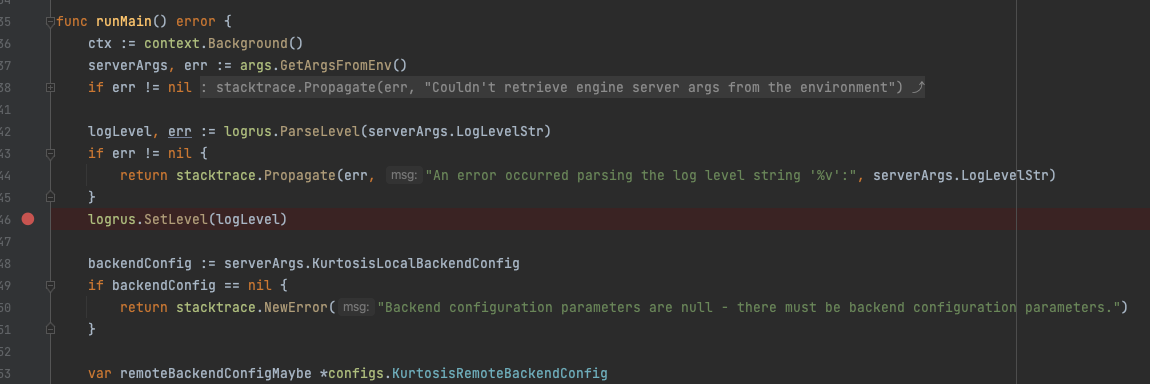
2. Add the breakpoint in the line where you want to stop the cursor
4. You can see [more Delve commands here][delve-docs]
For running Kurtosis engine with Golang remote debug:
1. Run the main build script with the first argument `debug_mode` as true. This will generate a new Kurtosis engine container image which will contain the `debug` suffix in the name.
```bash
scripts/build.sh true
```
2. Add the breakpoint in the line where you want to stop the cursor
 3. Run the engine in debug mode with the `ktdev engine start --debug-mode` or the `ktdev engine restart --debug-mode` commands
```bash
source ./scripts/set_kt_alias.sh
ktdev engine start --debug-mode
```
4. Then choose the "Engine-remote-debug" run configuration in the "run panel"
5. Press the "debug" button
3. Run the engine in debug mode with the `ktdev engine start --debug-mode` or the `ktdev engine restart --debug-mode` commands
```bash
source ./scripts/set_kt_alias.sh
ktdev engine start --debug-mode
```
4. Then choose the "Engine-remote-debug" run configuration in the "run panel"
5. Press the "debug" button
 6. Make a call to the engine's server (you can use the Kurtosis CLI or Postman) in order to reach out the breakpoint in the code
7. Use the debug panel to inspect the variables value and continue with the debug flow
6. Make a call to the engine's server (you can use the Kurtosis CLI or Postman) in order to reach out the breakpoint in the code
7. Use the debug panel to inspect the variables value and continue with the debug flow
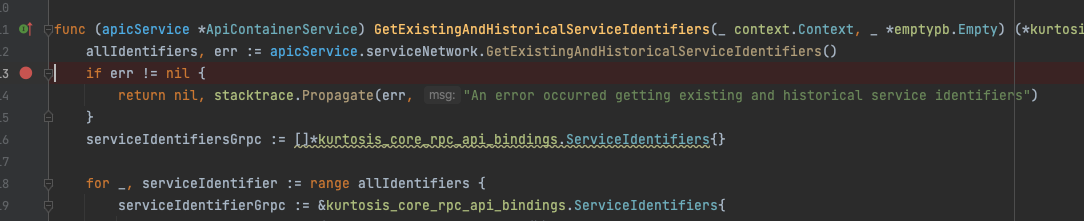 3. Run the Kurtosis engine in debug more or not depending on if you want to also debug the engine.
```bash
source ./scripts/set_kt_alias.sh
ktdev engine start --debug-mode
OR
ktdev engine start # you will have to build the engine in the regular way `engine/scripts/build.sh` if you choose this version
```
4. Add a new enclave in debug mode with the `enclave add` command and passing the `debug-mode` flag. This will create a new APIC container with the debug server port bounded and waiting for a connection.
IMPORTANT: You can only run one enclave in debug mode so far, if you want to run another one it will fail due the debug port is already in use,
```bash
ktdev enclave add --debug-mode
```
5. Then choose the "APIC-remote-debug" run configuration in the "run panel"
6. Press the "debug" button
3. Run the Kurtosis engine in debug more or not depending on if you want to also debug the engine.
```bash
source ./scripts/set_kt_alias.sh
ktdev engine start --debug-mode
OR
ktdev engine start # you will have to build the engine in the regular way `engine/scripts/build.sh` if you choose this version
```
4. Add a new enclave in debug mode with the `enclave add` command and passing the `debug-mode` flag. This will create a new APIC container with the debug server port bounded and waiting for a connection.
IMPORTANT: You can only run one enclave in debug mode so far, if you want to run another one it will fail due the debug port is already in use,
```bash
ktdev enclave add --debug-mode
```
5. Then choose the "APIC-remote-debug" run configuration in the "run panel"
6. Press the "debug" button
 7. Find the APIC's GRPC server port in the host machine (you can check it in Docker Desktop or using the Docker CLI, it's the one bounded with the container's 7443 port)
8. Make a call to the APIC's server (you can use the Kurtosis CLI or Postman) in order to reach out the breakpoint in the code
9. Use the debug panel to inspect the variables value and continue with the debug flow
7. Find the APIC's GRPC server port in the host machine (you can check it in Docker Desktop or using the Docker CLI, it's the one bounded with the container's 7443 port)
8. Make a call to the APIC's server (you can use the Kurtosis CLI or Postman) in order to reach out the breakpoint in the code
9. Use the debug panel to inspect the variables value and continue with the debug flow