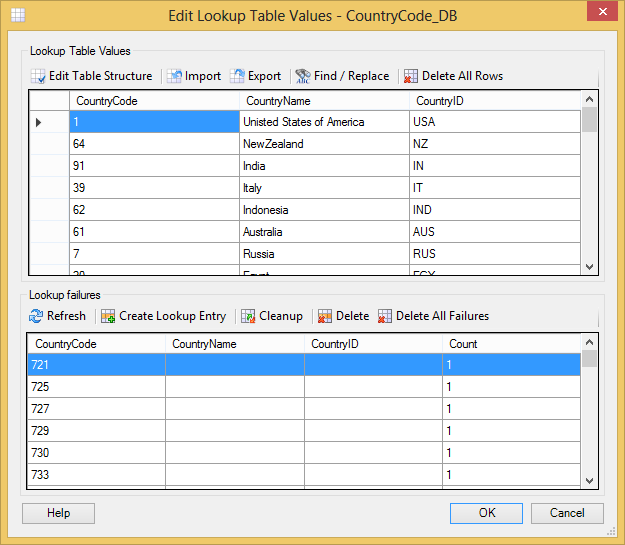
Rhapsody IDE makes failed lookups visible so you can easily add values that should be mapped. This not only helps in building and testing your system, but also in maintaining, where systems may change over time.
Adding and Deleting Lookup Failures
In the Rhapsody Lookup Tables dialog, double-click the lookup table you want to check. The Edit Lookup Table Values dialog is displayed:
Do one of the following:
To...
Do this...
Add a failed lookup entry to the lookup table
a. Under Lookup failures, select the row you want to add, then select the Create Lookup Entry icon. Rhapsody adds the failed entry to the bottom of the Lookup Table Values grid.
b. Enter a value for each column, as required.Delete a failed lookup entry
a. Under Lookup failures, select the entry you want to delete, then select the Delete button (or select the Delete All Failures button to delete all lookup failures).
b. Select the Yes button to confirm that you want to delete your selection.The Count column indicates the number of times a look up failure occurred for a value (or combination of values).
- Repeat step 2 until you have added or deleted all the lookup failure entries you want to modify.
- Select the OK button to save your changes, or the Cancel button to discard them.
Refreshing Lookup Failures
To refresh the list of lookup failures to reflect the latest state of lookup failures in your configuration, select the Refresh button.
Cleaning Up Lookup Failures
If you have:
- Added a failed entry manually, that is, you do not use the Create Lookup Entry icon to add the entry, or
- Used the Management Console to add failed entries,
then you can select the Cleanup button to clear all the lookup failures.
