Menu Path: View>Message Tracking Schemes |
|
Toolbar: >Message Tracking Schemes |
Read Access Rights:
|
Write Access Rights:
|
Message tracking schemes describe how Rhapsody performs message tracking and includes information such as the messages to track, what the different responses are, and what action should be taken in each case. Using a message tracking scheme means that the message tracking configuration can be configured centrally for any number of communication points without having to reconfigure it in every place that it is used. However, each communication point can also override parts of the scheme configuration if need be.
- Viewing Message Tracking Schemes
- Managing Message Tracking Schemes
- Adding a Message Tracking Scheme
- Editing a Message Tracking Scheme
- Viewing a Message Tracking Scheme
- Deleting a Message Tracking Scheme
- Showing Uses for a Message Tracking Scheme
- Copy a Message Tracking Scheme to Another Locker
- Checking Out a Message Tracking Scheme
- Checking In a Message Tracking Scheme
- Undoing Checking Out a Message Tracking Scheme
Viewing Message Tracking Schemes
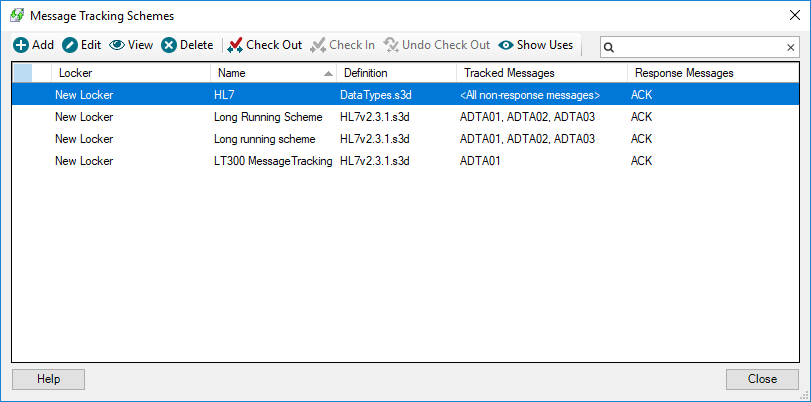
Message tracking schemes are configured from the Message Tracking Schemes Manager in the Rhapsody IDE. The Message Tracking Schemes Manager displays a list of all tracking schemes that have been defined, with a brief summary of the message definition used, the message types that are tracked, and the response messages. From the Message Tracking Schemes Manager, you can create new schemes, edit existing schemes, or delete existing schemes.
The Management Console enables you to monitor tracked messages while it is running. Failed messages can be followed up, and the tracking events can be viewed for each message. Refer to Message Tracking in the Management Console for details.
To launch the Message Tracking Schemes manager:
- Select the Message Tracking Schemes from the View menu (or press Ctrl+Shift+G).
- Alternatively, on the Properties dialog for a communication point, select the Scheme Manager button on the Message Tracking tab.
The Message Tracking Schemes manager displays the following information:
| Column | Description |
|---|---|
| Name | The unique user-defined name for the message tracking scheme within a locker. |
| Locker | The locker the message tracking scheme belongs to. You can use the right-click menu to copy the message tracking scheme to another locker using the Copy Message Tracking Scheme to Locker dialog. |
| Defintion | The definition associated with the message tracking scheme. |
| Tracked Messages | The messages tracked as part of the message tracking scheme. |
| Response Messages | The response message for the the message tracking scheme. |
Managing Message Tracking Schemes
The following actions are provided on this manager:
| Action | Description |
|---|---|
| Add | Add a new message tracking scheme. |
| Edit | Edit a selected message tracking scheme. |
Display a selected message tracking scheme. |
|
| Delete | Delete a selected message tracking scheme. |
| Copy To Another Locker | Create a copy of the selected message tracking scheme in another locker (only available in the right-click menu). |
| Check Out | Check out a selected message tracking scheme. |
| Check In | Check in a selected message tracking scheme. |
| Undo Check Out | Check in message tracking schemes that have have been checked out, reverting any changes made to them. |
| Show Uses | Display the components a message tracking scheme is being used in. |
| Filter | Perform text-based filtering to filter the list of displayed message tracking schemes. |
Actions can only be performed on message tracking scheme which are in lockers the user has the Edit Locker access right for.
Adding a Message Tracking Scheme
To add a new message tracking scheme:
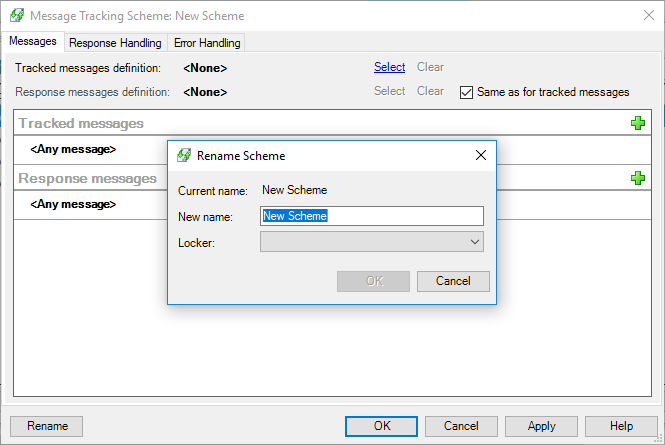
On the Message Tracking Schemes Manager, select the Add button. The Rename Scheme dialog is displayed:
In the Rename Scheme dialog, enter a name for the scheme in the New name field.
When a new message tracking scheme is generated, the scheme manager creates the tracking scheme with a default name. If you do not enter a name for the tracking scheme, subsequent tracking scheme names are generated as follows:
- New Scheme
- New Scheme #2
- New Scheme #3
- From the Locker drop-down list select the locker that the new scheme will be created in.
- Select the OK button in the Rename Scheme dialog.
- Select the OK button in the New Scheme dialog.
You can now start configuring the tracking scheme. Refer to Maintaining Message Tracking Schemes for details.
Editing a Message Tracking Scheme
To edit an existing message tracking scheme:
- From the Message Tracking Schemes Manager, select the message tracking scheme to edit.
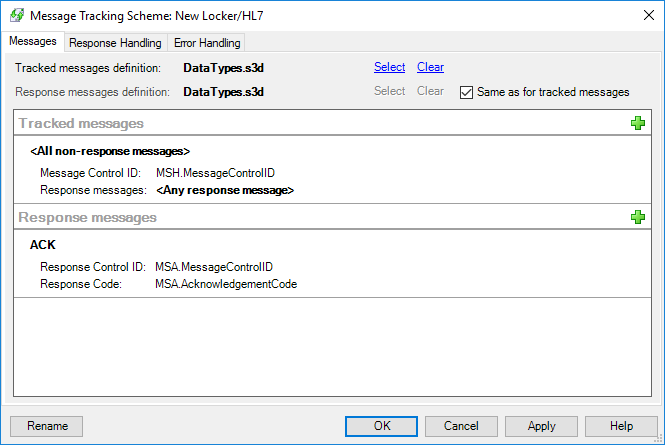
Select the Edit button. The Message Tracking Scheme dialog is displayed:
- Edit the configuration settings. Refer to Maintaining Message Tracking Schemes for details.
- Select the Apply button to apply the changes.
Viewing a Message Tracking Scheme
To view an existing message tracking scheme:
- From the Message Tracking Schemes Manager, select the message tracking scheme to view.
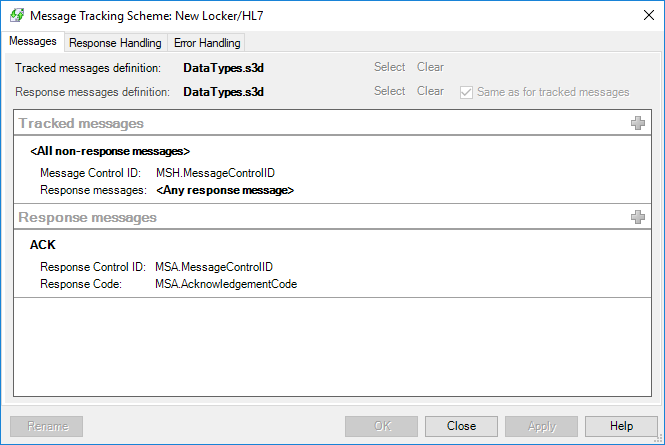
Select the View button. The Message Tracking Scheme dialog is displayed:
- View the configuration settings and select the Close button to exit.
Deleting a Message Tracking Scheme
To delete a message tracking scheme:
- From the Message Tracking Schemes Manager, select the message tracking scheme to delete.
- Select the Delete button. The Delete Message Tracking Scheme dialog is displayed.
- Select the OK button to proceed with the deletion.
Showing Uses for a Message Tracking Scheme
To show where a message tracking scheme is being used:
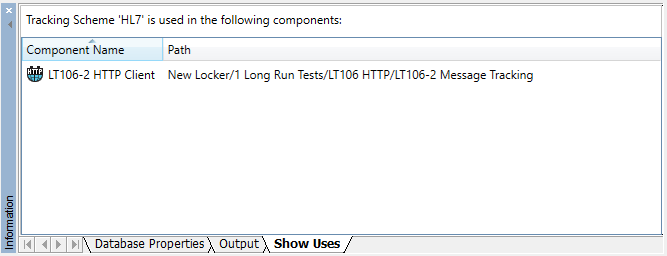
From the Message Tracking Schemes Manager, select a message tracking scheme and then select the Show Uses button (or right-click on the message tracking scheme and select Show Uses). The name and path of all components using the selecting message tracking scheme are displayed in the Show Uses tab in the Information panel of Rhapsody IDE:
- To view or edit the configuration properties of a component using the message tacking scheme:
- Double-click on the component path.
- Or alternatively, from the right-click menu, select Open Properties.
- Select the Close button to close the dialog.
Copy a Message Tracking Scheme to Another Locker
To create a copy of a message tracking scheme in another locker:
- From the Message Tracking Schemes Manager, select the message tracking scheme to copy.
- Right-click on the scheme to open the Context Menu.
- Select the Copy to Another Locker button. The Copy Tracking Scheme to Locker dialog is displayed.
- Select the locker to copy the message tracking scheme to.
- Select the Copy button to proceed with the copy.
- If the message tracking scheme is using a definition which does not exist in the new locker then the Dependency Resolution dialog is displayed.
- Select the Duplicate option for the definition.
- Select the OK button to proceed with the copy.
Checking Out a Message Tracking Scheme
To check out a message tracking scheme:
- From the Message Tracking Schemes Manager, select the message tracking scheme to check out.
- Select the Check Out button.
- The Check Out icon is displayed next to the message tracking scheme name indicating the message tracking scheme has been checked out.
A newly created message tracking scheme is checked out by default at the time of creation.
Checking In a Message Tracking Scheme
To check out a message tracking scheme:
- From the Message Tracking Schemes Manager, select a checked out message tracking scheme to check in.
- Select the Check In button to display the Check-in dialog.
- Ensure the message tracking scheme is selected in the Check-in dialog.
- Select the Check In button in the Check-in dialog to check in the message tracking scheme and return to the Message Tracking Scheme Manager.
- The Check Out icon is no longer displayed next to the message tracking scheme name indicating the message tracking scheme is checked in.
Undoing Checking Out a Message Tracking Scheme
To undo the checking out of all message tracking schemes:
- From the Message Tracking Schemes Manager, select the Undo Check Out button.
- The Undo Check Out dialog is displayed advising you that this action will overwrite any local changes.
- Select the OK button to proceed with the undo check out.

