Perfboard Designer
A browser-based layout editor for perfboard and stripboard (Veroboard) circuits.
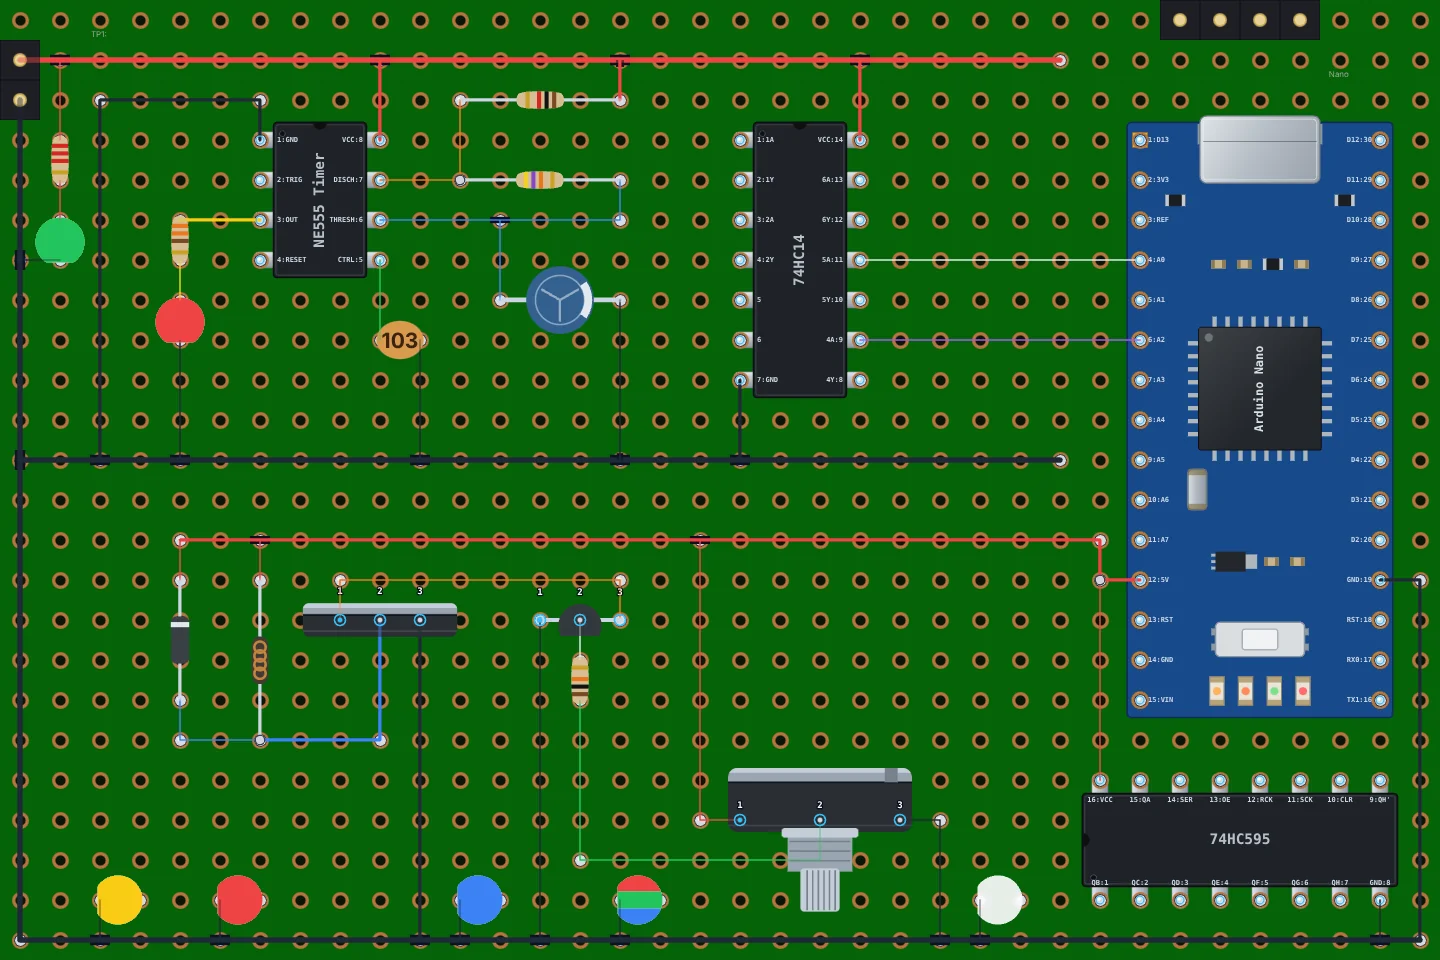
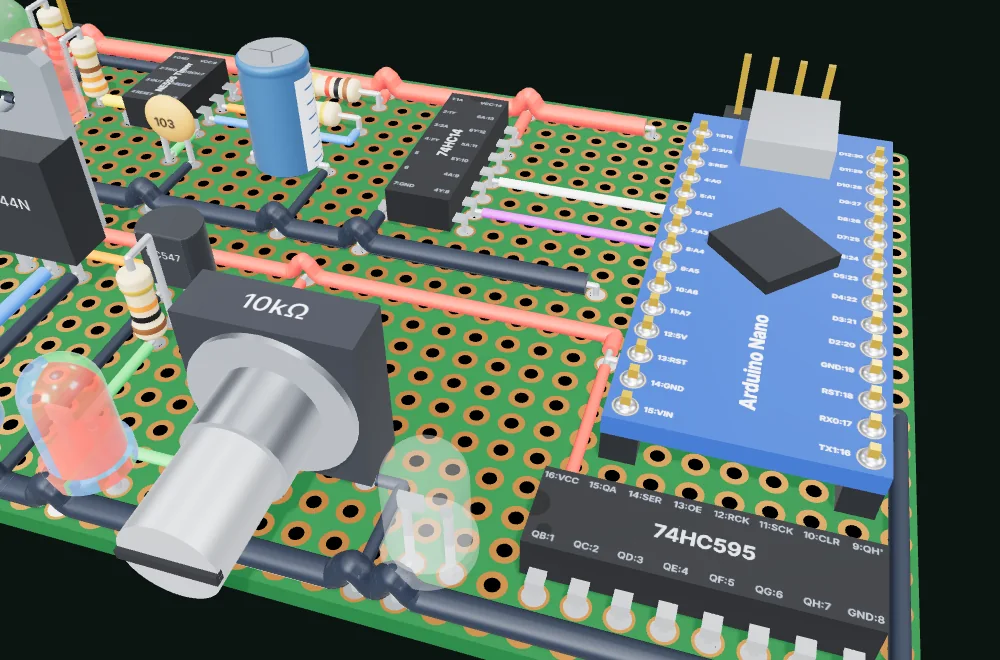
Place components and wires on the hole grid, mark strip cuts, and view the board in 3D.





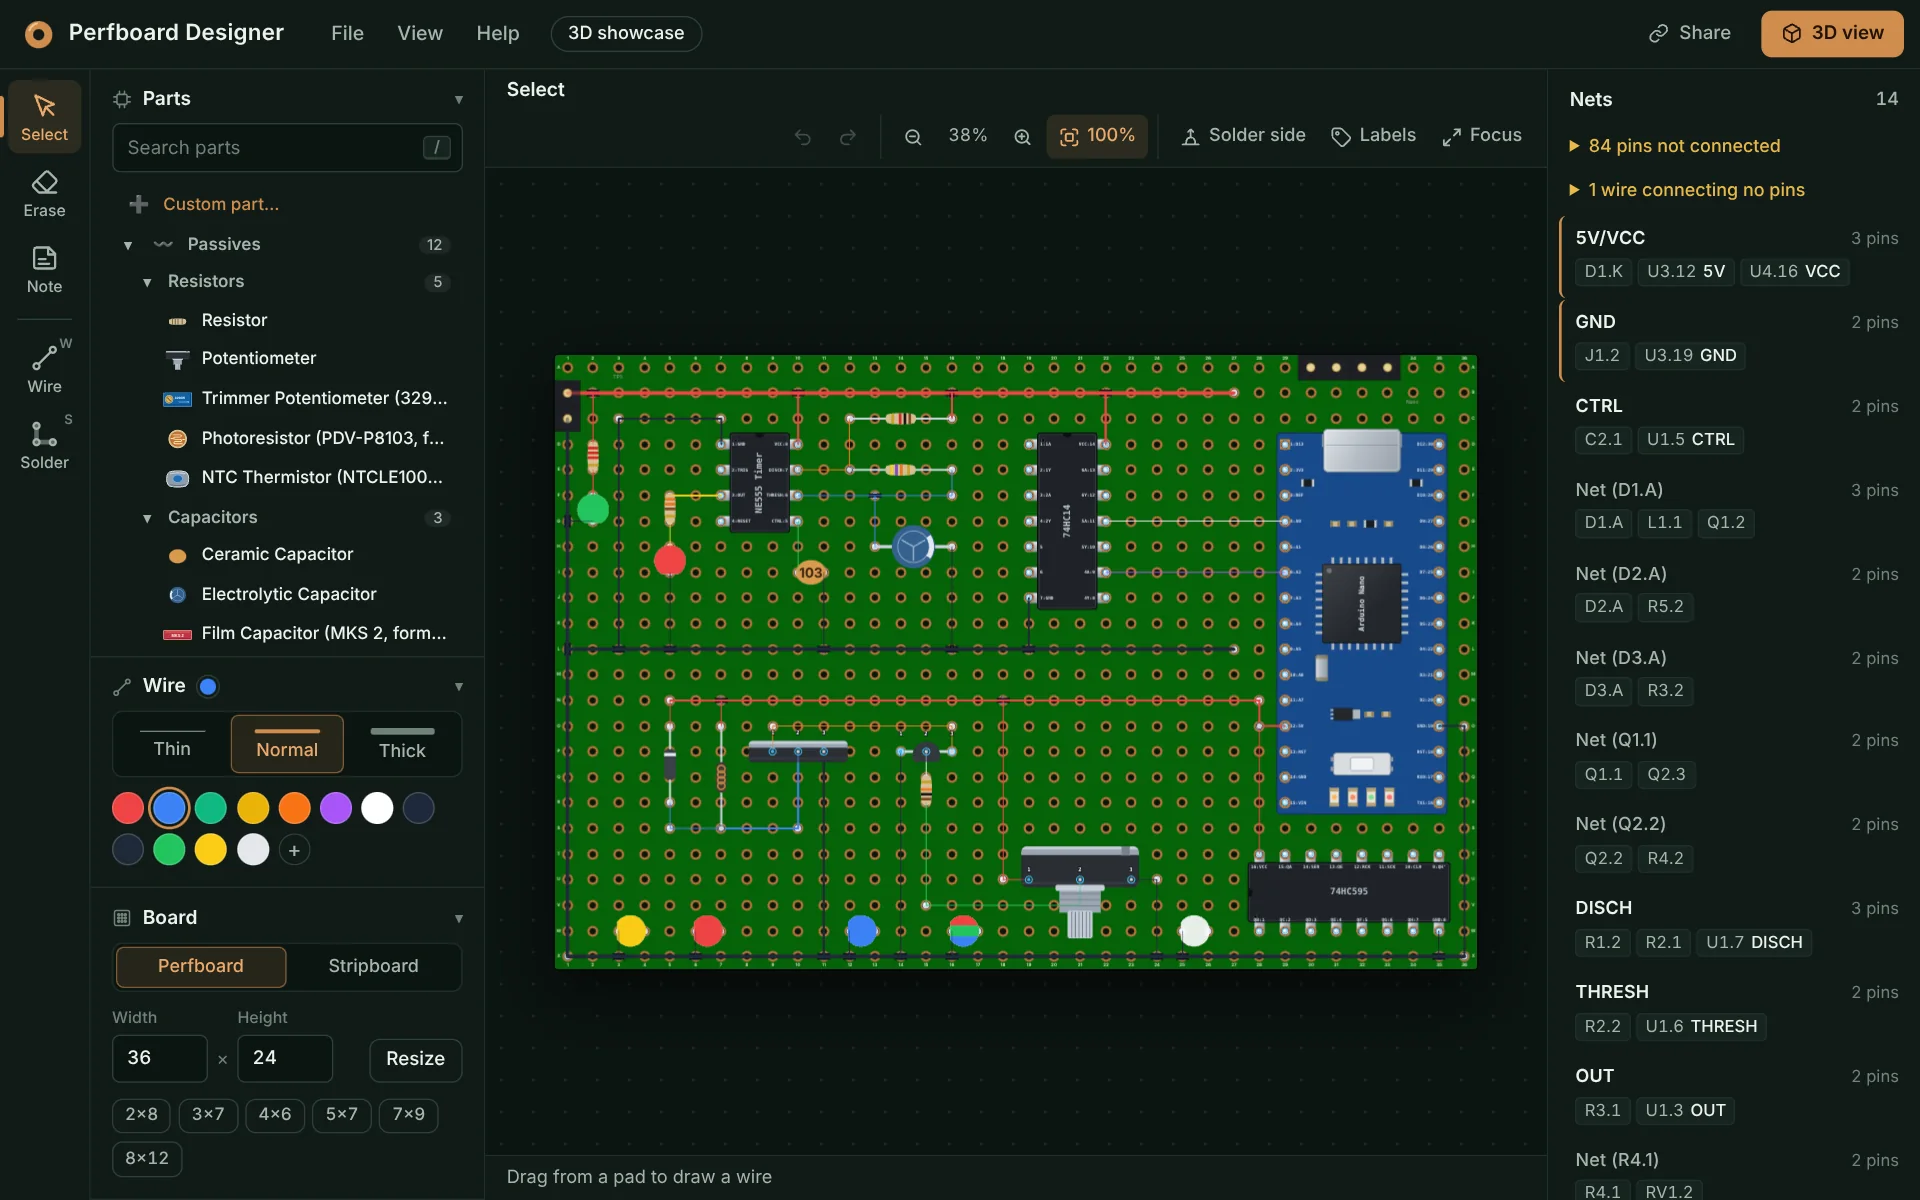
**[Perfboard Designer](https://perfboarddesigner.com/)** is a free, open-source **perfboard layout
tool** and **stripboard (Veroboard) planner** that runs in your web browser. Lay out resistors,
capacitors, LEDs, transistors, MOSFETs, potentiometers, header pins and ICs (NE555, ATmega328P,
Arduino Nano or your own custom chip) on a protoboard hole grid. Draw jumper wires the way you'll
solder them, cut stripboard tracks where you need a break, and see the finished board in 3D. You
catch mistakes on screen instead of at the soldering iron.
There's nothing to install, no account, and nothing is uploaded: your designs stay on your own
device.
**▶ Try it now: [perfboarddesigner.com/app](https://perfboarddesigner.com/app/)** ·
📖 [User guide](https://perfboarddesigner.com/guide/) ·
🤖 [Design boards with AI](https://perfboarddesigner.com/mcp-server/)
---
## Contents
- [Features](#features)
- [Stripboard (Veroboard) layout](#stripboard-veroboard-layout)
- [3D board preview](#3d-board-preview)
- [How to plan a perfboard layout](#how-to-plan-a-perfboard-layout)
- [Keyboard shortcuts and mouse controls](#keyboard-shortcuts-and-mouse-controls)
- [FAQ](#faq)
- [Run it locally](#run-it-locally)
- [Project file format](#project-file-format)
- [Design boards with AI (MCP server)](#design-boards-with-ai-mcp-server)
- [Contributing](#contributing)
---
## Features
- 🔌 **Real component library**: resistors with color bands worked out from their value
(type `4.7k`, get yellow-violet-red), ceramic and electrolytic capacitors, inductors, diodes,
colored LEDs, transistors, MOSFETs, potentiometers and header pins.
- 📦 **ICs and custom parts**: drop in an NE555 timer, DIP-14 and DIP-16 logic chips, an
ATmega328P or an Arduino Nano. Missing a part? **Custom part…** makes your own: a chip or dev
board with labeled pins, a module with pins anywhere, or a part in a package the library has (a
BC337 is a TO-92 transistor with its own pinout), and you can edit it again later. Chips and
fixed-pin parts rotate in 90° steps.
- 🔘 **Connectors, controls and power**: 2-pin and 3-pin screw terminals, female headers,
jumper caps, push buttons, slide switches, 3296W trimmers, and 7805 / LM317 regulators.
- 🔔 **More outputs and named chips**: buzzers, DPDT relays, four-lead RGB LEDs in common-anode
and common-cathode variants, plus LM358, LM386, PC817, ULN2803A and 74HC595 DIP presets with
labeled pins. All appear in both the 2D editor and 3D preview.
- 🧩 **Displays, sensors and more controls**: 2-, 4- and 8-position DIP switches, common-anode
and common-cathode seven-segment displays, quartz crystals, ceramic resonators, LDRs,
thermistors, film capacitors, 5×20 mm fuse holders, rotary encoders and DC barrel jacks.
Each has 2D artwork and a dedicated 3D model; check the footprint notes for parts whose
leads must be formed to fit the grid.
- 🔋 **Everyday hobby parts**: ATtiny85, L293D, CD4017, NE556, LM393, TL072, 74HC14, 4N35 and
6N137 DIP presets; 6×6 mm tactile, latching and toggle switches; 3 mm LEDs; 10-segment bar
graphs and 4-digit seven-segment displays; DS18B20, DHT11/DHT22, IR receiver and electret
microphone; 3.5 mm audio jacks, JST XH connectors, and CR2032, 2×AA and 18650 battery holders.
- ✏️ **Wires the way you solder them**: jumper wires in any color and three thicknesses (thin,
normal, thick). Straight runs of the same color merge into one wire automatically.
- 📐 **Perfboard or stripboard, any size**: start from a common board size (2×8 cm up to
8×12 cm) or enter your own hole count, then zoom, pan and go fullscreen while you work.
- 🏷️ **Part names and values on the board**: every part gets a reference designator (R1, C2,
U1…). Toggle **Labels** to show them with their values as on a silkscreen (`R1 10k`).
- 📝 **Notes on any hole**: label pads like `+9V`, `GND` or `TP1` so the layout still makes sense
months later.
- 🔗 **Check the connections**: the **Nets** panel lists which pins your wires and strips
connect, live as you edit, plus pins left unconnected, wires that connect nothing, and LEDs,
diodes and electrolytic capacitors that look backwards on the supply rails. Click a net to
light it up on the board.
- 💾 **Save, share and export**: keep as many projects as you like in the browser, saved
automatically as you go. Share a board with a link that opens a copy of it (no account or
upload: the board is in the link), or ask for a short link instead. Download it as a JSON
project file, or export it as a high-resolution PNG or an SVG image.
- 🤖 **Design with AI**: connect Claude, ChatGPT or another AI assistant to the
[MCP server](#design-boards-with-ai-mcp-server), describe a circuit, and get back a link that
opens the finished board in the editor.
- ↩️ **Fast to work with**: undo and redo, drag parts to move them, a right-click context menu,
and keyboard shortcuts for the common actions.
## Stripboard (Veroboard) layout
Switch any layout between **Perfboard** and **Stripboard** with one click. On a stripboard the
copper strips run along every row (or every column), so parts on the same strip are already
connected. Use the **Cut** tool to break a strip at a hole, for example under a DIP chip so its
two rows of pins don't short. Click a cut again to mend it.
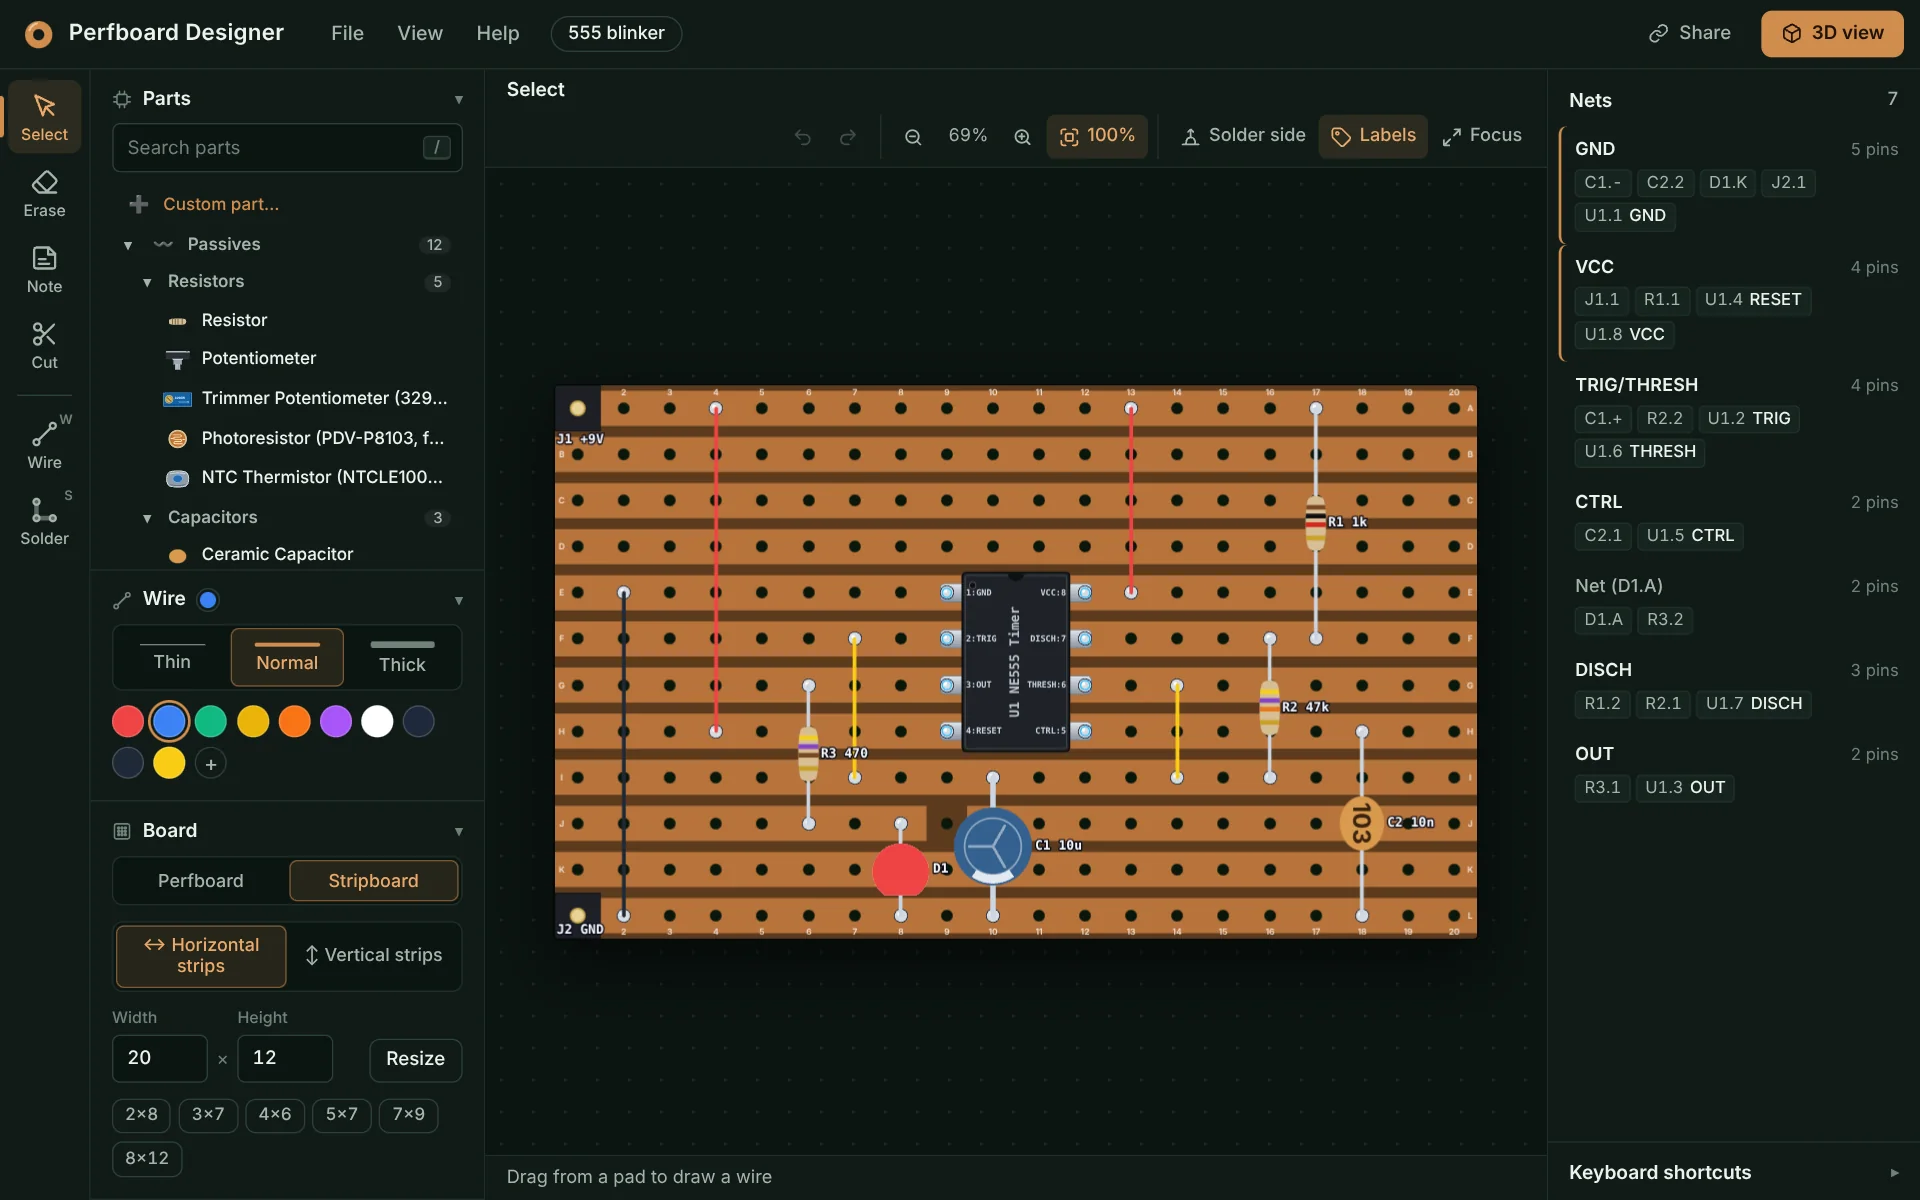
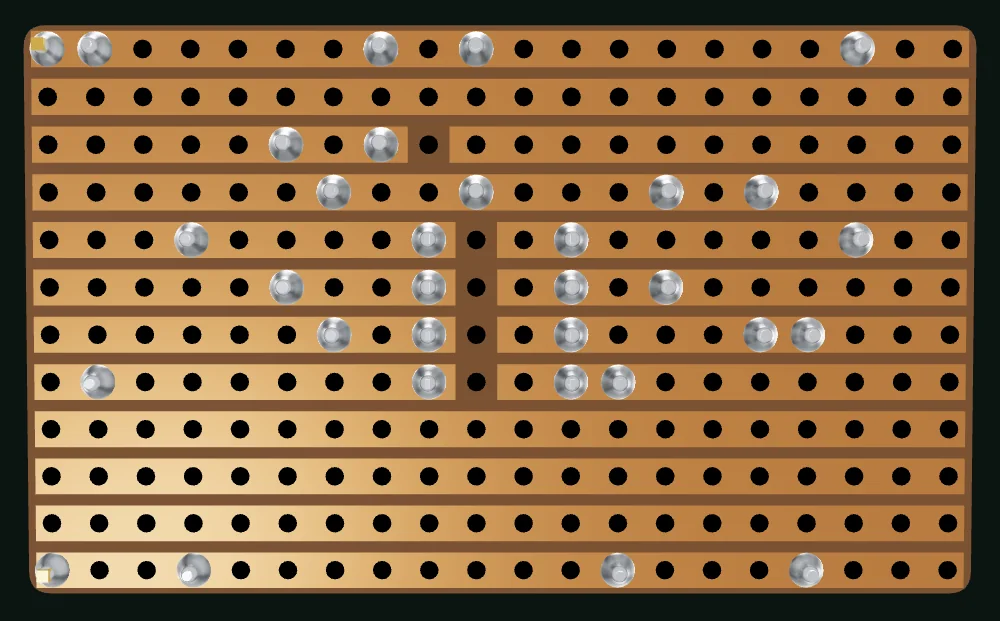
- Horizontal or vertical strips, on a board of any size.
- Turn the 3D view over to check the copper strips and cuts on the solder side.
- Switch back to perfboard at any time and your parts and wires stay put.
## 3D board preview
One click on **3D View** turns the layout into a 3D model of the finished board: resistors with
their color bands, ICs with labeled pins, LEDs, capacitors, transistors, pots, headers and every
jumper wire, on a perfboard or stripboard sized to match yours.
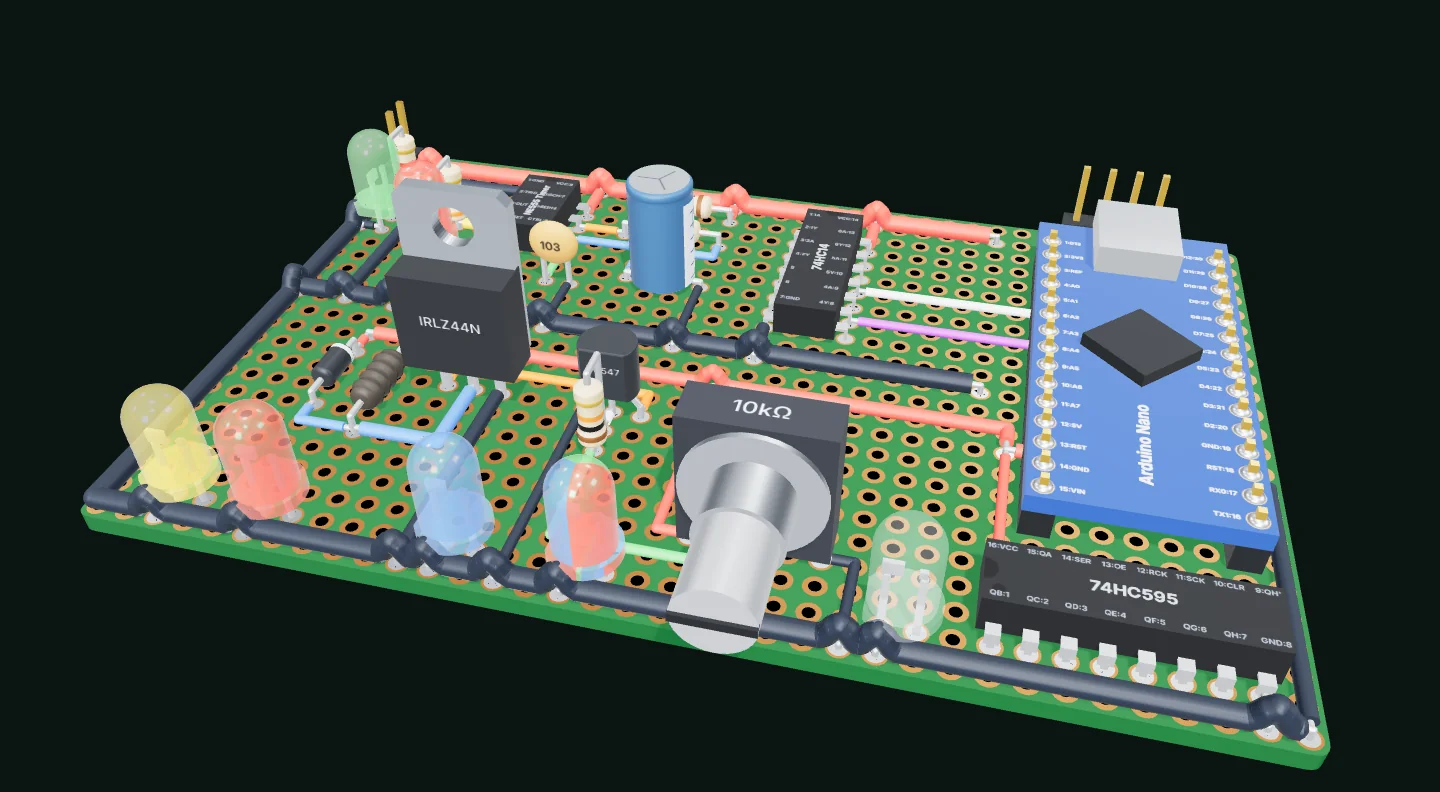
- Drag to orbit, right-drag to pan and scroll to zoom, or jump to an angled, top or bottom view.
- Check the solder side to see where wires and leads meet the copper.
- Save a screenshot of the render to share or keep next to your build.
- Export the board as a true-to-size 3D model (`.glb`) for Blender, CAD tools or any glTF viewer.
Component variants use the board's 2.54 mm hole grid. Check the
[component footprint notes](docs/component-footprints.md) for package details, pin labels,
and parts whose leads must be formed to fit the grid. The models are layout previews, not
manufacturing drawings. To explore the expanded catalog in 2D and 3D, import one of the component
galleries: [connectors](examples/new-components-connectors.json),
[batteries](examples/new-components-batteries.json), [switches](examples/new-components-switches.json),
[displays and LEDs](examples/new-components-displays-leds.json),
[passives and sensors](examples/new-components-passives-sensors.json) and
[DIP chips](examples/new-components-dip-chips.json). They show parts, not working circuits.
## How to plan a perfboard layout
1. **Pick your board**: open the [designer](https://perfboarddesigner.com/app/), choose
**Perfboard** or **Stripboard**, then a preset or the number of holes across and down to match
the board on your bench.
2. **Place parts and wires**: pick a component, then click the holes for its leads. Rotate chips
with `R` and draw wires between pins with the **Wire Tool** (`W`).
3. **Check it in 3D**: open **3D View** to see how everything fits, and flip the board to check
the solder side.
4. **Save it and build it**: use **File → Save Project to File** to keep the design, and
**File → Export PDF** for a project sheet: the board from both sides, the components and a
shopping list, the nets and checks, and true-size pages to lay your parts on at the workbench.
## Keyboard shortcuts and mouse controls
| Action | Shortcut / gesture |
| :--- | :--- |
| Toggle the wire tool | `W` |
| Rotate the selected chip or part | `R` |
| Add a note to the selected hole | `D` |
| Remove a hole's note | `Shift` + `D` |
| Change the selected wire's color | `C` |
| Delete the selected parts and wires | `Delete` |
| Select several parts and wires | `Shift` + click, `Shift` + drag a box, or `Ctrl` + `A` |
| Copy, cut, paste (at the pointer), duplicate | `Ctrl` + `C` / `X` / `V` / `D` |
| Undo / redo | `Ctrl` + `Z` / `Ctrl` + `Y` |
| Deselect, or step back out of a tool | `Esc` |
| Fullscreen | `F` |
| Download the board as an image | `P` |
| Zoom (20% to 300%, around the cursor) | Mouse wheel, or the 🔍 buttons |
| Pan | Left-drag empty space, `Space` + drag, or middle-mouse drag |
| Rotate, recolor, add a note, set a value or delete | Right-click |
## FAQ
### Is Perfboard Designer free?
Yes. It's completely free and open source, with no account, ads or limits.
### Do I need to install anything?
No. It runs in any modern web browser, and works best on a desktop or laptop with a mouse.
### Where are my designs saved?
On your own device. Your projects are saved in this browser automatically as you edit: open,
rename, duplicate or delete them from **File → Open Project**. **Save Project to File** downloads a
project file you can import again or share, and **Share** makes a link with the board inside
the link itself. Nothing is uploaded to a server, unless you ask **Share** for a short link: then
a copy of that board is stored at `projects.perfboarddesigner.com` so the short link can open
it, and deleted after a year unopened. If you accept analytics cookies, Google Analytics counts
which pages are visited, never what's on your boards; **Cookie settings** (in the site's footer, or
the editor's Help menu) changes that.
### Does it work for stripboard (Veroboard)?
Yes. Switch the board to Stripboard and copper strips run along every row or column. Use the Cut
tool to cut a strip at any hole; the cuts are saved with your project and shown on the copper side
of the 3D view.
### Can I add a part that isn't in the list?
Yes. Click **Custom part…** at the top of the parts list and pick what it is: a chip or dev board
(set its size and label every pin), a module with pins anywhere on its board, or a part in a
package the library has, such as a BC337 transistor (a TO-92 with its own pinout). You can edit it
again later, and it travels with every board and share link that uses it.
### Does it simulate or check my circuit?
It checks the wiring, not the circuit. The **Nets** panel shows which pins are connected to which,
and points out pins left unconnected and wires that connect nothing, so you can compare the board
with your schematic. It doesn't simulate how the circuit behaves.
### Is there a guide?
Yes: the [user guide](https://perfboarddesigner.com/guide/) walks through every tool, panel and
shortcut. It's also under **Help** in the editor.
## Run it locally
You need [Node.js](https://nodejs.org/) 16 or newer.
```bash
git clone https://github.com/MaurerKrisztian/perfboard-designer.git
cd perfboard-designer
npm install
npm run start
```
Then open for the editor ( is the landing
page).
| Command | What it does |
| :--- | :--- |
| `npm run start` | Dev server with hot reload |
| `npm run build` | Type-check and build the site into `dist/` |
| `npm run serve` | Preview the production build |
| `npm run lint` | Lint `src/` with ESLint |
It's built with TypeScript: a React UI over an editor core that draws the board with the HTML5
Canvas API. Vite bundles it, and three.js powers the 3D view (it's lazy-loaded, so the editor itself stays small).
## Project file format
Projects are saved as plain, readable JSON (format version 8 with optional requirements, else the oldest version that holds the board): the board
type and size, strip cuts, wires (with any corners they bend at), and every part with its reference
designator, all as `[column, row]` grid positions rather than pixels. Files from older versions
still open. The format is documented field by field
in [`src/project-file/project-file.ts`](src/project-file/project-file.ts), and the
[`examples/`](examples) folder has sample projects to open with **File → Import Project from File**.
Share links carry the same file, and can be made by other programs (an AI agent designing a board,
say): see [docs/share-links.md](docs/share-links.md).
## Requirements
A project file can carry optional **requirements**: the connections the board is meant to have,
written by an AI agent (through the MCP server) or another program. When a board has them and
checking is on, the **Nets** panel compares them with the actual wiring and reports missing
connections, unexpected joins and missing components or pins; click a report to highlight its
board nets. Unspecified pins stay unchecked, so partial requirements never report a full match.
Board edits never change requirements, and parts you add join their component list unconnected.
## Design boards with AI (MCP server)
Describe a circuit to your AI assistant and get back a board that opens in the editor. The
[`mcp/`](mcp) folder is an [MCP](https://modelcontextprotocol.io) server that lets Claude,
ChatGPT, Cursor, VS Code and other AI assistants design boards. It's free and needs no account.
What the assistant can do with it:
- Look up every part in the library, with its pins and polarity.
- Start a perfboard or stripboard, place parts, route wires and cut strips.
- Make parts the library doesn't have: a transistor in a known package with its own pinout, a
sensor module, a custom chip. They open in the editor like the ones you make yourself.
- Check the wiring: pins left unconnected, parts sharing a hole, shorted supply rails, LEDs and
electrolytic capacitors in backwards, strips shorting a chip. Given the netlist it meant, it reports every missing or extra connection.
- Hand you a share link (and a short link if you ask) that opens the board in the editor.
- Show you a picture of the board right in the chat, in Claude and ChatGPT.
- Read a board link you share with it, change the board and give you a new link.
**Use the hosted server:** add this address to your assistant as a remote MCP server (connector),
with no authentication:
```text
https://mcp.perfboarddesigner.com/mcp
```
**Or run it on your own computer** from npm
([`perfboard-designer-mcp`](https://www.npmjs.com/package/perfboard-designer-mcp), Node.js 22+).
In Claude Code:
```bash
claude mcp add --scope user perfboard -- npx -y perfboard-designer-mcp
```
It's also listed in the [MCP Registry](https://registry.modelcontextprotocol.io) as
`com.perfboarddesigner/mcp`. Step-by-step setup for each assistant is on the
[MCP server page](https://perfboarddesigner.com/mcp-server/), and
[mcp/README.md](mcp/README.md) covers the tools, settings and hosting your own copy.
## Contributing
Bug reports, ideas and pull requests are welcome:
- 🐞 [Report a bug or suggest a feature](https://github.com/MaurerKrisztian/perfboard-designer/issues)
- 🔧 Fork the repo and open a pull request
- 👥 See the [people who've already helped](https://perfboarddesigner.com/contributors/)
If Perfboard Designer saved you a desoldering session, a ⭐ on GitHub helps other makers find it.
## License
Distributed under the ISC License.