# Getting Started
* [1. Create an App](#1-create-an-app)
* [2. Set Up the SDK](#2-set-up-the-sdk)
* [Android](#android)
* [iOS](#ios)
* [Flutter](#flutter)
* [3. Verify Installation](#3-verify-installation)
* [4. Review Configuration Options](#4-review-configuration-options)
* [Troubleshoot](#troubleshoot)
## 1. Create an App
Create a new app by visiting the _Apps_ section on the dashboard.
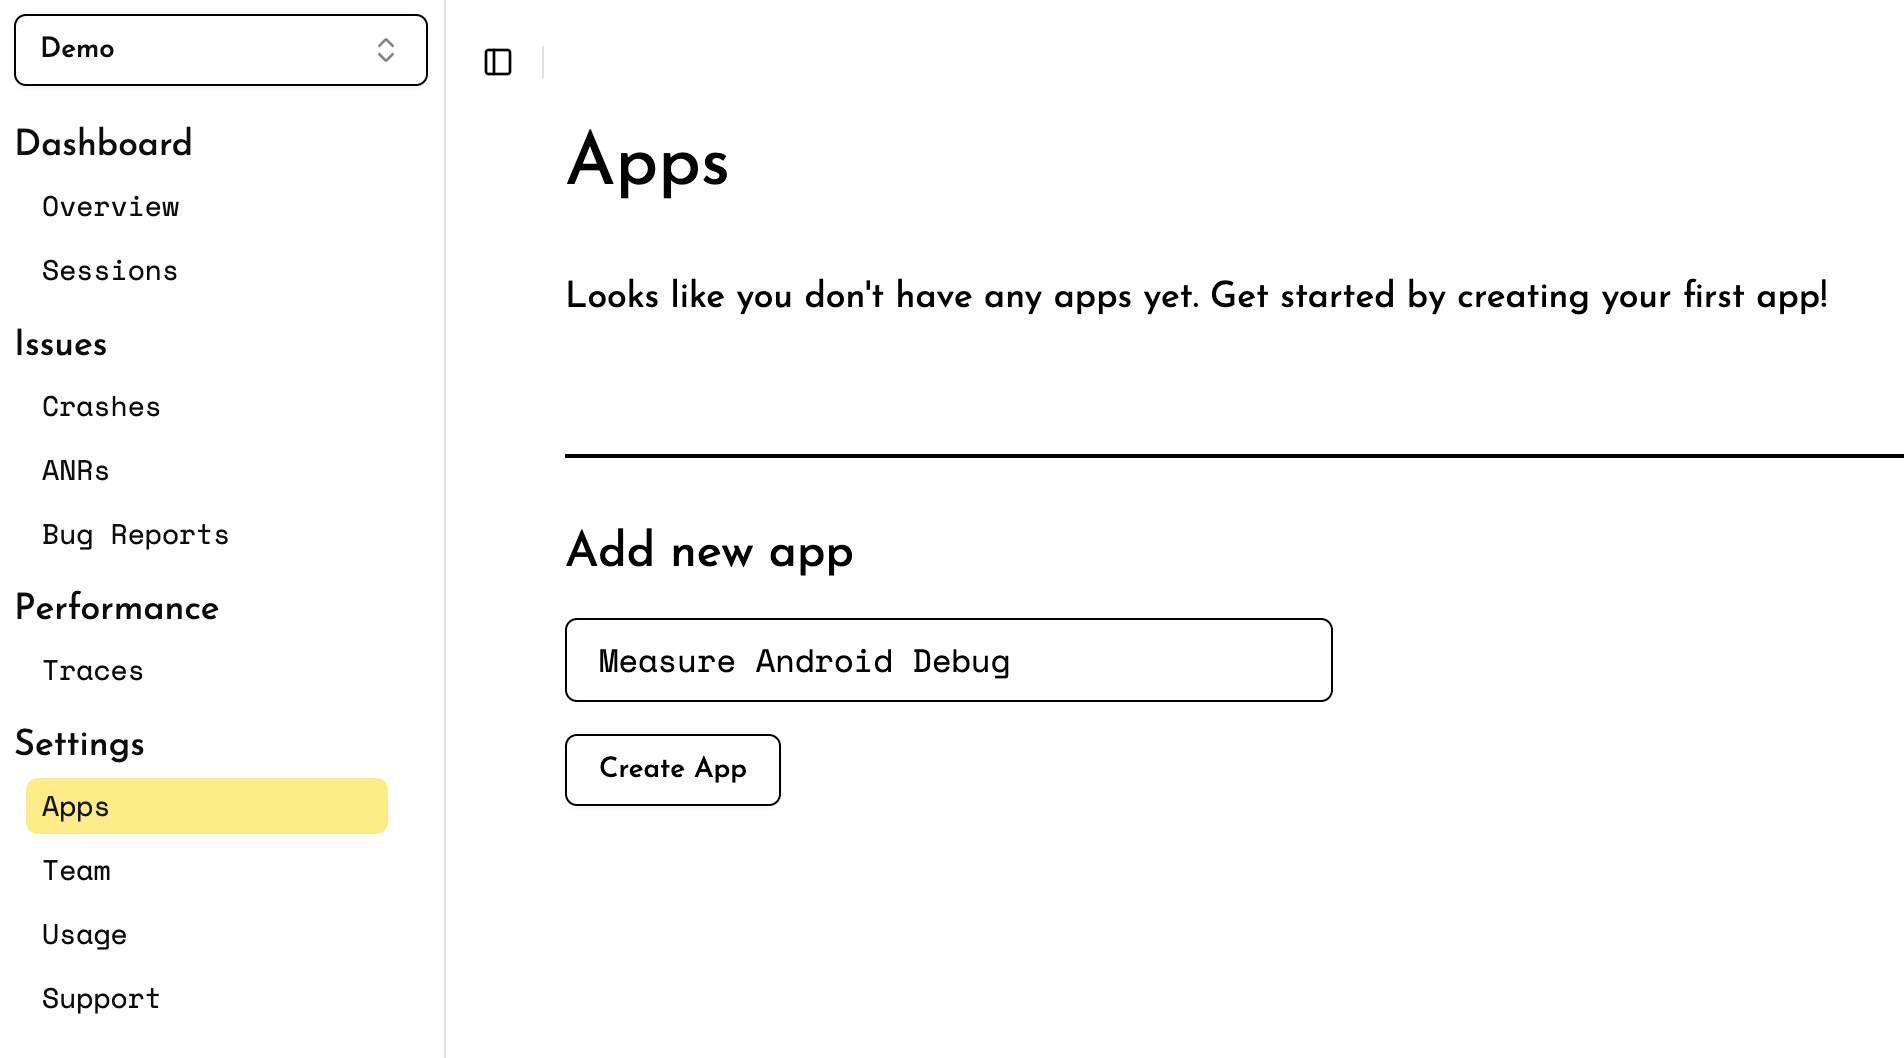
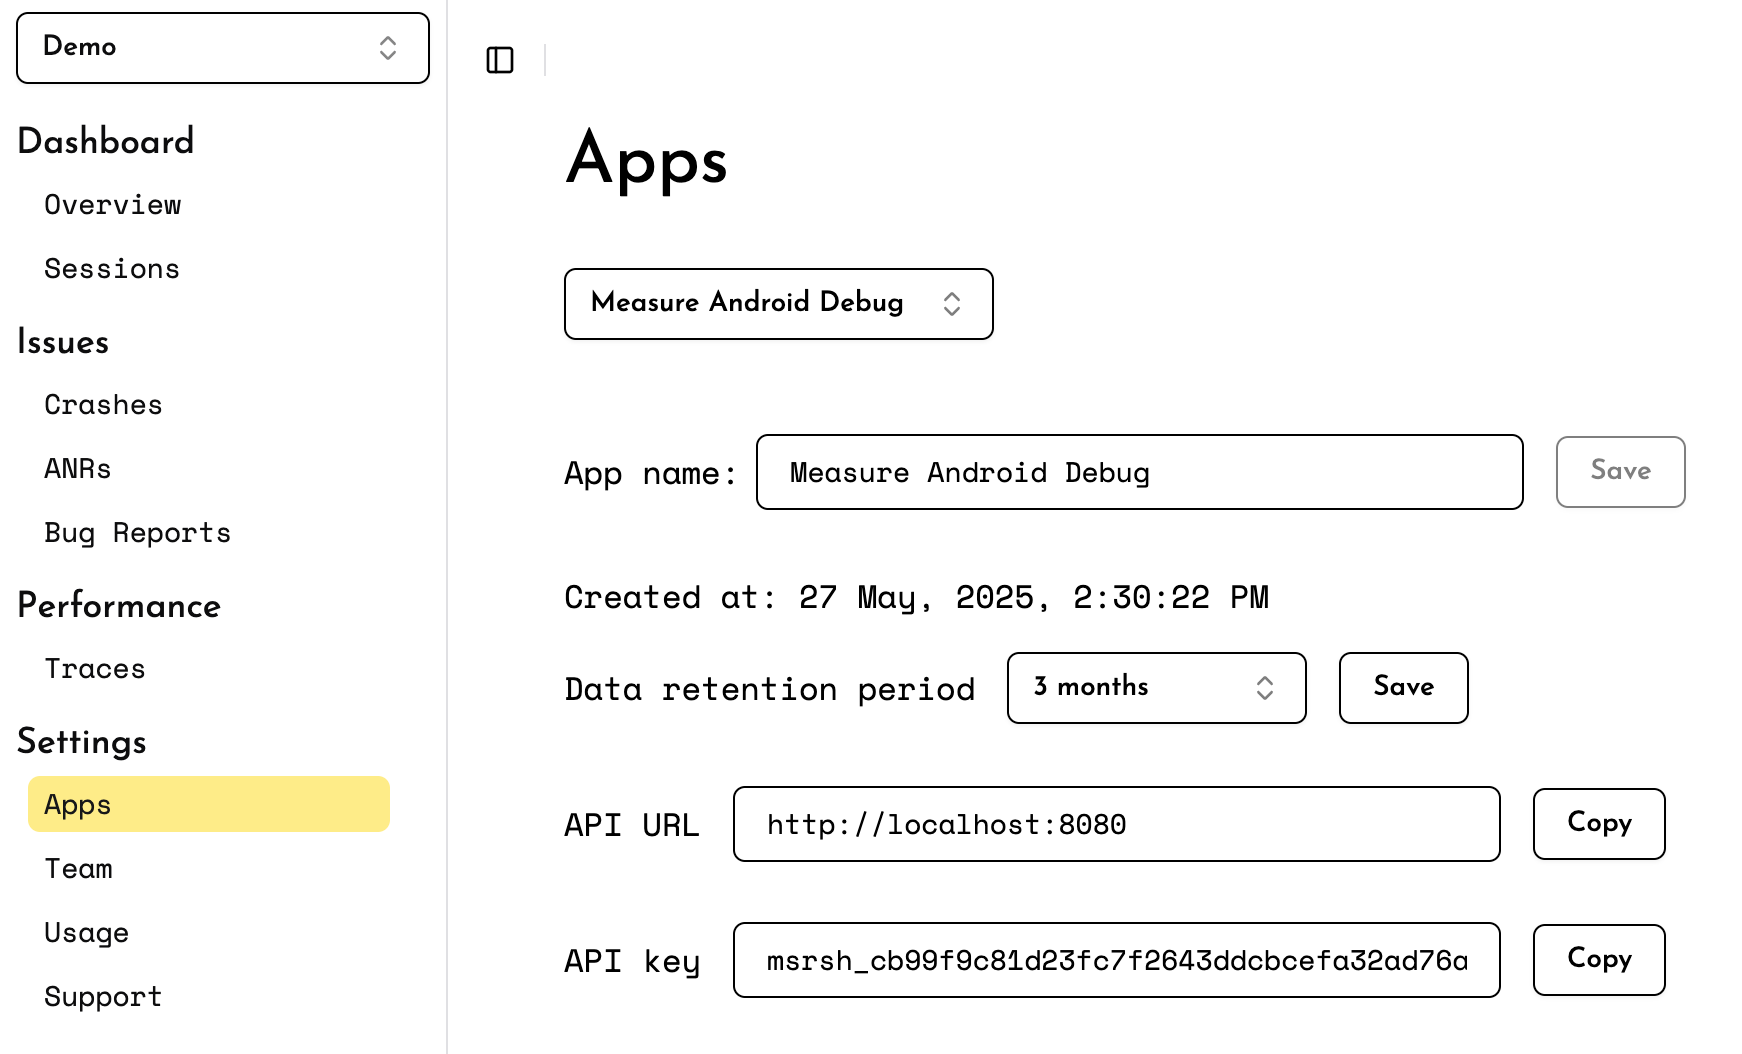
Once the app is created, note the `API URL` & `API Key` for your app. This will be used in the SDK configuration
in later steps.
## 2. Set Up the SDK
* [Android](#android)
* [iOS](#ios)
* [Flutter](#flutter)
## Android
Minimum Requirements
| Name | Version |
|-----------------------|-----------------|
| Android Gradle Plugin | `8.1.0` |
| Min SDK | `21` (Lollipop) |
| Target SDK | `35` |
Self-host Compatibility
| SDK Version | Minimum Required Self-host Version |
|---------------------|------------------------------------|
| >= `0.16.0` | `0.10.0` |
| `0.13.0` -`0.15.1` | `0.9.0` |
| `0.10.0` - `0.12.0` | `0.6.0` |
| `0.9.0` | `0.5.0` |
### Add the API Key & API URL
Add the API URL & API Key to your application's `AndroidManifest.xml` file.
```xml
```
Configure API Keys for Different Build Types
You can
use [manifestPlaceholders](https://developer.android.com/build/manage-manifests#inject_build_variables_into_the_manifest)
to configure different values for different build types or flavors.
In the `build.gradle.kts` file:
```kotlin
android {
buildTypes {
debug {
manifestPlaceholders["measureApiKey"] = "YOUR_API_KEY"
manifestPlaceholders["measureApiUrl"] = "YOUR_API_URL"
}
release {
manifestPlaceholders["measureApiKey"] = "YOUR_API_KEY"
manifestPlaceholders["measureApiUrl"] = "YOUR_API_URL"
}
}
}
```
or in the `build.gradle` file:
```groovy
android {
buildTypes {
debug {
manifestPlaceholders = ["measureApiKey": "YOUR_API_KEY"]
manifestPlaceholders = ["measureApiUrl": "YOUR_API_URL"]
}
release {
manifestPlaceholders = ["measureApiKey": "YOUR_API_KEY"]
manifestPlaceholders = ["measureApiUrl": "YOUR_API_URL"]
}
}
}
```
Then add the following in the `AndroidManifest.xml` file:
```xml
```
### Add the Gradle Plugin
Add the following plugin to your project.
```kotlin
plugins {
id("sh.measure.android.gradle") version "0.11.0"
}
```
or, use the following if you're using `build.gradle`.
```groovy
plugins {
id 'sh.measure.android.gradle' version '0.11.0'
}
```
Configure Variants
By default, the plugin is applied to all variants. To disable the plugin for specific variants, use the `measure` block
in your build file.
> [!IMPORTANT]
> Setting `enabled` to `false` will disable the plugin for that variant. This prevents the plugin from
> collecting `mapping.txt` file and other build information about the app. Features like tracking app size,
> de-obfuscating
> stack traces, etc. will not work.
For example, to disable the plugin for `debug` variants, add the following to your `build.gradle.kts` file:
```kotlin
measure {
variantFilter {
if (name.contains("debug")) {
enabled = false
}
}
}
```
or in the `build.gradle` file:
```groovy
measure {
variantFilter {
if (name.contains("debug")) {
enabled = false
}
}
}
```
### Add the SDK
Add the following to your app's `build.gradle.kts` file.
```kotlin
implementation("sh.measure:measure-android:0.15.1")
```
or, add the following to your app's `build.gradle` file.
```groovy
implementation 'sh.measure:measure-android:0.15.1'
```
### Initialize the SDK
Add the following to your app's Application class `onCreate` method.
> [!IMPORTANT]
> To be able to detect early crashes and accurate launch time metrics, initialize the SDK as soon as possible in
> Application `onCreate` method.
```kotlin
Measure.init(
context, MeasureConfig(
// Enable full collection in debug mode
// to verify installations.
enableFullCollectionMode = true,
)
)
```
See the [troubleshooting](#troubleshoot) section if you face any issues.
## iOS
Minimum Requirements
| Name | Version |
|-------------------------|---------|
| Xcode | 15.0+ |
| Minimum iOS Deployments | 12.0+ |
| Swift Version | 5.10+ |
Self-host Compatibility
| SDK Version | Minimum Required Self-host Version |
|-------------|------------------------------------|
| >=0.1.0 | 0.6.0 |
| >=0.7.0 | 0.9.0 |
### Install the SDK
Measure SDK supports **CocoaPods** and **Swift Package Manager (SPM)** for installation.
#### Using CocoaPods
[CocoaPods](https://cocoapods.org) is a dependency manager for Cocoa projects. For usage and installation instructions,
visit their website. To integrate MeasureSDK into your Xcode project using CocoaPods, specify it in your `Podfile`:
```ruby
pod 'measure-sh'
```
#### Using Swift Package Manager
The [Swift Package Manager](https://swift.org/package-manager/) is a tool for automating the distribution of Swift code
and is integrated into the `swift` compiler.
Add Measure as a dependency by adding `dependencies` value to your `Package.swift` or the Package list in Xcode.
```swift
dependencies: [
.package(url: "https://github.com/measure-sh/measure.git", branch: "ios-v0.8.1")
]
```
### Initialize the SDK
Add the following to your AppDelegate's `application(_:didFinishLaunchingWithOptions:)` to capture early crashes and
launch time metrics.
> [!IMPORTANT]
> To detect early crashes and ensure accurate launch time metrics, initialize the SDK as soon as possible
> in `application(_:didFinishLaunchingWithOptions:)`.
```swift
import Measure
func application(_ application: UIApplication,
didFinishLaunchingWithOptions launchOptions: [UIApplication.LaunchOptionsKey: Any]?) -> Bool {
let config = BaseMeasureConfig(
// Set to 1 to track all sessions
// useful to verify the installation
samplingRateForErrorFreeSessions: 1
)
let clientInfo = ClientInfo(apiKey: "", apiUrl: "")
Measure.initialize(with: clientInfo, config: config)
return true
}
```
```objc
#import
- (BOOL)application:(UIApplication *)application didFinishLaunchingWithOptions:(NSDictionary *)launchOptions {
ClientInfo *clientInfo = [[ClientInfo alloc] initWithApiKey:@"" apiUrl:@""];
BaseMeasureConfig *config = [[BaseMeasureConfig alloc] initWithEnableLogging:YES
samplingRateForErrorFreeSessions:1.0
traceSamplingRate:1.0
trackHttpHeaders:YES
trackHttpBody:YES
httpHeadersBlocklist:@[]
httpUrlBlocklist:@[]
httpUrlAllowlist:@[]
autoStart:true
trackViewControllerLoadTime:true
screenshotMaskLevel:ScreenshotMaskLevelObjcAllText
requestHeadersProvider:nil];
[Measure initializeWith:clientInfo config:config];
return YES;
}
```
## Flutter
The Flutter SDK currently supports only Android and iOS targets and is not available for web or desktop. The
SDK depends on the native Android and iOS SDKs, so all the minimum requirements for Android and iOS apply to the
Flutter SDK as well.
Minimum Requirements
| Name | Version |
|---------|---------|
| Flutter | `3.24` |
Self-host Compatibility
| SDK Version | Minimum Required Self-host Version |
|-------------|------------------------------------|
| >= `0.3.0` | `0.9.0` |
| >= `0.1.0` | `0.8.0` |
### Install the SDK
Add the following dependency to your `pubspec.yaml` file:
```yaml
dependencies:
measure_flutter: ^0.3.2
```
### Initialize the SDK
To initialize the SDK, you need to call the `Measure.instance.init` method in your `main` function.
- Run app inside the callback passed to the `init` method. This ensures that the Measure SDK can set up error handlers
to
track uncaught exceptions.
- Wrap your app with the `MeasureWidget`, this is required for gesture tracking and screenshots.
- Set the `sessionSamplingRate` and `samplingRateForErrorFreeSessions` in the `MeasureConfig` as per your requirements.
Ideally, set to `1` for debug.
- Provide different API Keys for iOS and Android by creating two separate apps on the dashboard.
> [!IMPORTANT]
> To detect early native crashes and to ensure accurate launch time metrics, initialize the Android SDK in
> `Application` class as described in the [Android](#initialize-the-sdk) section and the iOS SDK in `AppDelegate` as
> described in
> the [iOS](#initialize-the-sdk-1) section. It is highly recommended to initialize both native SDKs even when using the
> Flutter SDK.
```dart
Future main() async {
await Measure.instance.init(
() =>
runApp(
MeasureWidget(child: MyApp()), // wrap your app with MeasureWidget
),
config: const MeasureConfig( // SDK configuration
traceSamplingRate: 1,
samplingRateForErrorFreeSessions: 1,
),
clientInfo: ClientInfo( // API Key & URL
apiKey: Platform.isAndroid ? "ANDROID_API_KEY" : "IOS_API_KEY",
apiUrl: "YOUR_API_URL",
),
);
}
```
This does the following:
* Initializes the Measure SDK with the provided `clientInfo` and `config`.
* Wraps your app with the `MeasureWidget`.
* Sets up the error handlers to track uncaught exceptions.
* Initializes the native Measure SDKs for Android and iOS with the same `clientInfo` and `config`.
### Setup Android Gradle Plugin
To ensure stacktraces in crash reports are symbolicated correctly, you need to add the Measure Android Gradle Plugin
to your `android/build.gradle` file. This plugin automatically uploads the Flutter symbol files to the Measure server
when you build your app. See the [Add the Gradle Plugin](#add-the-gradle-plugin) section above for instructions.
### Setup Android Manifest
Add the API URL & API Key to your application's `AndroidManifest.xml` file. This is required by
the Android Gradle Plugin to upload mapping and symbol files automatically to the Measure server.
```xml
```
### Track navigation
See [Navigation Monitoring](features/feature-navigation-lifecycle-tracking.md) for instructions on how to track
navigation events.
### Track http requests
See [Network Monitoring](features/feature-network-monitoring.md) for instructions on how to track HTTP requests.
## 3. Verify Installation
Launch the app with the SDK integrated and navigate through a few screens. The data is sent to the server periodically,
so it may take a few seconds to appear. Checkout the `Usage` section in the dashboard or navigate to the `Sessions` tab
to see the sessions being tracked.
🎉 Congratulations! You have successfully integrated Measure into your app!
_______
## 4. Review Configuration Options
There are several configuration options available to customize the SDK behavior. Some options can be set during SDK
initialization, while others can be configured remotely from the dashboard. Review the [Configuration Options](features/configuration-options.md)
section to learn more about these options and how to use them effectively.
For debug builds, it's recommended to set `enableFullCollectionMode` to `true` during initialization to ensure all data is
collected for verification purposes. In release builds, you can adjust the sampling rates and other settings as needed
to balance signal vs noise and optimize costs.
## Troubleshoot
### Verify Sampling Rate
Try setting `samplingRateForErrorFreeSessions` to `1`, which would enforce all sessions to be sent to the server. It's
typically a good idea to set this to `1` for debug builds.
Android
```kotlin
val config = MeasureConfig(
samplingRateForErrorFreeSessions = 1f, // Set to 1 to track all sessions
)
Measure.init(context, config)
```
iOS
```swift
let config = BaseMeasureConfig(
// Set to 1 to track all sessions
// useful to verify the installation
samplingRateForErrorFreeSessions: 1
)
Measure.initialize(with: clientInfo, config: config)
```
Flutter
```dart
await
Measure.instance.init
(
() => runApp(
MeasureWidget(child: MyApp()),
),
config: const MeasureConfig(
// Set to 1 to track all sessions
// useful to verify the installation
samplingRateForErrorFreeSessions: 1,
),
clientInfo: ClientInfo(
apiKey: "YOUR_API_KEY",
apiUrl: "YOUR_API_URL"
,
)
,
);
```
### Verify API URL and API Key
If you are not seeing any data in the dashboard, verify that the API URL and API key are set correctly in your app.
Android
If logs show any of the following errors, make sure you have added the API URL and API key in your `AndroidManifest.xml`
file.
```
sh.measure.android.API_URL is missing in the manifest
sh.measure.android.API_KEY is missing in the manifest
```
iOS
Verify the API URL and API key are set correctly in the `ClientInfo` object when initializing the SDK.
```swift
let config = BaseMeasureConfig()
let clientInfo = ClientInfo(apiKey: "", apiUrl: "")
Measure.initialize(with: clientInfo, config: config)
```
Flutter
Verify the API URL and API key are set correctly in the `ClientInfo` object when initializing the SDK.
```dart
await
Measure.instance.init
(
() => runApp(
MeasureWidget(child: MyApp()),
),
config: const MeasureConfig(
samplingRateForErrorFreeSessions: 1,
),
clientInfo: ClientInfo(
apiKey: "YOUR_API_KEY",
apiUrl: "YOUR_API_URL"
,
)
,
);
```
When running on Android do ensure the same API URL and API key are set in the `AndroidManifest.xml` file as well as
it's required for the Android Gradle Plugin to upload mapping and symbol files automatically to the Measure server.
### Connecting to Locally-hosted Server
**iOS**
If you are running the measure-sh server on your machine, setting the API_URL to localhost:8080 will work on the
simulator because it can access localhost. However, a physical device cannot access your computer's localhost.
To resolve this, you can use [ngrok](https://ngrok.com/) or a similar service to provide a public URL to your local
server. This allows your physical device to connect to the server.
**Android**
For Android, if your device is on the same network as your computer, you can use your computer's local IP address (e.g.,
192.168.1.X:8080) as the API_URL. Alternatively, you can set up ADB port forwarding with the command `adb reverse tcp:
8080 tcp:8080` to allow the device to connect to the server.
When using an Android emulator, you can set the API_URL to http://10.0.2.2:8080 to access the server running on your
machine.
Alternatively, you can use [ngrok](https://ngrok.com/) or a similar service to provide a public URL to your local
server. This allows your Android emulator or physical device to connect to the server.
### Enable Logs
Android
Enable logging during SDK initialization. All Measure SDK logs use the tag `Measure`.
```kotlin
val config = MeasureConfig(enableLogging = true)
Measure.init(context, config)
```
iOS
Enable logging during SDK initialization.
```swift
let config = BaseMeasureConfig(enableLogging: true)
Measure.initialize(with: clientInfo, config: config)
```
Flutter
Enable logging during SDK initialization.
```dart
await
Measure.instance.init
(
() => runApp(
MeasureWidget(child: MyApp()),
),
config: const MeasureConfig(
enableLogging
:
true
,
)
,
);
```
### Connecting to a Self-hosted Server
If you are hosting the server in cloud. Make sure the API URL is set to the public URL of your server.
For example: set the API URL to `https://measure-api..com`, replacing with your own domain.
### Contact Support
If none of the above steps resolve the issue, feel free to reach out to us on [Discord](https://discord.gg/f6zGkBCt42)
for further
assistance.