# Tutorial: make your first VRM avatar
[README](../README.md) · [日本語](tutorial.ja.md) · [한국어](tutorial.ko.md) · [简体中文](tutorial.zh-CN.md)
> [!WARNING]
> **This kit is still in development.**
>
> Some documentation hasn't caught up yet, and there are bugs and missing features. Thank you for your understanding.
>
> **These docs were written by AI.**
>
> They can be a little hard for people to read. We recommend opening this repository (or the extracted release folder) in a coding agent such as Codex or Claude Code, and learning about the kit by talking with the agent.
>
> For example: "Read README.md and AGENTS.md and tell me what this kit can do."
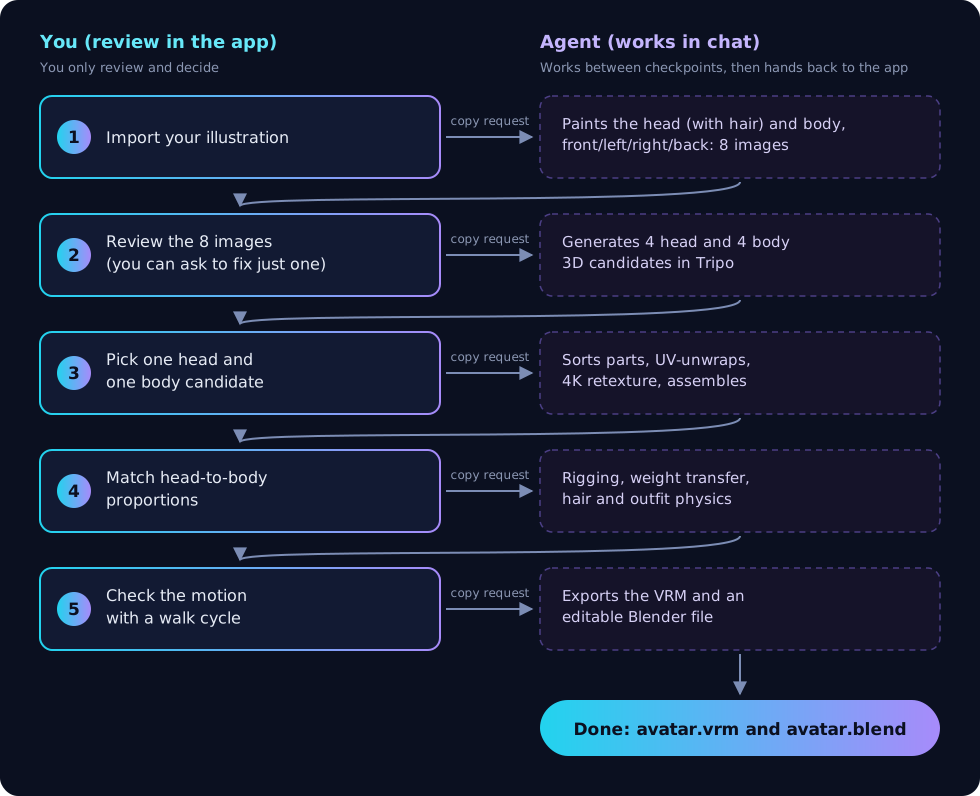
This tutorial walks through the whole process, from one illustration to a finished VRM avatar. The example character is 海月 みる (Miru Umitsuki).
Each step has two parts:
- **👤 What you do**: buttons to press and things to look at in the app. Follow them in order.
- **🤖 What the agent does**: what the agent works on after you hand over the request. This is just for reading.
## Contents
0. [What to prepare](#0-what-to-prepare)
1. [Start the kit](#1-start-the-kit)
2. [Load the illustration and request 8 images](#2-load-the-illustration-and-request-8-images)
3. [Review the 8 images](#3-review-the-8-images)
4. [Choose the head and body 3D candidates](#4-choose-the-head-and-body-3d-candidates)
5. [Adjust the proportions](#5-adjust-the-proportions)
6. [Review the completed VRM](#6-review-the-completed-vrm)
7. [Save the VRM](#7-save-the-vrm)
- [Saving and resuming](#saving-and-resuming) · [Troubleshooting](#troubleshooting)
---
## 0. What to prepare
Set up the tools listed under [What you need](../README.md#what-you-need) in the README. The agent checks your setup in step 1, so you can start even if something is missing.
Two more things make the process smoother:
- **The illustration**: PNG / JPEG / WebP, up to 20 MB. A full-body picture showing hairstyle, outfit and shoes works best. A character sheet with a close-up of the face or a back view is fine too. Use an illustration you are allowed to use.
- **Information for the VRM**: model name, author name and usage terms (whether others may use it, commercial use, redistribution, modification). Enter these in the app when exporting, after motion review.
## 1. Start the kit
**👤 What you do**
1. Download `charakuru-1.1.0-….zip` from [Releases](https://github.com/nanocle/Charakuru/releases) and extract it to a folder you can write to. Not the "Source code" ZIP.
2. Open the extracted folder in Codex and ask:
```text
Read the root AGENTS.md and help me start creating a character with this kit.
```
3. When the agent has started the app, open `http://127.0.0.1:8766` in your browser.
**🤖 What the agent does**
It reads `AGENTS.md` and checks whether Node.js, image generation, browser control, Blender and the rest are available. If something is missing, it tells you. Then it starts the app. When opening the app or Tripo, it uses your existing browser and tabs. If the page is not open, it adds a tab in the same browser; it starts a new browser only when none is open. If browser control needs a connection, it asks you to connect that browser.
The menu on the left shows the stages, from top to bottom: **Image library → Model editor → Rigging → Motion check**. **New / Open / Save** at the top right handle the project.
> [!TIP]
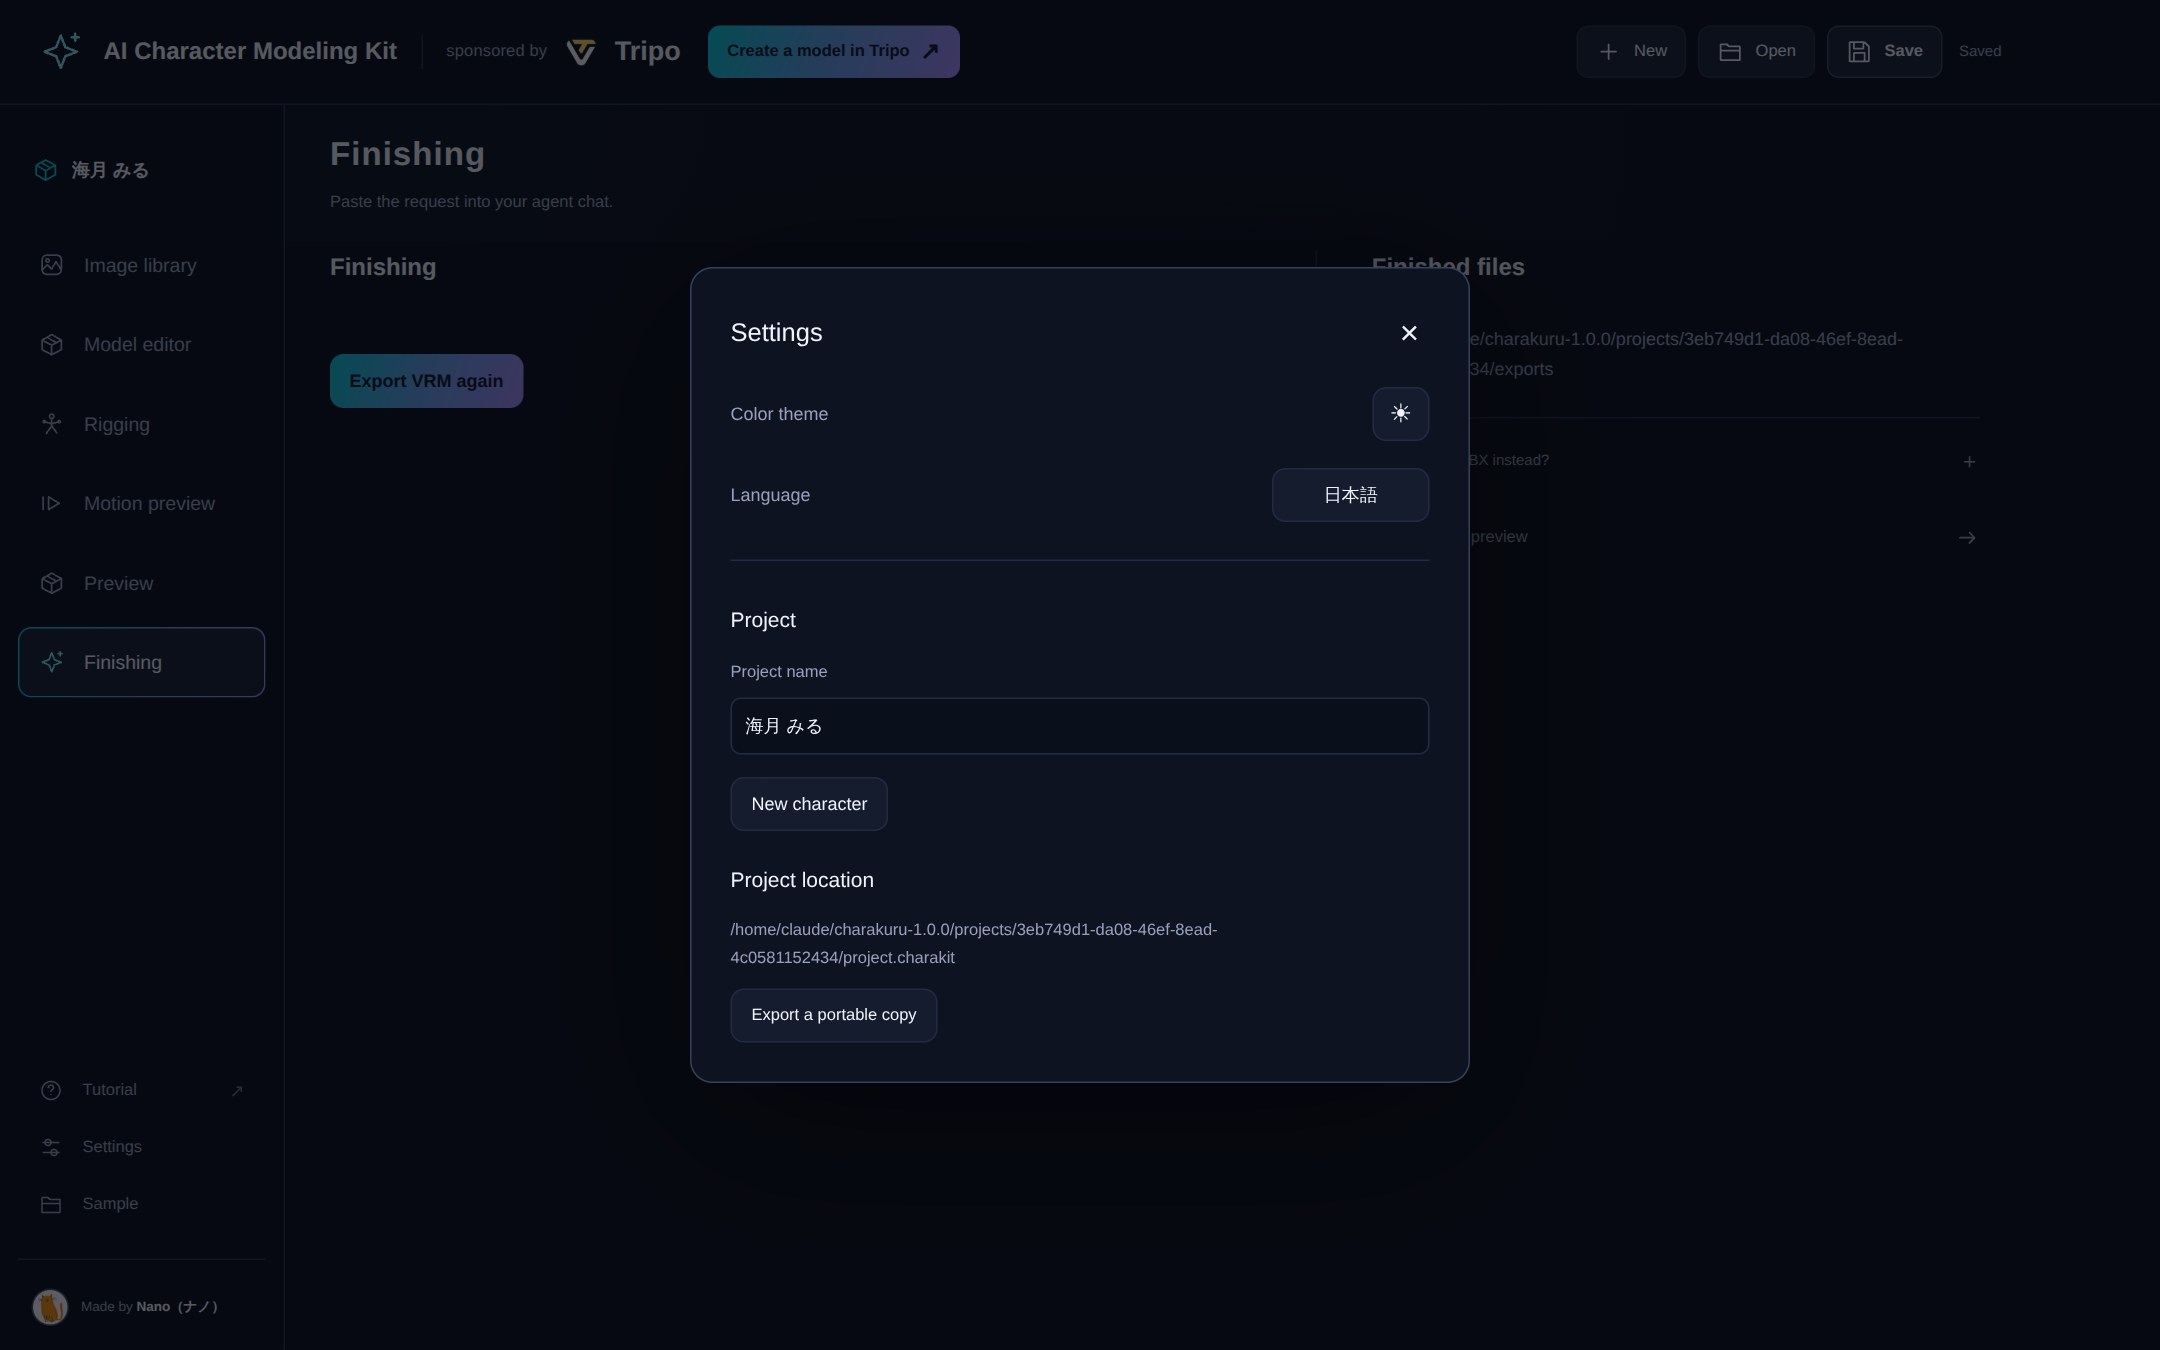
> To start the app yourself, run `npm start` in the extracted folder. No `npm install` is needed. To change the UI language, open **Settings** at the bottom left and select English, 日本語, 한국어 or 简体中文 under **Language**.
### How to send a request (same for every step)
Every step below uses the same routine.
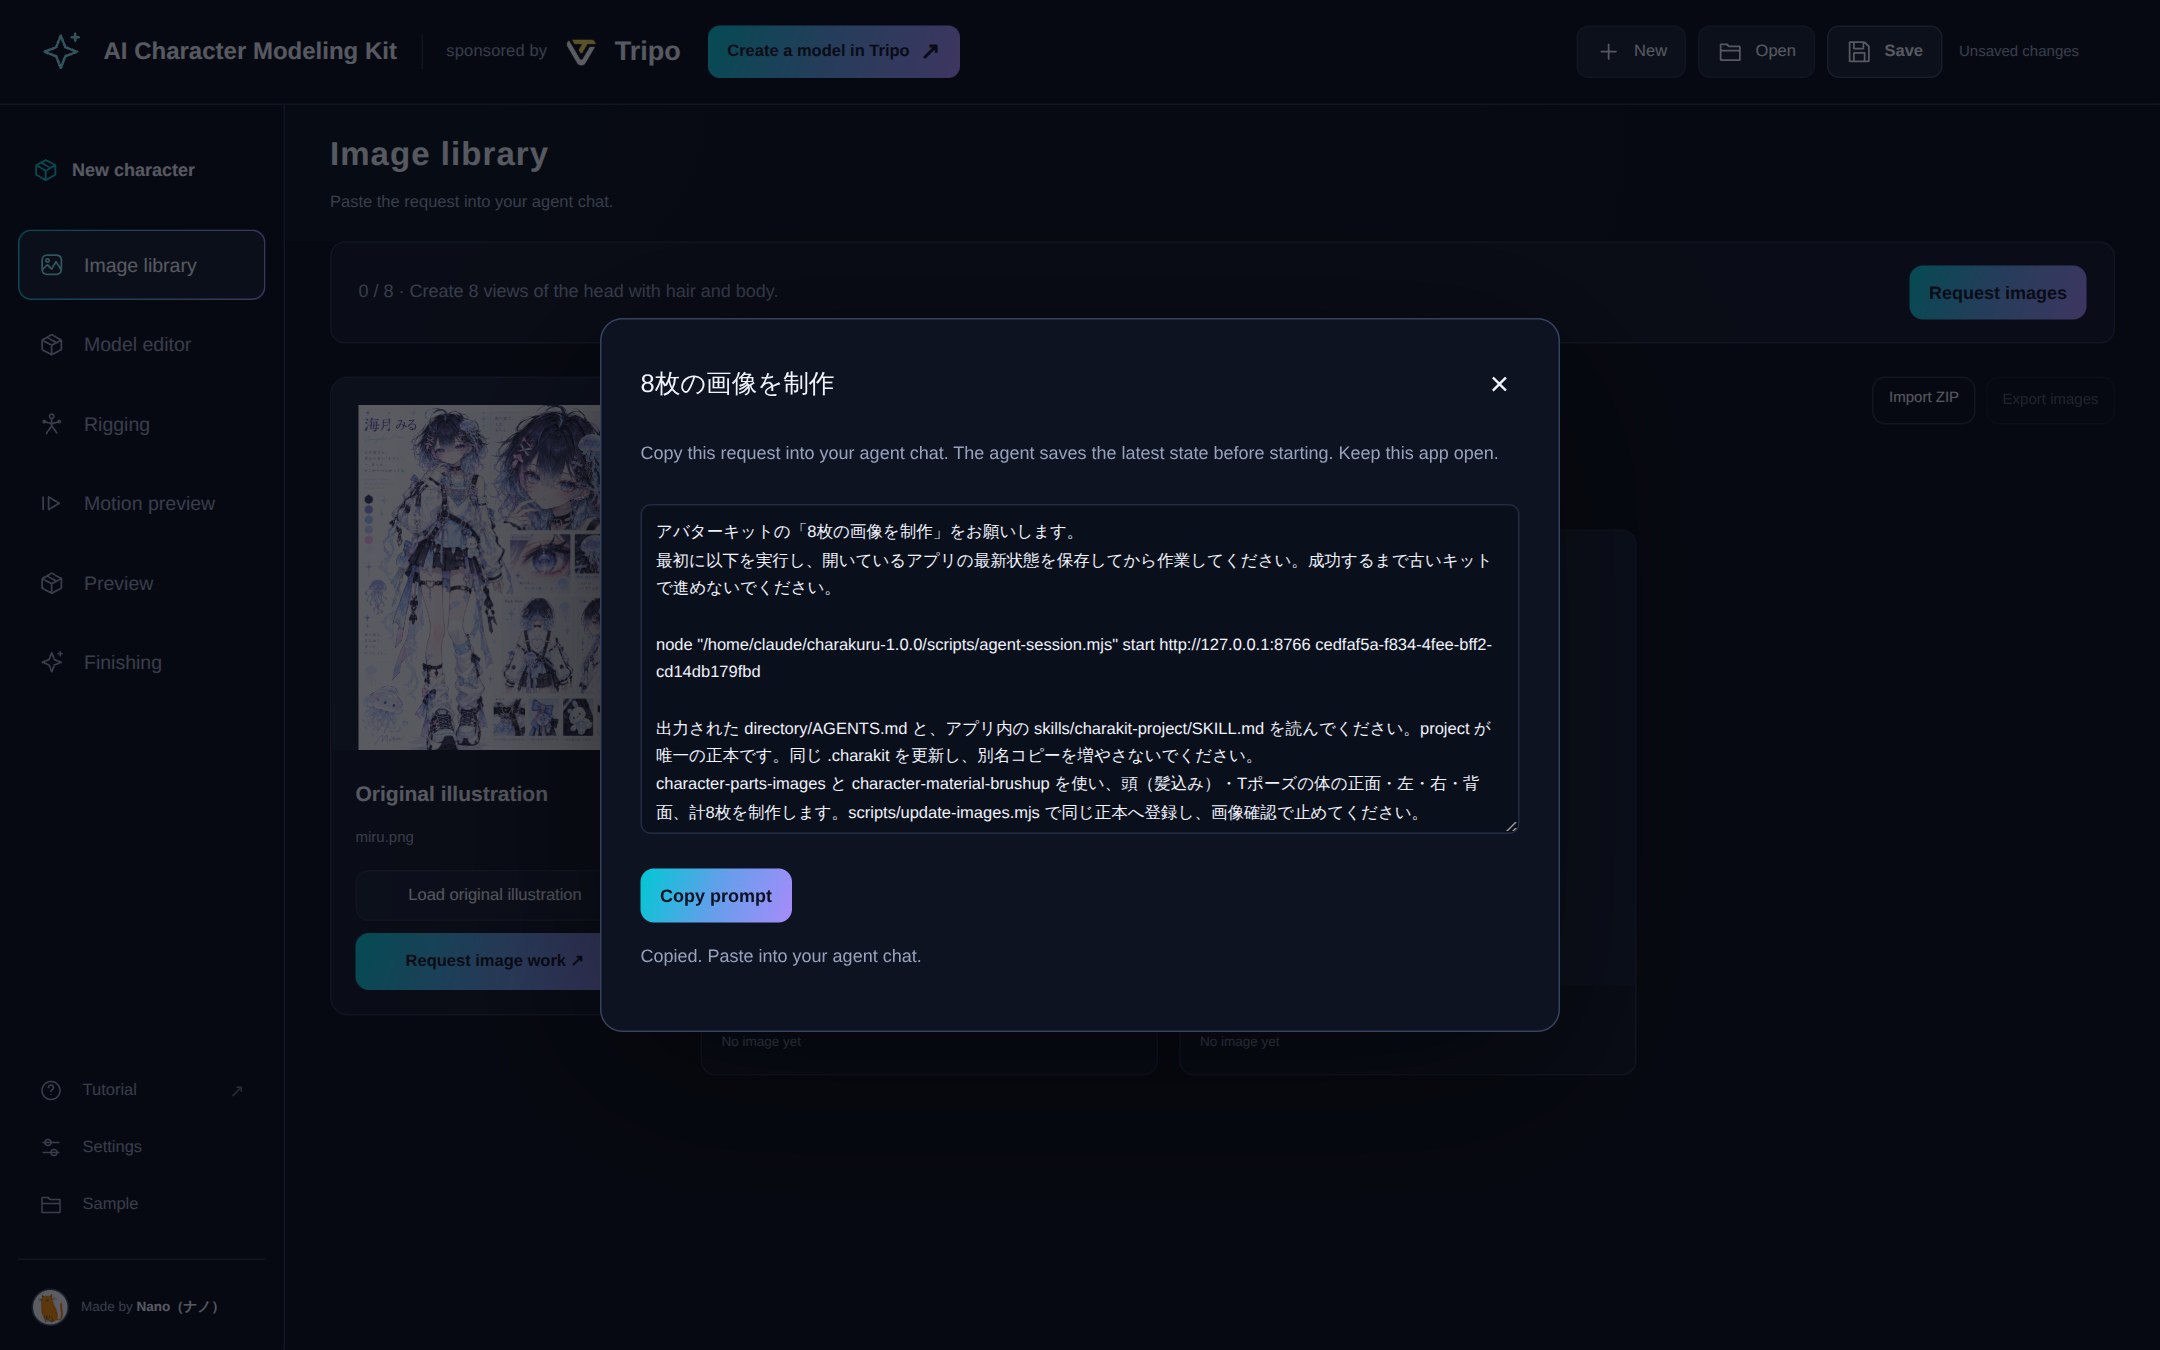
1. Press the step's continue button (for example **Request images** at the top right). A request window opens.
2. Press **Copy prompt**.
3. Paste it into your Codex chat and send it. **Copying alone does not start the agent.**
4. Keep the app open while the agent works. Its progress appears under the page heading.
5. When it's done, the app shows "Work is ready for your review." and switches to the new state on its own.
> [!NOTE]
> Select English, 日本語, 한국어 or 简体中文 in Settings → Language. Copied requests and agent reports use that language. User names, notes and paths remain unchanged.
## 2. Load the illustration and request 8 images
**👤 What you do**
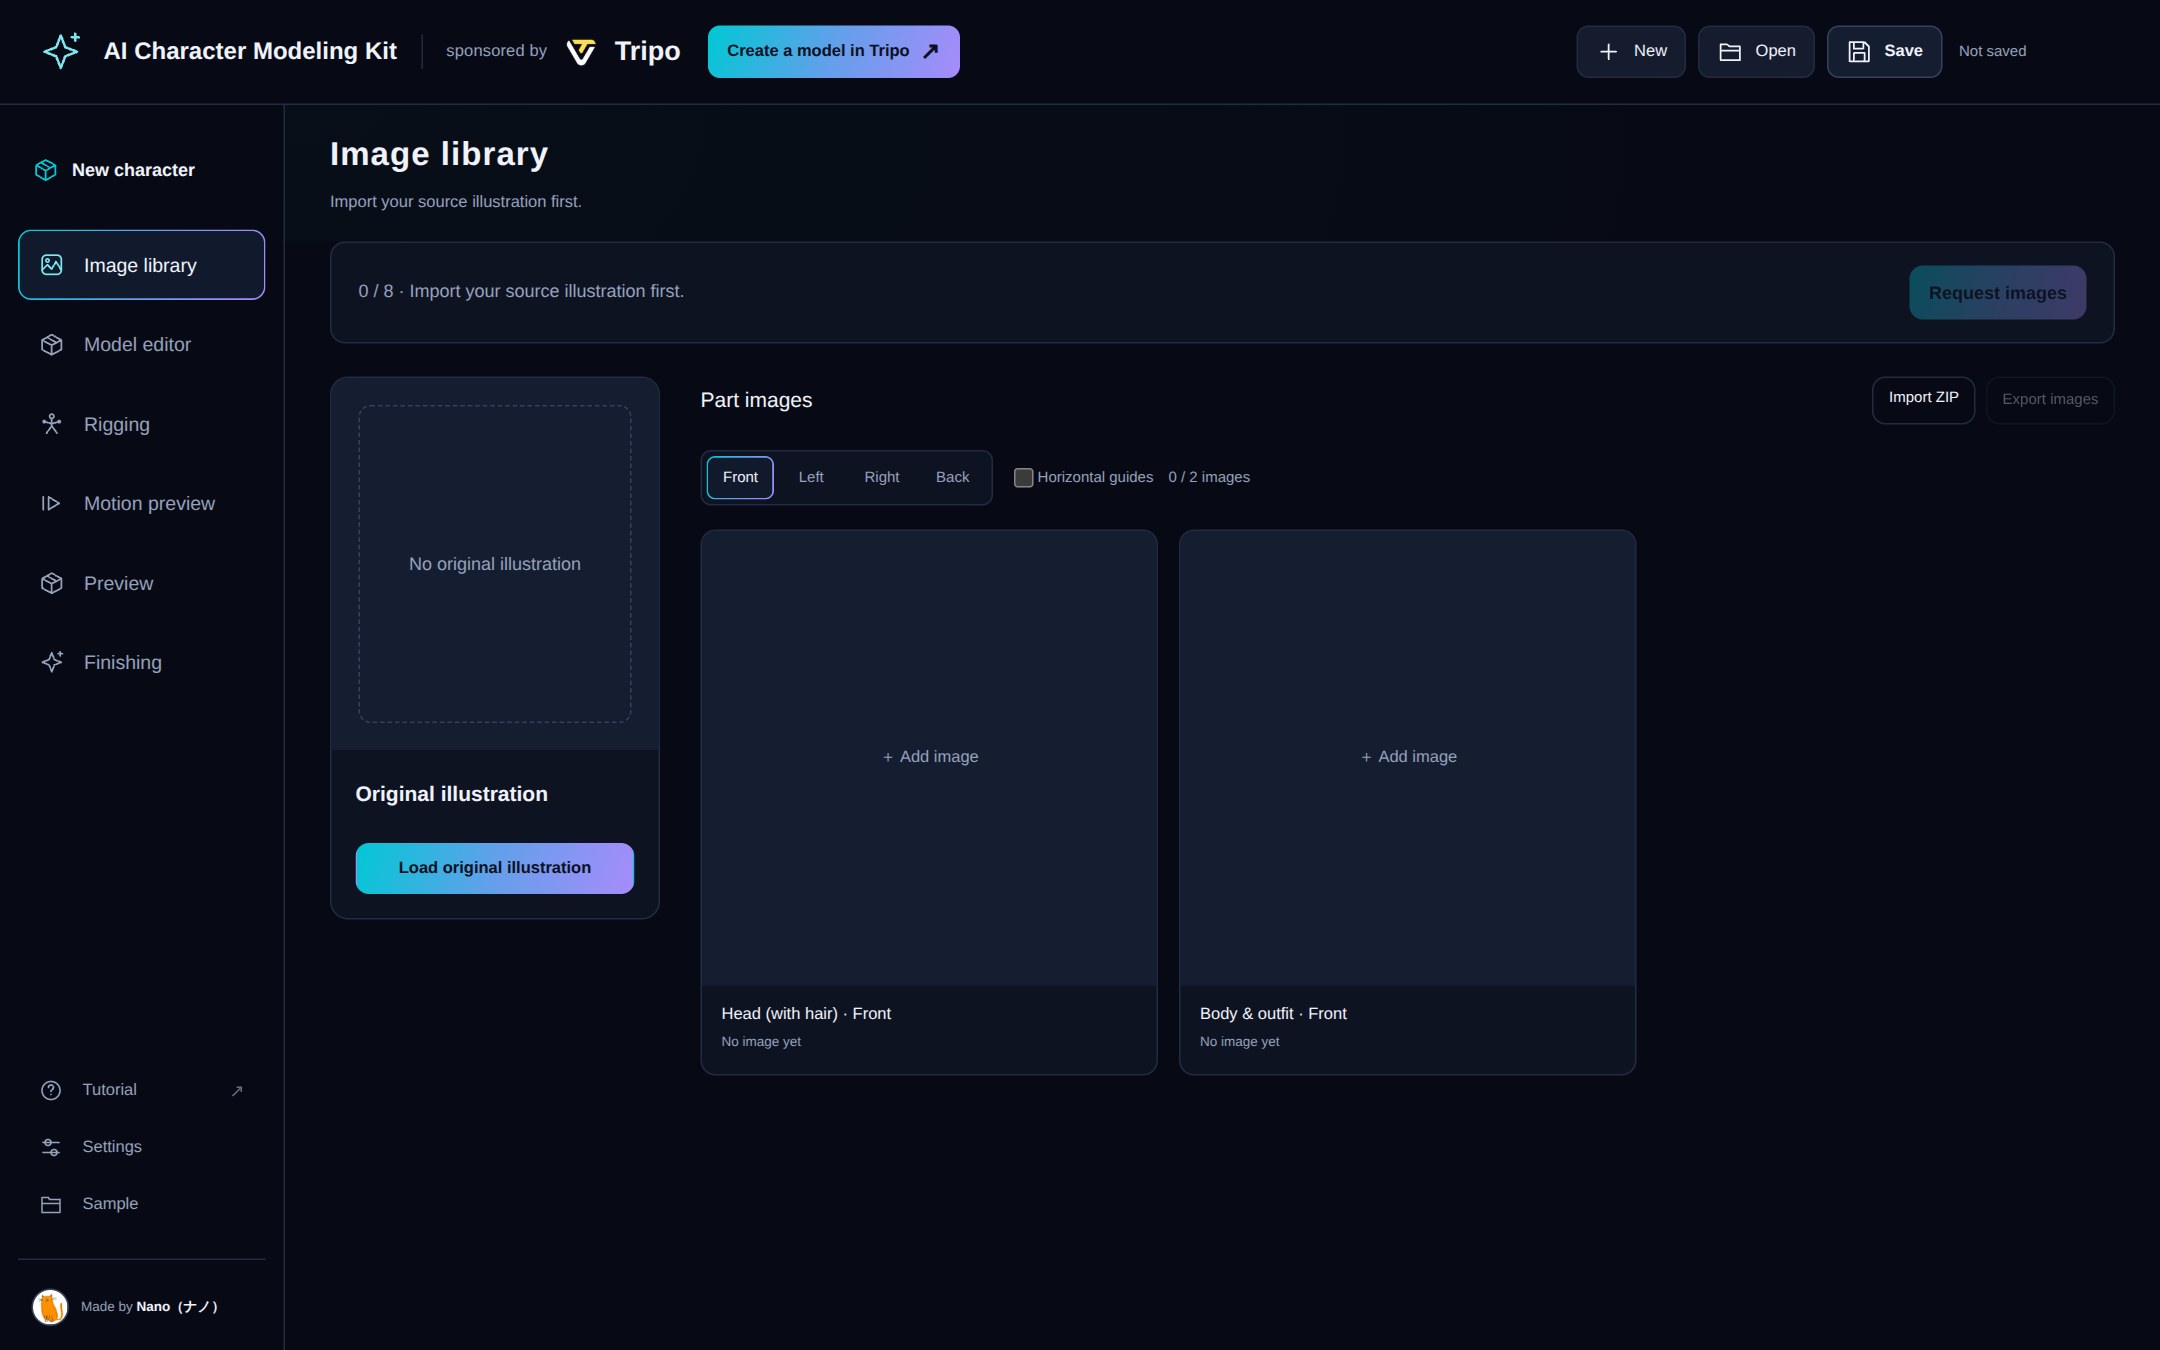
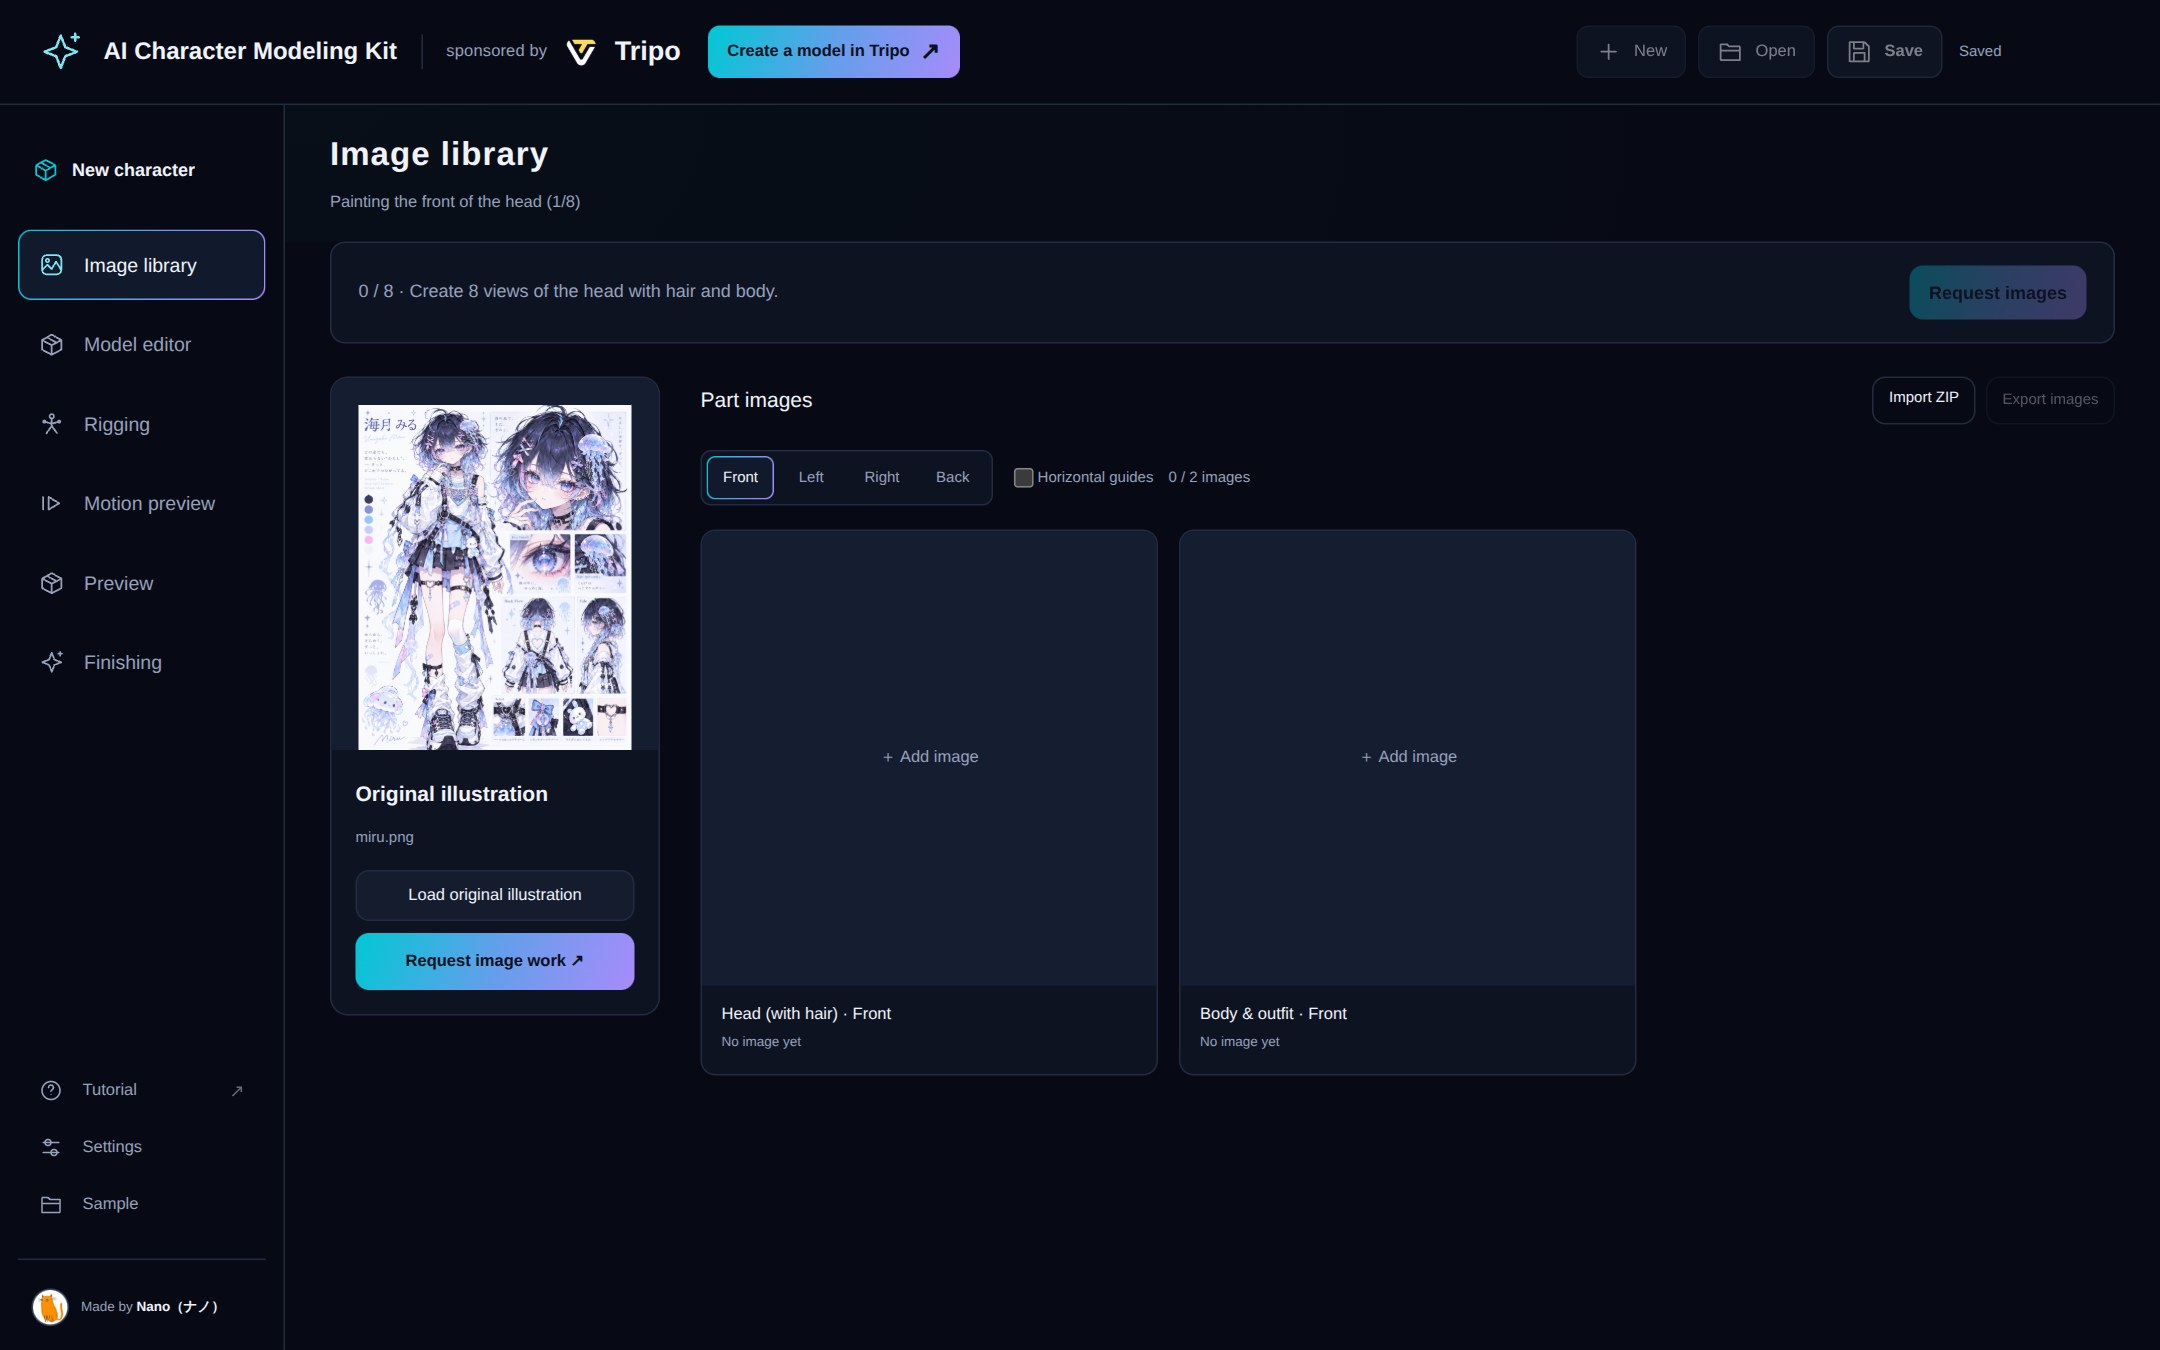
1. Open **Image library** in the left menu.
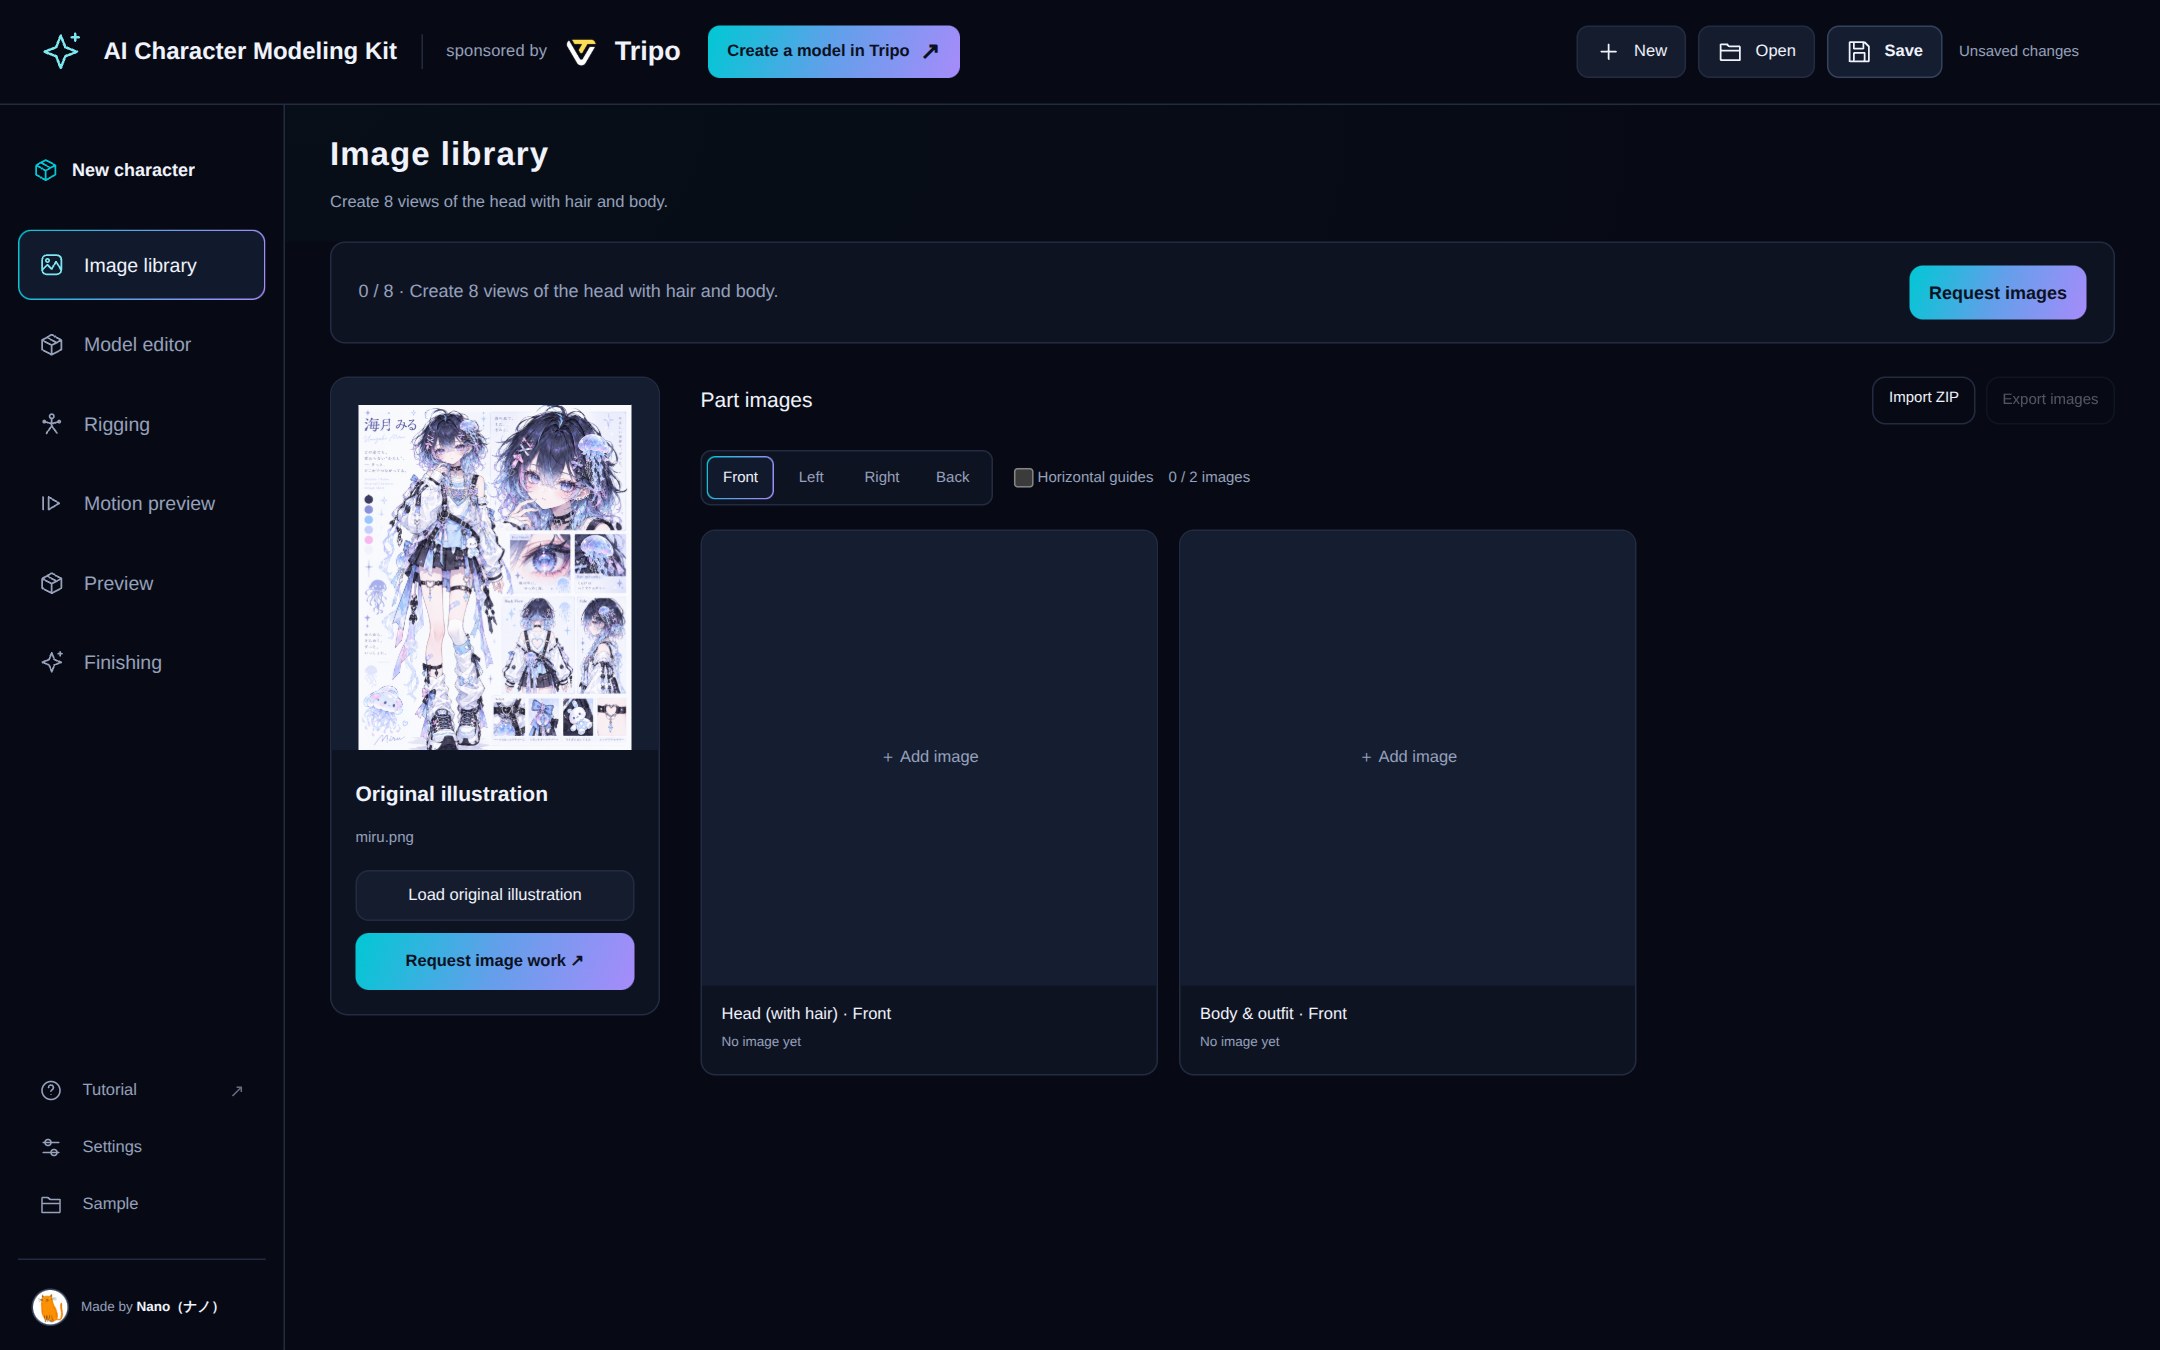
2. In the illustration area, press **Load original illustration** and choose your file.
3. Press **Request images** (top right) or **Request image work ↗** (below the illustration), copy the request and send it in the chat.
**🤖 What the agent does**
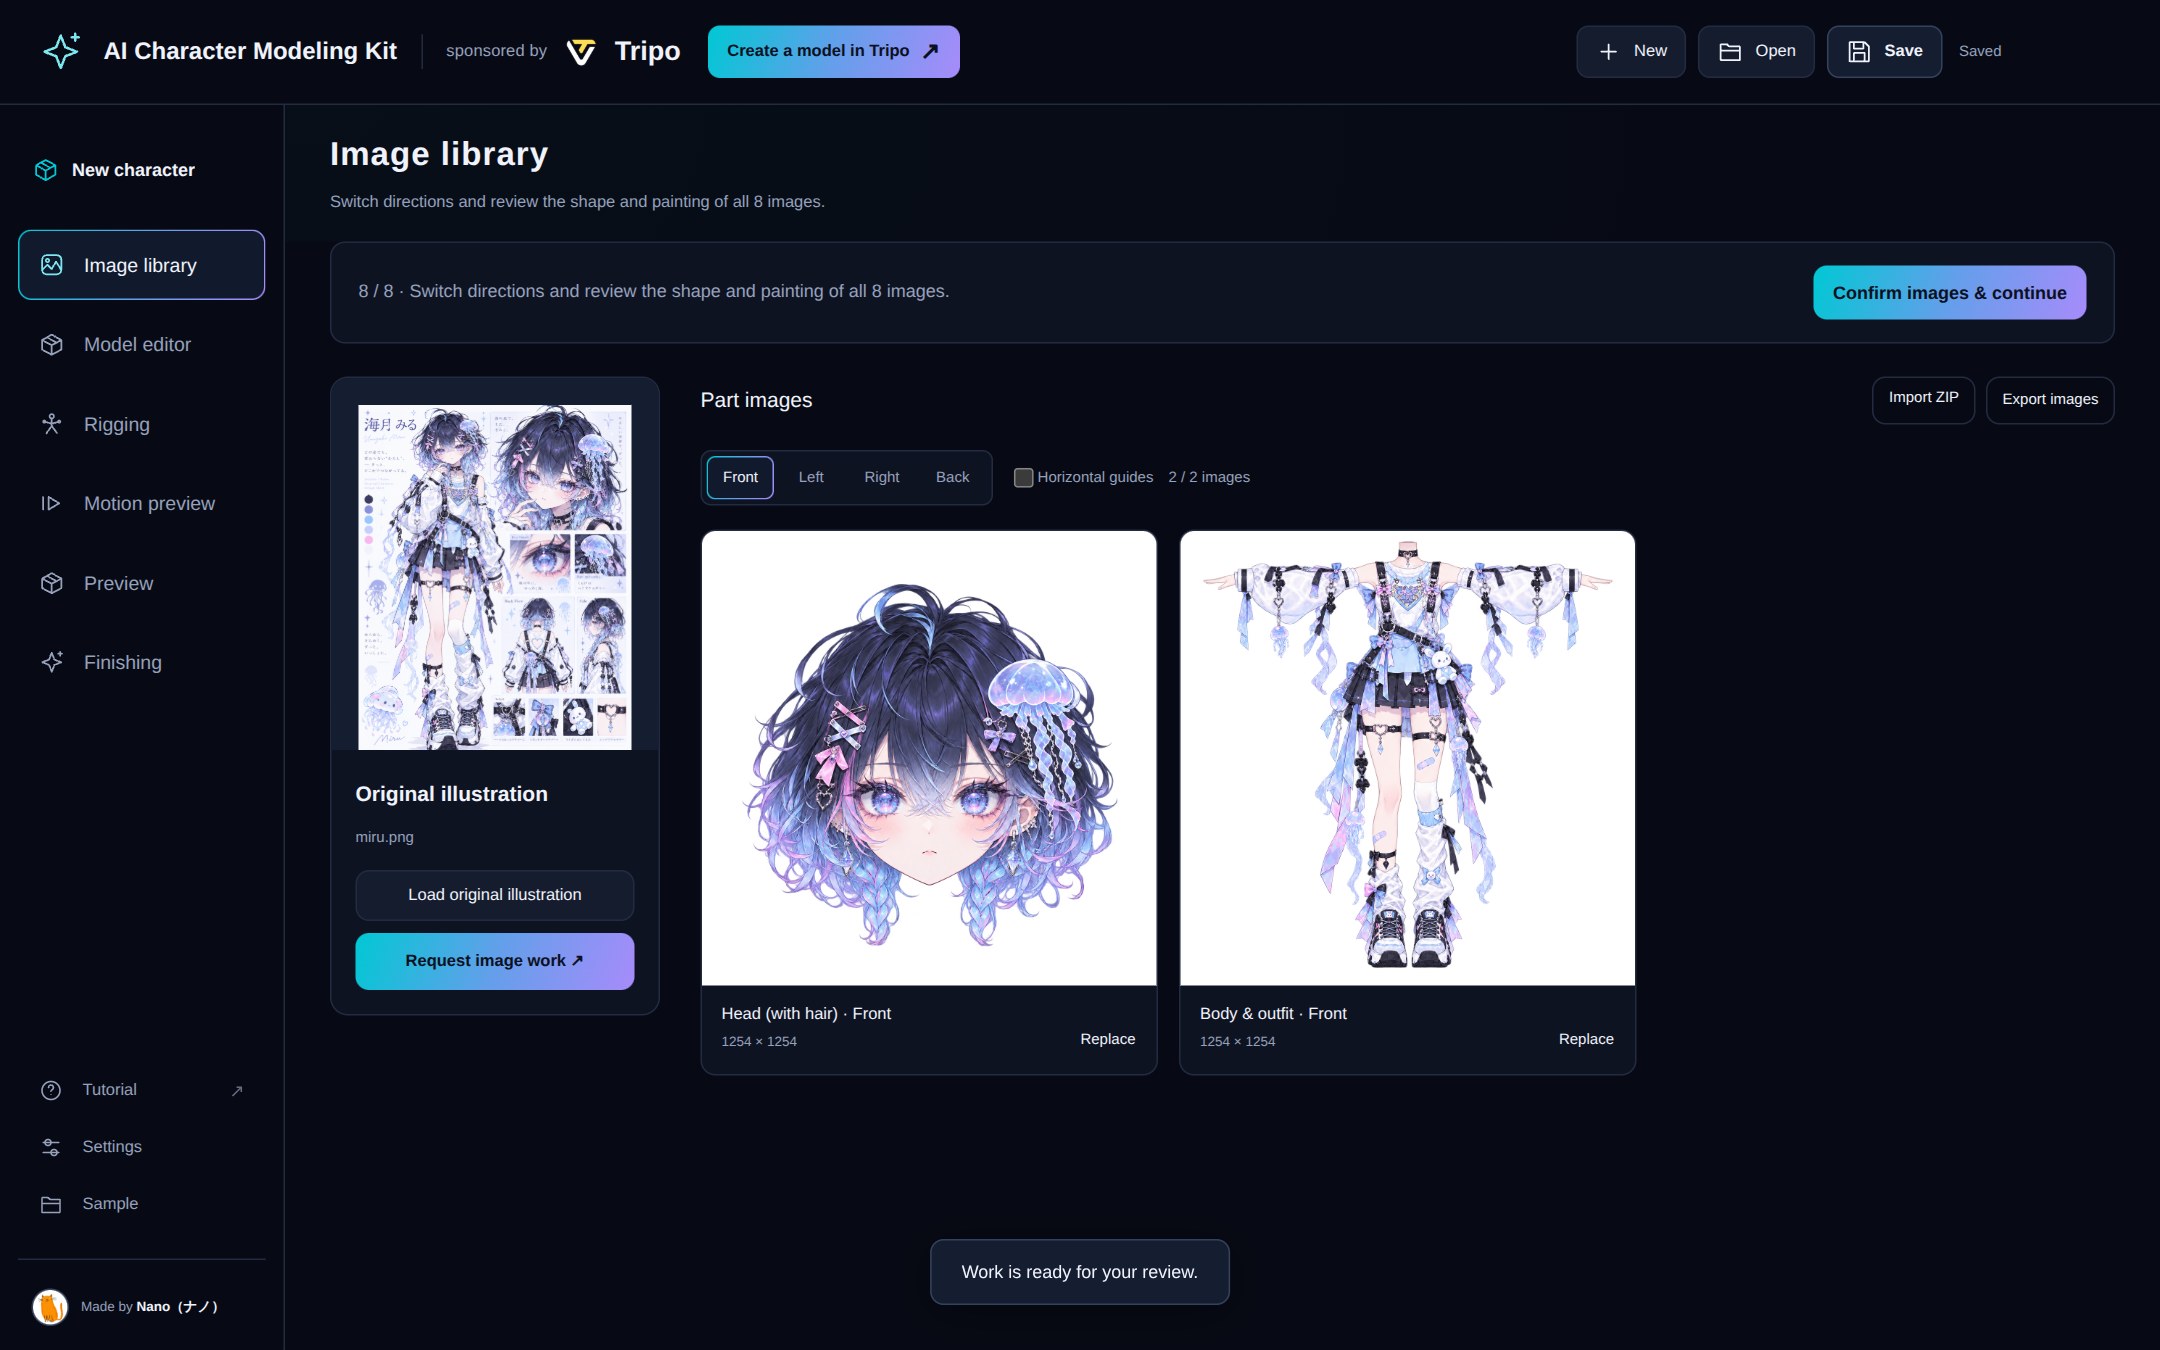
Based on the illustration, it paints the **head (with hair)** and the **body with the outfit**, each from four views: front, left, right and back. That makes 8 images. The original illustration remains the design source for the part images. After those are finished, the agent creates full-body front, own-right-side and back balance references from the original and finished parts, and adds them to the same project.
- The head is straightened, with a calm, closed-mouth expression.
- The body is posed in a T-pose with arms out to the sides.
- Hair, skin and clothing are painted to the same level of finish as a completed character illustration.
- Each image is added to the project together with the prompt used for it.
## 3. Review the 8 images
**👤 What you do**
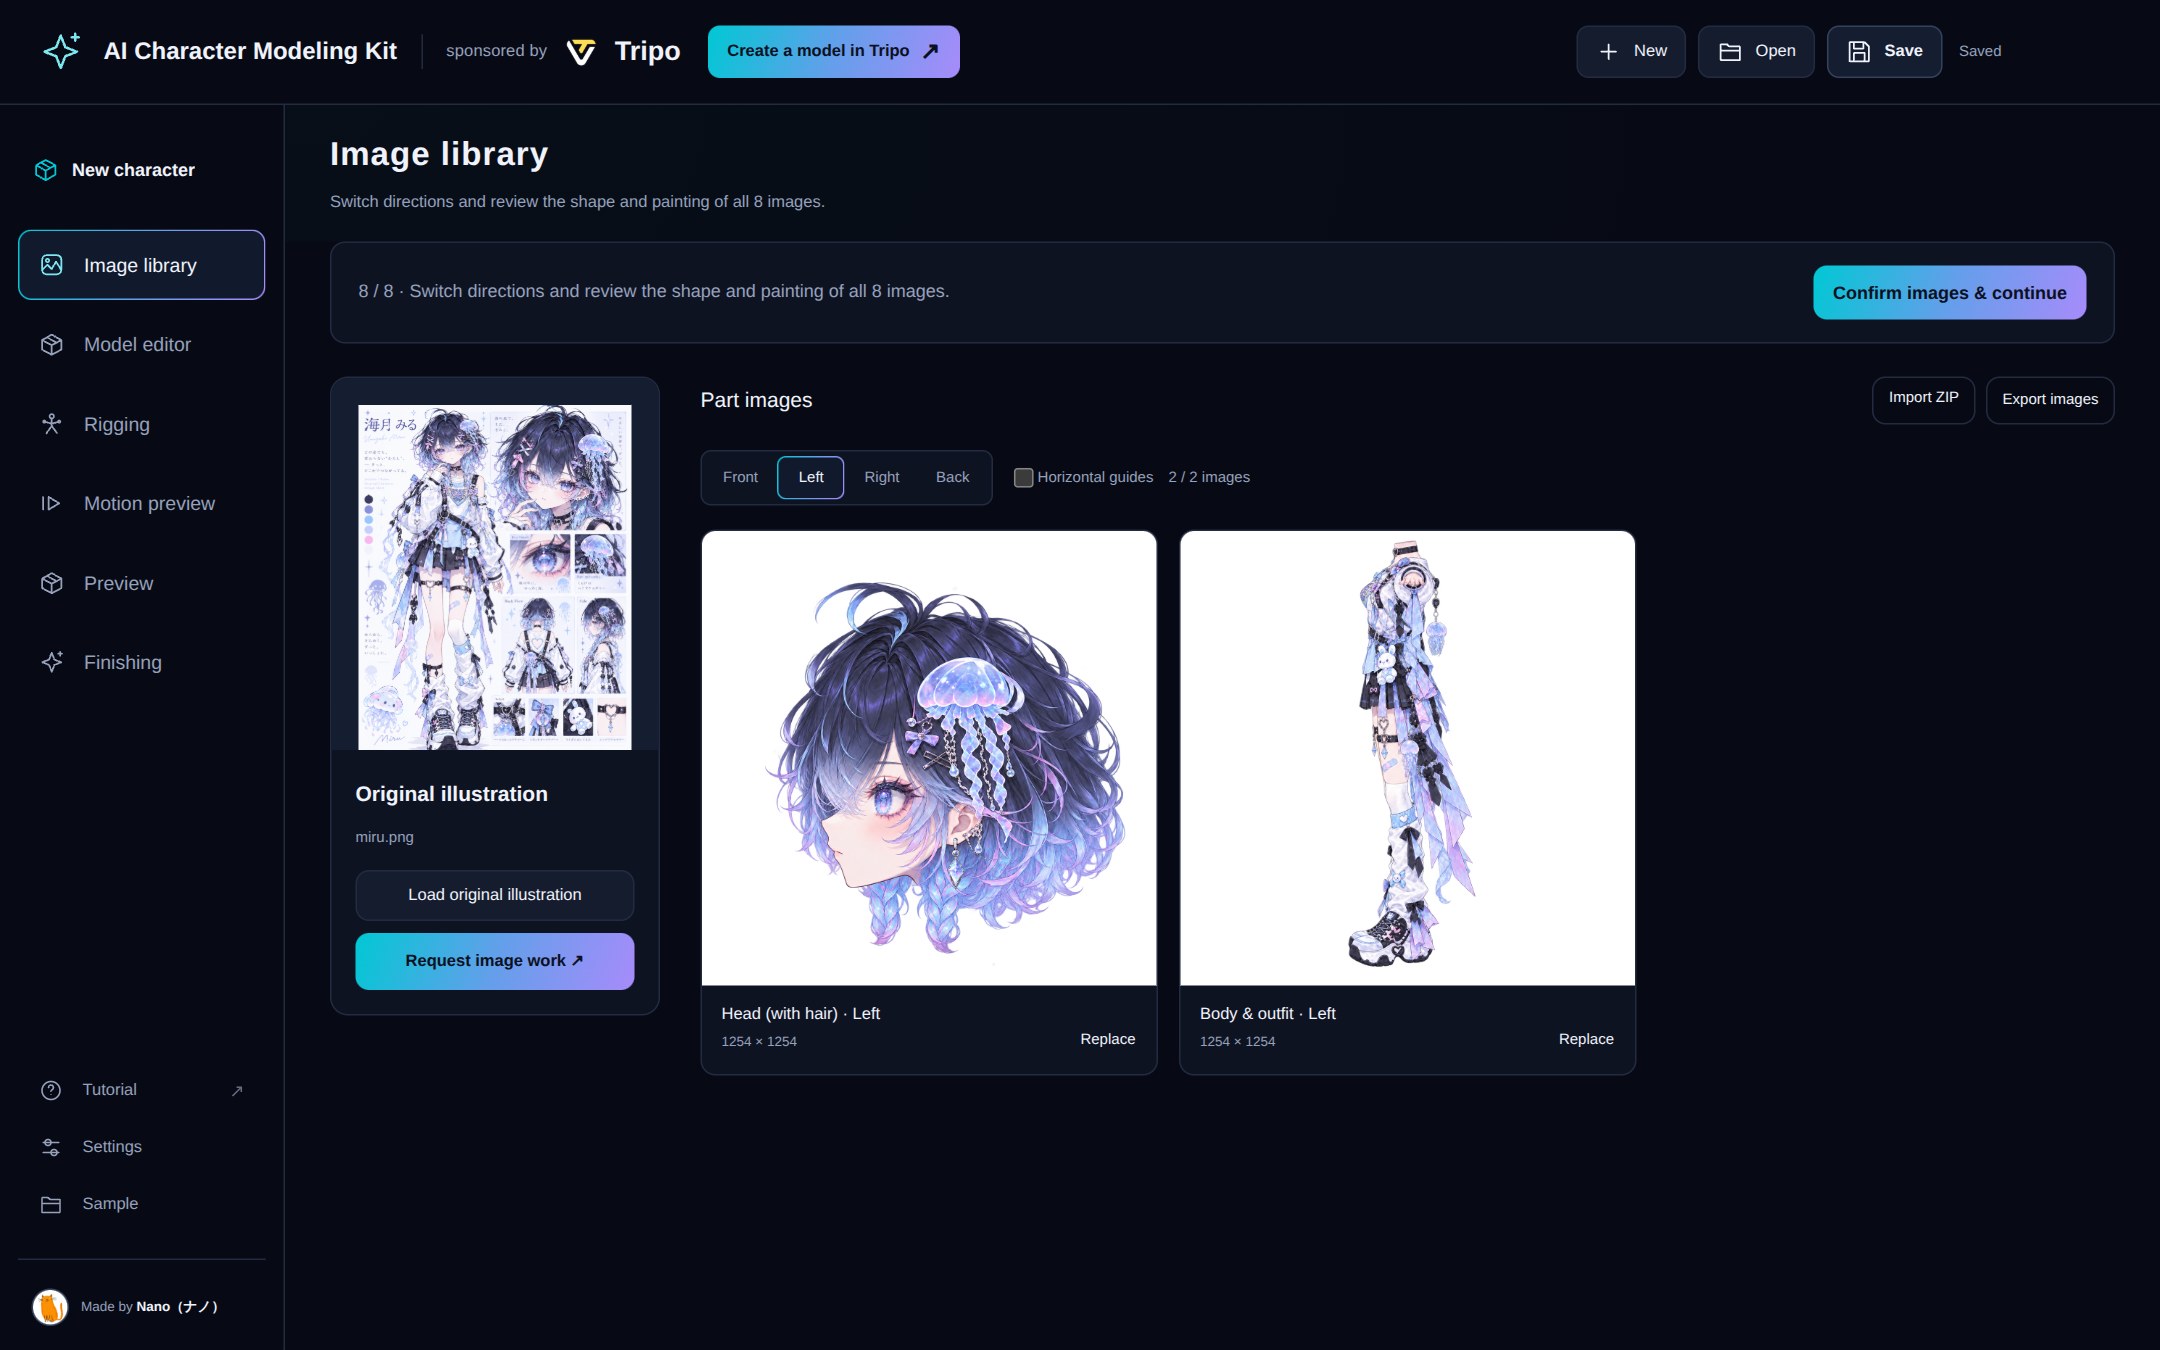
1. When the agent is done, the head and body images appear side by side. Use **Front / Left / Right / Back** at the top to switch views and look at all 8.
2. Check for anything off, for example:
- Do the hair length, tips and accessories match the illustration?
- Do the outfit's patterns, colors and asymmetric parts sit in the right places?
- Is any body showing in the head images, or any back hair left in the body images?
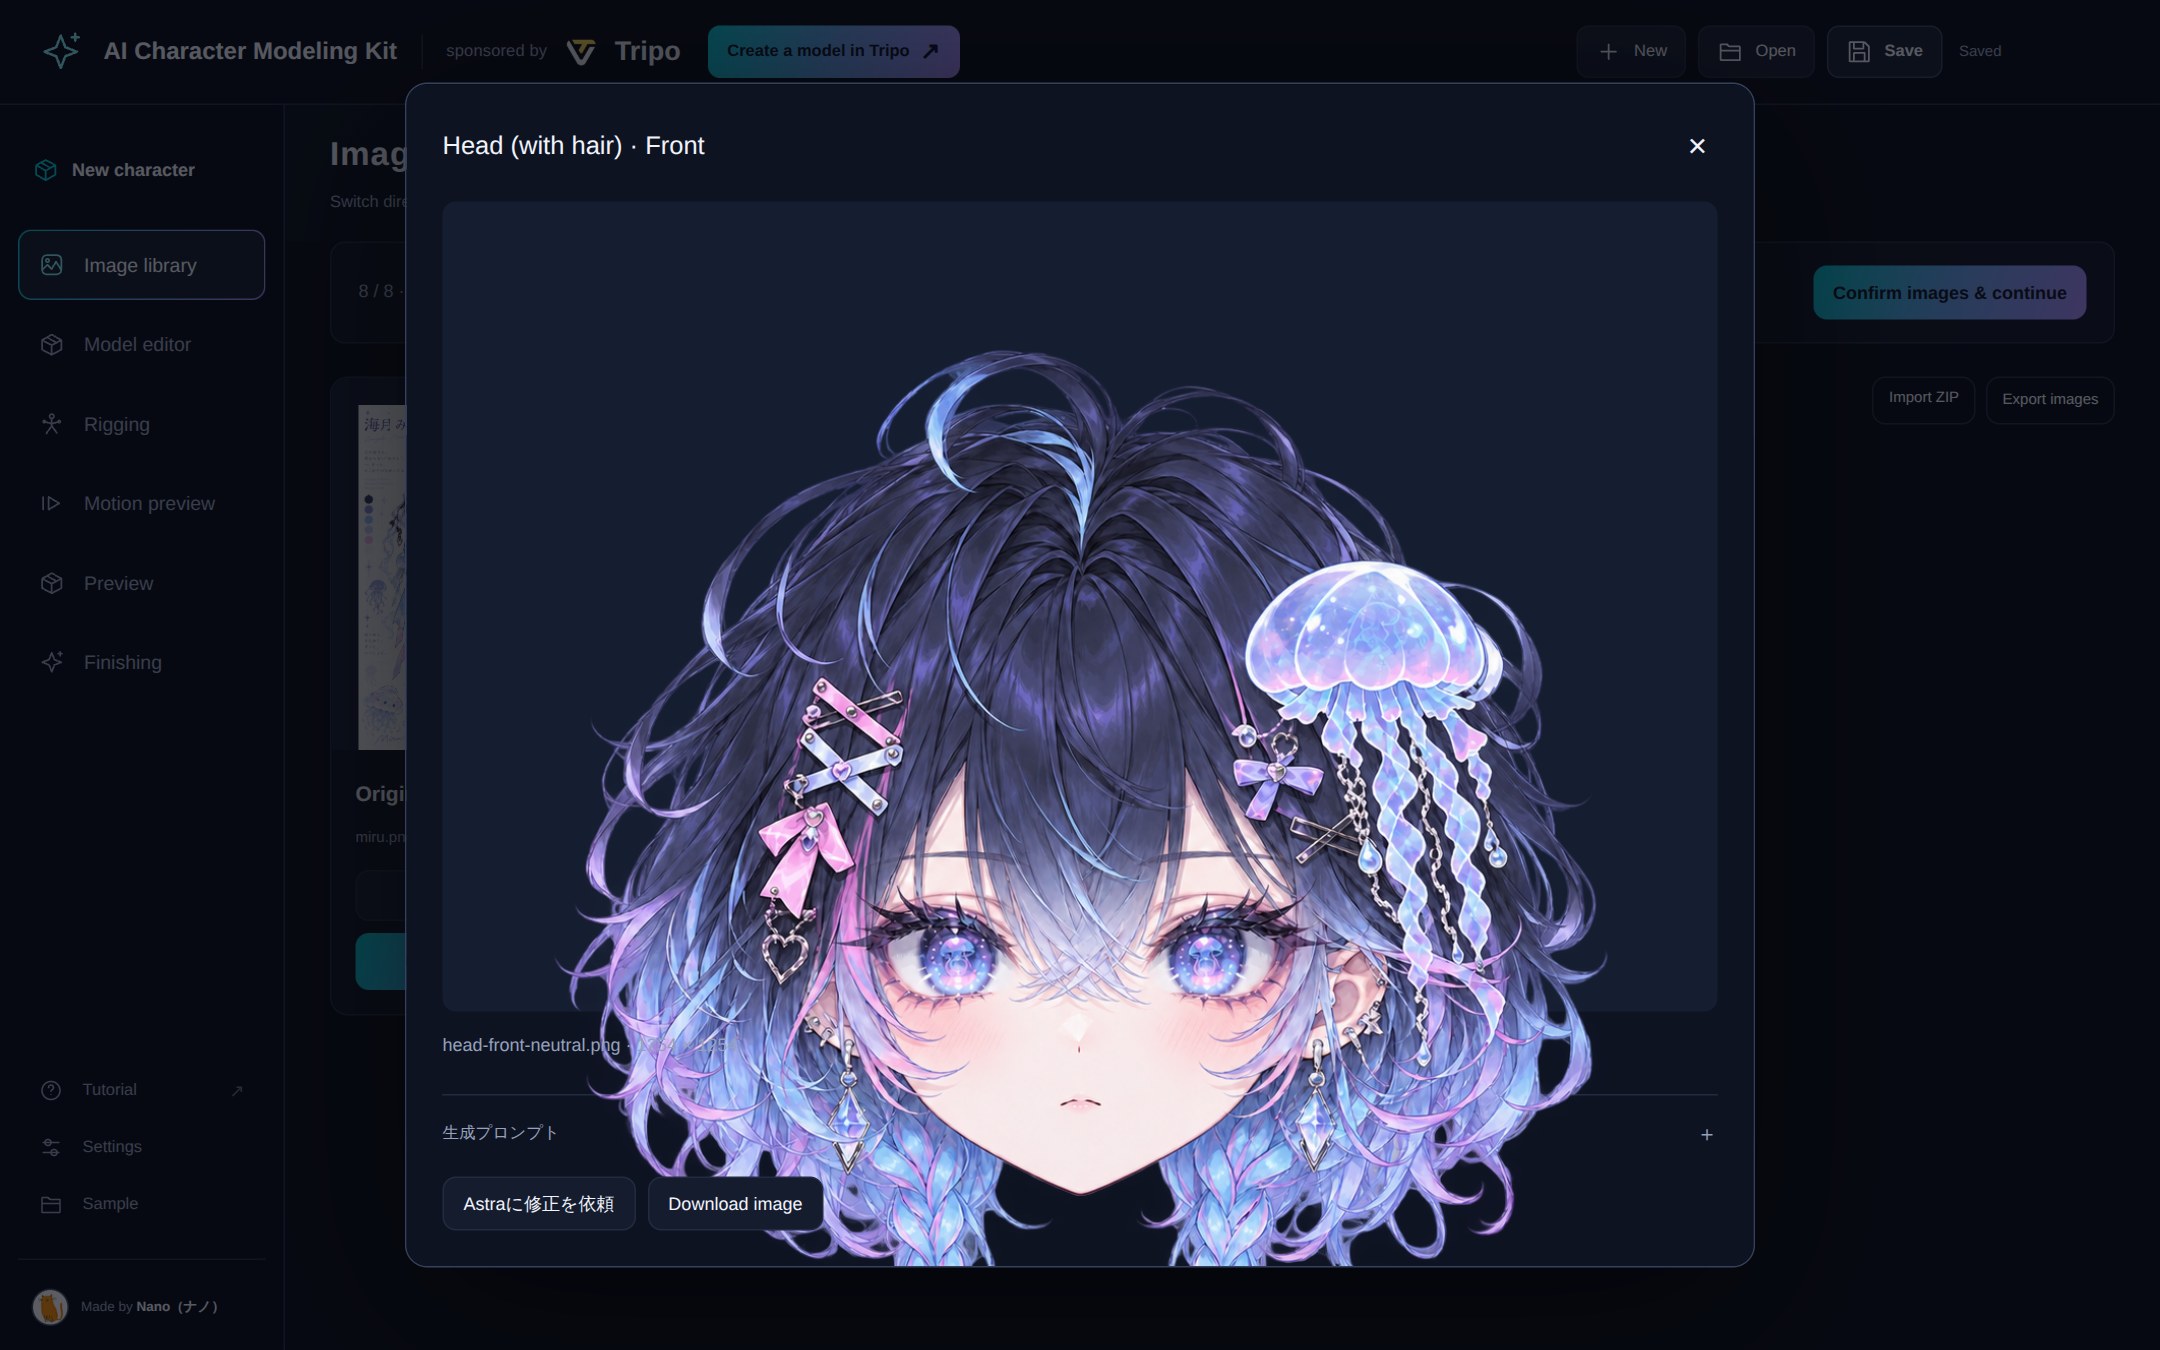
3. To fix a single image, click it to enlarge it and press **Astraに修正を依頼** (request a fix). Copy the request, paste it into the chat, **add what you want changed and where**, then send it.
4. When all 8 look right, press **Confirm images & continue** and send the request in the chat.
The balance references also appear below the part images. Click to enlarge them and check that the original design and proportions are preserved.
Switched to the "Left" view
Click to enlarge. You can request a fix for this one image from here
> [!NOTE]
> You can also use **Replace** on any image to swap in one you made yourself.
**🤖 What the agent does**
It operates Tripo in the browser and generates **four 3D candidates each for the head and the body** from the four views. It downloads the candidates, adds them to the project and stops for you to choose. Tripo credits start being used from this stage.
## 4. Choose the head and body 3D candidates
**👤 What you do**
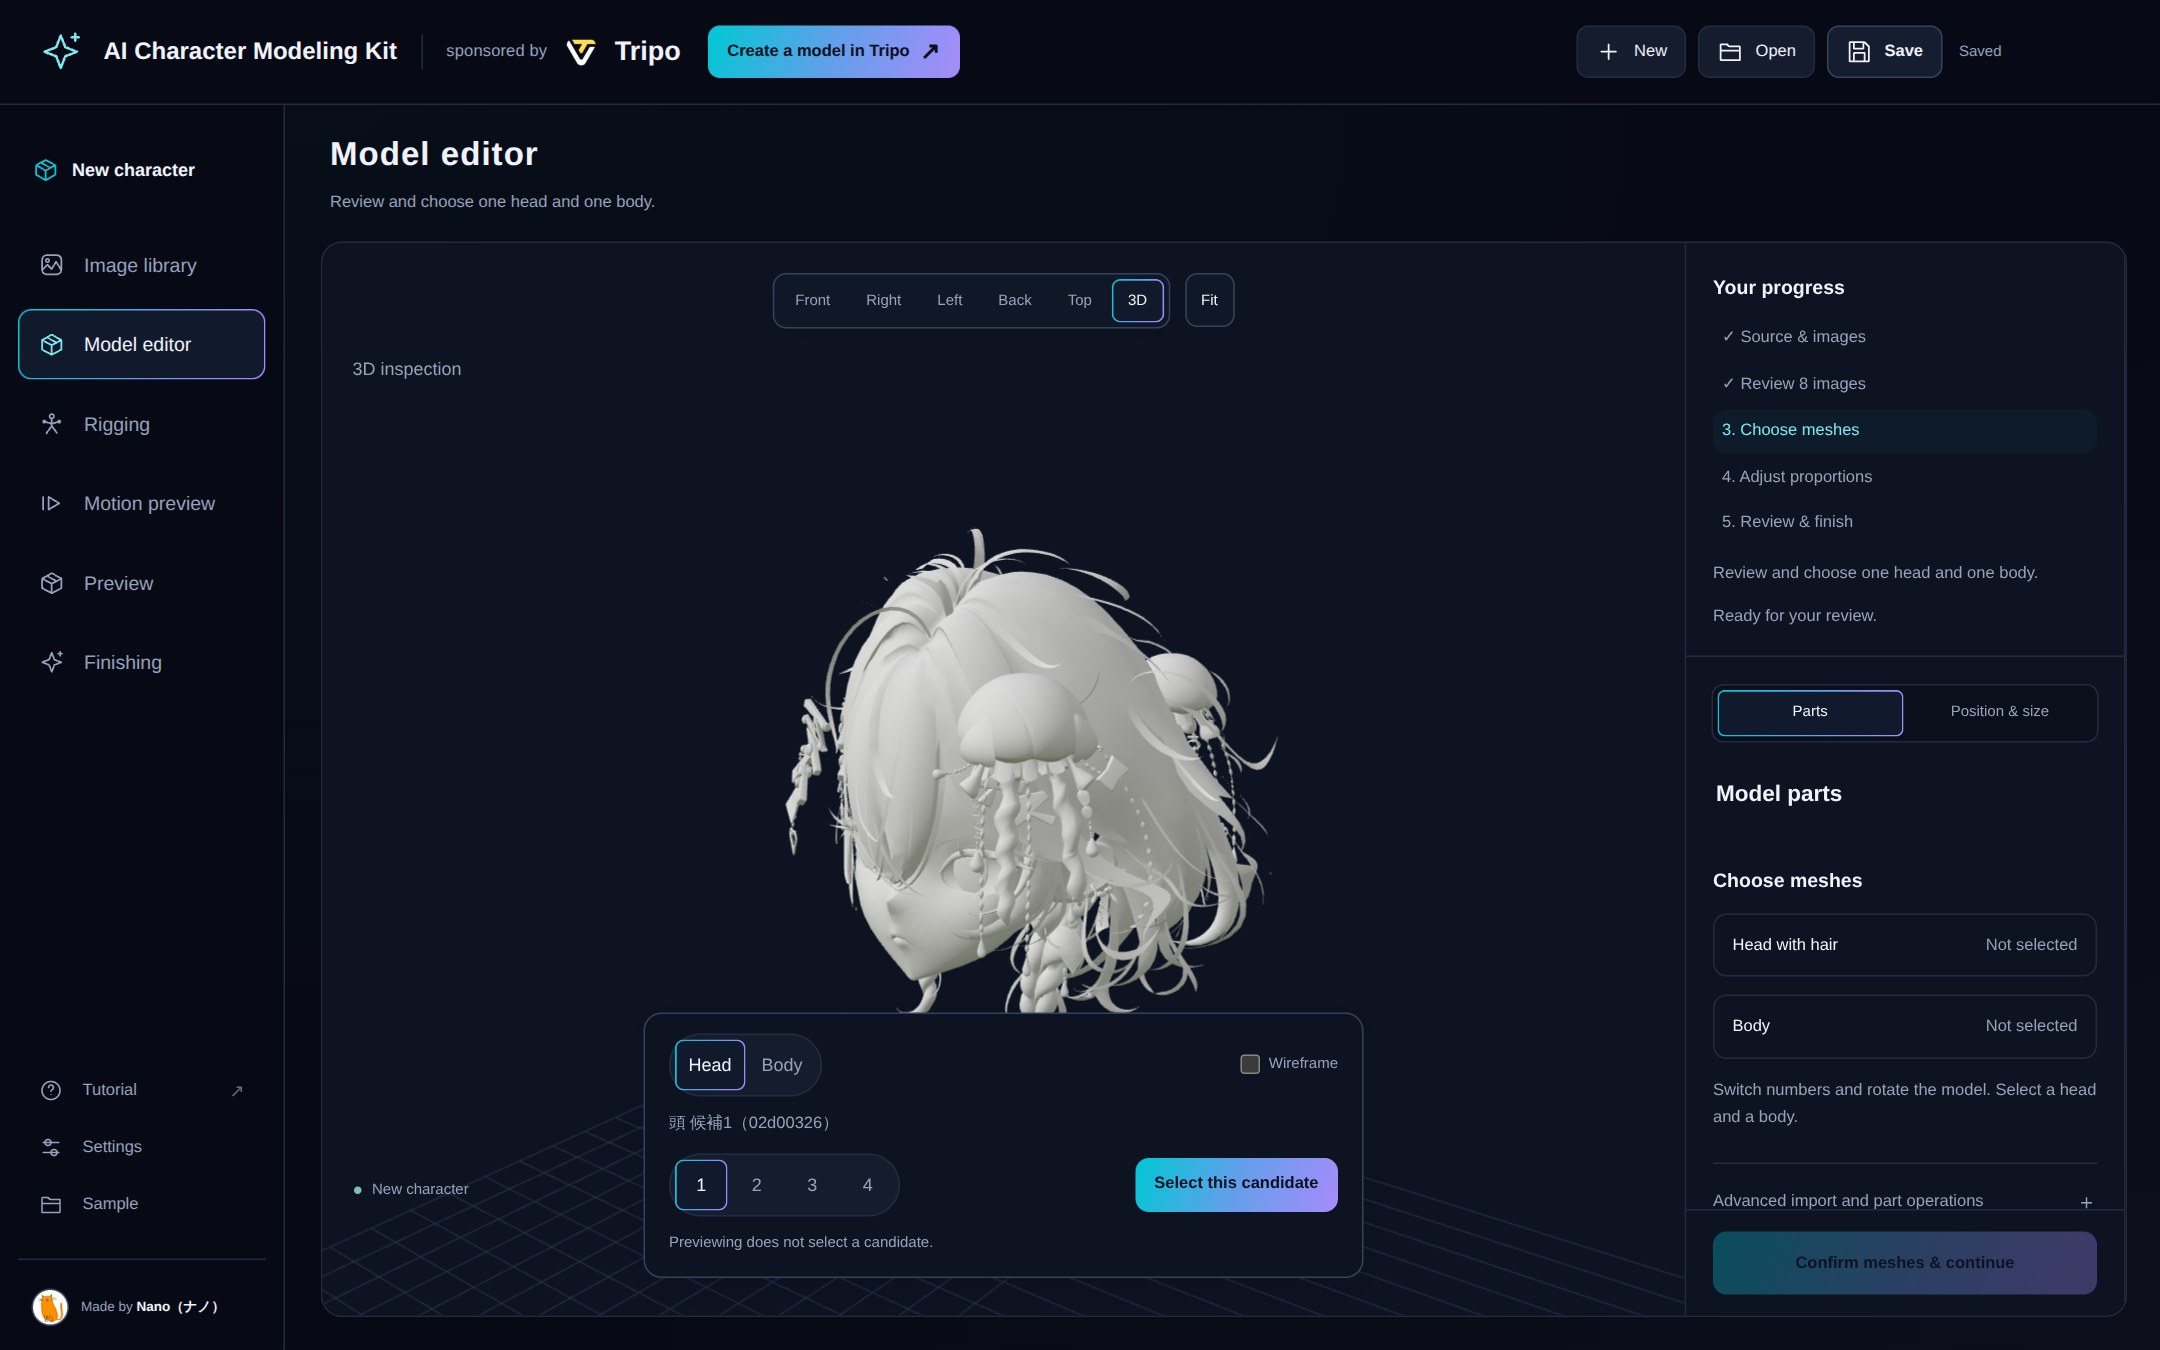
1. A comparison dialog opens after candidates are generated. Choose **Head** and switch numbers **1–4**. Reopen it with **Choose model candidates** in the model editor. Reference images are hidden during comparison.
2. Drag to rotate, or use **Front / Right / Left / Back / Top / 3D** at the top to change the view. Turn on **Wireframe** to see how dense the mesh is.
3. With the best candidate showing, press **Select this candidate**.
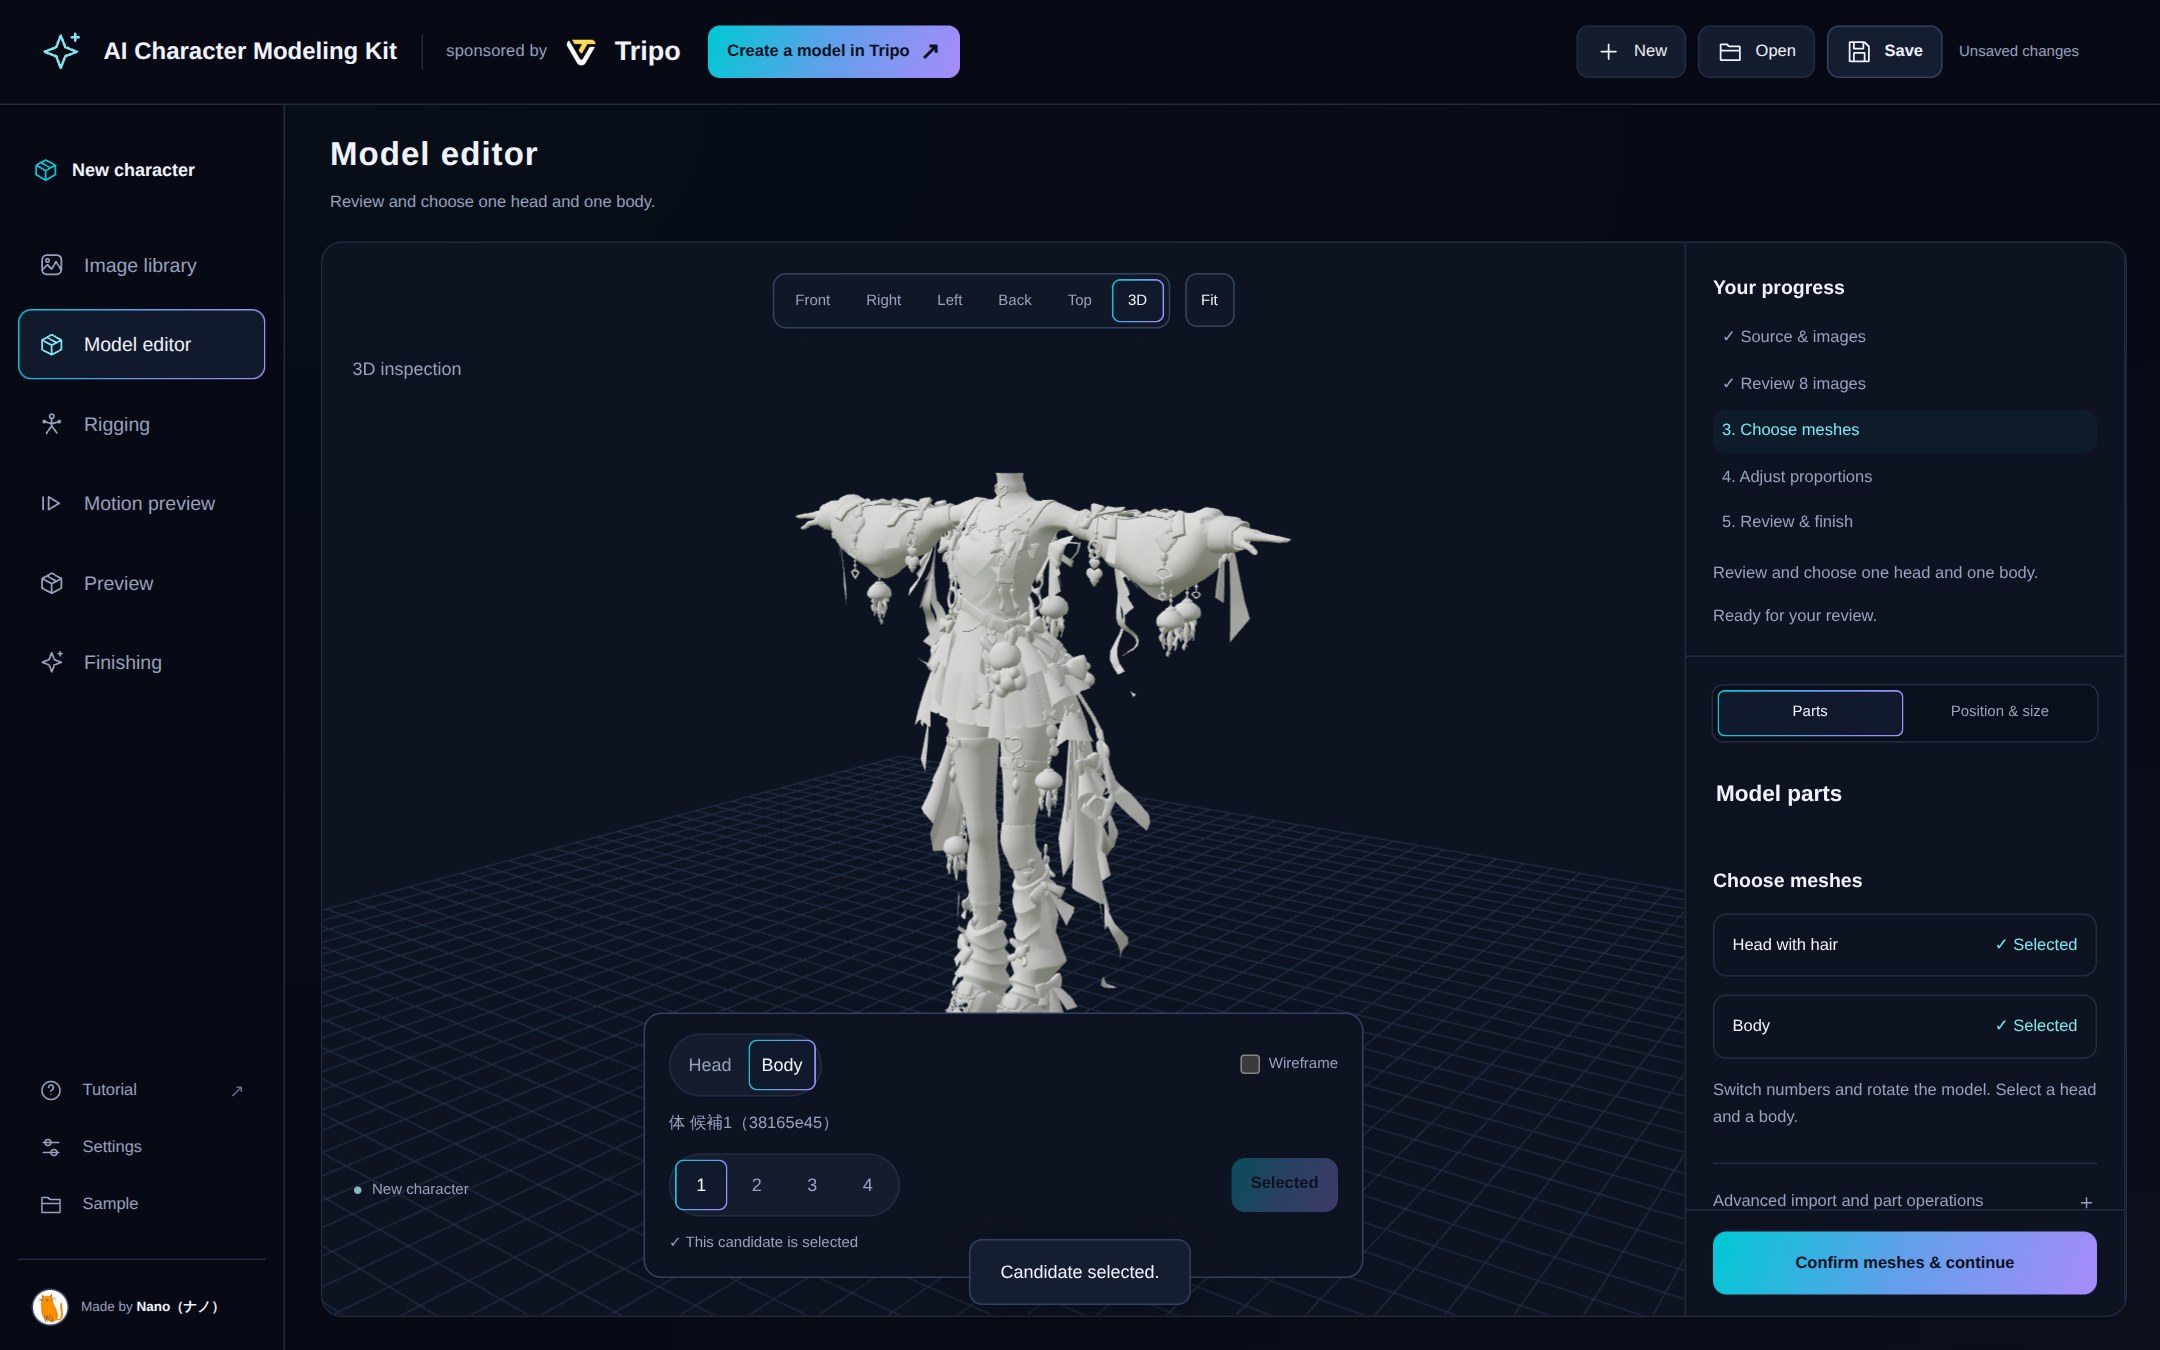
4. Switch to **Body** and choose one the same way.
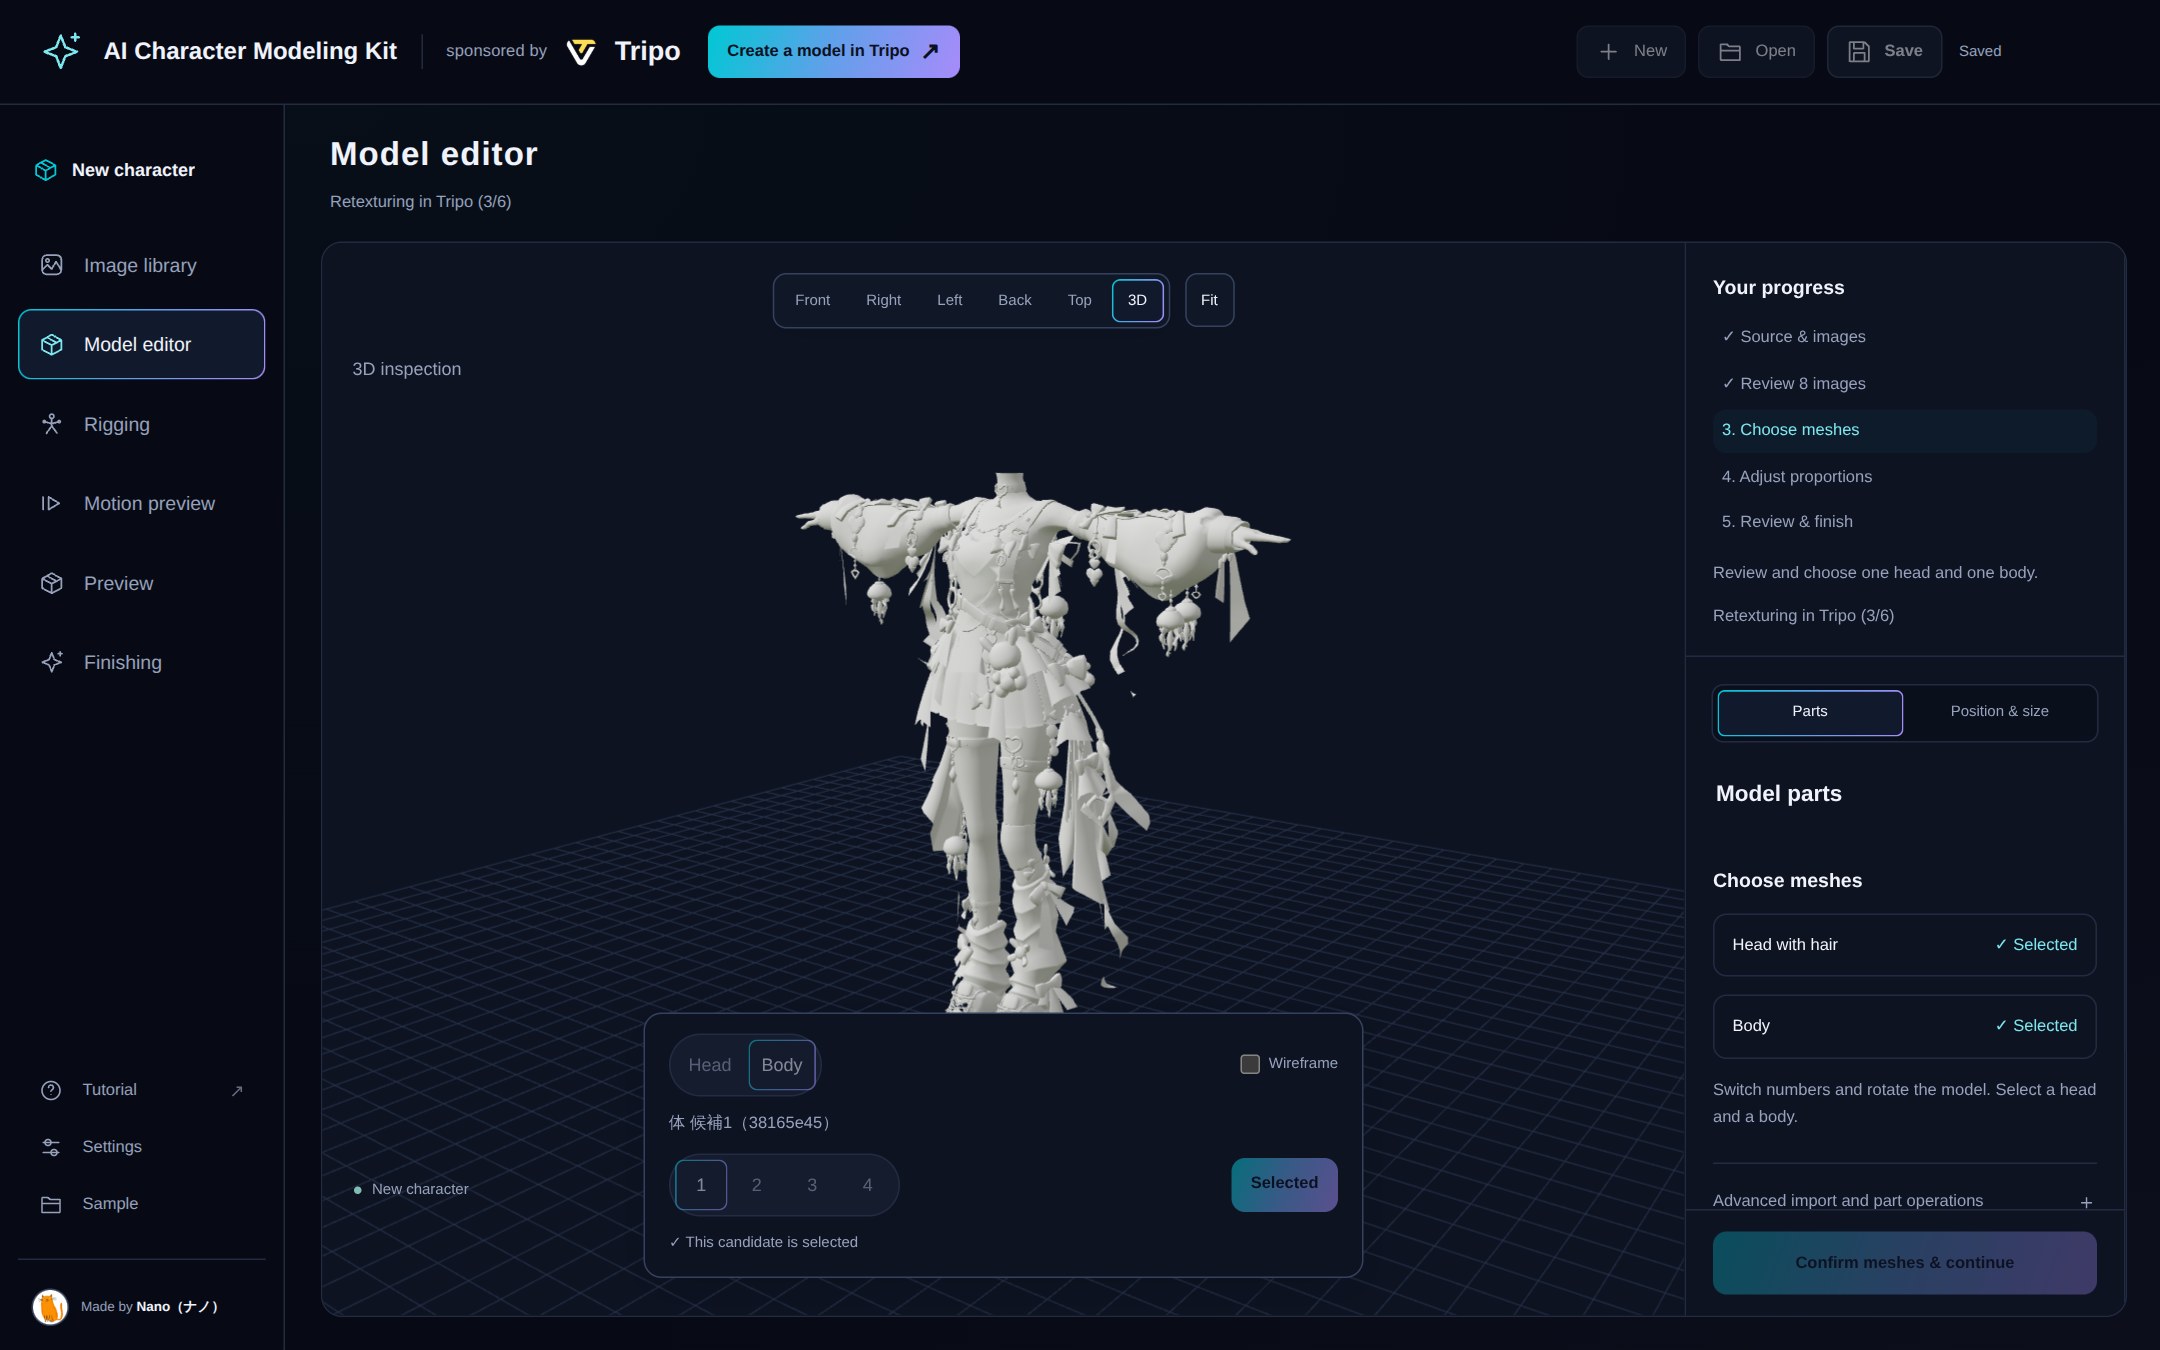
5. When both head and body show "Selected" under **Choose meshes** on the right, press **Confirm meshes & continue** and send the request in the chat.
Switch numbers to compare candidates
Continue once both head and body show "Selected"
> [!NOTE]
> Viewing a candidate does not select it. Only the one you press **Select this candidate** on is used.
After texturing, choosing a different candidate shows an explanation and a **Copy and select this candidate** button. The original .charakit and working Blend remain intact. Parts, textures, rig and springs are rebuilt in the copy. Use **Open original** in Settings to return to the parent project.
**🤖 What the agent does**
It prepares the chosen head and body for finishing.
- Splits the parts in Tripo and classifies texture groups and spring groups independently.
- Uses five texture categories: hair, head, upper body, lower body and other accessories. The lower body includes the waist outfit, skirt or trousers, legs and footwear together. Absent hair or accessories are omitted. Large ribbons may be accessories even when attached to clothing. It paints reference images for these same groups.
- Unwraps the UVs in Tripo and rebuilds the textures at 4K.
- Assembles the parts and adds them to the project.
Even when the skirt and legs are separated for spring motion, they share one lower-body reference set and texture, with the outfit kept as designed. No standalone leg or shoe reference is produced. The assembled skirt remains a separate mesh for spring motion.
If some shapes are joined and can't be separated, the agent shows you the spot in an image and asks how to proceed. Answer in the chat.
## 5. Adjust the proportions
**👤 What you do**
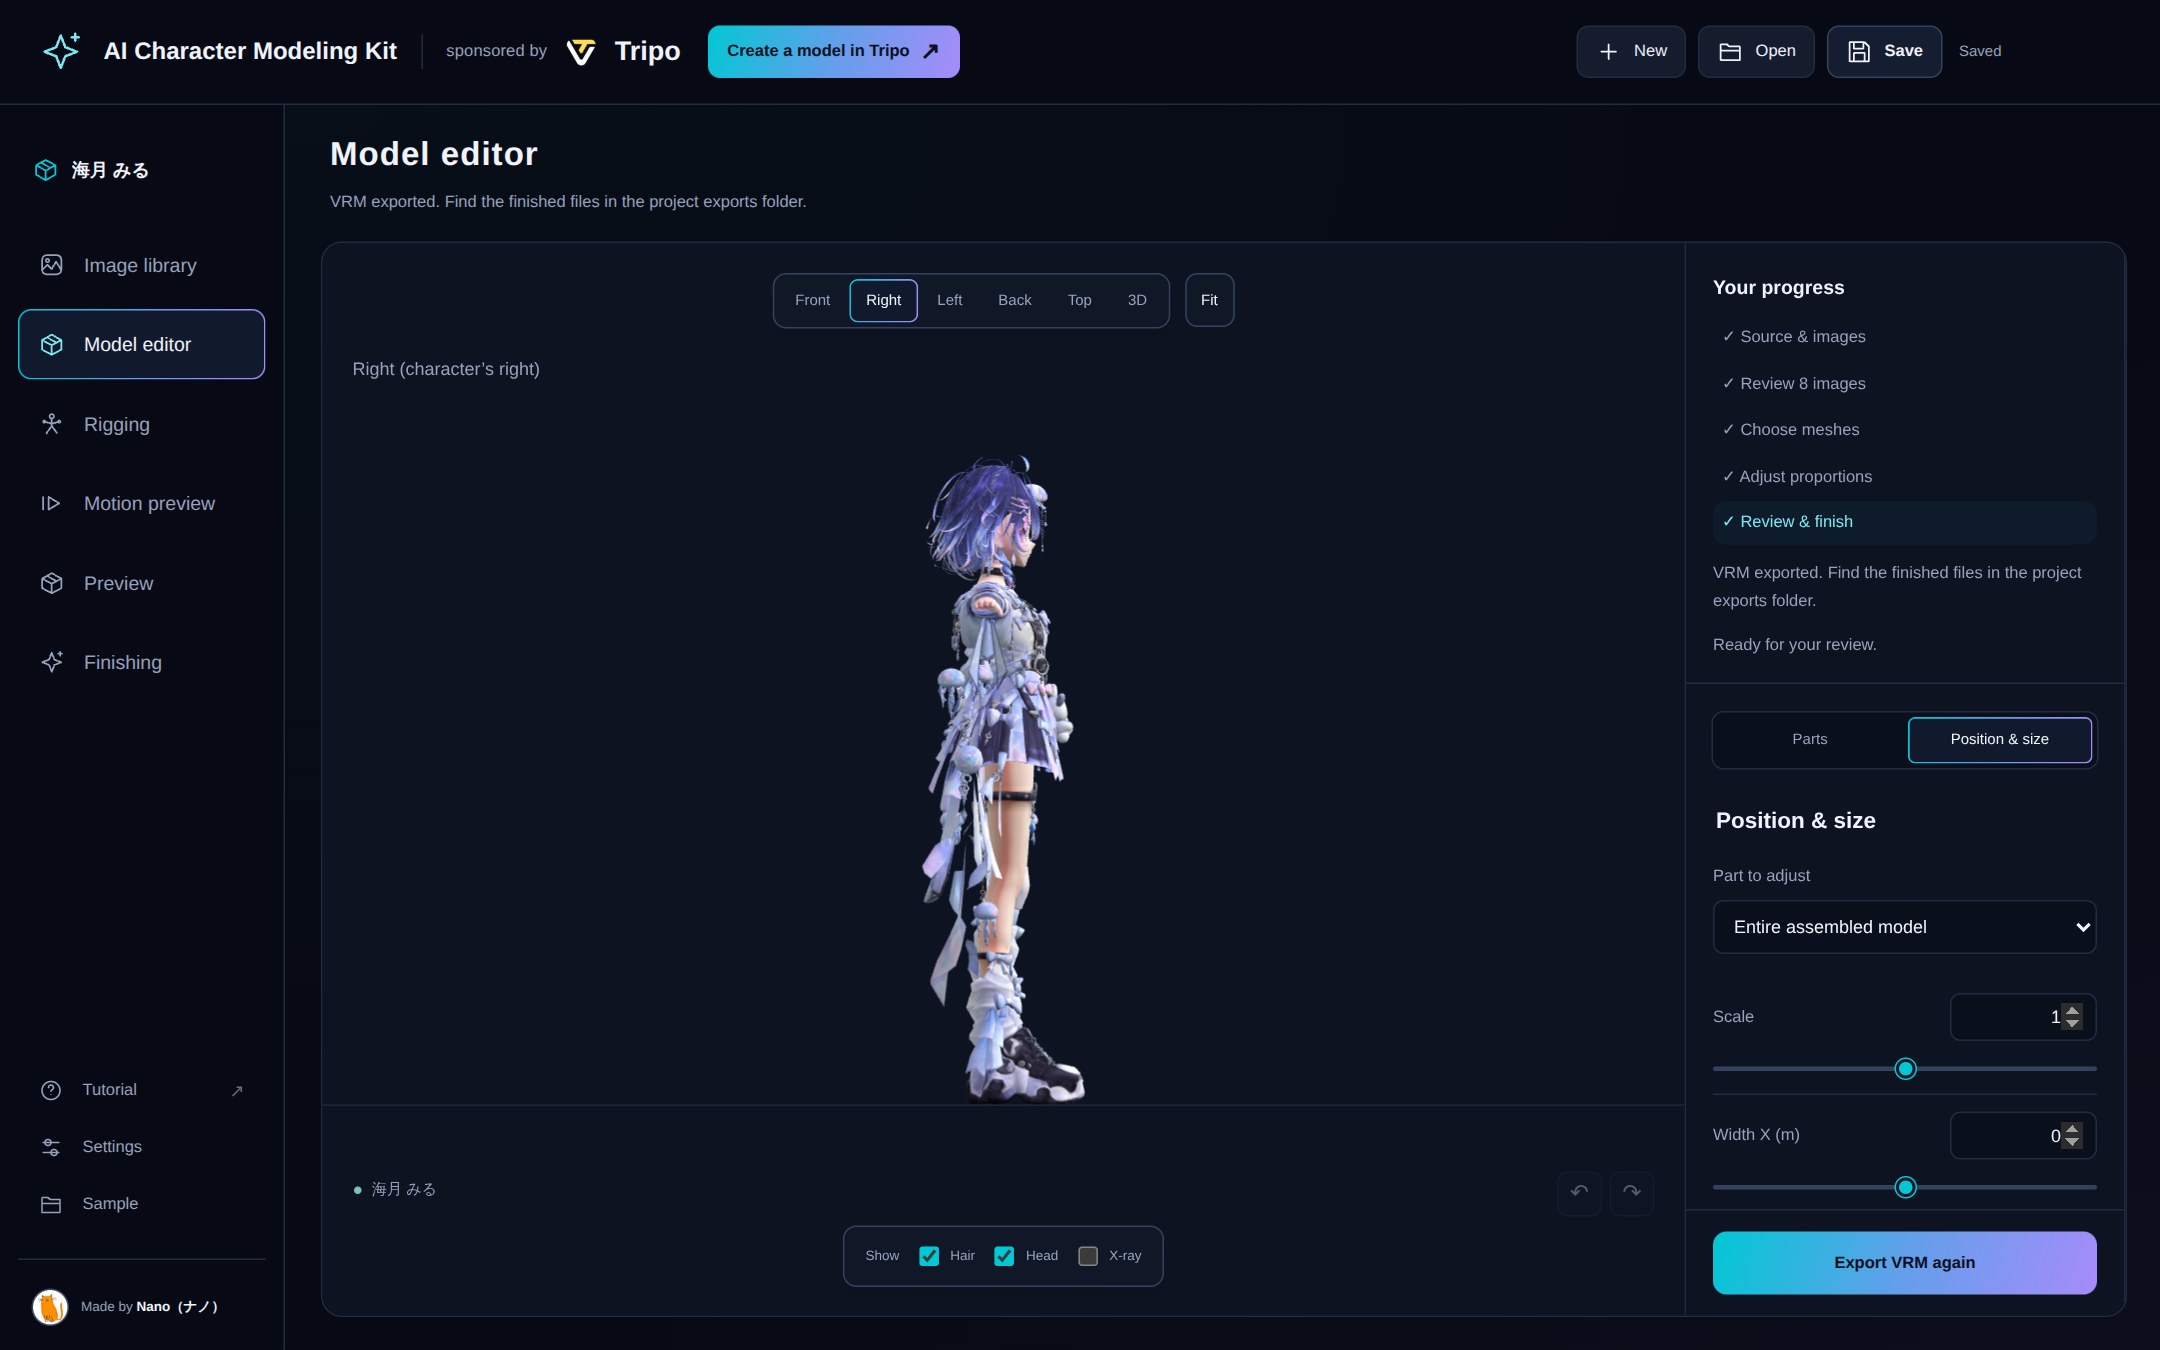
1. Open **Model editor** to adjust proportions.
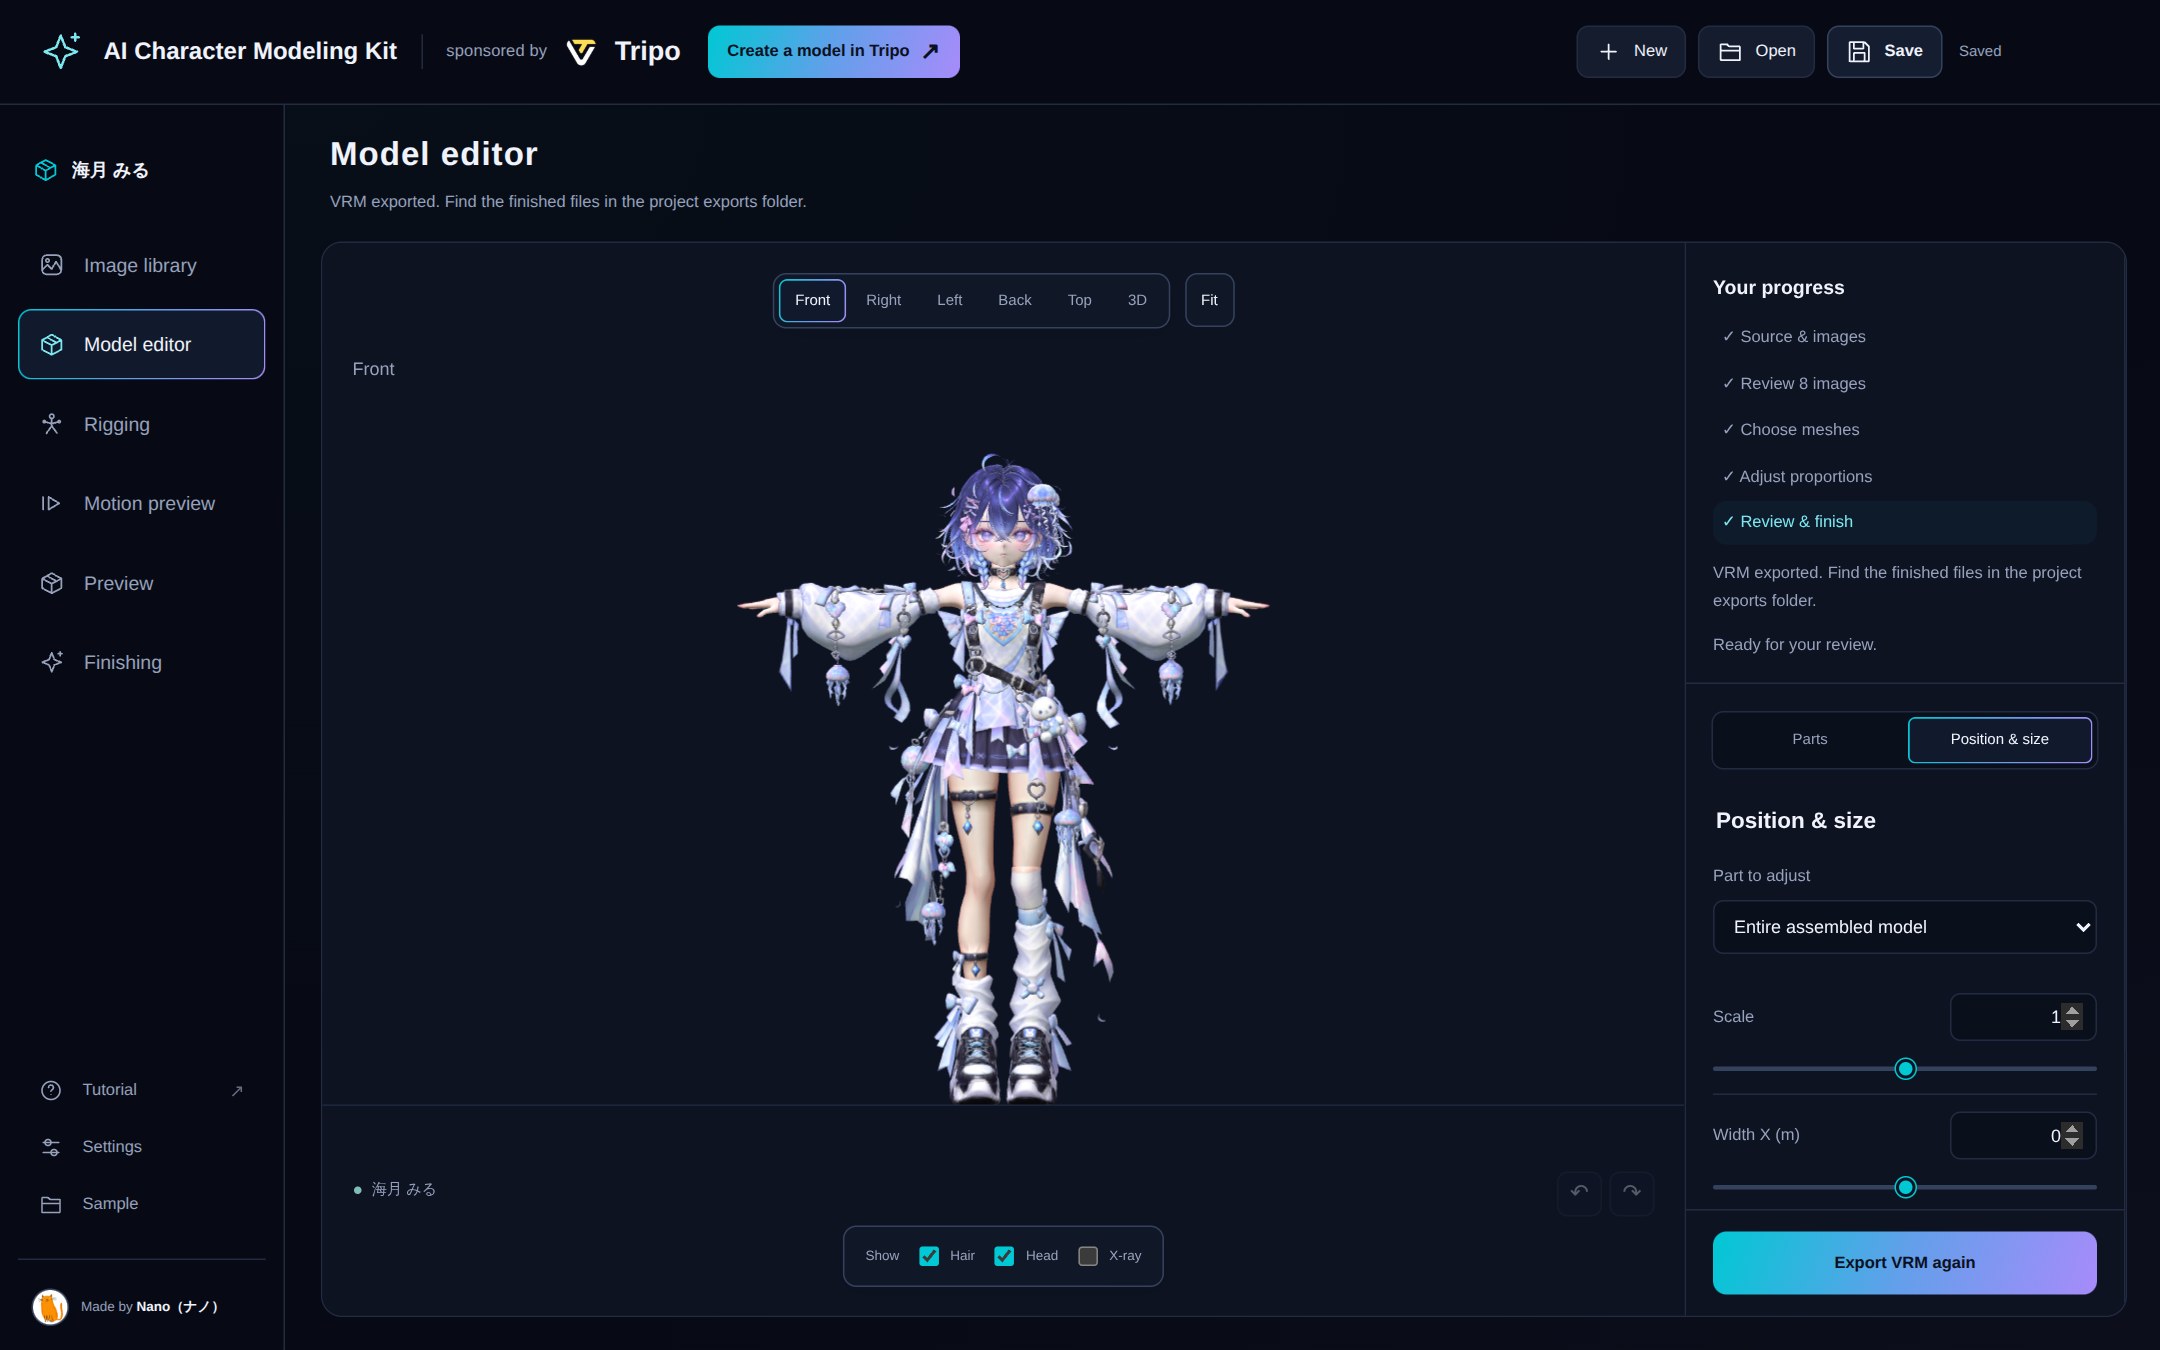
2. Under **Part to adjust**, choose head, hair or body and use the scale and position sliders. Turn on **Move hair together with the head** to move them together.
3. Switch between the front and right views to check the neck joint and head size. ↶ ↷ undo and redo.
4. If needed, enter **Target total height (m)** and press **Apply height** to set the overall size. The 1.7 m shown is an example, not a VRM requirement.
5. When you're happy, press **Confirm proportions & continue** and send the request in the chat.
Reference views are fitted to model height and feet once during proportion editing. Use **Adjust reference views** to compare images against the translucent model. Scaling keeps the feet fixed; front, side and back share character height and foot level, while horizontal offsets stay independent. Each image has a vertical centerline. The modal ruler follows the image's character bounds, excluding transparent margins, and displays its converted height without changing the model's actual size. Position/size locking applies to all three views. You can add, replace, drag and adjust transparency. The side reference is the character's own right side. **Apply** saves changes; **Cancel** or Esc discards them.
These screenshots were taken from the finished project, so the part to adjust shows the whole assembled model. In this step you choose head, hair or body instead.
**🤖 What the agent does**
- Rigs the head (without hair) and body in Tripo and imports only the bone positions. The visible mesh and textures stay as they are.
- Transfers weights from the bundled base body and checks how shoulders, elbows and knees bend.
- Puts the hair back and sets up physics for hair, skirt, ribbons and other swinging parts.
- Adds a review model to the project and stops at the motion check.
## 6. Review the completed VRM
After rig, weights and springs are set up, the app builds the completed VRM from the saved Blend and automatically checks its structure, MToon, textures and spring response for each part. Appearance is not scored automatically, and an agent's visual approval is not a completion requirement.
**👤 What you do**
1. When work finishes, **Motion preview** automatically shows the checked VRM with physics enabled and **Default (walk)** playing. Model information is not required for review. Loading status and failures appear in the viewer.
2. Press **Pause** to stop the animation. Grab and drag the model with the mouse to check its hair and outfit springs. Drag the background to move the camera.
3. Use **Rest pose** to return to the original pose, **Show bones** to inspect the skeleton, and **Reset physics** to reset springs while keeping the model's position and pose.
4. Choose **Load motion (VRMA)** for another motion. Then switch between the default walk on the left and the loaded motion on the right. Use **Change** to replace the loaded file.
5. Check the appearance and movement from the front and side. Request specific changes in chat if needed.
The loaded VRMA stays available while the page is open. Reloading returns to the default walk. Poses and model dragging are temporary review controls and do not change the saved VRM.
## 7. Save the VRM
Press **Export VRM** and confirm the model name, authors and usage terms. Press **Save information and export** to save the information and download the VRM. Canceling lets you continue motion review. The shape, materials and springs stay as reviewed; only model information is finalized. No request needs to be copied and no agent export pass is needed. The local app also saves `exports/avatar.vrm` and the editable `exports/avatar.blend`.
Authors and usage conditions are saved with the project and prefilled for future exports. Information changes preserve the displayed model and its physics verification. Changes to the model or spring setup require the updated VRM to pass checks again before it is displayed.
---
## Saving and resuming
- When you hand over a request and the agent starts work, the app's current state is saved automatically. To save at other times, press **Save** at the top right.
- Starting the app again from the same folder reopens the last project.
- In **Settings**, you can check the **Project location** and **Export a portable copy**.
- You can go back to earlier stages from the left menu. Just looking doesn't undo anything. If you change images, candidates or placement, the stages after it need to run again.
- When moving to another computer, keep the whole project folder, including `exports`, not just `project.charakit`.
## Troubleshooting
### A start command is blocked by policy in Codex on Windows
We reproduced Codex on Windows mistaking the `start` argument and URL in the old `agent-session.mjs start URL REQUEST_ID` command for a PowerShell URL launch. This kit uses `begin` in new requests to avoid that false positive. You do not need to change Codex permissions for this issue. Saving, input validation and the conditions for starting work are unchanged.
1. If an old request using `start` was rejected, open the app from the updated kit and check the source image or project you want to use.
2. Copy a new request from the app and send it in chat. Its start command is `agent-session.mjs begin`. Keep the app open.
3. Once the agent confirms success and `saved: true`, the app saves its latest state and work can begin. If restarting the app or changing the source image invalidated the request, review the app and copy a new request. You do not need to save manually or create another kit file.
This change follows a reproduction of the same rejection reported in [Issue #2](https://github.com/nanocle/Charakuru/issues/2) and [Issue #3](https://github.com/nanocle/Charakuru/issues/3). Codex's [Windows classifier](https://github.com/openai/codex/blob/rust-v0.162.0-alpha.2/codex-rs/shell-command/src/command_safety/windows_dangerous_commands.rs) also checks for `start` and a URL without distinguishing command names from arguments. The old `start` command remains a compatibility alias, but new requests use `begin`. If `begin` is also rejected before launch, the kit's start operation has not run. Stop retrying and report the kit version, Windows and Codex versions, selected permissions setting, and the error summary with personal paths removed.
### Other issues
- **Nothing happens after sending a request**: the request has to be pasted into the chat and sent. Make sure the app is still open.
- **The work stopped or failed**: the reason is shown on screen. **Reload saved project** reopens the saved state.
- **The browser blocked a Tripo download**: the agent tells you which file to save by hand. Do just that.
- **You found a bug**: please report it through [Issues](https://github.com/nanocle/Charakuru/issues), following [the reporting guide](../CONTRIBUTING.md).