Upload images in Markdown documents to Amazon S3 with one click
In MWeb, there are two ways to upload images. One is to upload first and then insert the Markdown syntax into the document; the other is to insert the image into the document by dragging or copying and pasting when writing the document. The image will be stored locally. After the document is written, it can be uploaded with one click. For detailed usage of these two methods, please refer to the article: MWeb's image upload service introduction.
After knowing the image upload method, the following is a detailed description of how to configure the Amazon S3 image upload service. After configuration, you can easily upload images in Markdown documents to Amazon S3.
First, go to "Settings - Publishing" and add the Amazon S3 image upload service. At this time, the information filling interface shown in the figure below will be displayed. The figure below is the filling interface of the Mac version of MWeb, and the iPad/iPhone platform is the same.
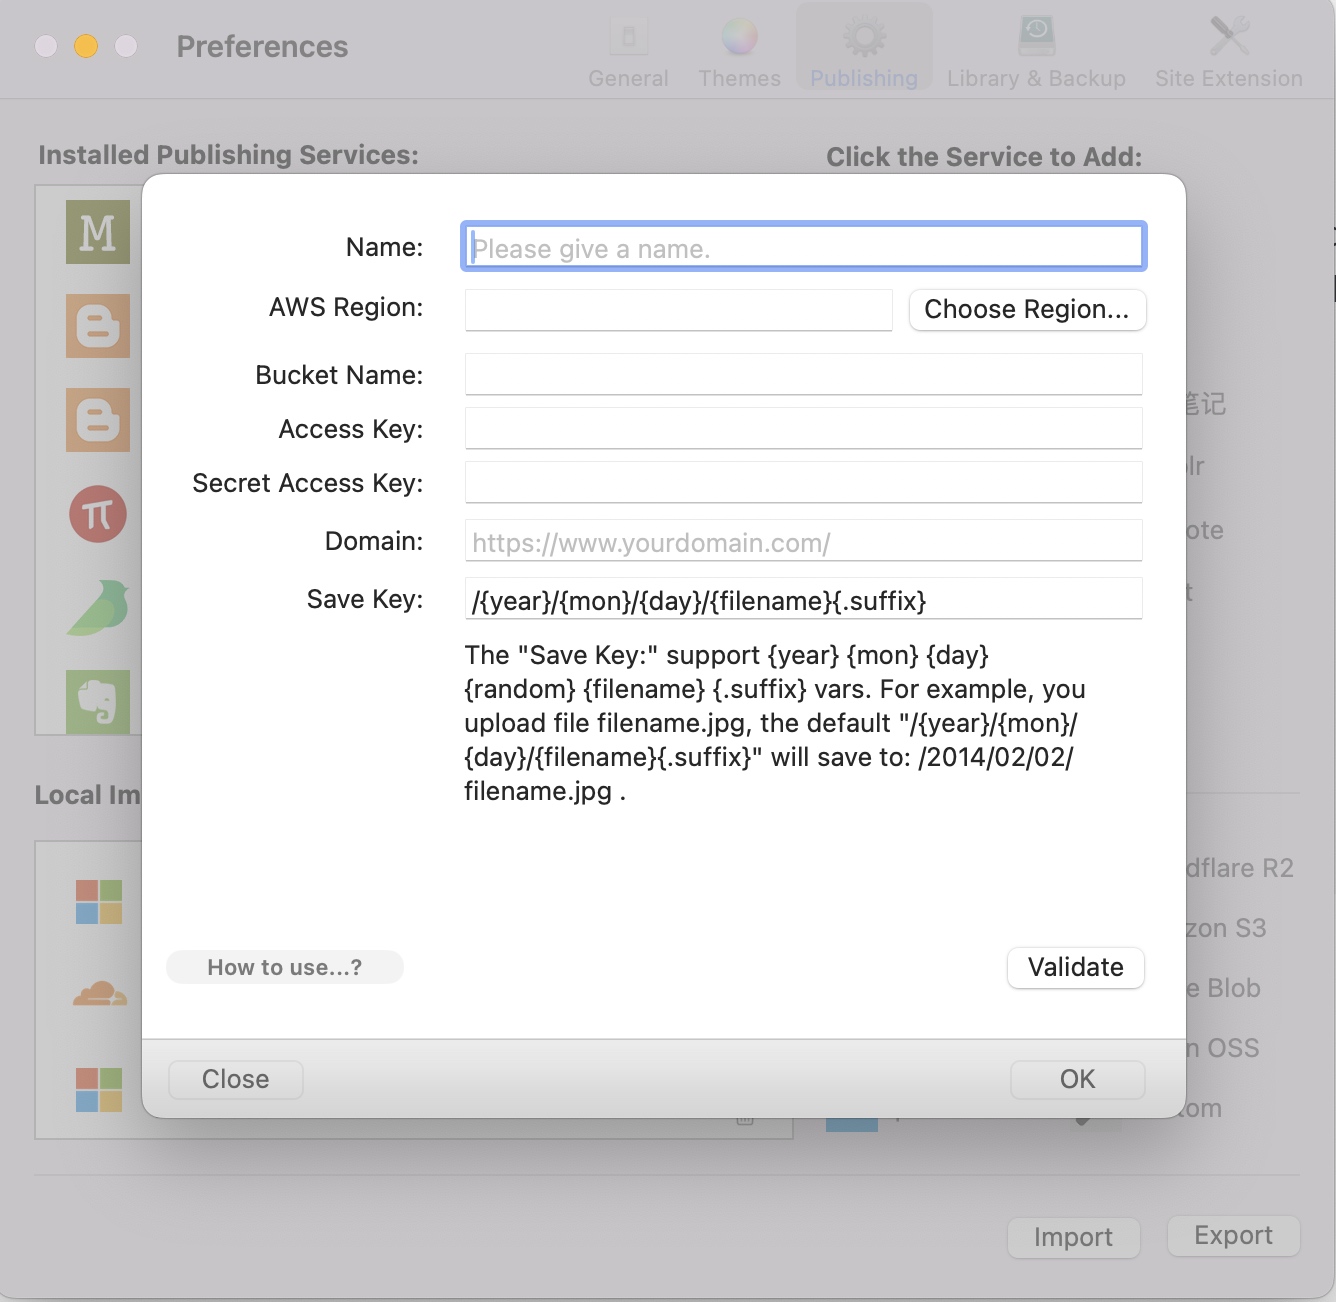
The following will explain each item in detail.
Name: You can fill in the name you want, as long as it can identify this image upload service.
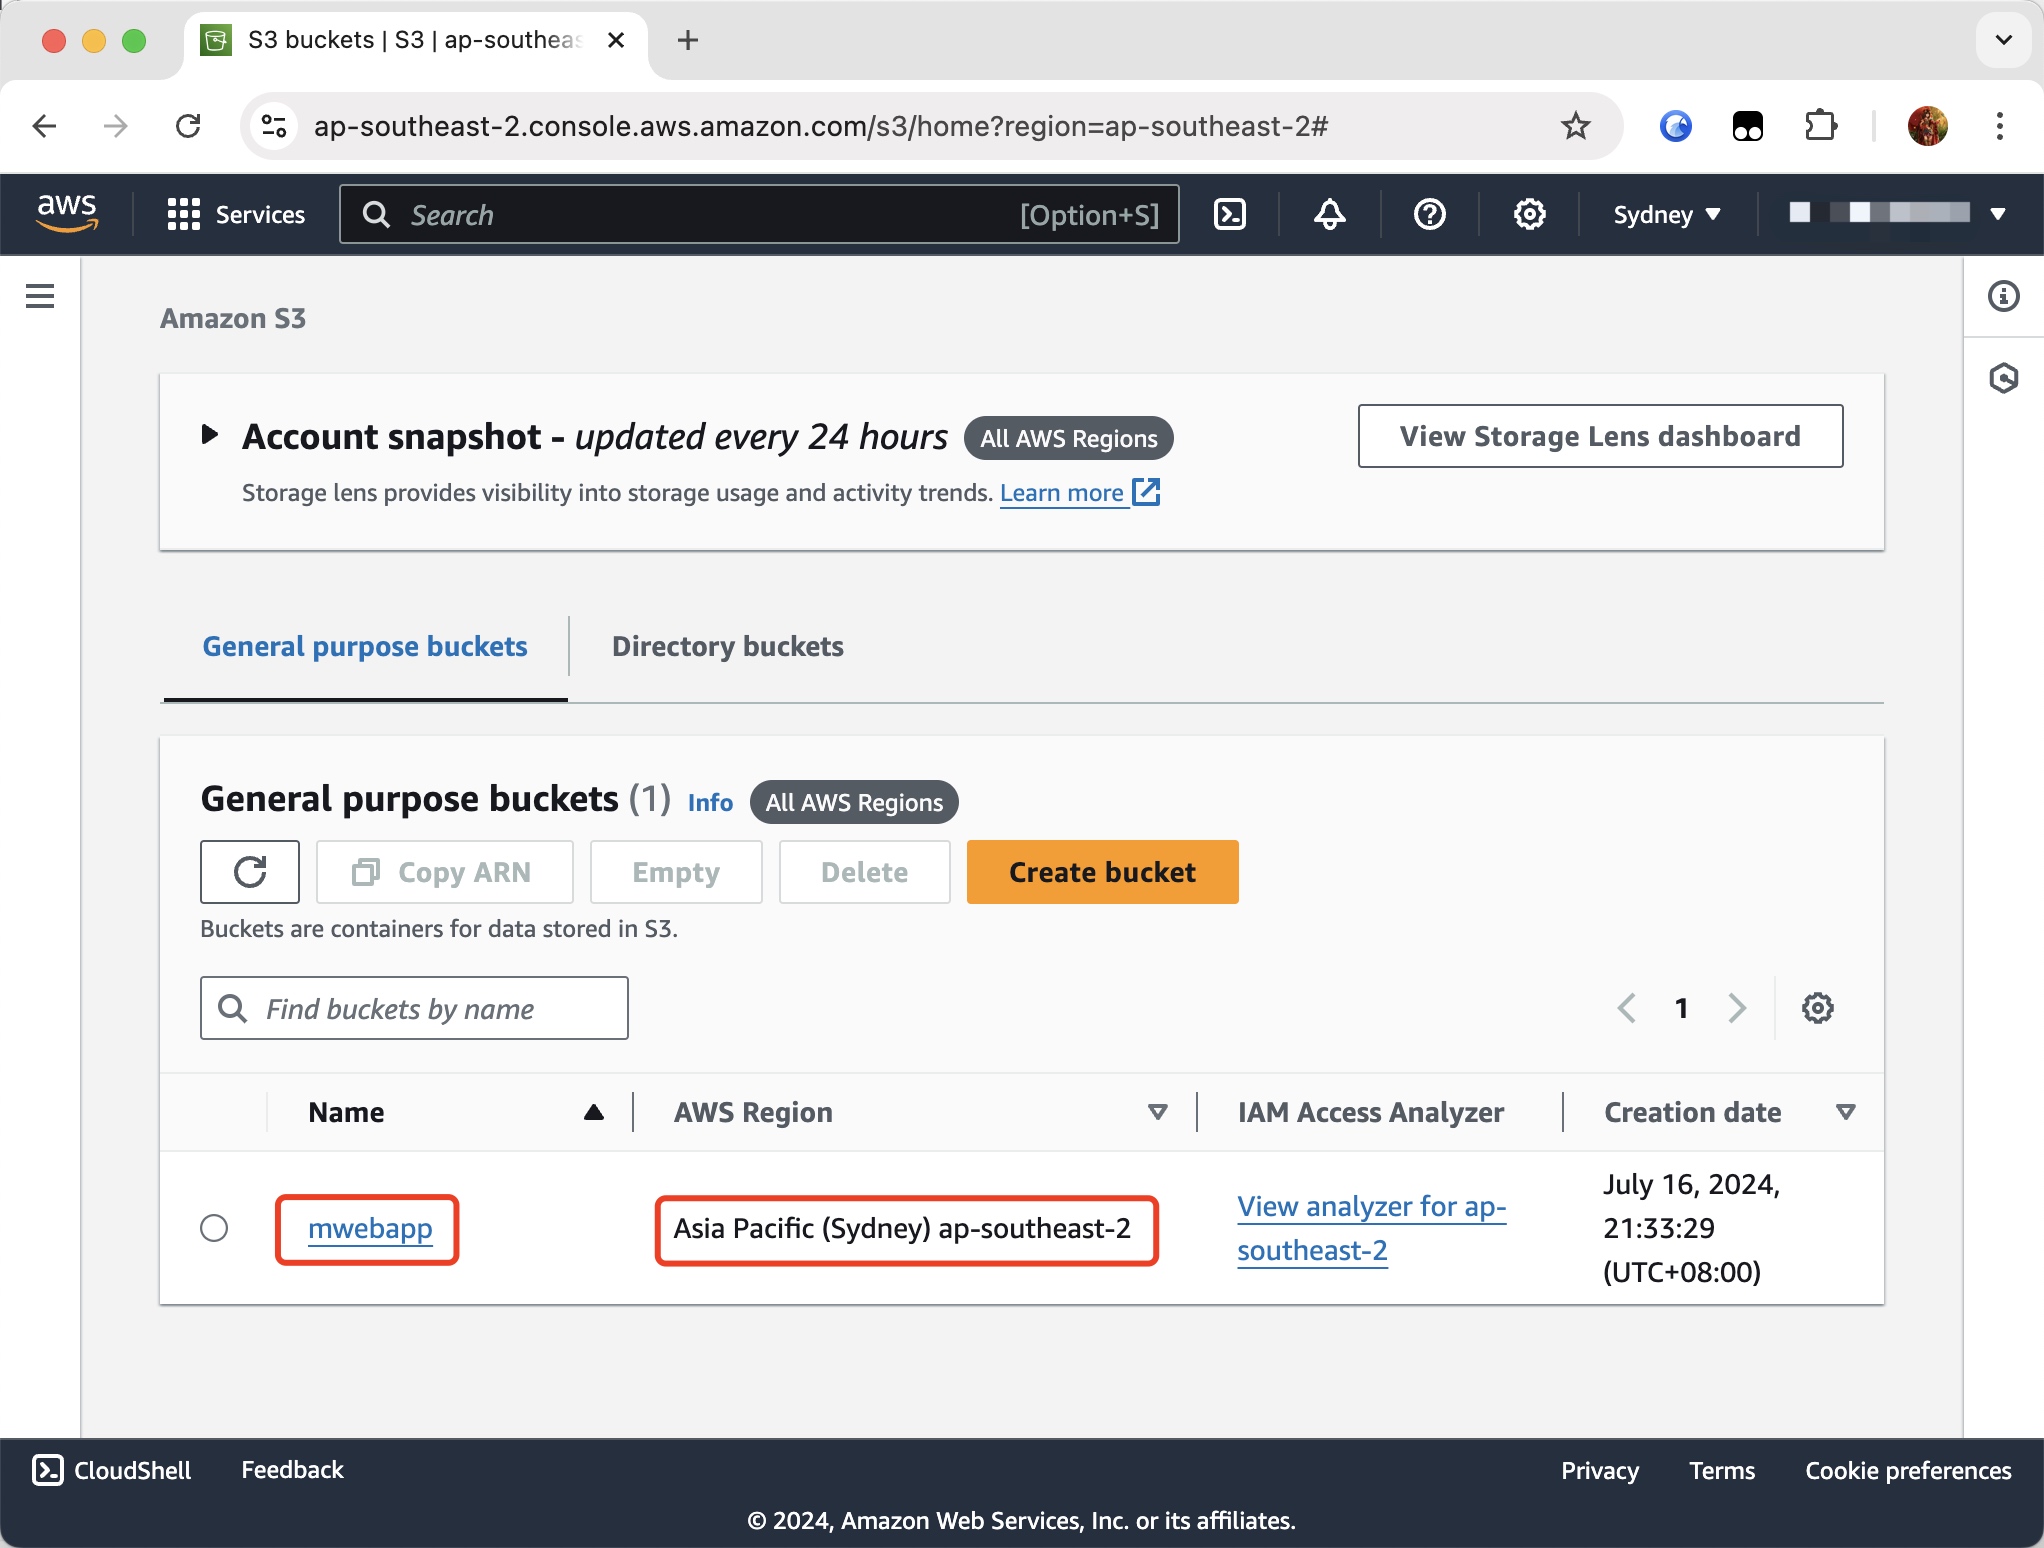
AWS Region: and Bucket Name:, you will know it after creating the bucket. Among them, you can click the "Choose Region..." button to choose the AWS region, or fill it in directly. As shown in the figure below, my AWS region is: ap-southeast-2, and the bucket name is: mwebapp.
Please note that bucket name with . is not supported, for example, bucket name like s3.sample.com are not supported. For details, please check S3 Bucket naming rules documention.
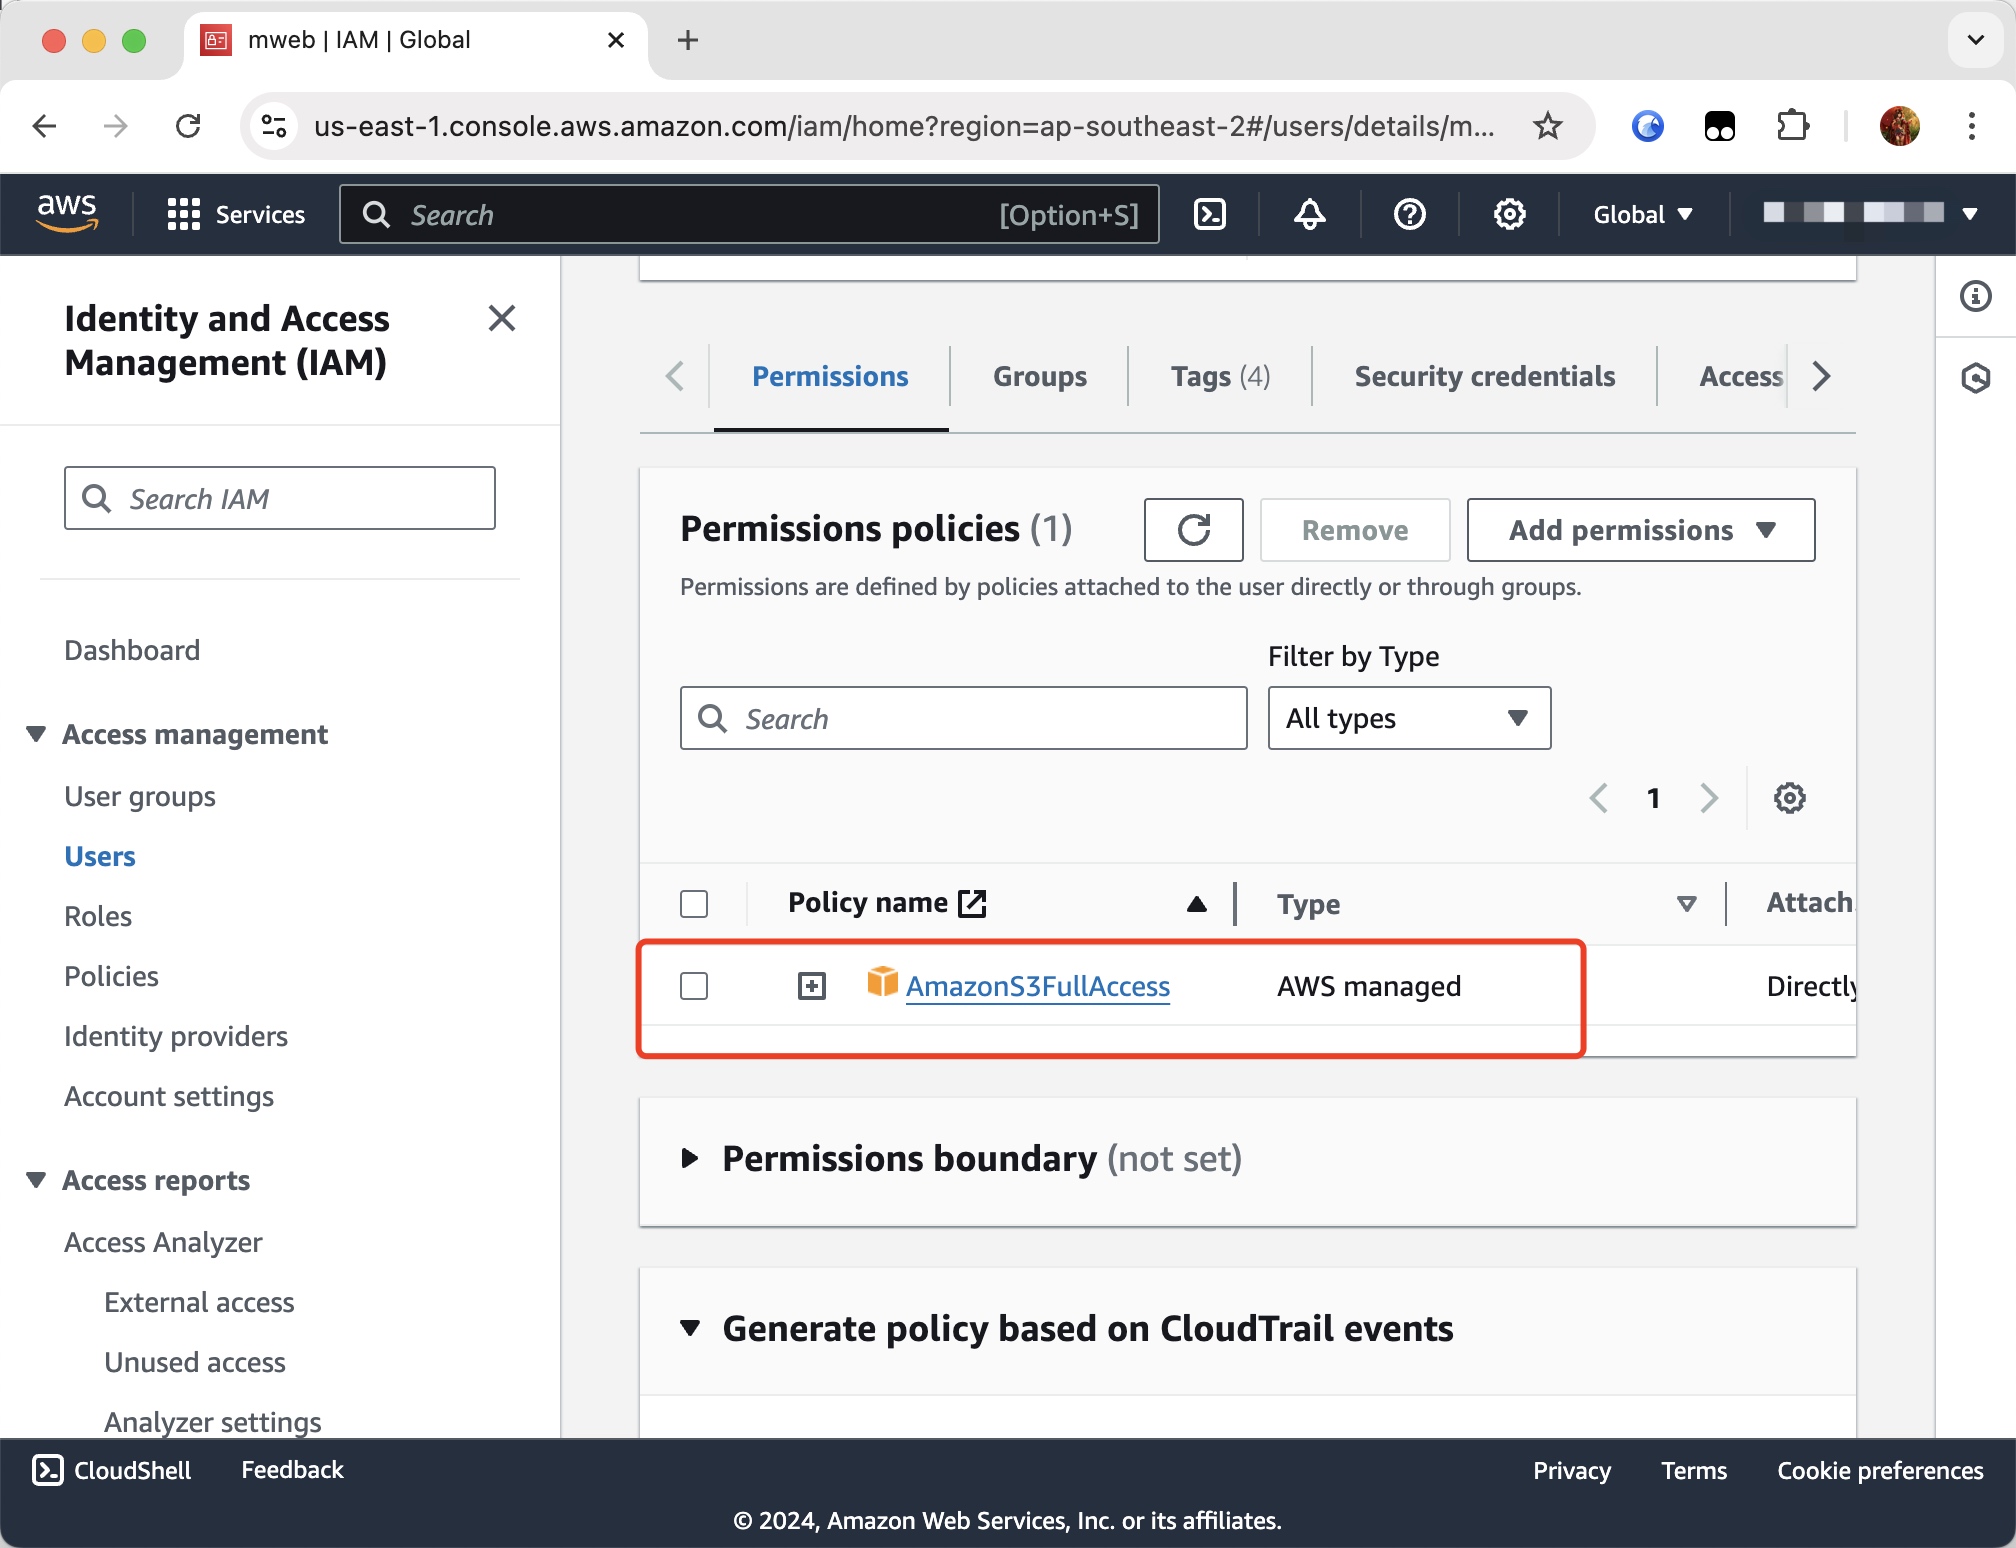
Access Key: and Secret Access Key: For these two, you need to create users and assign permissions in Identity and Access Management (IAM). This part is quite complicated. I simply created a user named mweb and granted it the AmazonS3FullAccess permission, as shown below:
After authorization, create an access key in "Security Credentials", as shown below:
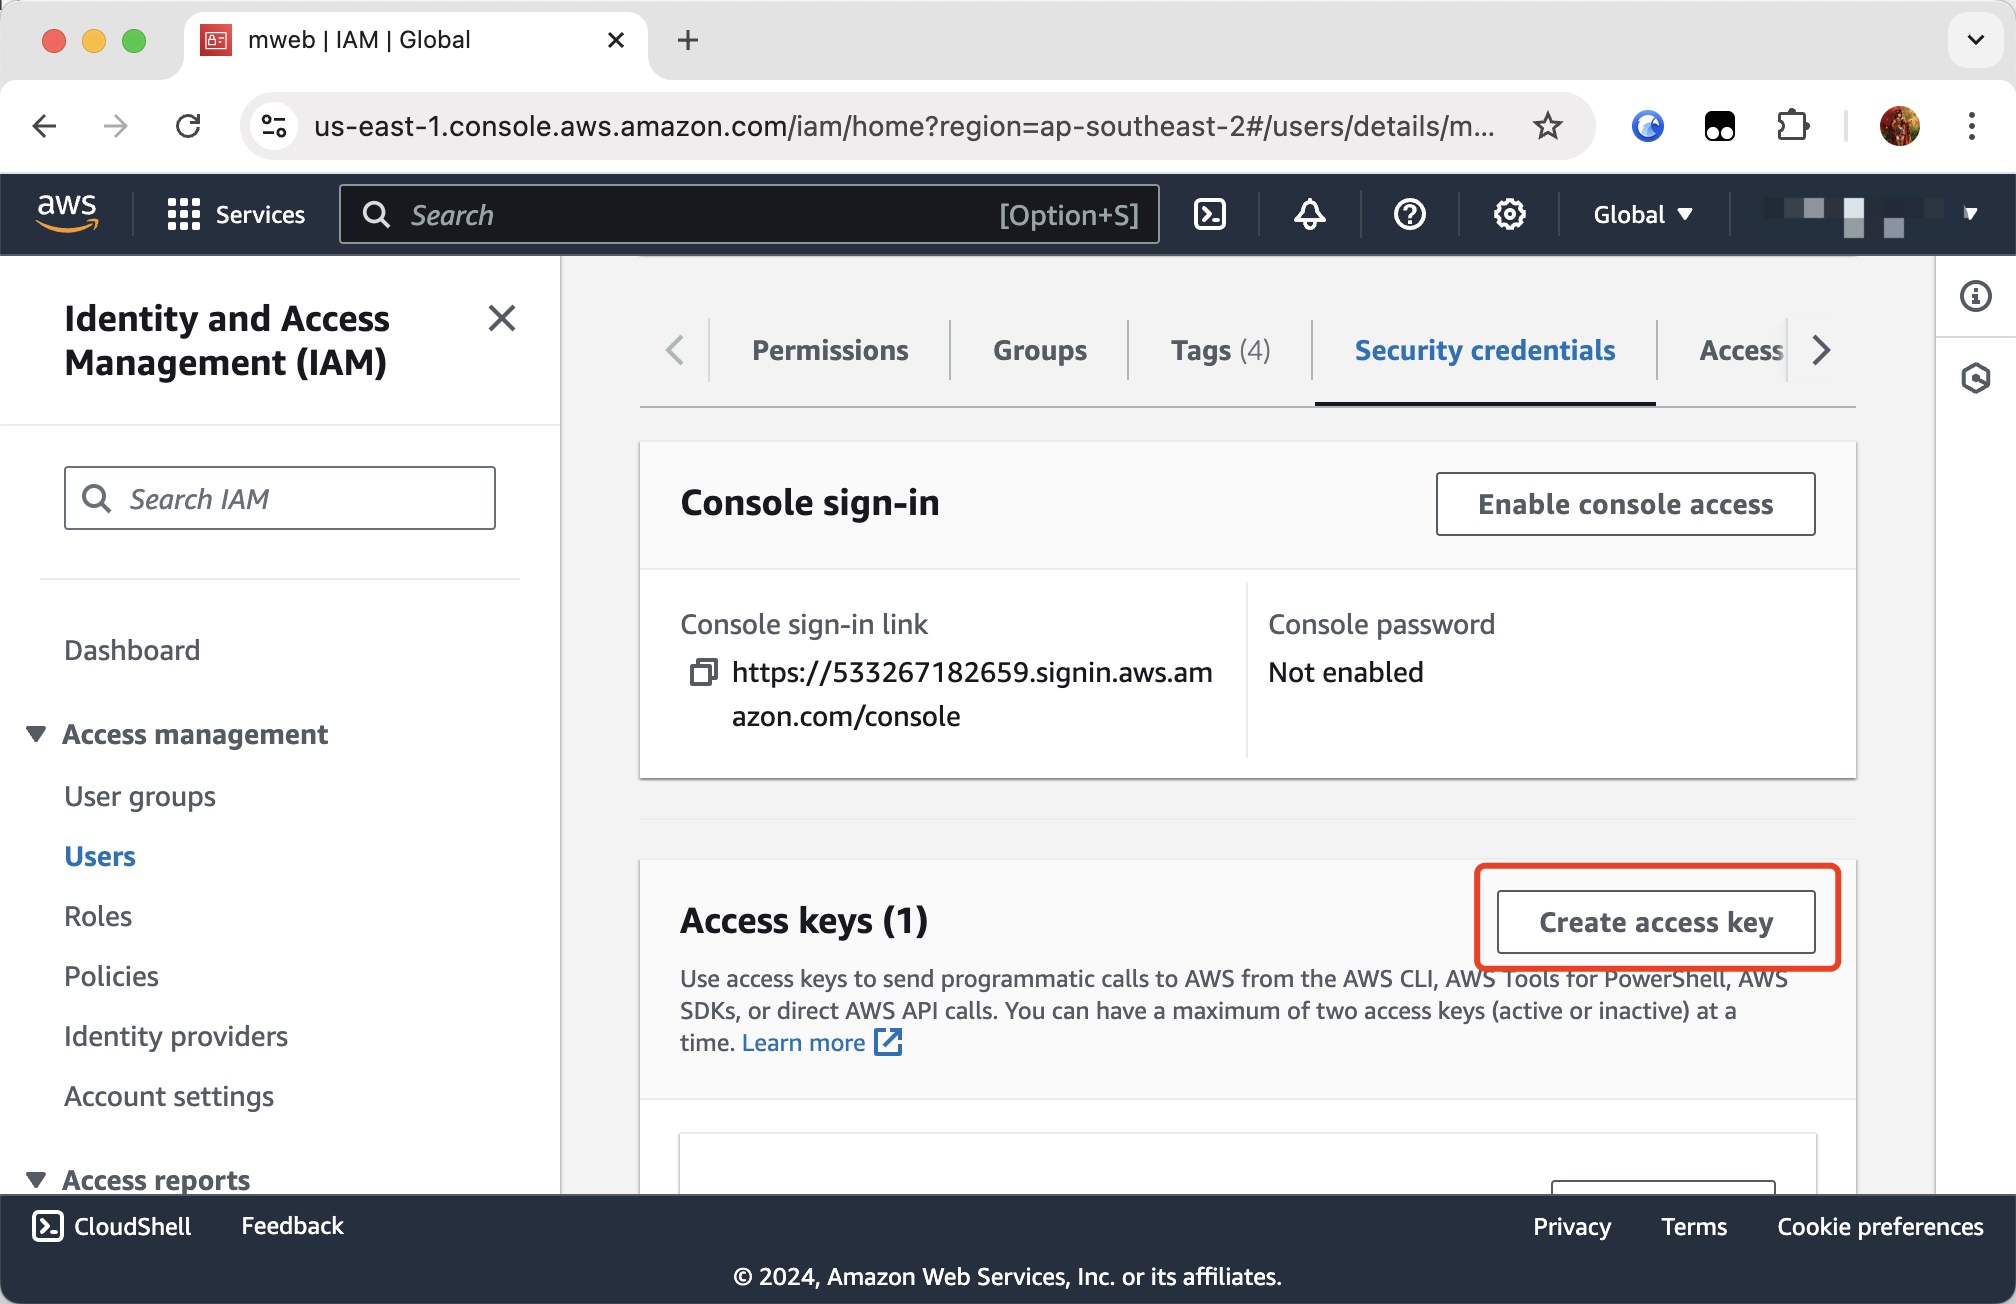
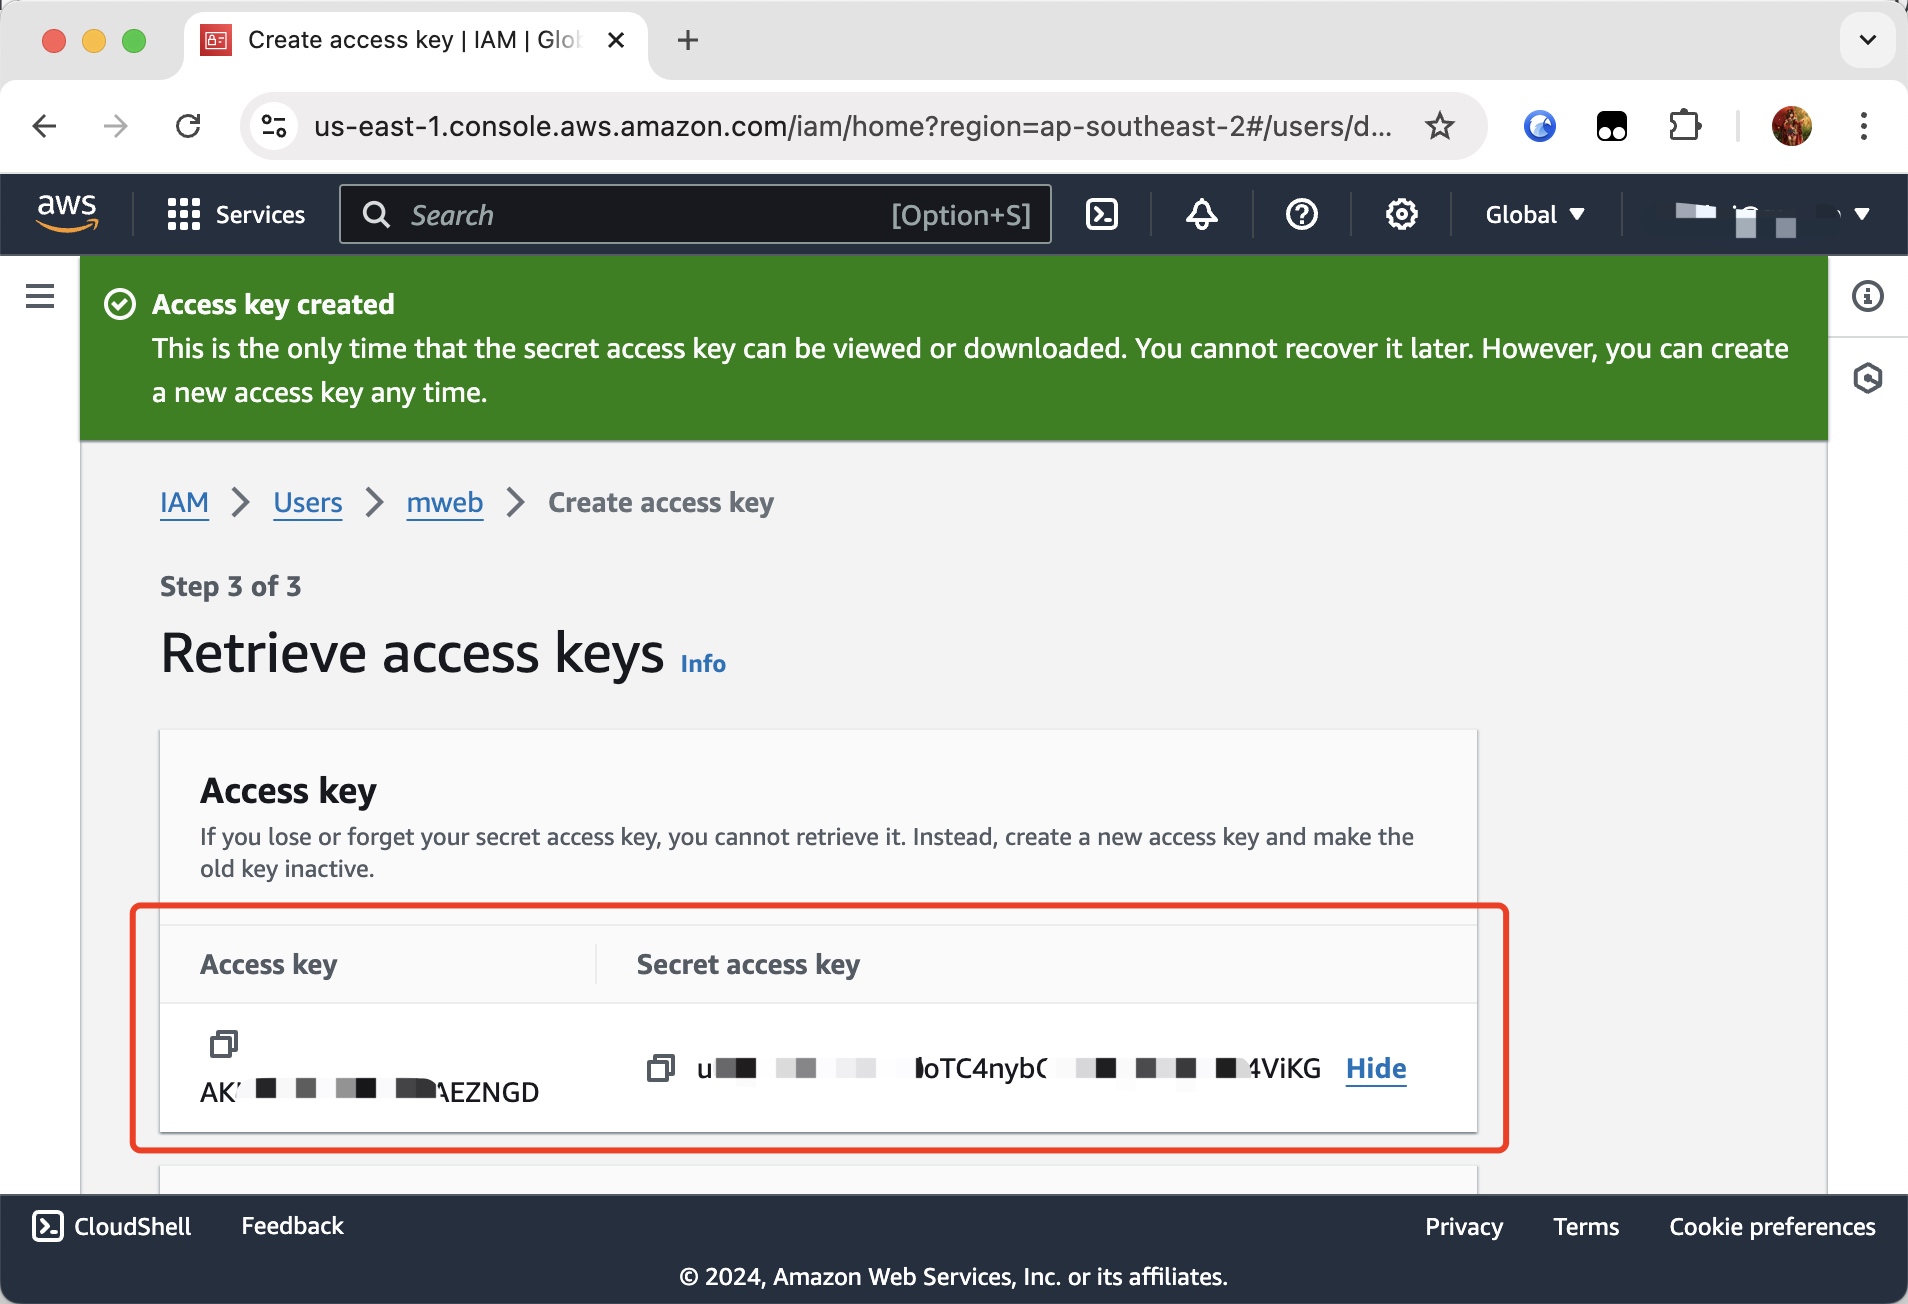
In the selection of "Access key best practices & alternatives" when creating, I chose "Other", so that I can get Access Key: and Secret Access Key:, as shown below:
Domain: Amazon There is a very detailed document on how to bind a domain name to a bucket. Please refer to: Tutorial: Configuring a static website on Amazon S3. I will fill in: http://mwebapp.s3-website-ap-southeast-2.amazonaws.com.
Save Key: Please do not change unless necessary. If you want to change it, you should know what it means.
The following is a screenshot after filling in the form:
