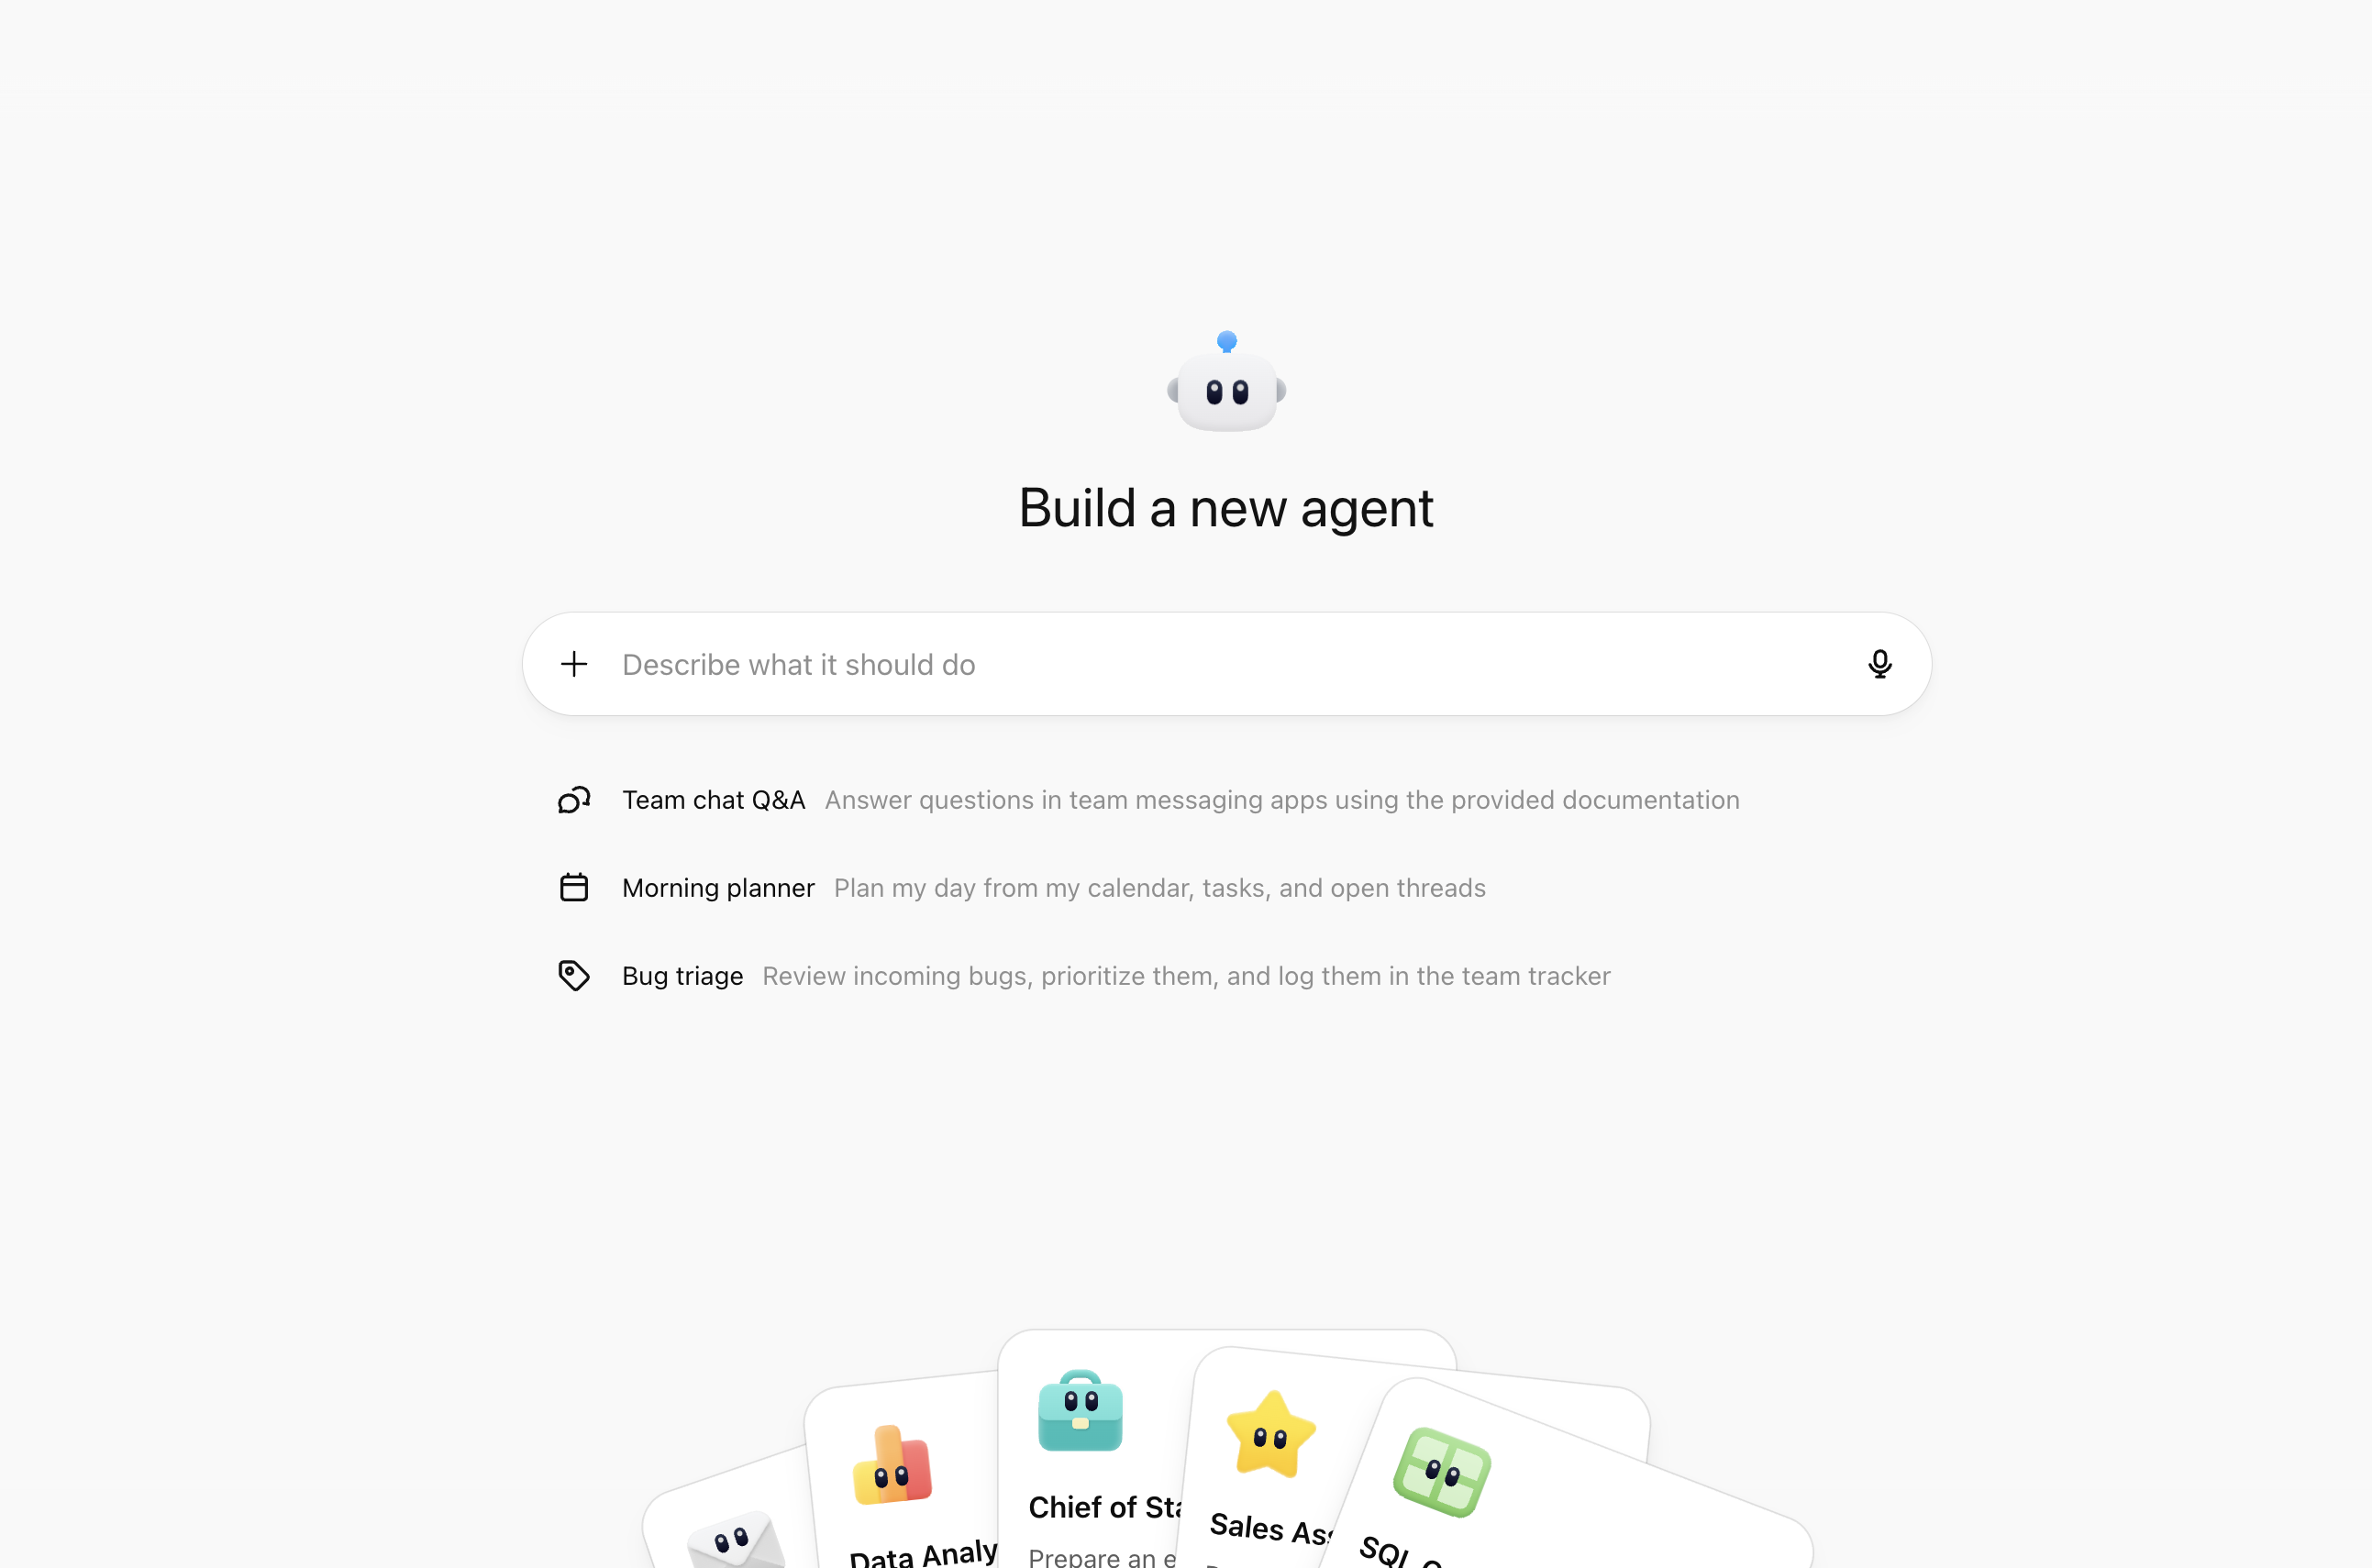
# Building workspace agents in ChatGPT to complete repeatable, end-to-end work
This cookbook shows how to build a ChatGPT workspace agent. Currently available in research preview for ChatGPT Business, Enterprise, and Edu customers, workspace agents are evolutions of GPTs that can work across tools to complete high-value tasks, helping your team move faster.
In this cookbook, we'll create a workspace agent through the conversational builder, give it access to our team's calendars and knowledge bases, and add a brief-writing skill to help craft the agent's output. Then we'll test our team agent, schedule it to run on a recurring schedule, and share it with teammates.
## Introduction
ChatGPT workspace agents are shared agents that can run repeatable workflows across ChatGPT and independently complete end-to-end tasks. They can use connected apps, follow skills, run on a schedule, and they can be shared with your colleagues in your workspace.
In this cookbook, we'll build a workspace agent that supports a sales team. Sales teams often spend time manually pulling account notes, recent customer feedback, product usage metrics, and company news to prepare for upcoming customer meetings.
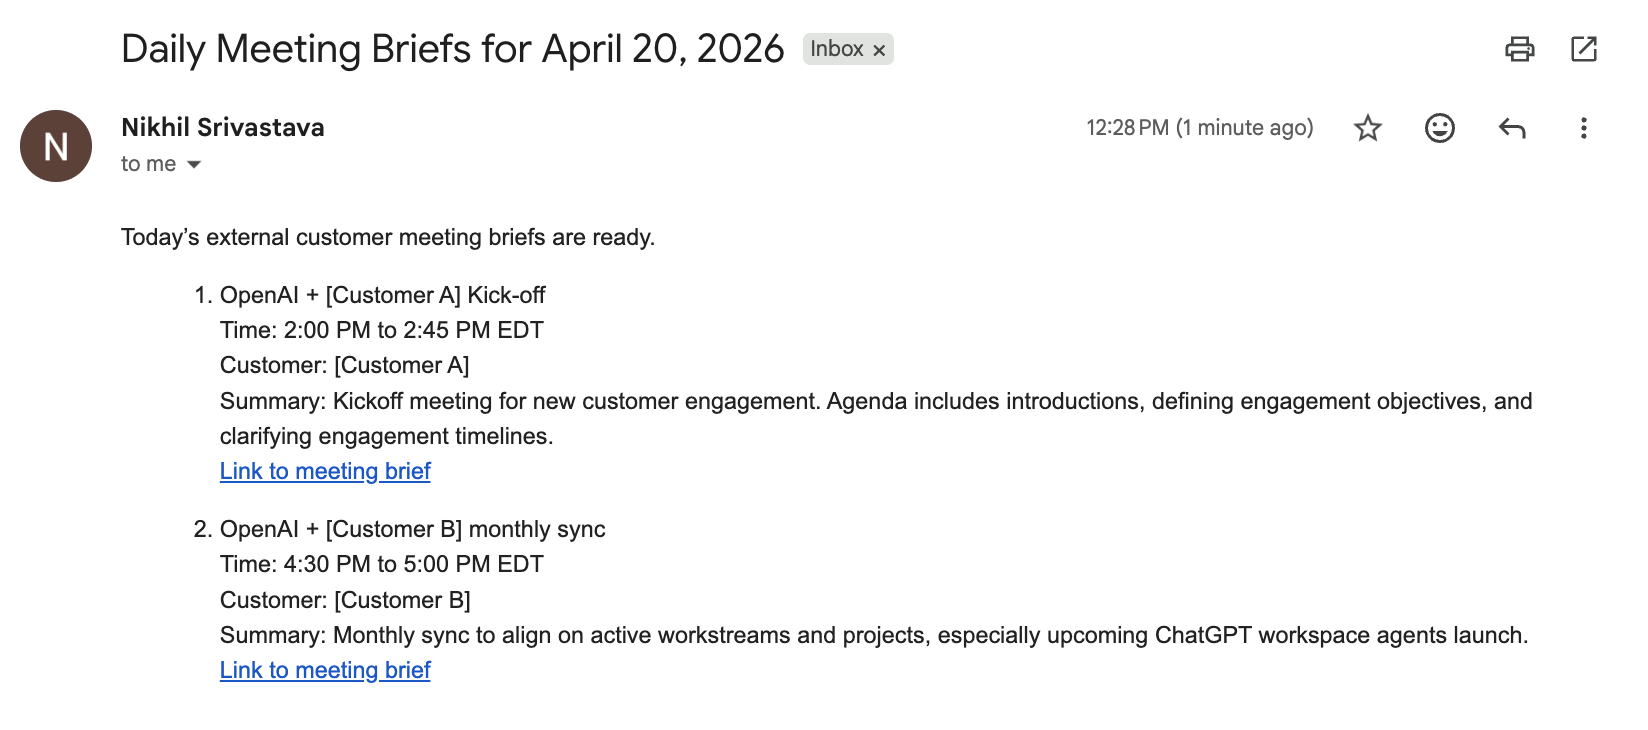
We'll build a workspace agent that helps our sales team more efficiently prepare for their sales meetings by automatically generating meeting briefs ahead of upcoming customer calls, backed by up-to-date customer data. Specifically, our agent will run each day to check tomorrow's customer meetings, gather recent account context from SharePoint, and search the web for recent company news and background information on each attendee. Our agent will generate a meeting brief, save it down as a SharePoint doc, and send us an executive summary.
Once our agent is deployed, it will run automatically each day, and we can also invoke it on-demand in ChatGPT.
## Prerequisites and setup
For this cookbook, you will need a ChatGPT Business, Enterprise, or Edu workspace with access to workspace agents, and a set of apps (connectors) that enable your agent to access your calendar and account information. We'll use Google Calendar and Microsoft SharePoint to show a workflow that uses both Google Workspace and Microsoft 365 apps, but you can switch out any supported apps. Our agent will send notifications in Slack, but you can also use email or another notification surface.
Before you build, ask your workspace admin to confirm four settings:
1. **Agents are enabled for your workspace.** Workspace owners can enable agents for the workspace and assign access to specific roles with RBAC.
2. **You have permission to build and share agents.** An admin will need to enable you (or the appropriate RBAC group) to create agents. If you plan to share the agent, an admin may also need to enable publishing.
3. **The apps you need are enabled.** For this cookbook, an admin would need to enable Google Calendar, Gmail, and SharePoint in workspace app settings.
4. **[optional] Slack is approved for the workspace.** Only required if you want to interact with your agent through Slack. Enterprise admins need to enable the "workspace agents for Slack" app and grant access to users or groups with RBAC. Your Slack workspace must also allow the ChatGPT Agents app for Slack.
## Building your agent
The conversational agent builder is the fastest way to start. It can draft the agent profile, choose apps, generate a skill, write instructions, and prepare a draft agent that you can test in Preview. We'll use that flow here, then review each piece step by step so you can refine the agent later.
Note that if you want inspiration on work to automate, you can start from pre-built agent templates including a Chief of Staff, Data Analysis, and Customer Support agents.
### 1. Describe your workflow
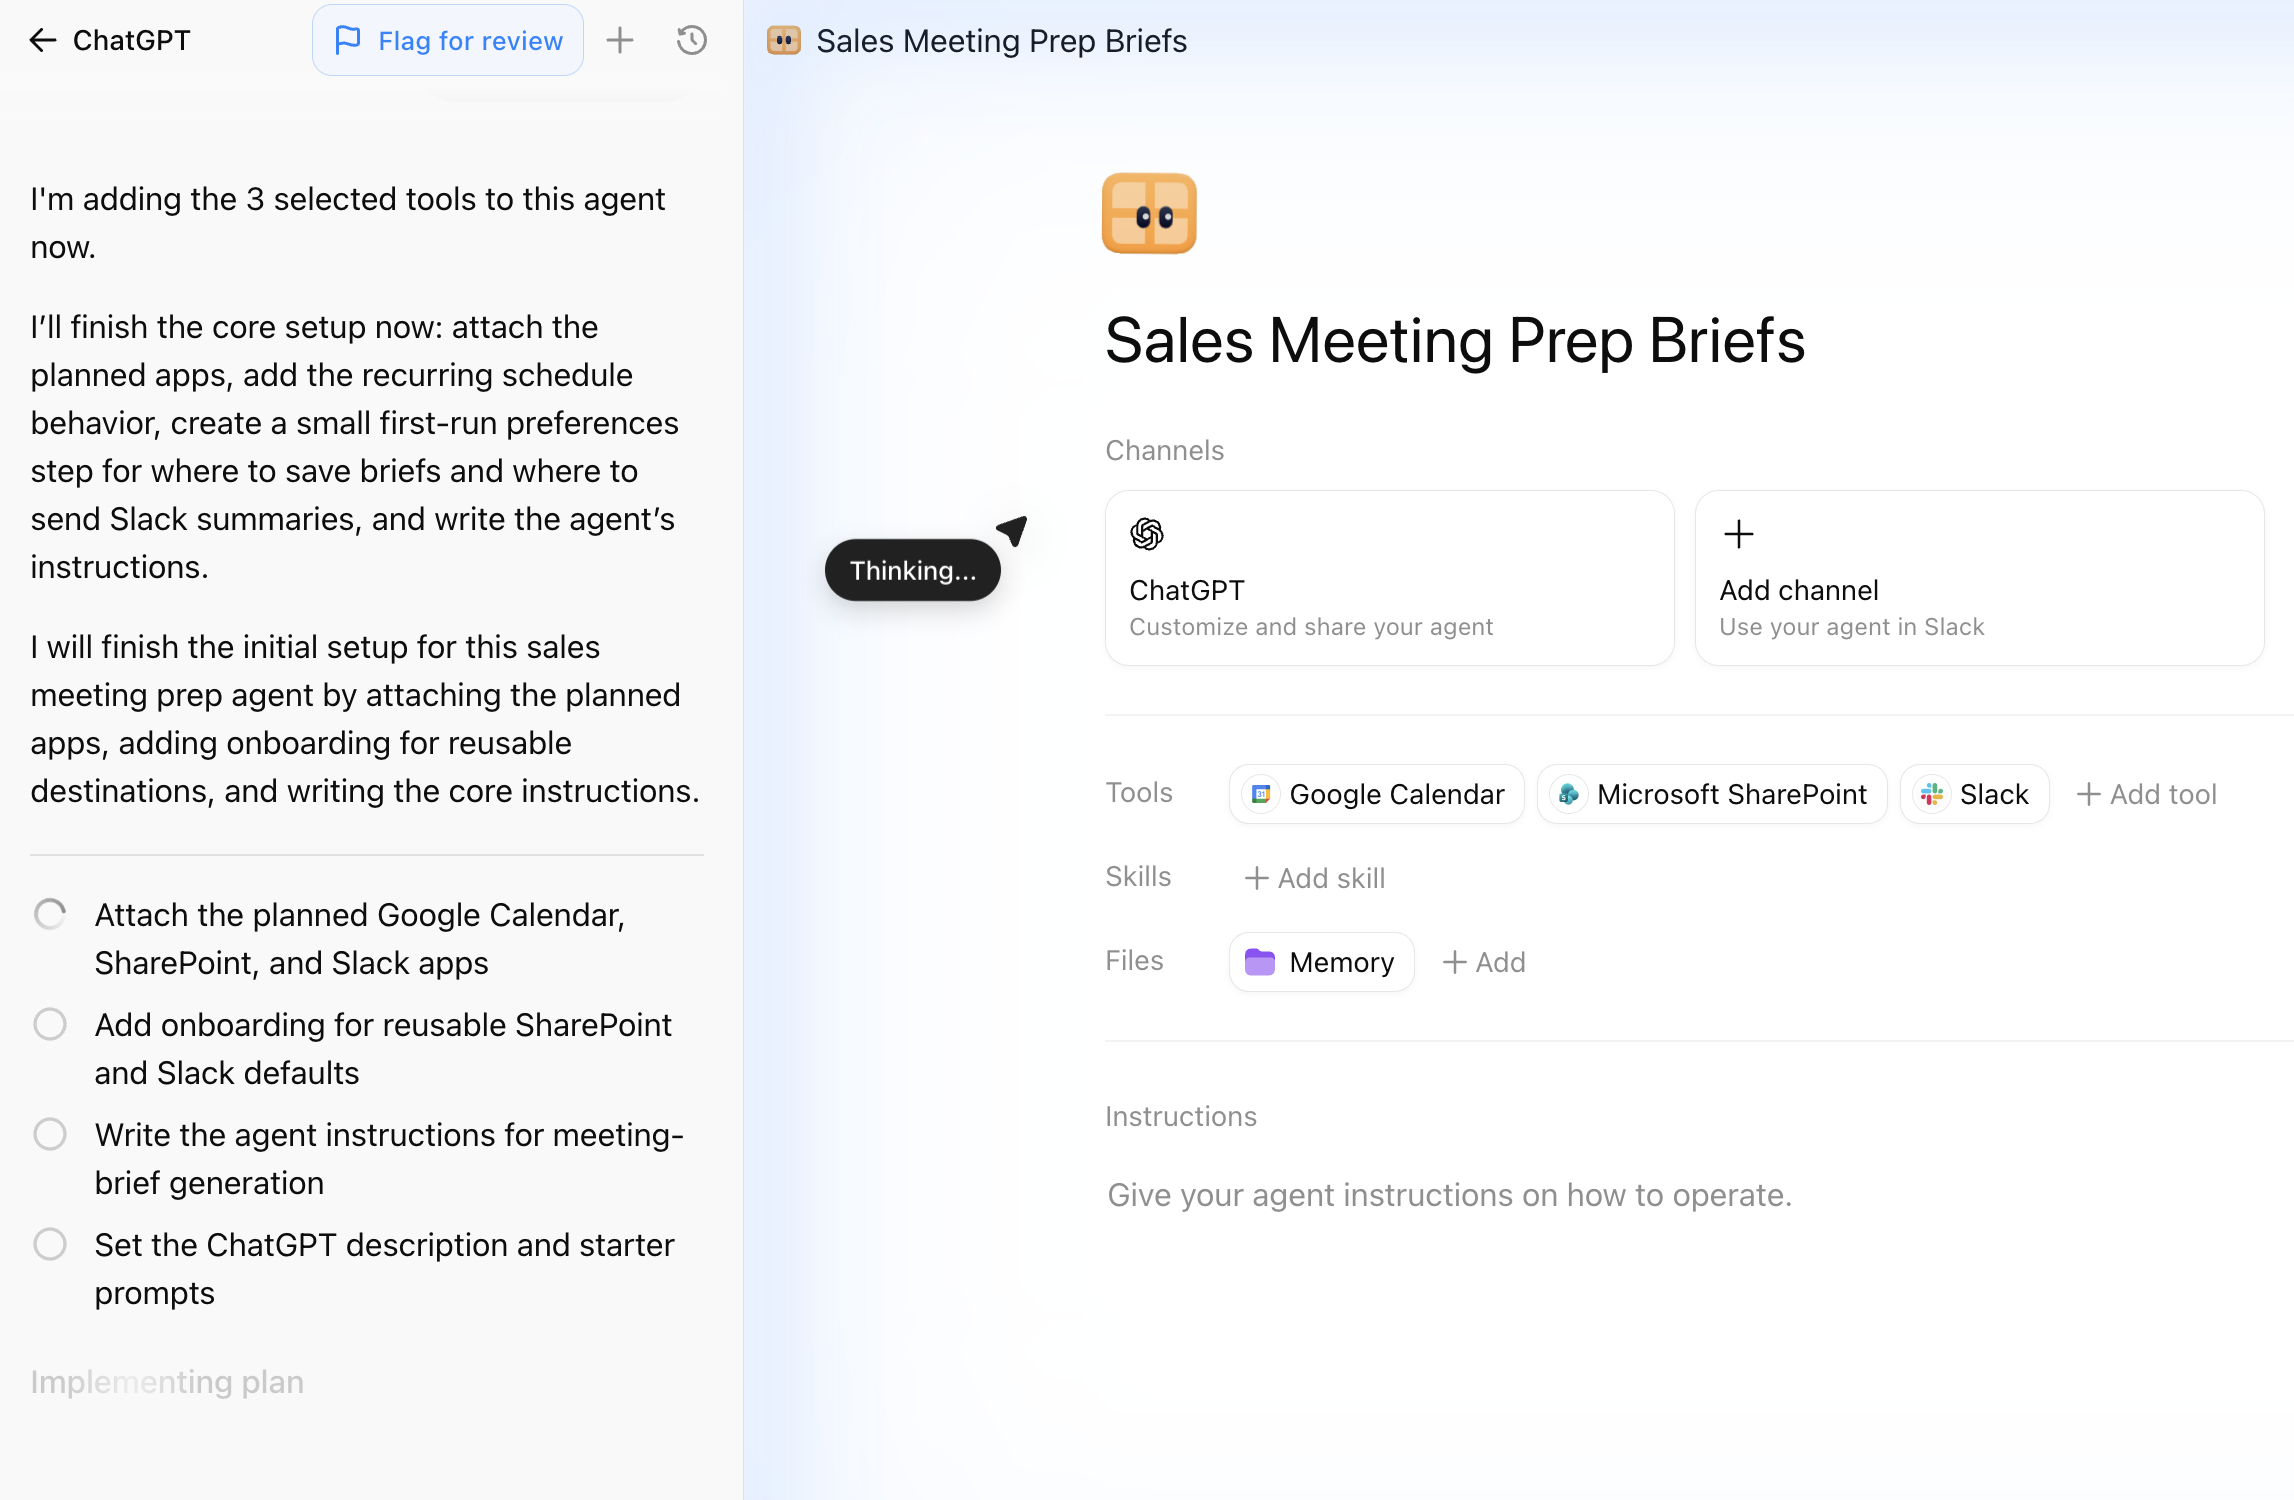
We'll enter the following text into the agent builder:
```text
Create an agent to help with sales meeting prep. The agent should check my Google Calendar for tomorrow's customer meetings. Exclude internal-only meetings and skip events with no external attendees.
For each customer meeting, pull recent notes and feedback from SharePoint, then search the web for any relevant company news from the last 30 days. Then write a 2-3 page meeting brief. Save the meeting brief as a SharePoint doc.
Then, send me an email with a daily summary of my upcoming meetings, with a link to the full brief.
```
You'll see the assistant create a plan for building the agent, then starting to build each component step-by-step. The first draft should give you a working agent with a name, description, instructions, and a set of connected apps.
If you don't have the required apps already configured, the agent builder will walk you through the configuration steps. If an app is unavailable, you can adjust scope - for example if you don't have Slack enabled, you can instruct your agent to send you an email with your sales meeting doc instead.
### 2. Review and configure your apps
Now we'll review the configurations of our apps. Because our agent can access external tools, it's important to understand the permissions it has to take actions on these tools, and how those permissions change as we share our agent for other teammates to use.
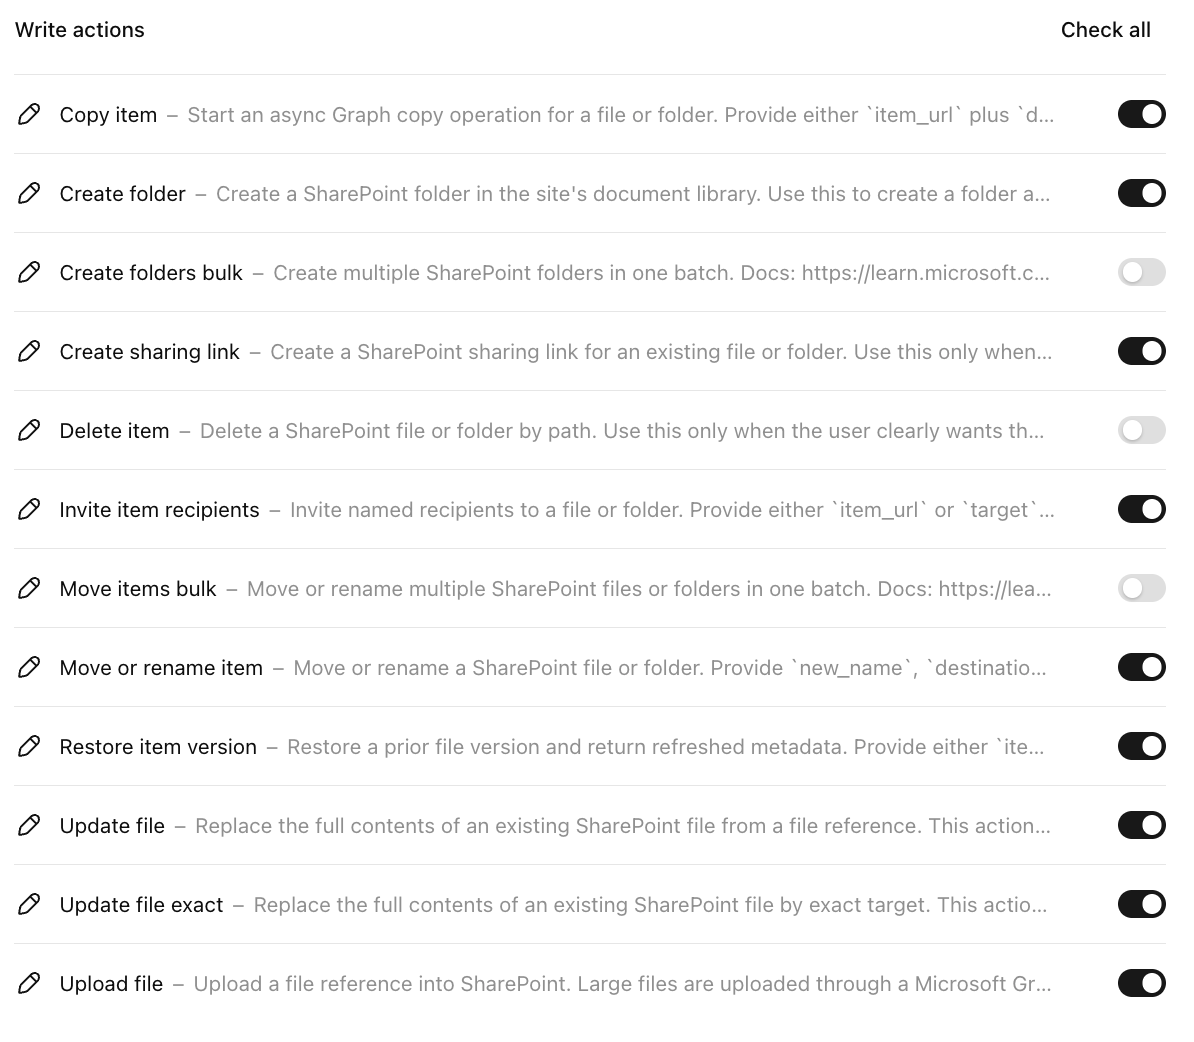
Note that connector actions can be enforced at the workspace level by admins. For example, an admin can enforce that workspace agents can only take read actions, but not write actions, for the SharePoint connector.
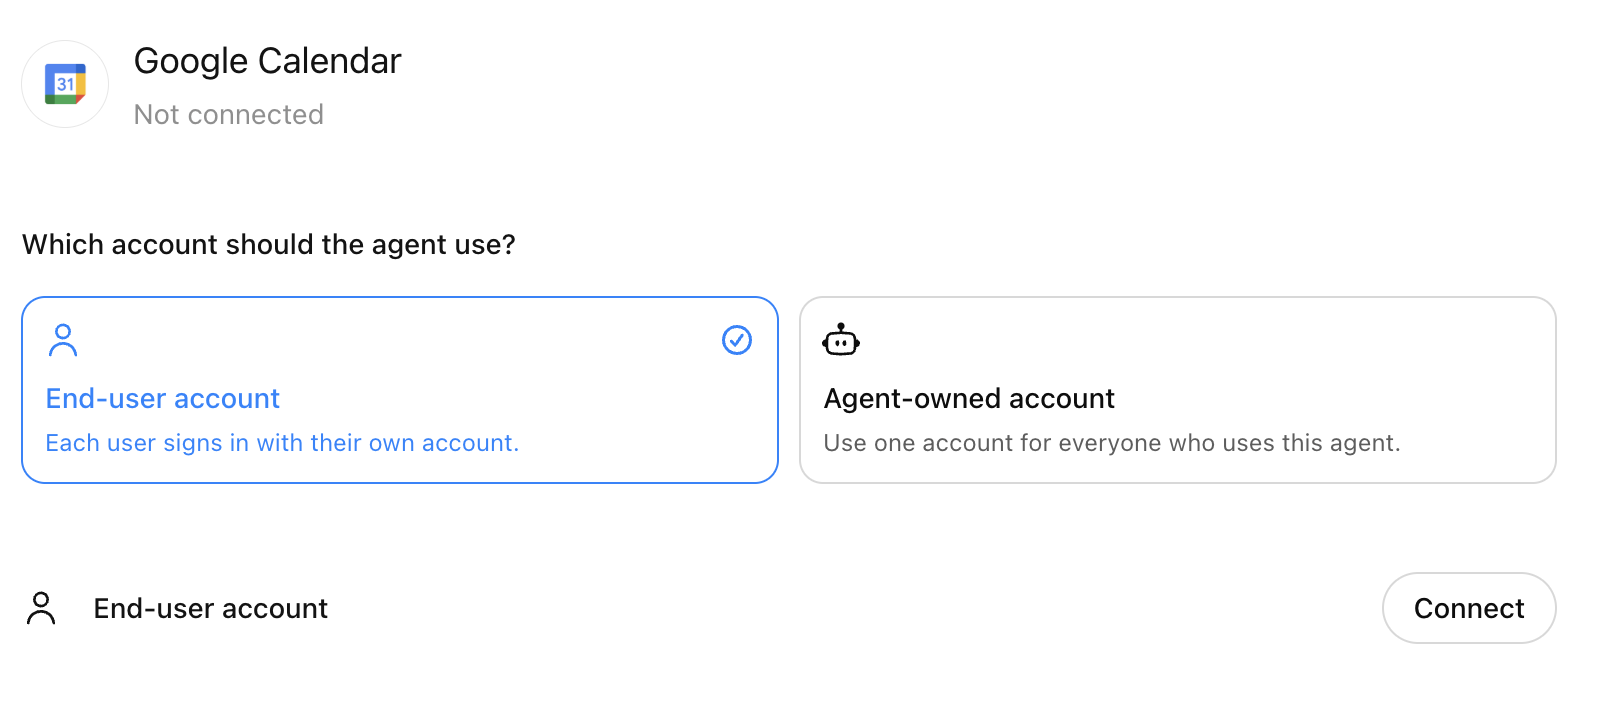
We can click into each connector to view and change its permissions.
For the **Google Calendar** connection, we'll use *End-user account*. What this means is that each person who is using the agent will need to authenticate with their own google calendar, and the agent will access their individual meetings.
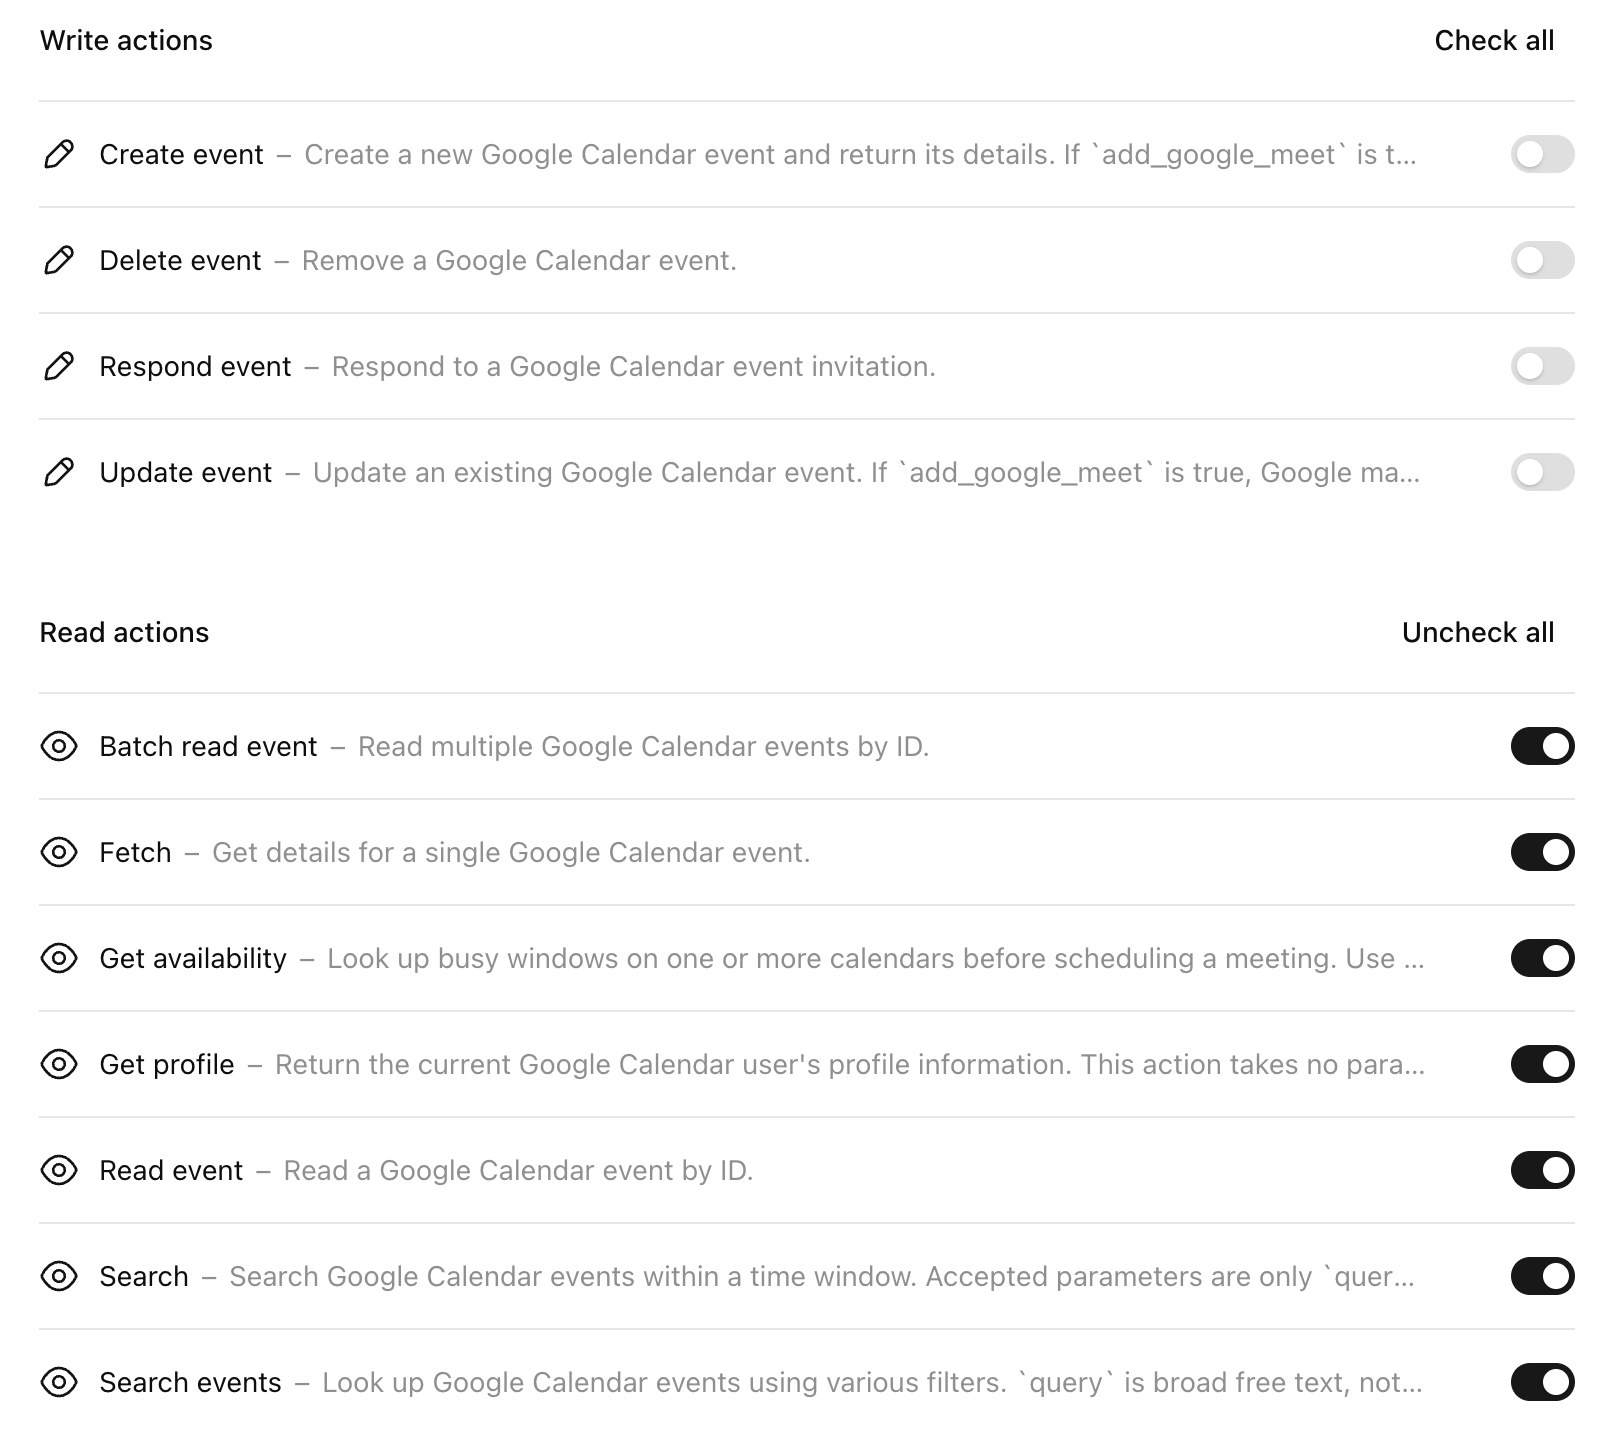
For Google Calendar, we just need to view upcoming meetings and attendees, so we'll only enable read actions. We can also enforce permissions more granularly, by selecting individual actions to enable or disable.
We'll also use the same *End-user account* configuration for the **Gmail** connector, since each agent user will get their own email briefing for their upcoming meetings.
For the **Microsoft SharePoint** connection, we'll use an *Agent-owned account* linked to a service account associated with a sales team. What this means is that regardless of who is using the agent, the agent will have access to the full set of SharePoint folders, files, and sites that are accessible to the team service account.
In this case, we want to be able to search through SharePoint for any documents relevant to a customer account, then create a new meeting prep document. So we'll scope the SharePoint connector permissions accordingly, to allow a broad set of read actions but prevent bulk write actions and prevent deletes.
Aside from the connectors we've already enabled, the agent has access to **Web search** that it will use to enrich the meeting briefs with recent public company news from the last 30 days.
### 3. Enabling skills and memories for consistent, customized outputs
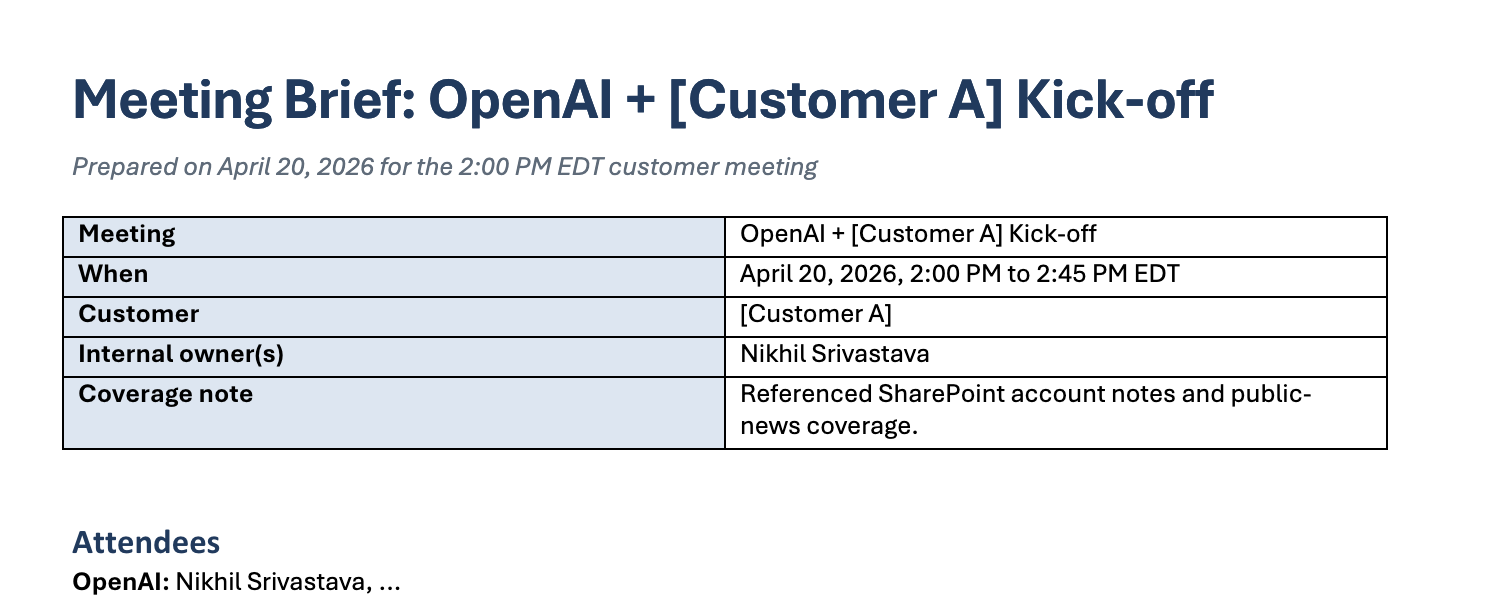
One of the benefits of using workspace agents is how easy it is to ensure **high-quality and consistent** outputs, and skills are an ideal way to help our agent follow the same workflow each time it generates a meeting prep document.
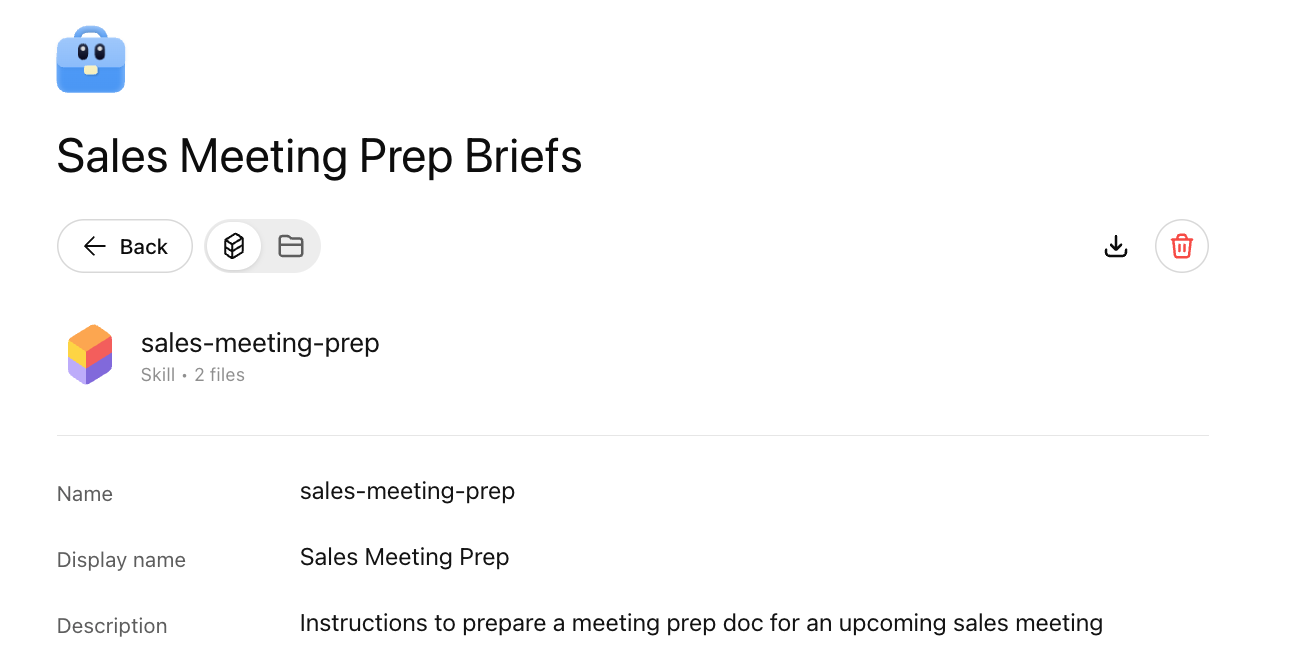
Skills package instructions, resources, and scripts to help our agent reliably complete its instructions. To equip our agent with a skill, we'll select "Add skill" in our agent view. We can upload a skill that we've already created (skills are built on the [open-source agent skills standard](https://agentskills.io/home) so you can use them across AI products), or we can use the built-in skill builder directly within ChatGPT workspace agents.
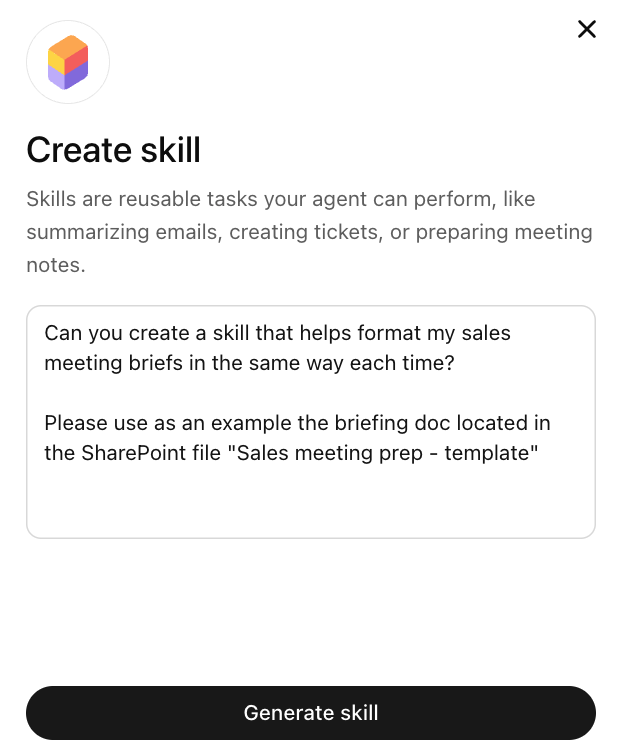
Our assistant will read the meeting template we've provided, and help us create a customized skill that matches the output format we want. In order to polish our skill, we can either click into the skill and edit it directly within the agent builder, and we can upload additional files that the agent can use when it decides to use the skill.
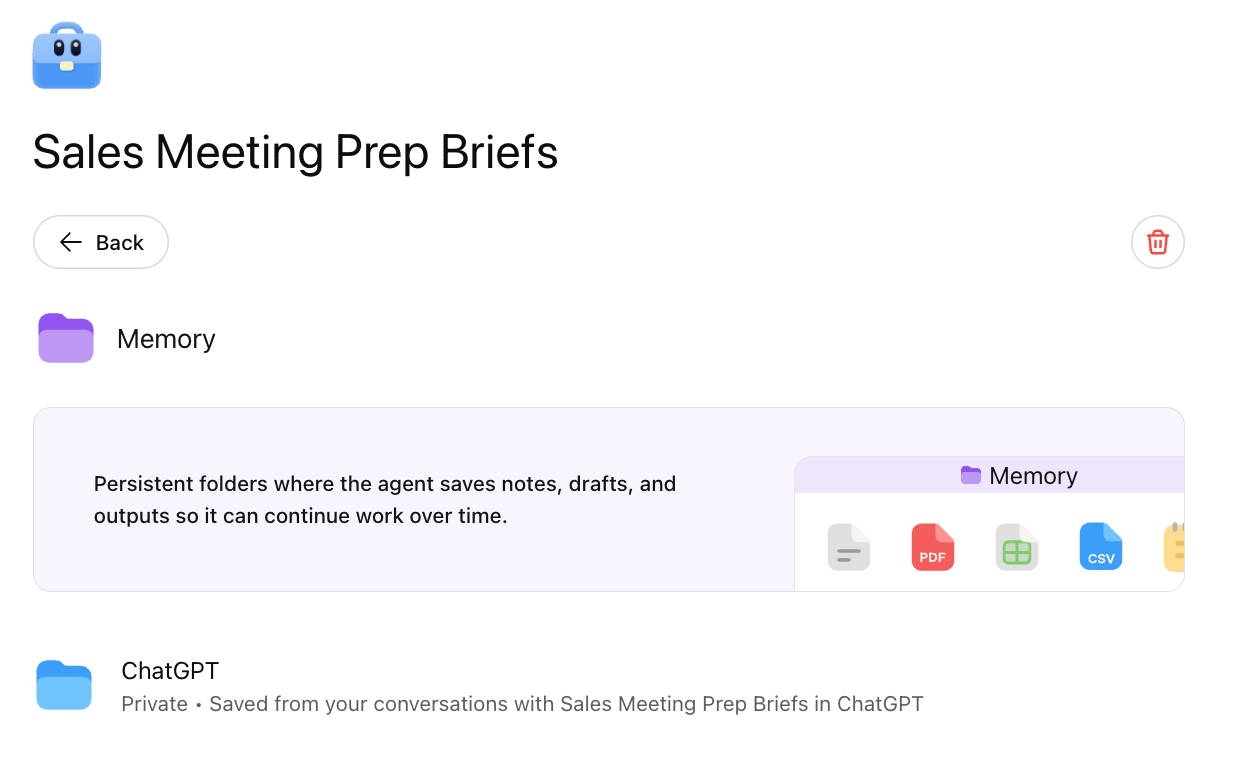
We'll also enable **Memory** for our agent. Memory enables the agent to maintain context across different agent sessions, by giving it access to a persistent folder where the agent can save notes, drafts, and outputs. In this case, we'll give the agent memory for previous runs of this agent so it knows per-user context.
Note that this memory is not shared across different end users of our agent. Users can view their memories from the agent page. For example, a user might give the agent guidance to ignore a certain meeting on its calendar that it doesn't need a meeting prep doc for, and the agent will be able to access that memory when following its instructions.
## Testing your agent
Before scheduling our agent to run on a periodic cadence, and before sharing it with other teammates, we can select **Preview** or **Try in ChatGPT** in the top-right corner of the agent builder to test our agent. We can also select **Create** to save our agent, and then invoke it by tagging it in our ChatGPT input box. Note that when you first create an agent, it is by default available only to you.
Note that our agent builder has automatically created some sample starter prompts that appear next to the agent in ChatGPT. To view and edit these prompts, we can select ChatGPT under "Channels" in the agent view.

We'll ask our agent to prepare briefs for the meetings on our calendar for tomorrow, and we can view the traces of actions the agent is taking - accessing connectors, referencing skills and memories - as well as the agent's chain-of-thought reasoning as it completes its task.
When our agent completes, we see that it has generated polished SharePoint documents for each of our upcoming customer meetings and sent us an email summary.
You can run additional tests with different input data - for example, you might ask the agent to prepare a brief for a meeting that you already had last week, to compare its output with a human-generated prep doc. You can also add that prep doc to the skill's files as an example. You can update agent instructions, provide it additional connectors and permissions, or update its skill to refine the output it produces.
## Deploying your agent
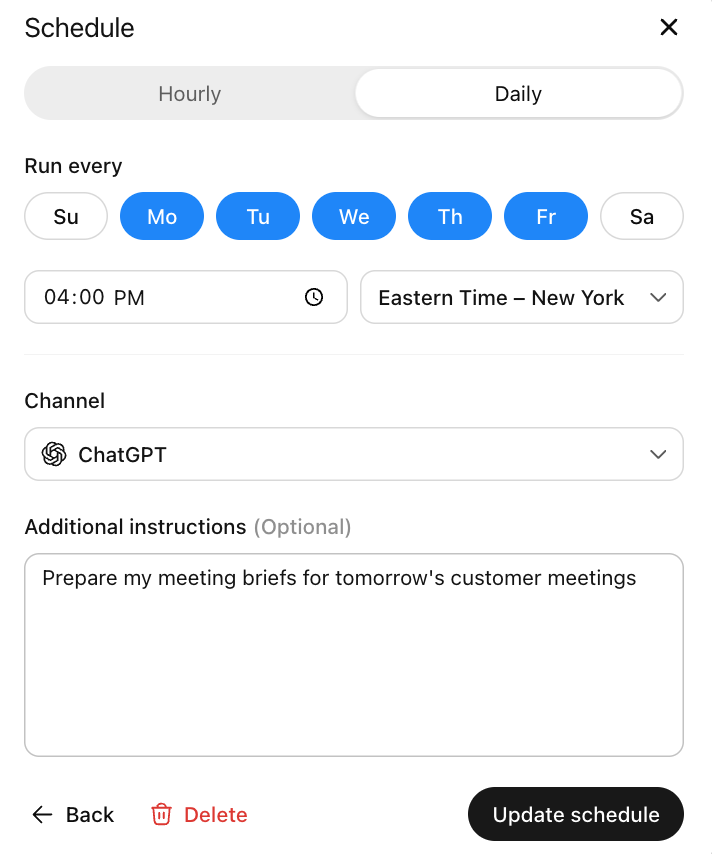
We'll first set our agent to run each day at 4pm, to give us a preview of the upcoming day. We'll select **Schedule** in the top-right of the agent screen and then **Add new schedule** to specify when the agent should run, and provide it any specific instructions.
For example, in addition to our daily weekday schedule, we might want to create a "weekly prep" schedule that runs each Sunday evening, and instruct our agent to prepare meeting briefs for each upcoming meeting this week.
Now, we'll share our agent with our team. In the "Channels" section of the agent builder, we can select **ChatGPT** and then **Enable sharing**. (Note that your workspace admin will need to grant you permission to share agents you've created.)
We can turn on sharing to generate a shareable link for our agent, which lets anyone in your workspace either chat directly with your agent, or duplicate your agent to create their own forked version which they can edit individually. (You won't be able to access their duplicated agent, unless they choose to share it with you. Currently, multiple users cannot edit the same agent.)
Because we've selected *End-user account* for our Google Calendar and Gmail connectors, each person using our agent will need to log into these apps, and the agent will be able to access their specific meetings and email. However, because we've selected *Agent-owned account* for the SharePoint connector, **anyone we share the agent with will be able to access the SharePoint resources**.
In addition to providing our teammates with a link to our agent, we can also choose to list our agent in our company directory, allowing anyone in your workspace to view the agent. You can access your company directory of employee-built agents by selecting **Agents** from ChatGPT, and then selecting the agent directory tab.