# iOS Installation
## Automatic linking
```sh
react-native link react-native-callkeep
```
## Installation with Cocoa pods
Include in a Podfile in your react-native `ios` directory:
```
pod 'RNCallKeep', :path => '../node_modules/react-native-callkeep'
```
Then:
```bash
cd ios
pod install
```
## Manual installation
### 1. Add Files To Project
1.1. In Xcode: Right click `Libraries` ➜ Add Files to `[Your project name]`.
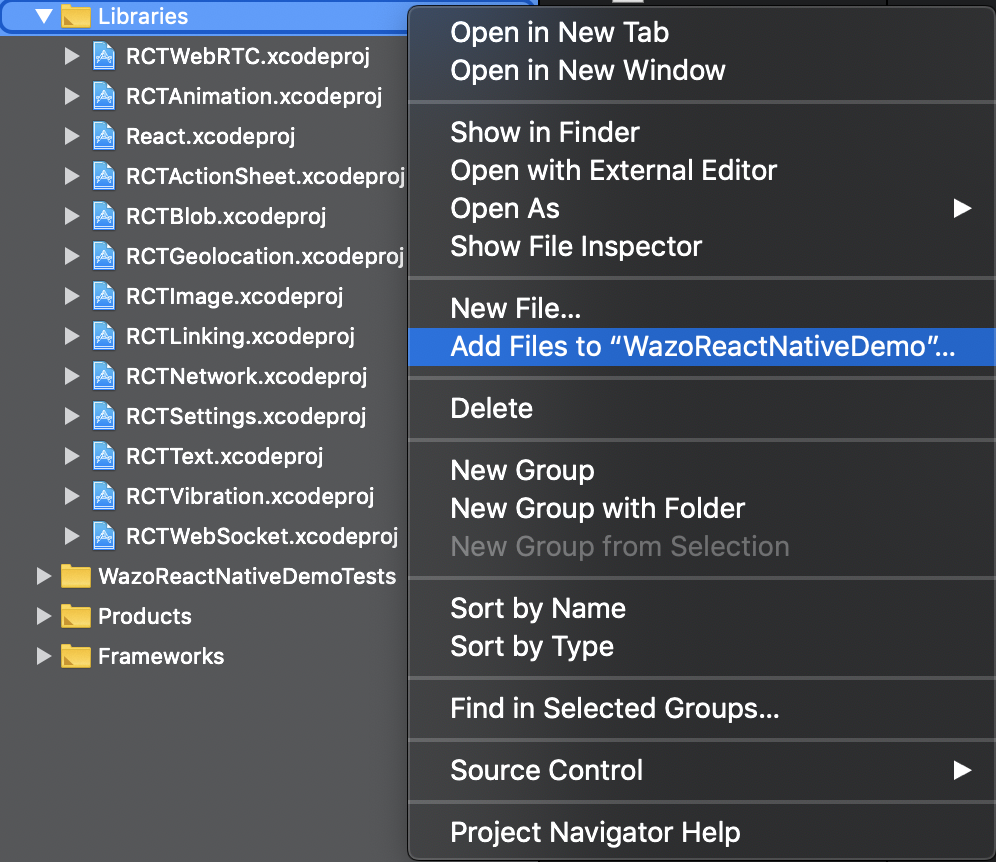
1.2. Choose `node_modules/react-native-callkeep/ios/RNCallKeep.xcodeproj` then click `Add`.
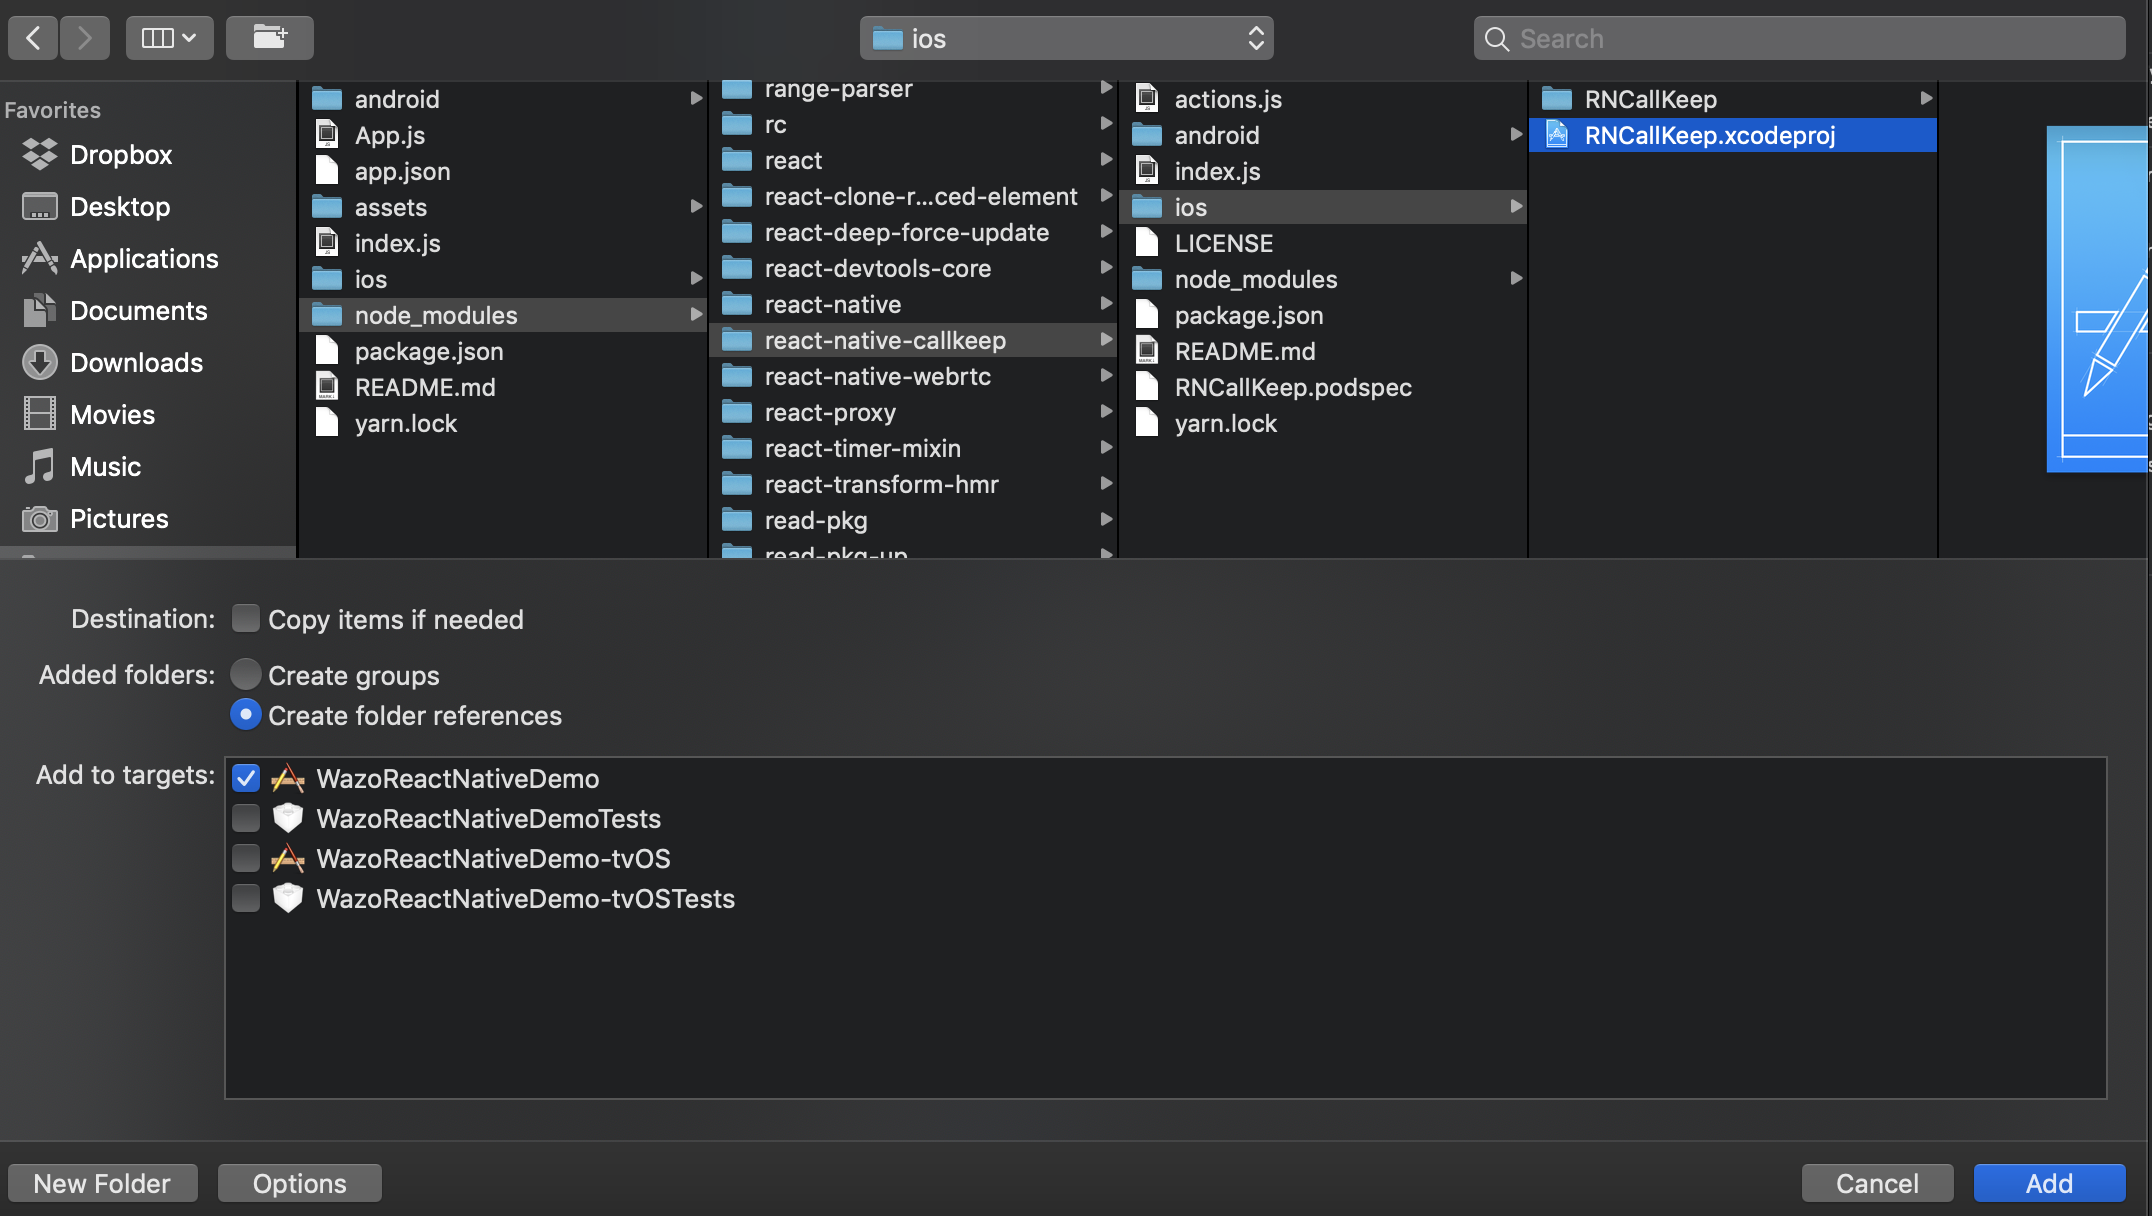
You'll now have the Library included.

### 2. Link library in build phases
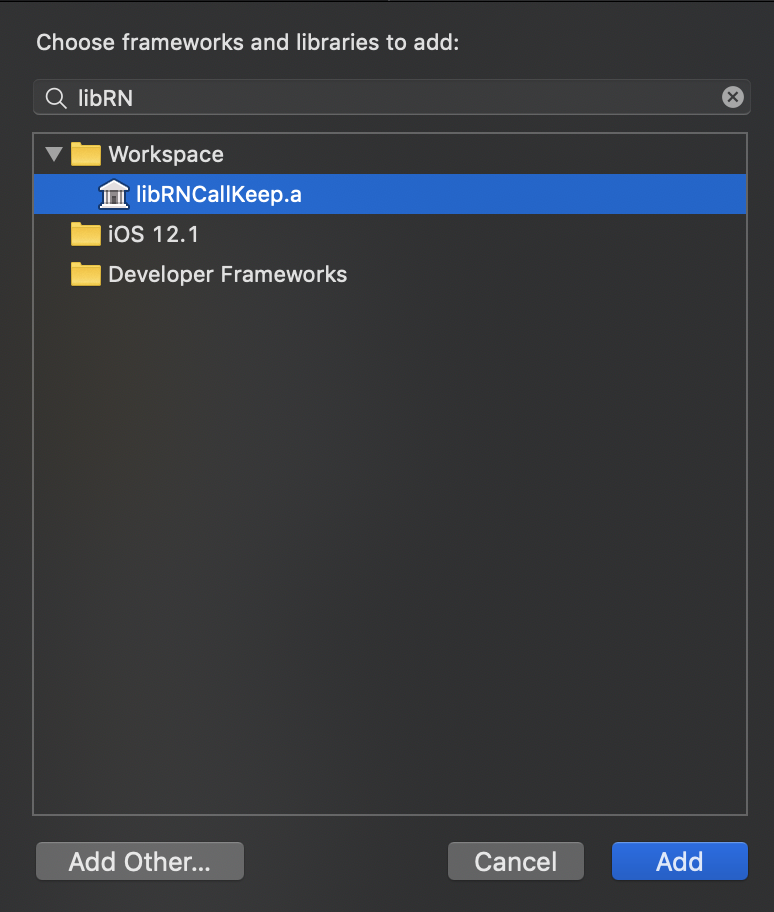
2.1. Click on `Build Phases` tab, then open `Link Binary With Libraries`.
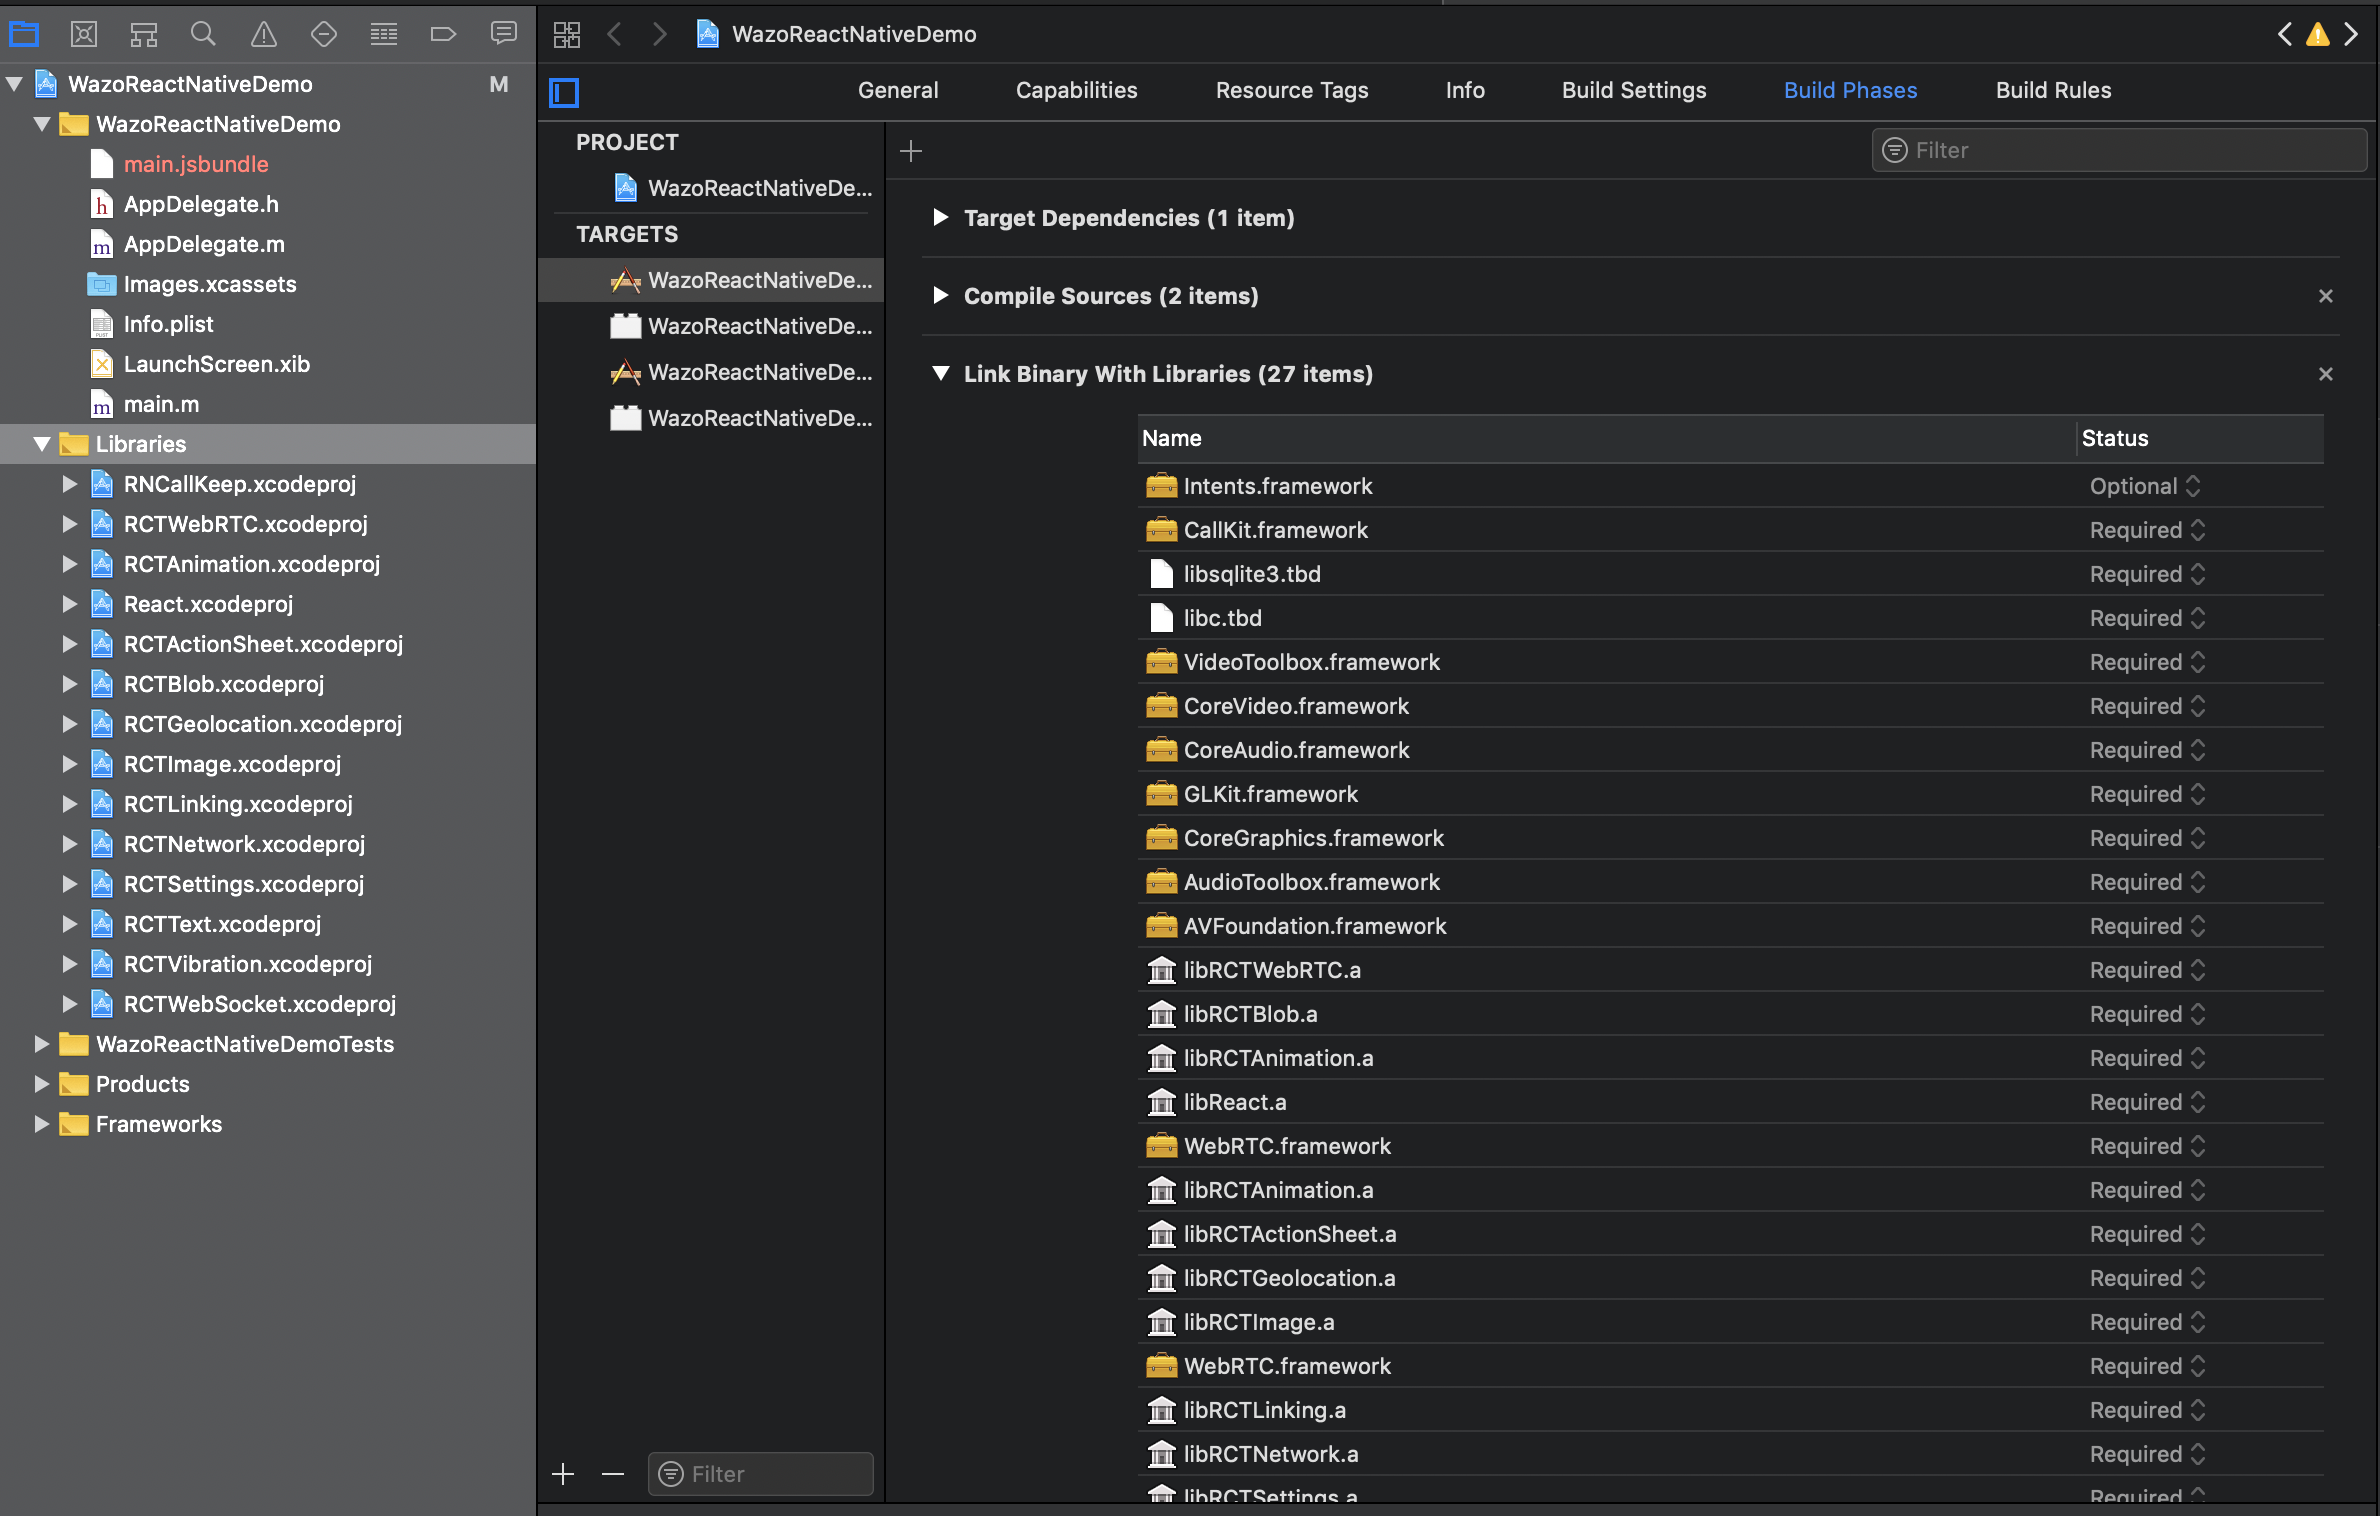
2.2. Add `libRNCallKeep.a`.
## Common installation steps
### 1. Link required libraries
1.1. Click on `Build Phases` tab, then open `Link Binary With Libraries`.
1.2. Add `CallKit.framework` and `Intents.framework` (and mark it `Optional`).

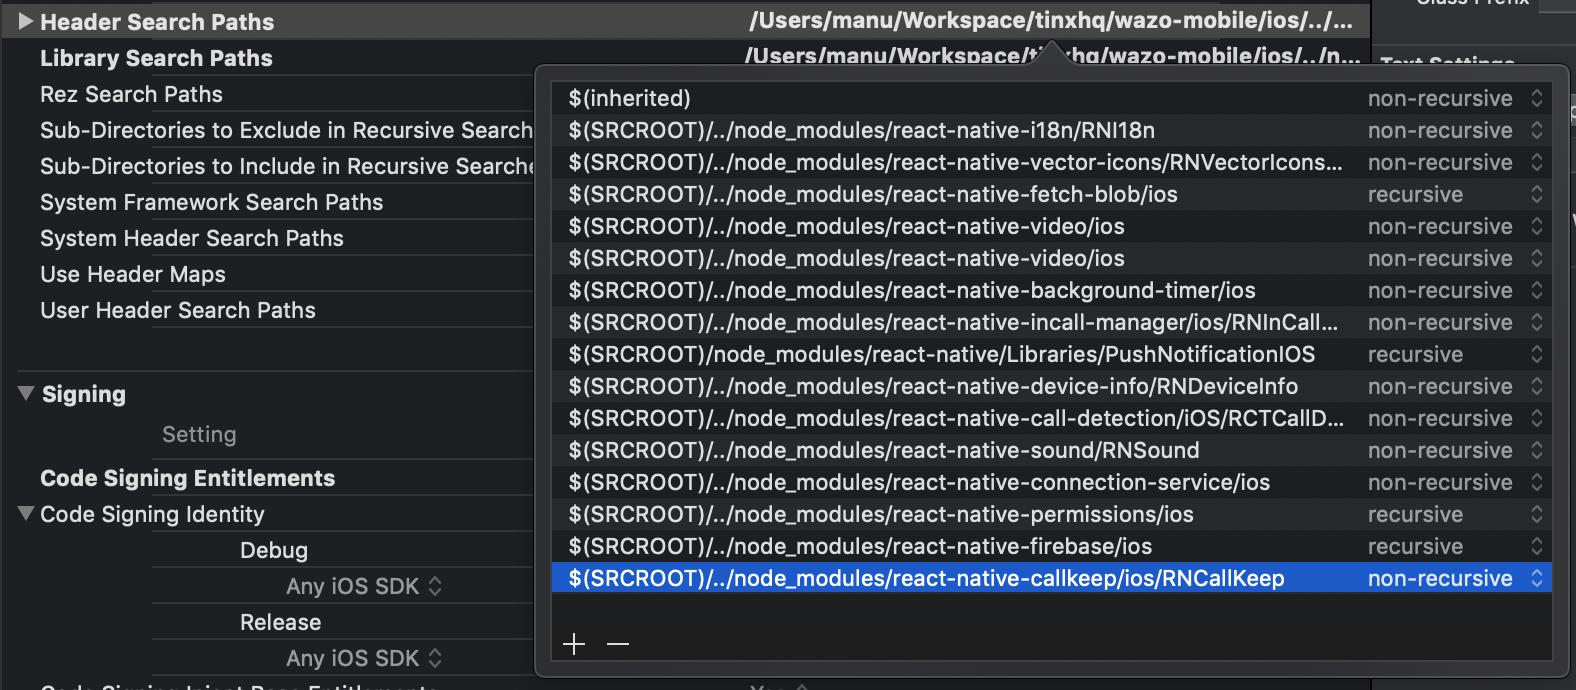
### 2. Add header search path
2.1. Click on `Build Settings` tab, then search for `Header Search Paths`.
2.2. Add `$(SRCROOT)/../node_modules/react-native-callkeep/ios/RNCallKeep`.
### 3. Allow voip background
3.1. Open `Info.plist` file and add `voip` in `UIBackgroundModes`.

By editing this file with a text editor, your should see:
```
UIBackgroundModes
voip
```
### 4. Updating AppDelegate.m
4.1. Import Library:
```diff
+ #import "RNCallKeep.h"
```
4.2. Handling User Activity.
This delegate will be called when the user tries to start a call from native Phone App.
Add it before the `@end` tag.
```diff
+ - (BOOL)application:(UIApplication *)application
+ continueUserActivity:(NSUserActivity *)userActivity
+ restorationHandler:(void(^)(NSArray> * __nullable restorableObjects))restorationHandler
+ {
+ return [RNCallKeep application:application
+ continueUserActivity:userActivity
+ restorationHandler:restorationHandler];
+ }
```