 We recommend using a virtual environment for development. [Read about it here](https://pypi.org/project/virtualenv/).
Follow the following steps to create a virtual environment, clone the repository and install all the packages.
### Cloning the repo
```bash
# Python 3.6+ required
git clone https://github.com/redis-developer/Reeko-Slack-Bot
cd Reeko-Slack-Bot
python3 -m venv env
source env/bin/activate
pip3 install -r requirements.txt
```
We recommend using a virtual environment for development. [Read about it here](https://pypi.org/project/virtualenv/).
Follow the following steps to create a virtual environment, clone the repository and install all the packages.
### Cloning the repo
```bash
# Python 3.6+ required
git clone https://github.com/redis-developer/Reeko-Slack-Bot
cd Reeko-Slack-Bot
python3 -m venv env
source env/bin/activate
pip3 install -r requirements.txt
```
 ---
### ngrok
##### Using ngrok as a local proxy
To develop locally we'll be using ngrok, which allows you to expose a public endpoint that Slack can use to send your app events. If you haven't already, [install ngrok from their website](https://ngrok.com/download) .
[Read more about ngrok](https://api.slack.com/tutorials/tunneling-with-ngrok)
---
### ngrok
##### Using ngrok as a local proxy
To develop locally we'll be using ngrok, which allows you to expose a public endpoint that Slack can use to send your app events. If you haven't already, [install ngrok from their website](https://ngrok.com/download) .
[Read more about ngrok](https://api.slack.com/tutorials/tunneling-with-ngrok)
 ---
### AWS Account
You need a verified aws account to test the [process_resume.py](./process_resume.py)
You can get your credentials file at ~/.aws/credentials (C:\Users\USER_NAME\.aws\credentials for Windows users) and copy the following lines in the [.env](./.env) file.
Also add your S3 bucket name in the .env file
```bash
AWS_ACCESS_KEY_ID="YOUR_ACCESS_KEY_ID"
AWS_SECRET_ACCESS_KEY="YOUR_SECRET_ACCESS_KEY"
BUCKET_NAME="YOUR_BUCKET_NAME"
```
---
### AWS Account
You need a verified aws account to test the [process_resume.py](./process_resume.py)
You can get your credentials file at ~/.aws/credentials (C:\Users\USER_NAME\.aws\credentials for Windows users) and copy the following lines in the [.env](./.env) file.
Also add your S3 bucket name in the .env file
```bash
AWS_ACCESS_KEY_ID="YOUR_ACCESS_KEY_ID"
AWS_SECRET_ACCESS_KEY="YOUR_SECRET_ACCESS_KEY"
BUCKET_NAME="YOUR_BUCKET_NAME"
```
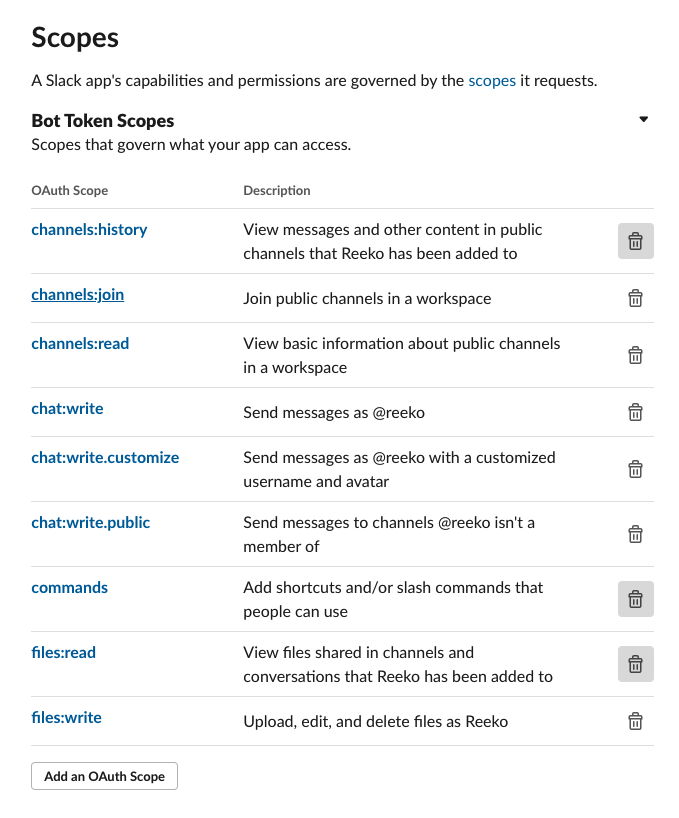
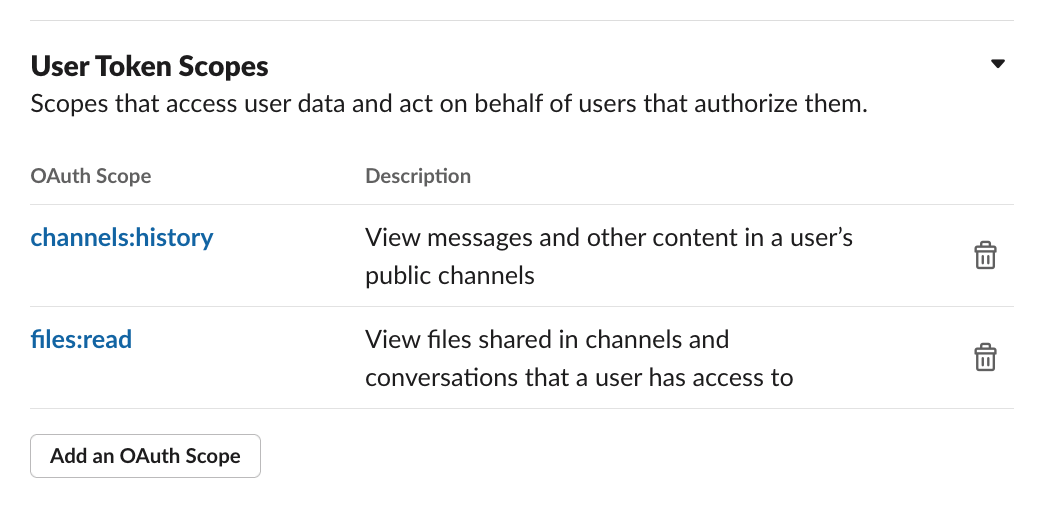
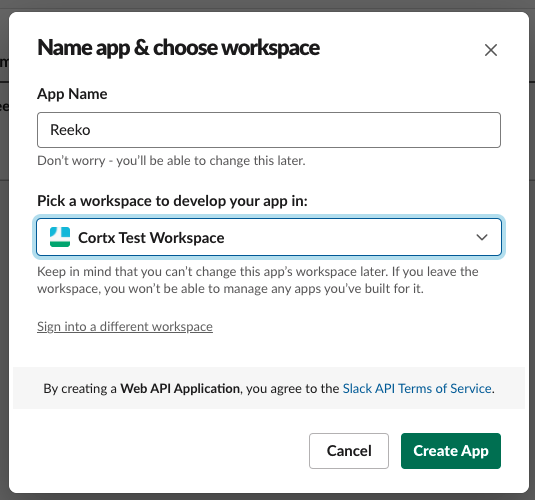 3. Requesting scopes - [Scopes](https://api.slack.com/scopes) give your app permission to do things (for example, post messages) in your development workspace. You can select the scopes to add to your app by navigating over to the _OAuth & Permissions_ sidebar.
4. Add the following scopes the _Bot Token Scopes_ by clicking on the `Add an OAuth Scope ` button
3. Requesting scopes - [Scopes](https://api.slack.com/scopes) give your app permission to do things (for example, post messages) in your development workspace. You can select the scopes to add to your app by navigating over to the _OAuth & Permissions_ sidebar.
4. Add the following scopes the _Bot Token Scopes_ by clicking on the `Add an OAuth Scope ` button
| OAuth Scope | Description |
|---|---|
| channels:history | View messages and other content in public channels that reeko has been added to |
| channels:join | Join public channels in a workspace |
| channels:read | View basic information about public channels in a workspace |
| chat:write | Send messages as @reeko |
| chat:write.customize | Send messages as @reeko with a customized username and avatar |
| chat:write.public | Send messages to channels @reeko isn't a member of |
| commands | Add shortcuts and/or slash commands that people can use |
| files:read | View files shared in channels and conversations that reeko has been added to |
| files:write | Upload, edit, and delete files as reeko |
| OAuth Scope | Description |
|---|---|
| channels:history | View messages and other content in public channels that reeko has been added to |
| files:read | View files shared in channels and conversations that reeko has been added to |
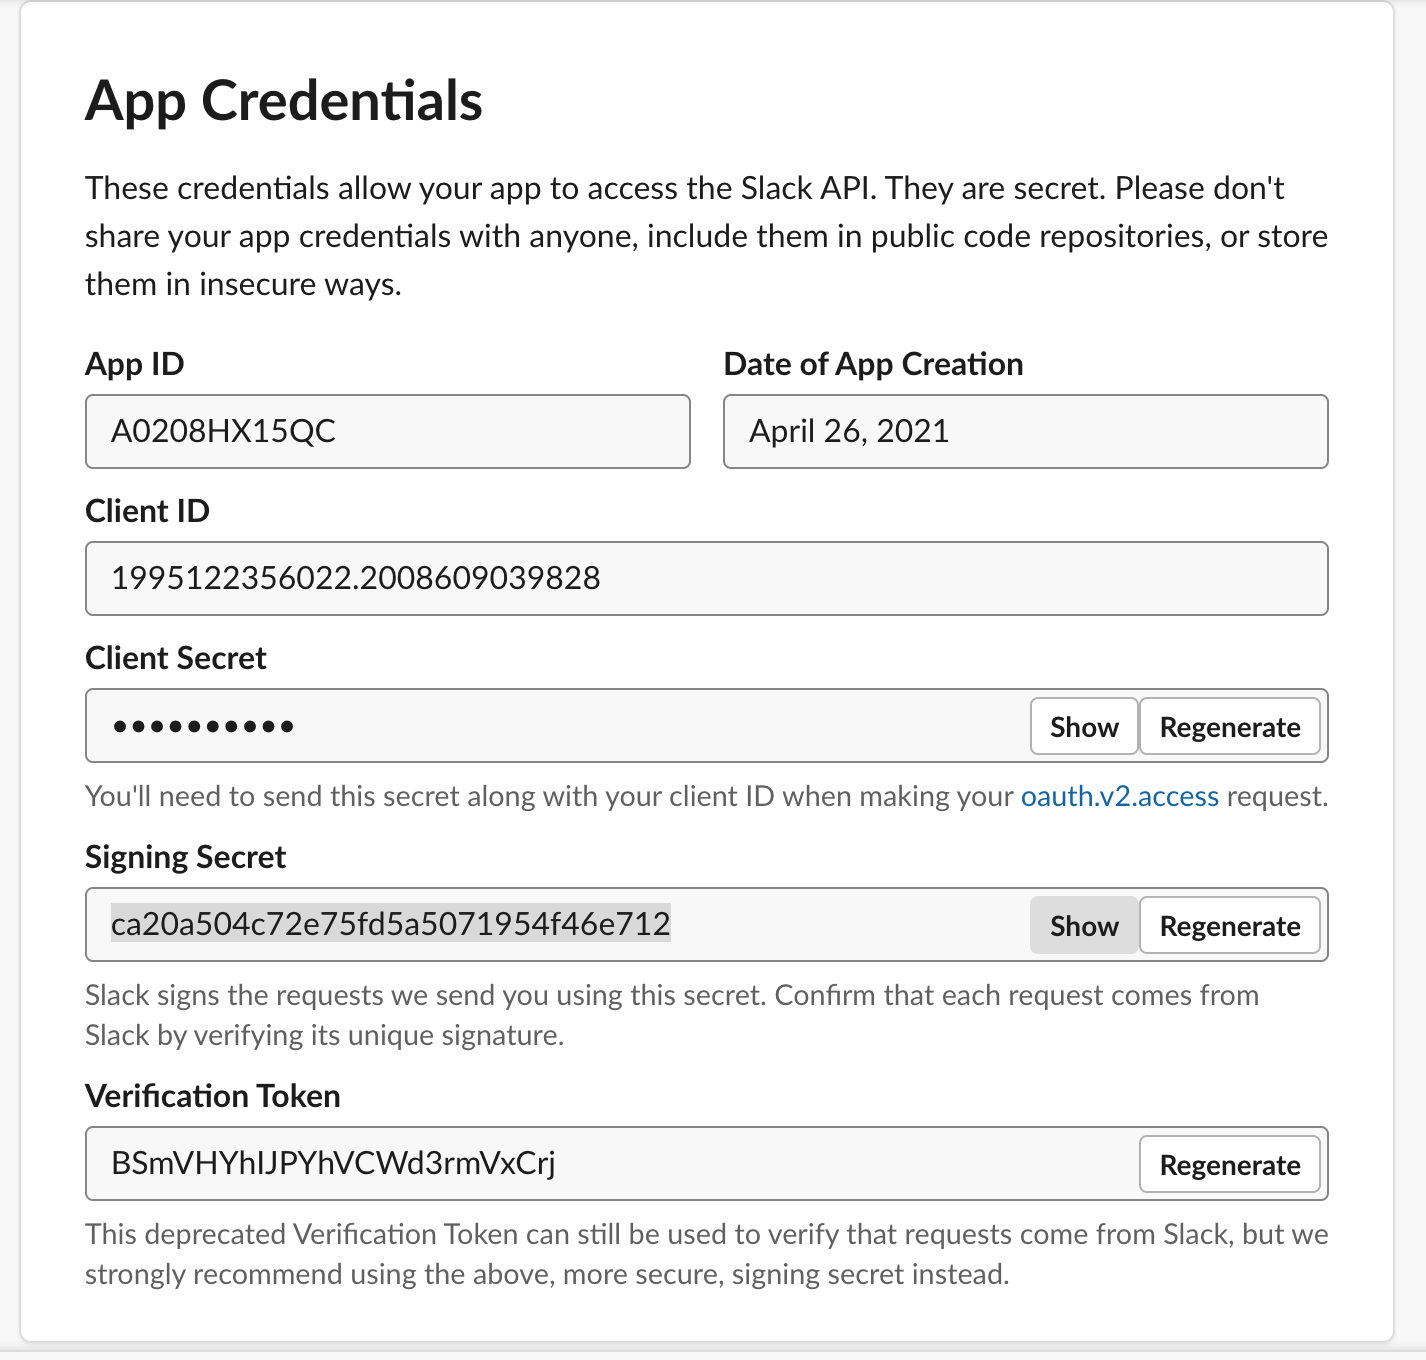
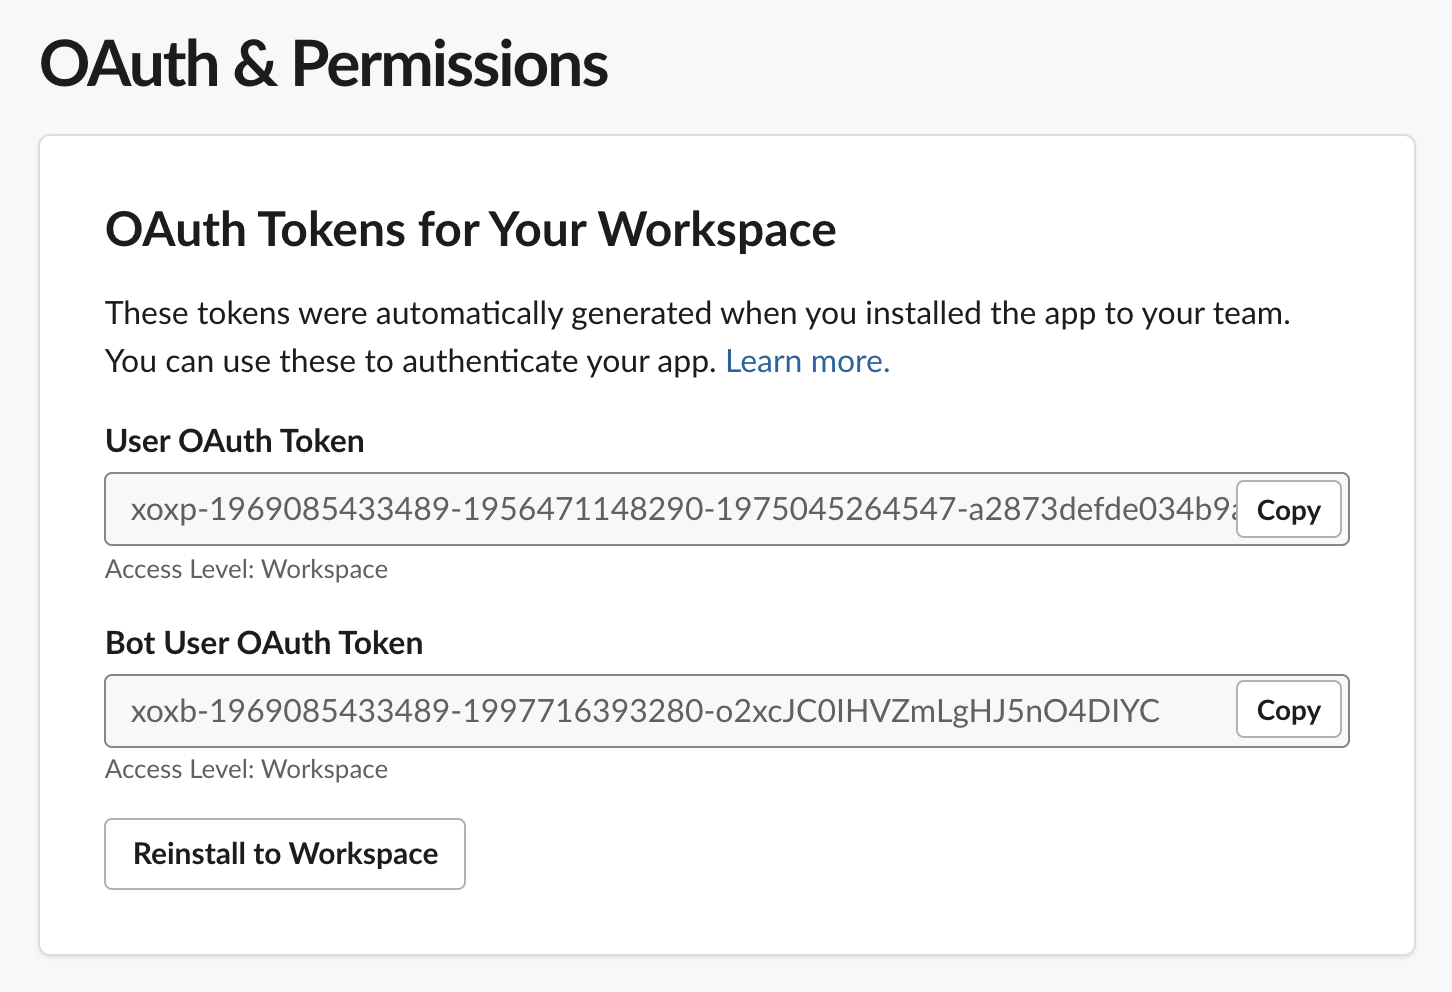 9. In addition to the access token, you'll need a signing secret. Your app's signing secret verifies that incoming requests are coming from Slack. Navigate to the _Basic Information_ page from your [app management page](https://api.slack.com/apps). Under App Credentials, copy the value for _Signing Secret_ and add it to the [.env](./env) file.
```bash
SLACK_SIGNING_SECRET=your-signing-secret
```
9. In addition to the access token, you'll need a signing secret. Your app's signing secret verifies that incoming requests are coming from Slack. Navigate to the _Basic Information_ page from your [app management page](https://api.slack.com/apps). Under App Credentials, copy the value for _Signing Secret_ and add it to the [.env](./env) file.
```bash
SLACK_SIGNING_SECRET=your-signing-secret
```
 10. Make sure you have followed the steps in [Cloning the repo](#Cloning-the-repo). To start the bolt app. The HTTP server is using a built-in development adapter, which is responsible for handling and parsing incoming events from Slack on port 3000
```bash
python3 app.py
```
10. Make sure you have followed the steps in [Cloning the repo](#Cloning-the-repo). To start the bolt app. The HTTP server is using a built-in development adapter, which is responsible for handling and parsing incoming events from Slack on port 3000
```bash
python3 app.py
```
 Open a new terminal and ensure that you've installed [ngrok](#ngrok), go ahead and tell ngrok to use port 3000 (which Bolt for Python uses by default):
```bash
ngrok http 3000
```
Open a new terminal and ensure that you've installed [ngrok](#ngrok), go ahead and tell ngrok to use port 3000 (which Bolt for Python uses by default):
```bash
ngrok http 3000
```
 For local slack development, we'll use your ngrok URL from above, so copy it your clipboard
```bash
For example: https://your-own-url.ngrok.io (copy to clipboard)
```
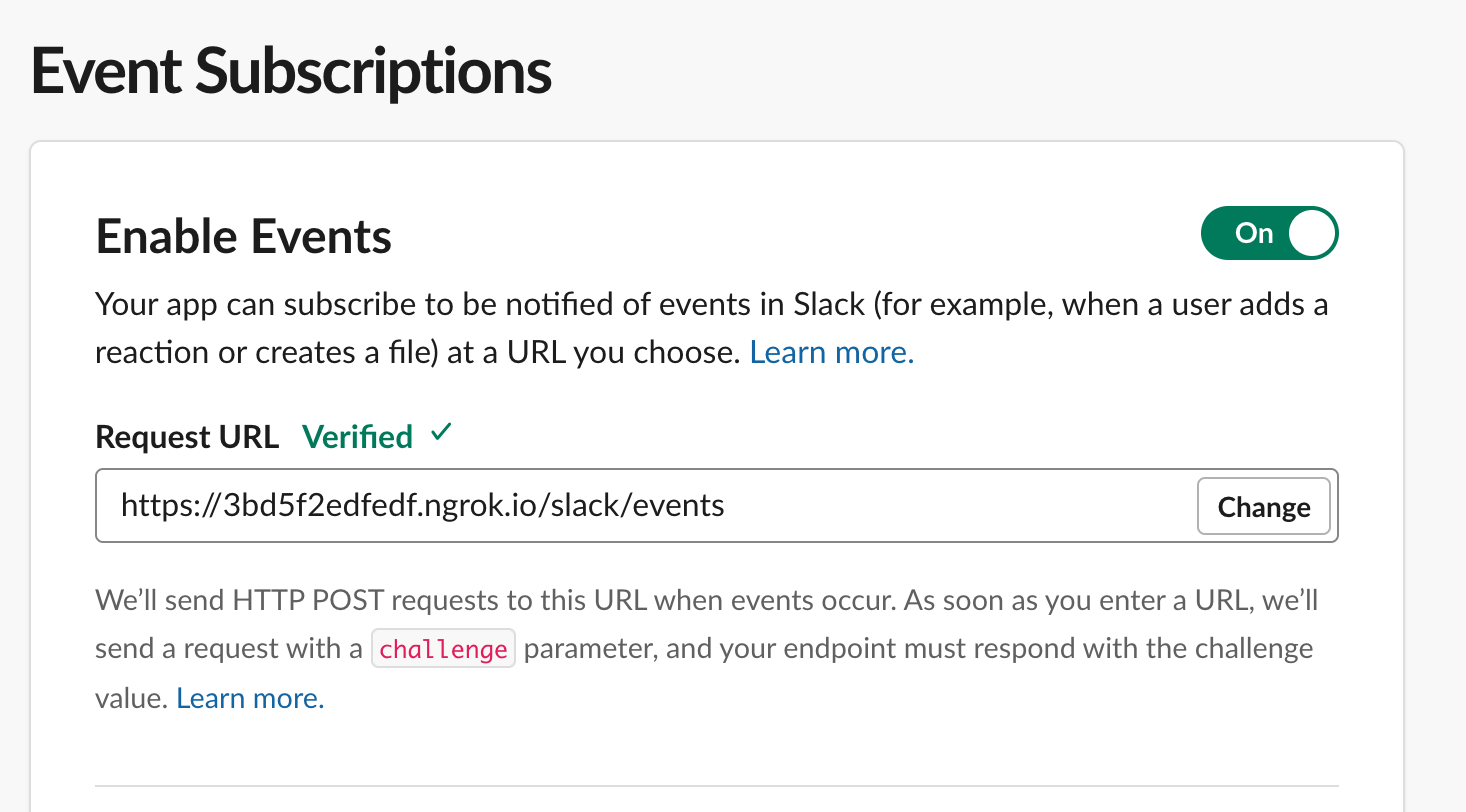
11. Subscribing to events - Your app can listen to all sorts of events happening around your workspace — messages being posted, files being shared, and more. On your app configuration page, select the _Event Subscriptions_ sidebar. You'll be presented with an input box to enter a `Request URL`, which is where Slack sends the events your app is subscribed to. _Hit the save button_
By default Bolt for Python listens for all incoming requests at the /slack/events route, so for the Request URL you can enter your ngrok URL appended with /slack/events.
```bash
Request URL: https://your-own-url.ngrok.io/slack/events
```
If the challenge was successful you will get a verified right next to the Request URL.
For local slack development, we'll use your ngrok URL from above, so copy it your clipboard
```bash
For example: https://your-own-url.ngrok.io (copy to clipboard)
```
11. Subscribing to events - Your app can listen to all sorts of events happening around your workspace — messages being posted, files being shared, and more. On your app configuration page, select the _Event Subscriptions_ sidebar. You'll be presented with an input box to enter a `Request URL`, which is where Slack sends the events your app is subscribed to. _Hit the save button_
By default Bolt for Python listens for all incoming requests at the /slack/events route, so for the Request URL you can enter your ngrok URL appended with /slack/events.
```bash
Request URL: https://your-own-url.ngrok.io/slack/events
```
If the challenge was successful you will get a verified right next to the Request URL.
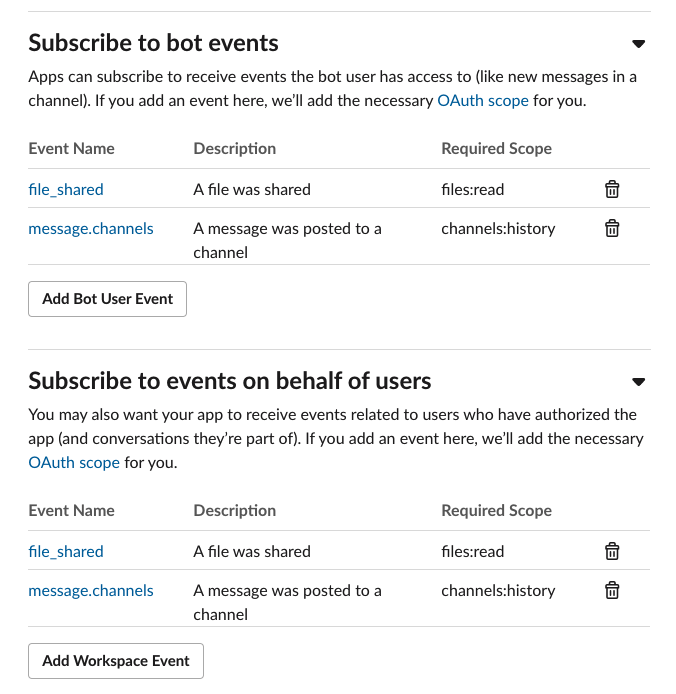
 On the same page click on the `Subscribe to bot events` menu on the bottom of the page. Click on the `Add Bot User Event` .
Similary click on the `Subscribe to events on behalf of user`. Click on the `Add Workspace Event`.
Add the following scopes
On the same page click on the `Subscribe to bot events` menu on the bottom of the page. Click on the `Add Bot User Event` .
Similary click on the `Subscribe to events on behalf of user`. Click on the `Add Workspace Event`.
Add the following scopes
| EventName | Description | Required Scope |
|---|---|---|
| file_share | A file was shared | files:read |
| message.channels | A message was posted to a channel | channesls:history |
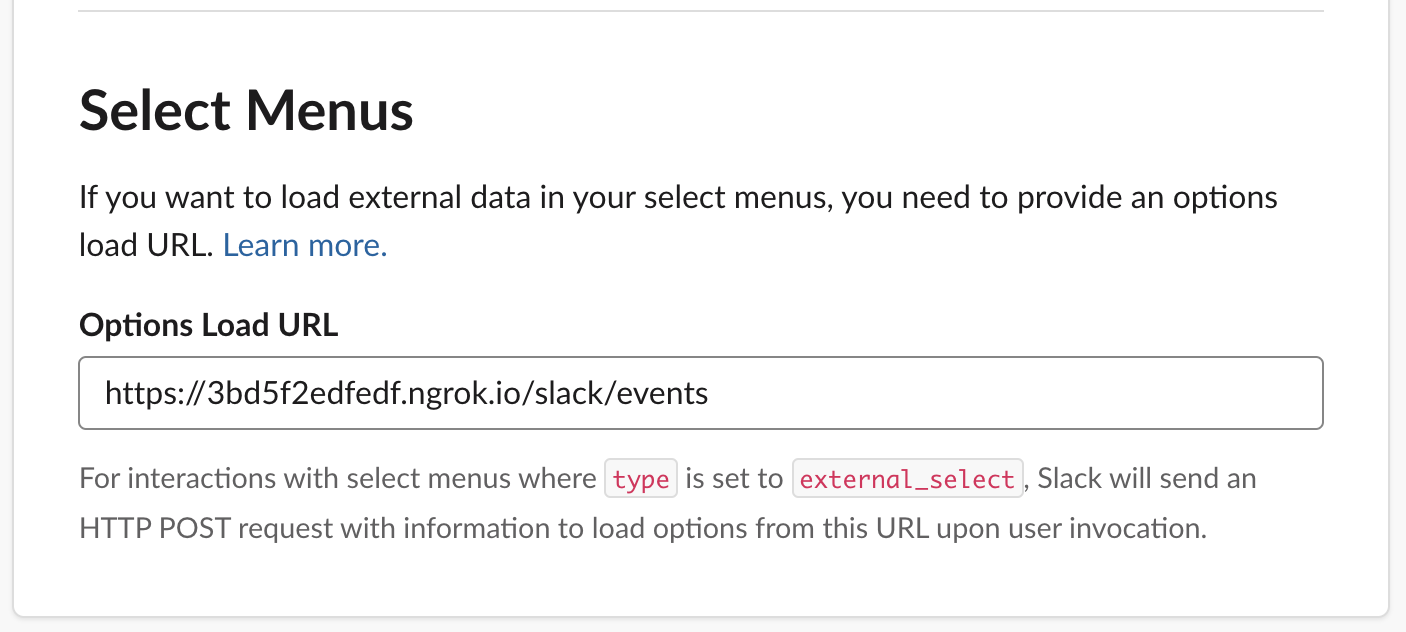
 13. Scroll down to the _Select Menus_ section, in the Options Load URL, enter your ngork URL appended with /slack/events
```bash
Options Load URL: https://your-own-url.ngrok.io/slack/events
```
13. Scroll down to the _Select Menus_ section, in the Options Load URL, enter your ngork URL appended with /slack/events
```bash
Options Load URL: https://your-own-url.ngrok.io/slack/events
```
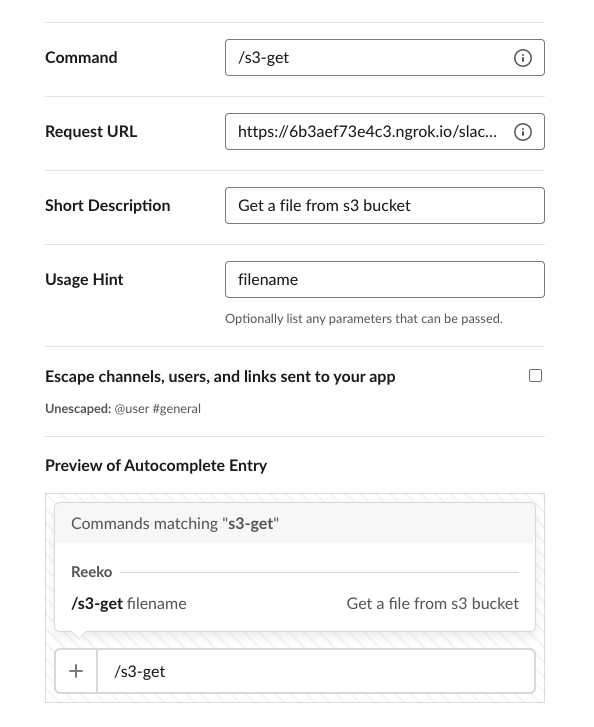
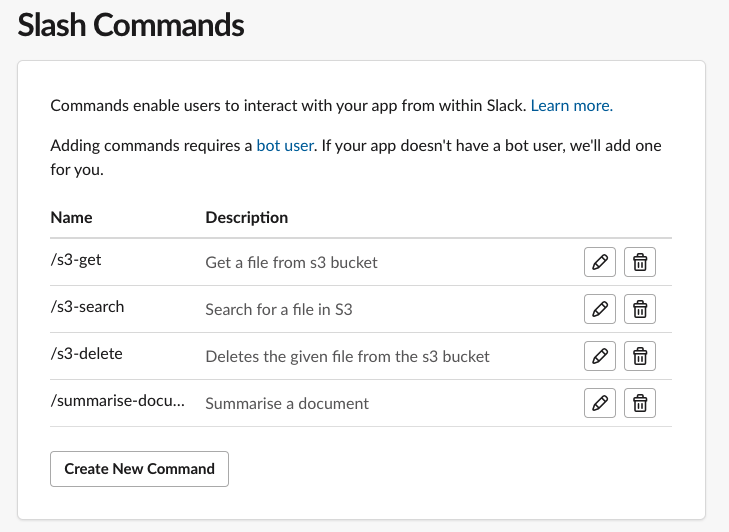
 14. Finally we come to the slash commands. Slack's custom slash commands perform a very simple task: they take whatever text you enter after the command itself (along with some other predefined values), send it to a URL, then accept whatever the script returns and posts it as a Slackbot message to the person who issued the command. We have 5 slash commands to be added in the workspace.
Head over to the _Slash Commands_ sidebar and click on the `Create New Command` button to head over the Create New Command page.
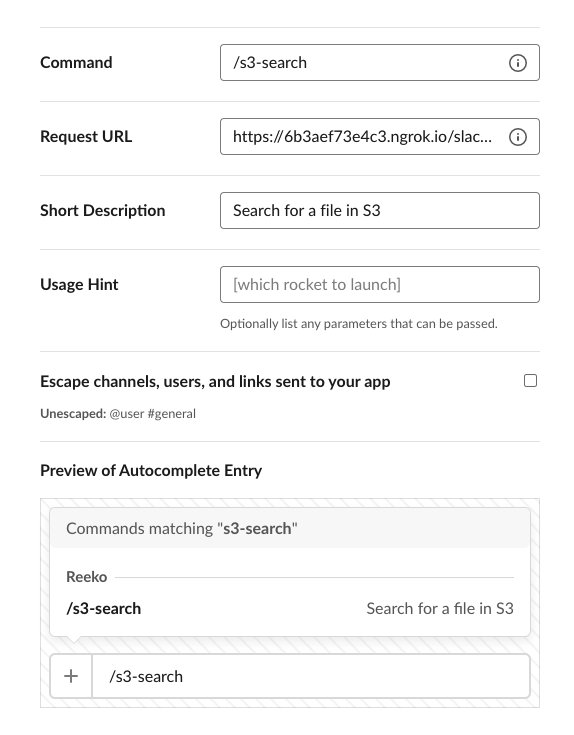
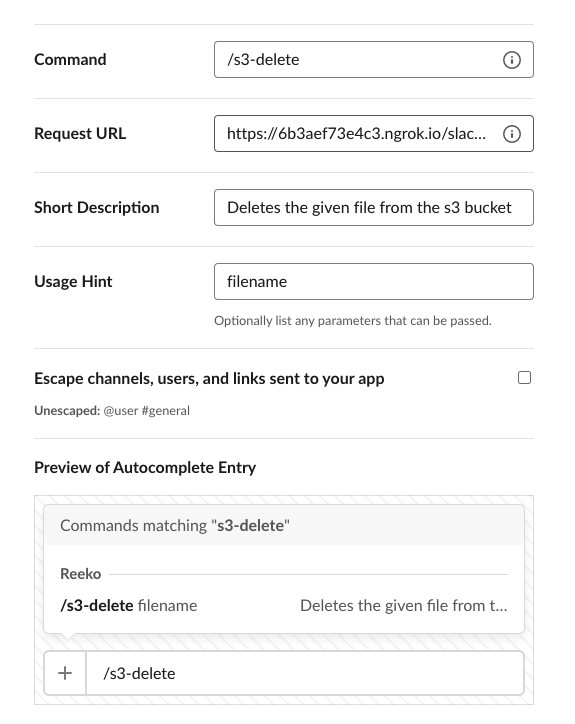
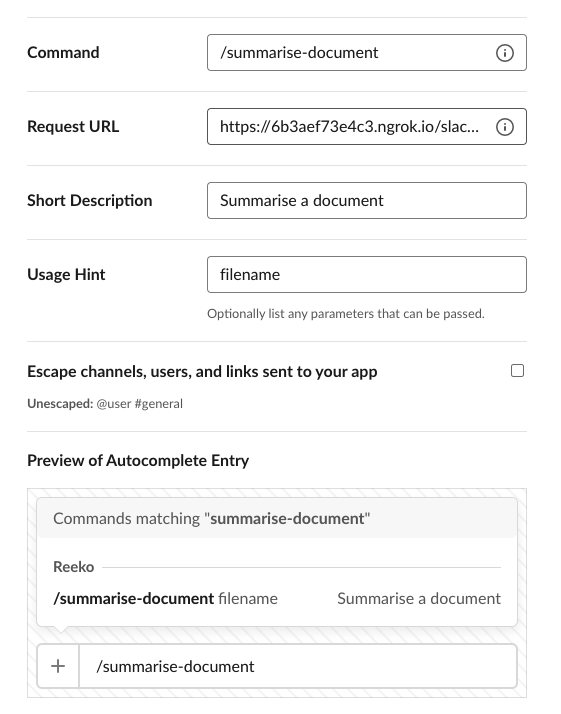
Add the Command, Request URL,Short Description and Usage hint, according to the table provided below.
Click on Save to return to the _Slash Commands_
14. Finally we come to the slash commands. Slack's custom slash commands perform a very simple task: they take whatever text you enter after the command itself (along with some other predefined values), send it to a URL, then accept whatever the script returns and posts it as a Slackbot message to the person who issued the command. We have 5 slash commands to be added in the workspace.
Head over to the _Slash Commands_ sidebar and click on the `Create New Command` button to head over the Create New Command page.
Add the Command, Request URL,Short Description and Usage hint, according to the table provided below.
Click on Save to return to the _Slash Commands_
| Command | Request URL | Short Description | Usage Hint |
|---|---|---|---|
| /s3-get | https://your-own-url.ngrok.io/slack/events | Get a file from s3 bucket | filename |
| /s3-search | https://your-own-url.ngrok.io/slack/events | Search for a file in S3 | |
| /s3-delete | https://your-own-url.ngrok.io/slack/events | Deletes the given file from the s3 bucket | filename |
| /summarise-document | https://your-own-url.ngrok.io/slack/events | Summarise a document | filename |
 15. Watch the [video]() to know more about using these slack commands
16. Open the slack channel and upload a file in any channel, note the file name
15. Watch the [video]() to know more about using these slack commands
16. Open the slack channel and upload a file in any channel, note the file name