
# Chipify


(c) 2026 Santiago Hofwimmer BSc
Institute for Integrated Circuits and Quantum Computing, Johannes Kepler University (JKU), Linz, Austria
[Link to repository](https://github.com/santihofi/chipify/)
[Link to Youtube Channel (tutorials following soon)](https://www.youtube.com/@chipify-eda)
> [!WARNING]
> This repository is a Work in Progress.
> [!IMPORTANT]
> It is recomended to use the [IIC-OSIC-TOOLS](https://github.com/iic-jku/iic-osic-tools) container. Otherwise, you have to install [Ngspice](https://github.com/ngspice/ngspice), [Xschem](https://github.com/StefanSchippers/xschem) and [IHP-Open-PDK](https://github.com/IHP-GmbH/IHP-Open-PDK) manually as prerequisites.
> [!IMPORTANT]
> Currently, only the [IHP-Open-PDK](https://github.com/IHP-GmbH/IHP-Open-PDK) is fully supported, but more will follow soon
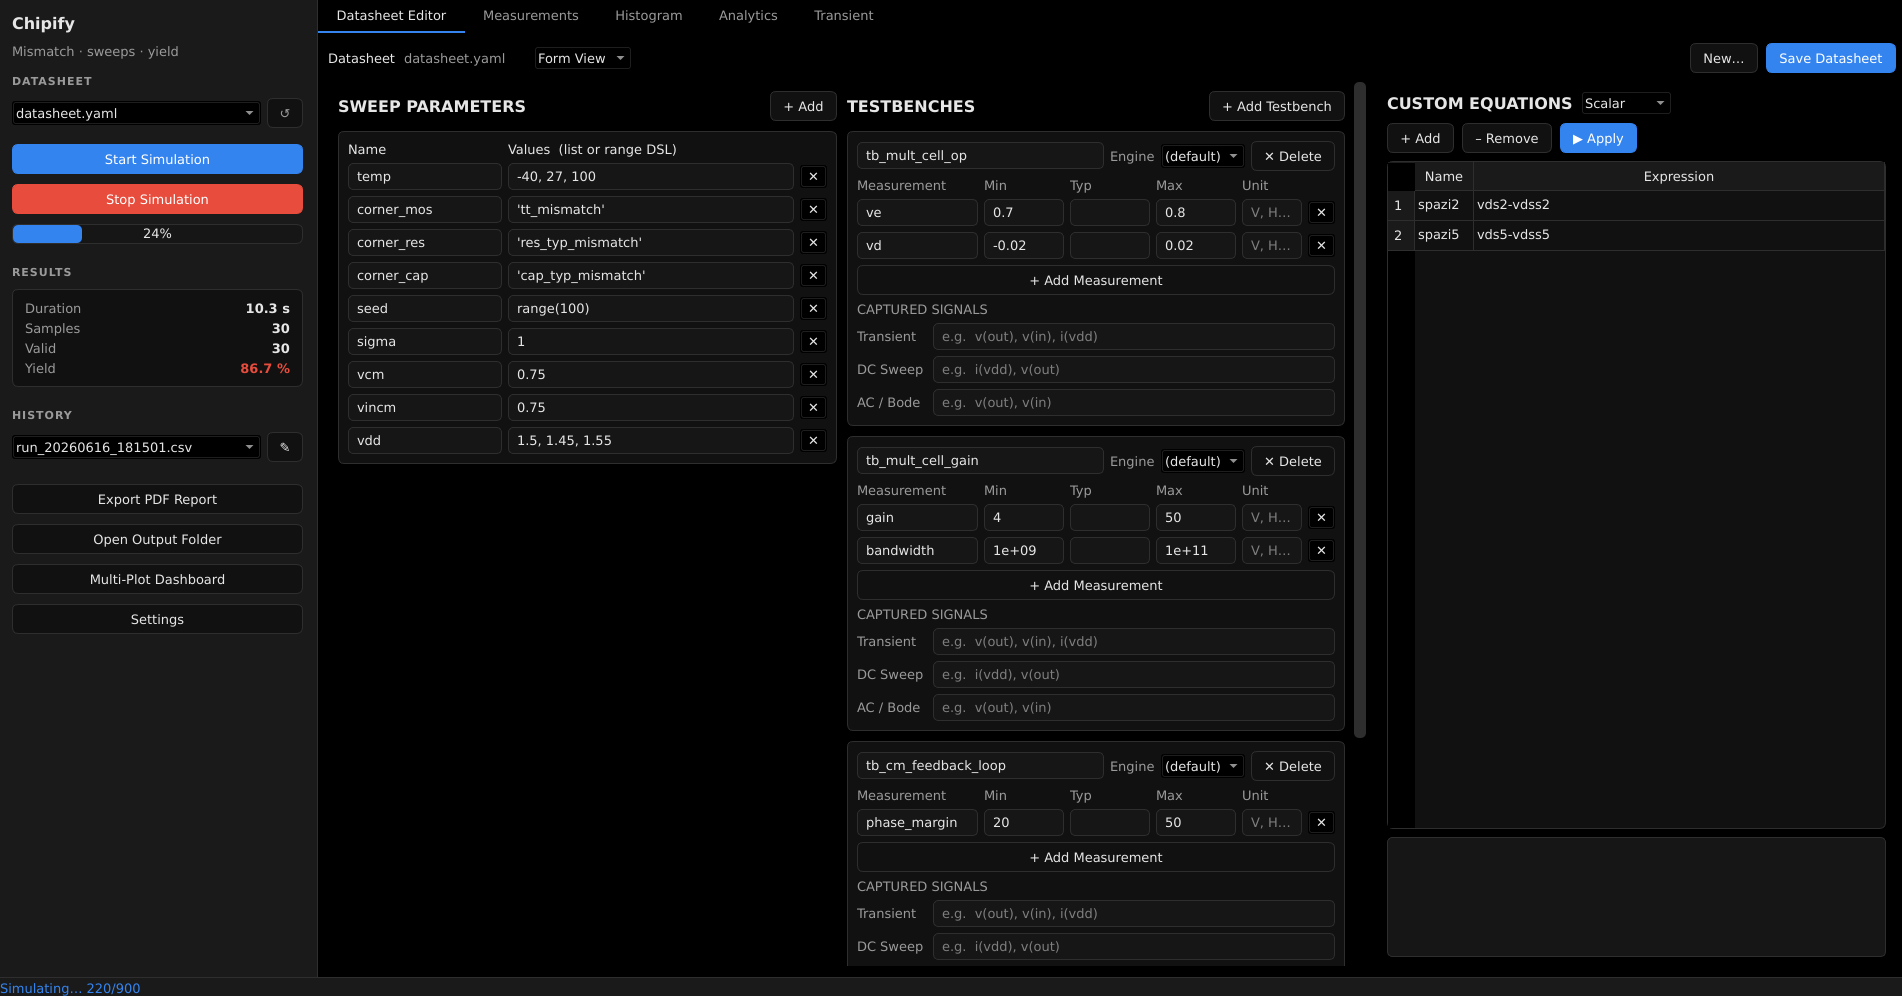
**Chipify** is a high-performance EDA (Electronic Design Automation) tool for
**mismatch simulations, parameter sweeping, and yield analysis**. It wraps
[Xschem](https://xschem.sourceforge.io/) (schematic capture) and
[Ngspice](https://ngspice.sourceforge.io/) (circuit simulation) to automate
Monte-Carlo and corner sweeps, run them in parallel, and turn the raw results
into plots, yield matrices, and reports.
It ships with both a **PySide6 (Qt) desktop GUI** and a **headless CLI**, plus
a plugin system for custom plots, reports, and expressions.
## Features
- **Parallel sweeps** — multiprocessing pool runs Monte-Carlo / corner cases across all cores.
- **Datasheet-driven** — describe parameters, tests, and pass/fail specs in a single YAML file.
- **Range DSL** — `range`, `linspace`, and `logspace` parameter sweeps (safely parsed, no `eval`).
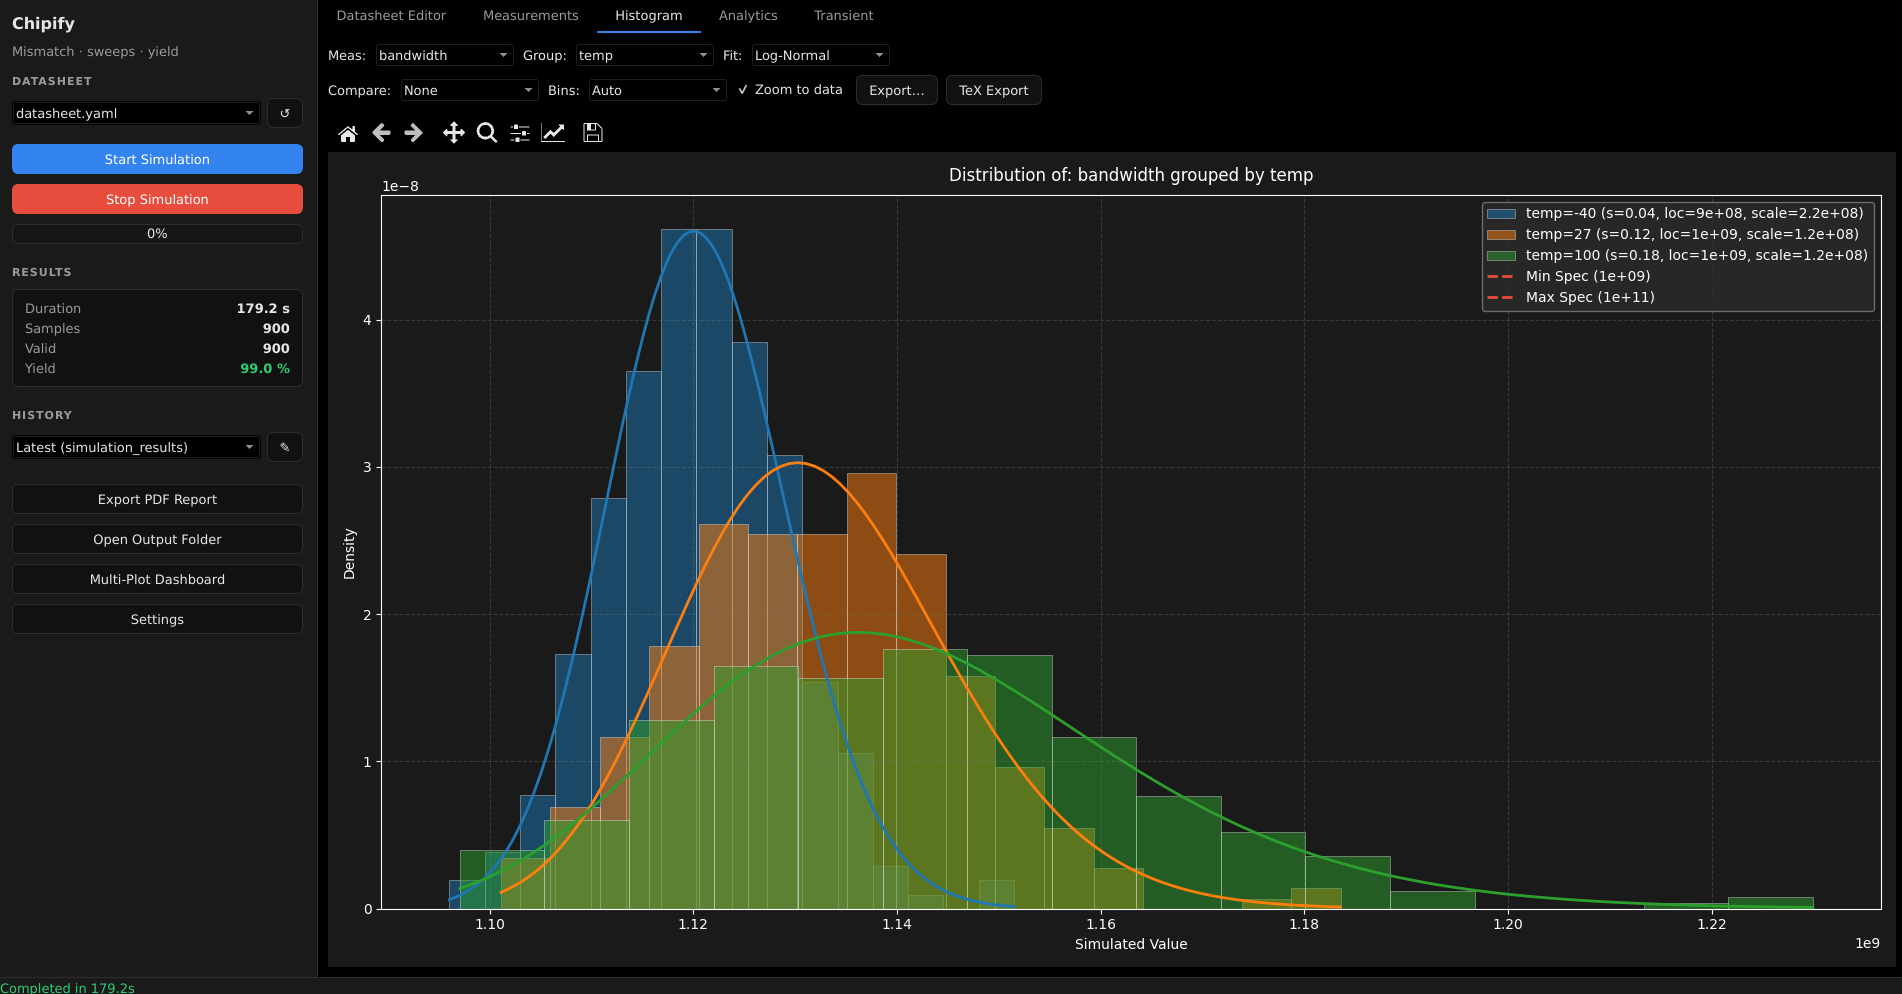
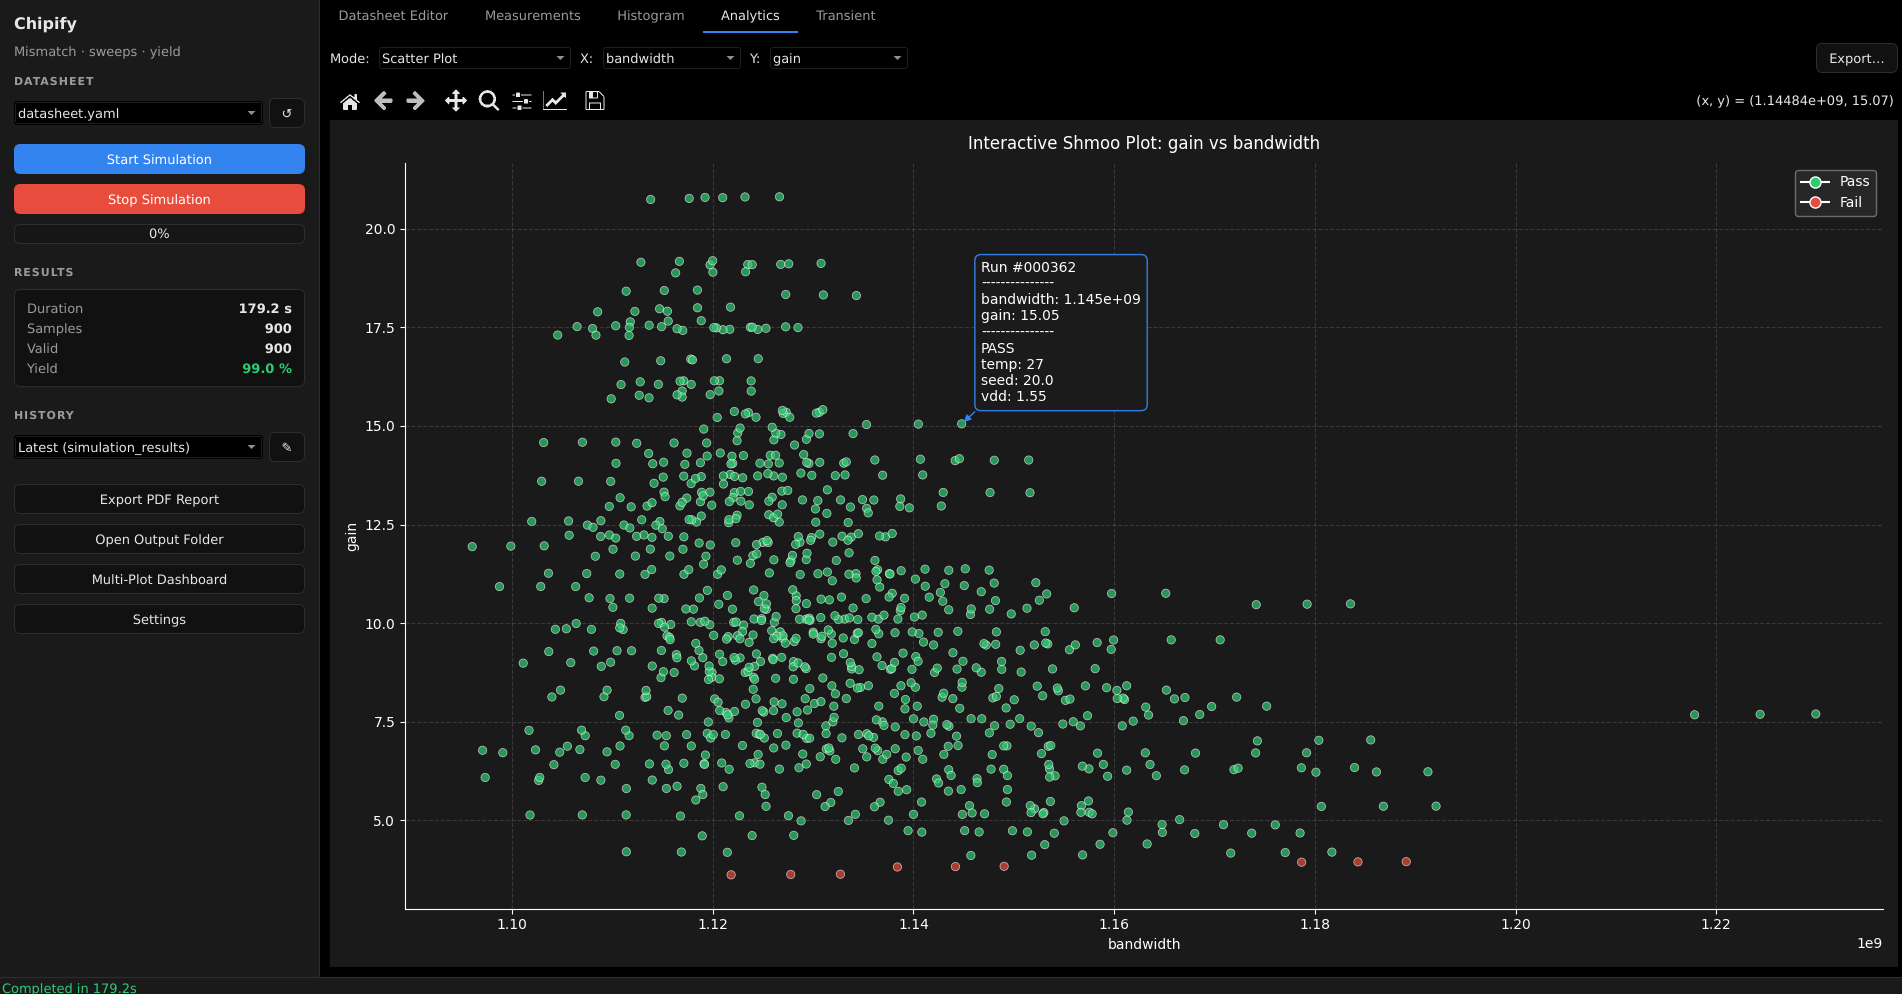
- **Yield & statistics** — pass/fail yield, histograms with distribution fits, corner yield matrices.
- **Safe custom expressions** — derive new metrics with a sandboxed evaluator (no arbitrary code execution).
- **Reports** — export to PDF, Markdown, and LaTeX; PNG/SVG plot exporters.
- **Pluggable** — add your own plots, reports, expressions, and exporters (see [PLUGINS.md](PLUGINS.md)).
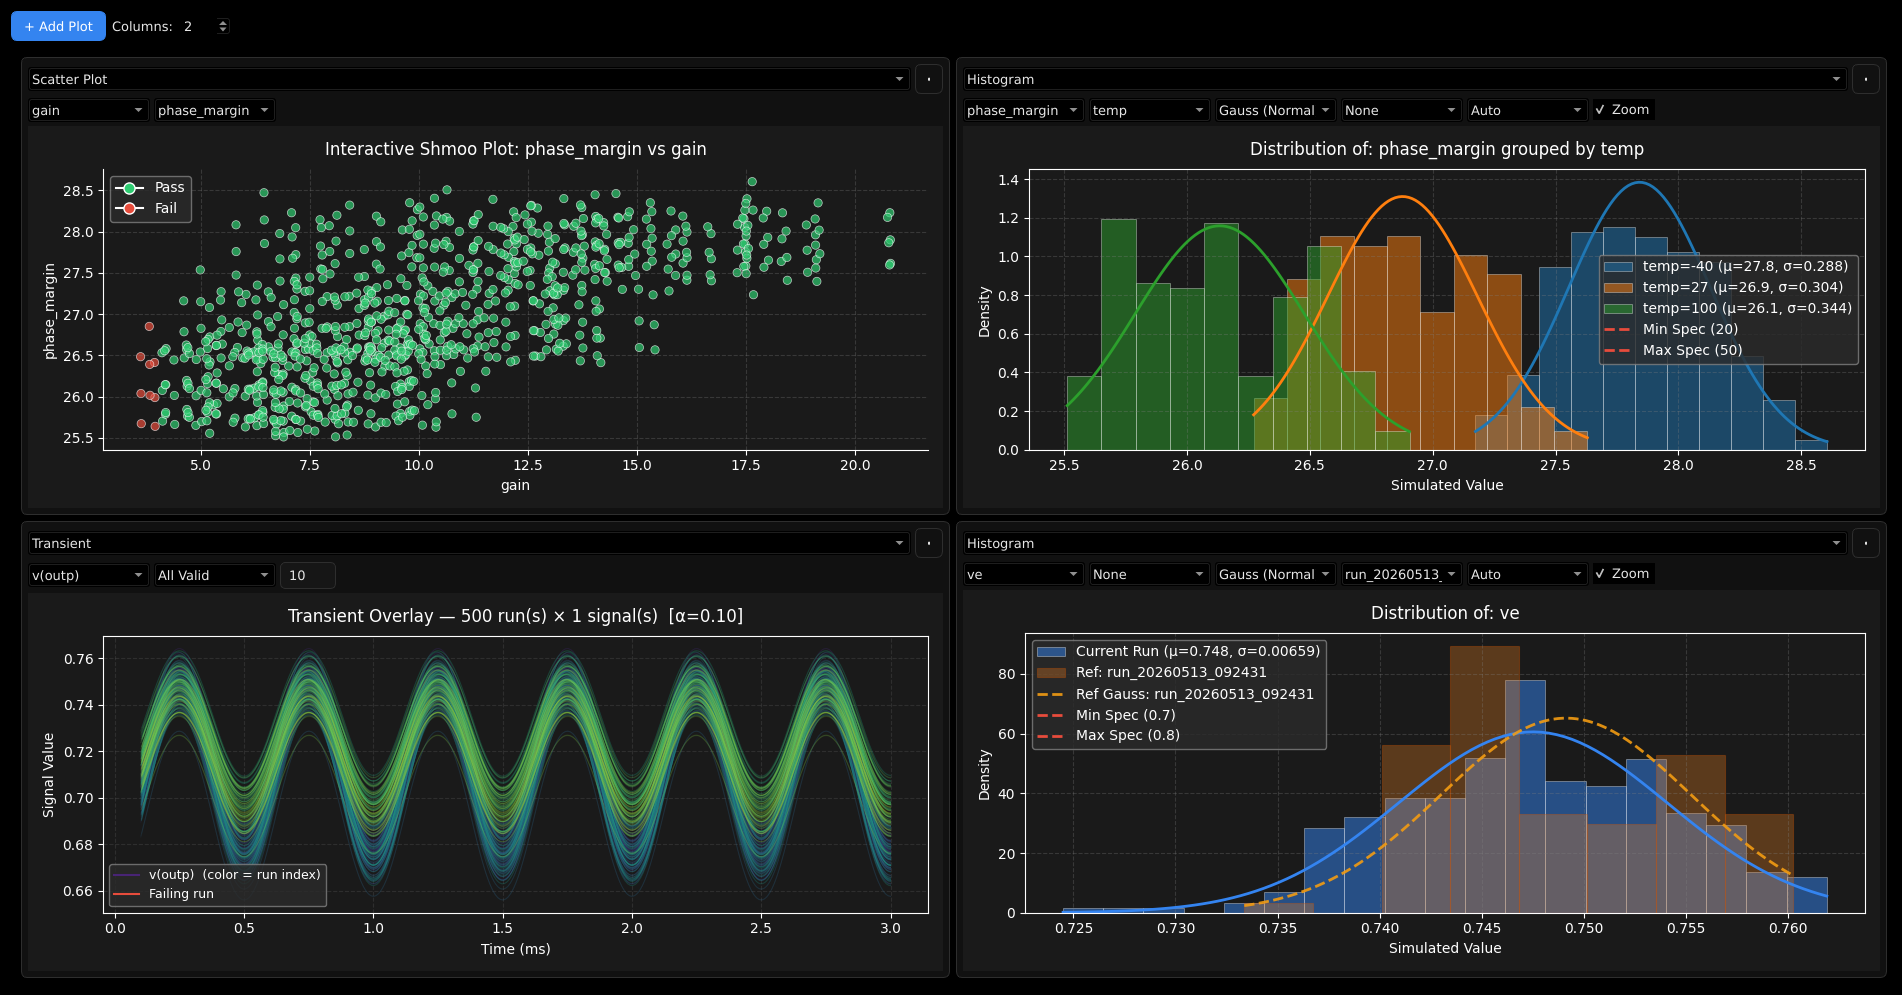
- **Multi Plot Dashboard** - arrange a selection of plots on a second window.
## Prerequisites
Chipify is a *wrapper* around external EDA tools, so these must be installed and
available on your `PATH`:
- **Python 3.11+**
- **[Ngspice](https://ngspice.sourceforge.io/)** — the SPICE simulator
- **[Xschem](https://xschem.sourceforge.io/)** — schematic capture / netlist generation
- *(optional)* **[VACASK](https://vacask.fke.uni-lj.si/)** + PyOPUS — alternative simulation backend
- *(Linux)* **PySide6 system libraries** — the Qt GUI runs on `PySide6-Essentials`
(installed automatically by pip; only QtCore/QtGui/QtWidgets are used, so the
larger PySide6 Addons aren't needed). Qt still needs a few shared libraries that
pip can't install:
- **`libegl1` / `libgl1`** (`libEGL.so.1` / `libGL.so.1`) are dlopened when Qt
is imported — required even for the headless test suite. Without them you get
`ImportError: libEGL.so.1: cannot open shared object file`.
- **`libxcb-cursor0`** (Qt ≥ 6.5) is needed by the `xcb`/XWayland platform for
the on-screen GUI; without it a Wayland session falls back to native Wayland,
where dropdown menus don't close on selection.
`install.sh` installs all of these automatically on Debian/Ubuntu; elsewhere
install them with your package manager (e.g. `apt install libegl1 libgl1
libxcb-cursor0`). System libraries can't be declared in
`setup.py`/`pyproject.toml`, so they're handled by `install.sh`.
It is highly recommended to install and run Chipify inside the [IIC-OSIC-TOOLS](https://github.com/iic-jku/iic-osic-tools) docker container. This way, all the required tools plus a bunch of open source PDKs are already installed.
## Installation
```bash
python3 -m pip install chipify
```
## Quick start
### Desktop GUI
```bash
chipify
```
This opens the desktop application where you can edit datasheets, launch sweeps,
and explore results interactively.
### Headless CLI
See [`examples/datasheet.yaml`](examples/datasheet.yaml) for a documented
datasheet template (and [examples/README.md](examples/README.md) for how to run
it). Place your datasheet YAML in the input folder (`datasheets/` by default), then:
```bash
chipify-cli -c my_design.yaml # run a single datasheet
chipify-cli --batch ./datasheets # run every *.yaml in a directory
chipify-cli -c my_design.yaml --json # also print a JSON summary (handy for CI)
chipify-cli -c my_design.yaml --markdown report.md
```
Results are written to the output folder (`out/` by default), including
`simulation_results.csv` and any generated reports. Run `chipify-cli --help`
for the full list of options.
## Configuration
User preferences are stored in `settings.json` in the directory you launch
Chipify from (CPU cores, simulator engine, theme, live plotting, …). The file
is created/updated by the GUI's settings dialog. Custom equations live in the
datasheet YAML (`equations:` / `transient_equations:`), not in `settings.json`.
### Folder paths
By default Chipify uses this layout under the working directory:
| Folder | `settings.json` key | Default |
| -------------- | ------------------- | -------------- |
| Input datasheets | `in_dir` | `datasheets/` |
| Simulation output | `out_dir` | `out/` |
| Model files (`*.lib`/`*.mod`/`*.inc` staged for simulation) | `work_dir` | `work/` |
| Testbench files | `tb_dir` | `tb/` |
To relocate any of them, set the corresponding key in `settings.json` to an
absolute or relative path, e.g.:
```json
{
"out_dir": "results",
"in_dir": "/data/chipify/datasheets"
}
```
Any key that is missing or blank falls back to its default. Paths are resolved
when Chipify starts, so changes take effect on the next launch.
### Importing SPICE netlists (skip schematic entry)
By default each testbench netlists an Xschem schematic (`tb/.sch`) for you.
If you don't use schematic entry, set the optional per-testbench `source: netlist`
key — Chipify then loads an existing SPICE deck for that testbench directly and
skips Xschem. The deck is located by convention, next to where the schematic
would live: `tb/.spice` for ngspice, `tb/.sim` for vacask.
```yaml
tests:
gain_tb: # loads tb/gain_tb.spice instead of tb/gain_tb.sch
engine: ngspice # selects the simulator (and the .spice/.sim extension)
source: netlist # default is "xschem"
gain:
min: 40
unit: dB
```
In the desktop GUI this is the per-testbench **Source** dropdown (`xschem` /
`netlist`). The `engine:` key still chooses the simulator. Downstream everything
is unchanged — parameter sweeps, measurement capture, pass/fail specs, and
reports all work exactly as with a schematic.
Authoring an imported netlist:
- **Swept parameters** are substituted via Jinja2 `{{ param }}` placeholders in
the deck (e.g. `V1 vdd 0 {{ vdd }}`). A value that isn't a placeholder is the
same for every sweep point.
- The whole deck is rendered as a Jinja2 template, so **avoid stray literal
`{...}` braces** (inline expressions like `{R*2}`) — they raise a template
error. Precompute such values in a `.control`/`.param` form that doesn't use
bare braces.
- **ngspice (managed capture):** name your `let`/`meas` vectors after the
datasheet measurement keys and add your analysis (`tran`/`dc`/`ac`) in a
`.control` block. Do **not** hand-write `echo MY_DATA:`/`wrdata` lines —
Chipify injects those from the datasheet, just as it does for Xschem output.
- **vacask:** provide a `.sim` deck that writes a `.raw` consistent with the
Spectre path; Chipify extracts scalars/waveforms from the `.raw` file (and any
`measure:` expressions) in the datasheet.
- **Model files** referenced via `.include`/`.lib` can be given three ways:
- a **bare filename** (`.include models.lib`) — put the file in `work/`
(`*.lib`/`*.mod`/`*.inc` are staged into the scratch dir automatically);
- a **relative path** (`.include ../macros/amp.spice`) — resolved against the
directory of the testbench itself, and baked into the deck as an absolute
path before it runs. If the file isn't there, that testbench fails with an
error naming the path and the directory searched; the rest of the sweep
still runs;
- an **absolute path** — used as-is.
The same applies to `include` / `ahdl_include` / `load` in a vacask `.sim`
deck. Chipify runs the deck from a scratch dir, not from `tb/`, which is why
the relative paths have to be resolved up front.
Re-running against pre-generated templates (the `--templates-dir` flag) still
takes precedence over a per-testbench `source: netlist`.
## Running the examples
The examples for chipify can be found [here](https://github.com/santihofi/chipify-examples)
## Project layout
```
chipify/ # engine (no GUI-toolkit deps)
cli.py # CLI entry point + GUI launcher
simulator.py # multiprocessing simulation engine
schema.py # datasheet validation + range DSL
expression.py # sandboxed expression evaluation
settings.py # project folder paths (configurable via settings.json)
app_config.py # persistent preferences + logging
data_loader.py # results loading / pass-fail / history (shared, headless)
uikit/ # toolkit-agnostic GUI-support layer (state, services, plugin facade)
gui_qt/ # PySide6 (Qt) desktop GUI (tabs / controllers / workers / widgets)
tests/ # pytest suite for the core engine + GUI smoke tests
```
See [context.md](context.md) for the full architecture overview and
[PLUGINS.md](PLUGINS.md) for the plugin API.
## Development
```bash
pip install -e .
pytest # run the test suite
python -m mypy chipify/settings.py # strict type-checking (see pyproject.toml)
```
## License
Licensed under the [Apache License 2.0](LICENSE).