# Import and export
[Documentation](README.md) / Import and export
Bring existing documents in as Markdown, and send notes out as PDF, DOCX, ODT
or HTML.
## Import
Everything comes in as a clean Markdown file in your vault. Existing files are
never overwritten. A name conflict gets a numeric suffix.
### Two ways in
- **Import button in the sidebar.** Pick one or more files.
- **Drag and drop.** Drop files, or whole folders, from Explorer or Finder
onto the sidebar. Drop on a folder in the tree to import there, or anywhere
else for the vault root.
A dropped folder is imported recursively and its subfolder structure is
mirrored. Hidden folders such as `.git` are skipped. Files that cannot be
converted are skipped, and the rest of the batch still imports. A drop is
capped at 100 files.
### Word, PDF and HTML
`.docx`, PDF and HTML are converted **entirely offline**. Headings, lists,
emphasis and tables are kept as far as the source allows. No AI and no
network connection are involved.
Embedded images are extracted into the `images/` folder of your vault and
linked automatically, just like pasted images.
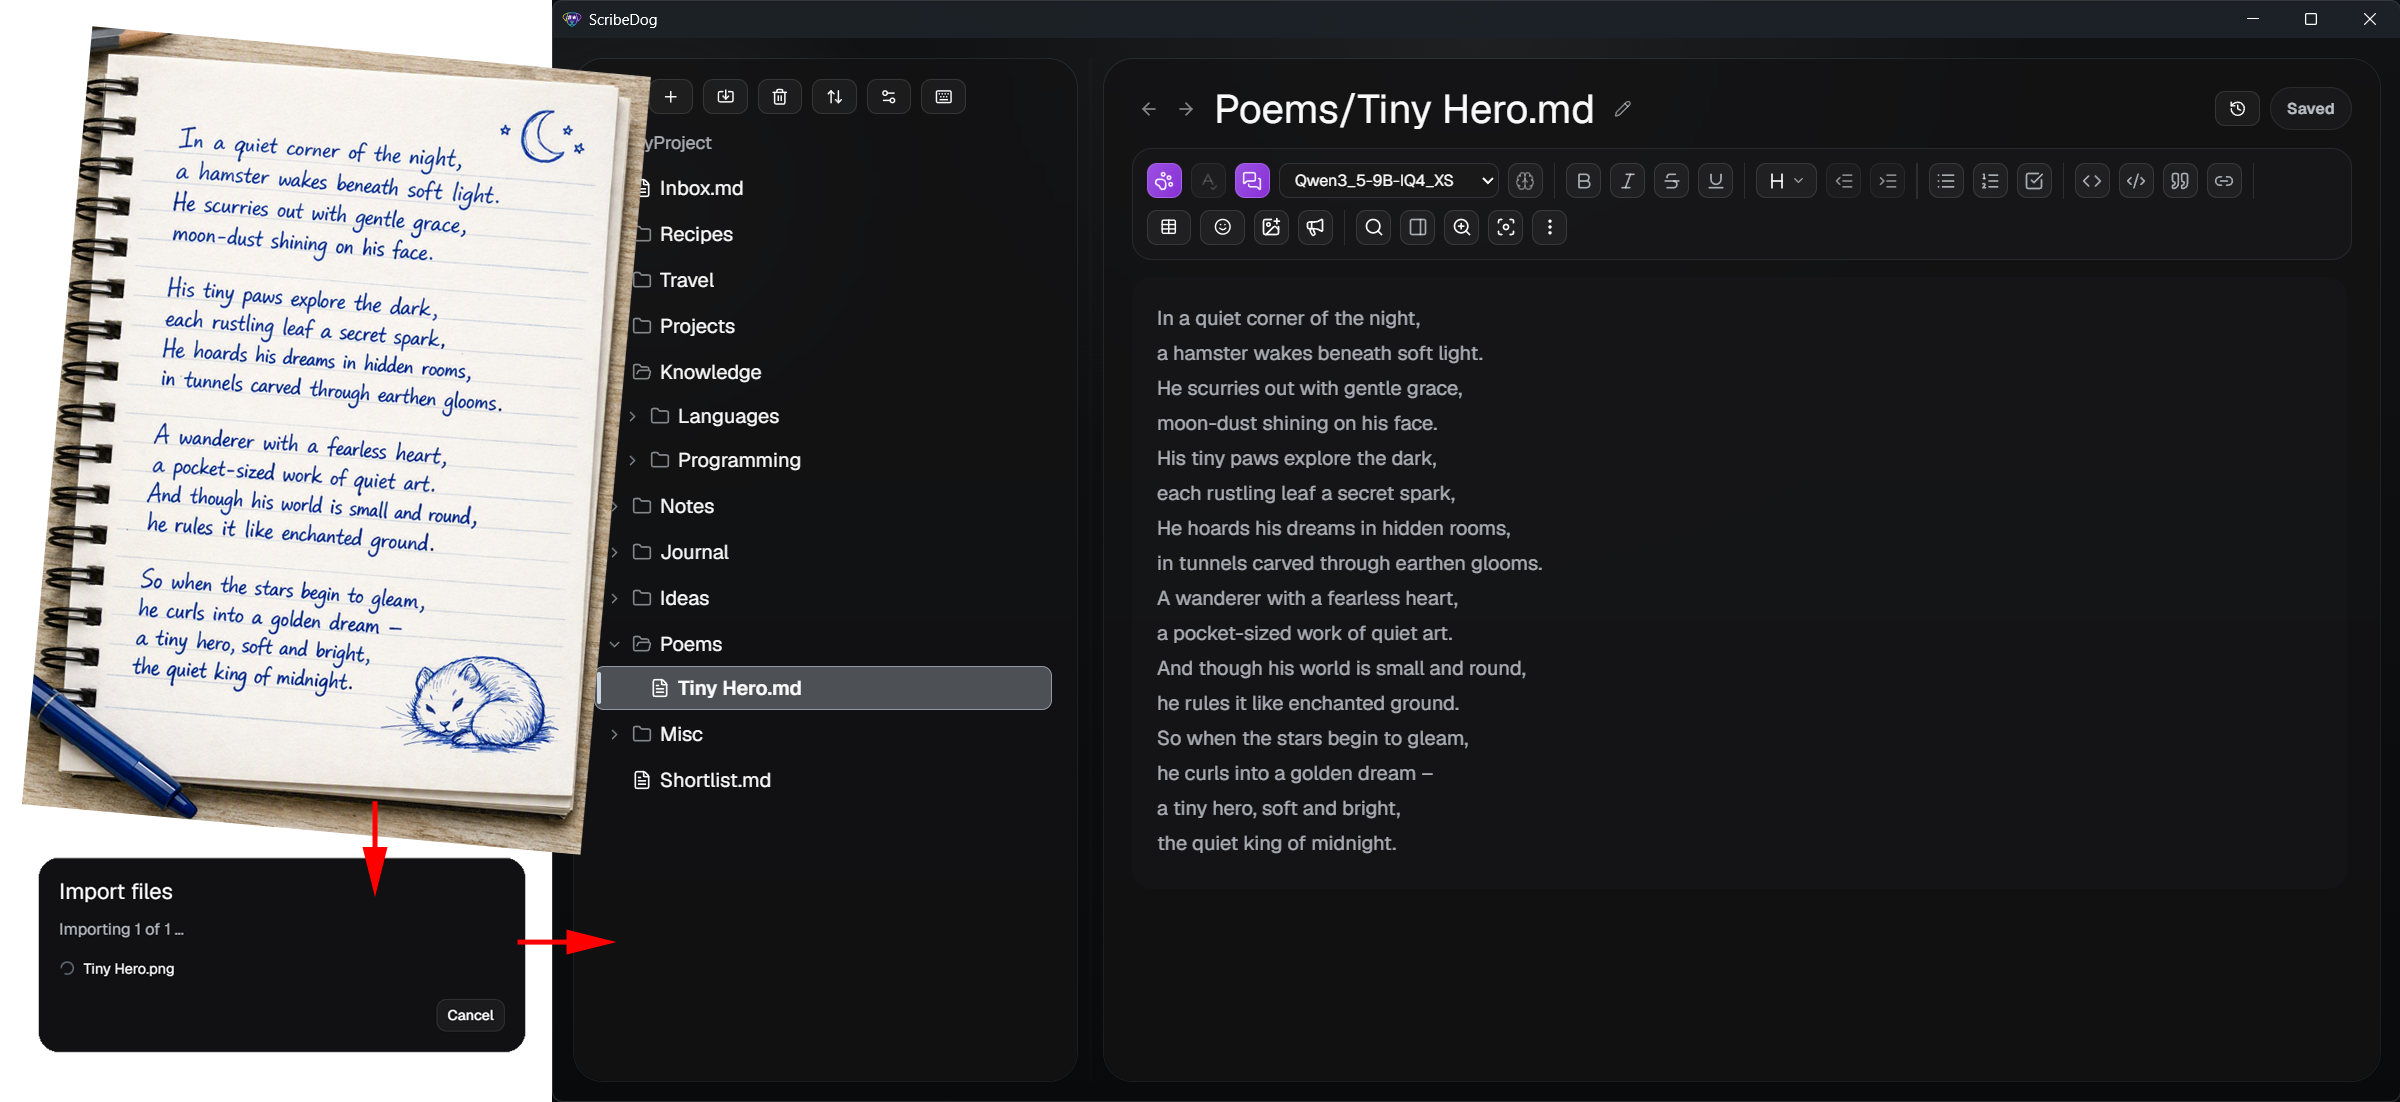
### Images become text
Import screenshots, scans or photos of pages (PNG, JPG, GIF, WebP). Your
configured vision-capable AI model turns them into editable Markdown through
OCR. If your model runs locally, the image stays on your machine.
 ## Export
Right-click a file or a folder in the sidebar and choose **Export**. Formats:
**PDF, DOCX, ODT and HTML**.
- **Folders export recursively** and keep your subfolder structure. A project
folder becomes a set of shareable documents in one go.
- Embedded images and emoji come along, in a clean sans-serif document style.
- Highlights survive every export.
- With folder notes on, the note of a folder is exported as its introduction
chapter.
- Existing files are never silently overwritten. You are asked per file, with
an "apply to all" option. The last export destination is remembered.
## Page setup
Under **Settings, Appearance** you choose the paper: A4, US Letter, A5 or US
Legal, with normal, narrow or wide margins. It applies to PDF, print, DOCX
and ODT alike. Until you pick one, the paper follows the region of your
system.
### Page breaks
- Insert a manual page break with `Ctrl+Enter` or the toolbar.
- It is stored as ``. Typora and
browser printing understand that line too, and other Markdown tools just
show an empty line.
- Headings stay with the text that follows them. An image stays with its
caption, an italic line right below it.
### See the pages while you write
**Show page breaks** in the toolbar options, off by default, draws the end of
each page right in the editor.
PDF export and printing break at exactly those places. Every page keeps one
line free at the bottom so that the print of the browser fits too. Only
scaling in the print dialog moves them.
Printing uses the same font, sizes and table layout as the PDF, so paper and
PDF look alike.
[Back to the documentation index](README.md)