Category 

To open this page, go to Category.
Managing volumes of products requires being able to group together items under specific criteria. With the Category feature, you can group and build hierarchies of products by category. This is how a shop administrator can create a structure to display products by, for example, Electronics. Under this category, you can group all of your products that meet this criteria. Furthermore, you can create nested categories that split the products into smaller groups such as TVs, Mobile Phones, DVDs, etc.
Products can be assigned to any number of Categories by any random or logical category you need. This allows you to create categories such as Summer Sale, Bargain Basement or any other categorization that suits your purposes. The primary uses of categories are to build dynamic category pages and enhance your store's search and filter capabilities.
From the Category menu, you can:
- Create a new product category
- Assign products to a category
- Define a template to a category
- Manage category details
- Assign images to categories
Graphic User Interface
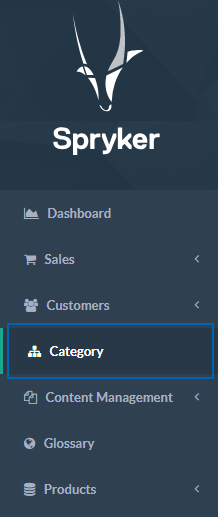
To open Category, on the left-side navigation bar, click Category.
Hover your mouse over the numbers to view their description.
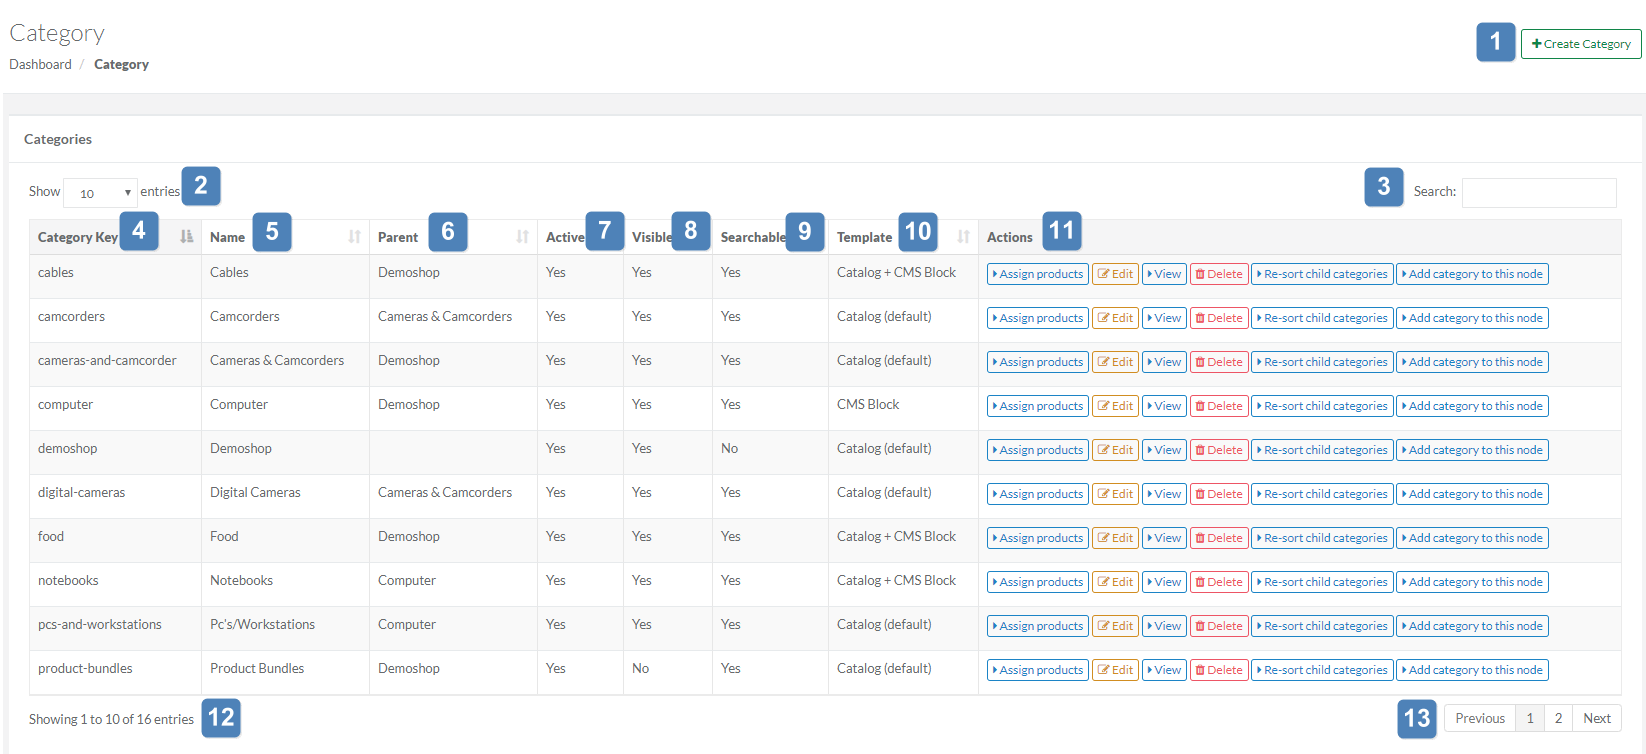
If you have an older tree-like version of the Category section UI, it might be difficult to manage a big number of categories. You can migrate to the new version described above using the tutorial.
To create a new category:
- On the left side navigation bar, select Category.
- In the top right corner, click +Create Category.

This will take you to Create category page.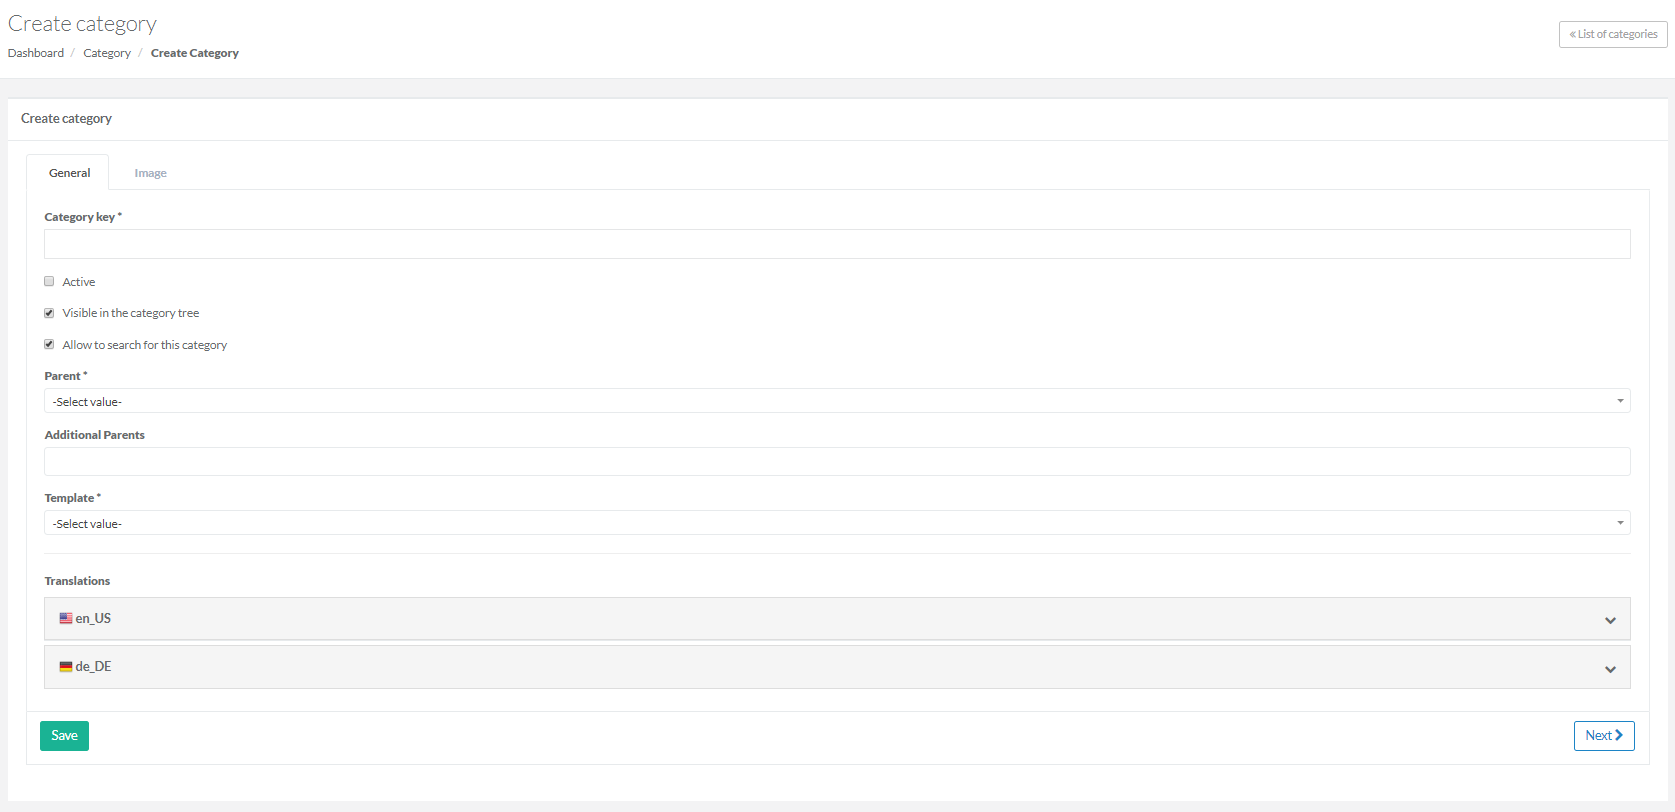
- In the General tab, enter the following details:
The Category key, Parent, and Template fields must be filled in. The other fields are optional.
- Category key: Enables you to render the category name that will be displayed in the shop front end in different languages if needed (for more information on translations check our glossary manual). Hence, after creating a new category you need to go to the glossary and add the corresponding text for the category key.
- Active: Select if you want your category to be visible in the shop application.
- Visible in the category tree: Select if you want your category to be shown in the menu in the shop application.
- Allow to search for this category: Select if you want to make your category available in search results.
- Parent: Select a category under which your category will be displayed in the hierarchical tree. That means that the category you are currently creating will be nested into this particular category.
- Additional Parents: Select if you want your category to be displayed under another or several parent categories.
- Template: Select a template to define how the category page will look like in the shop application. See Assigning a Template to a Category Page for more details.
- In the Translations section, enter the meta details. Their purpose is to improve search ranking in the search engines.
- Name: Enter the name that serves as an ID for the back-end.
The name that will be displayed to the customer on the shop website is rendered with the help of the category key.
- Meta Information: Add the text that describes your category. The text you enter as meta information will not be displayed on the website to the customer but will be located in the HTML code of the category page.
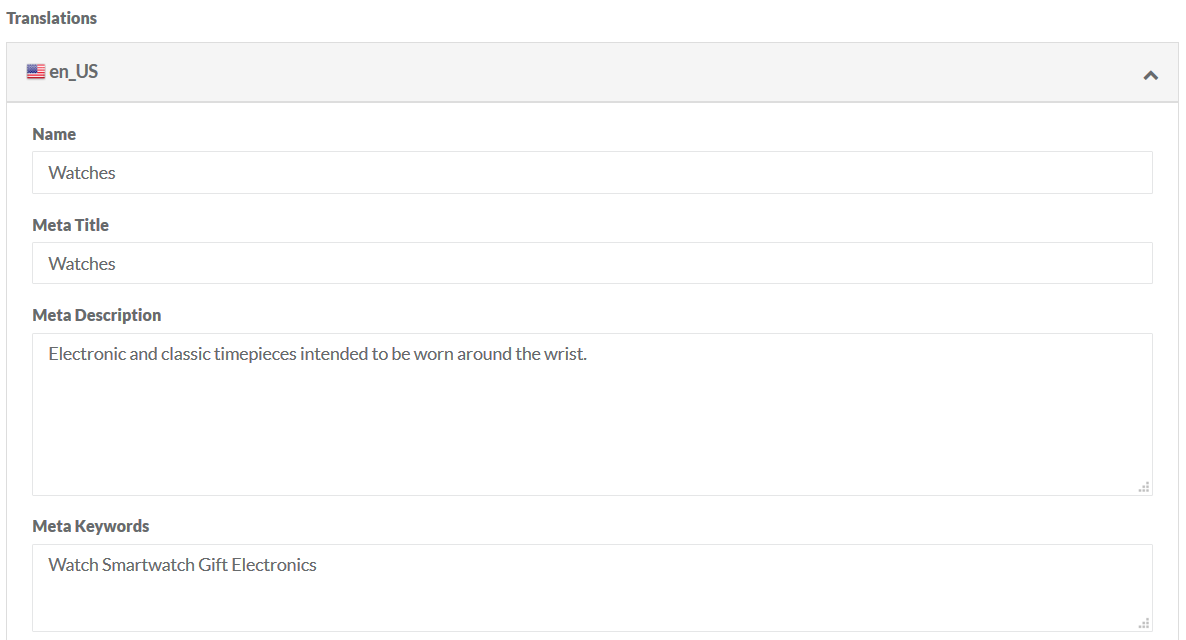
- Name: Enter the name that serves as an ID for the back-end.
- Add an image to the category. See Assigning an Image to a Category in Admin UI to learn how to do this.
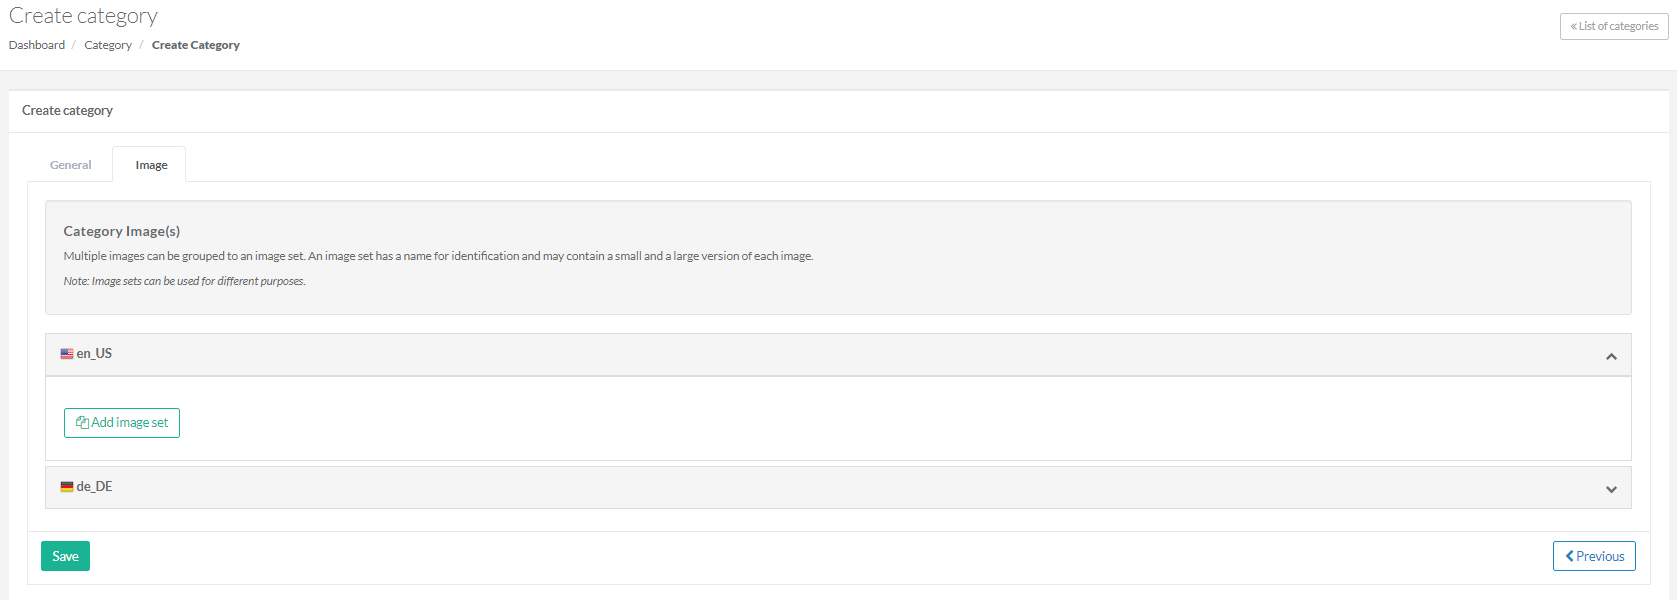
- Click Save.
Here you can view, edit, and remove category details, as well as assign products to categories, re-sort child categories or create a new child category.

Assigning Products to Categories
To assign products to a category:
- Click Assign Products in the Actions column.

- Select checkboxes next to the products you would like to assign to the category. The selected products will appear in the Products to be assigned tab.

- Click Save.
A product can be assigned to one or more product categories.
In the section below, you can deassign products from the category by clearing check boxes next to the products you wish to remove. The unselected products will appear in the Products to be deassigned tab.

If you want to clear all check boxes, click Deselect All.
Editing Category Details in Admin UI
Clicking Edit in the Actions column will take you to the Edit Category page.
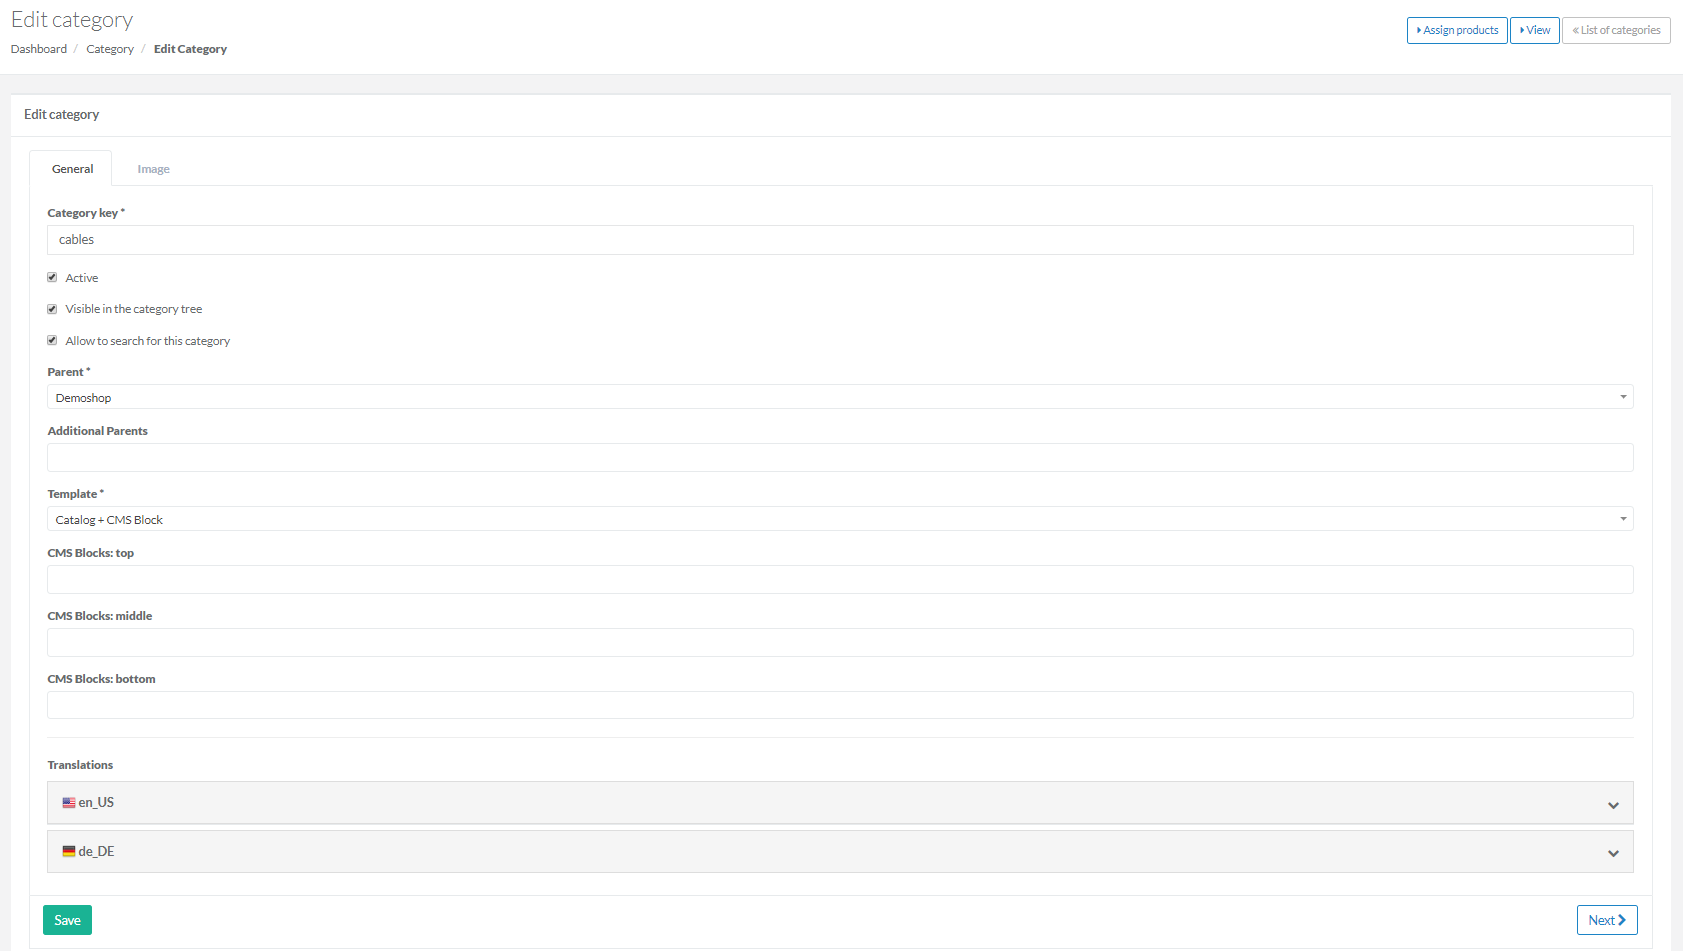
This page allows you to do the following:
- Change the category key.
- Specify whether the category should be active or not.
- Mark the category to be searchable on the website.
- Select a parent category (categories).
- Select a template for a category. See Assigning a template to ca Category page to learn how to select a template.
- Assign a block to a category page.
- Update meta information.
From this page, you can:
- Navigate to the Assign products to category page. To do this, click Assign Products in the top right corner of the page.
- Switch to the View category page by clicking View in the in the top right corner.
- Return to the list of categories. For this, click List of categories.
Viewing Category Details
To view category details, click View in the Actions column. This will open the View category page where you can view general information on the category in question and check what products it has.

From this page, you can:
- Navigate to the Assign products to category page. To do this, click Assign products in the upper right corner of the page.
- Go to the Edit category page by clicking Edit in the upper right corner.
- Return to the list of categories.
Deleting a Category and All the Related Details
It is possible to delete a category with all its information.
To delete a category:
- Click Delete in the Actions column of the table. The Delete category: page name page opens.
- Select Yes, I am sure and click Delete.

Keep in mind that all the elements related to the category will be removed as well.
Creating a New Child Category
The category you are about to create will be nested into the parent category selected.
To create a child category, click Add category to this node in the Actions column next to the category to which you want to add a child category.

This will open the Create category page.

The category for which you want to create a child category will be automatically added to the Parent field.
On the page that appears, enter all the required details and save changes.
Here you can select a template that will change the way your category page is rendered on the shop website.
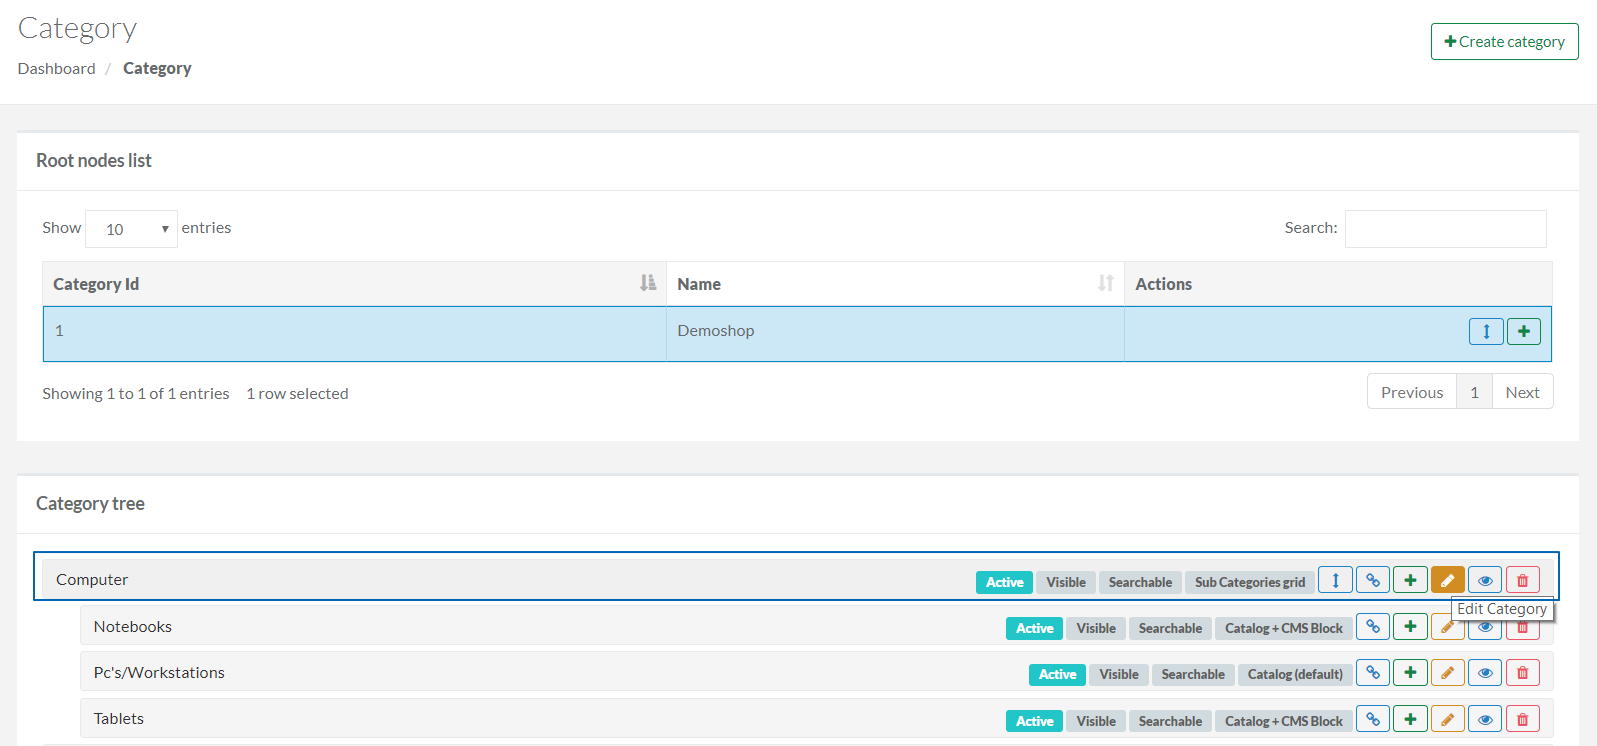
The Computer category will be used to demonstrate a process of assigning a template.
To assign a template to a category page:
- On the left-side navigation bar, click Category.
- In the Category tree, click Edit Category next to the category you want to assign a template for. This will take you to the Edit Category page.
-
In the Template field, select a template for a category from the list:
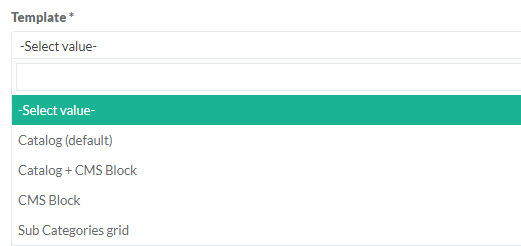
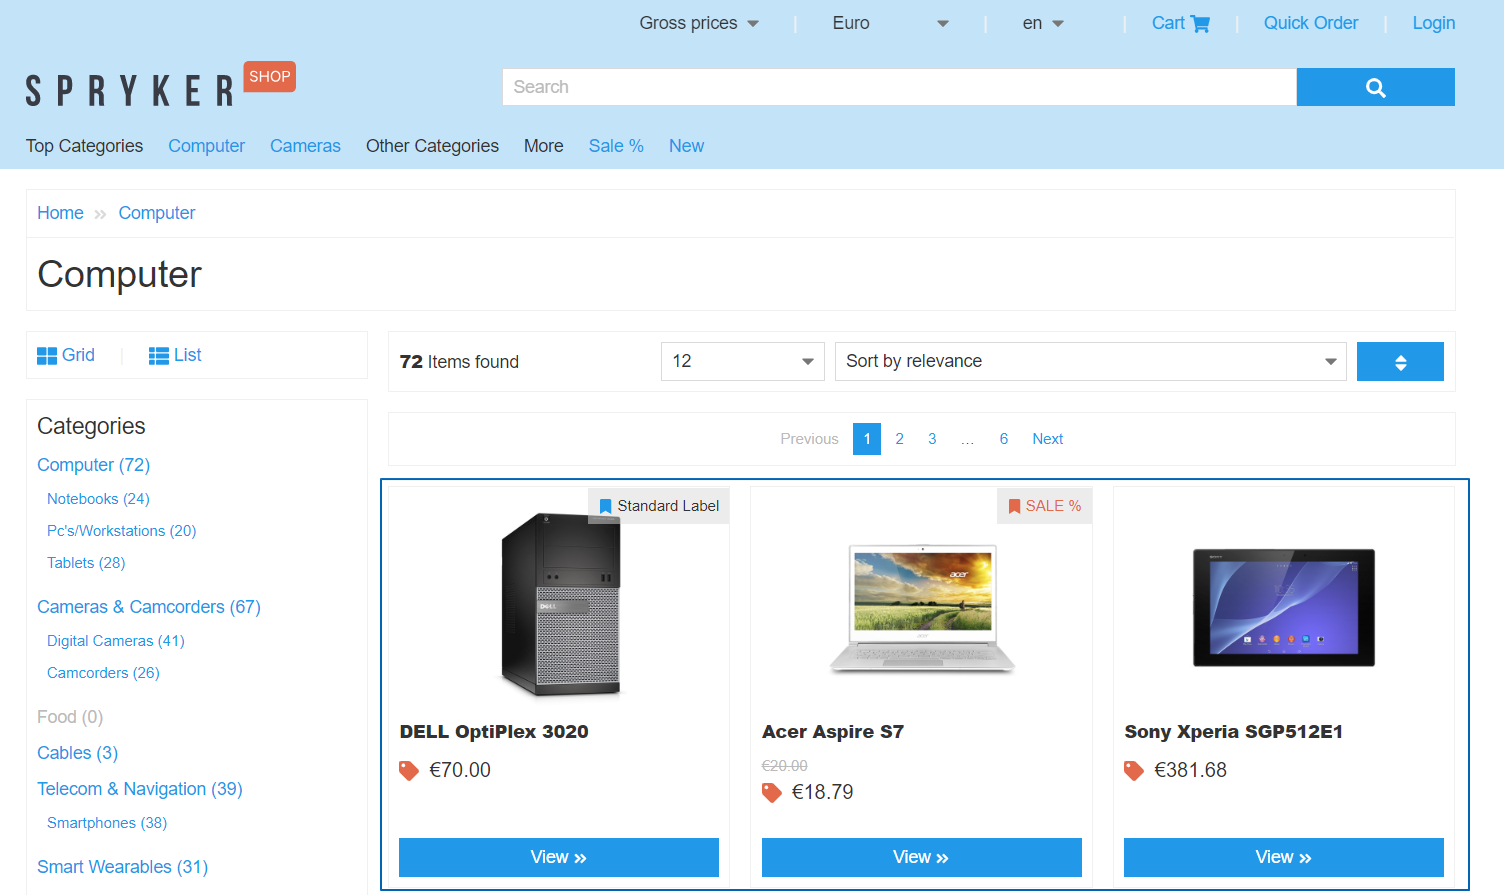
- Catalog (default): Select to display all product pages linked to the selected category. The product pages include the general product description, a price, an image, and a clickable View button that will redirect you to the product detail page.
This is how the Catalog template looks on Yves.
Catalog + CMS Block: Select to show all product pages assigned to the selected category and a CMS Block.
Depending on your design requirements, you need to set a specific CMS block and to specify where it should be displayed: top, middle, or bottom. See Creating Category and Product Pages for more details.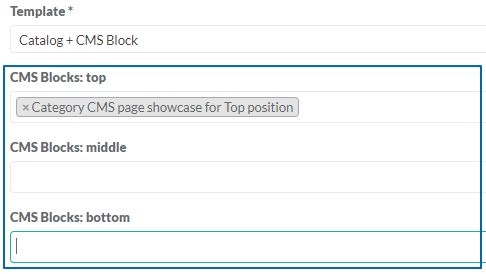
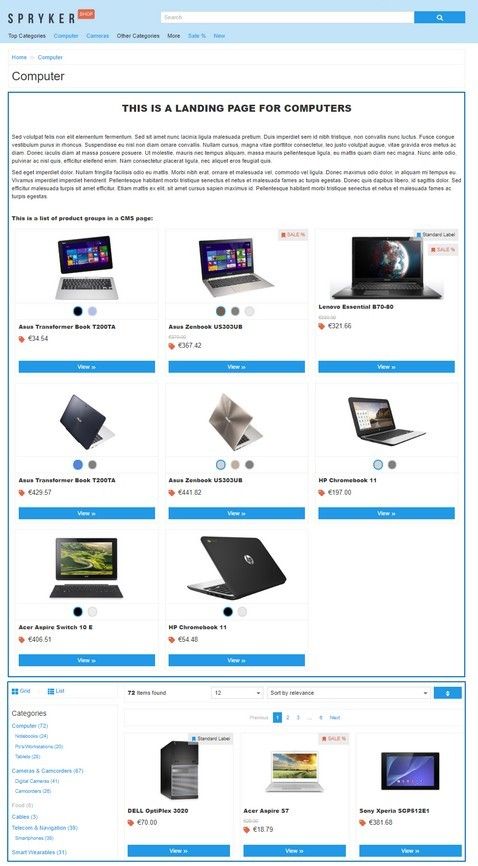
Below there is the Catalog + CMS Block template how it looks on Yves. The top content section is a CMS block and the bottom content section is a catalog.
- CMS Block: Select to display only a specific CMS block on the category page. In this case, choose a position of the CMS block on the page.
This is how the template looks on Yves.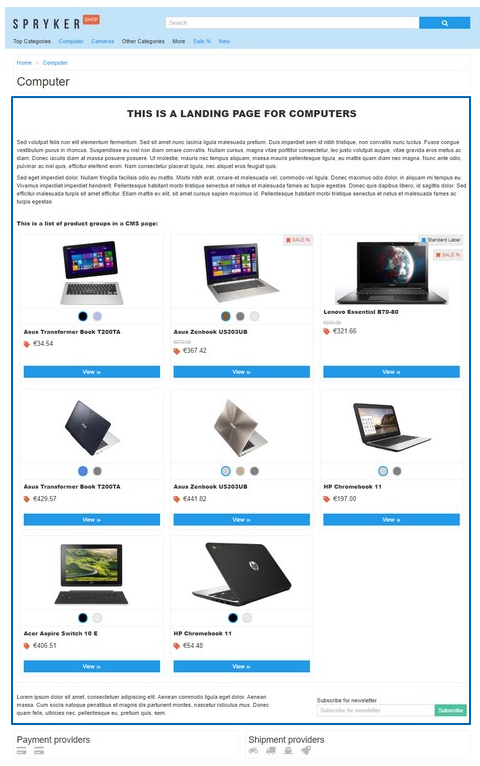
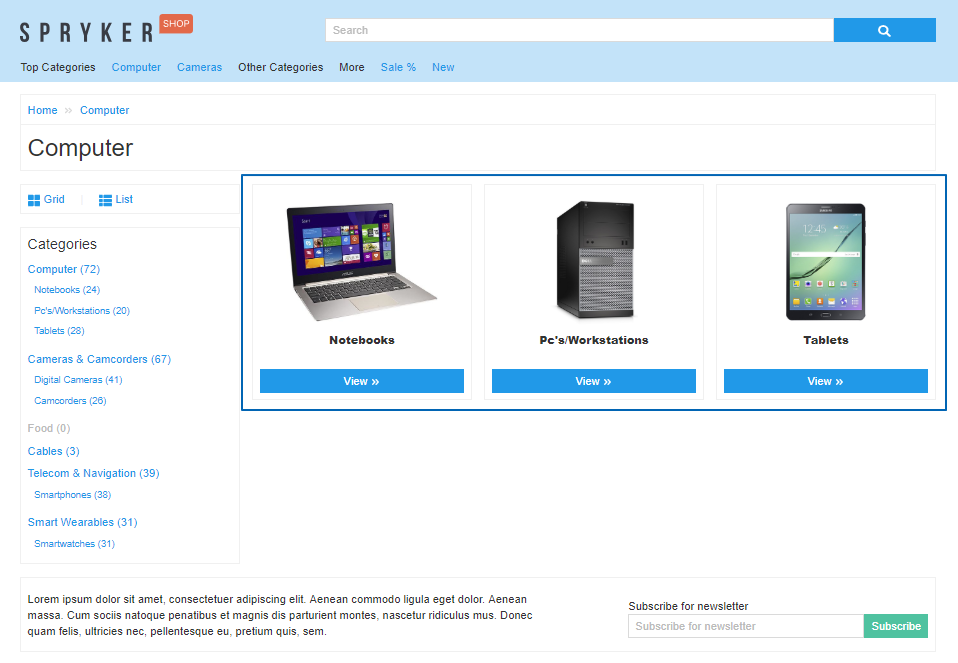
- Sub Categories grid: Select to create a multilevel category structure.
Here you can assign an image to each subcategory. See Assigning an Image to a Category in Zed to learn how to add an image.
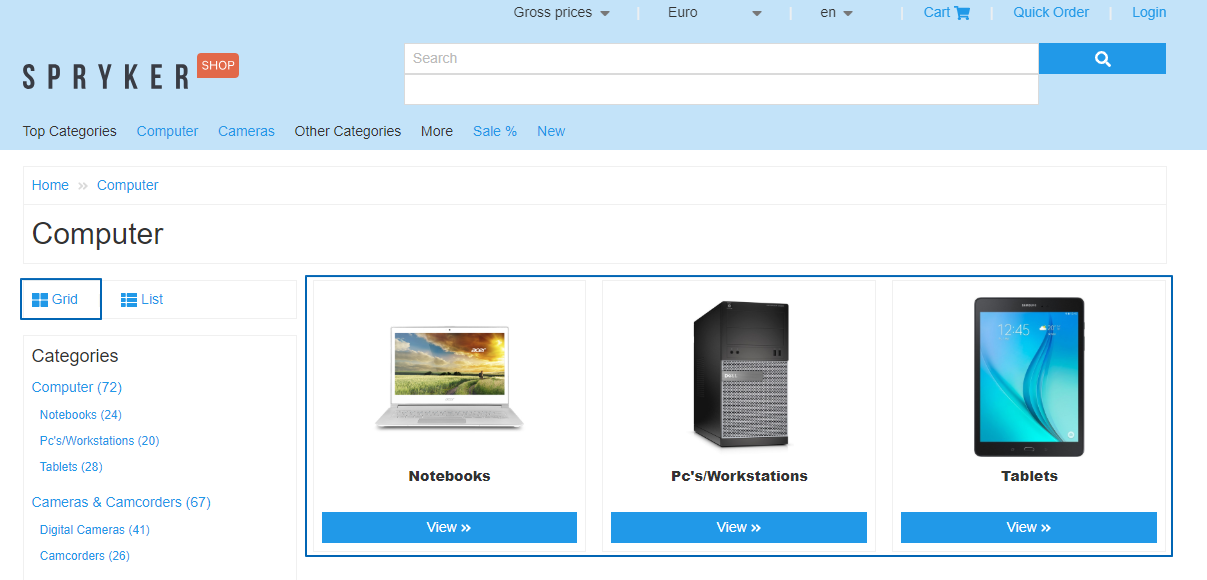
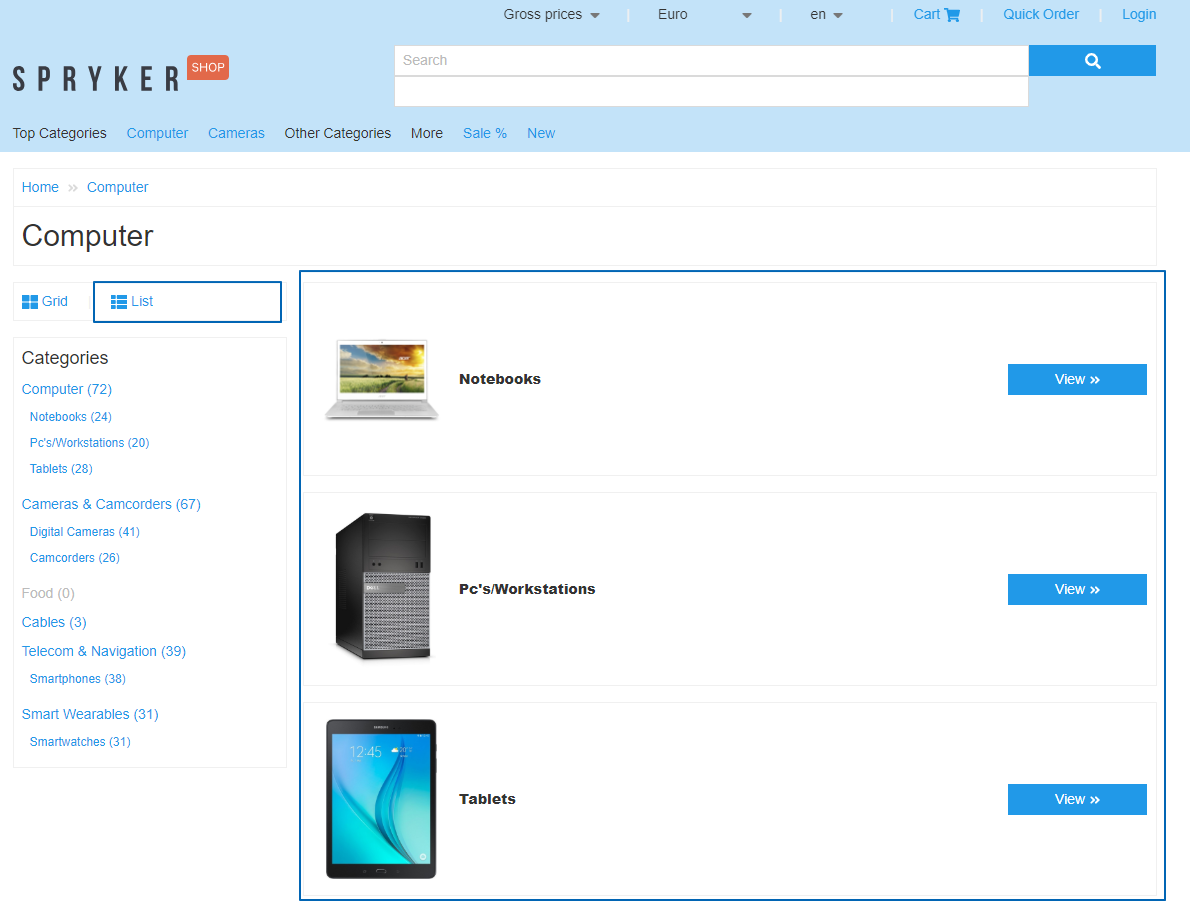
This is how your shop visitors see the Sub Categories template.
- Catalog (default): Select to display all product pages linked to the selected category. The product pages include the general product description, a price, an image, and a clickable View button that will redirect you to the product detail page.
- Click Save.
Here you can add an image set to a subcategory of the parent category.
Please make sure that the template of the parent category is Sub Categories grid. See the Assigning a Template to a Category Page section to learn how to add a template to a parent category.
To assign an image to a subcategory:
- On the left-side navigation bar, select Category.
- Click Edit Category next to the child category you would like to add an image to.
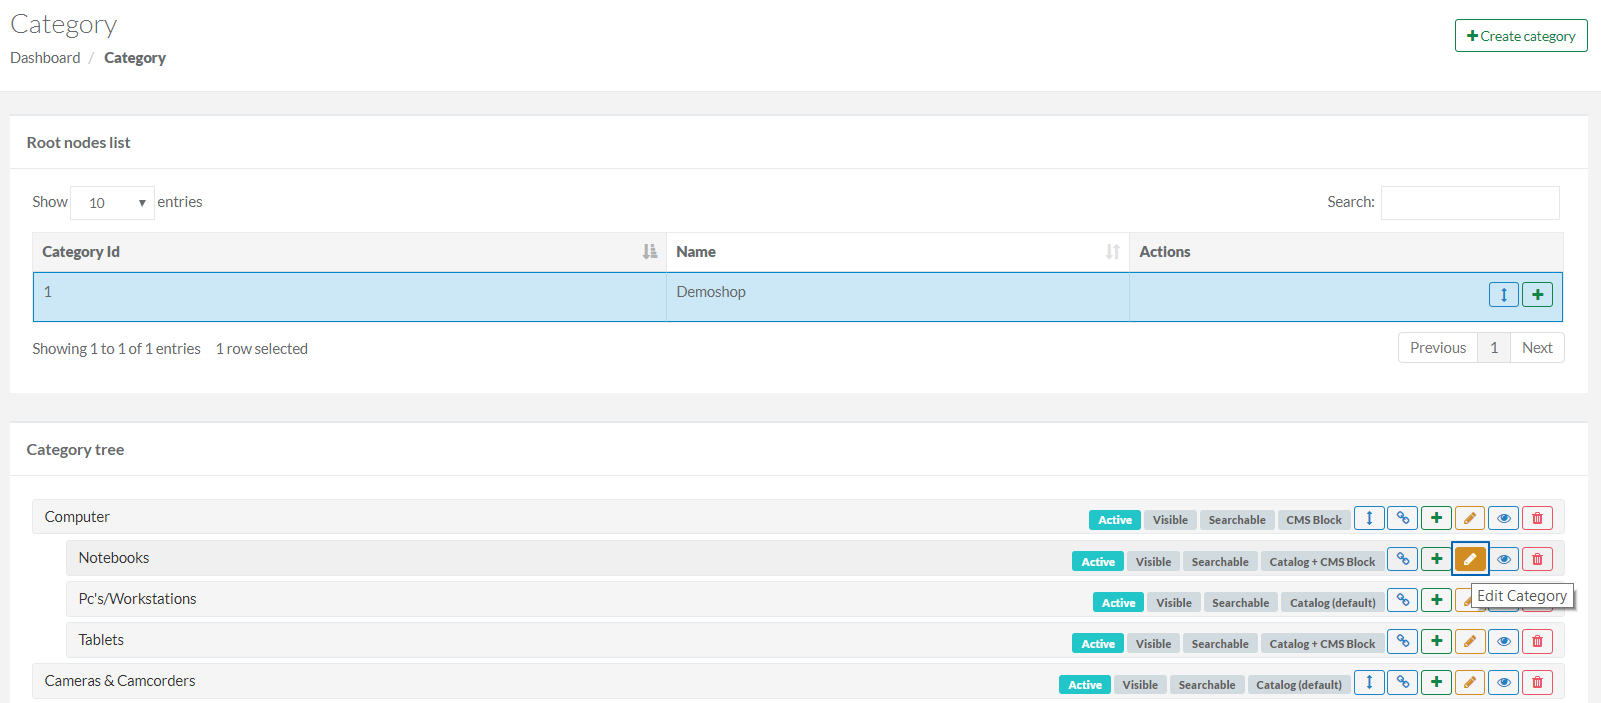
This will take you to the Edit category page. - Switch to the Image tab.
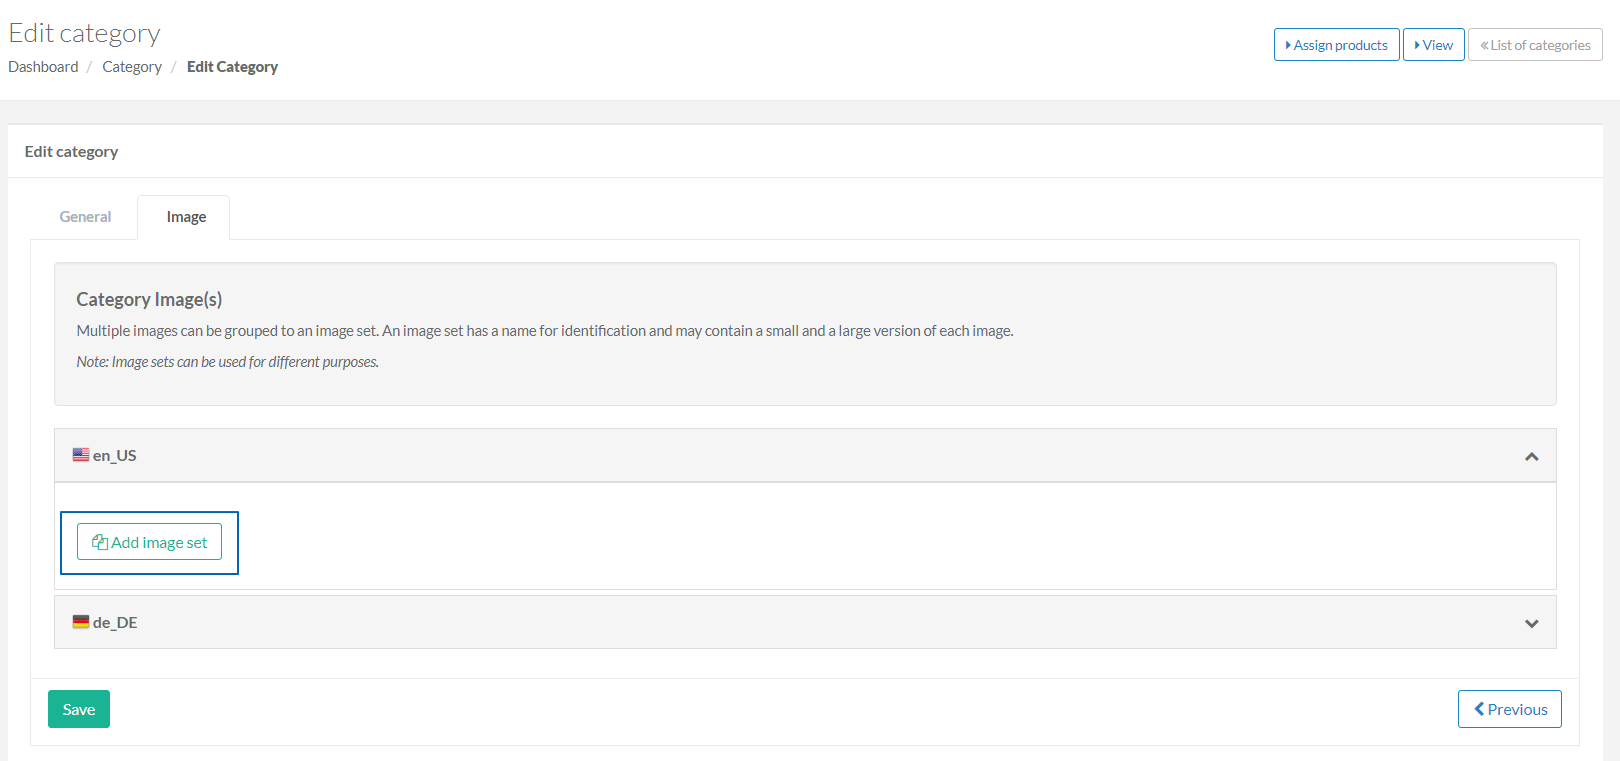
- Click Add image set.
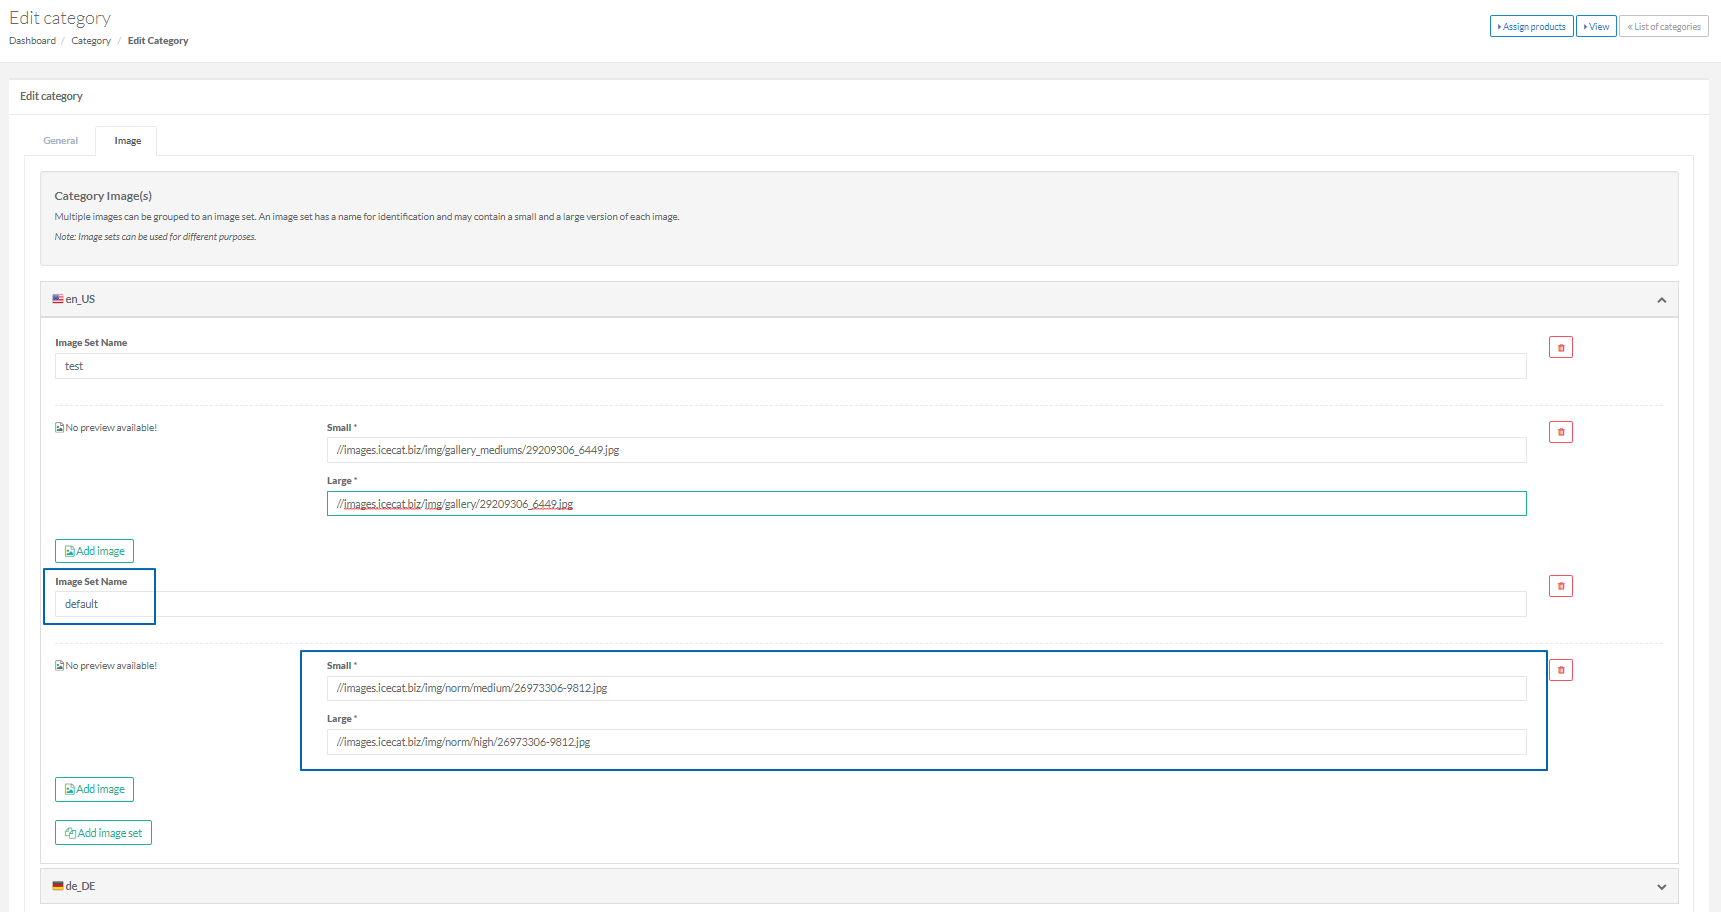
- Enter an image name into the Image Set Name field.
- Set URLs for small and large versions.
The Small and Large fields must be filled in. All other fields are optional.
Keep in mind that small images will be used when subcategories on the parent category page are displayed as a list, while the large images will be used when subcategories are displayed as a grid.
- Click Save.
If you want to assign several images or image sets, click Add image or Add image set respectively, and enter URLs. However, in this case, the image set going first or having the name 'default' will be applied to the category. The same applies to the images.
- Go to the website to view the parent category page containing the subcategories:
Subcategories are displayed as a grid.
Subcategories are displayed as a list.
- On the left side navigation bar, select Category.
-
Click Re-sort child categories.
- Change the order of the categories by dragging & dropping.


Click Save to finish.
See also:
- HowTo - Manage a Big Number of Categories
- Enable CMS Block Feature for your project
- Integrate Category Image Feature in your project
Last review date: Mar 5, 2019