Docker Install Prerequisites - Windows
This document describes the install prerequisites for Windows.
When running commands, you should use absolute paths. For example: mkdir /d/spryker && cd $_ or mkdir /c/Users/spryker && cd $_.
Minimum System Requirements
Before proceeding to the actual installation procedure, please review the minimum system requirements described in the table below:
| System Requirement | Additional Details |
|---|---|
| Windows 10 64bit | Pro, Enterprise, or Education (1607 Anniversary Update, Build 14393 or later). |
| BIOS Virtualization is enabled | Typically, virtualization is enabled by default. Note that having the virtualization enabled is different from having Hyper-V enabled. This setting can be checked in the Task Manager → Performance tab. For more details, see Virtualization must be enabled. |
|
CPU SLAT-capable feature |
SLAT is CPU related feature. It is called Rapid Virtualization Indexing (RVI). |
|
RAM: 4GB |
This is a minimum requirement. The value can be higher than 4GB. A lower value is not sufficient for installation purposes. |
|
vCPU: 2 |
This is a minimum requirement. The value can be higher than 2. A lower value is not sufficient for running the application. |
- Download Docker Desktop.
- Open the installation file and follow the instructions of the wizard.
Experimental features are provided for testing and evaluation purposes.
- Right-click Docker icon in the tray and select Settings.
- Select Daemon tab.
- Select Basic checkbox.
- Update variables as follows:
{
  ....
  "experimental": true,
  "features": {
    "buildkit": true
  }
}
WSL is a Windows Subsystem for Linux. It allows Linux programs to run on Windows.
Follow the procedure described below to enable the WSL:
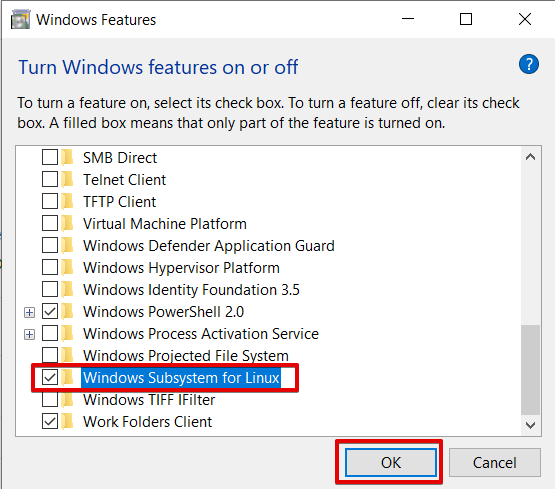
- Open Windows Control Panel → Programs → Programs and Features.
- Select Turn Windows features on or off hyperlink.

- Check Windows Subsystem for Linux and click OK.
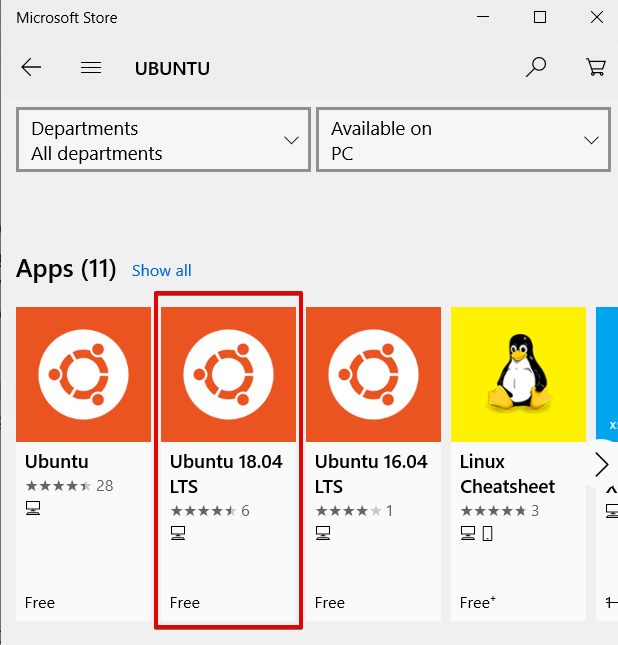
Firstly, install Ubuntu:
- Open Microsoft Store.
- In the Search filed, enter "Ubuntu" and press Enter.
- From the search results page, select Ubuntu 18.04 LTS and install it.
Once Ubuntu is installed, update it:
- Open the Start menu.
- Find and launch Ubuntu.
- Follow the instructions in the wizard.
- Set the default root mount point in /etc/wsl.conf.
# Enable extra metadata options by default [automount] enabled = true root = / options = "metadata,umask=22,fmask=11" mountFsTab = false - Restart Ubuntu.
Docker
- Update the apt package:
sudo apt-get update - Install packages to allow apt to use a repository over HTTPS:
sudo apt-get install \ apt-transport-https \ ca-certificates \ curl \ gnupg-agent \ software-properties-common - Add Docker’s official GPG (GNU Privacy Guard) key:
curl -fsSL https://download.docker.com/linux/ubuntu/gpg | sudo apt-key add - - Set up a stable repository:
sudo add-apt-repository \ "deb [arch=amd64] https://download.docker.com/linux/ubuntu \ $(lsb_release -cs) \ stable" - Install the latest version of Docker CE:
sudo apt-get install docker-ce docker-ce-cli containerd.io
Docker Compose
-
Download the current stable release of Docker Compose:
sudo curl -L "https://github.com/docker/compose/releases/download/1.24.0/docker-compose-$(uname -s)-$(uname -m)" -o /usr/local/bin/docker-compose -
Apply executable permissions to the binary:
sudo chmod +x /usr/local/bin/docker-compose
- Install Ruby and Ruby -dev:
sudo apt-get install ruby ruby-dev - Install docker-sync
sudo gem install docker-sync -
Set your Docker for Windows host as an ENV variable:
-
Open the Docker for Windows settings and check Expose daemon on tcp://localhost:2375 without TLS.
-
Run the following command in your WSL shell:
echo "export DOCKER_HOST=tcp://127.0.0.1:2375" >> ~/.bashrc
-
-
Compile and install OCaml.
Before proceeding, check OCaml release changelog and ensure that the OCaml version that you are going to install is compatible.
-
Install the build script:
sudo apt-get install build-essential make -
Download the ocaml archive:
wget http://caml.inria.fr/pub/distrib/ocaml-4.06/ocaml-4.06.0.tar.gz -
Extract the downloaded archive:
tar xvf ocaml-4.06.0.tar.gz -
Change the directory:
cd ocaml-4.06.0 -
Configure and compile ocaml:
./configure make world make opt umask 022 -
Install ocaml and clean:
sudo make install
sudo make clean
-
-
Compile and Install Unison.
Before proceeding:- Check Unison release.
- Download the source code.
- Compile and install it.
- Download the Unison archive:
wget https://github.com/bcpierce00/unison/archive/v2.51.2.tar.gz - Extract the archive:
tar xvf v2.51.2.tar.gz - Change the directory:
cd unison-2.51.2 - Compile and install Unison:
make UISTYLE=text
sudo cp src/unison /usr/local/bin/unison
sudo cp src/unison-fsmonitor /usr/local/bin/unison-fsmonitor
See also:
Last review date: Aug 06, 2019