Steward
分享是一種喜悅、更是一種幸福
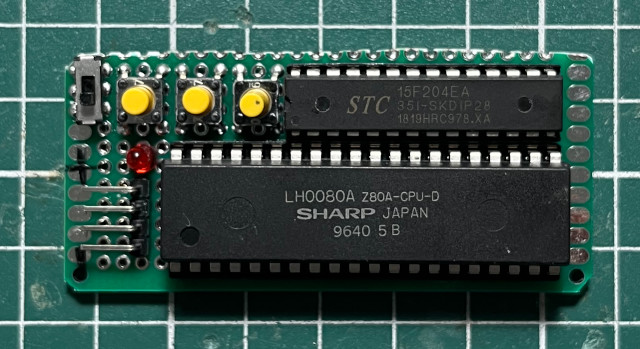
微處理器 - SHARP LH0080A - 開發板
參考資訊:
https://github.com/dev26th/stc_diyclock_gps
https://www.stcmicro.com/datasheet/STC15F204EA-cn.pdf
https://forum.arduino.cc/t/nano-z80-teaching-aid/1290901
https://www.hackster.io/michalin70/retro-computing-with-arduino-mega-and-a-z80-processor-86c79c
https://www.jameco.com/Jameco/Products/ProdDS/35561.pdf?srsltid=AfmBOoprG2KOI0KvClFjnKsE_nvmg3FrZy3G3mMCbNyhGYsHmX0QU6GL
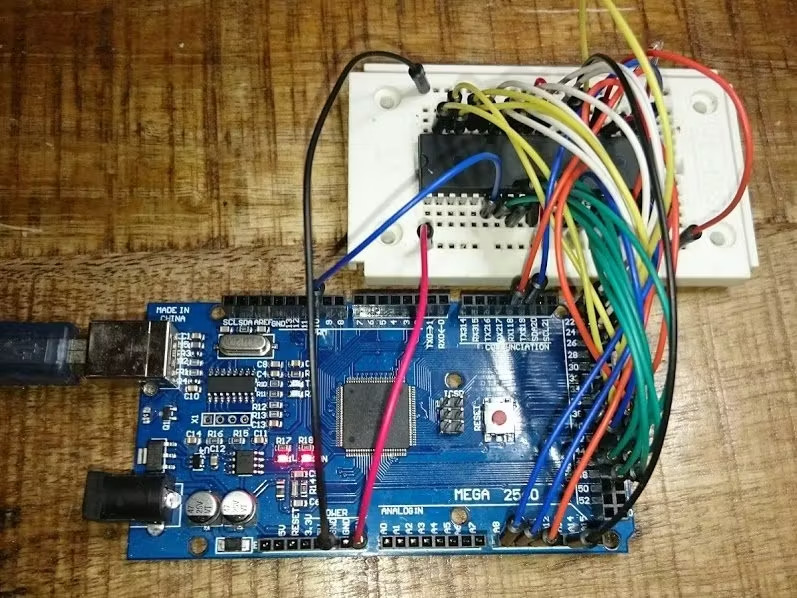
在Arduino討論區看到的PCB,相當適合拿來研究Z80,可惜沒有找到購買的地方

另一個搭配Arduino MEGA的例子
感謝作者附上的電路圖
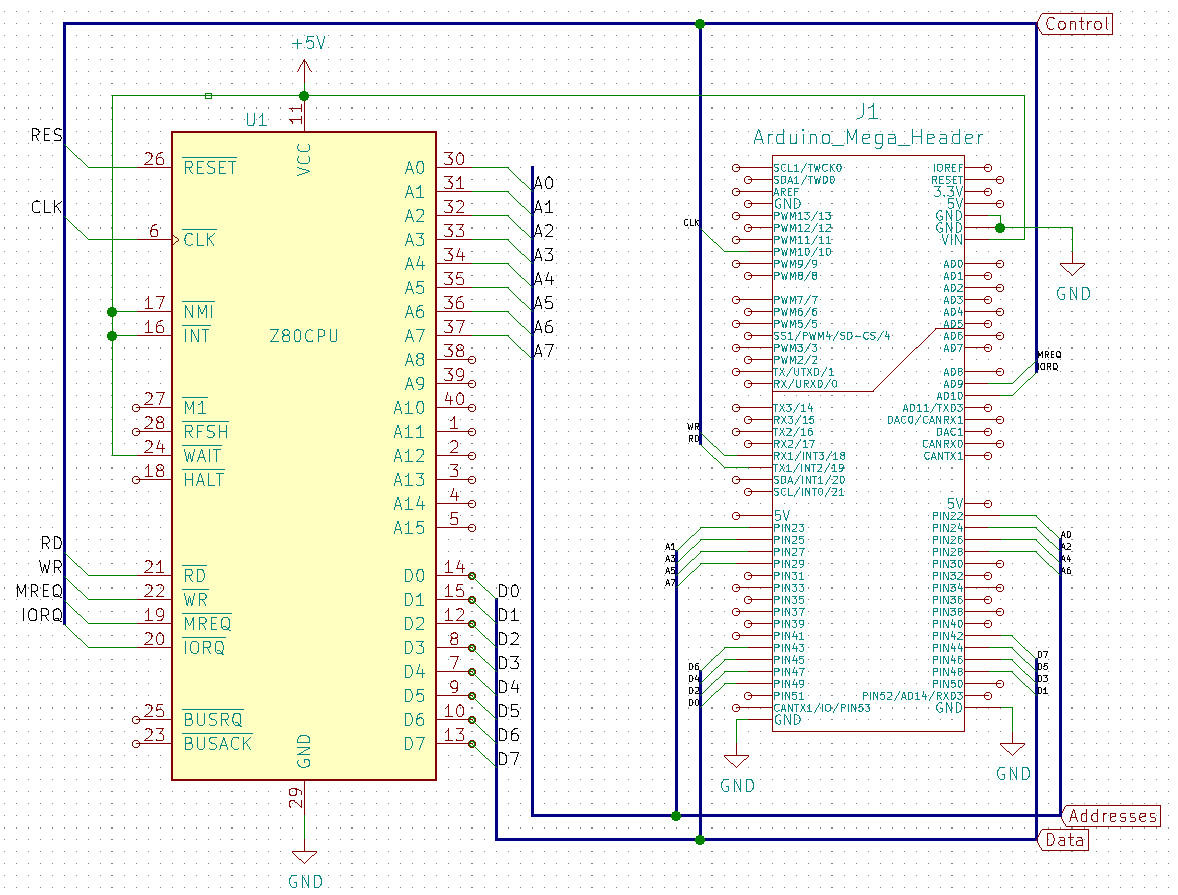
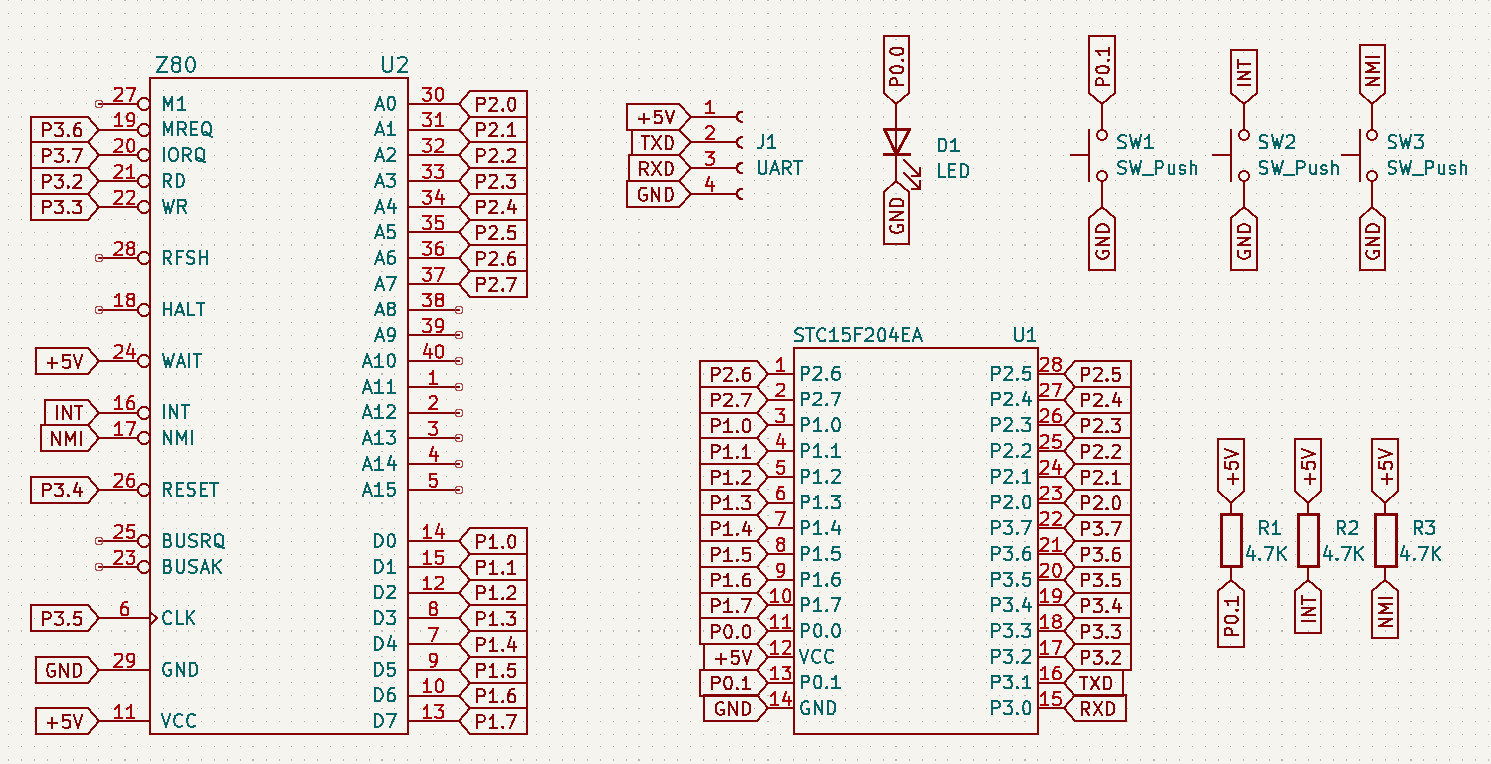
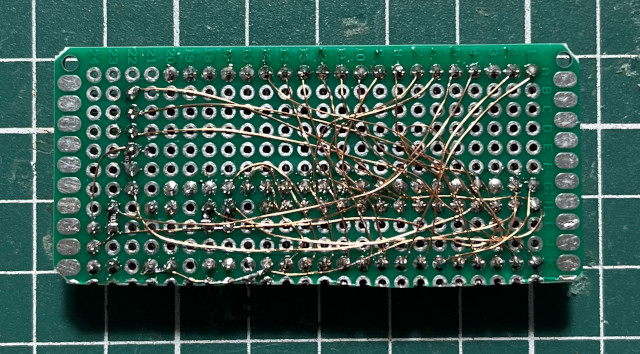
司徒想要更簡單一點的電路,因此,手動畫了下自己想要的電路
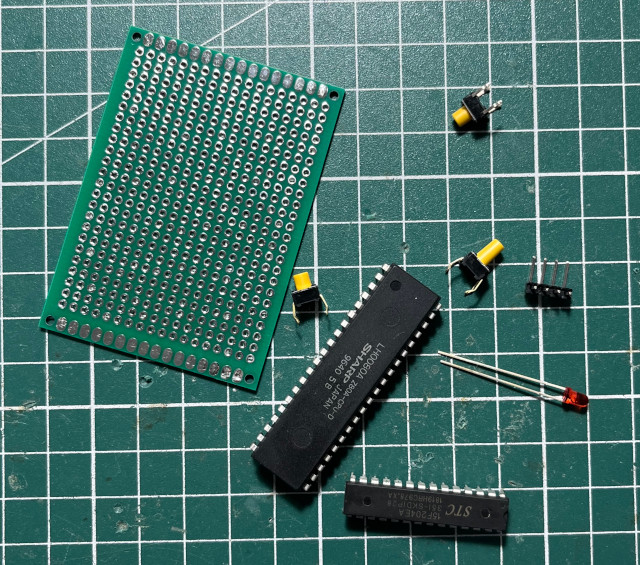
材料
焊接完成
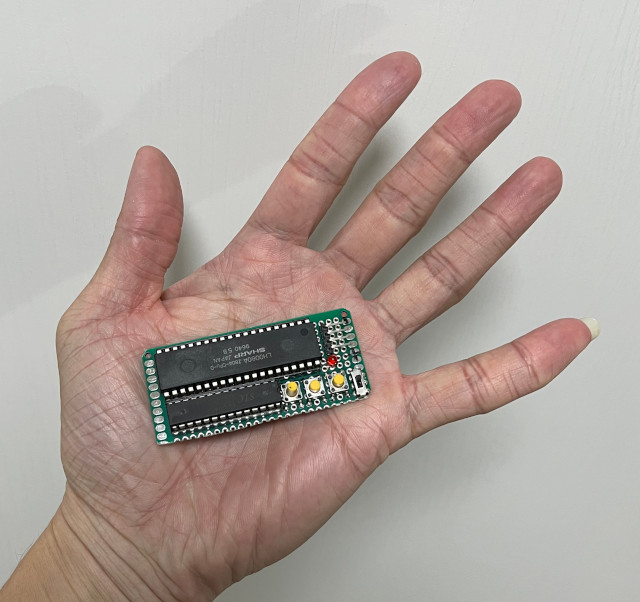
一樣小巧可愛
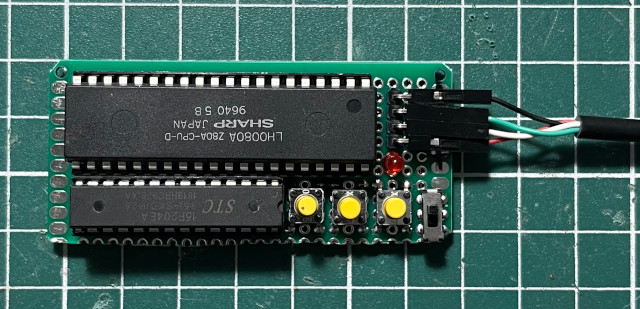
連接UART燒錄測試
$ sudo stcgal -p /dev/ttyUSB0 -l 9600 -b 9600 -t 11059 main.hex
    Waiting for MCU, please cycle power: done
    Protocol detected: stc15a
    Target model:
      Name: STC15F204EA
      Magic: F394
      Code flash: 4.0 KB
      EEPROM flash: 1.0 KB
    Target frequency: 10.993 MHz
    Target BSL version: 6.7R
    Target options:
      reset_pin_enabled=False
      watchdog_por_enabled=False
      watchdog_stop_idle=True
      watchdog_prescale=256
      low_voltage_reset=True
      low_voltage_threshold=4
      eeprom_lvd_inhibit=True
      eeprom_erase_enabled=False
      bsl_pindetect_enabled=False
    Loading flash: 284 bytes (Intel HEX)
    Trimming frequency: 11.059 MHz
    Switching to 9600 baud: done
    Erasing 2 blocks: done
    Writing flash: 576 Bytes [00:00, 755.78 Bytes/s]
    Finishing write: done
    Setting options: done
    Target UID: F39444AF01C2FD
    Disconnected!