# ClaudeBar
[](https://github.com/tddworks/ClaudeBar/actions/workflows/build.yml)
[](https://github.com/tddworks/ClaudeBar/actions/workflows/tests.yml)
[](https://codecov.io/gh/tddworks/ClaudeBar)
[](https://github.com/tddworks/ClaudeBar/releases/latest)
[](https://swift.org)
[](https://developer.apple.com)
[](https://formulae.brew.sh/cask/claudebar)
A macOS menu bar application that monitors AI coding assistant usage quotas. Keep track of your Claude, Codex, Gemini, GitHub Copilot, Antigravity, Z.ai, Kimi, Kiro, Amp, OpenCode Go, and more at a glance.
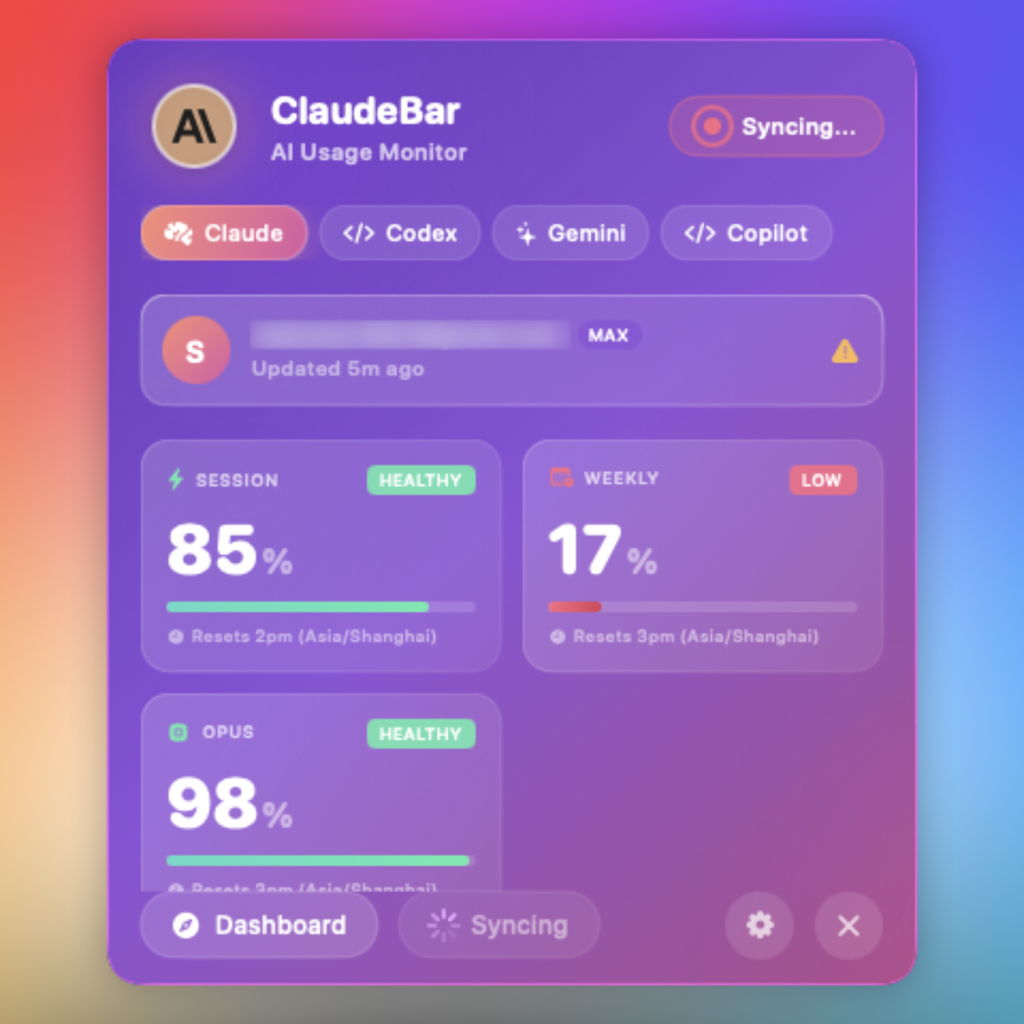
Dark Mode |
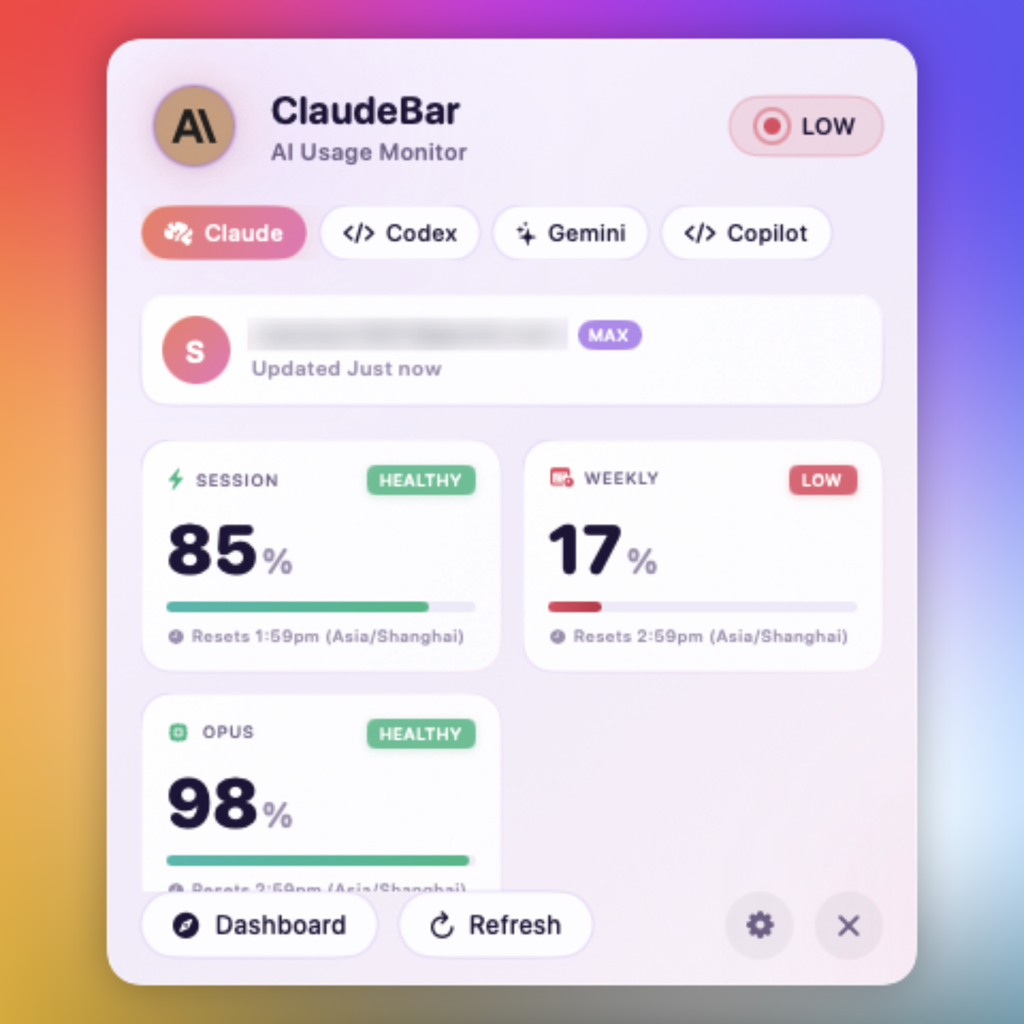
Light Mode |

CLI Theme |
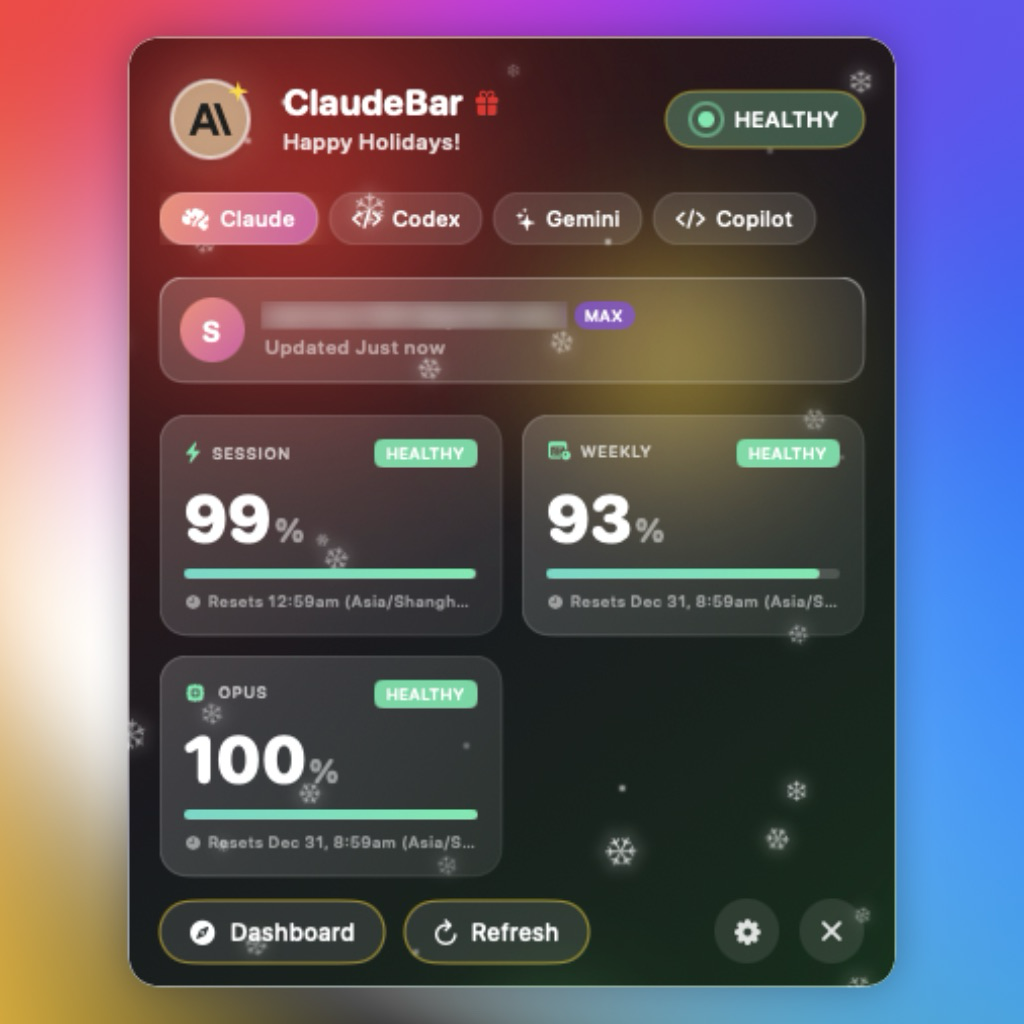
Christmas Theme |
## Features
- **Multi-Provider Support** - Monitor Claude, Codex, Gemini, GitHub Copilot, Antigravity, Z.ai, Kimi, Kiro, Amp, and OpenCode Go quotas in one place
- **Provider Enable/Disable** - Toggle individual providers on/off from Settings to customize your monitoring
- **Real-Time Quota Tracking** - View Session, Weekly, and Model-specific usage percentages
- **Multiple Themes** - Light, Dark, CLI, Christmas, and [imported terminal themes](#import-terminal-theme) (.itermcolors)
- **Automatic Adaptation** - System theme follows your macOS appearance; Christmas auto-enables during the holiday season
- **Visual Status Indicators** - Color-coded progress bars (green/yellow/red) show quota health
- **System Notifications** - Get alerted when quota status changes to warning or critical
- **Auto-Refresh** - Automatically updates quotas at configurable intervals
- **Keyboard Shortcuts** - Quick access with `⌘D` (Dashboard) and `⌘R` (Refresh)
## Quota Status Thresholds
| Remaining | Status | Color |
|-----------|--------|-------|
| > 50% | Healthy | Green |
| 20-50% | Warning | Yellow |
| < 20% | Critical | Red |
| 0% | Depleted | Gray |
## Requirements
- macOS 15+
- Swift 6.2+
- CLI tools installed for providers you want to monitor:
- [Claude CLI](https://claude.ai/code) (`claude`)
- [Codex CLI](https://github.com/openai/codex) (`codex`)
- [Gemini CLI](https://github.com/google-gemini/gemini-cli) (`gemini`)
- [GitHub Copilot](https://github.com/features/copilot) - Configure credentials in Settings
- [Antigravity](https://antigravity.google) - Auto-detected when running locally
- [Z.ai](https://z.ai/subscribe) - Configure Claude Code with GLM Coding Plan endpoint
- [Kimi](https://www.kimi.com/code/console) (`kimi`) - CLI mode (recommended) or API mode (see below)
- [Kiro](https://kiro.dev) (`kiro-cli`) - Requires kiro-cli installation (see below)
- [Amp](https://ampcode.com) (`amp`) - Auto-detected when CLI is installed
- [OpenCode Go](https://opencode.ai/go) (`opencode`) - Tracks OpenCode Go usage windows (5hr/$12, weekly/$30, monthly/$60) via local SQLite DB
### Kimi Setup
Kimi supports two probe modes, configurable in **Settings > Kimi Configuration**:
**CLI Mode (Recommended)** - Launches the interactive `kimi` CLI and sends `/usage` to fetch quota data. Requires `kimi` CLI installed (`uv tool install kimi-cli`). No Full Disk Access needed.
**API Mode** - Calls the Kimi API directly using browser cookie authentication. Requires **Full Disk Access** for ClaudeBar to read the `kimi-auth` browser cookie:
1. Open **System Settings** > **Privacy & Security** > **Full Disk Access**
2. Toggle **ClaudeBar** on (or click `+` and add it)
3. Restart ClaudeBar
You can also set the `KIMI_AUTH_TOKEN` environment variable to bypass cookie reading in API mode.
### Kiro Setup
Kiro monitors AWS Kiro (formerly CodeWhisperer) usage through the `kiro-cli` command-line tool.
**Installation**: `uv tool install kiro-cli` or `pip install kiro-cli`
**Authentication**: Run `kiro-cli` and follow the login prompts.
**Kiro IDE Users**: If you use Kiro IDE, simply install kiro-cli. Both share the same authentication, so no additional login is required.
## Installation
### Homebrew
Install via [Homebrew](https://brew.sh).
```bash
brew install --cask claudebar
```
### Download (Recommended)
Download the latest release from [GitHub Releases](https://github.com/tddworks/ClaudeBar/releases/latest):
- **DMG**: Open and drag ClaudeBar.app to Applications
- **ZIP**: Unzip and move ClaudeBar.app to Applications
Both are code-signed and notarized for Gatekeeper.
### Build from Source
```bash
git clone https://github.com/tddworks/ClaudeBar.git
cd ClaudeBar
# Install Tuist (if not installed)
brew install tuist
# Install dependencies and build
tuist install
tuist build ClaudeBar -C Release
```
## Usage
After building, open the generated Xcode workspace and run the app:
```bash
tuist generate
open ClaudeBar.xcworkspace
```
Then press `Cmd+R` in Xcode to run. The app will appear in your menu bar. Click to view quota details for each provider.
## Development
The project uses [Tuist](https://tuist.io) for dependency management and Xcode project generation.
### Quick Start
```bash
# Install Tuist (if not installed)
brew install tuist
# Install dependencies
tuist install
# Generate Xcode project and open
tuist generate
open ClaudeBar.xcworkspace
```
### Build & Test
```bash
# Build the project
tuist build
# Run all tests
tuist test
# Run tests with coverage
tuist test --result-bundle-path TestResults.xcresult -- -enableCodeCoverage YES
# Build release configuration
tuist build ClaudeBar -C Release
```
### SwiftUI Previews
After opening in Xcode, SwiftUI previews will work with `Cmd+Option+Return`. The project is configured with `ENABLE_DEBUG_DYLIB` for preview support.
## Architecture
> **Full documentation:** [docs/ARCHITECTURE.md](docs/ARCHITECTURE.md)
ClaudeBar uses a **layered architecture** with `QuotaMonitor` as the single source of truth:
| Layer | Purpose |
|-------|---------|
| **App** | SwiftUI views consuming domain directly (no ViewModel) |
| **Domain** | Rich models, `QuotaMonitor`, repository protocols |
| **Infrastructure** | Probes, storage implementations, adapters |
### Key Design Decisions
- **Single Source of Truth** - `QuotaMonitor` owns all provider state
- **Repository Pattern** - Settings and credentials abstracted behind injectable protocols
- **Protocol-Based DI** - `@Mockable` protocols enable testability
- **Chicago School TDD** - Tests verify state changes, not method calls
- **No ViewModel/AppState** - Views consume domain directly
## Import Terminal Theme
Match ClaudeBar's appearance to your terminal. Import any `.itermcolors` file:
1. Open **Settings** (gear icon)
2. Click **Import .itermcolors**
3. Select your file (export from iTerm2: Preferences > Profiles > Colors > Color Presets > Export)
450+ pre-made schemes available at [iTerm2-Color-Schemes](https://github.com/mbadolato/iTerm2-Color-Schemes/tree/master/schemes).
Imported themes are saved in `~/.claudebar/themes/` and persist across restarts.
## Contributing
### Adding a New AI Provider
Use the **add-provider** skill to guide you through adding new providers with TDD:
```
Tell Claude Code: "I want to add a new provider for [ProviderName]"
```
The skill guides you through: Parsing Tests → Probe Tests → Implementation → Registration.
See `.claude/skills/add-provider/SKILL.md` for details and `AntigravityUsageProbe` as a reference implementation.
## Dependencies
- [Sparkle](https://sparkle-project.org/) - Auto-update framework
- [Mockable](https://github.com/Kolos65/Mockable) - Protocol mocking for tests
- [Tuist](https://tuist.io) - Xcode project generation (for SwiftUI previews)
## Releasing
Releases are automated via GitHub Actions. Push a version tag to create a new release.
**For detailed setup instructions, see [docs/release/RELEASE_SETUP.md](docs/release/RELEASE_SETUP.md).**
### Release Workflow
The workflow uses Tuist to generate the Xcode project:
```
Tag v1.0.0 → Update Info.plist → tuist generate → xcodebuild → Sign & Notarize → GitHub Release
```
Version is set in `Sources/App/Info.plist` and flows through to Sparkle auto-updates.
### Quick Start
1. **Configure GitHub Secrets** (see [full guide](docs/release/RELEASE_SETUP.md)):
| Secret | Description |
|--------|-------------|
| `APPLE_CERTIFICATE_P12` | Developer ID certificate (base64) |
| `APPLE_CERTIFICATE_PASSWORD` | Password for .p12 |
| `APP_STORE_CONNECT_API_KEY_P8` | API key (base64) |
| `APP_STORE_CONNECT_KEY_ID` | Key ID |
| `APP_STORE_CONNECT_ISSUER_ID` | Issuer ID |
2. **Verify your certificate**:
```bash
./scripts/verify-p12.sh /path/to/certificate.p12
```
3. **Create a release**:
```bash
git tag v1.0.0
git push origin v1.0.0
```
The workflow will automatically build, sign, notarize, and publish to GitHub Releases.
## Contributors
Thanks to everyone who has contributed to ClaudeBar!
## License
MIT


