# Tuya IoT Platform Configuration Guide
This topic describes how to create a project on the [Tuya IoT Platform](https://iot.tuya.com/) and link devices to this project with an account of the Tuya Smart app or Smart Life app.
## Prerequisites
You have [registered](https://developer.tuya.com/en/docs/iot/tuya-smart-app-smart-life-app-advantages?id=K989rqa49rluq#title-3-Account) with the **Tuya Smart** app or **Smart Life** app.
## Create a project
1. Log in to the [Tuya IoT Development Platform](https://iot.tuya.com/).
2. In the left navigation pane, click **Cloud**.
3. On the page that appears, click **Create Cloud Project**.
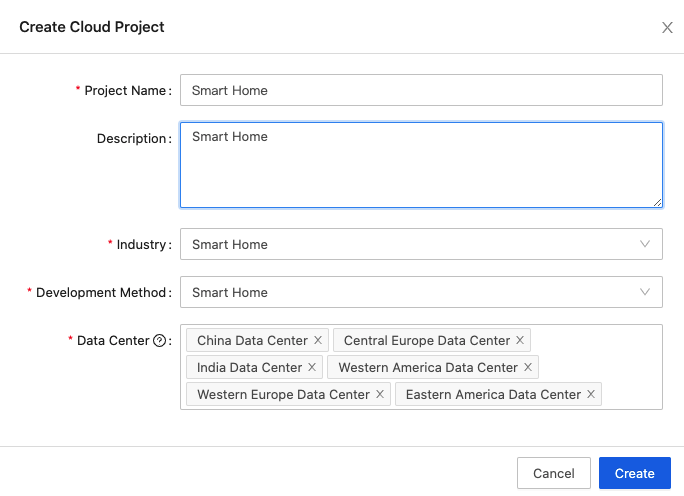
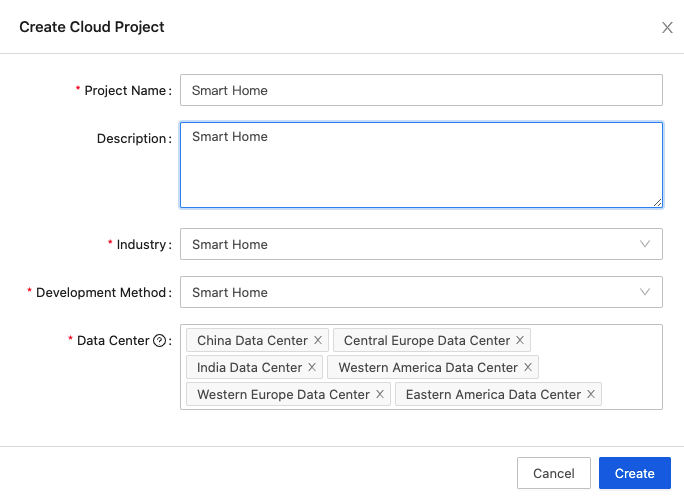
4. In the **Create Cloud Project** dialog, set the required parameters.
| Parameters | Description |
|:----|:----|
| Project Name | User-defined |
| Description | User-defined |
| Industry | Select one as per your needs. |
| Development Method | Select **Smart Home**. |
| Data Center | Select the correct data center to serve your project. For more information, see [Mappings Between OEM App Accounts and Data Centers](https://developer.tuya.com/en/docs/iot/oem-app-data-center-distributed?id=Kafi0ku9l07qb). |
 5. Click **Create** to continue with project configuration.
6. In the **Authorize API Services** dialog, select **Device Status Notification**.
5. Click **Create** to continue with project configuration.
6. In the **Authorize API Services** dialog, select **Device Status Notification**.
 7. Click **Authorize**.
## Get authorization key
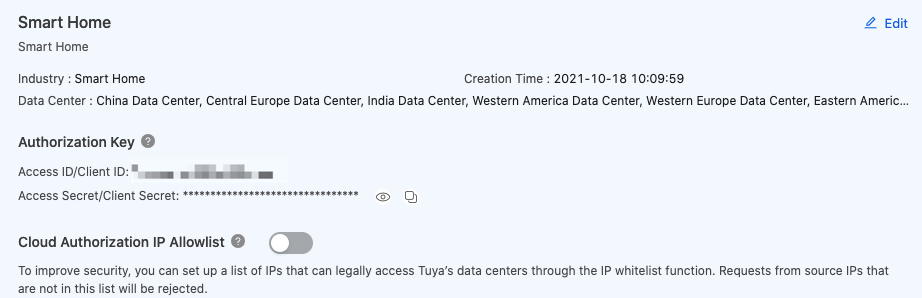
Click the newly created project to enter the **Overview** page and get the **Authorization Key** used to make API requests.
7. Click **Authorize**.
## Get authorization key
Click the newly created project to enter the **Overview** page and get the **Authorization Key** used to make API requests.
 ## Link devices by app account
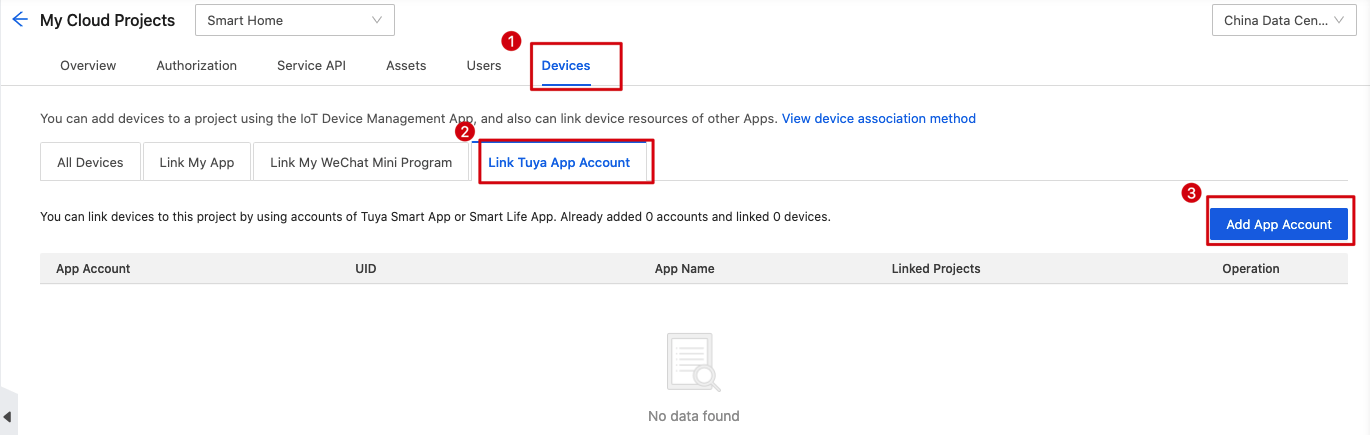
1. Click the **Devices** tab.
2. Choose **Link Tuya App Account** > **Add App Account**. A QR code will appear.
## Link devices by app account
1. Click the **Devices** tab.
2. Choose **Link Tuya App Account** > **Add App Account**. A QR code will appear.

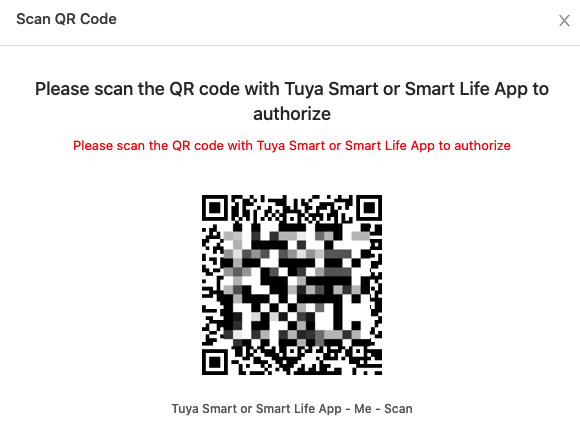 3. Scan the QR code with the **Tuya Smart** app or **Smart Life** app.
> **important**:
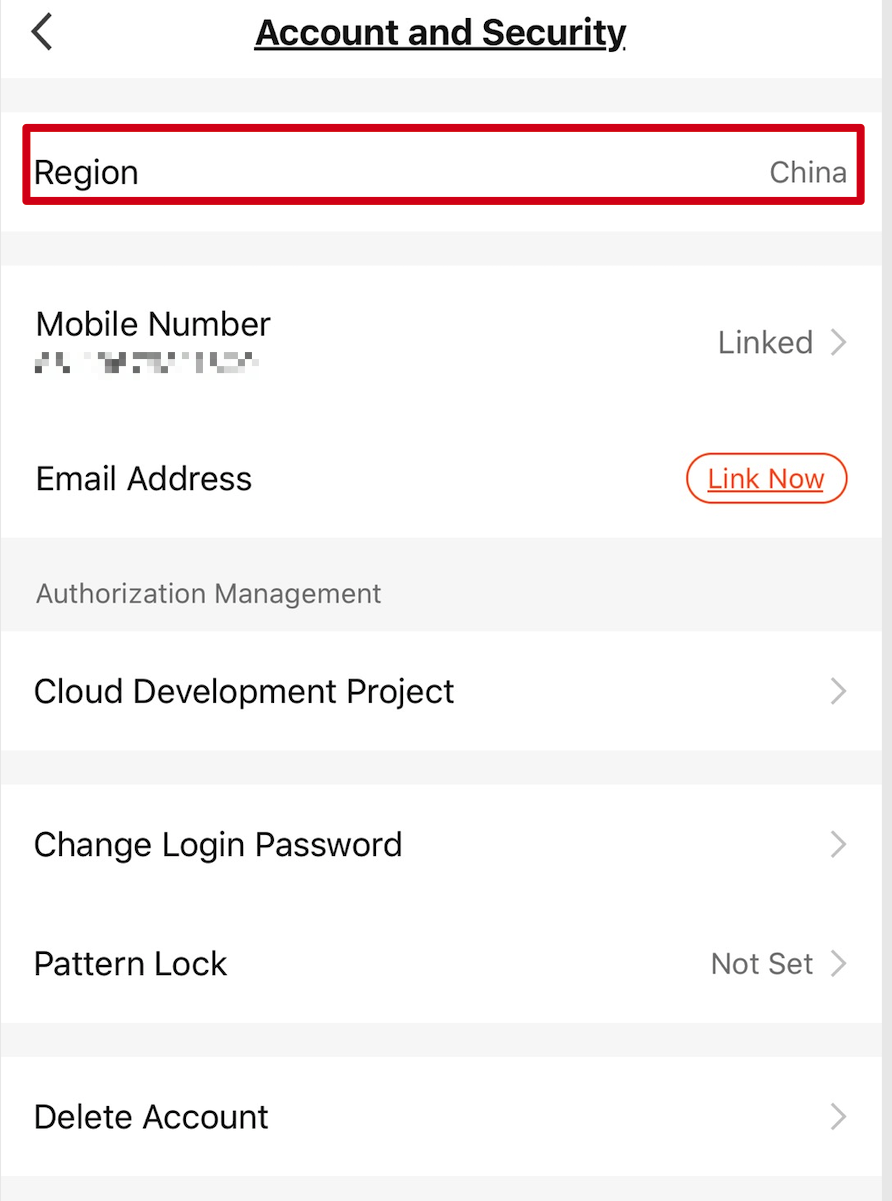
The data center selected for your cloud project must be capable of serving the region of your app account. Here is how to find the region: open the mobile app you use and tap **Me** > **Setting** > **Account and Security** > **Region**. For more information, see [Mappings Between OEM App Accounts and Data Centers](https://developer.tuya.com/en/docs/iot/oem-app-data-center-distributed?id=Kafi0ku9l07qb).

4. Tap **Confirm** on the app.
5. Click **All Devices**. You will find all your smart devices that have been added to this mobile app are listed here.
## Mappings between regions and data centers
Make sure the **data center** you select for your cloud project can serve the **region** of your app account.
- Region: the region you have selected when you register with the Tuya Smart app or Smart Life app. Here is how to find the region: open the mobile app you use and tap **Me** > **Setting** > **Account and Security** > **Region**.
3. Scan the QR code with the **Tuya Smart** app or **Smart Life** app.
> **important**:
The data center selected for your cloud project must be capable of serving the region of your app account. Here is how to find the region: open the mobile app you use and tap **Me** > **Setting** > **Account and Security** > **Region**. For more information, see [Mappings Between OEM App Accounts and Data Centers](https://developer.tuya.com/en/docs/iot/oem-app-data-center-distributed?id=Kafi0ku9l07qb).

4. Tap **Confirm** on the app.
5. Click **All Devices**. You will find all your smart devices that have been added to this mobile app are listed here.
## Mappings between regions and data centers
Make sure the **data center** you select for your cloud project can serve the **region** of your app account.
- Region: the region you have selected when you register with the Tuya Smart app or Smart Life app. Here is how to find the region: open the mobile app you use and tap **Me** > **Setting** > **Account and Security** > **Region**.
 - Data center: The server that your cloud project is hosted on. You must select the correct data center that can serve your **region**. Otherwise, your devices cannot be connected to the [Tuya IoT Development Platform](https://iot.tuya.com/).
 For more information, see [Mappings Between OEM App Accounts and Data Centers](https://developer.tuya.com/en/docs/iot/oem-app-data-center-distributed?id=Kafi0ku9l07qb).