---
uid: Uno.GetStarted.Licensing
---
# Sign in with Uno Platform
Sign in with your Uno Platform account directly in your favorite IDE (Visual Studio, VS Code, or Rider), to unlock powerful tools like Hot Reload, helping you speed up development. With a single registration, you also get early access to new features and the opportunity to connect with the Uno Platform community to share feedback and network.
## Create your account
1. Go to our website, [platform.uno](https://platform.uno/), and click on the **Sign in** button in the top right corner, or go directly to [platform.uno/my-account](https://platform.uno/my-account).
1. Enter your email address and click on **Register**.
1. On the registration page, fill in your information. Once done, click on **Sign up**.
1. You will receive a confirmation email from `no-reply@platform.uno`. Follow the instructions in the email to activate your account.
1. You should then see the sign-in page. Enter your email and password and click on **Sign in** to access your account details, where you can update information or add more details.
## Sign in to your IDE of choice
After creating your Uno Platform account, follow the steps below to sign in to your preferred IDE:
**I am developing on...**
### [**Visual Studio**](#tab/vs2022)
If you've already set up **Visual Studio** by following the [Get Started on Visual Studio](xref:Uno.GetStarted.vs2022) documentation, sign in as follows:
1. Create a new Uno Platform project by following the [Creating an app with Visual Studio](xref:Uno.GettingStarted.CreateAnApp.VS2022) documentation or open an existing one with Uno.Sdk version 5.5 or higher.
For existing applications, you should take this opportunity to update to the [latest `Uno.Sdk` version](https://www.nuget.org/packages/Uno.Sdk). See our [migration guide](xref:Uno.Development.MigratingFromPreviousReleases) to upgrade.
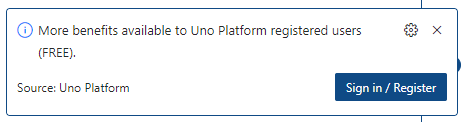
2. After your project has finished loading, a notification should appear. Click on the **Sign in / Register** button.

> [!TIP]
> Ensure that the lower left IDE icon shows a check mark and says "Ready" . This ensures that the projects have been created, and their dependencies have been restored completely.
>
> [!NOTE]
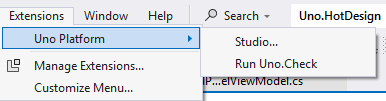
> If the notification doesn’t appear, access the Studio app by clicking on **Extensions** > **Uno Platform** > **Studio...**.
>
> 
### [**Visual Studio Code**](#tab/vscode)
If you’ve already set up **Visual Studio Code** by following the [Get Started on VS Code](xref:Uno.GetStarted.vscode) documentation, sign in as follows:
1. Create a new Uno Platform project by following the [Creating an app with VS Code](xref:Uno.GettingStarted.CreateAnApp.VSCode) documentation or open an existing one with Uno.Sdk version 5.5 or higher.
For existing applications, you should take this opportunity to update to the [latest `Uno.Sdk` version](https://www.nuget.org/packages/Uno.Sdk). See our [migration guide](xref:Uno.Development.MigratingFromPreviousReleases) to upgrade.
1. After your project has finished loading, check the status bar at the bottom left of VS Code. By default, `YourProjectName.sln` is selected. Switch to `YourProjectName.csproj` to load the project instead.

1. Once you've switched to the proper project, a notification should appear. Click the **Sign in / Register** button.
> [!NOTE]
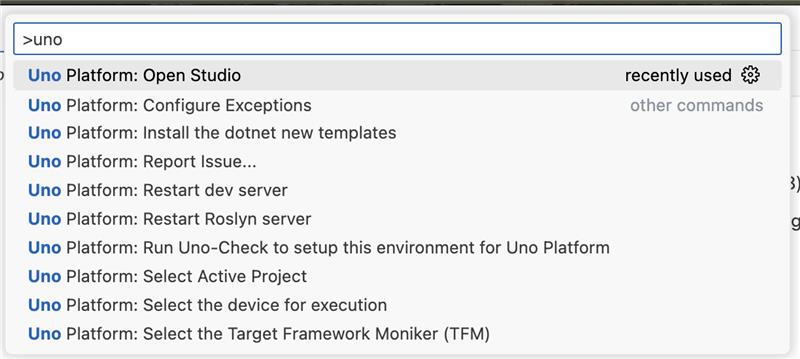
> If the notification doesn’t appear, access the Studio app by selecting **View** > **Command Palette...** and typing `Uno Platform: Open Studio`.
>
> 
### [**JetBrains Rider**](#tab/rider)
If you’ve already set up **JetBrains Rider** by following the [Get Started on JetBrains Rider](xref:Uno.GetStarted.Rider) documentation, sign in as follows:
1. Create a new Uno Platform project by following the [Create an app with JetBrains Rider](xref:Uno.GettingStarted.CreateAnApp.Rider) documentation or open an existing one with Uno.Sdk version 5.5 or higher.
For existing applications, you should take this opportunity to update to the [latest `Uno.Sdk` version](https://www.nuget.org/packages/Uno.Sdk). See our [migration guide](xref:Uno.Development.MigratingFromPreviousReleases) to upgrade.
1. After your project has finished loading, a notification should appear. Click on the **Sign in / Register** button.

> [!NOTE]
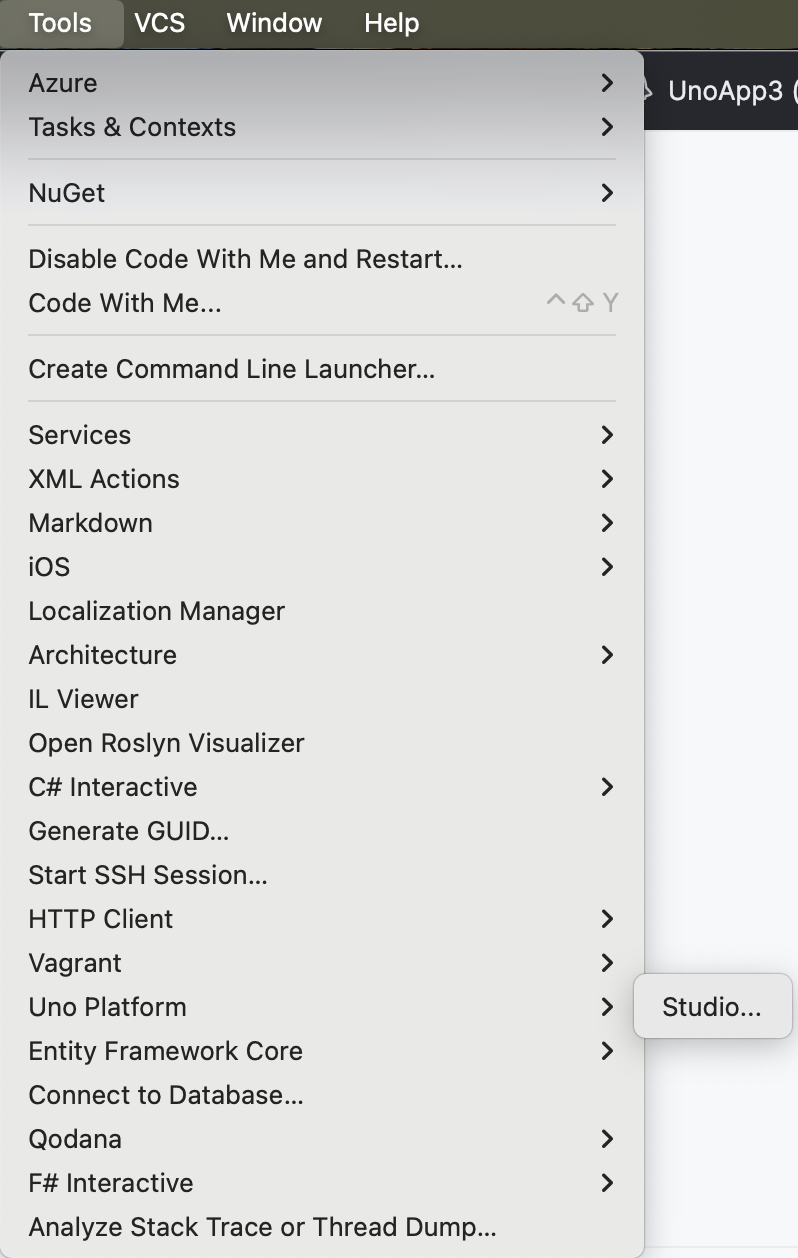
> If the notification doesn’t appear, access the Studio app by selecting **Tools** > **Uno Platform** > **Studio...**.
>
> 
---
### Uno Platform Studio Window
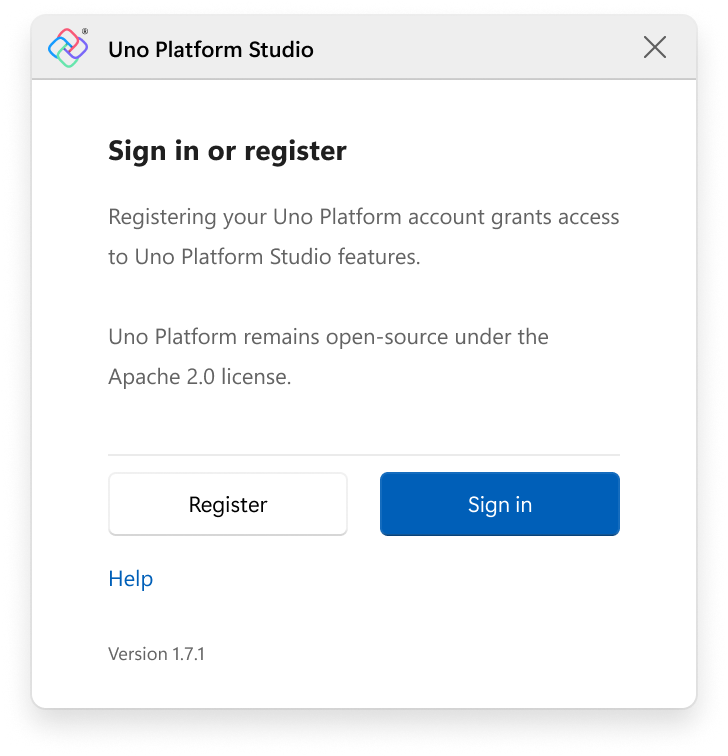
1. In the Uno Platform Studio window, click on **Sign in**. You’ll be redirected to your browser to enter your Uno Platform account credentials.
2. After signing in (or creating your account), return to the Uno Platform Studio window. You’ll now see your account and subscription details displayed. Your subscription type (Community or Pro) determines which products you can access. From the overflow menu (...), you can access additional resources, refresh your account information, or sign out.
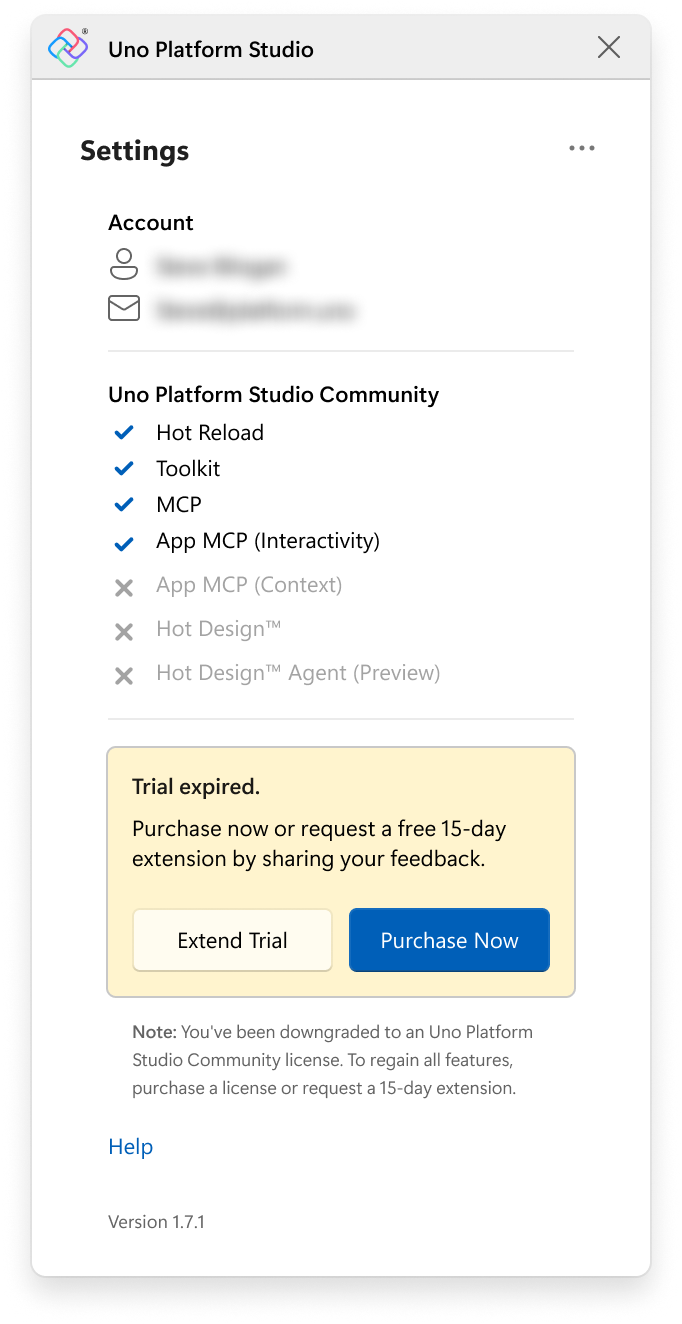
### Uno Platform Studio Pro 15-Day Trial
The Community edition of **Uno Platform Studio** includes a 15-day trial of **Uno Platform Studio Pro**, which includes **Hot Design®**, **Hot Design® Agent**, and **Uno MCPs**. If your **Uno Platform Studio Pro** trial has expired, you’ll have the option to extend it directly from the Uno Studio Platform window—or, if you’re ready to upgrade, simply click **Purchase Now**. This will take you to the Uno Platform website, where you can choose your subscription plan and the number of licenses you need.
## Getting a Uno Platform Studio Pro License
**Uno Platform Studio** revolutionizes how developers design, build, and iterate on their applications. When you purchase a **Uno Platform Studio Pro** license, you get full access to purpose-built tools that streamline your workflow:
- **[Hot Design®](xref:Uno.HotDesign.Overview)**: The industry-first, runtime visual designer, for cross-platform .NET Applications. Hot Design® transforms your running app into a Designer, from any IDE, on any OS, to create polished interfaces with ease. [Get started](xref:Uno.HotDesign.GetStarted.Guide)
- **[Hot Design® Agent](xref:Uno.HotDesign.Agent)**: An AI-powered assistant designed for rapid UX/UI creation and enhancement within your application. It leverages data contexts and live previews to help developers design, refine, and interact with user interfaces in real time. Built on deep knowledge of Uno Platform and your running app, it simplifies cross-platform .NET design, enabling intuitive and efficient workflows.[Learn more](xref:Uno.HotDesign.Agent)
- **[Uno MCPs](xref:Uno.Features.Uno.MCPs)**: Uno MCP connects AI agents and developers directly to Uno Platform’s complete knowledge base - documentation, APIs, and best practices with structured, semantic access. The App MCP is a local runtime service that allows AI agents and automation tools to intelligently interact with a live Uno Platform application. [Get started](xref:Uno.GetStarted)
- **[Hot Reload](xref:Uno.Features.HotReload)**
Reliably update any code in your app and get instant confirmation your changes were applied, with a new Hot Reload Indicator to monitor changes while you develop. [Get started](xref:Uno.HotReload.GetStarted.Guide)
- **[Design-to-Code](xref:Uno.Figma.GetStarted)**
Generate ready-to-use, well-structured XAML or C# Markup directly from your Figma designs with one click, completely eliminating manual design handoff. [Get started](xref:Uno.Figma.GetStarted)
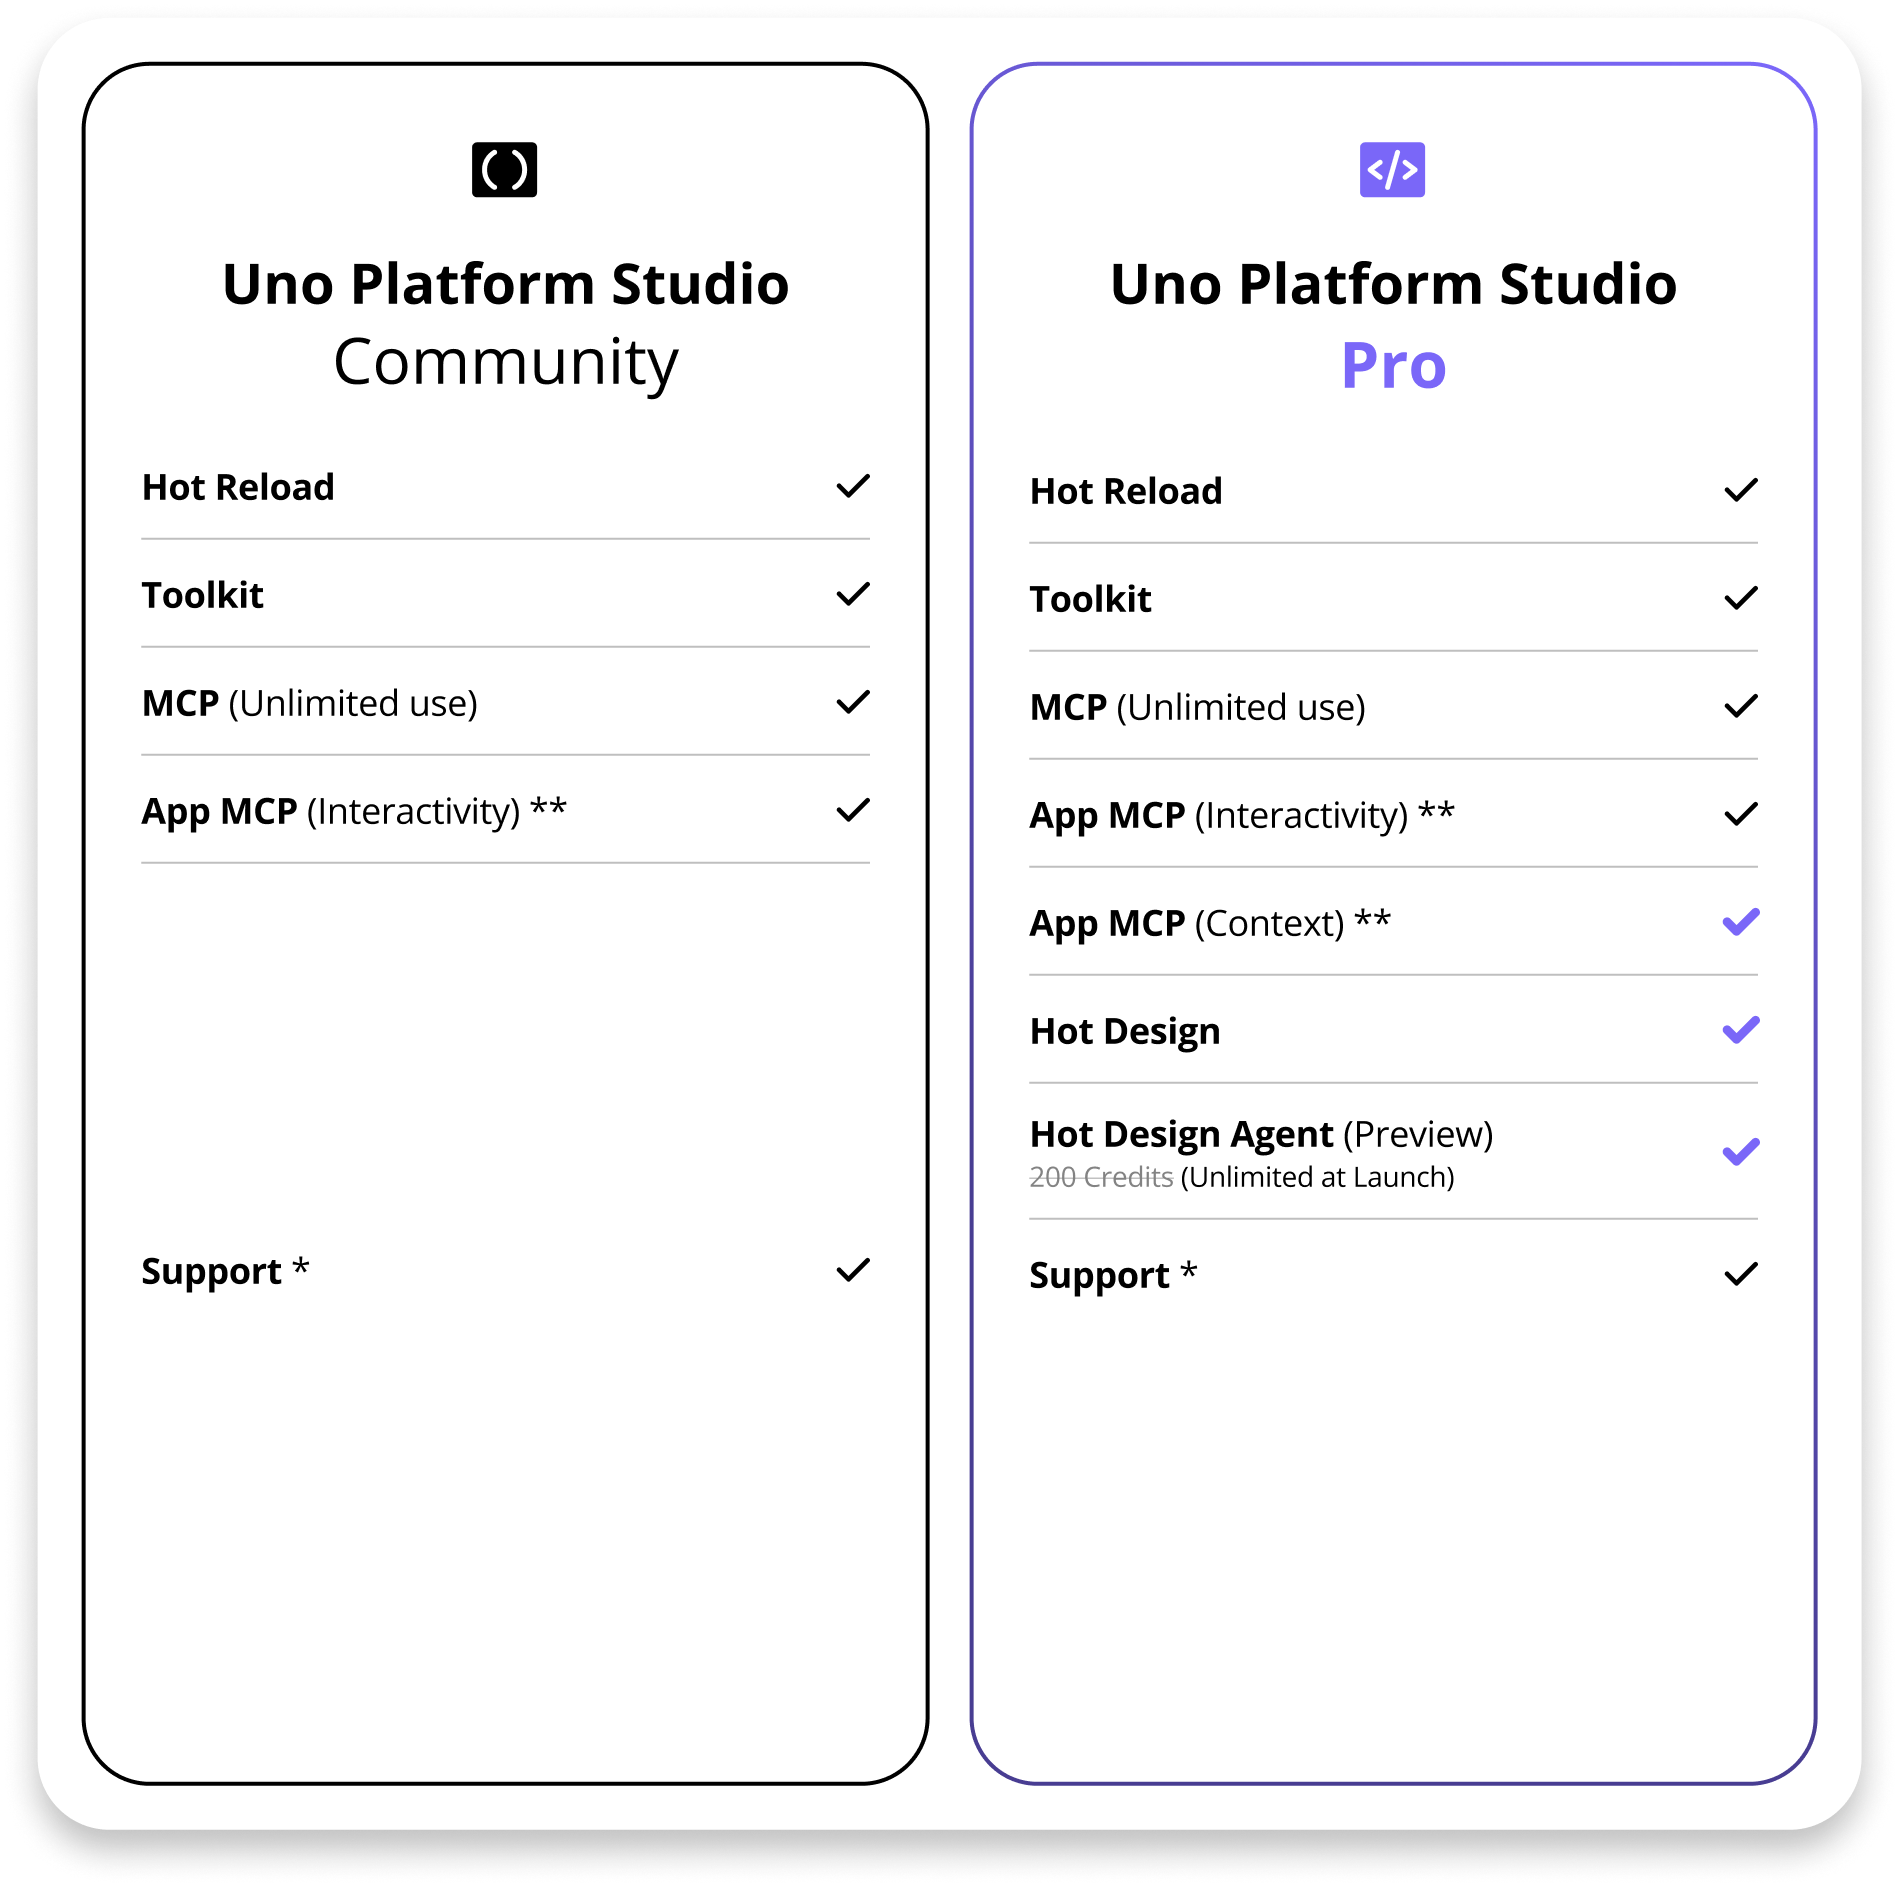
Check out [Compare Uno Platform Studio Community vs Pro plan](https://platform.uno/select-subscription/) to see what you gain by upgrading.
> [!IMPORTANT]
> Uno Platform itself remains open-source and free under Apache 2.0. The Pro subscription is specifically for Uno Platform Studio features.
### Purchase a Pro License
1. Visit [platform.uno/select-subscription](https://platform.uno/select-subscription/) to view subscription options and current pricing.
1. Choose your preferred billing cycle (monthly or yearly).
1. Add how many licenses you want above **Buy Now** Button.
1. Click **Buy Now** on your selected plan.
1. If you don't have a Uno Platform account yet, you'll be prompted to create one during the checkout process.
1. Complete the payment process and receive your license confirmation email.
### Special Pricing
- **Students and Open Source Maintainers**: Contact [info@platform.uno](mailto:info@platform.uno) for special pricing
- **Enterprise/Custom Quotes**: Contact [info@platform.uno](mailto:info@platform.uno) for customized licensing
### Subscription Management
- **Cancellation**: You can cancel your subscription anytime from your [account dashboard](https://platform.uno/my-account)
- **Billing**: Invoices are sent to your registered email address
## Assigning a Uno Platform Studio Pro License
Once you have purchased a Uno Platform Studio Pro subscription, you may need to assign or activate your license:
### Activating Your License After Purchase
1. After purchasing your Pro subscription, you should receive a confirmation email with your license details.
1. Sign in to your IDE following the steps in the "Sign in to your IDE of choice" section above.
1. In the Uno Platform Studio window, click **Refresh** to update your license status.
1. Your Pro features should now be available.
### Checking License Status
If you notice a small snowflake icon next to the Hot Design® flame icon when running your Uno app, this indicates that Hot Design® is not active:
### Troubleshooting License Issues
1. **License Not Showing**:
- Open your IDE settings and access Uno Platform Studio again
- Click the **Refresh** button to update your account status
- Ensure you're signed in with the correct Uno Platform account
1. **License Assignment** (for team subscriptions):
- Log in to your Uno Platform account at [platform.uno/my-account](https://platform.uno/my-account)
- Navigate to the **Subscriptions** section in the left navigation bar (1)
- Enter the email address of the person you want to grant access to in the text box (2)
- Click **Assign** to assign the license (3)
- The recipient will receive a notification email about the license assignment

1. **Verification**:
- After assignment, return to your IDE settings
- Click **Refresh** in the Uno Platform Studio window
- You should see a blue checkmark on Hot Design®, indicating it's ready to use
### Troubleshooting Common Issues
If you encounter issues during the subscription or licensing process:
1. **Payment Problems**:
- Verify your payment information is correct
- Check with your bank if the transaction was blocked
- Try using a different payment method
- Contact [info@platform.uno](mailto:info@platform.uno) for payment assistance
1. **License Not Activated**:
- Check your email (including spam folder) for confirmation
- Wait up to 15 minutes for license activation
- Use the **Refresh** button in Uno Platform Studio
- Sign out and sign in again to your IDE
1. **Uno Platform Studio Pro Trial Expired**:
- The 15-day trial is automatically included with Community accounts
- After expiration, upgrade to Pro to continue using Uno Platform Studio Pro features
- Visit [platform.uno/select-subscription](https://platform.uno/select-subscription/) to upgrade
1. **Support**:
- Pro support covers Uno Platform Studio features only
- For general support, visit [GitHub Discussions](https://github.com/unoplatform/uno/discussions) or [Discord](https://www.platform.uno/discord)
- [Paid support](https://platform.uno/contact/) available for enterprise needs
## Questions
For general questions about Uno Platform, refer to the [general FAQ](xref:Uno.Development.FAQ) or see the [troubleshooting section](xref:Uno.UI.CommonIssues) for common issues and solutions.
If you encounter any issues or need further assistance, join our [Discord server](https://platform.uno/discord), connect with us via [GitHub](https://github.com/unoplatform/uno/discussions), or reach out on our [contact page](https://platform.uno/contact).