# AdGuard Home - Getting Started
> [!WARNING]
> This article is outdated. See the [up-to-date version][kb-article] in our Knowledge Base.
[kb-article]: https://adguard-dns.io/kb/adguard-home/getting-started/
* [Installation](#installation)
* [First start](#first-time)
* [Running as a service](#service)
* [Updating](#update)
* [Manual update](#manual-update)
* [Configuring devices](#configure-devices)
* [Running without superuser (Linux only)](#running-without-superuser)
* [Limitations](#limitations)
## Installation
> [!WARNING]
> This section is outdated. See the [up-to-date version][kb-install] in our Knowledge Base.
[kb-install]: https://adguard-dns.io/kb/adguard-home/getting-started/#installation
### Official releases
Download the archive with the binary file for your operating system from the
[latest stable release page][releases]. The full list of supported platforms as
well as links to beta and edge (unstable) releases can be found in our
“[Platforms][platforms]” page.
To install AdGuard Home as a service, unpack the archive, enter the
`AdGuardHome` directory, and run:
```sh
./AdGuardHome -s install
```
#### Notes
* Users of **Fedora Linux** and its derivatives: install AdGuard Home into the
`/usr/local/bin` directory. Otherwise, it may cause issues with SELinux and
permissions. See [issue 765] and [issue 3281].
* Users of **macOS 10.15 Catalina** and newer should place the AdGuard Home
working directory inside the `/Applications` directory.
[issue 3281]: https://github.com/AdguardTeam/AdGuardHome/issues/3281
[issue 765]: https://github.com/AdguardTeam/AdGuardHome/issues/765#issuecomment-752262353
[platforms]: https://github.com/AdguardTeam/AdGuardHome/wiki/Platforms
[releases]: https://github.com/AdguardTeam/AdGuardHome/releases/latest
### Docker and Snap
We also provide an [official AdGuard Home docker image][docker] and an [official
Snap Store package][snap].
[docker]: https://hub.docker.com/r/adguard/adguardhome
[snap]: https://snapcraft.io/adguard-home
### Other
Some other unofficial options include:
* (Maintained by @frenck) [Home Assistant add-on][has].
* (Maintained by @kongfl888) [OpenWrt LUCI app][luci].
* (Maintained by @graysky2) [Arch Linux][arch], [Arch Linux ARM][archarm], and
other Arch-based OSs, may build via the [`adguardhome` package][aghaur] in
the [AUR][aur].
* (Maintained by @gramakri) [Cloudron app][cloudron].
[aghaur]: https://aur.archlinux.org/packages/adguardhome/
[arch]: https://www.archlinux.org/
[archarm]: https://archlinuxarm.org/
[aur]: https://wiki.archlinux.org/index.php/Arch_User_Repository
[cloudron]: https://git.cloudron.io/cloudron/adguard-home-app
[has]: https://github.com/hassio-addons/addon-adguard-home
[luci]: https://github.com/kongfl888/luci-app-adguardhome
## First start
> [!WARNING]
> This section is outdated. See the [up-to-date version][kb-first] in our Knowledge Base.
[kb-first]: https://adguard-dns.io/kb/adguard-home/getting-started/#first-time
First of all, check your firewall settings. To install and use AdGuard Home,
the following ports and protocols must be available:
* 3000/TCP for the initial installation;
* 80/TCP for the web interface;
* 53/UDP for the DNS server.
You may need to open additional ports for protocols other than plain DNS, for
example DNS-over-HTTPS.
DNS servers bind to port 53, which requires superuser privileges most of the
time, [see below](#running-without-superuser). Therefore, on unix systems you
need to run it with `sudo` or `doas` in terminal:
```sh
sudo ./AdGuardHome
```
On Windows, run `cmd.exe` or PowerShell with admin privileges and run
`AdGuardHome.exe` from there.
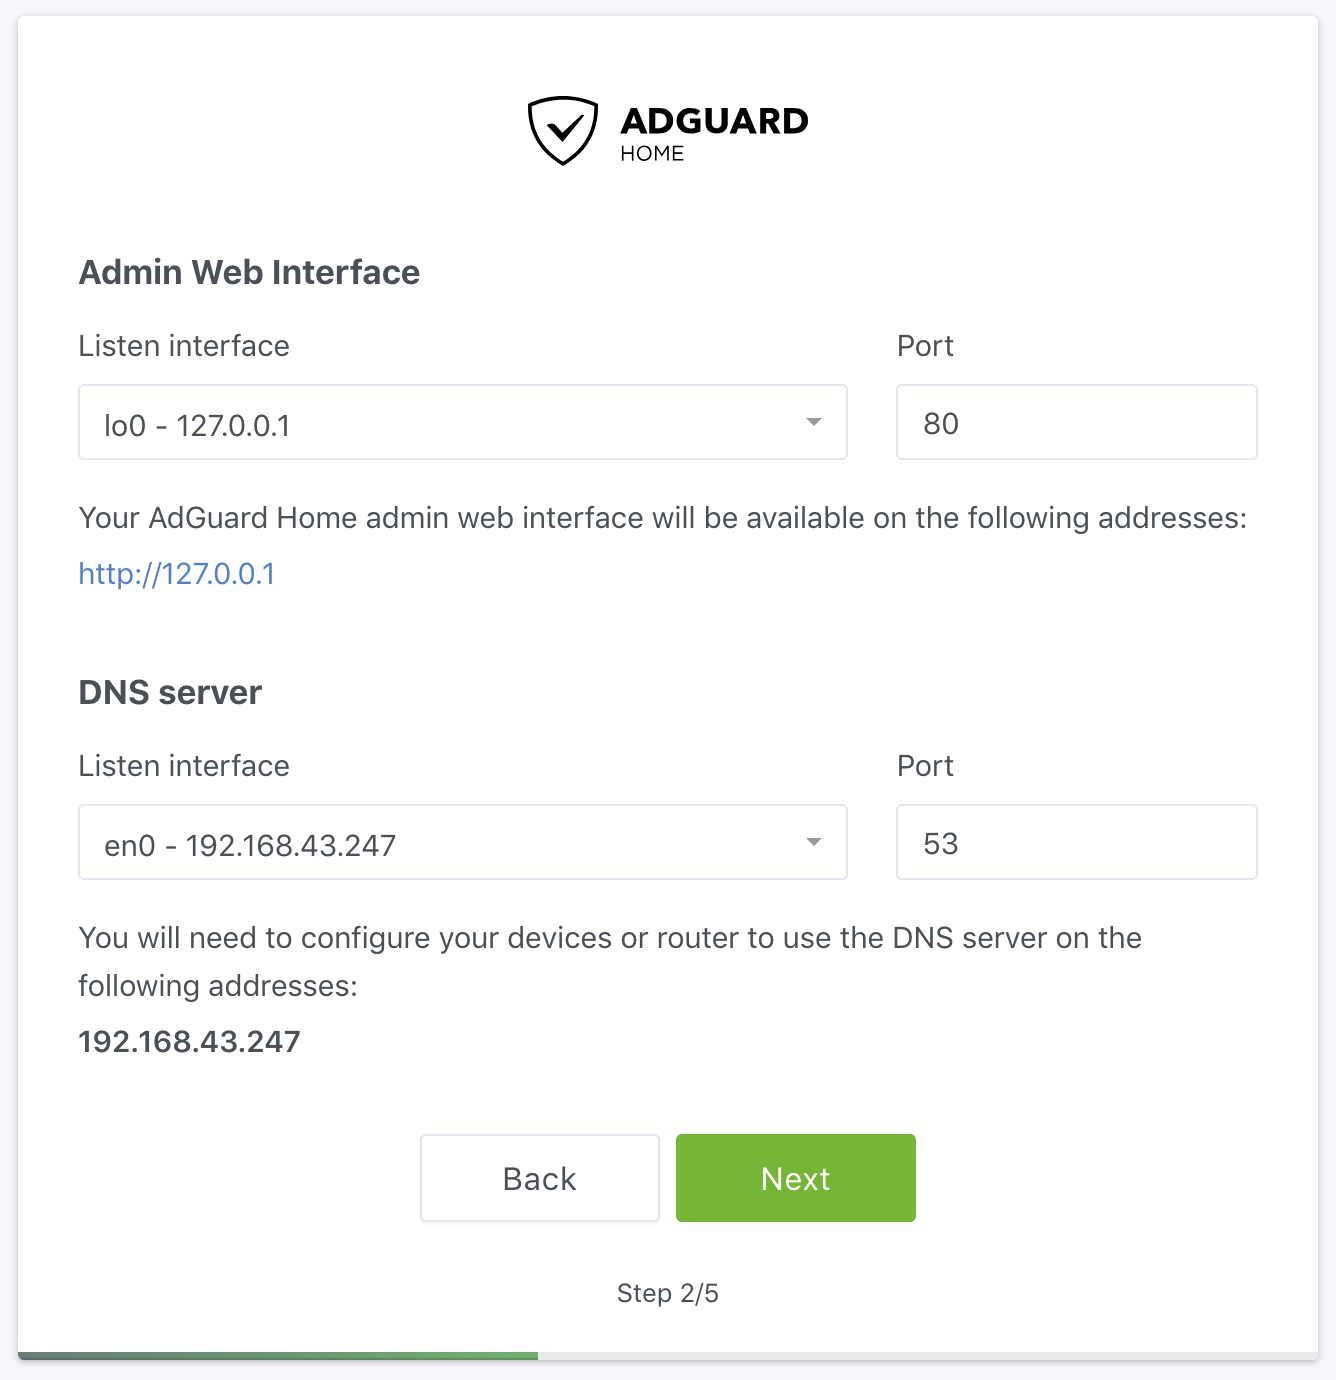
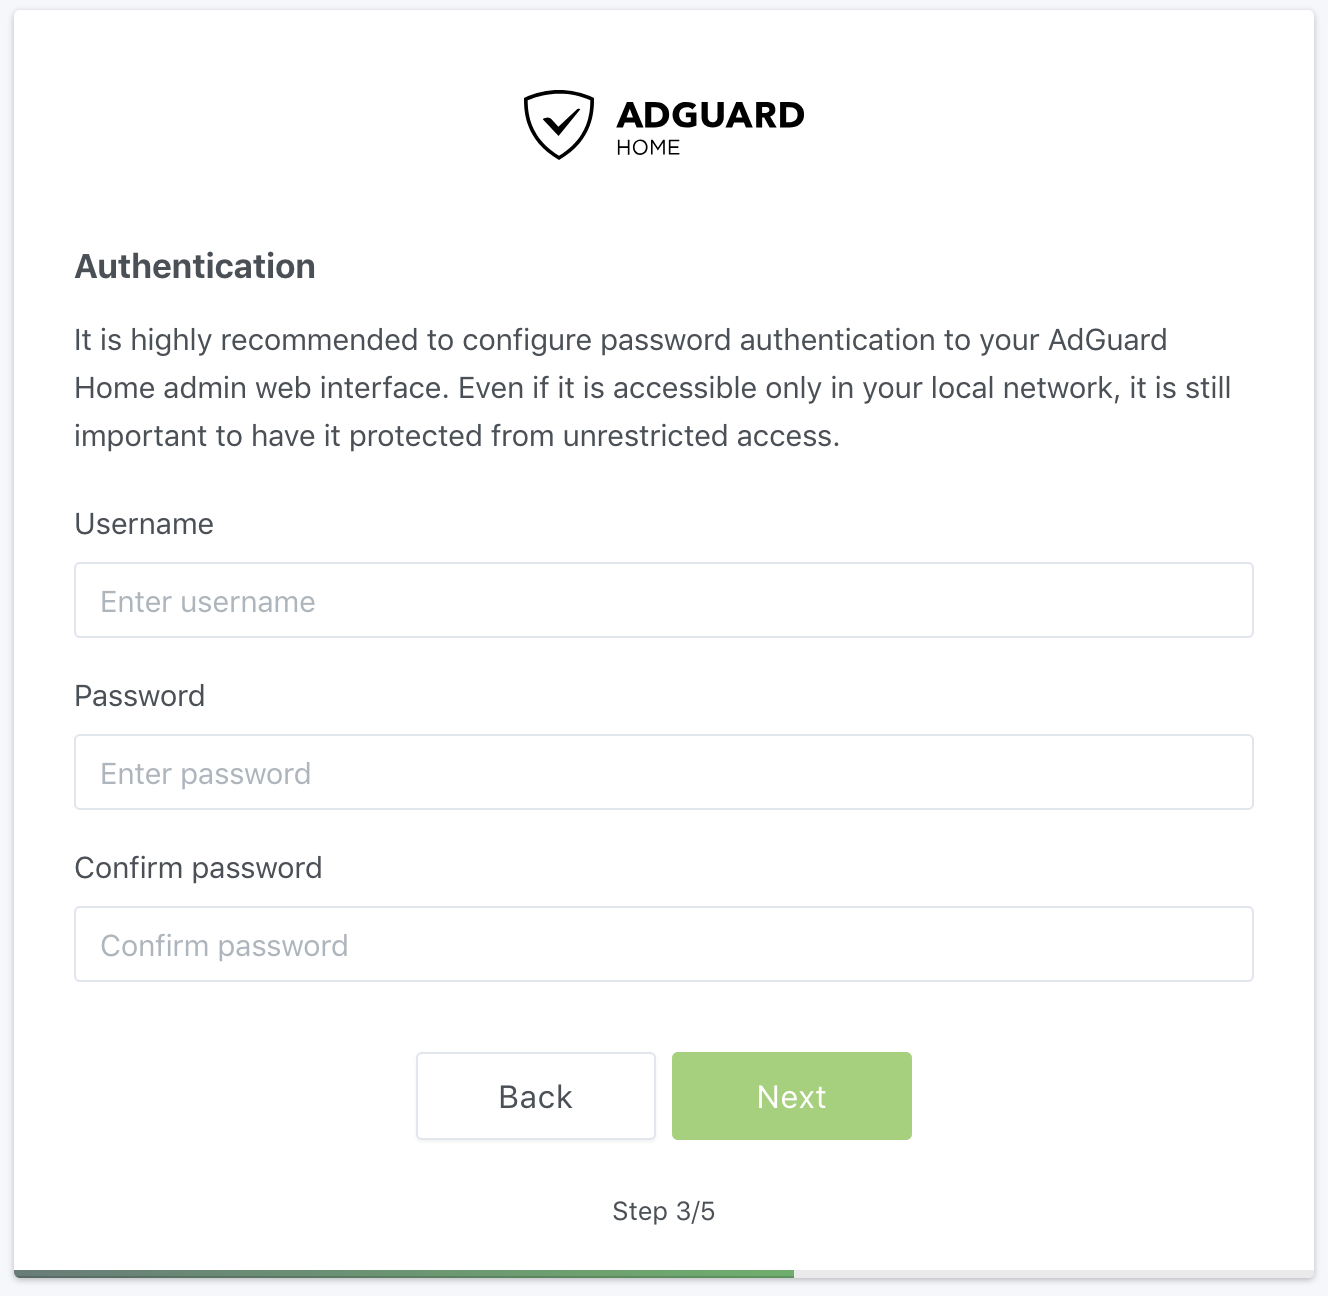
When you run AdGuard Home for the first time, it starts listening to
`0.0.0.0:3000` and prompts you to open it in your browser:
```none
AdGuard Home is available on the following addresses:
Go to http://127.0.0.1:3000
Go to http://X.X.X.X:3000
```
There you will go through the initial configuration wizard.
## Running as a service
> [!WARNING]
> This section is outdated. See the [up-to-date version][kb-svc] in our Knowledge Base.
[kb-svc]: https://adguard-dns.io/kb/adguard-home/getting-started/#service
The next step would be to register AdGuard Home as a system service (aka
daemon). To install AdGuard Home as a service, run:
```sh
sudo ./AdGuardHome -s install
```
On Windows, run `cmd.exe` with admin privileges and run `AdGuardHome.exe -s
install` to register a windows service.
Here are the other commands you might need to control the service:
* `AdGuardHome -s uninstall`: Uninstall the AdGuard Home service.
* `AdGuardHome -s start`: Start the service.
* `AdGuardHome -s stop`: Stop the service.
* `AdGuardHome -s restart`: Restart the service.
* `AdGuardHome -s status`: Show the current service status.
### Logs
By default, the logs are written to stderr when you run AdGuard Home in
a terminal. If you run it as a service, the log output depends on the platform:
* On macOS, the log is written to `/var/log/AdGuardHome.*.log` files.
* On other unixes, the log is written to `syslog` or `journald`.
* On Windows, the log is written to the Windows event log.
You can change this behavior in the AdGuard Home [configuration
file](Configuration).
## Updating
> [!WARNING]
> This section is outdated. See the [up-to-date version][kb-upd] in our Knowledge Base.
[kb-upd]: https://adguard-dns.io/kb/adguard-home/getting-started/#update

When a new version is released, AdGuard Home's UI shows a notification message
and the “Update Now” button. Click this button, and AdGuard Home will be
automatically updated to the latest version. Your current AdGuard Home
executable file is saved inside the `backup` directory along with the current
configuration file, so you can revert the changes, if necessary.
### Manual update
> [!WARNING]
> This section is outdated. See the [up-to-date version][kb-mupd] in our Knowledge Base.
[kb-mupd]: https://adguard-dns.io/kb/adguard-home/getting-started/#manual-update
In case the button isn't shown or an automatic update has failed, you can update
manually. We have a [detailed guide on manual updates][mupd], but in short:
1. Download the new AdGuard Home package.
1. Unpack it to a temporary directory.
1. Replace the old AdGuard Home executable file with the new one.
1. Restart AdGuard Home.
[mupd]: https://adguard-dns.io/kb/adguard-home/faq/#manual-update
### Docker, Home Assistant, and Snapcraft updates
Auto-updates for Docker, Hass.io / Home Assistant, and Snapcraft installations
are disabled. Update the image instead.
### Command-line update
To update AdGuard Home package without the need to use Web API run:
```sh
./AdGuardHome --update
```
## Configuring devices
> [!WARNING]
> This section is outdated. See the [up-to-date version][kb-dev] in our Knowledge Base.
[kb-dev]: https://adguard-dns.io/kb/adguard-home/getting-started/#configure-devices
### Router
This setup will automatically cover all devices connected to your home router,
and you won't need to configure each of them manually.
1. Open the preferences for your router. Usually, you can access it from your
browser via a URL, such as or .
You may be prompted to enter a password. If you don't remember it, you can
often reset the password by pressing a button on the router itself, but be
aware that if this procedure is chosen, you will probably lose the entire
router configuration. If your router requires an app to set it up, please
install the app on your phone or PC and use it to access the router’s
settings.
1. Find the DHCP/DNS settings. Look for the DNS letters next to a field which
allows two or three sets of numbers, each broken into four groups of one to
three digits.
1. Enter your AdGuard Home server addresses there.
1. On some router types, a custom DNS server cannot be set up. In that case,
setting up AdGuard Home as a DHCP server may help. Otherwise, you should
check the router manual on how to customize DNS servers on your specific
router model.
### Windows
1. Open Control Panel through Start menu or Windows search.
1. Go to Network and Internet category and then to Network and Sharing Center.
1. On the left side of the screen find the “Change adapter settings” button and
click it.
1. Select your active connection, right-click it and choose Properties.
1. Find “Internet Protocol Version 4 (TCP/IPv4)” (or, for IPv6, “Internet
Protocol Version 6 (TCP/IPv6)”) in the list, select it and then click
Properties again.
1. Choose “Use the following DNS server addresses” and enter your AdGuard Home
server addresses.
### macOS
1. Click the Apple icon and go to System Preferences.
1. Click Network.
1. Select the first connection in your list and click Advanced.
1. Select the DNS tab and enter your AdGuard Home server addresses.
### Android
1. From the Android Menu home screen, tap Settings.
1. Tap Wi-Fi on the menu. The screen listing all of the available networks
will be shown (it is impossible to set custom DNS for mobile connection).
1. Long press the network you're connected to and tap Modify Network.
1. On some devices, you may need to check the box for Advanced to see further
settings. To adjust your Android DNS settings, you will need to switch the
IP settings from DHCP to Static.
1. Change set DNS 1 and DNS 2 values to your AdGuard Home server addresses.
### iOS
1. From the home screen, tap Settings.
1. Choose Wi-Fi in the left menu (it is impossible to configure DNS for mobile
networks).
1. Tap the name of the currently active network.
1. In the DNS field enter your AdGuard Home server addresses.
## Running without superuser (Linux only)
> [!WARNING]
> This section is outdated. See the [up-to-date version][kb-su] in our Knowledge Base.
[kb-su]: https://adguard-dns.io/kb/adguard-home/getting-started/#running-without-superuser
You can run AdGuard Home without superuser privileges, but you need to either
grant the binary a capability (on Linux) or instruct it to use a different port
(all platforms).
### Granting the necessary capabilities
Using this method requires the `setcap` utility. You may need to install it
using your Linux distribution's package manager.
To allow AdGuard Home running on Linux to listen on port 53 without superuser
privileges and bind its DNS servers to a particular interface run:
```sh
sudo setcap 'CAP_NET_BIND_SERVICE=+eip CAP_NET_RAW=+eip' ./AdGuardHome
```
Then run `./AdGuardHome` as an unprivileged user.
### Changing the DNS listen port
To configure AdGuard Home to listen on a port that does not require superuser
privileges, stop AdGuard Home, open `AdGuardHome.yaml` in your editor, and find
these lines:
```yaml
dns:
port: 53
```
You can change the port to anything above 1024 to avoid requiring superuser
privileges. If the file does not exist, create it in the same folder, type
these two lines down and save.
## Limitations
> [!WARNING]
> This section is outdated. See the [up-to-date version][kb-lim] in our Knowledge Base.
[kb-lim]: https://adguard-dns.io/kb/adguard-home/getting-started/#limitations
Some file systems don't support the `mmap(2)` system call that the statistics
system requires. See also [issue 1188].
You can resolve this issue:
* either by supplying the `--work-dir DIRECTORY` arguments to `AdGuardHome`
binary. This option will tell AGH to use another directory for all its files
instead of the default `./data` directory.
* or by creating symbolic links pointing to another file system that supports
`mmap(2)` (e.g. tmpfs):
```sh
ln -s ${YOUR_AGH_PATH}/data/stats.db /tmp/stats.db
ln -s ${YOUR_AGH_PATH}/data/sessions.db /tmp/sessions.db
```
[issue 1188]: https://github.com/AdguardTeam/AdGuardHome/issues/1188